How to Use Smart Tags - Dynamic Text Replacement
Discover how Smart Tags on Popupsmart empower you to tailor content for individualized user engagement.
Popupsmart provides a practical way to display dynamic texts on your popup campaigns using the Smart Tags feature.
Create personalized onsite marketing messages with dynamic content to boost conversions.
What Are Smart Tags?
Smart tags allow you to add dynamic text to your popup campaigns and personalize them.
For example, you can automatically address visitors by their names or show their location using a specifically formatted placeholder text.
Add a Smart Tag to Your Campaign
Select Element
On the "Customize" step, select an element you want to add a smart tag to. We will edit a text element in the popup builder for this guide.
Supported Elements
Dynamic text replacement works in text elements and input fields.
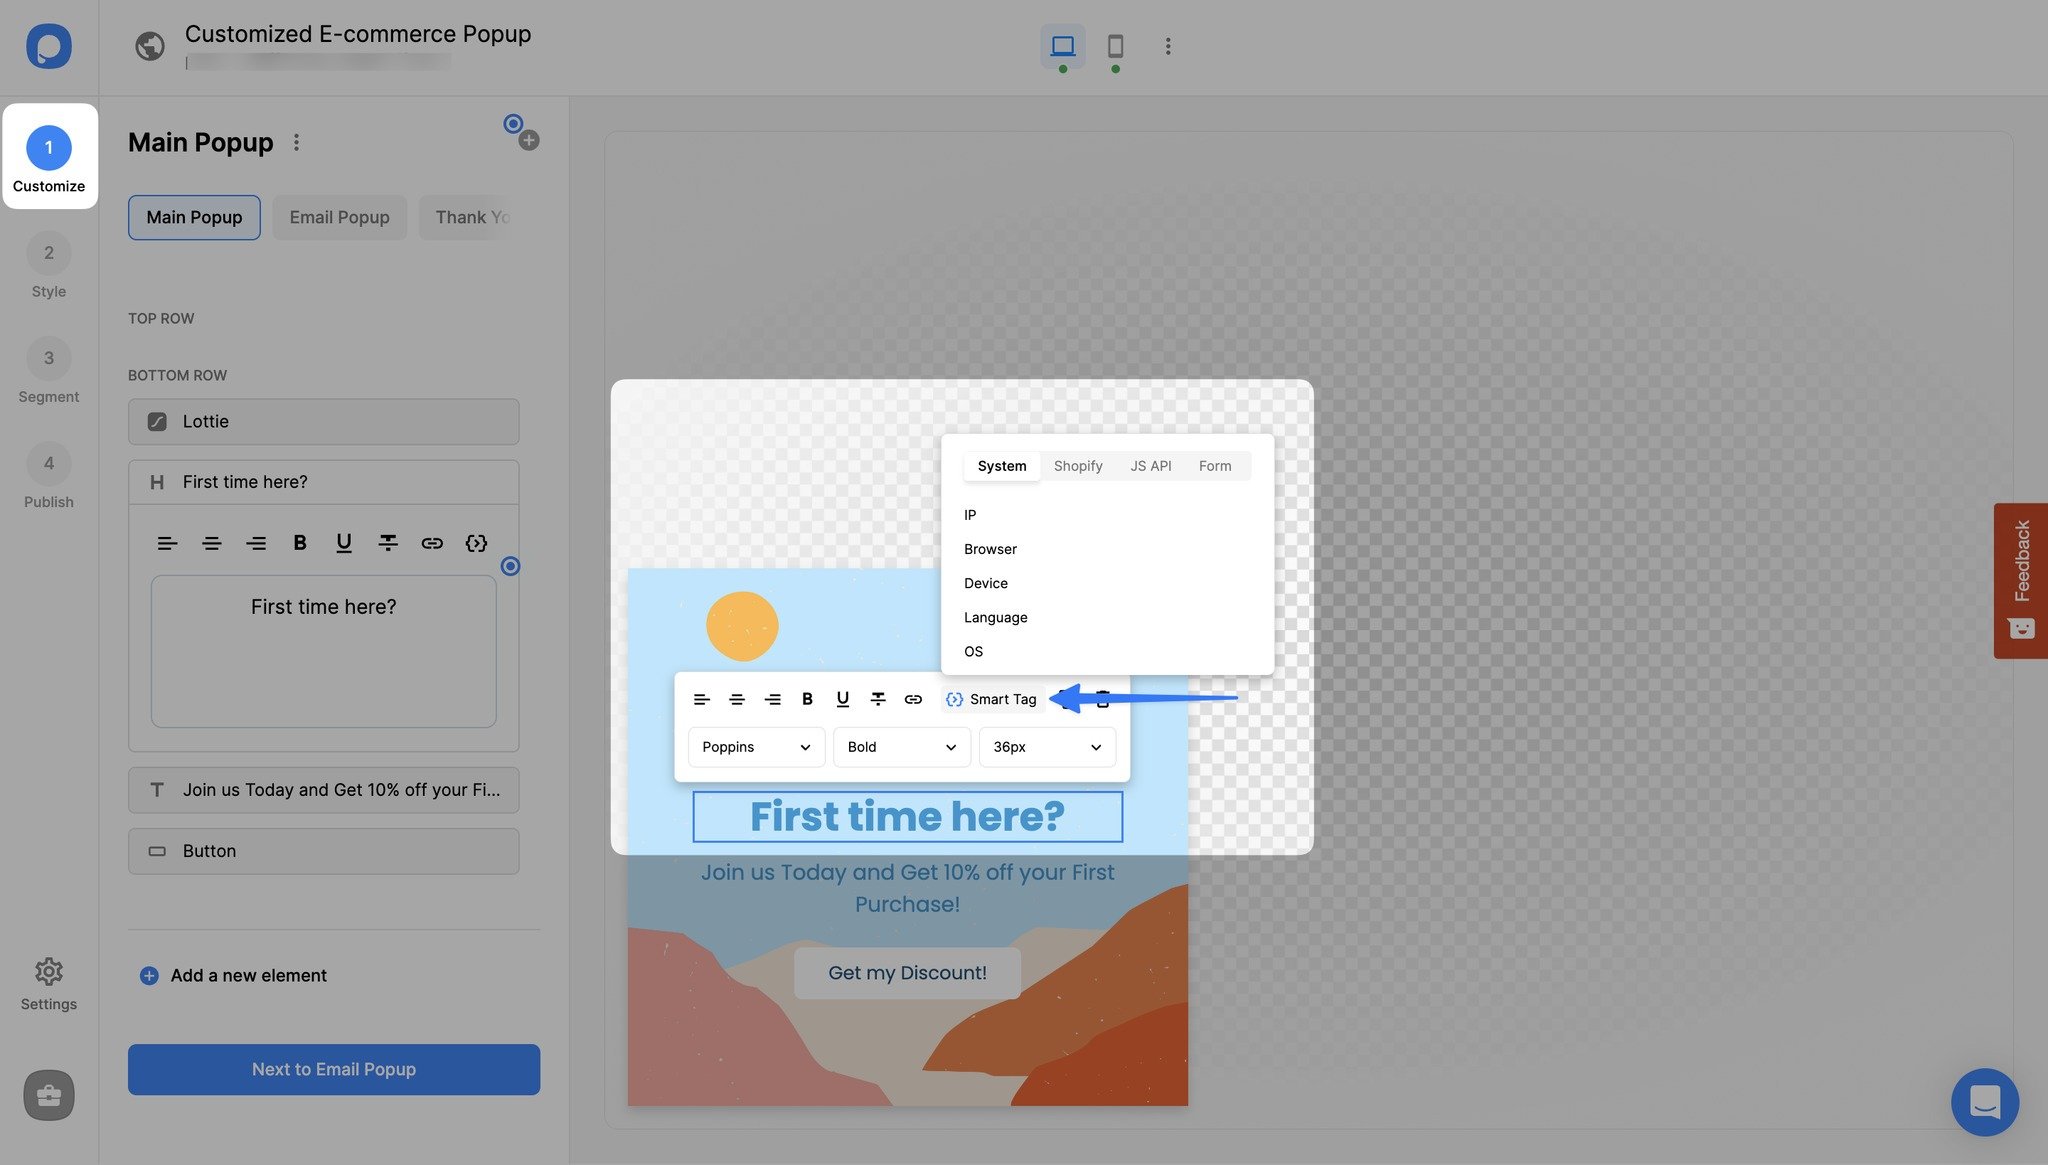
Define Default Value (Optional)
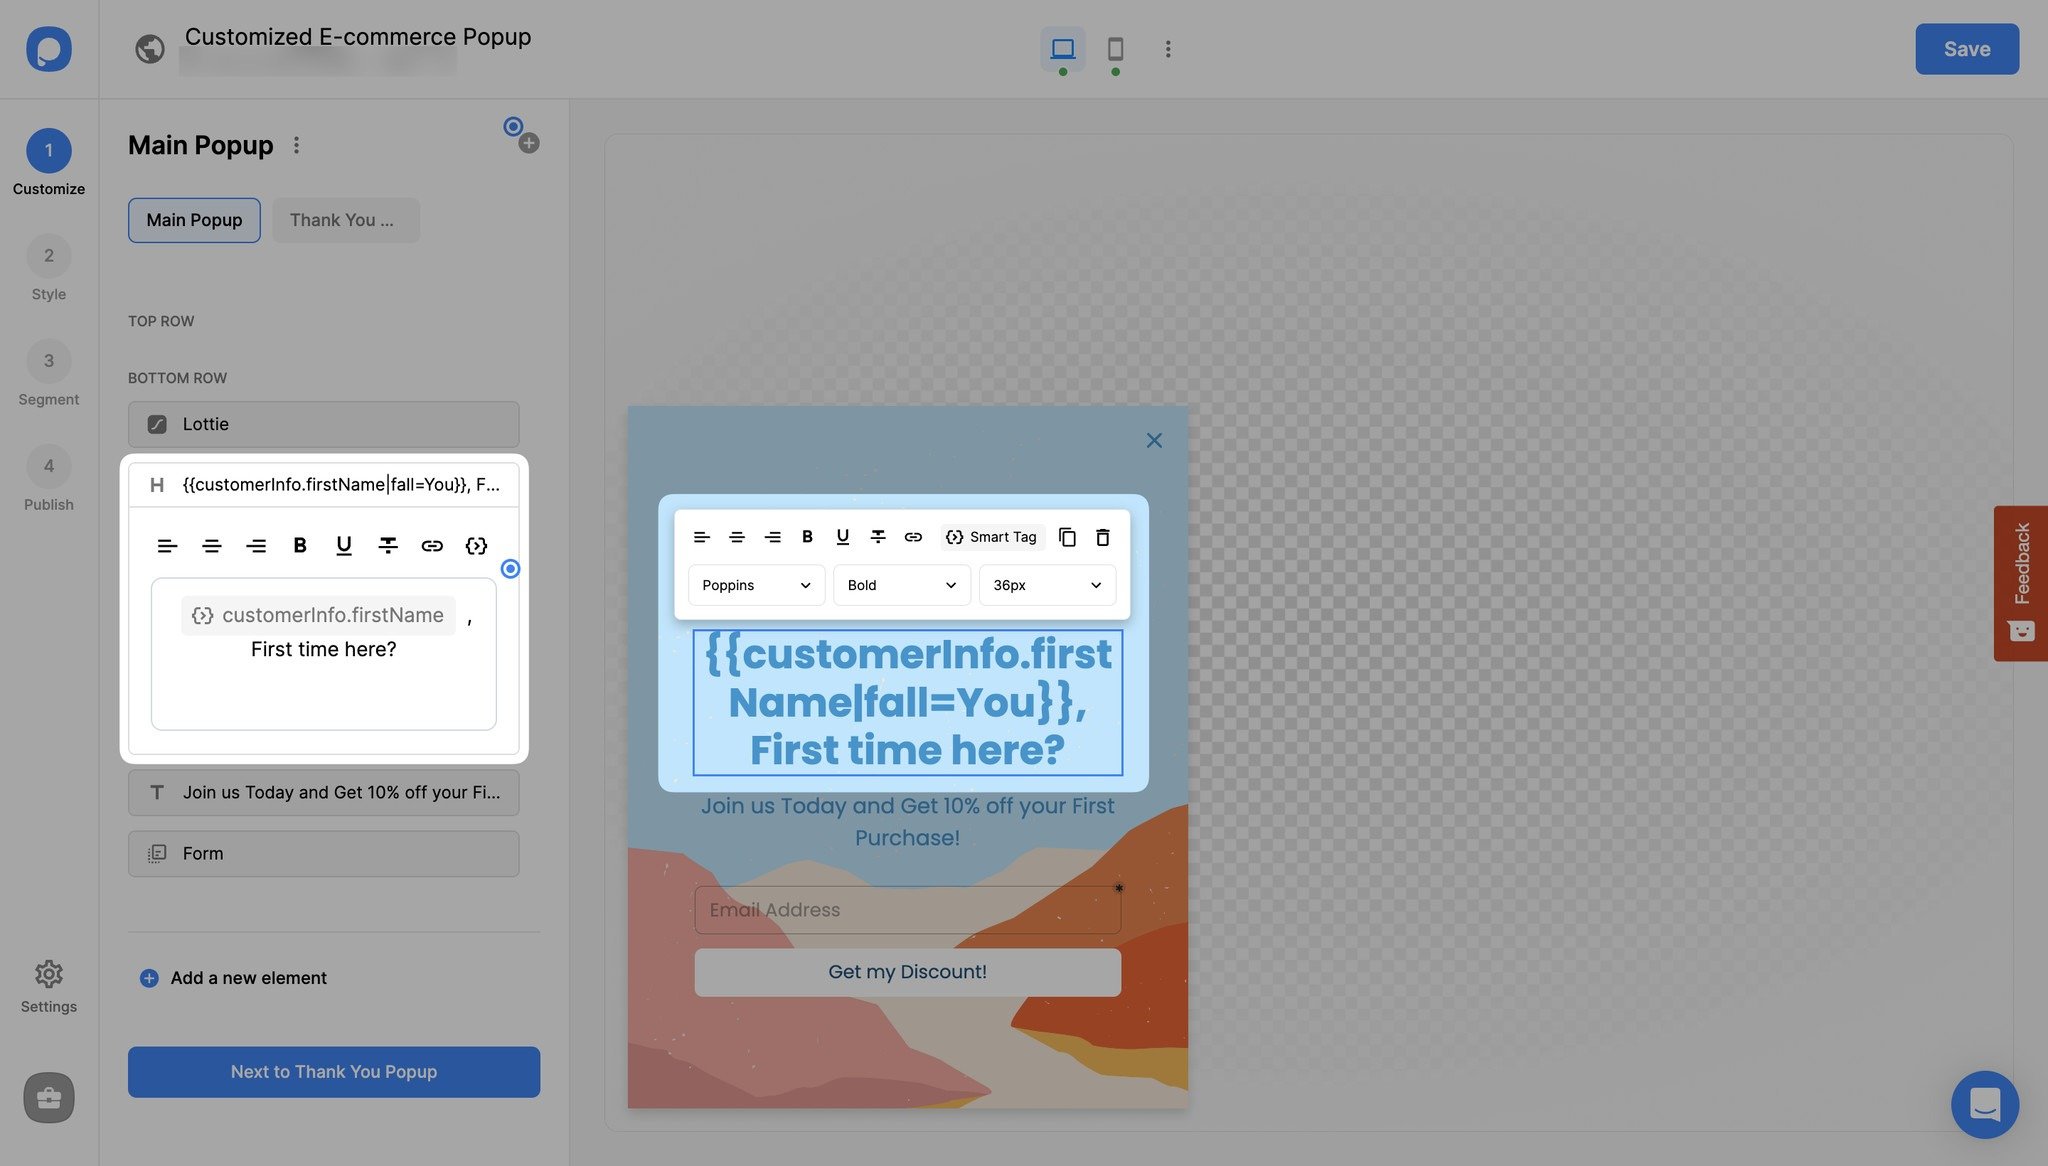
Optionally, define a default value to use for the Smart Tag if the tag can't find the necessary data: e.g., {{Name|fall=You}} so that when there's no data to pull, the defined default text "You" will fall instead.
Default Text Note
The default text replacement or the "fall" attribute is optional. If you don't use it and there is no variable data about the user, then the dynamic text won't show. For example, "Hey {{Name}}" will appear as "Hey."
Once the popup is saved and published, the Smart Tag will be shown as the dynamic value you have set.
How Smart Tags Work
Popupsmart's Smart Tags feature works in a campaign's text elements, input fields, and also for the success popups. Additionally, smart tags can be added to the hidden input fields for purposes like collecting data.
You can feed the Smart Tag data in two ways; JavaScript API and URL parameter.
URL Parameters for Dynamic Text Replacement
URL parameter fills in the data when it is, for example, "examplewebsite.com/?name=firstname". As you might know, most URL parameters contain user information such as order ID, product ID, or even user name. If we go back to square one, URL parameters are query strings.
Let's take a look at the anatomy of a URL parameter for a better understanding:
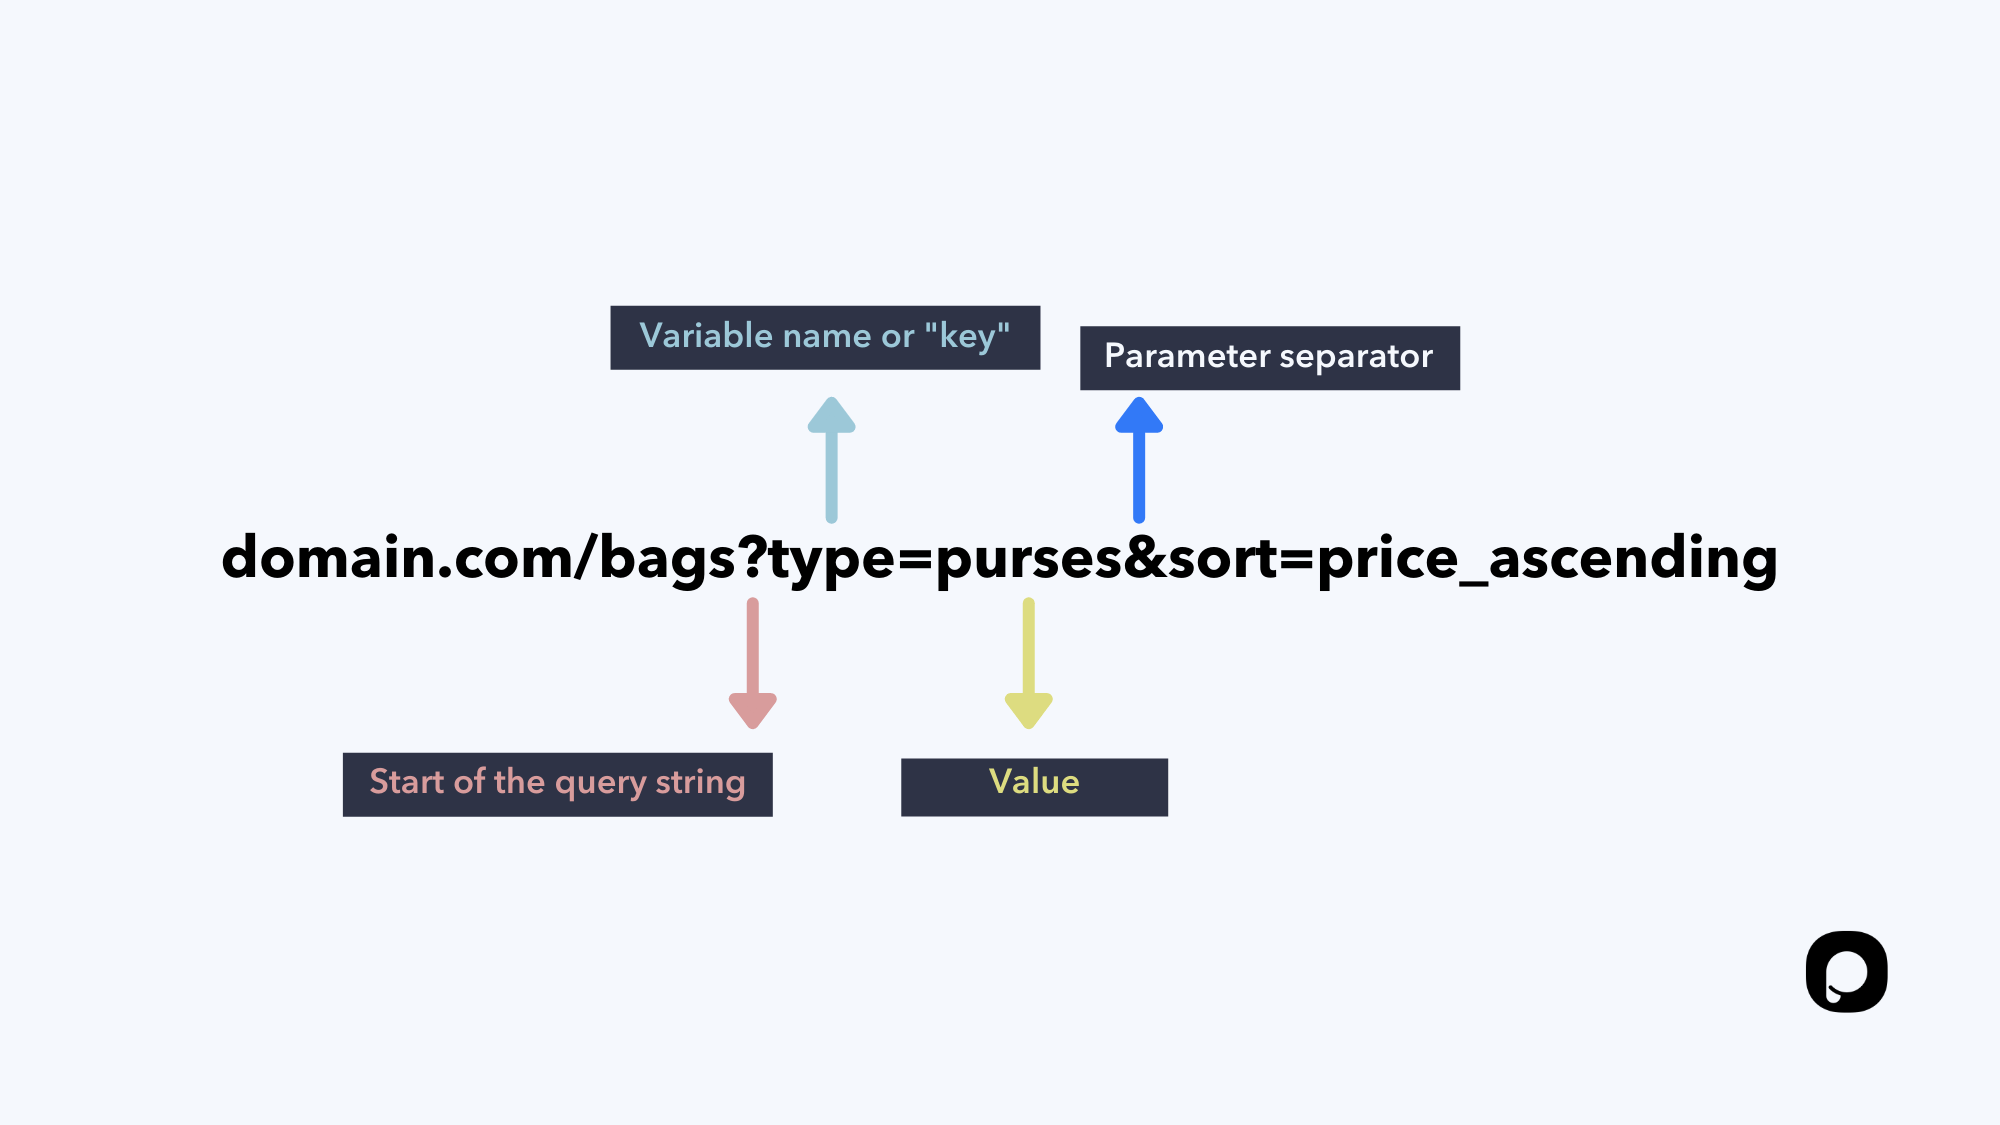
So, for example, when the URL parameter is something like domain.com/?name=firstname, then the Smart Tag ({{Name}}) transforms into the name data in the query string.
Go to your Popupsmart dashboard to create or edit a campaign. Then, on your popup builder screen, enter the smart tag variable name in curly braces into the field you wish to show a dynamic text.
Custom Variables
If you need to define another custom variable, then you can do so by defining it as metadata on Google Tag Manager.
Some parameters, like the {{Name}}, can be found through email marketing services. Since you already know your subscribers' names and other information, you may show them a personalized popup.
Just add the dynamic text to your popup and set up URL targeting to show on that specific page. Then, link the URL to your email button. Your subscribers who click your email button will be directed to the page with the personalized popup.
Using JavaScript API for Dynamic Text Replacement
On the other hand, JavaScript API functions as psMetaData.add({ name: })
Apart from these, smart tags can also be fed with the data coming from system fields, which are automatically created by browsers.
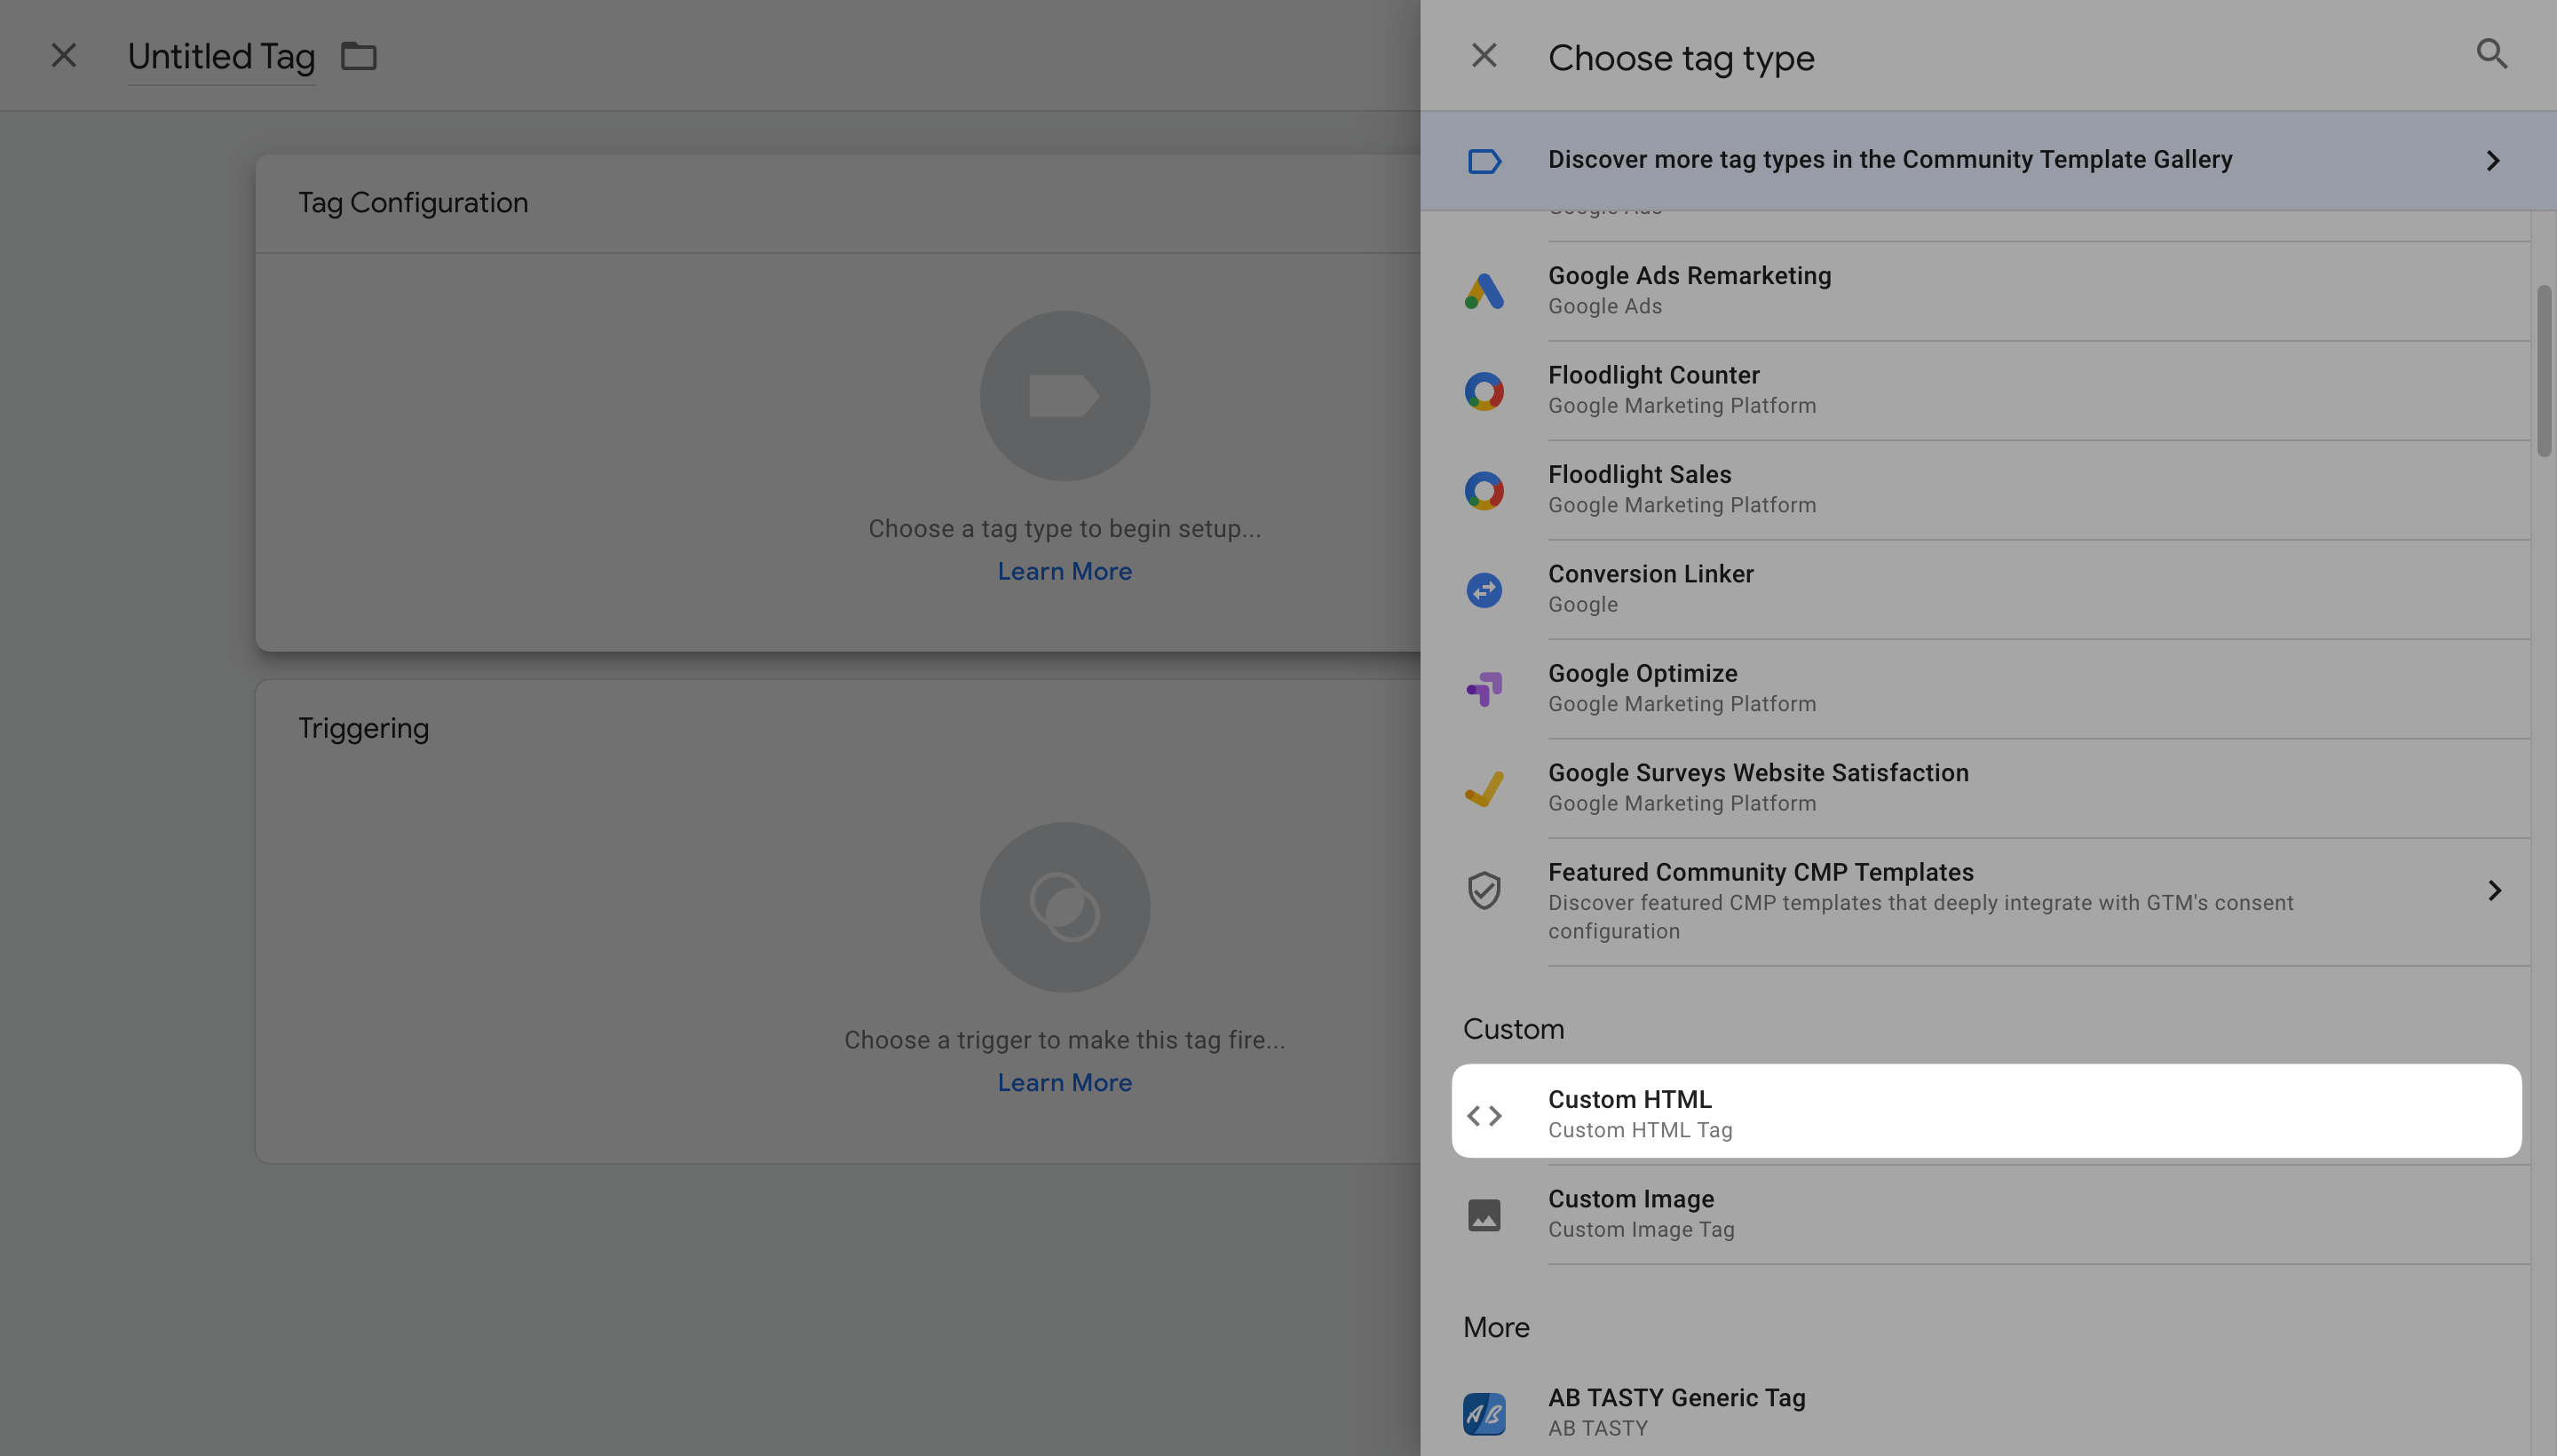
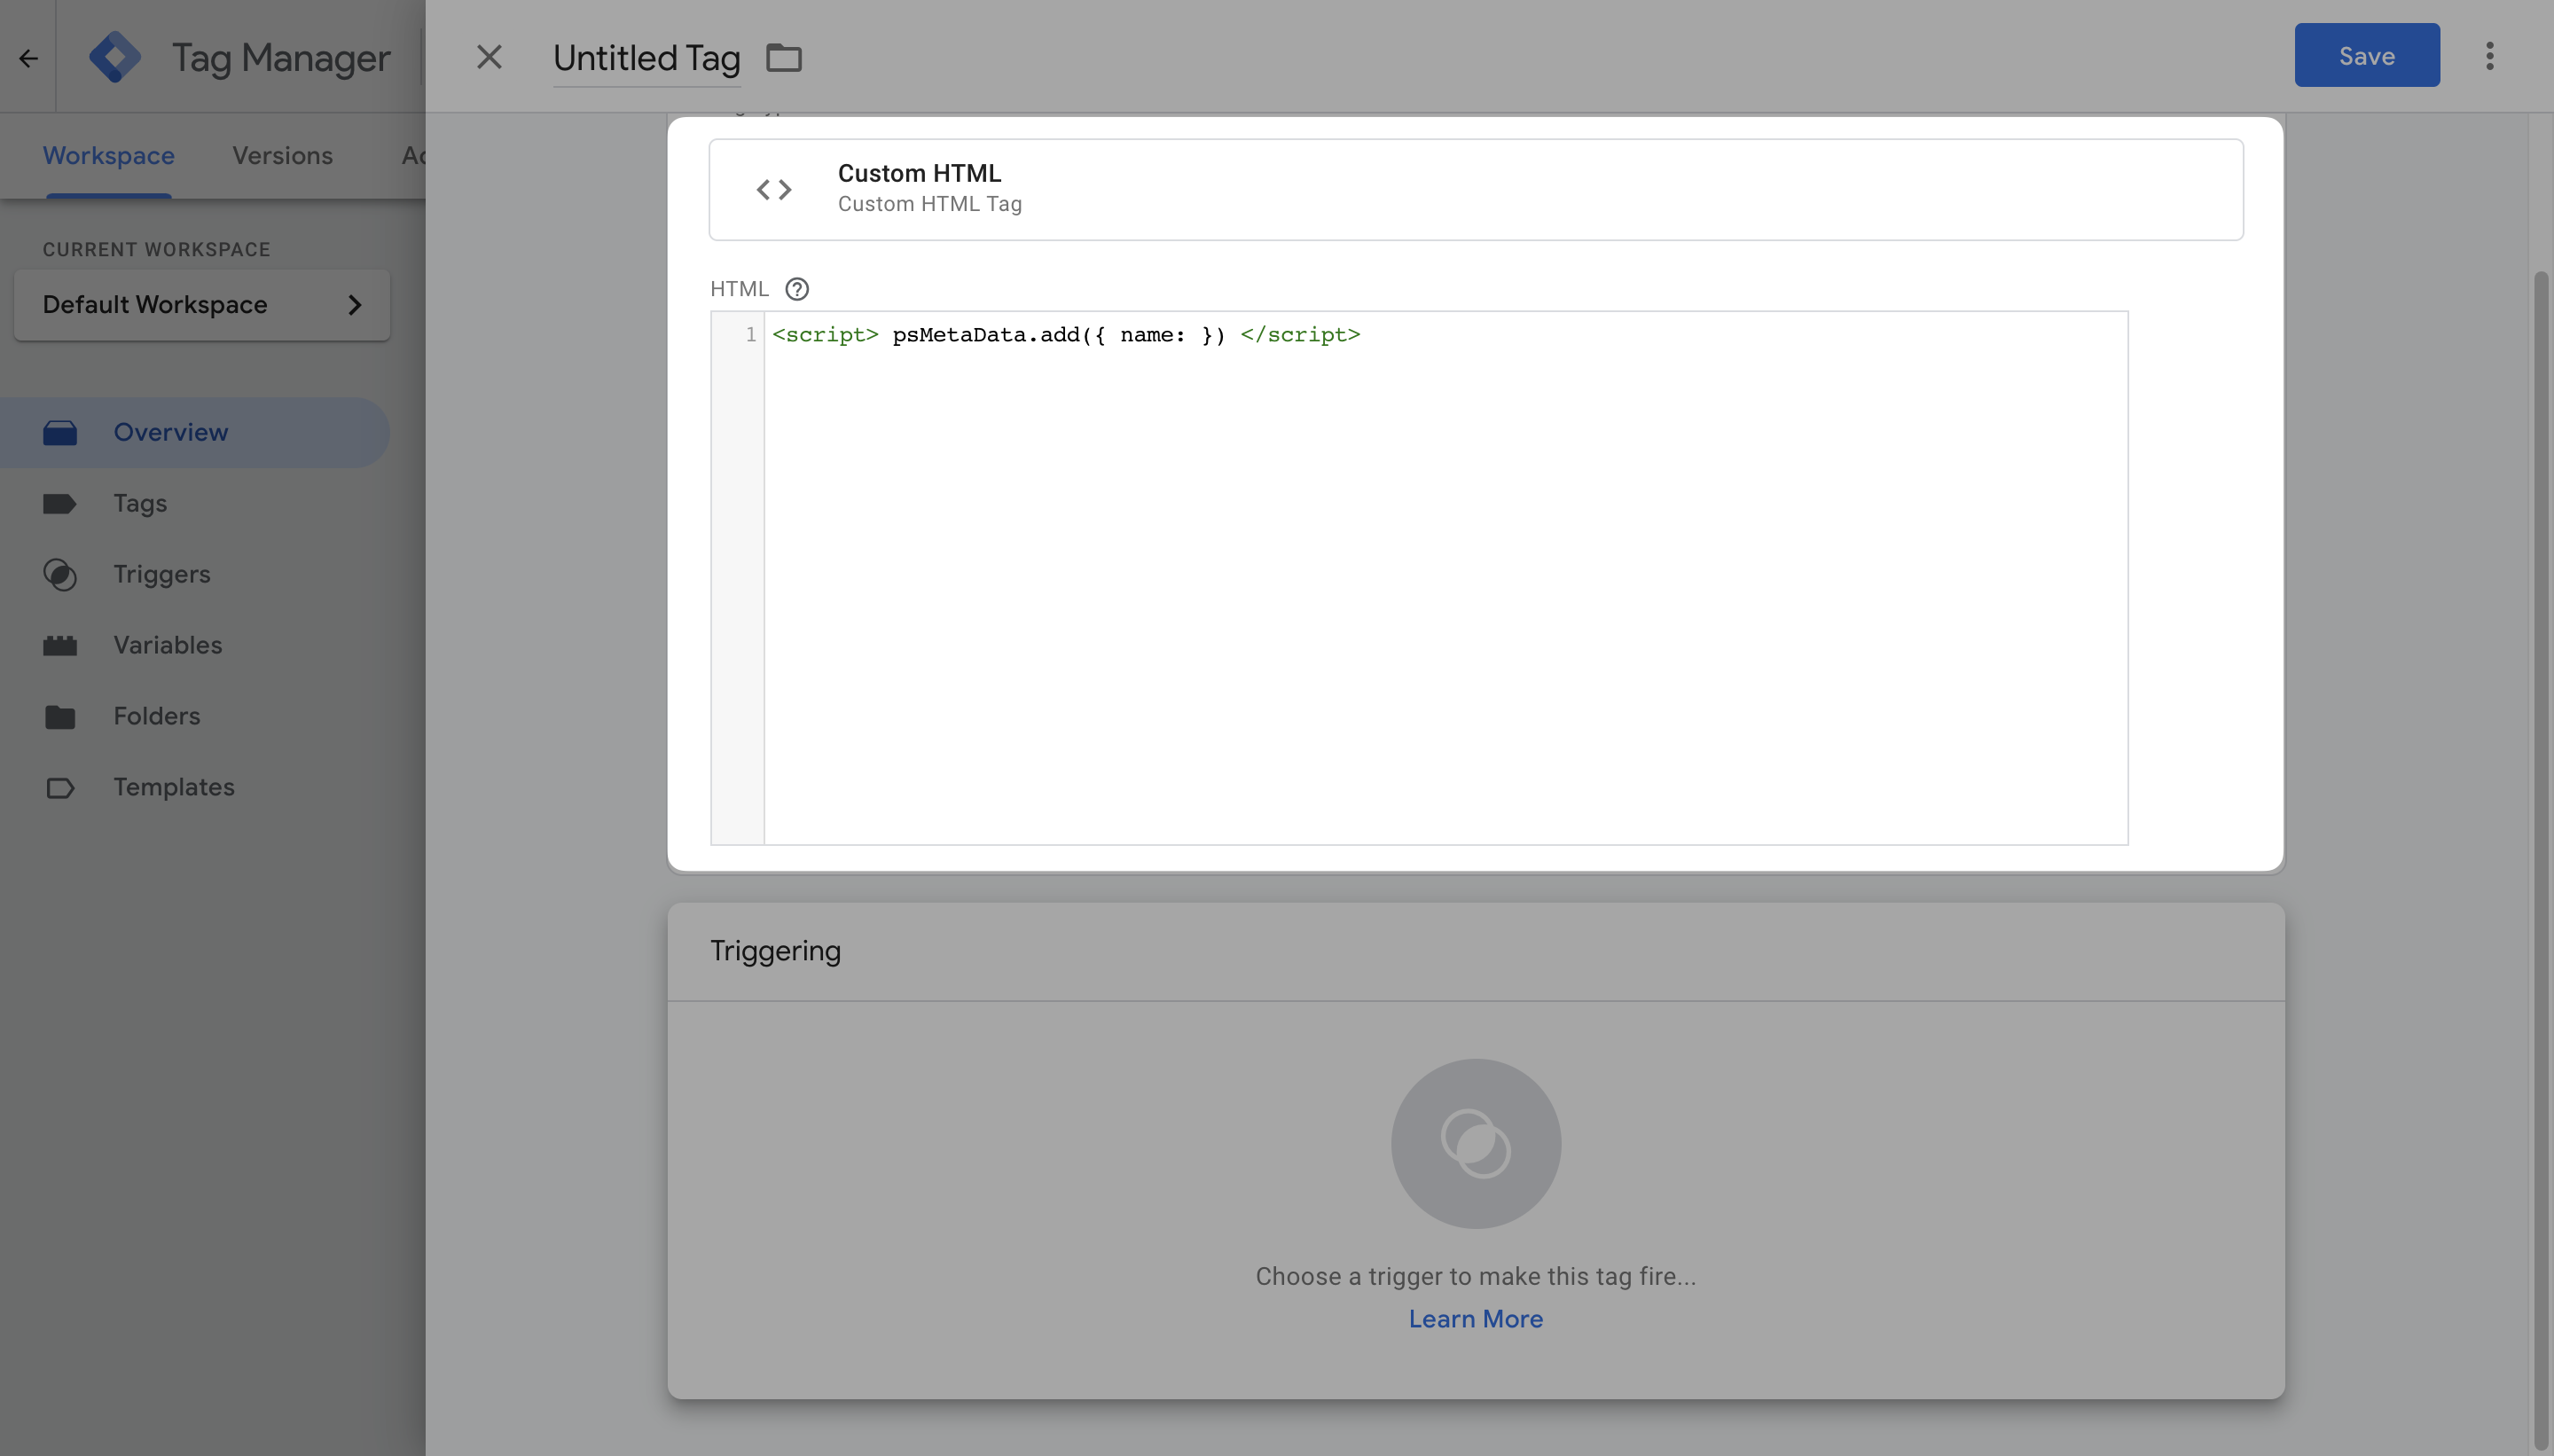
Defining a Smart Tag using Google Tag Manager
Enter Script
Enter the snippet code as shown below. Note that you can set up the variable types as you need.
<script> psMetaData.add({ name: }) </script>

Select Window Loaded
Then, click on the "Trigger Configuration" and select "Window Loaded" from the opening sidebar.

Choose Event Scope
There are two options you may choose; "All Window Loaded Events" or "Some Window Loaded Events."
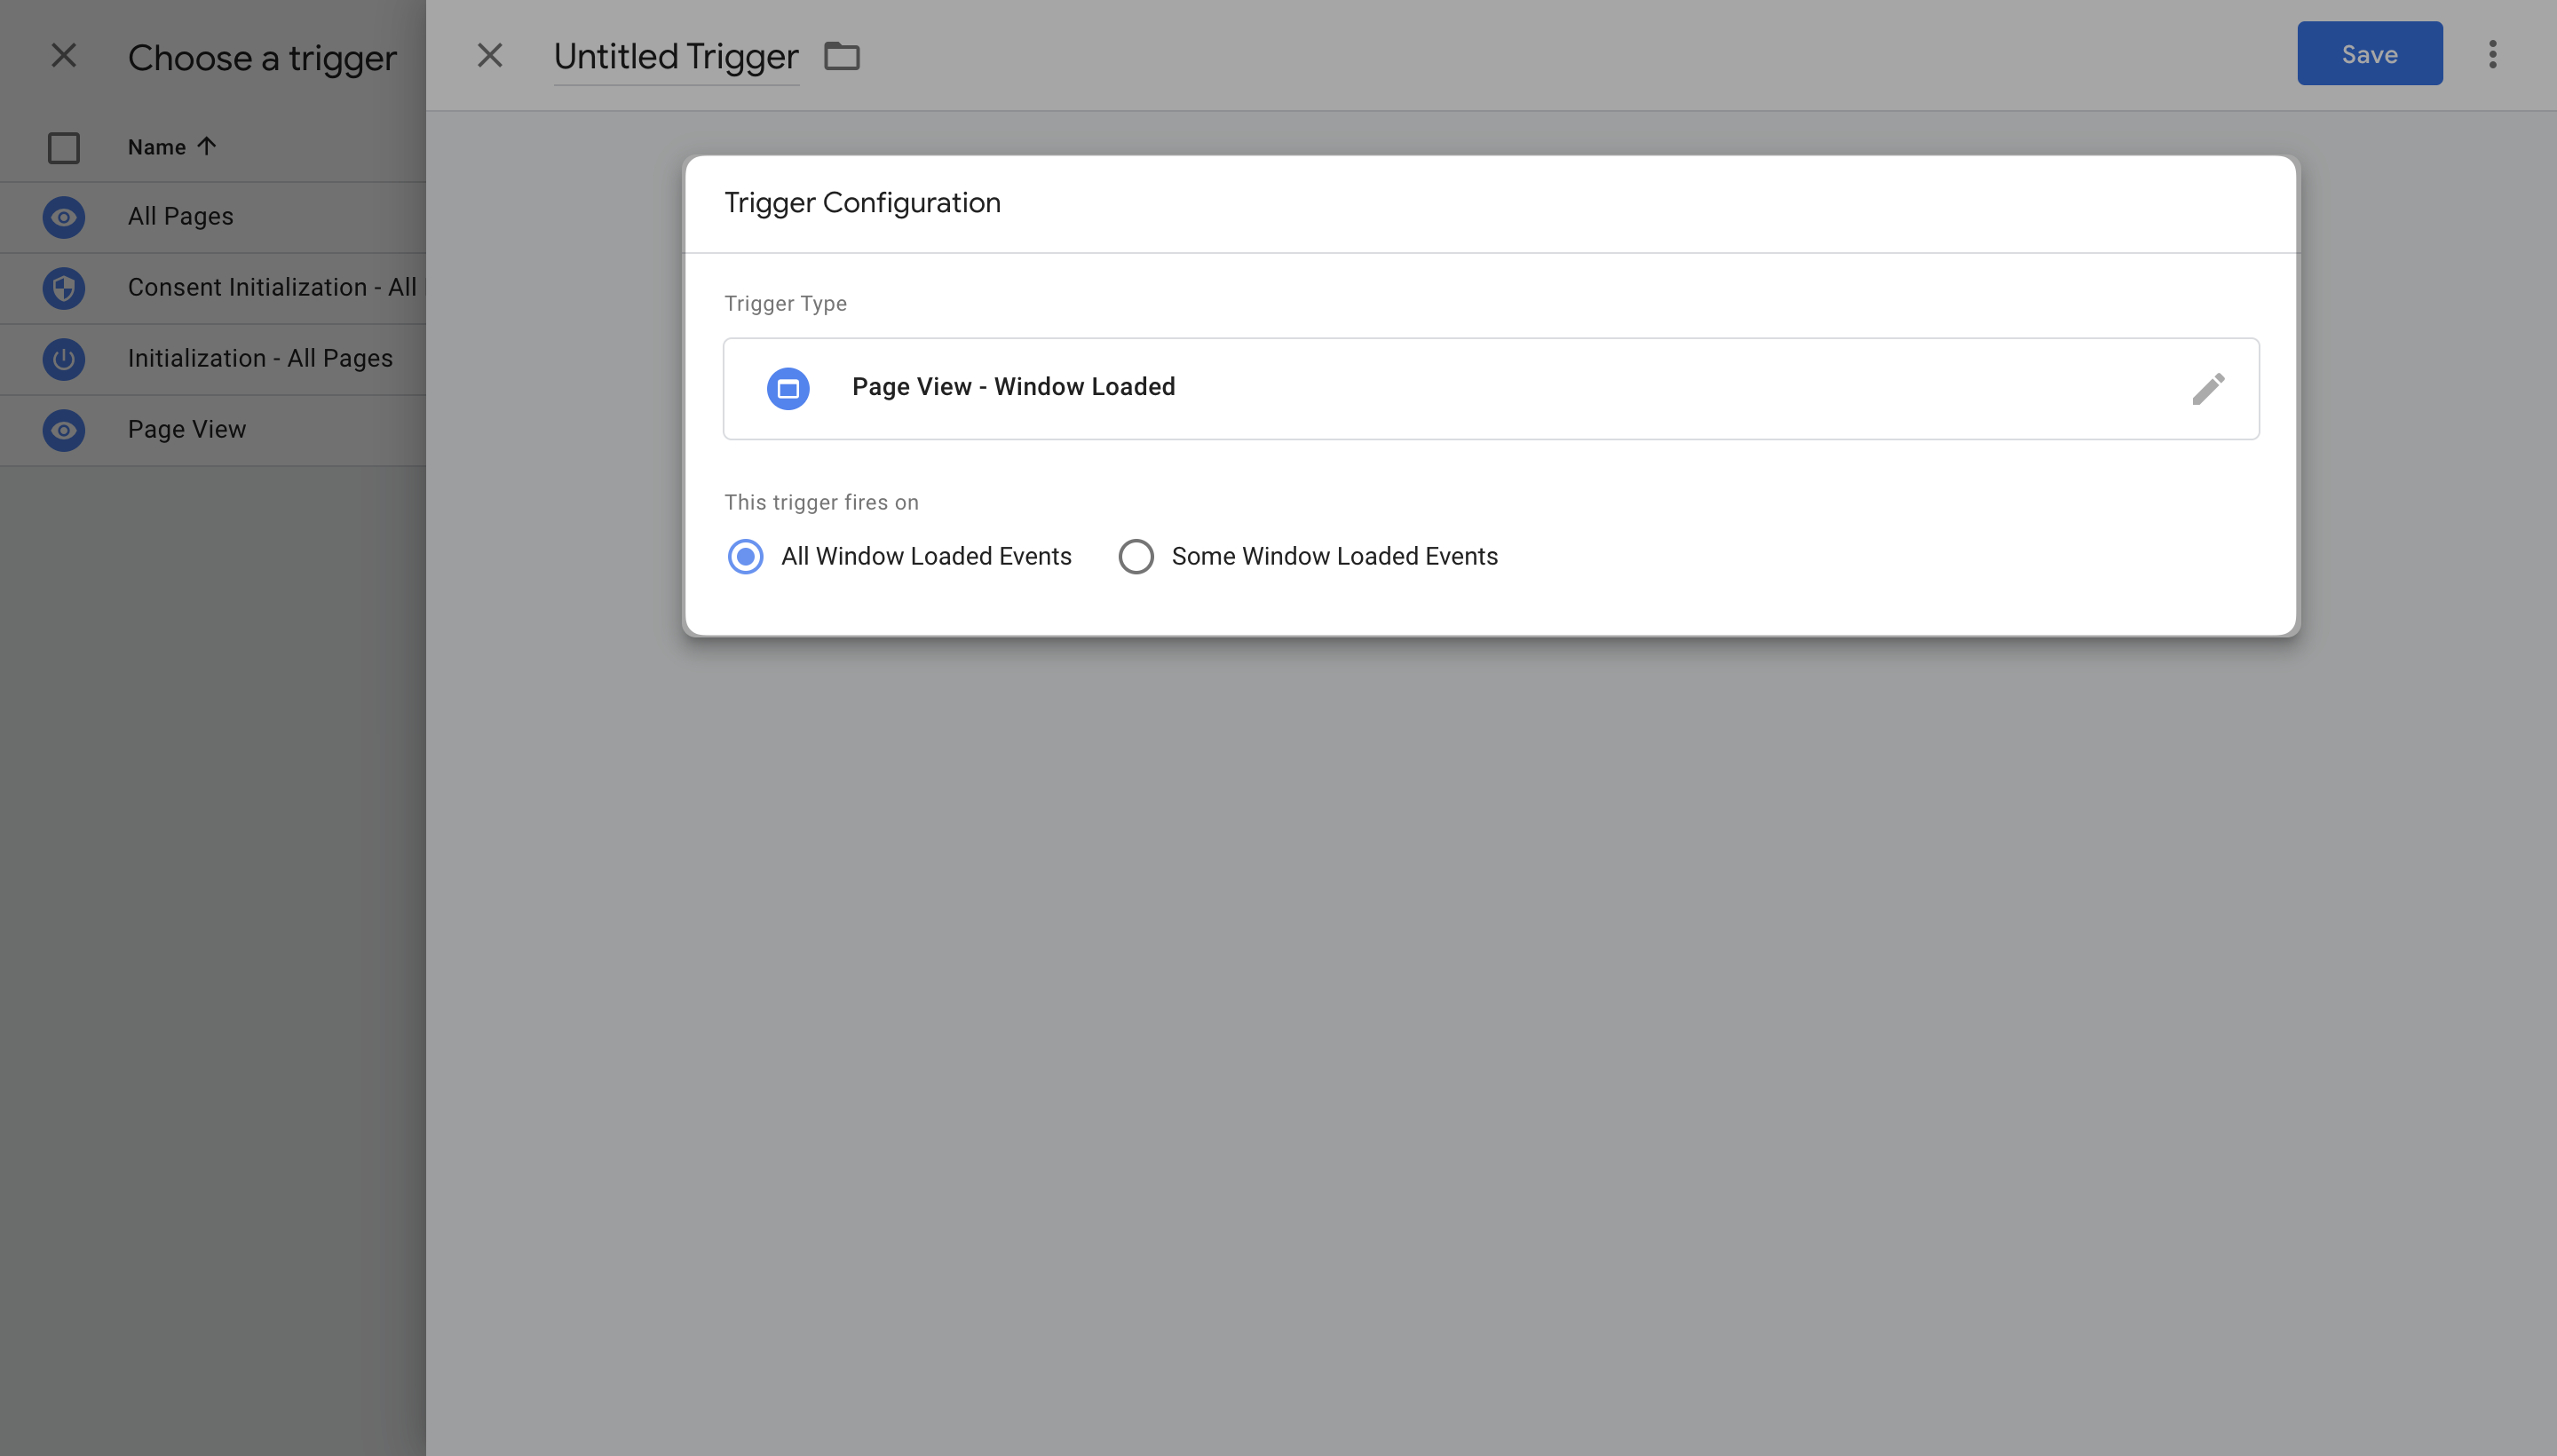
- If you choose "some," then you need further configuration to use this trigger only on specific Page Hostname, URLs, Paths, or Referrers.
- If this feels advanced to you, just select All Window Loaded Events.
When you are finished adjusting your settings, click on the "Save" button to save your smart tag.
Have more questions? Contact us via live chat or get in touch with us by emailing support@popupsmart.com
How is this guide?