How to Prefill Form Fields
Discover how to prefill form fields on Popupsmart for a seamless user experience and improved conversions.
Popup forms often contain generic input fields that many users will fill in the same way, such as email addresses and names. Making respondents fill in these fields manually can be repetitive and time-consuming.
Instead, you can use Popupsmart's Prefill feature to pre-populate form elements for your customers and prospects.
How Prefill Feature Works
Popupsmart uses smart tags (dynamic text replacement) to collect dynamic user information (i.e., usernames, email addresses, location, etc.) You can add smart tags (specifically formatted placeholder texts) in your popup's form field names to prefill them with user data.
Smart tags can also pull users' information from special URL parameters if there are any. A URL parameter fills in the data when it includes the information you want to be prefilled in the form.
For example, "examplewebsite.com/?name=erica"
You may copy our predefined smart tags or use Google Tag Manager to create a tag.
Case Sensitivity
Smart tags are case-sensitive; use them as in the case they should be. Otherwise, they won't operate.
How to Set Up Prefill
Create or Open Campaign
Create a new popup campaign or open an existing one after logging in to the dashboard. To create a new campaign, hit the "New Campaign" button in the "Campaign" screen, and select the most convenient one of the ready-made templates.
Add Form Element
After that, from the "Customize" section, click "Add a new element" and select "Form."

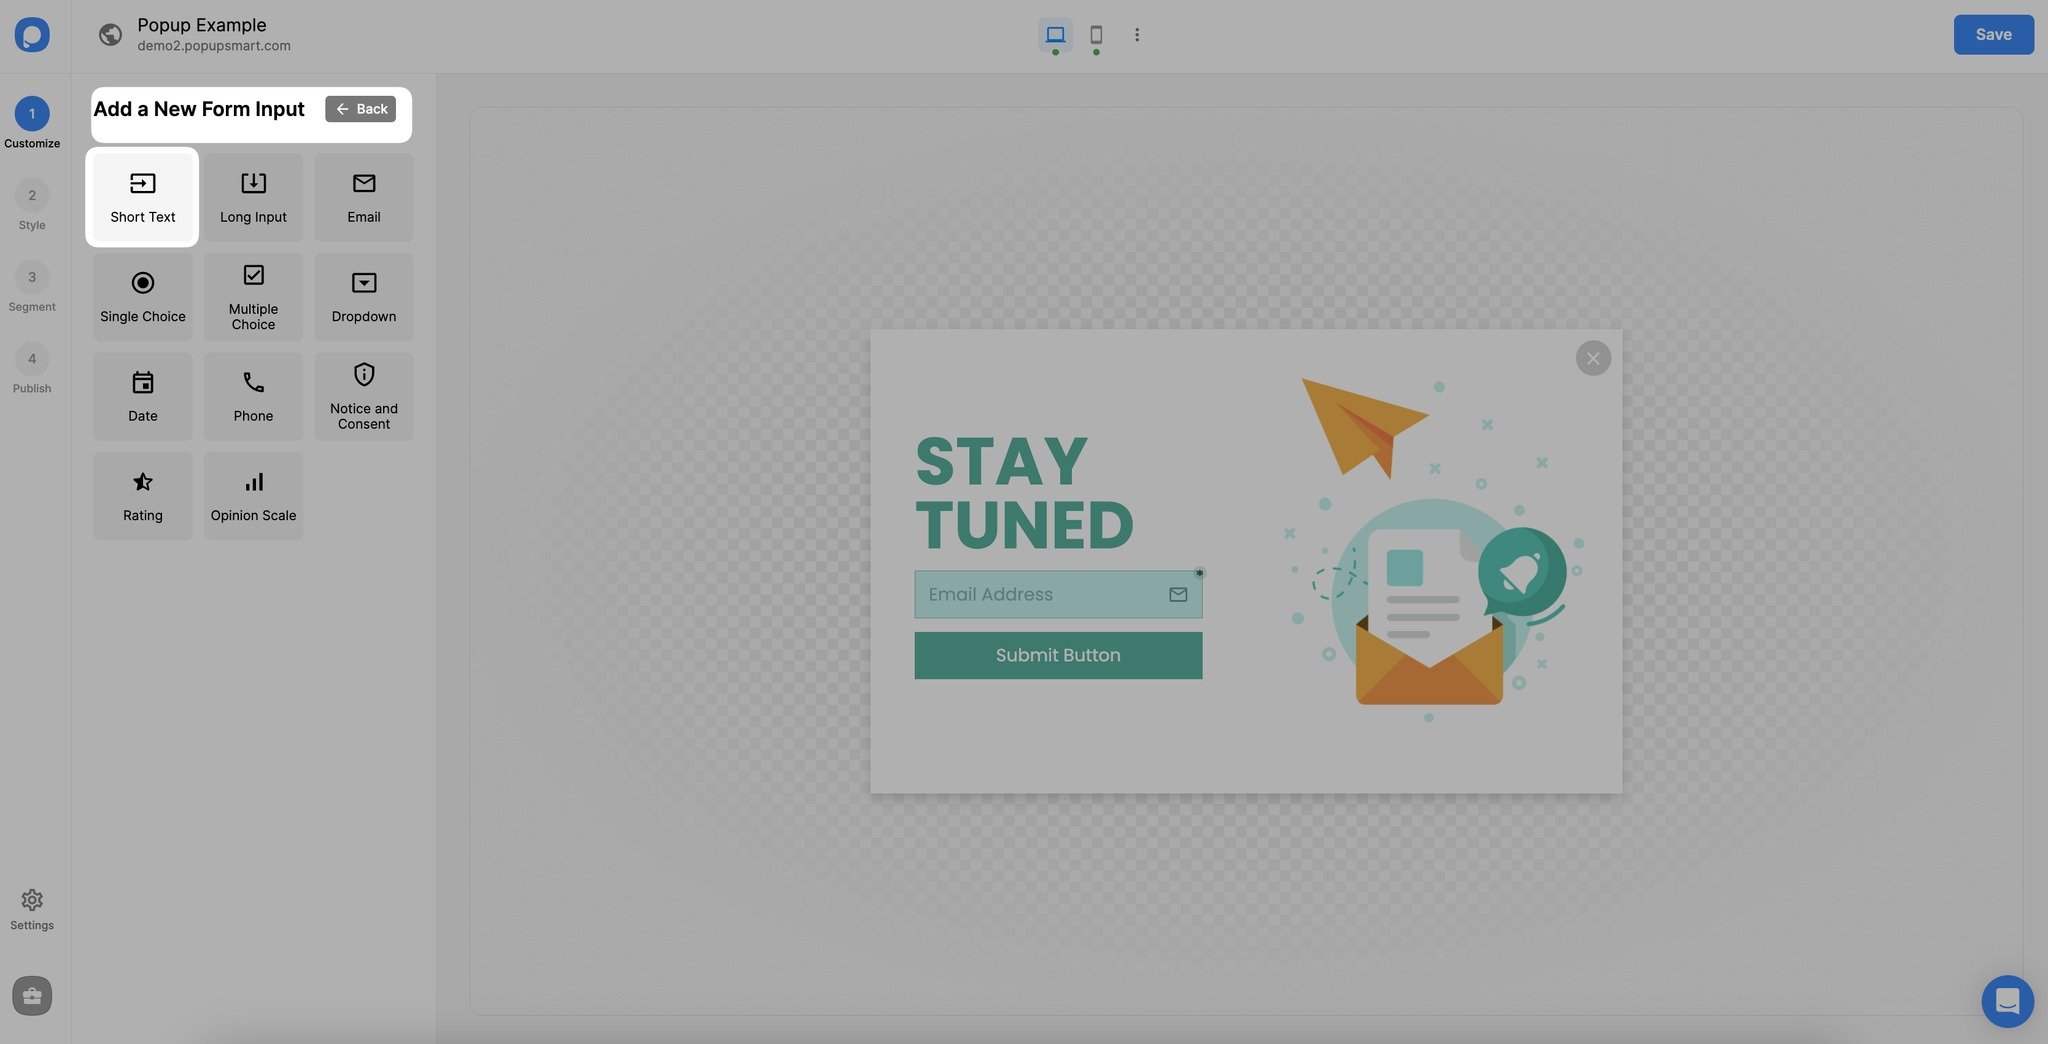
Add Text Field
Click "Add a new form field" and choose the "Short Text" form element to add your popup.
Enable Prefill
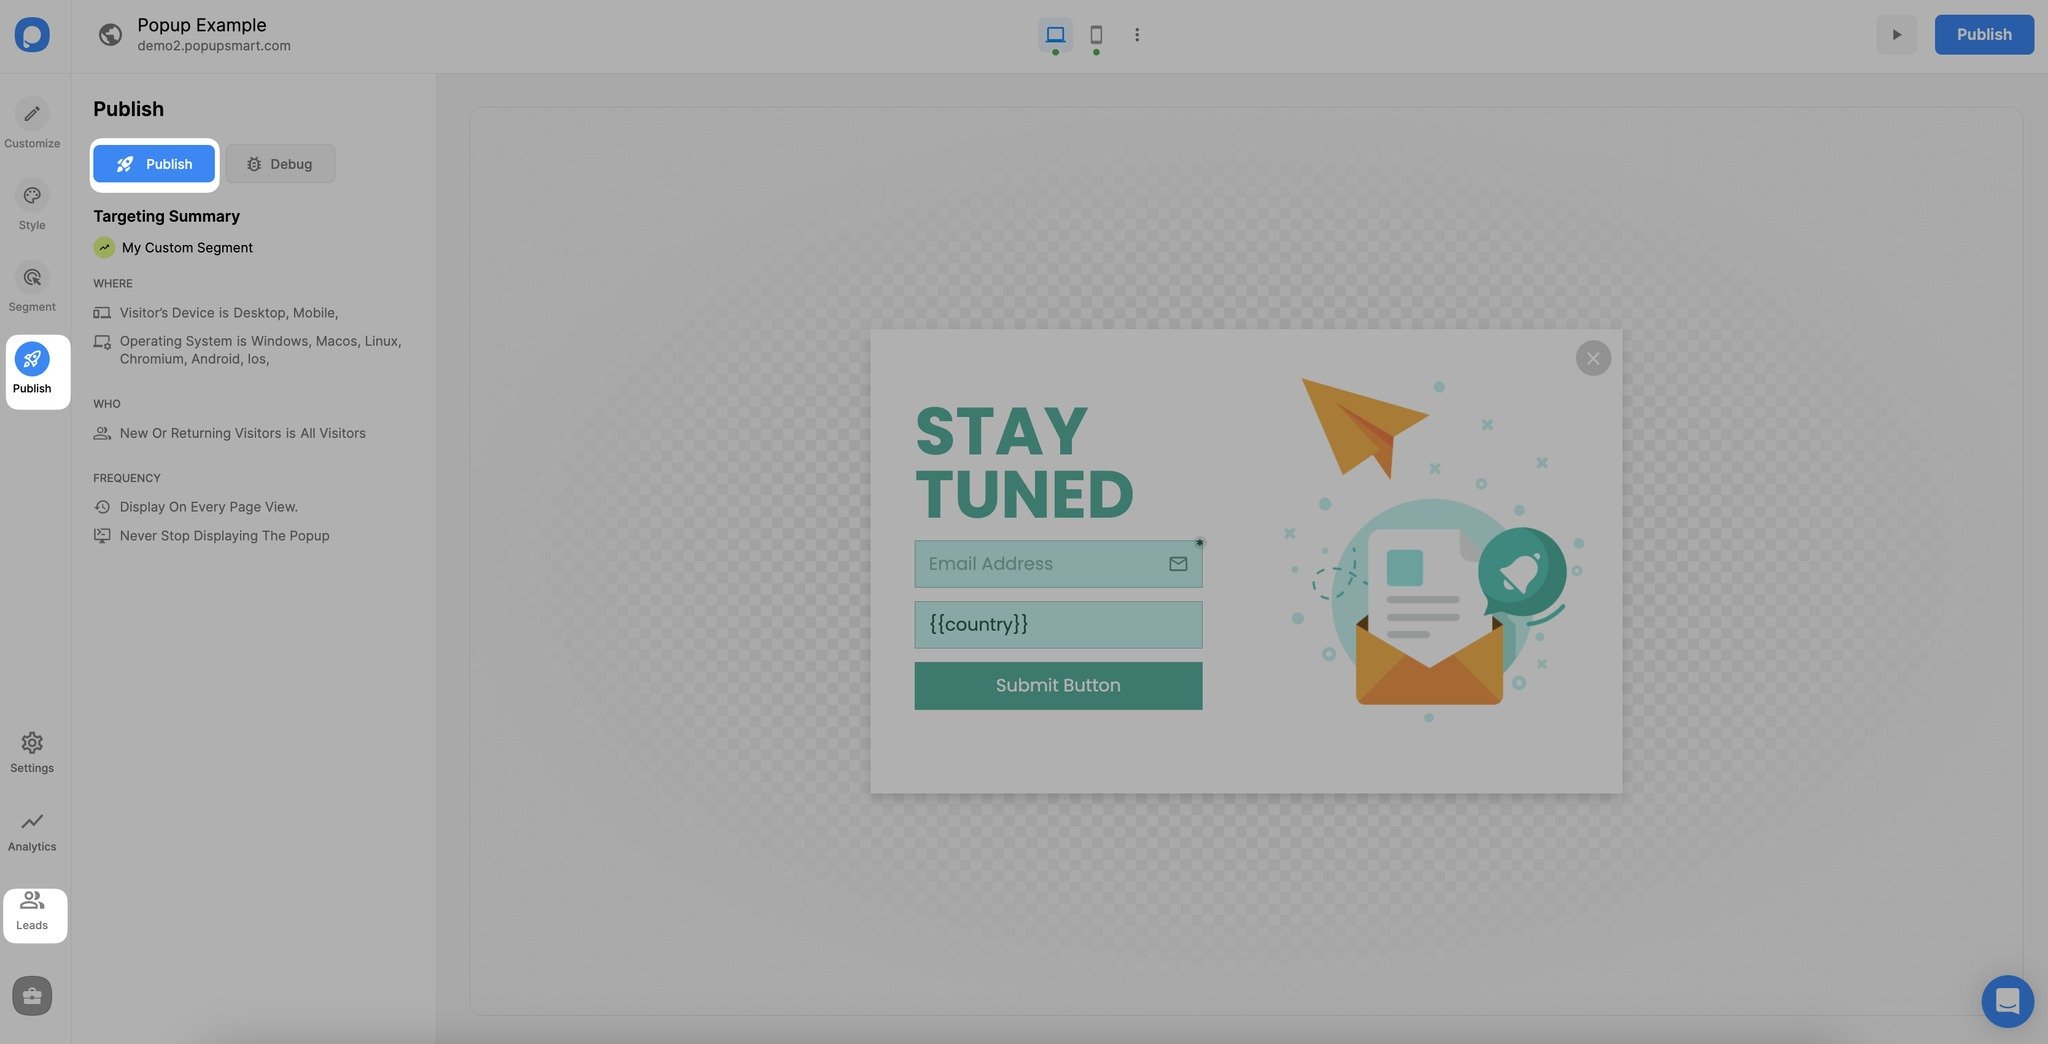
Then, click your "Text" element and turn on the "Prefill" toggle. Select a predefined smart tag from the "Add prefill value" part.
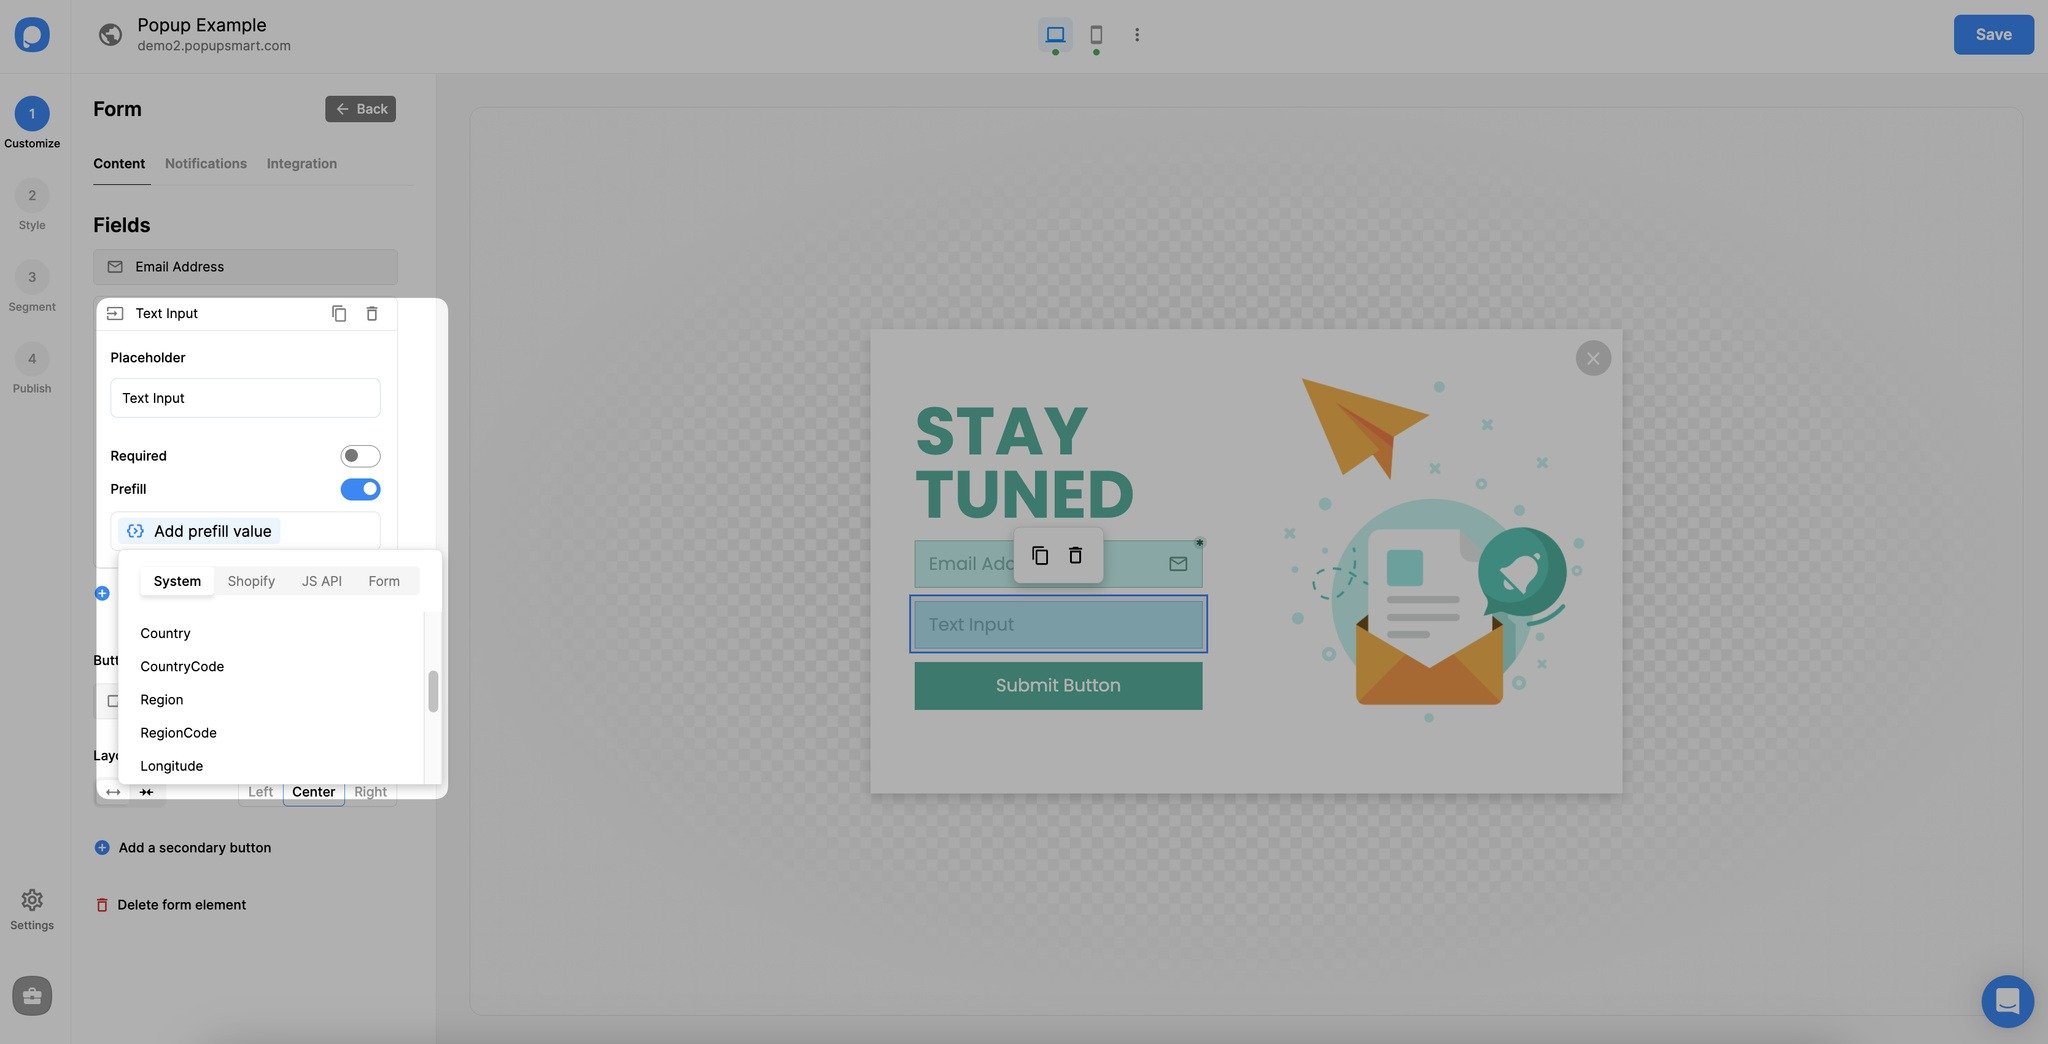
For example, select {{country}} under the "System" part if you want to learn which country your visitors are from.
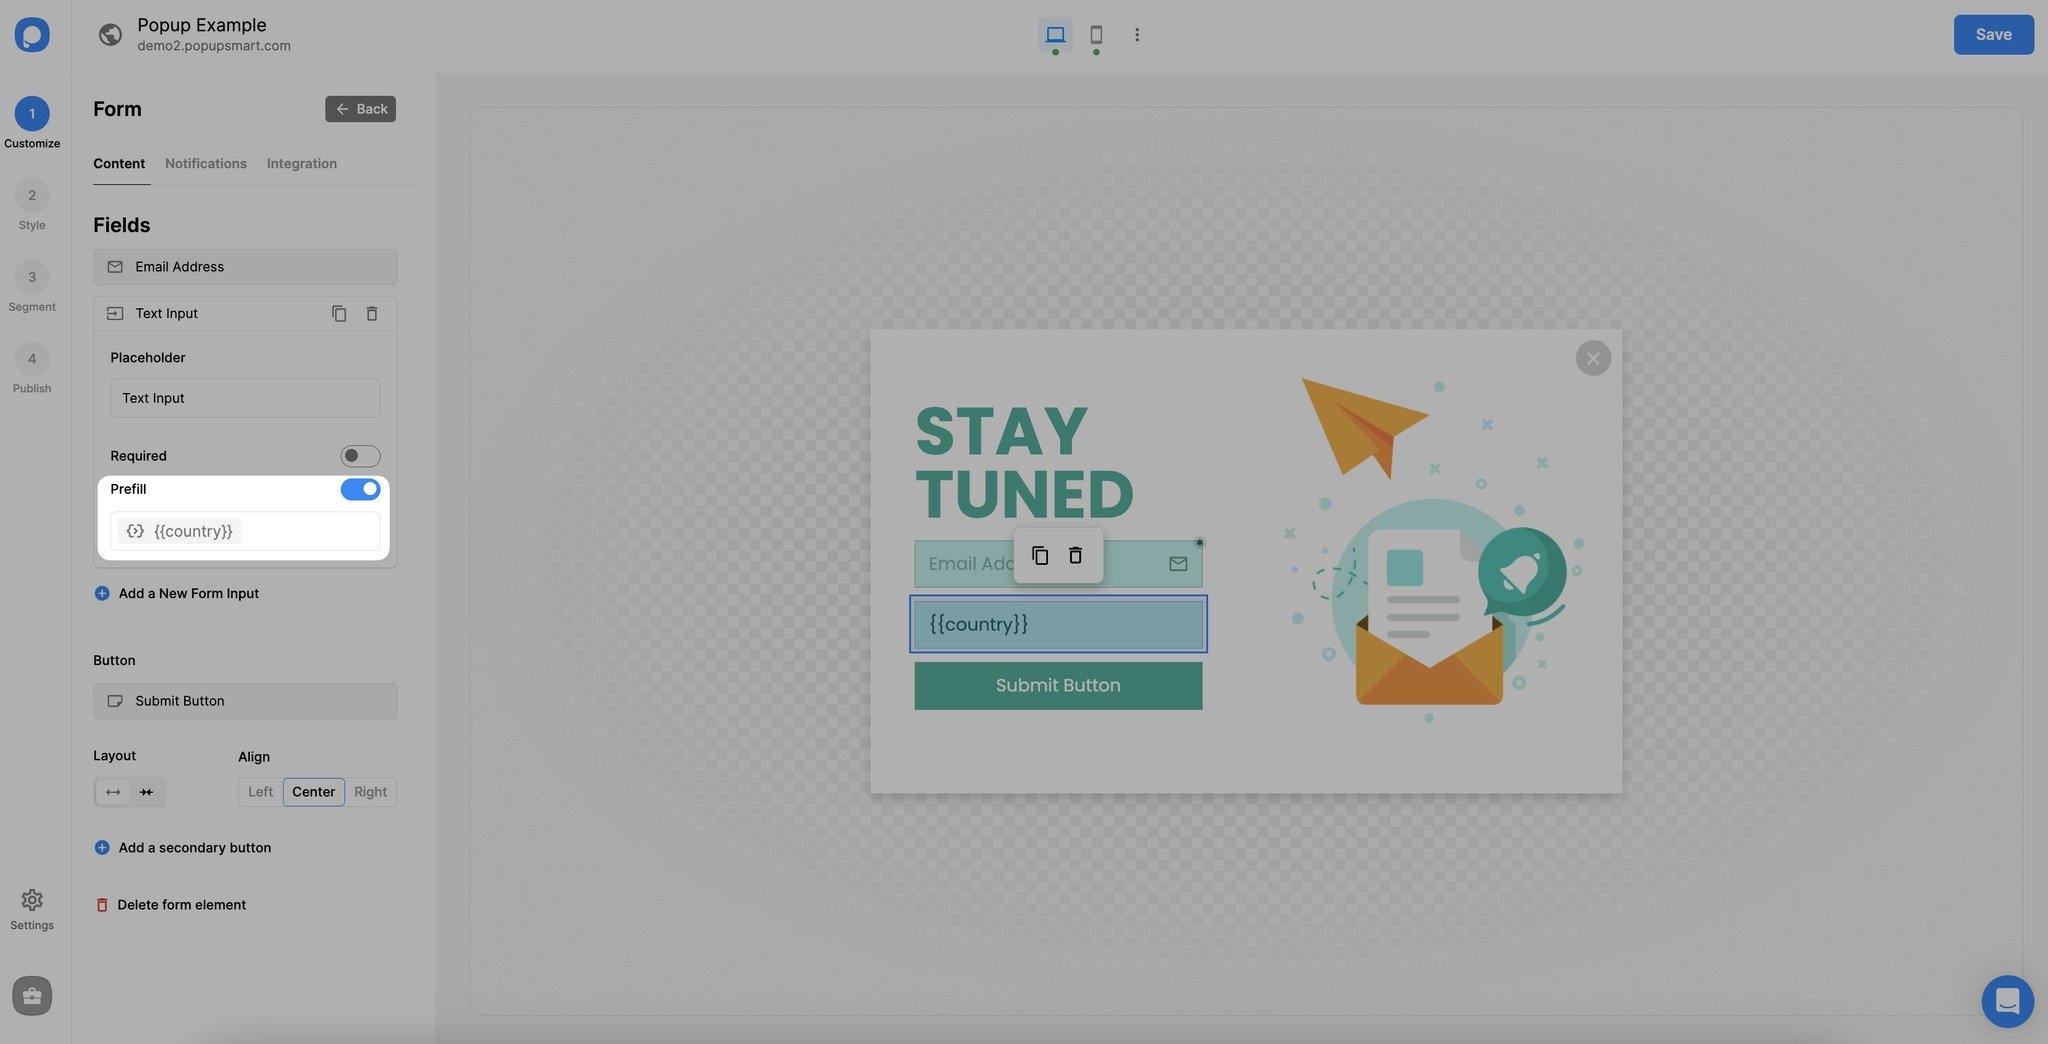
This will prefill that input. You can use different smart tags for different fields as you need among the "System, Shopify, JS API, and Form" categories.
Do not forget to hit the "Save" button when you complete the changes.
View Collected Data
You can access the collected user data through your "Leads" table. For this, you need to publish your popup, and the "Leads" section will appear and show you the collected data.
How Prefill Forms Find Data
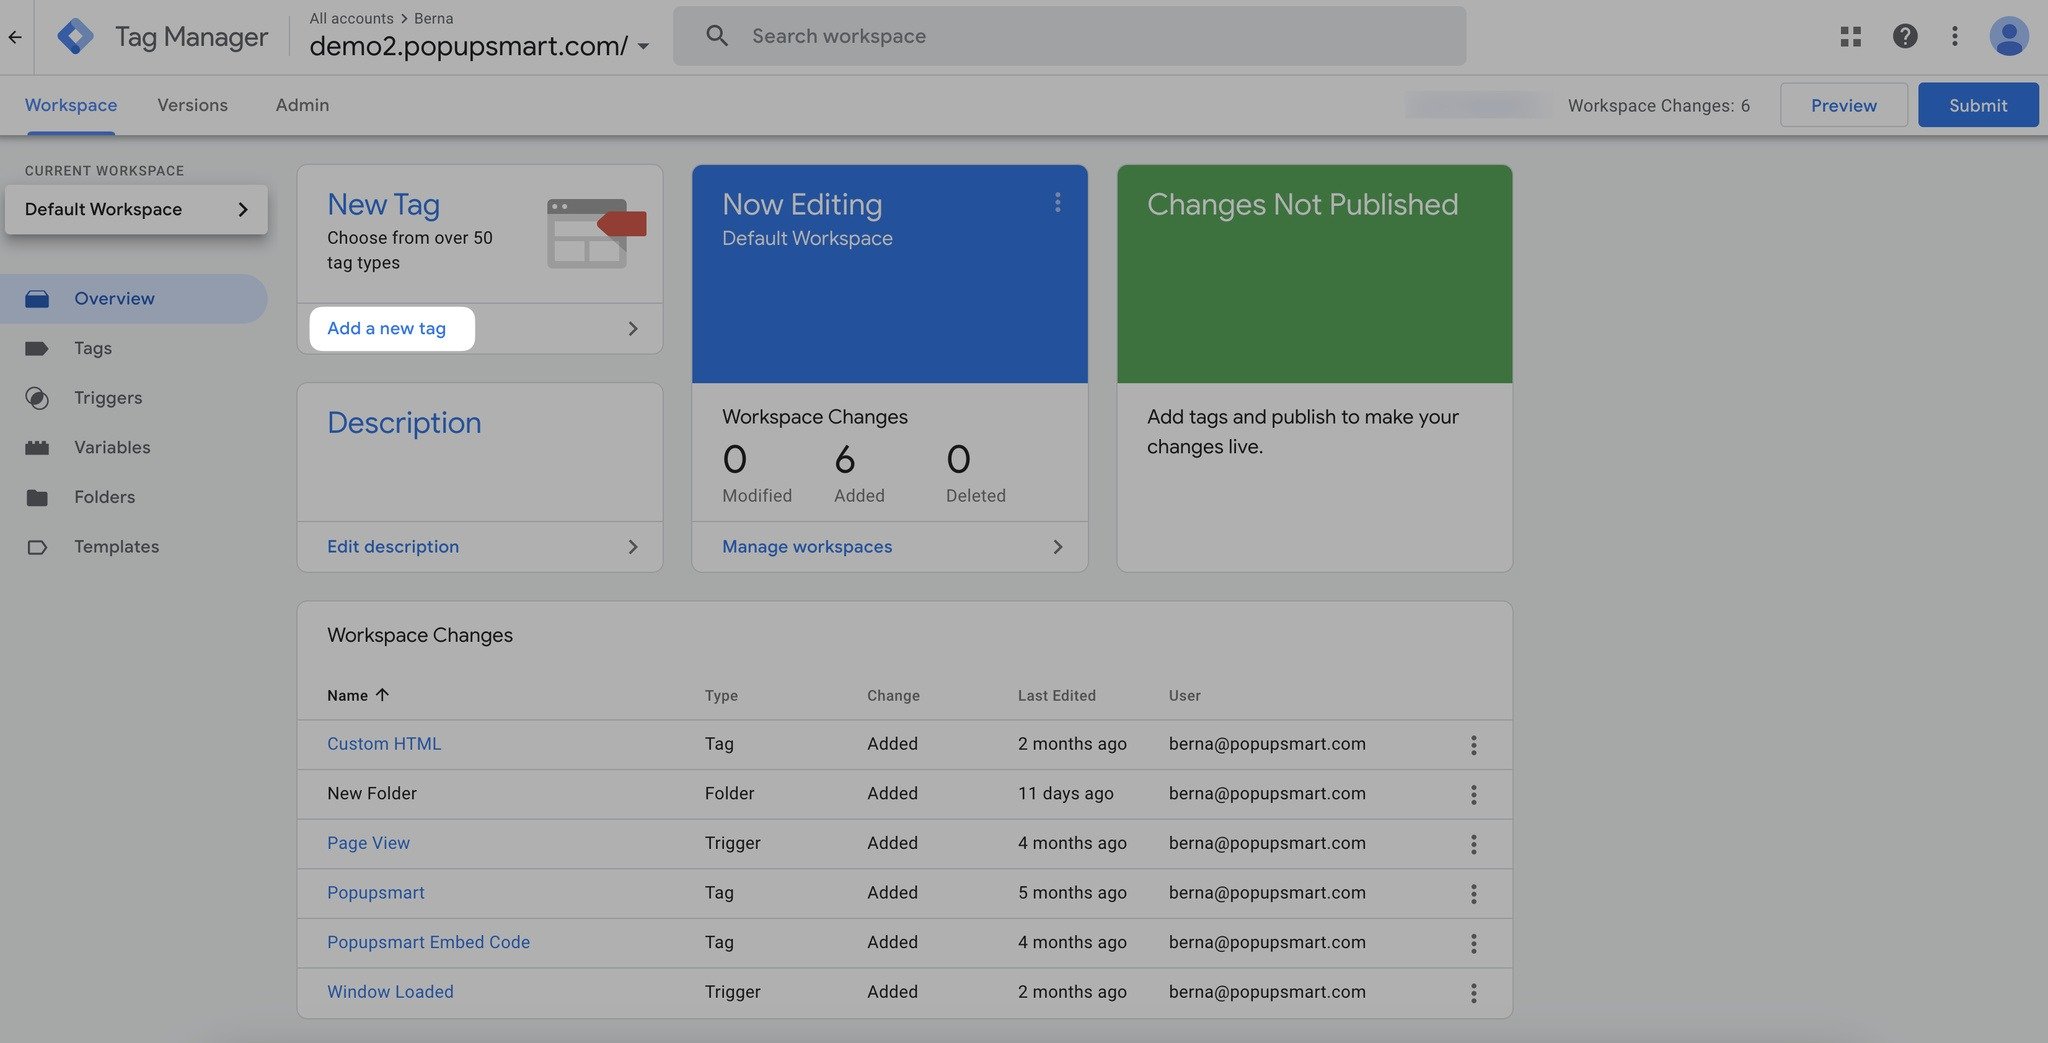
Using Google Tag Manager to Define Custom Variables
One method to prefill popup forms is to implement the Popupsmart JavaScript API on GTM.
Add Code Snippet
Paste the following code snippet in the HTML field: <script> ps.addMeta('name','value') </script>
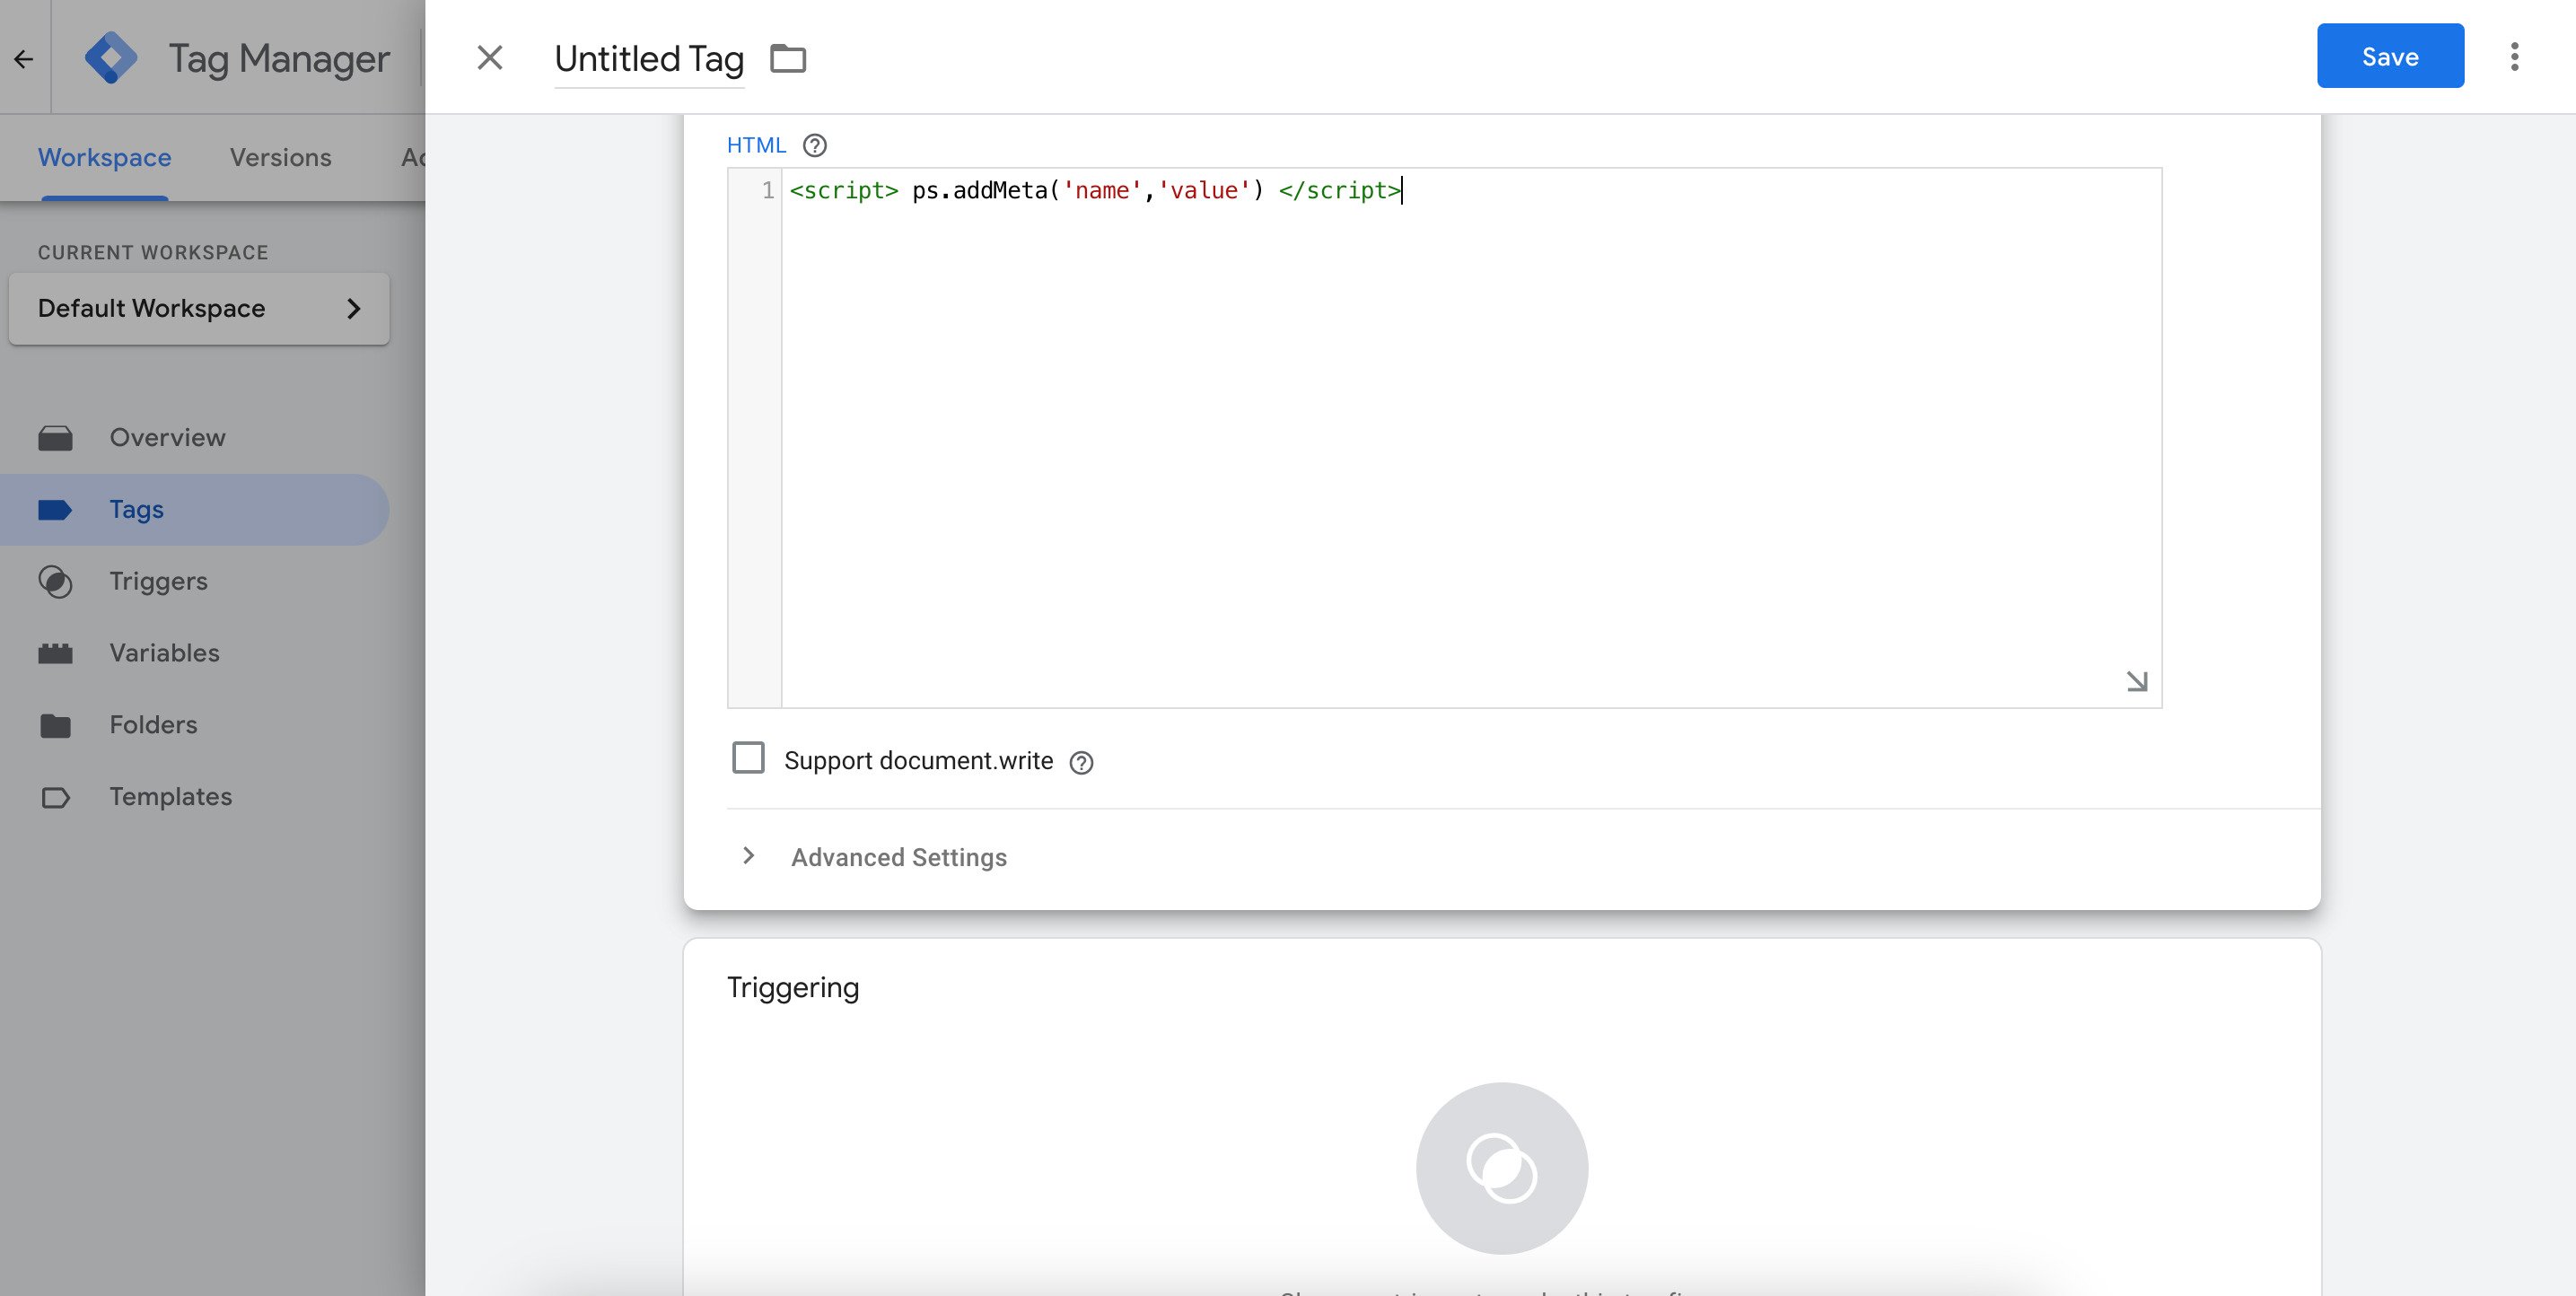
Set Trigger
After this, scroll down and click the "Triggering" section and click on the "+" button to set up your tag's trigger.
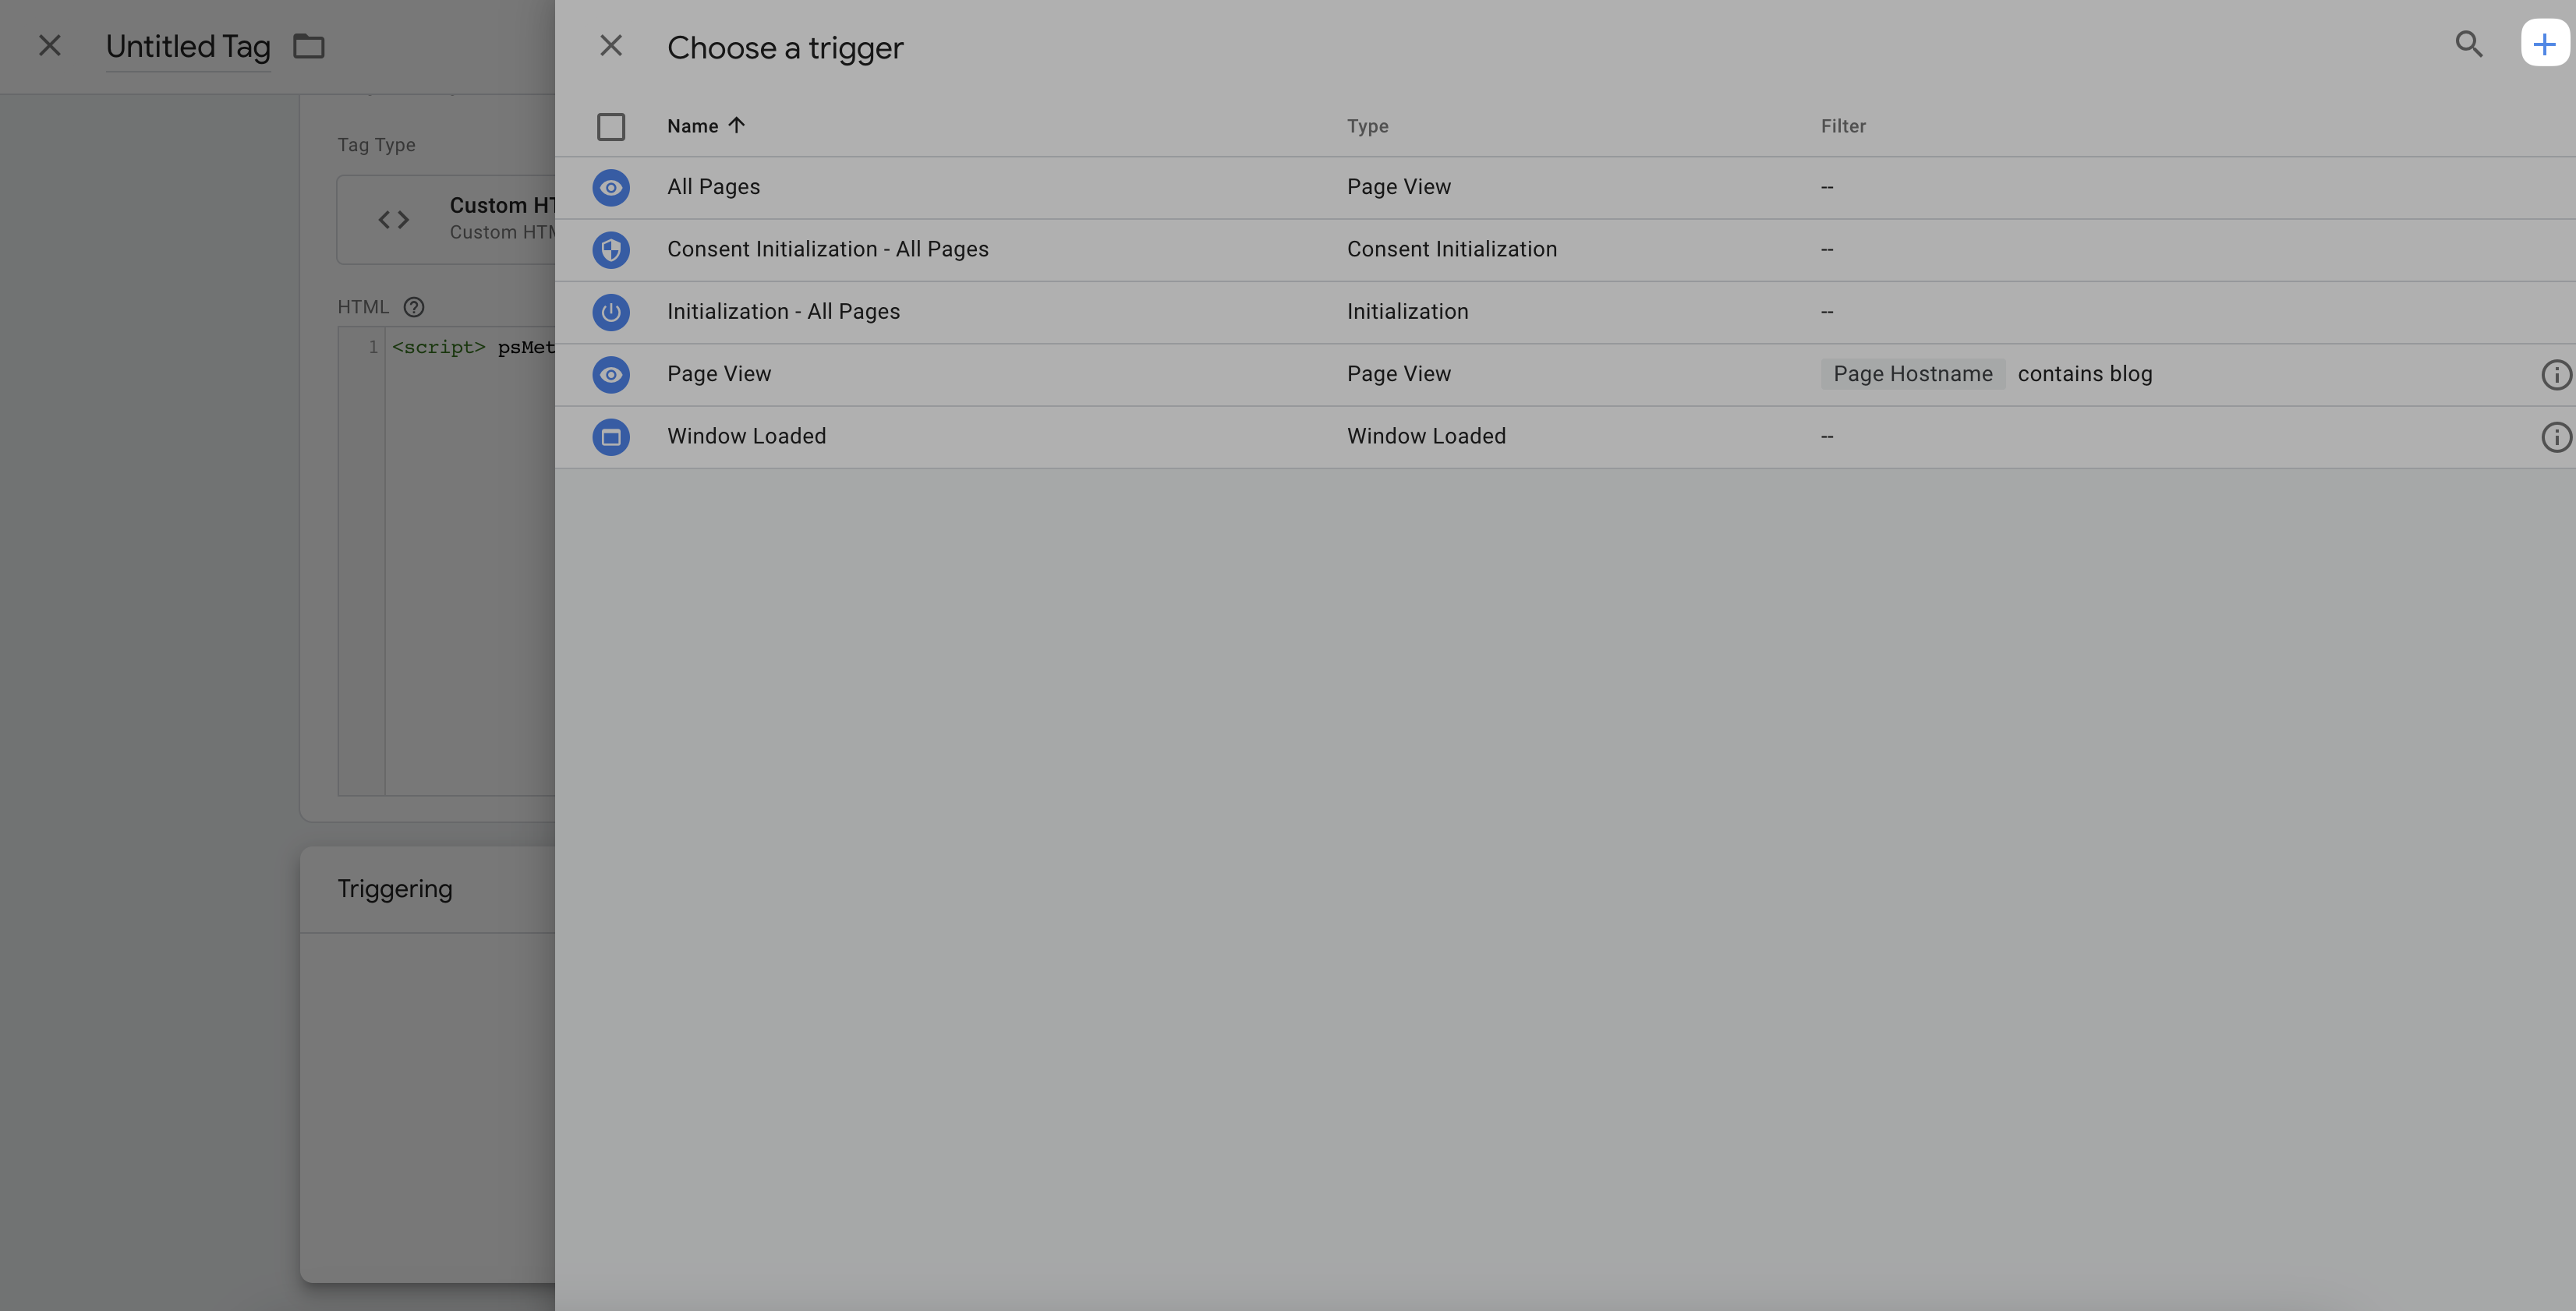

Choose Event Scope
There are two options you may select; All Window Loaded Events or Some Window Loaded Events.
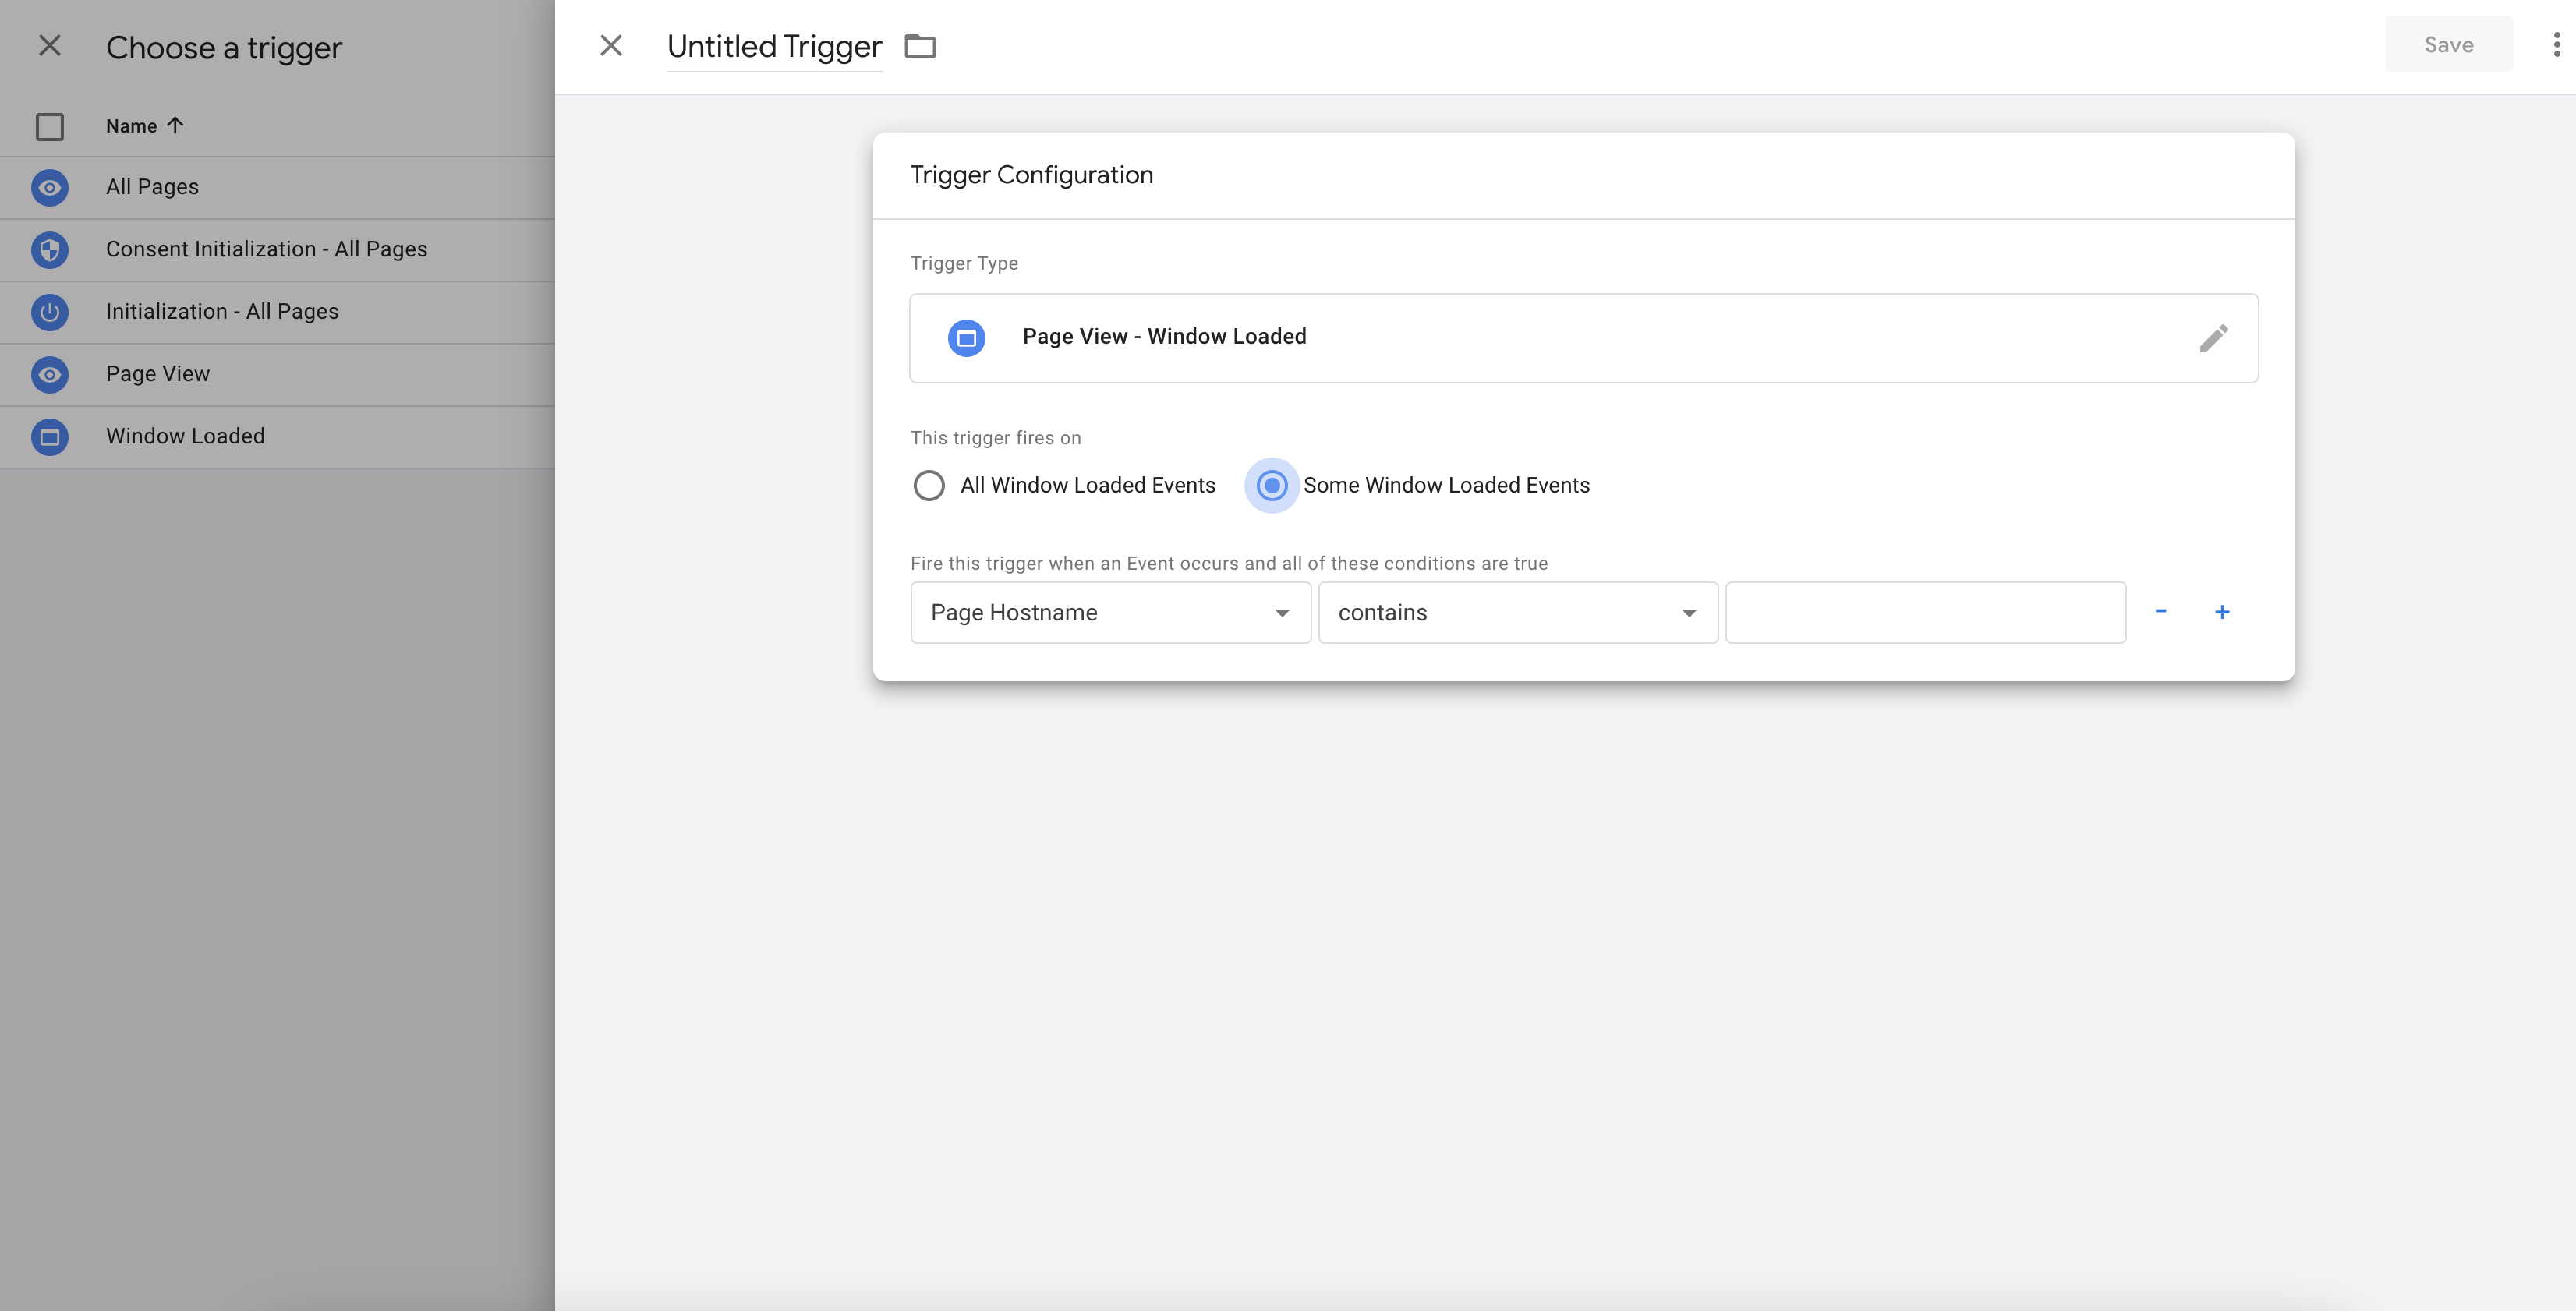
If you select "some," then you'll need further configuration to use this trigger only on specific Page Hostname, URLs, Paths, or Referrers. Otherwise, just select All Window Loaded Events.
Using Email Service Providers for Auto-Filling Forms
If you'd like to target your newsletter subscribers, some of whose information you already have, then it's a great way to prefill a popup form for them and boost conversions.
Just link the CTA button on your email content with a page URL that contains the user information.
For example: domain.com/page?name=firstname&country=canada
Basically, the popup form on the linked page will be pre-populated with the data provided on the URL parameter.
Using URL Parameters
You can manually enter URL parameters to prefill popup forms. This method works as "examplewebsite.com/?name=firstname"
We recommend using this one when you already know the user data and will link to the page from a source that contains the required user information.
Still have questions? Contact us via live chat or email us at support@popupsmart.com.
How is this guide?