How to Use Column & Row Structures Efficiently in a Popup?
Discover how to efficiently use column and row structures on your popup campaigns for organized and engaging designs.
Column & row structures in popups help you create differently layered popups.
Unlike popups with limited area for design, you will be able to add diverse components in different places.
Also, these structures are simple to comprehend, so you can easily navigate them according to the target design in your mind.
We will guide you through and give significant tips about the light popups to show you the column/row structures directly.
How to Use Column & Row Structures
Choose Template
Choose a template from the template page.
There will be a column or row by default on your popup. If there is any element you want to add, you can simply add it from the "Add a new element" button.
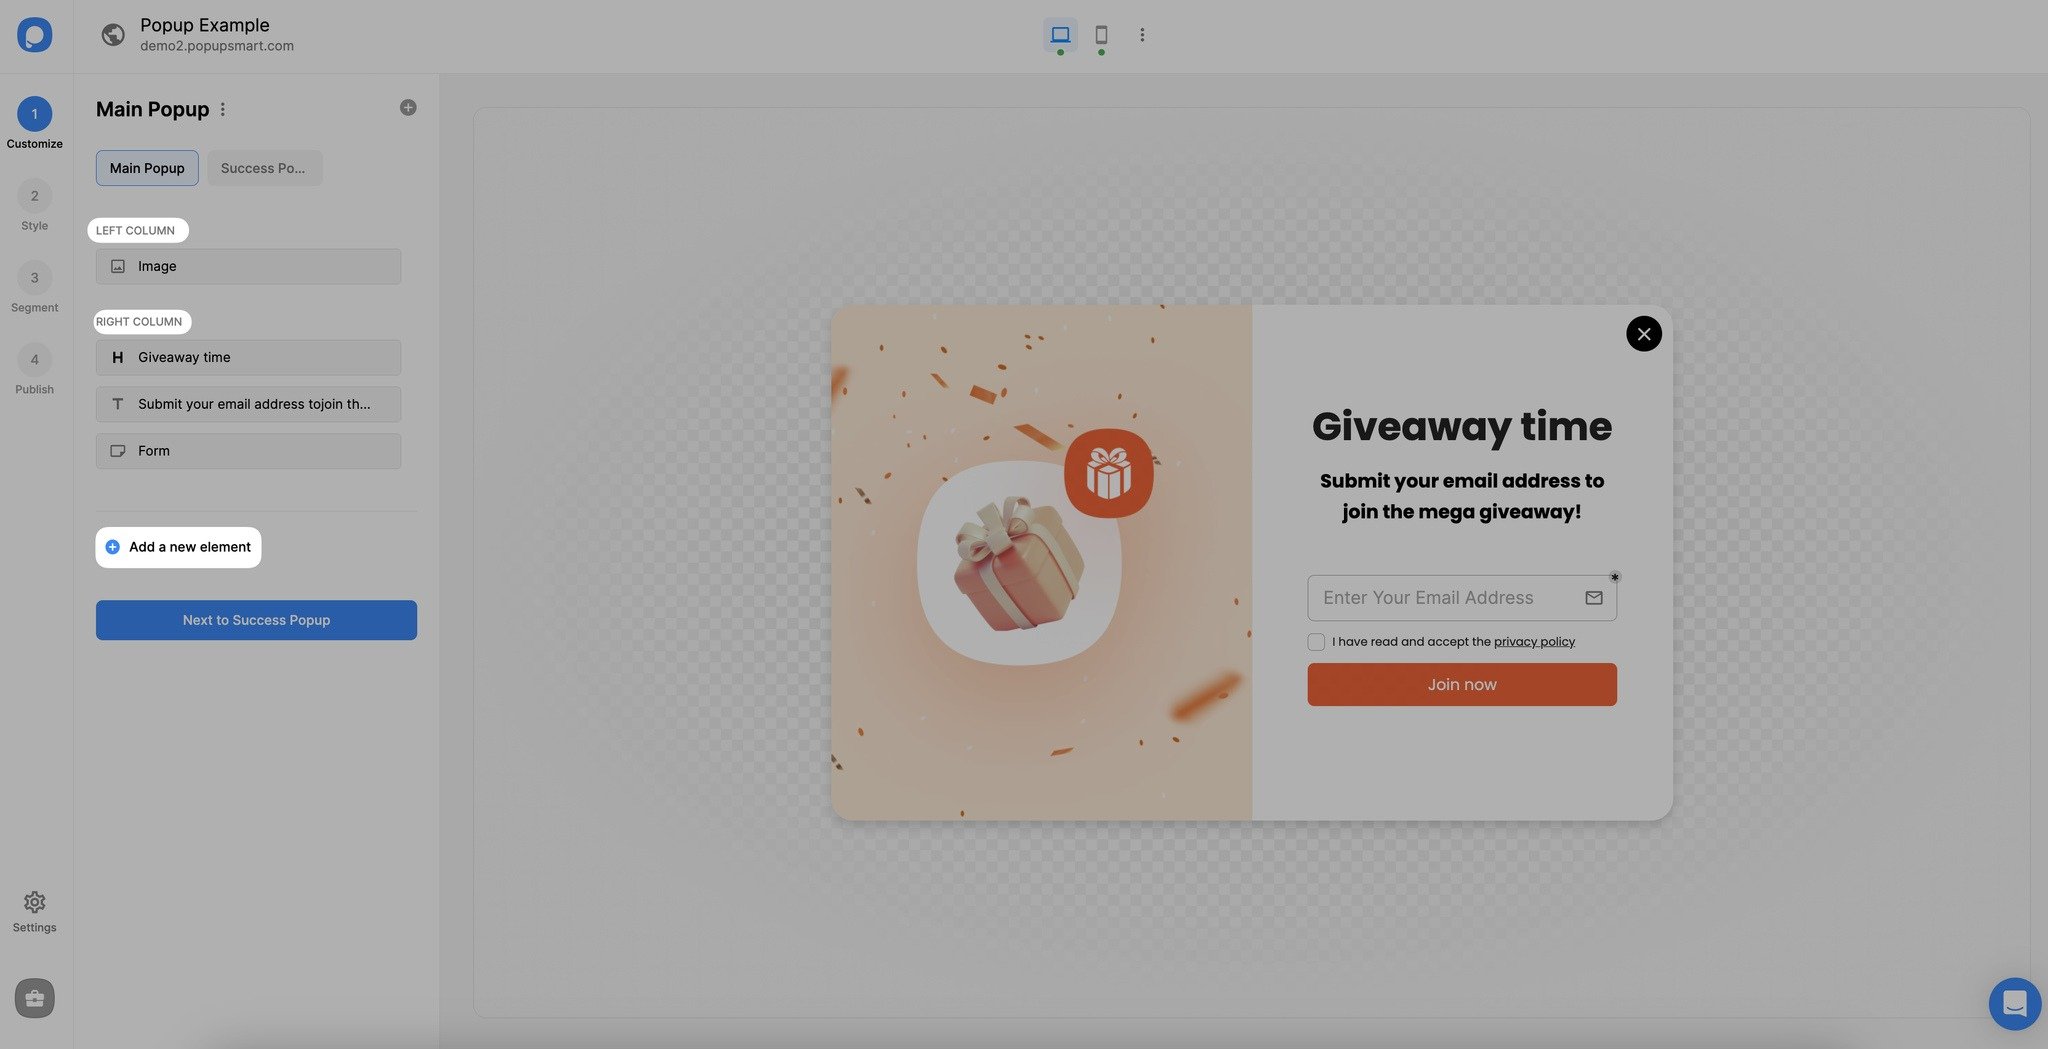
Use Column Structure
Column structure divides your popup into two columns, which are the right column and the left column. Each column can have different elements.

When you add any element to your column, it will be shown in the column you select.
You can drag and drop elements you want to the left or right column easily.
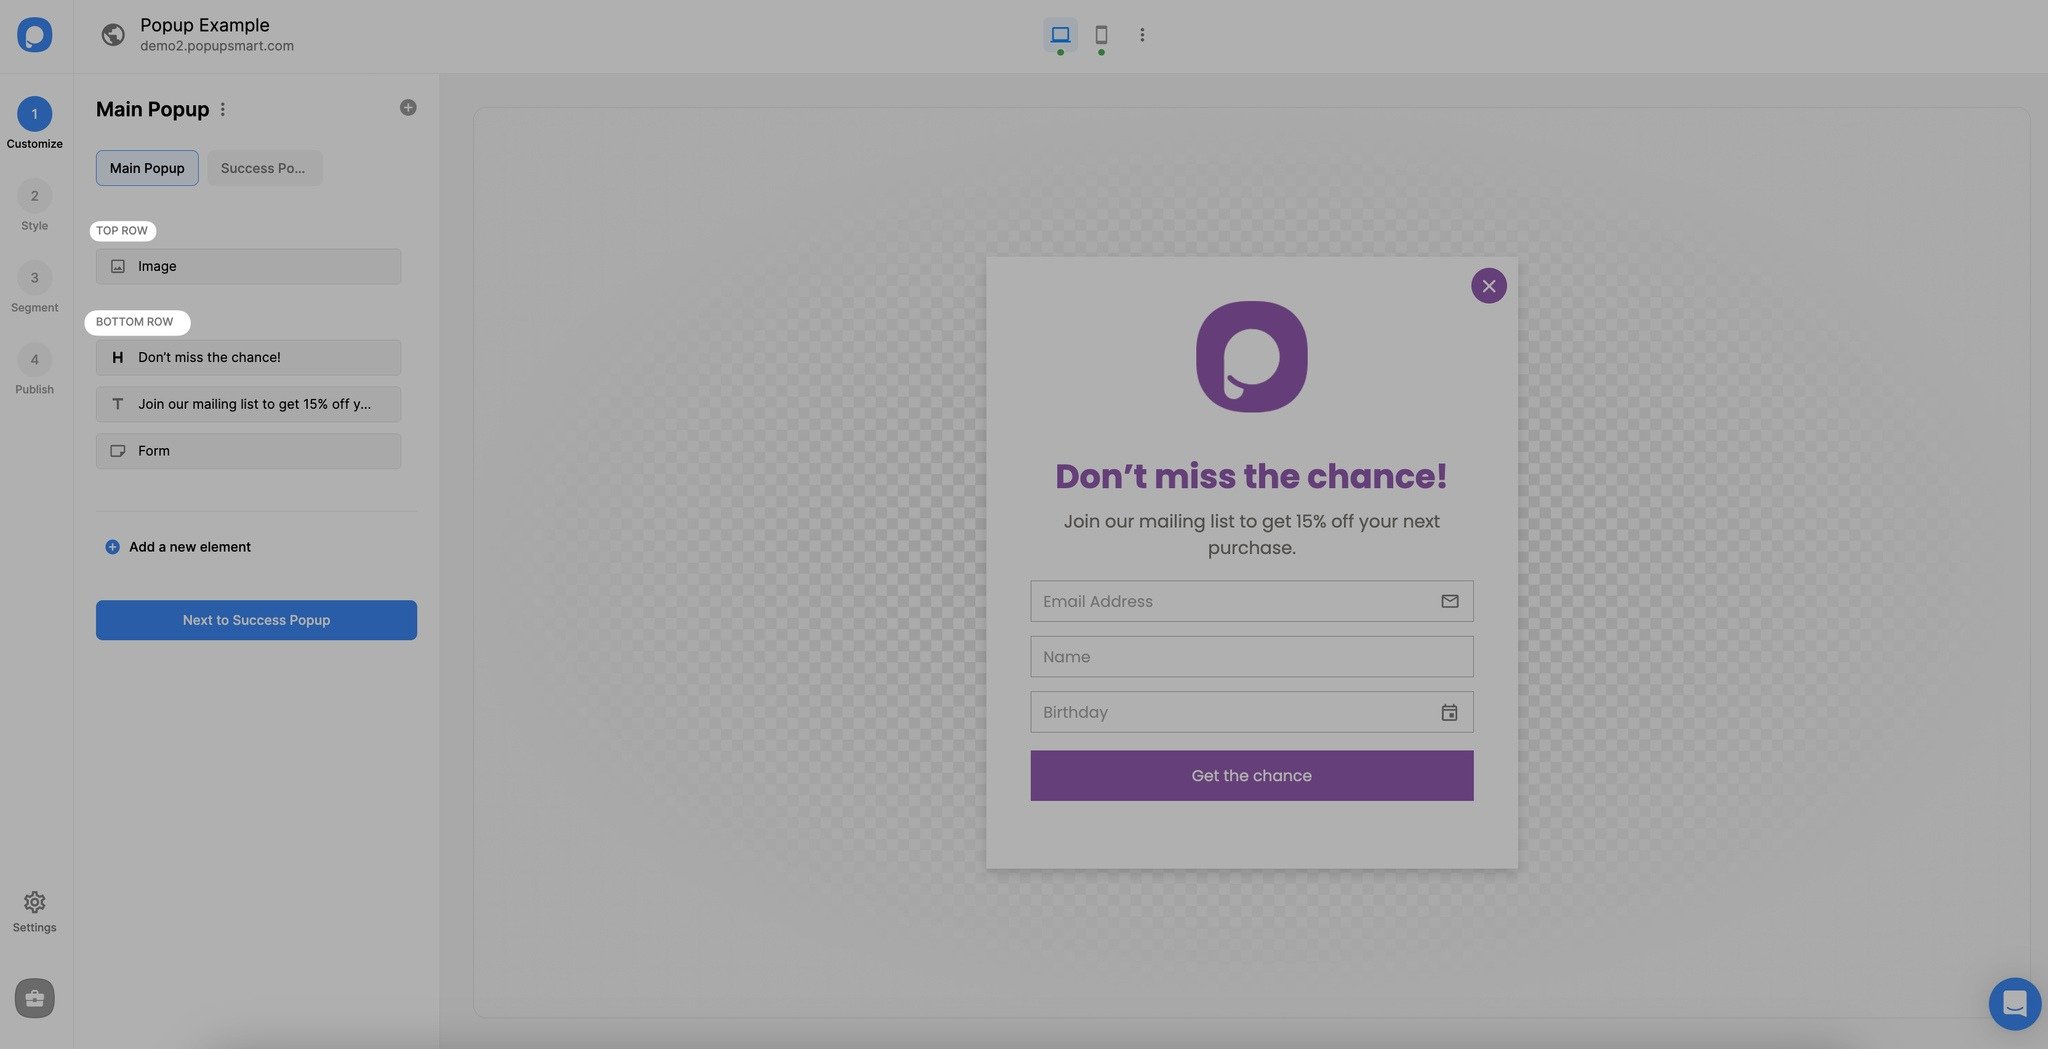
Use Row Structure
For the row structure, you have a top row and bottom row, which divides your popup into various rows, as it is shown below.
Easy Adaptation
Column and row structures allow you to organize your popup properly, and since they come within popup templates, it's very easy to adapt!
If you have any questions, you can contact us.
How is this guide?