How to Integrate Popupsmart with Mailchimp
By following the steps below, you can connect your Mailchimp account with Popupsmart popup builder in just a few minutes.
To start the integration process, you need to have some default features
1. Sign up to your Popupsmart account and create a new campaign. Then, choose a popup with a form input element or a blank popup to add a form input element on the Customize step.
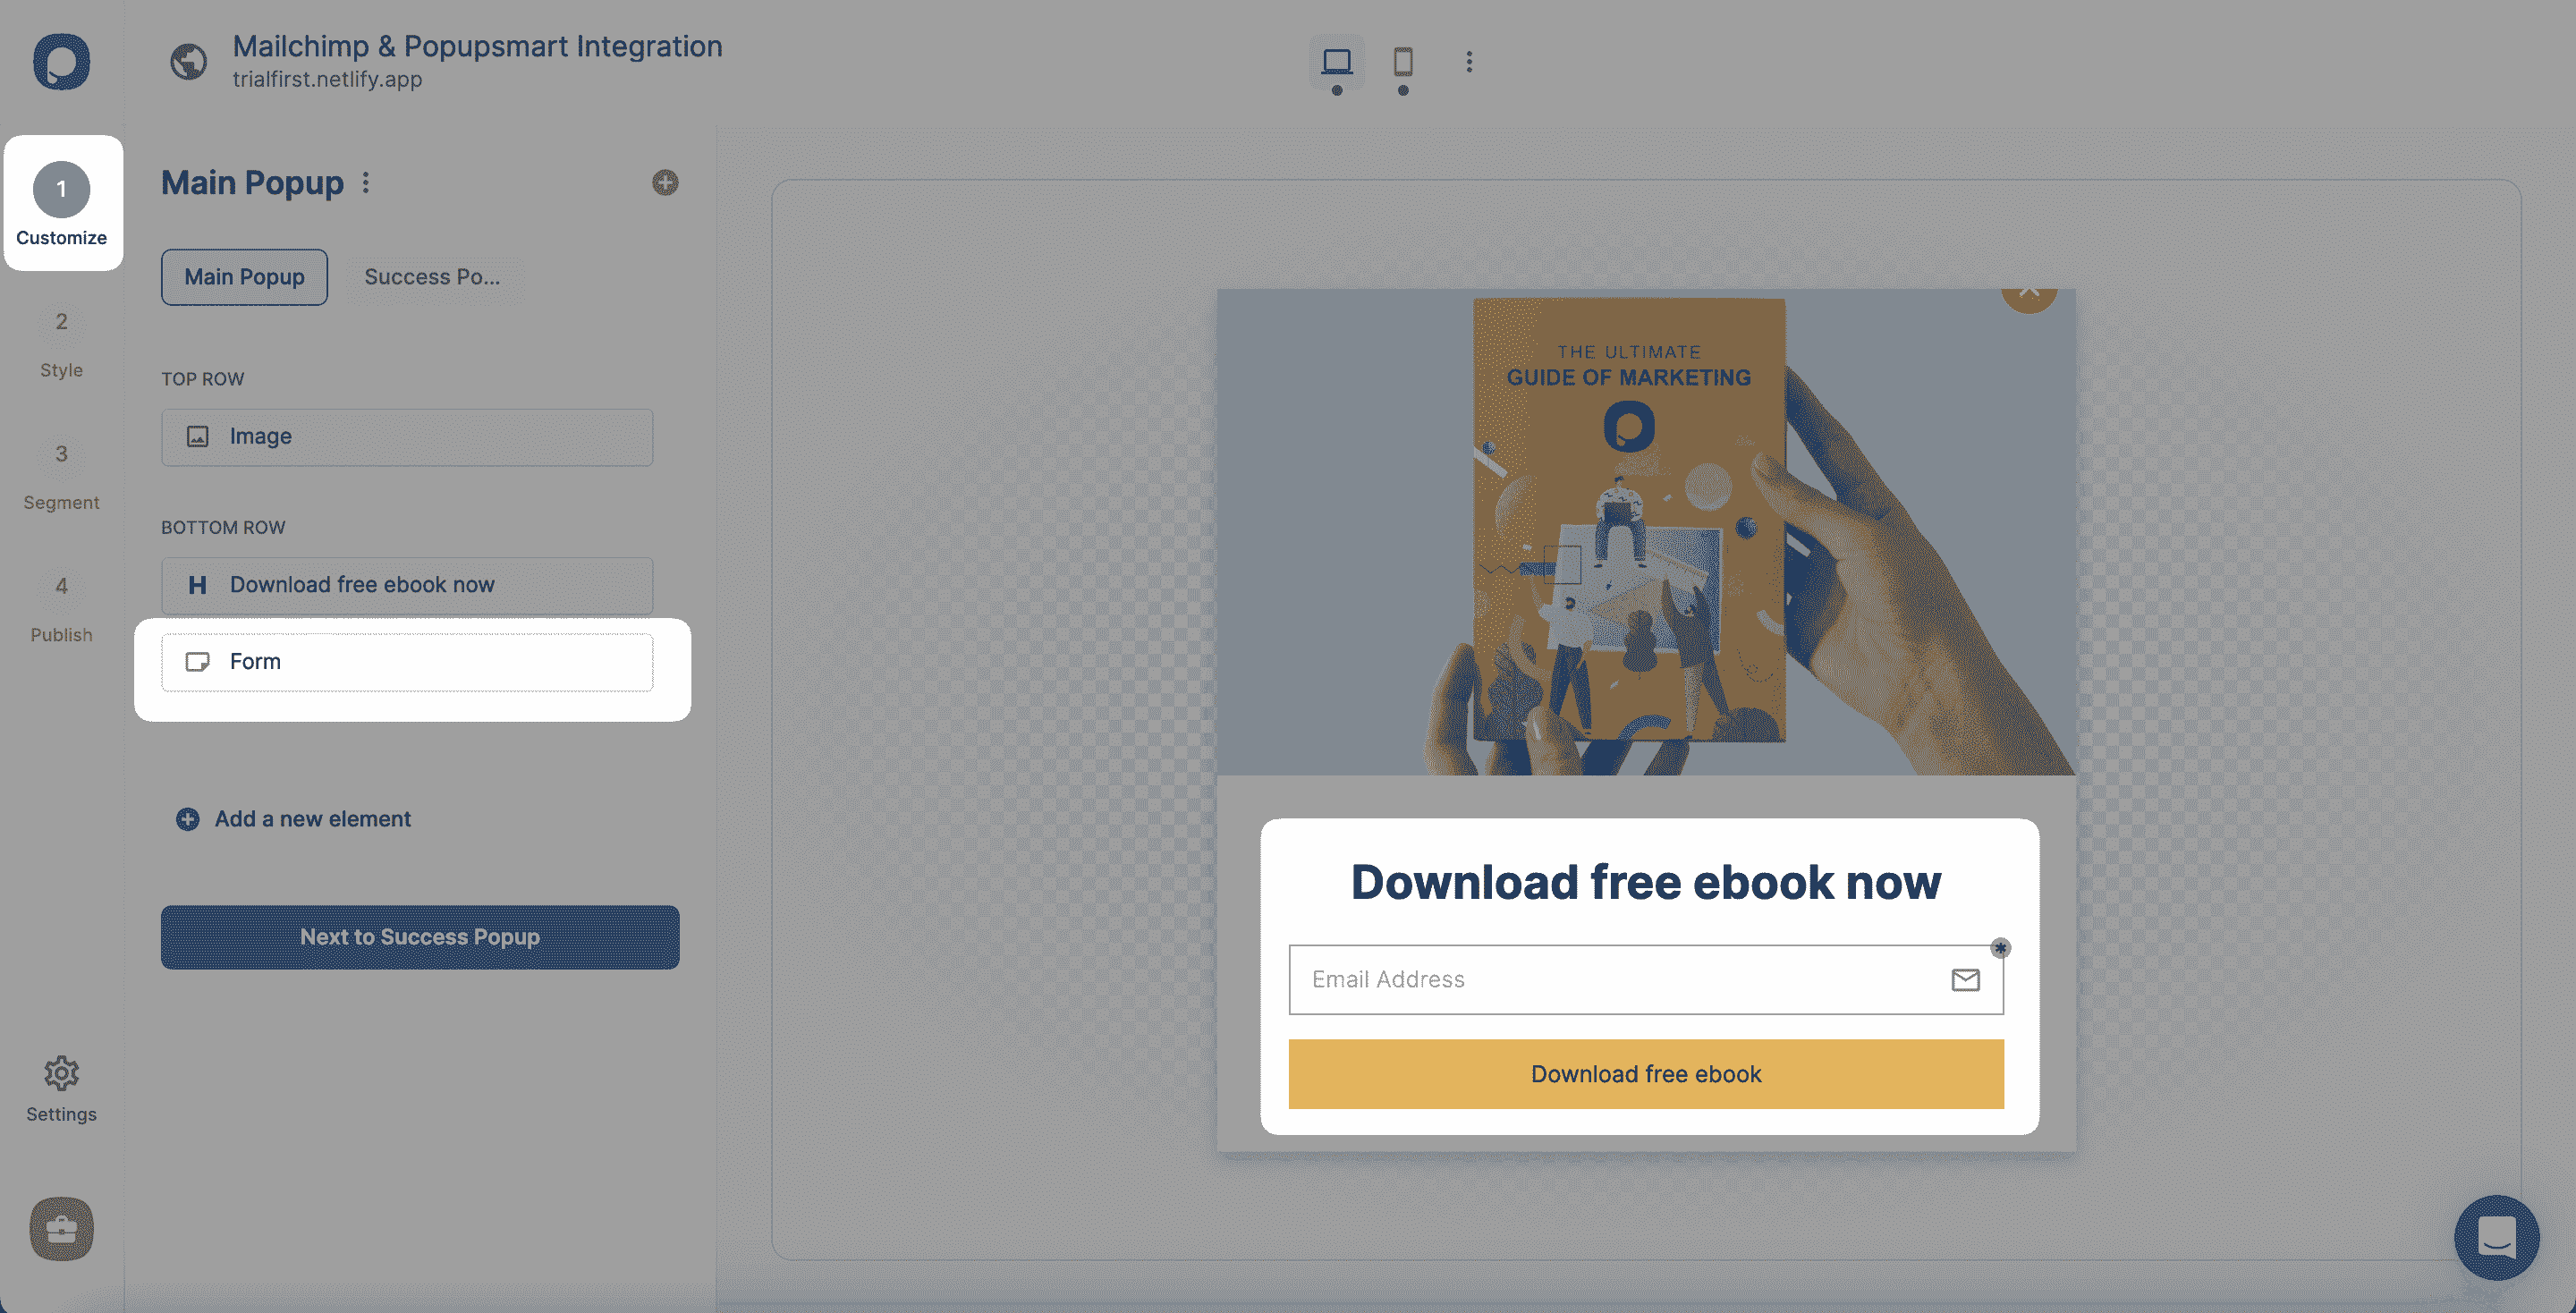
A form input element helps you collect data. The integration helps you pull them with the related CRM, so you must know that the data collected is only available on your Popupsmart and Mailchimp accounts.
2. To find the “Integration,” you need to click the form element you add, and then you need to “+ Add integration.”
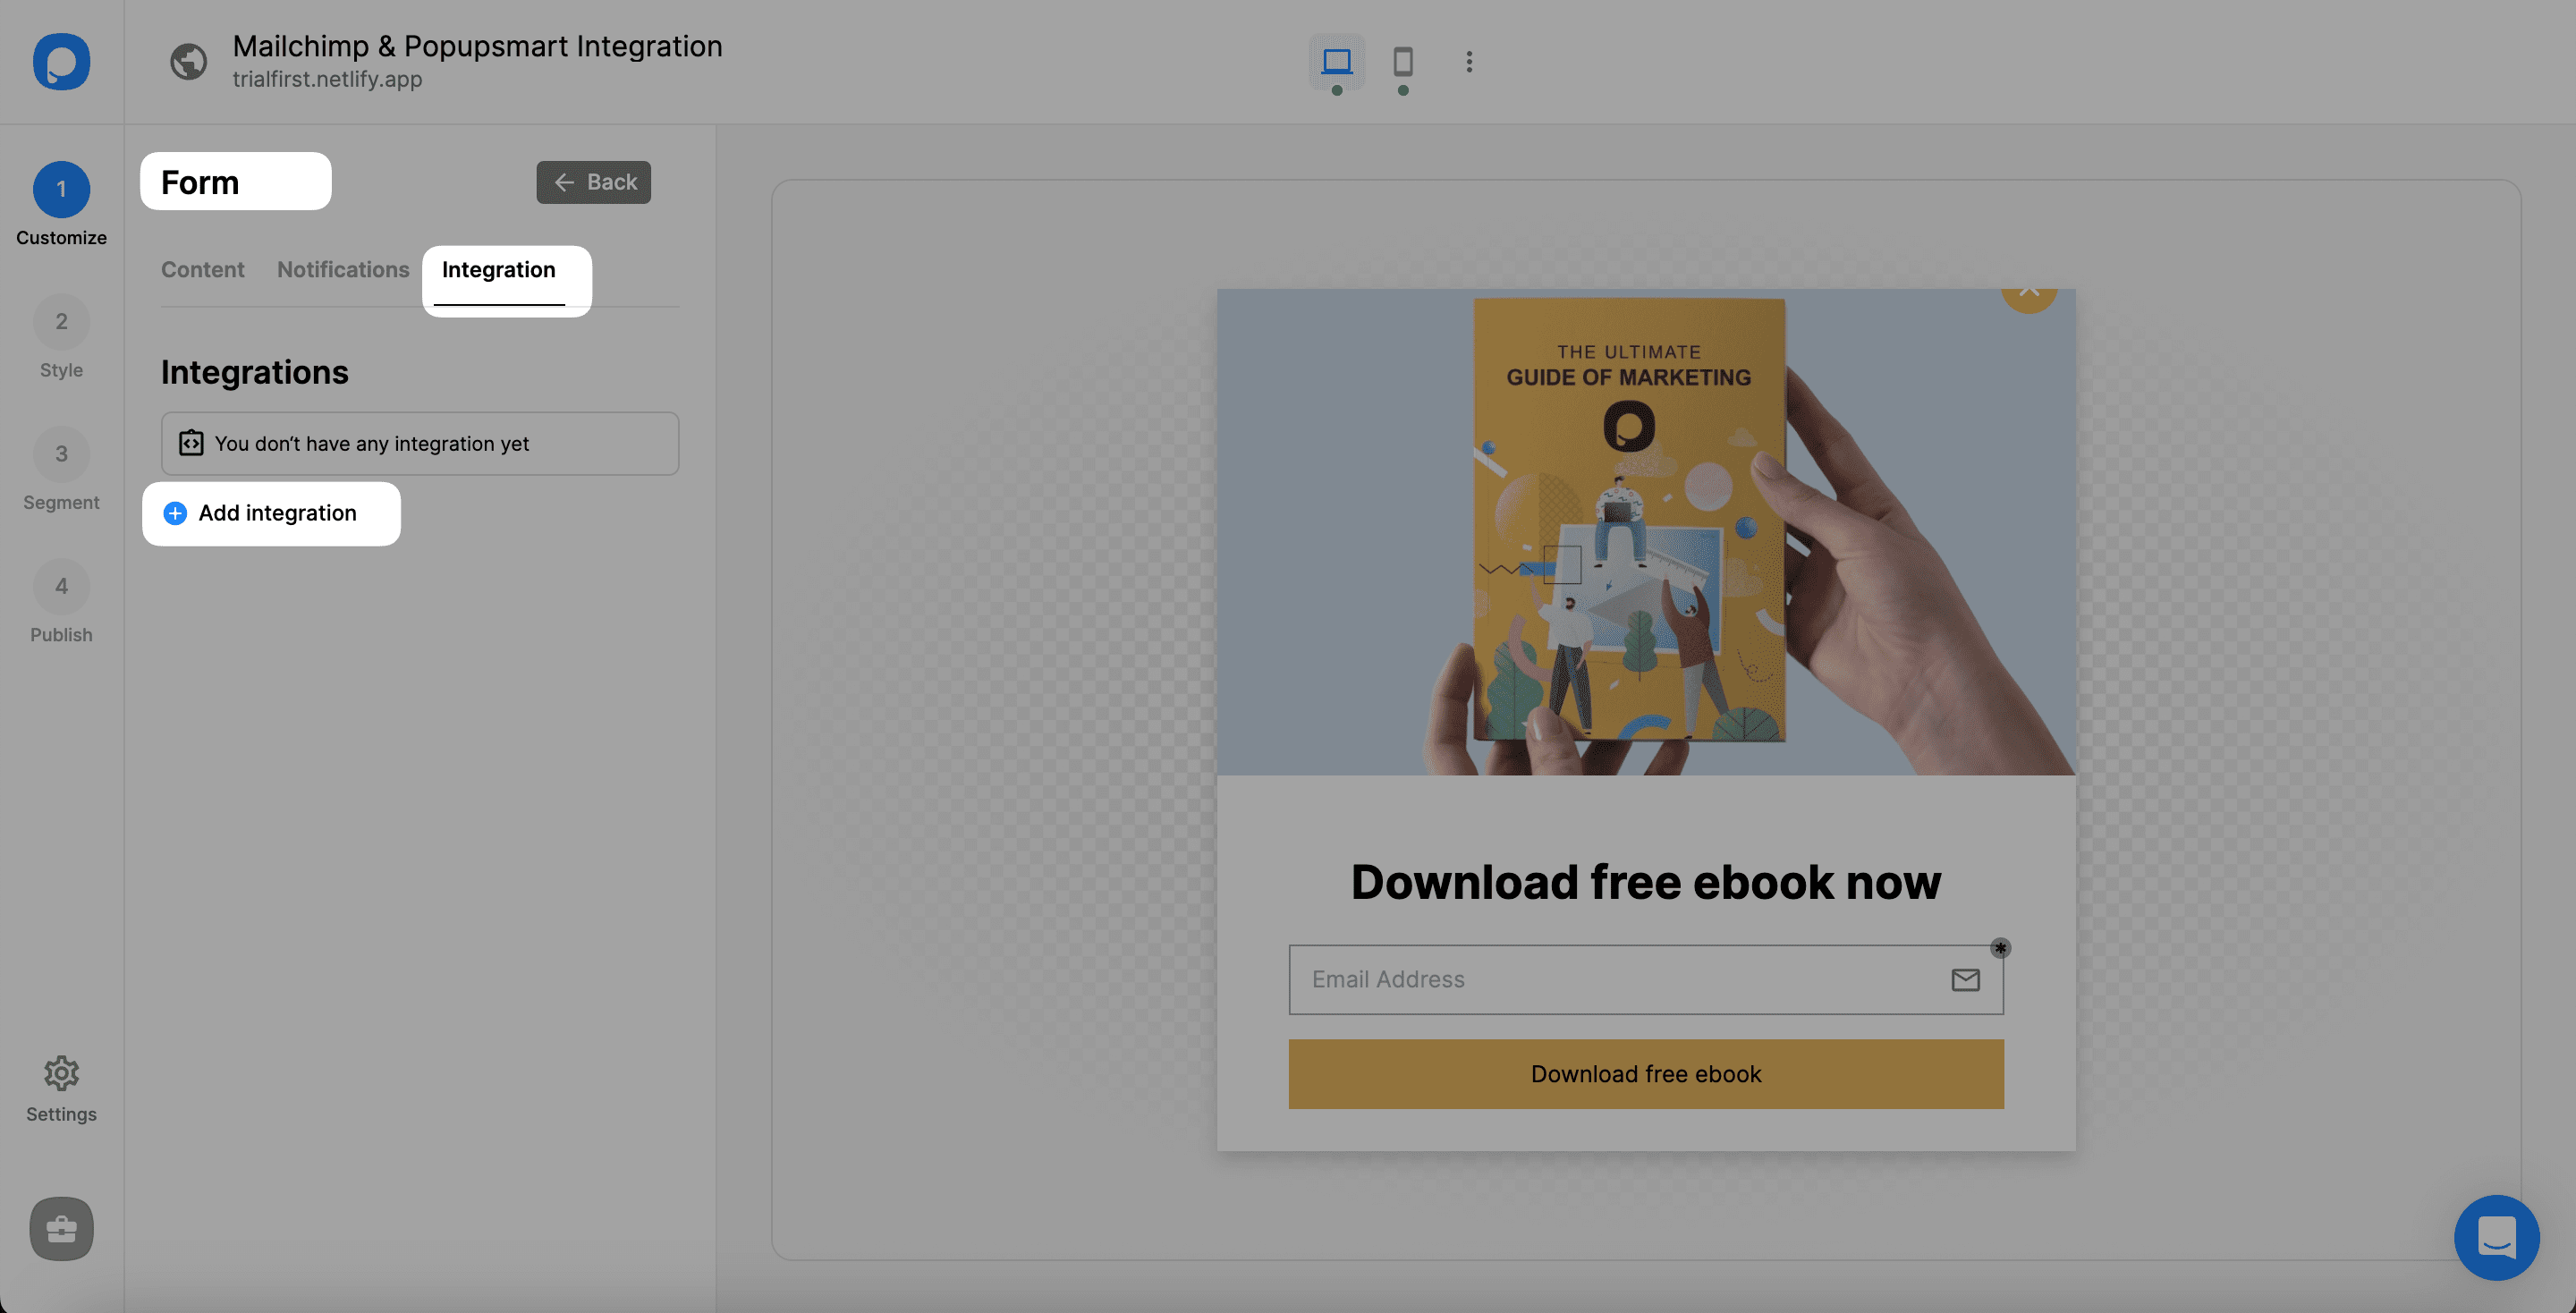
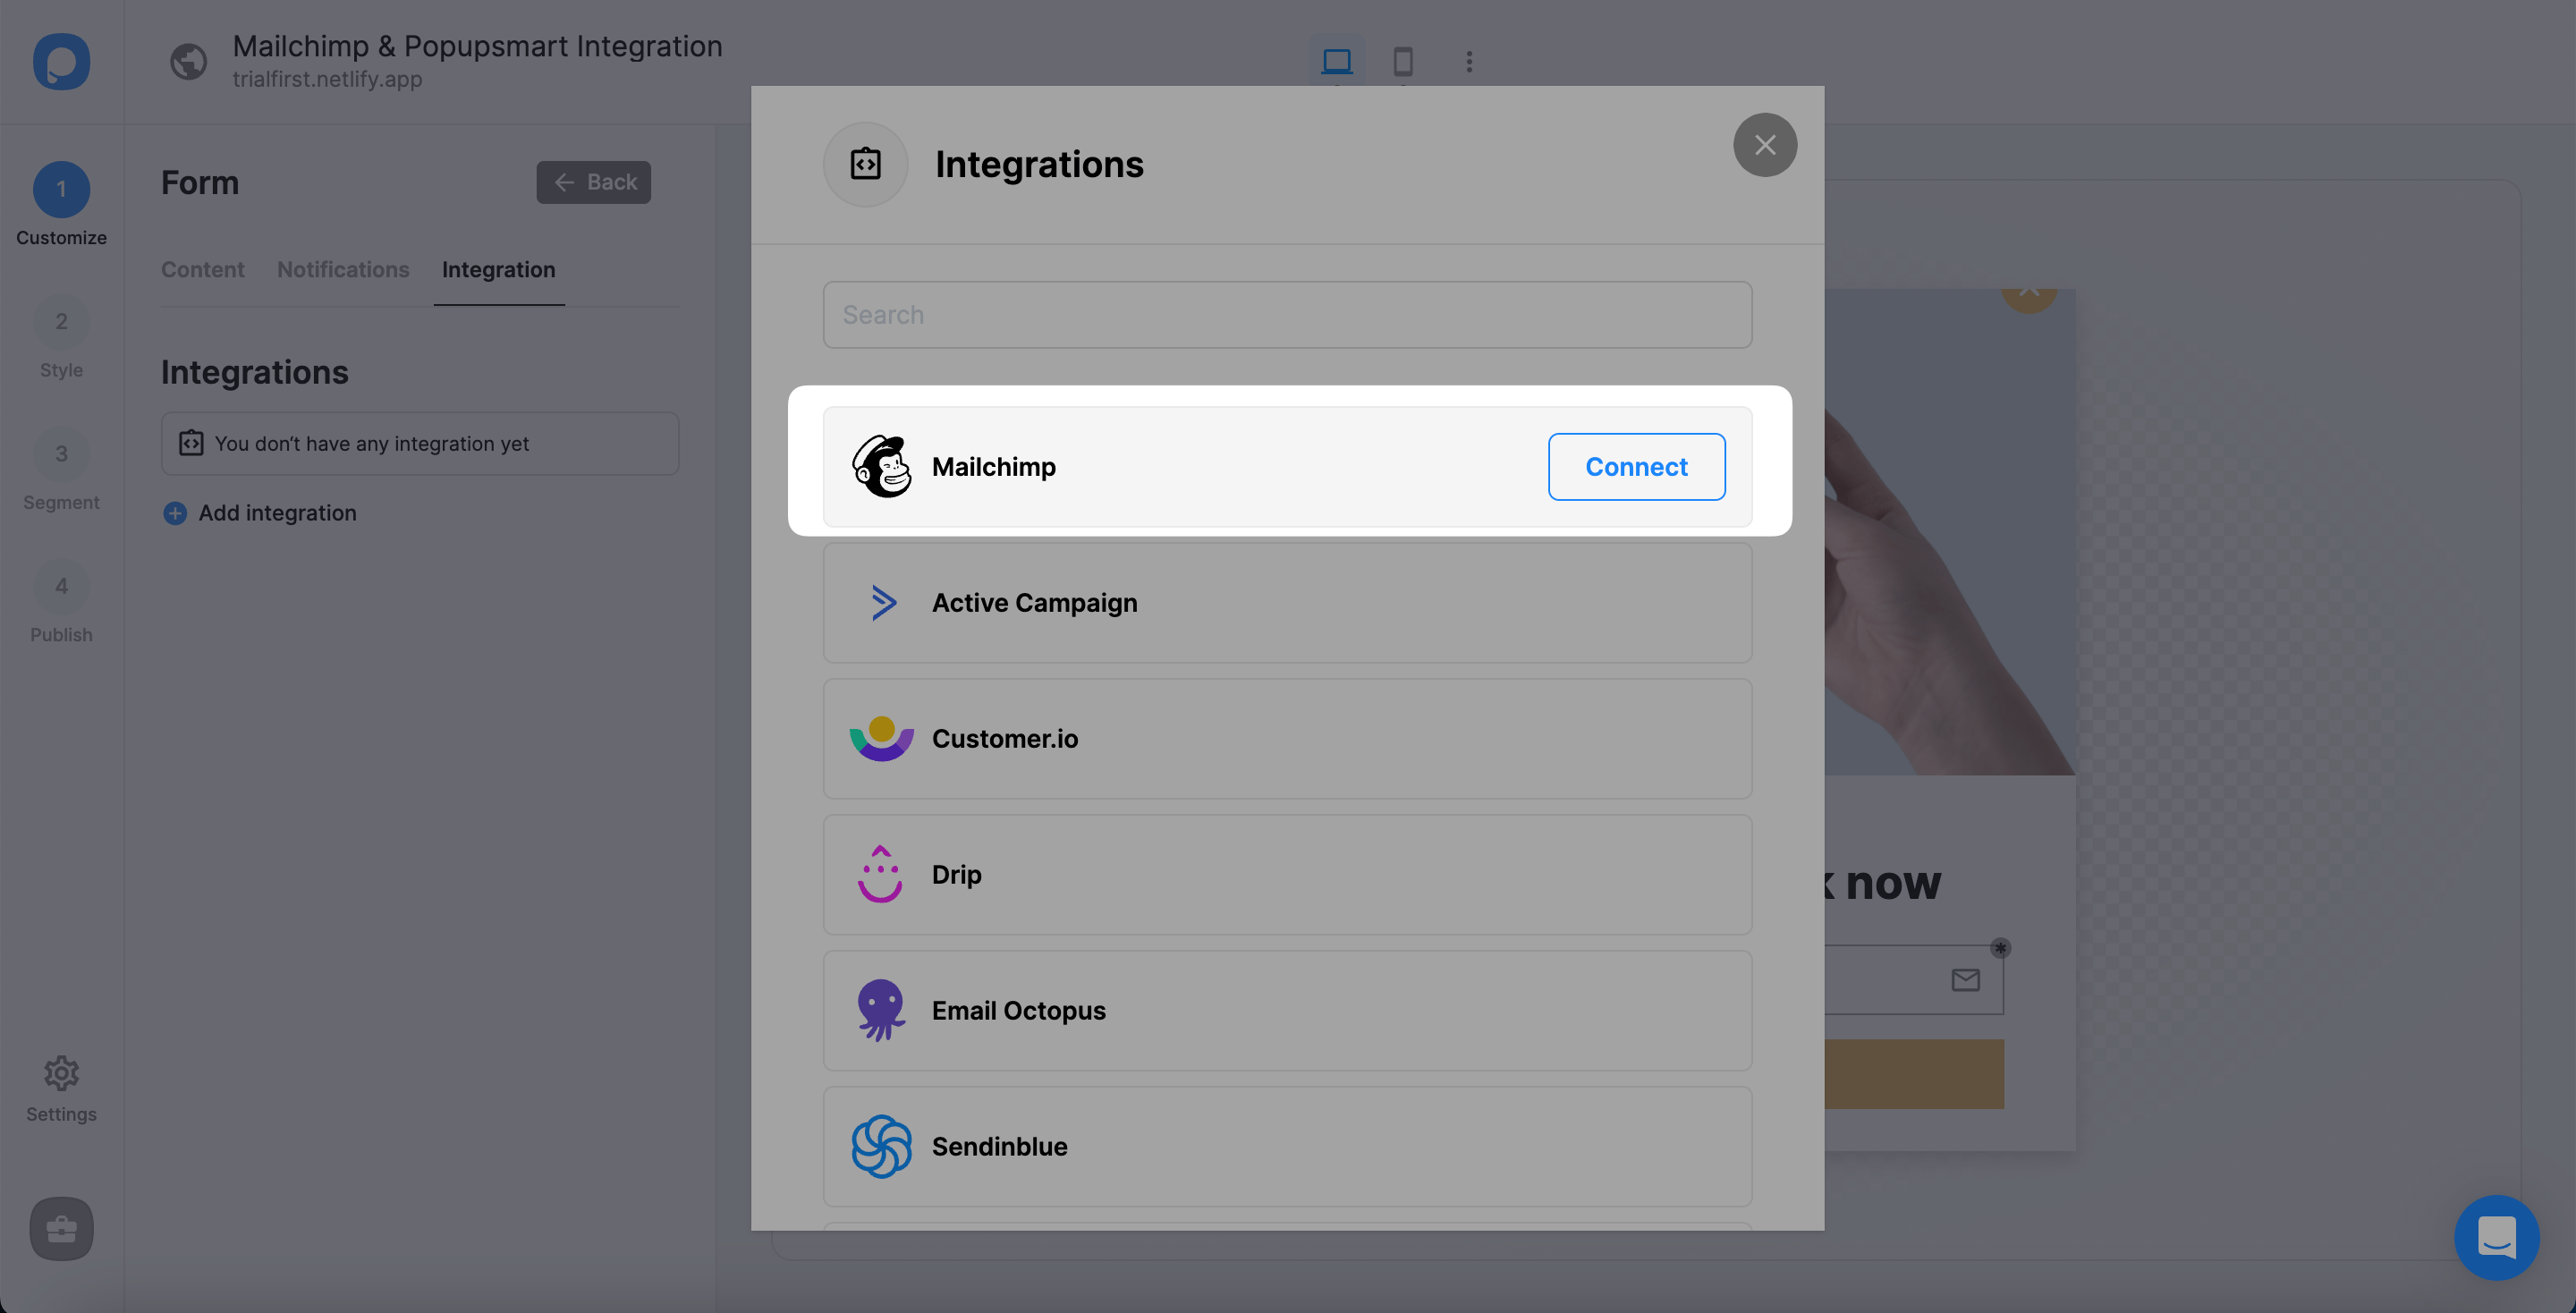
3. Then, find Mailchimp and click "Connect".
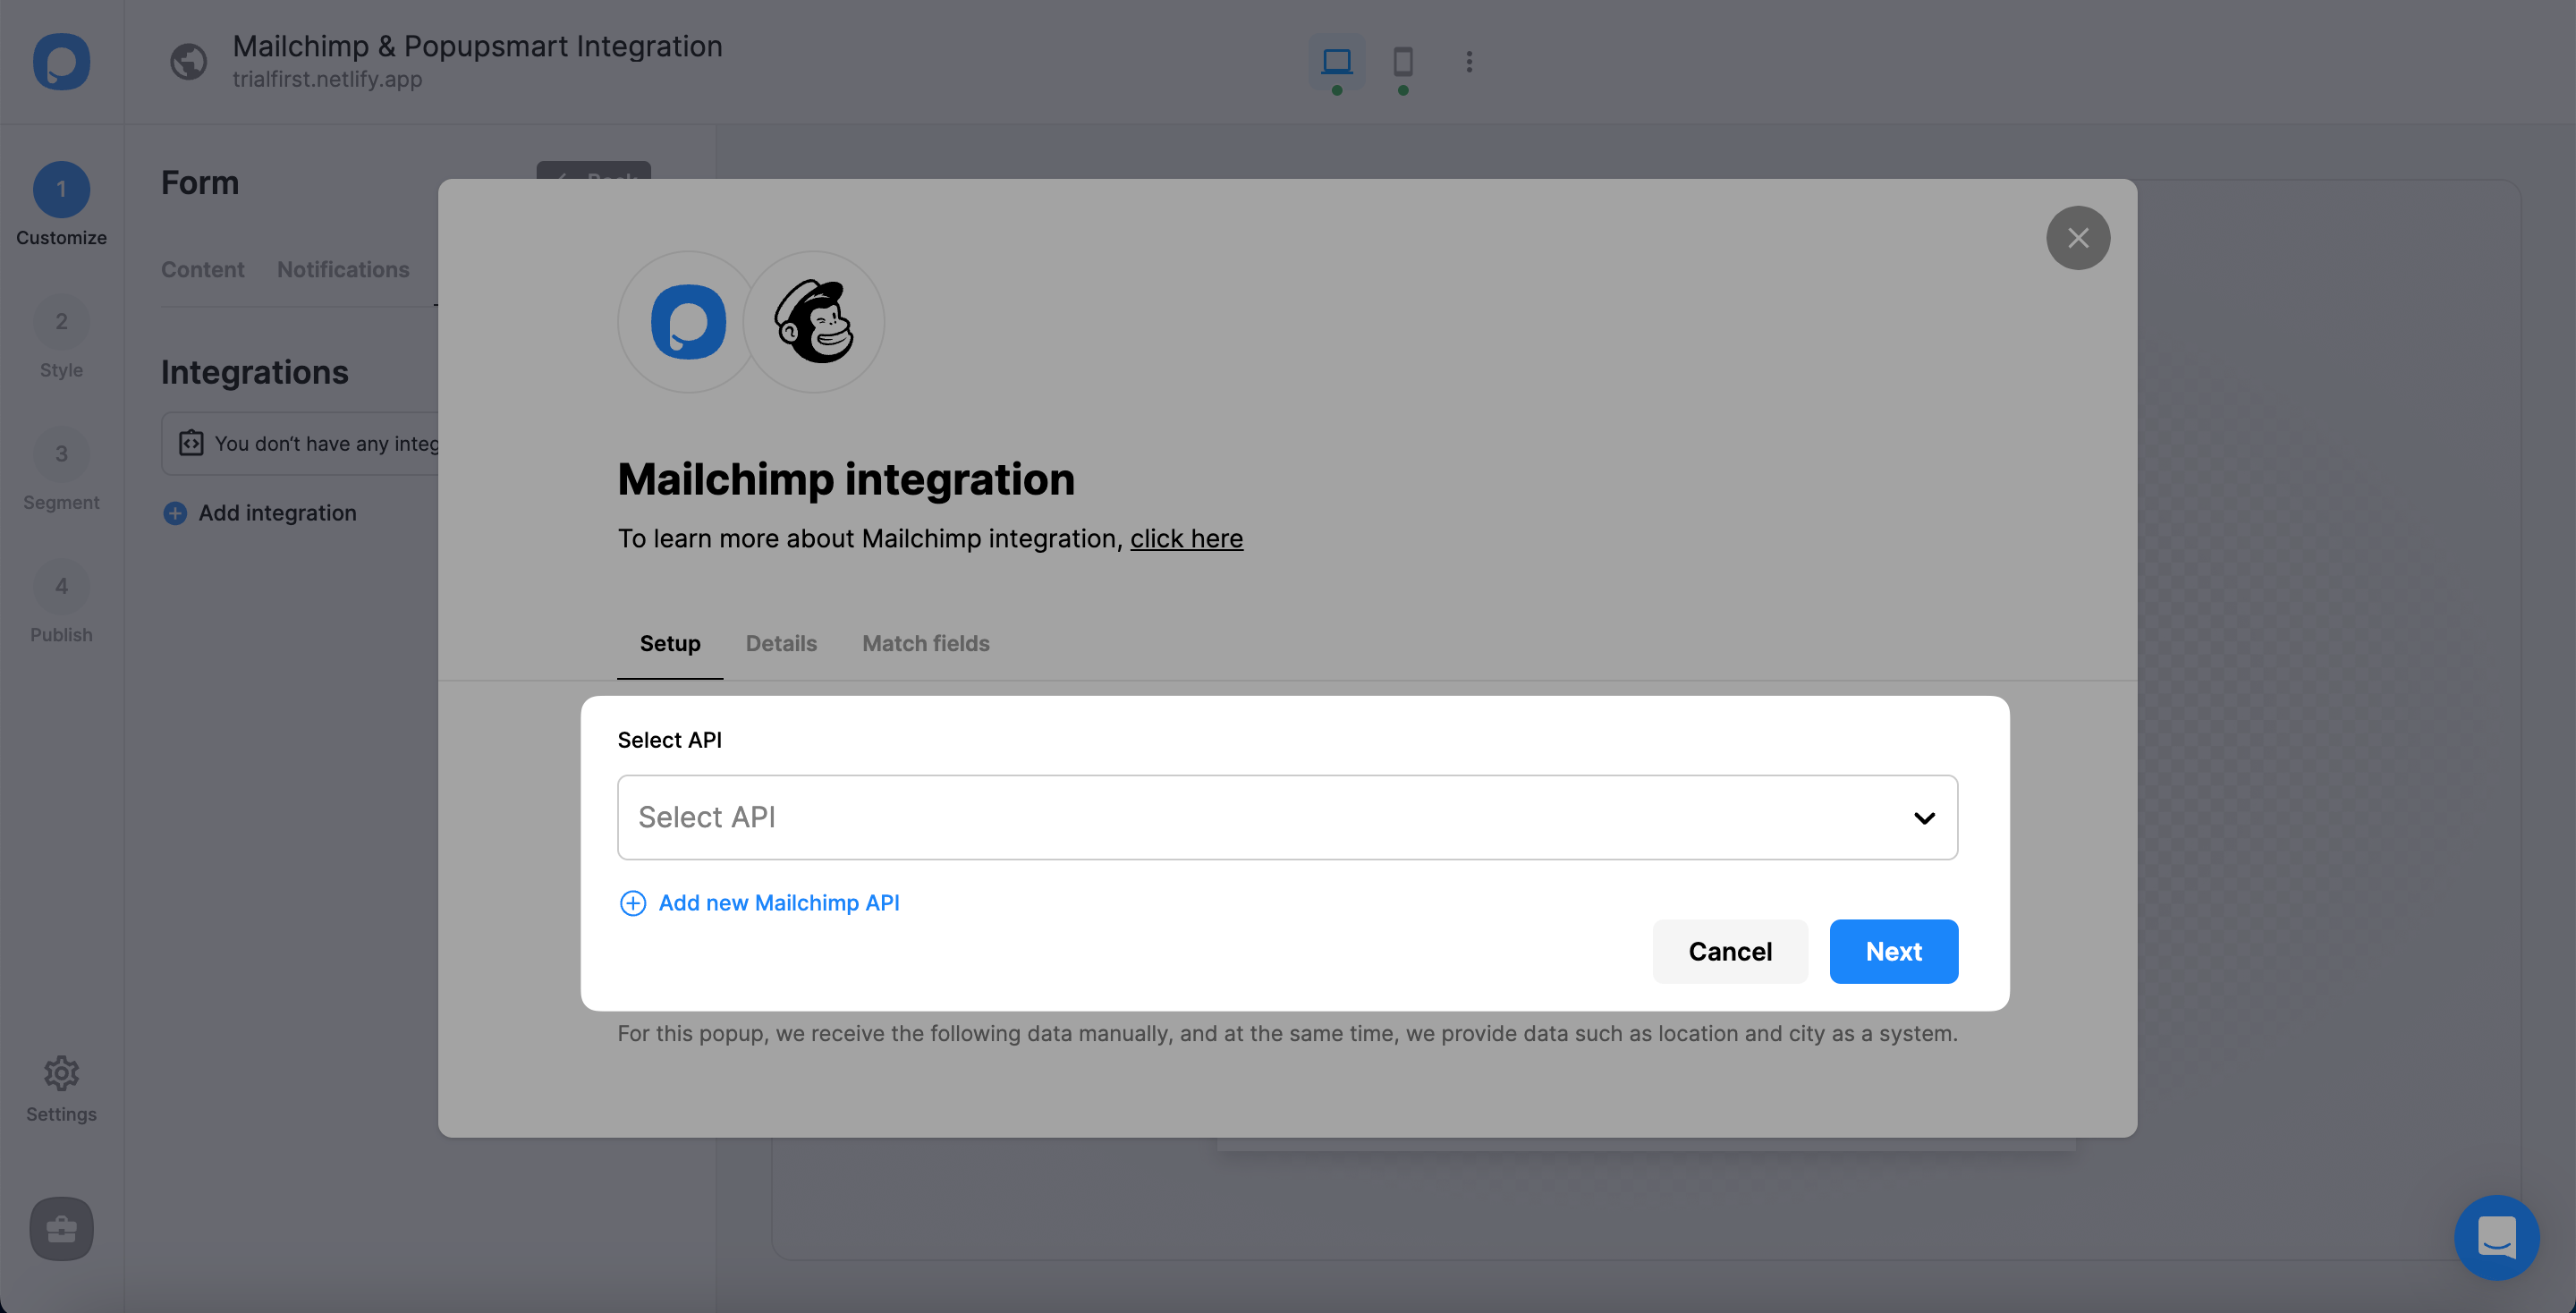
4. For the Setup, you need to select API or “Add new Mailchimp API.”
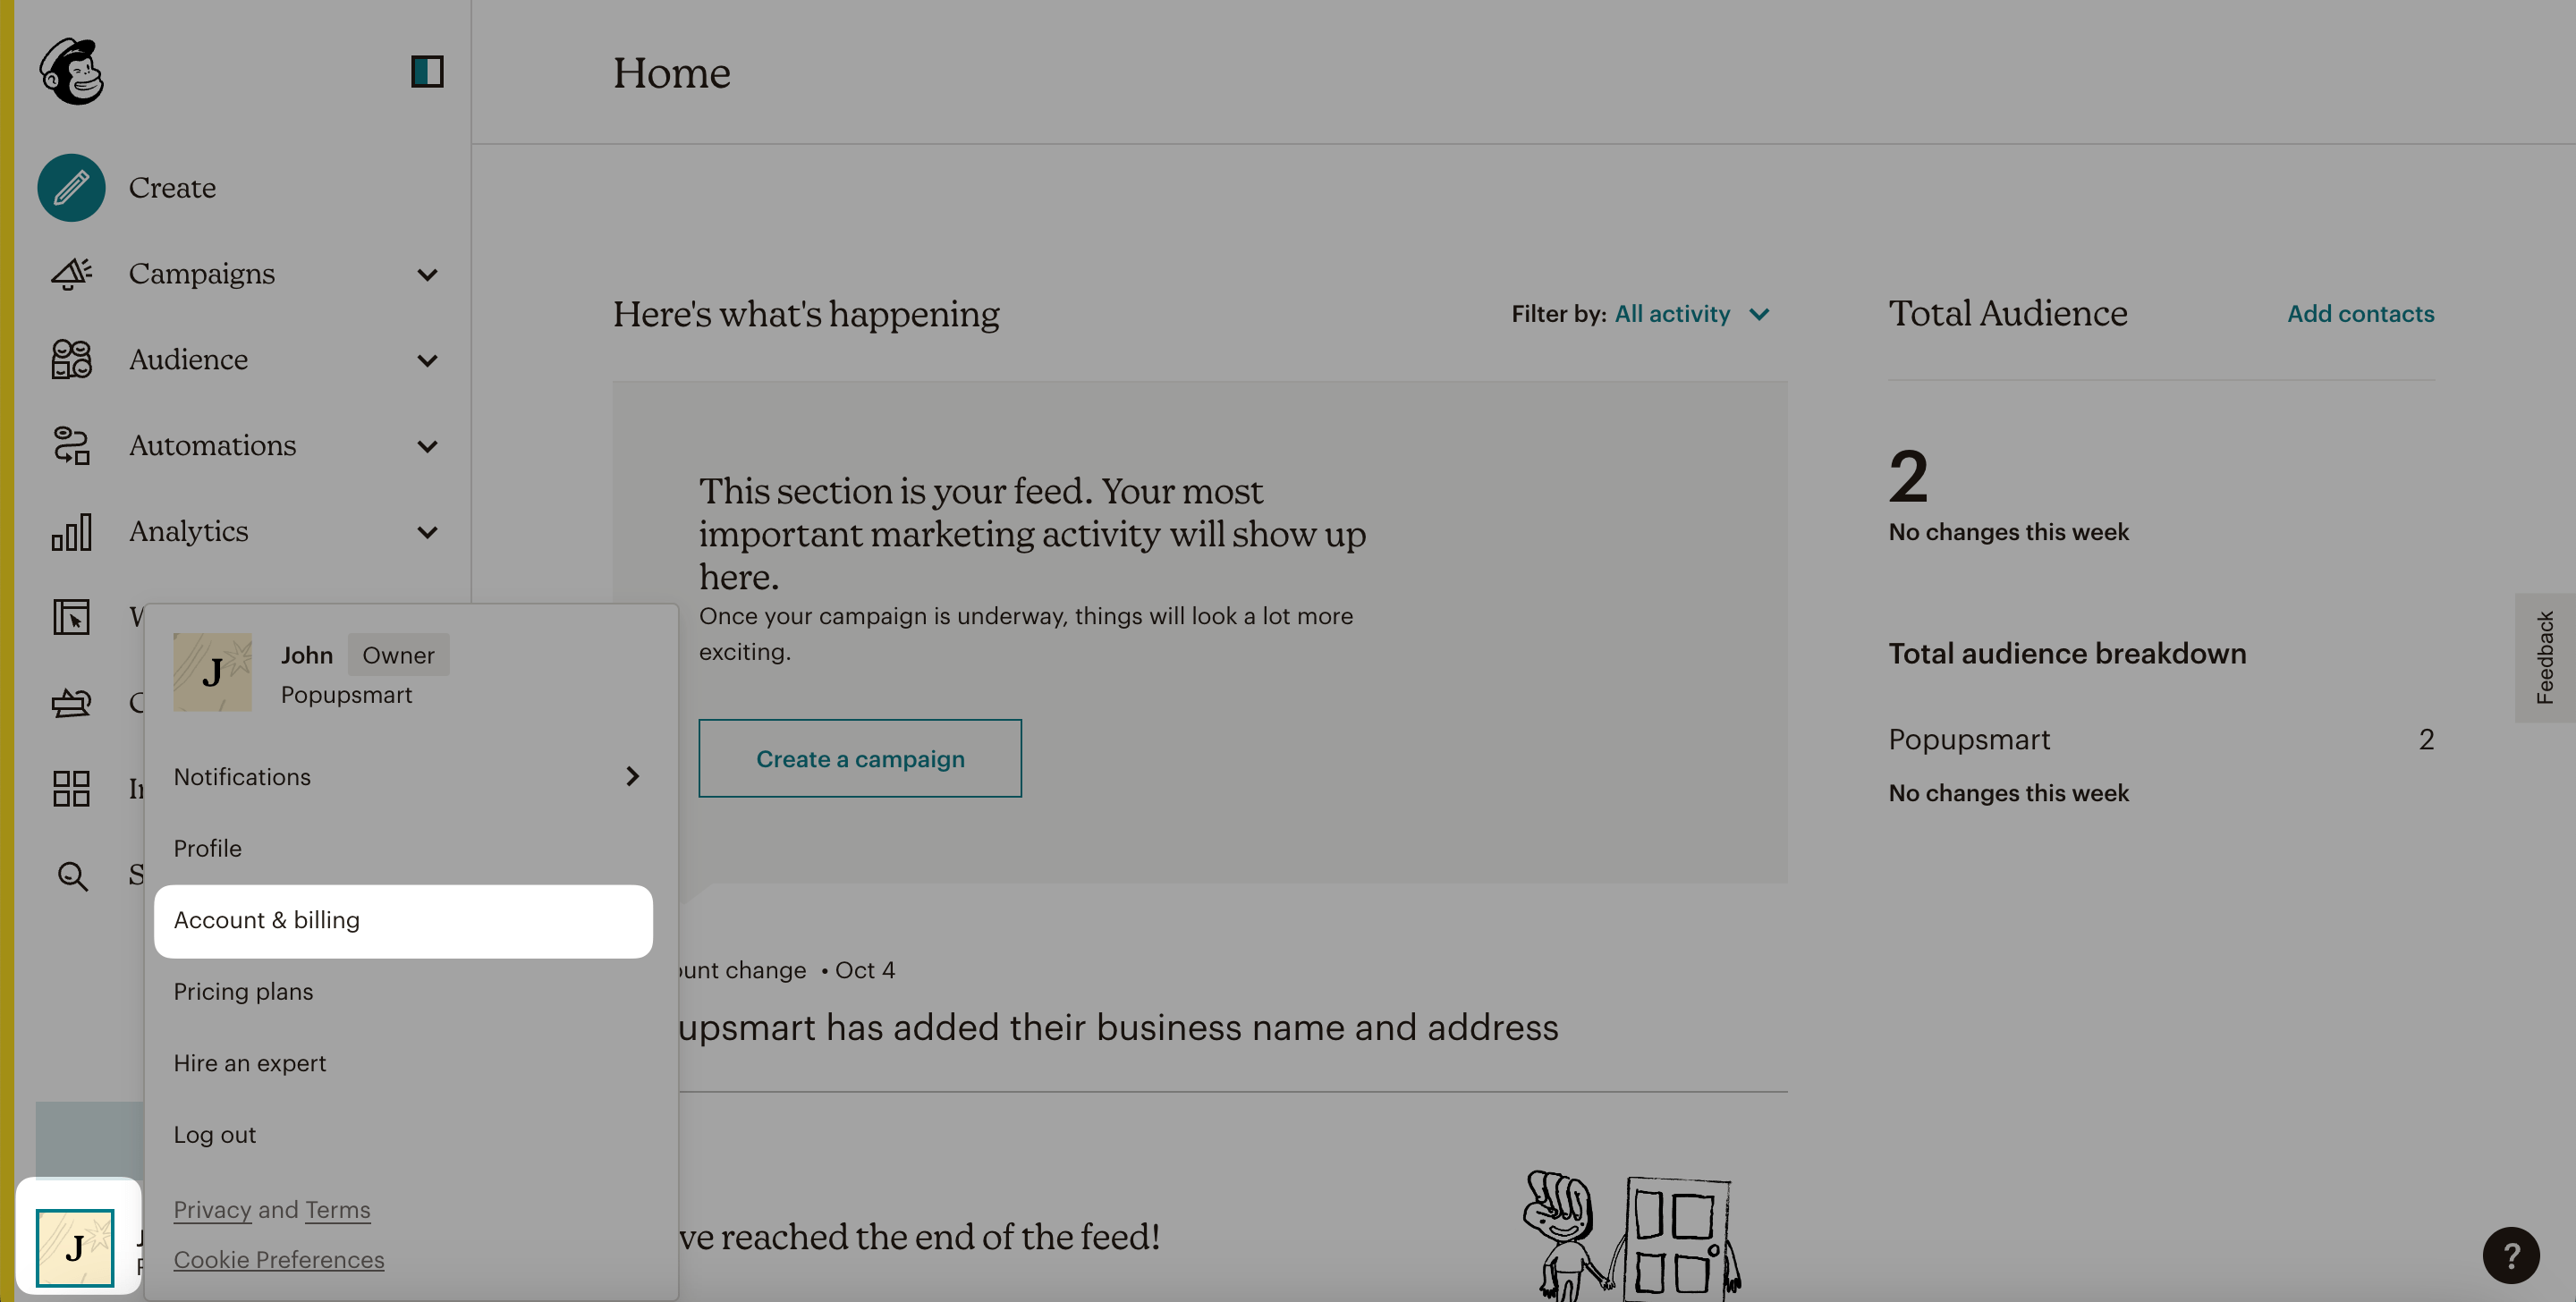
5. Now, it’s time to log in to your Mailchimp account with your account information. When you view your dashboard, click on your profile at the bottom of the left-side menu and select "Account & billing."
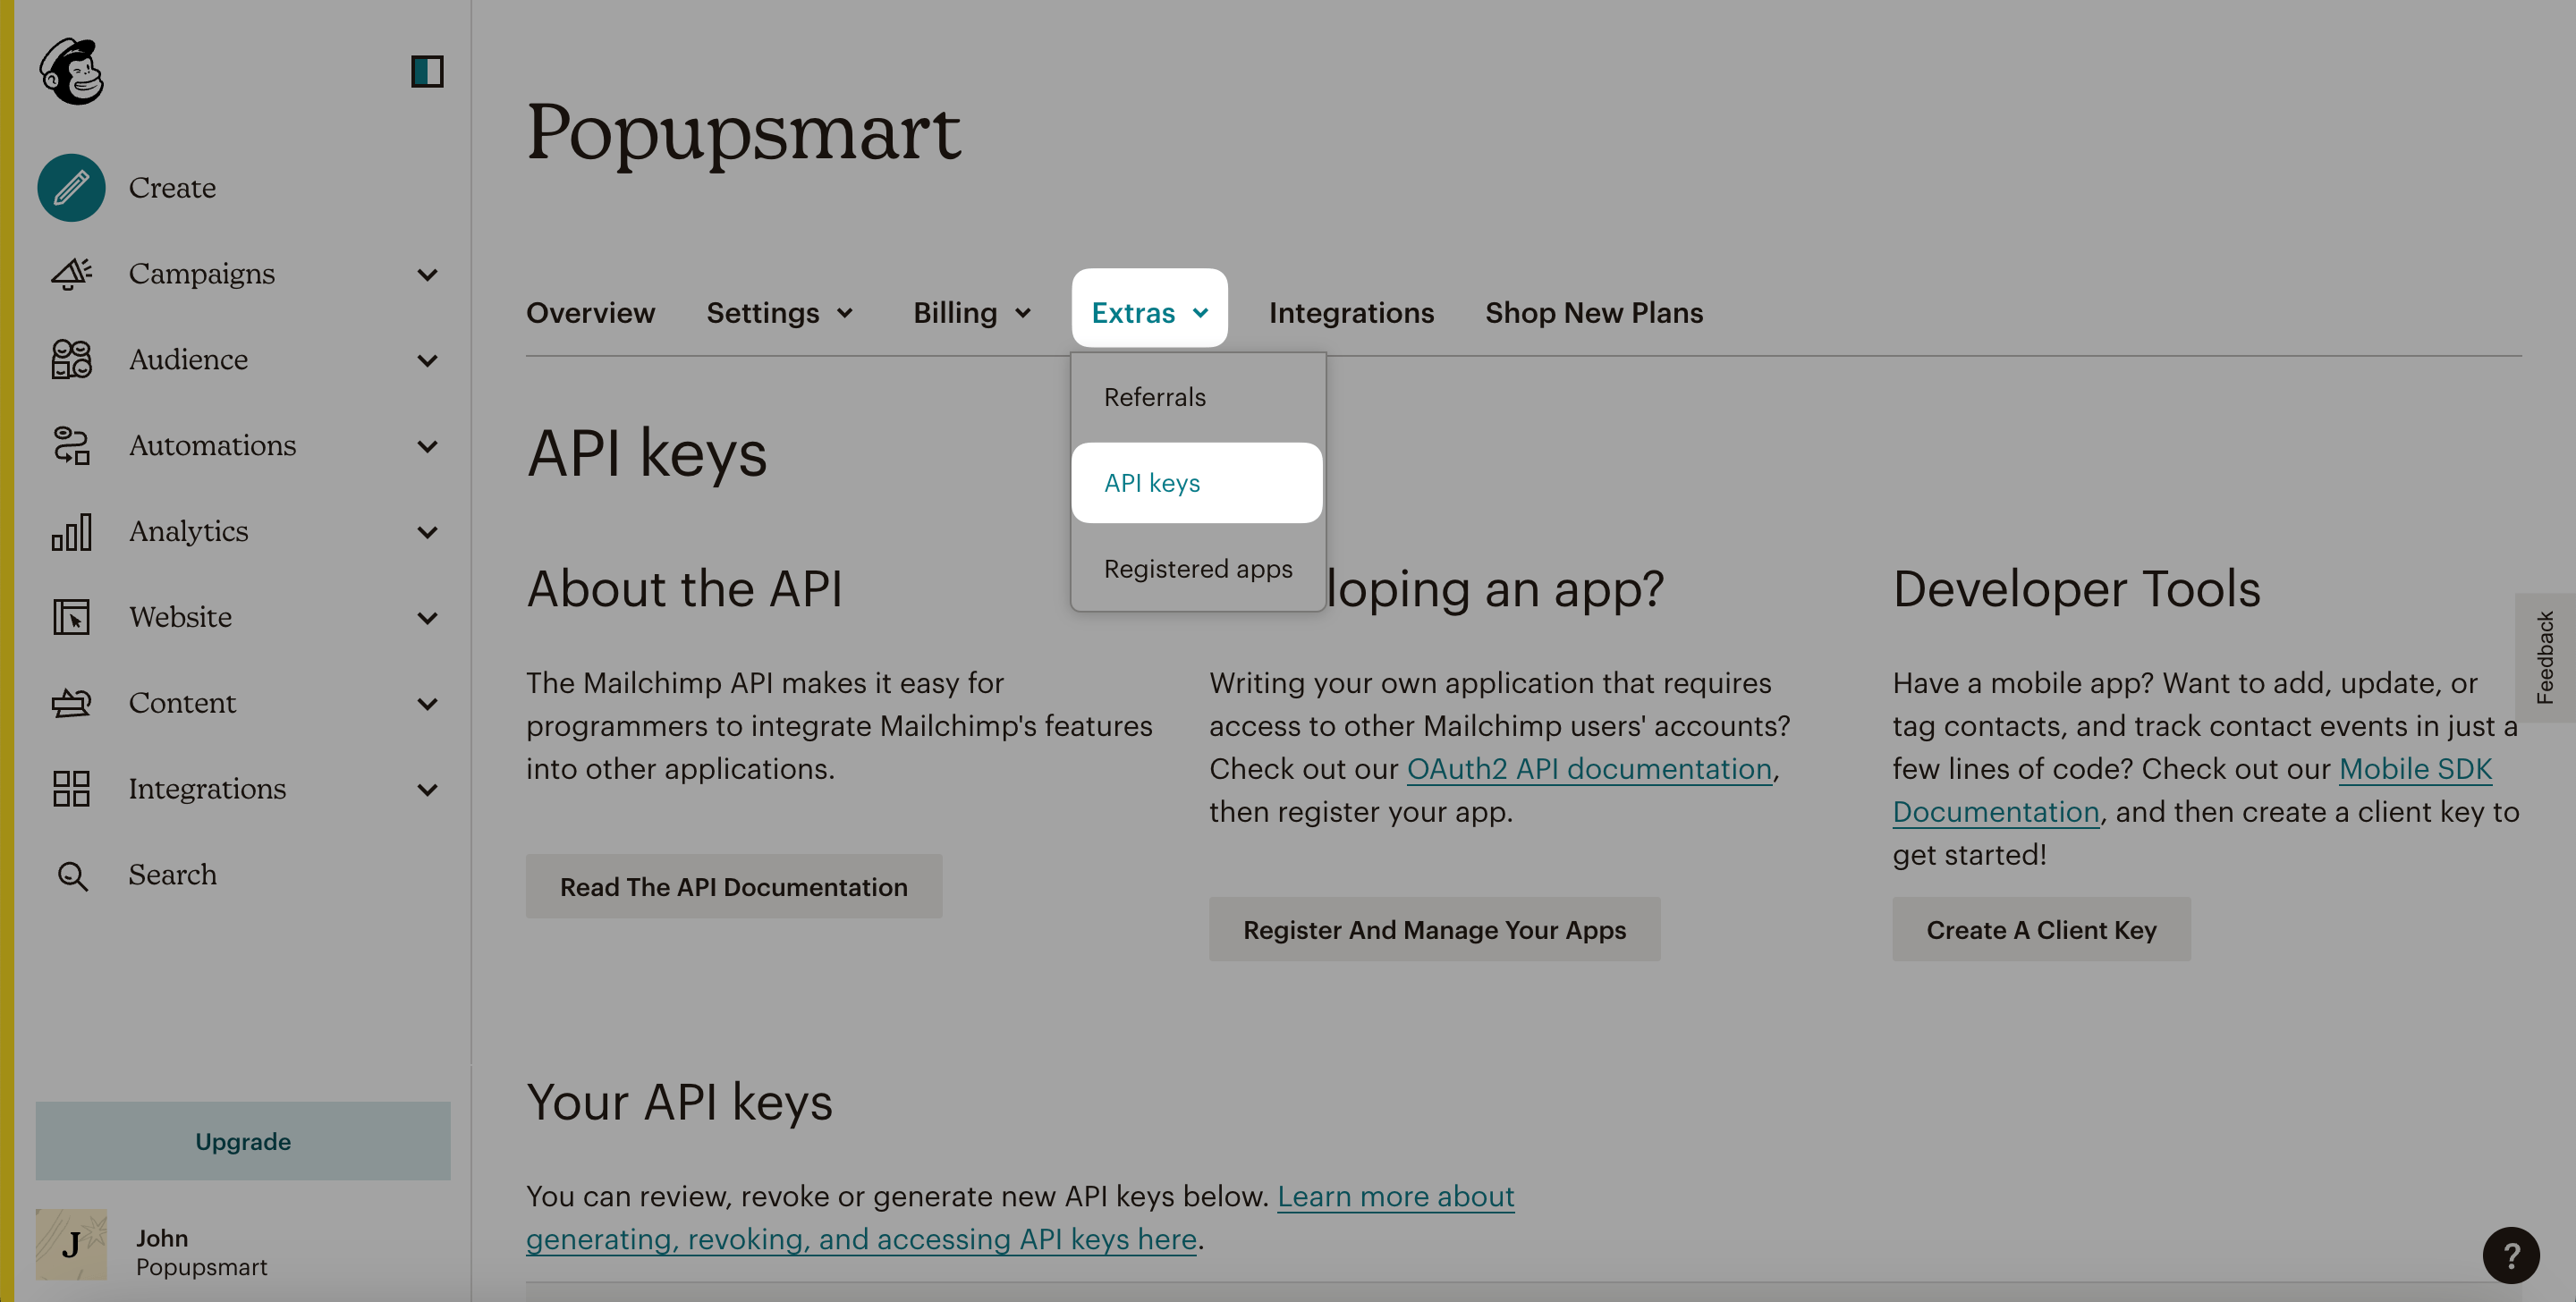
6. Then, click the "Extras" tab and navigate to "API keys".
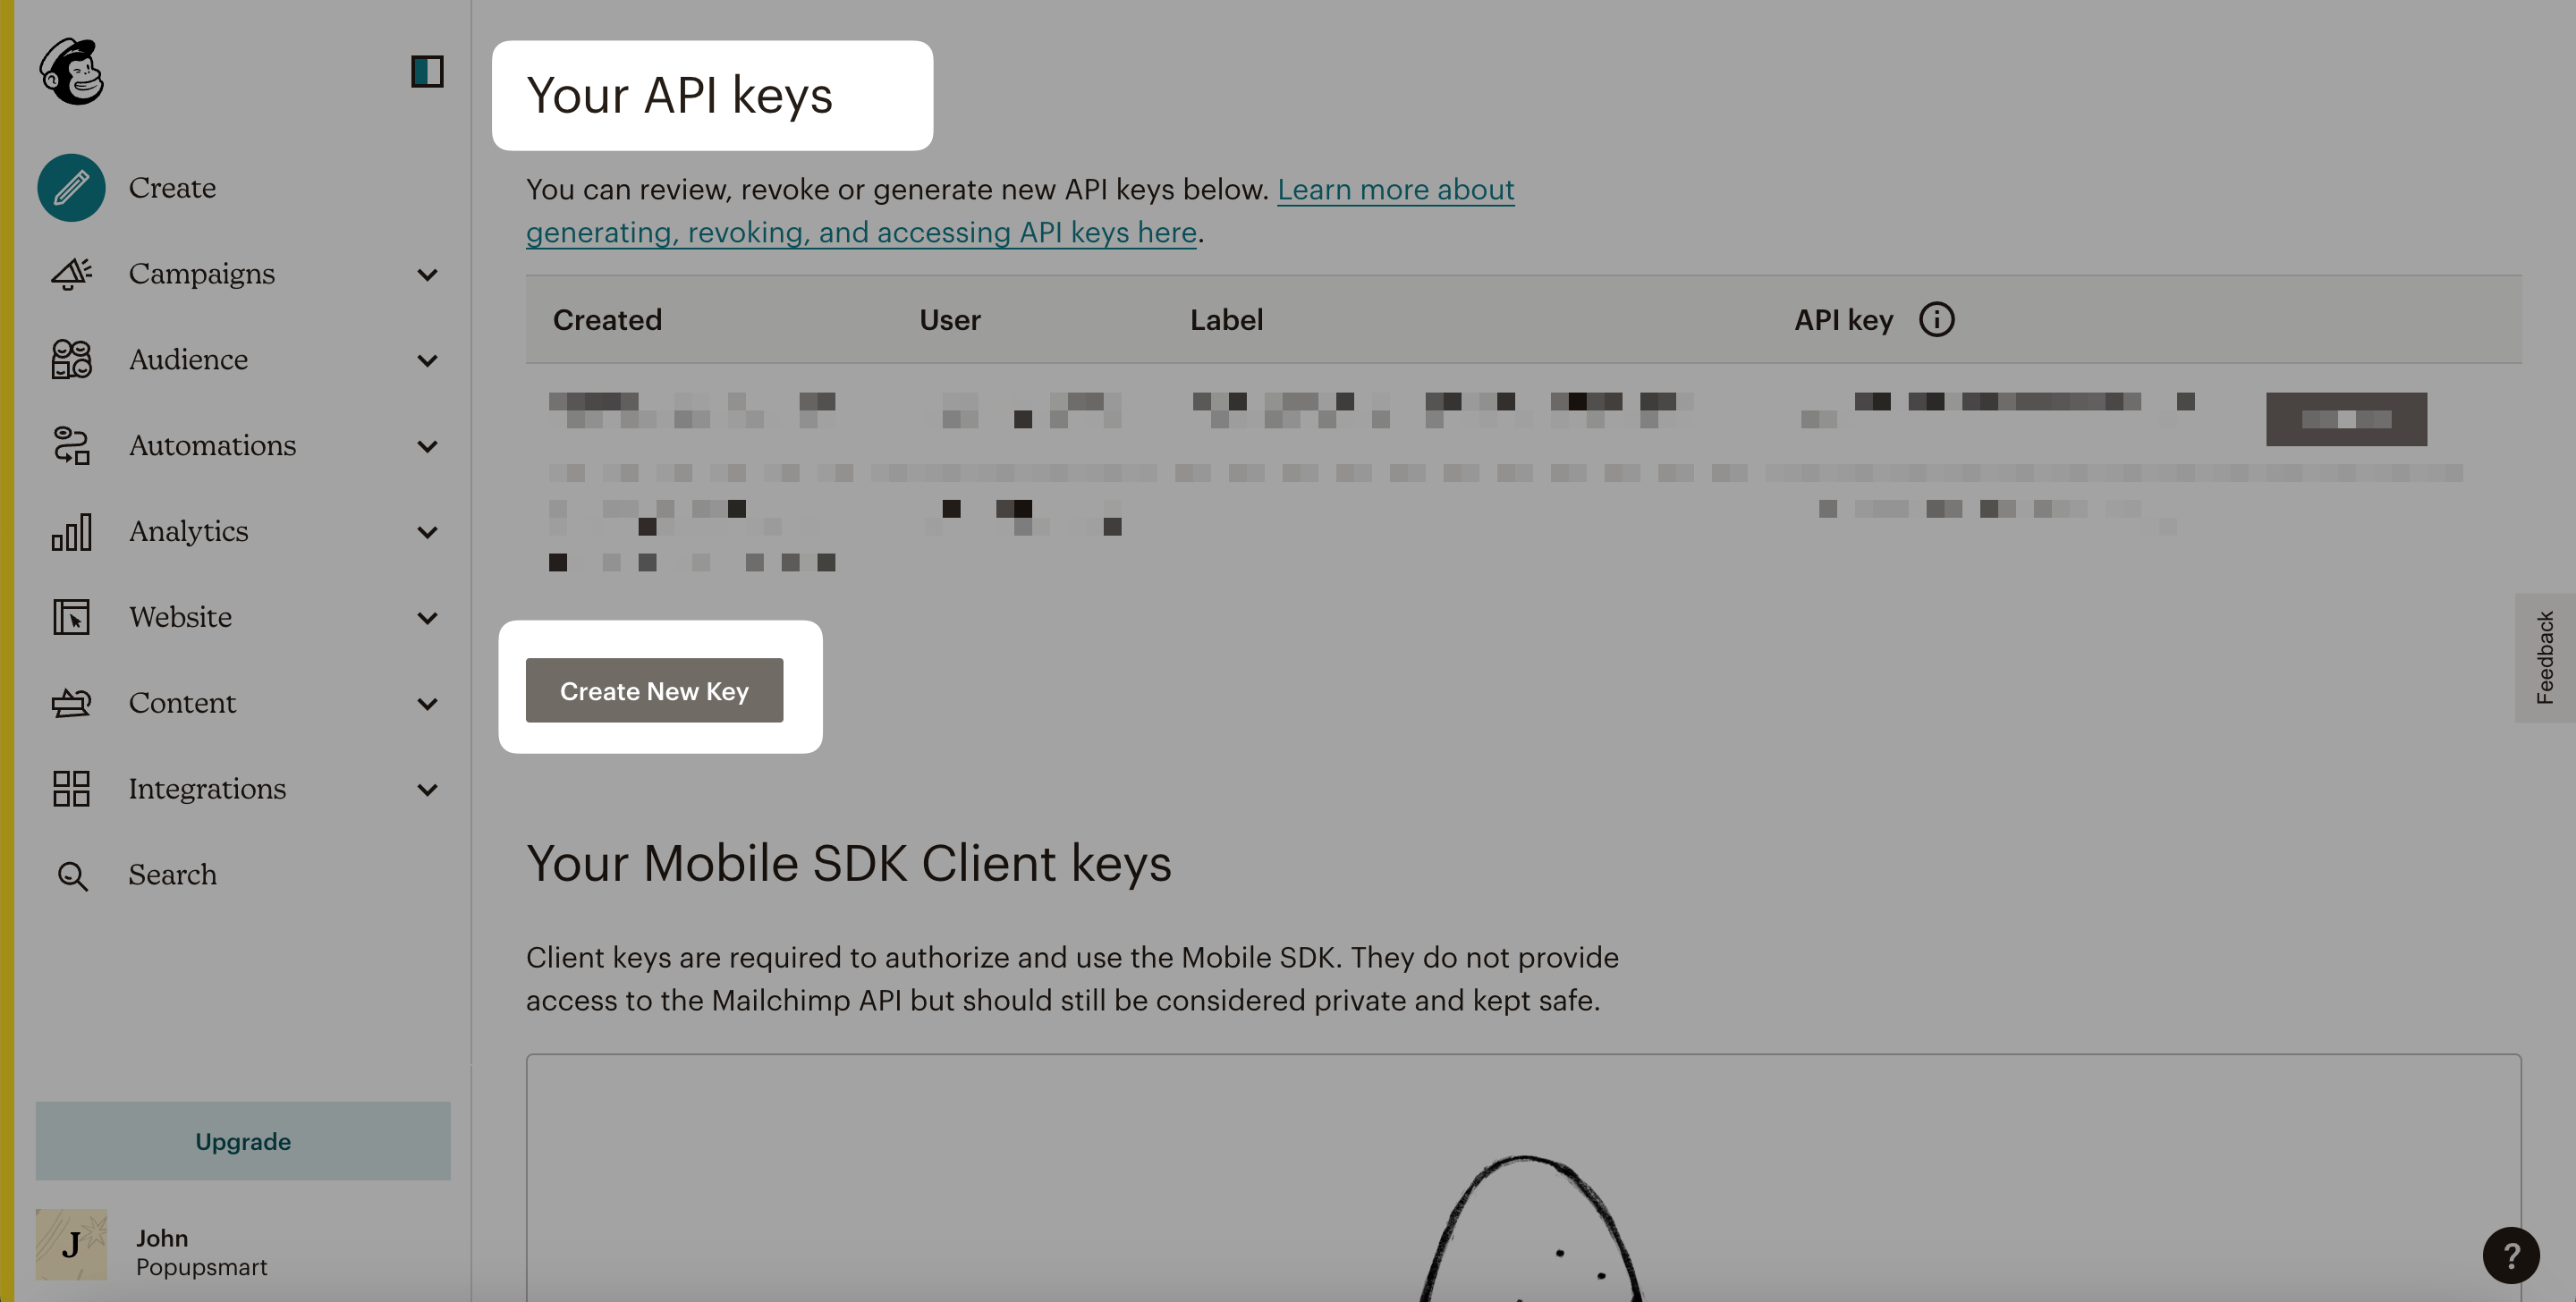
7. Next, click the "Create A / New Key" button to create a new API key.
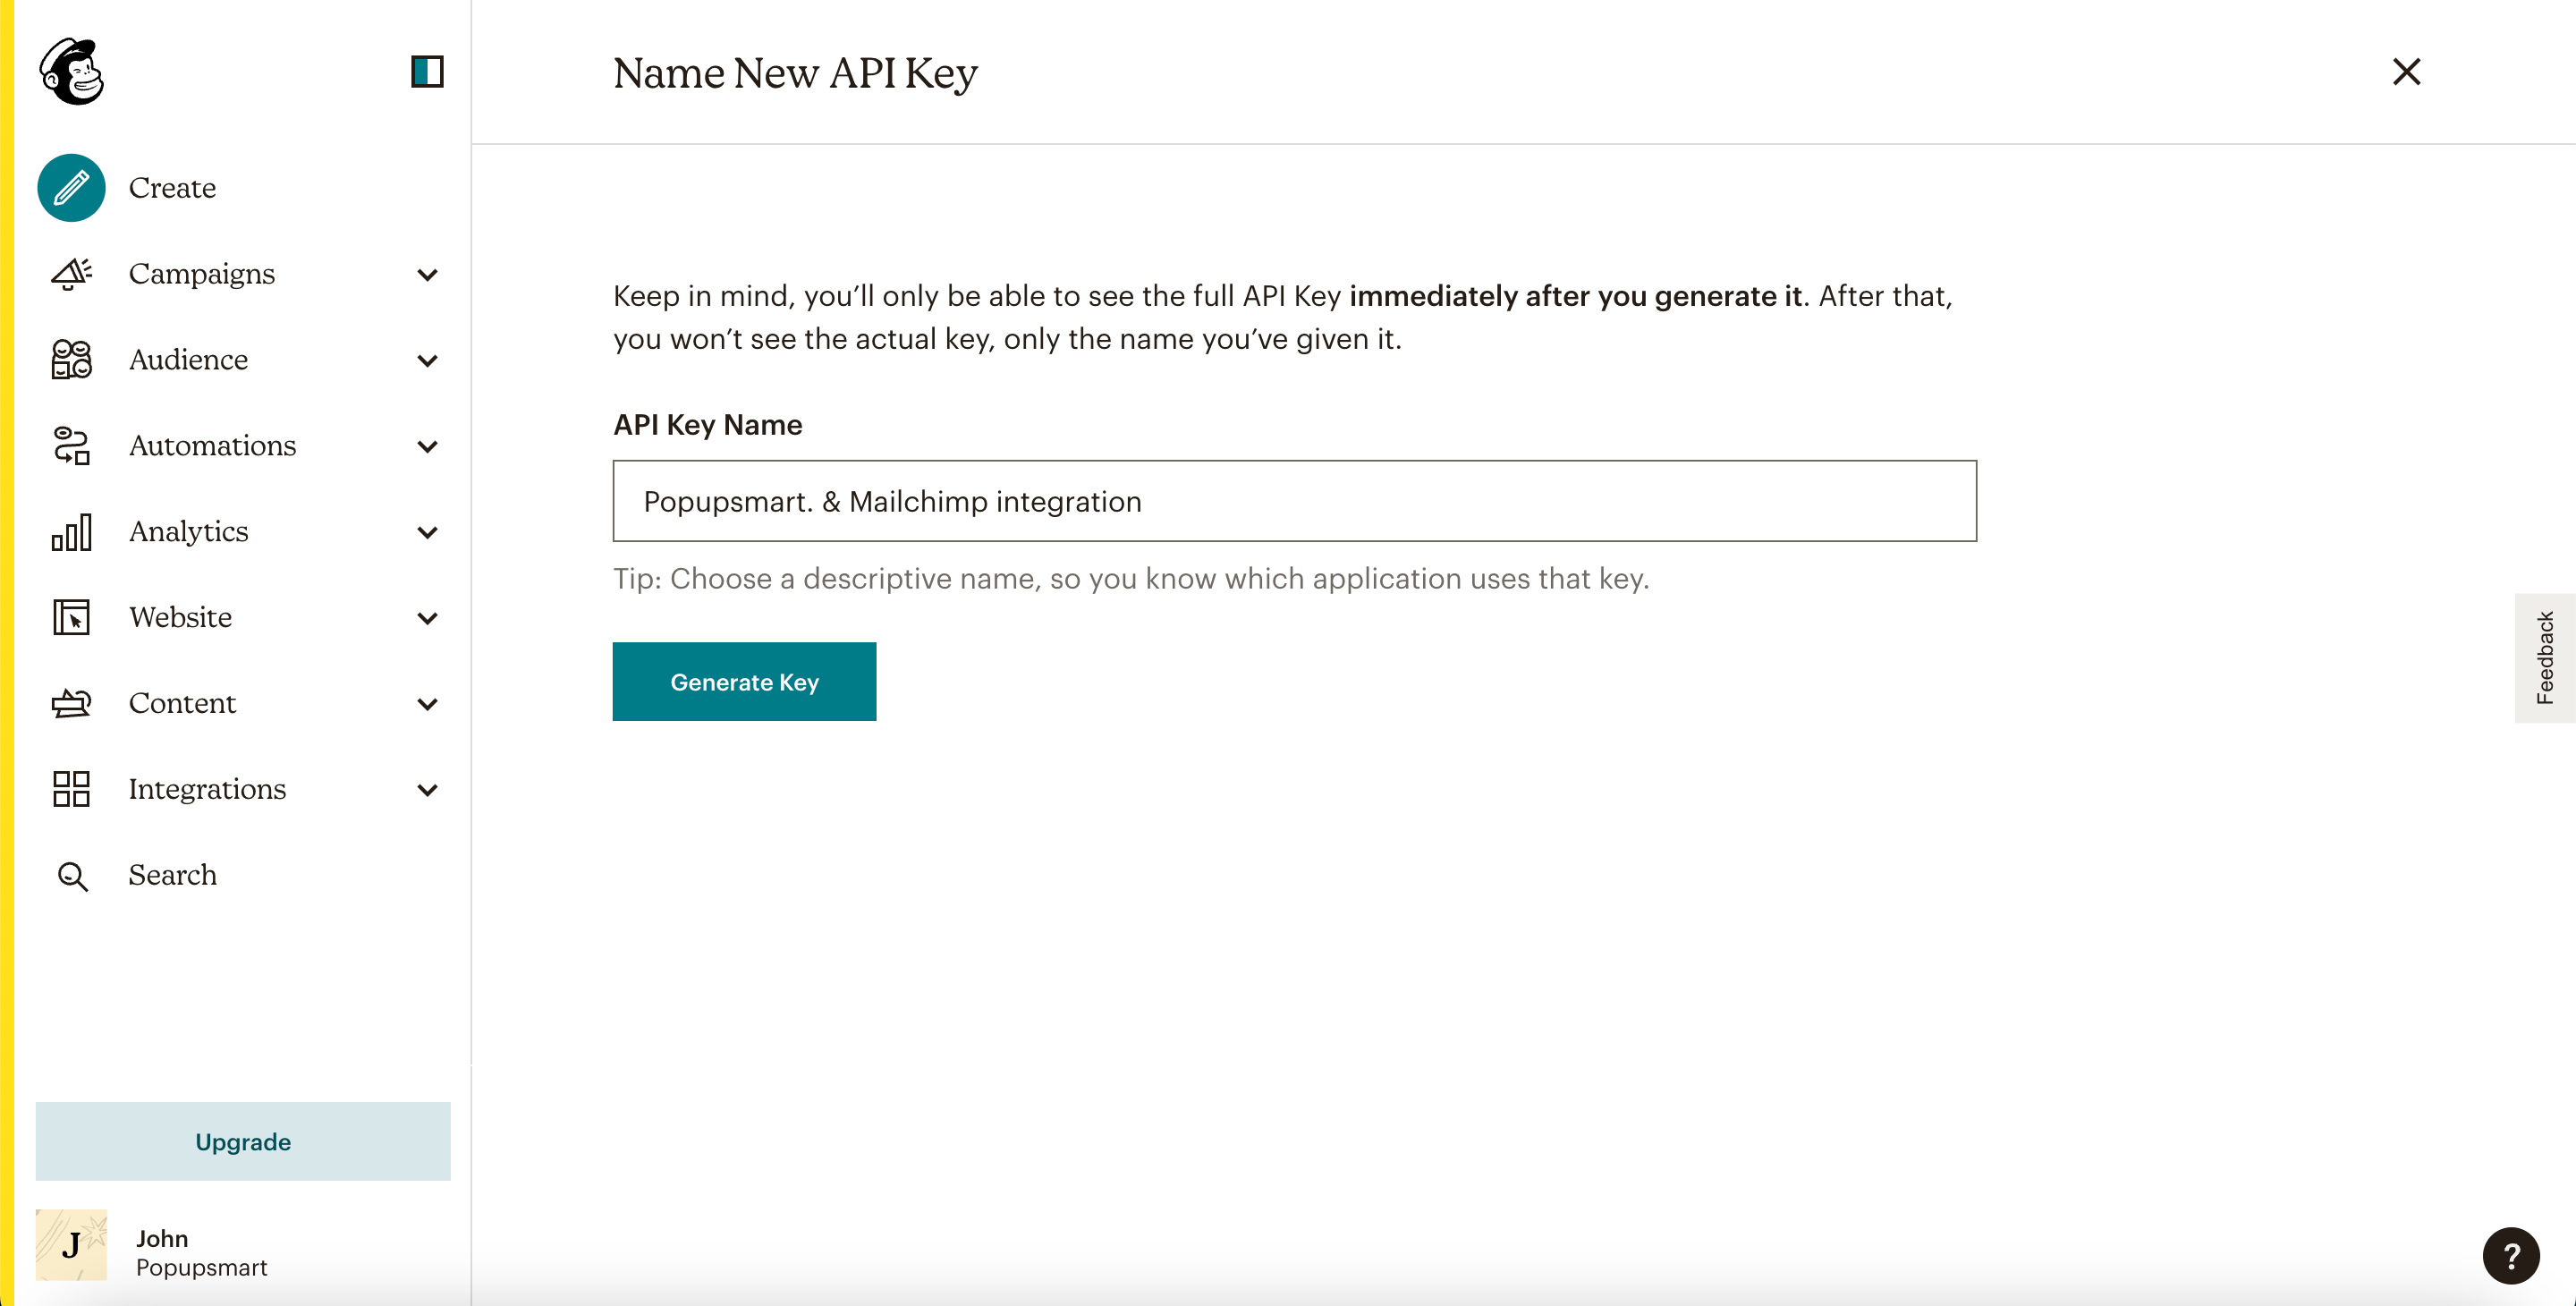
8. Generate API Key Name for your API.
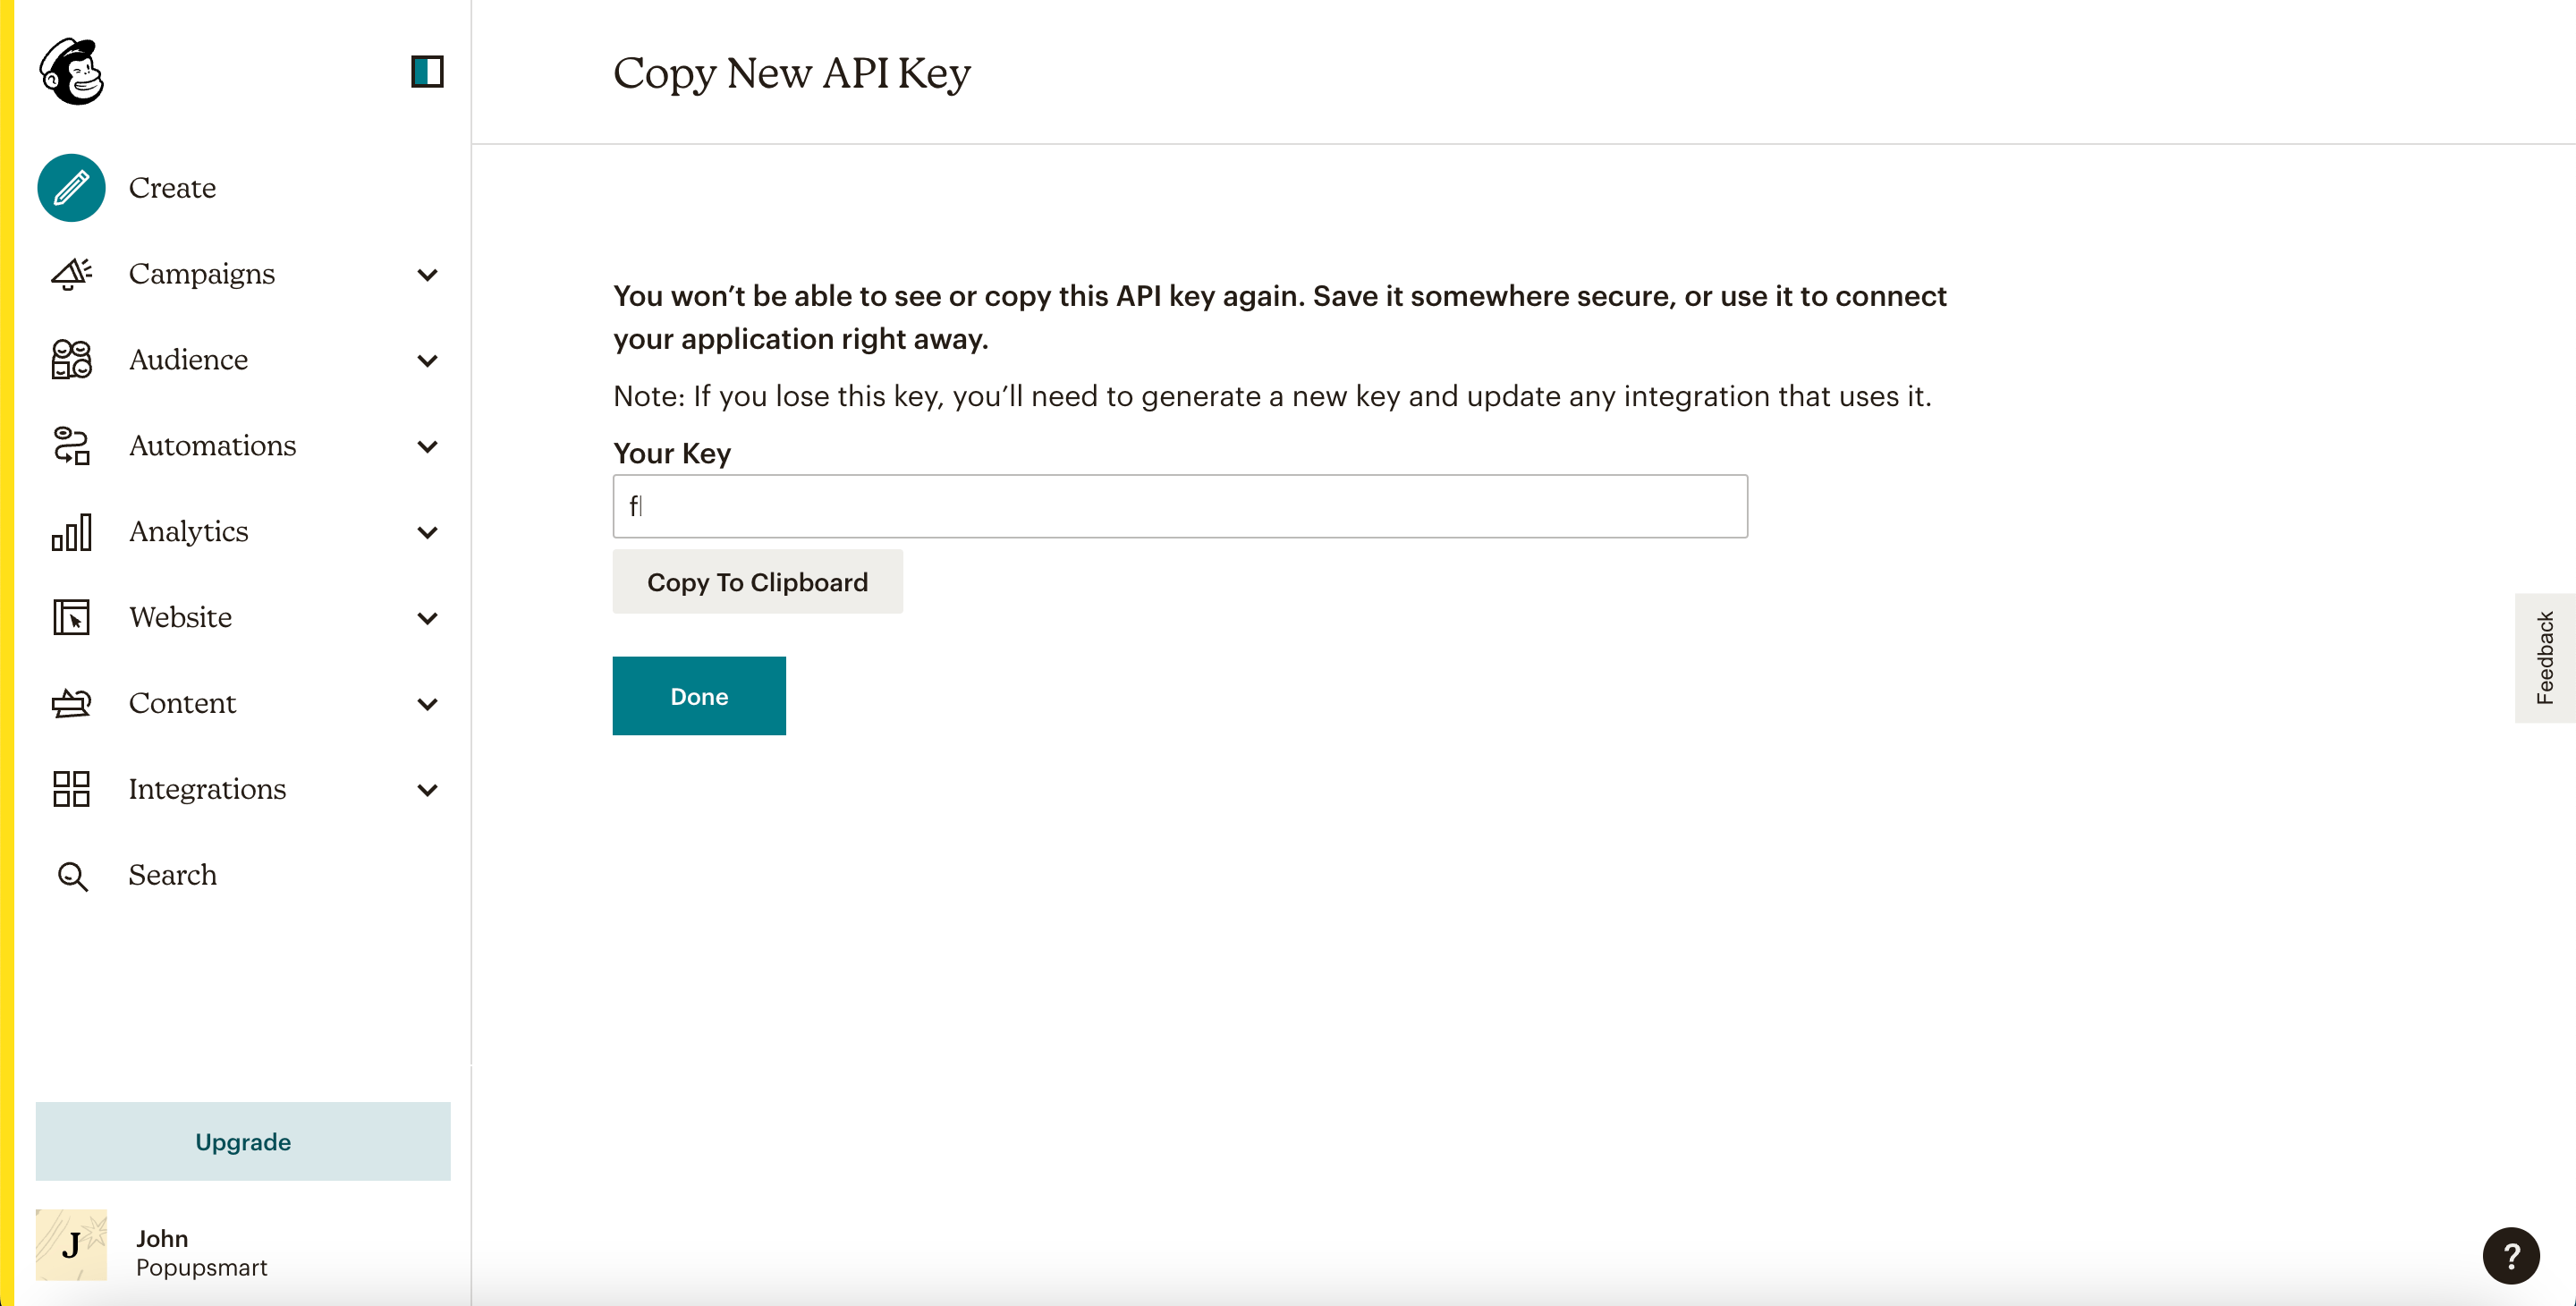
9. Your API key is ready. You can copy it to use on the Popupsmart dashboard.
10. Turning back to the Popupsmart dashboard, paste the API key you have copied on your Mailchimp account. Then, click "Save" to continue.

11. On the Details, before clicking "Next," select your list for the details from the dropdown.

12. You can fill in the blanks in Match fields according to the data you want to have and click "Save."
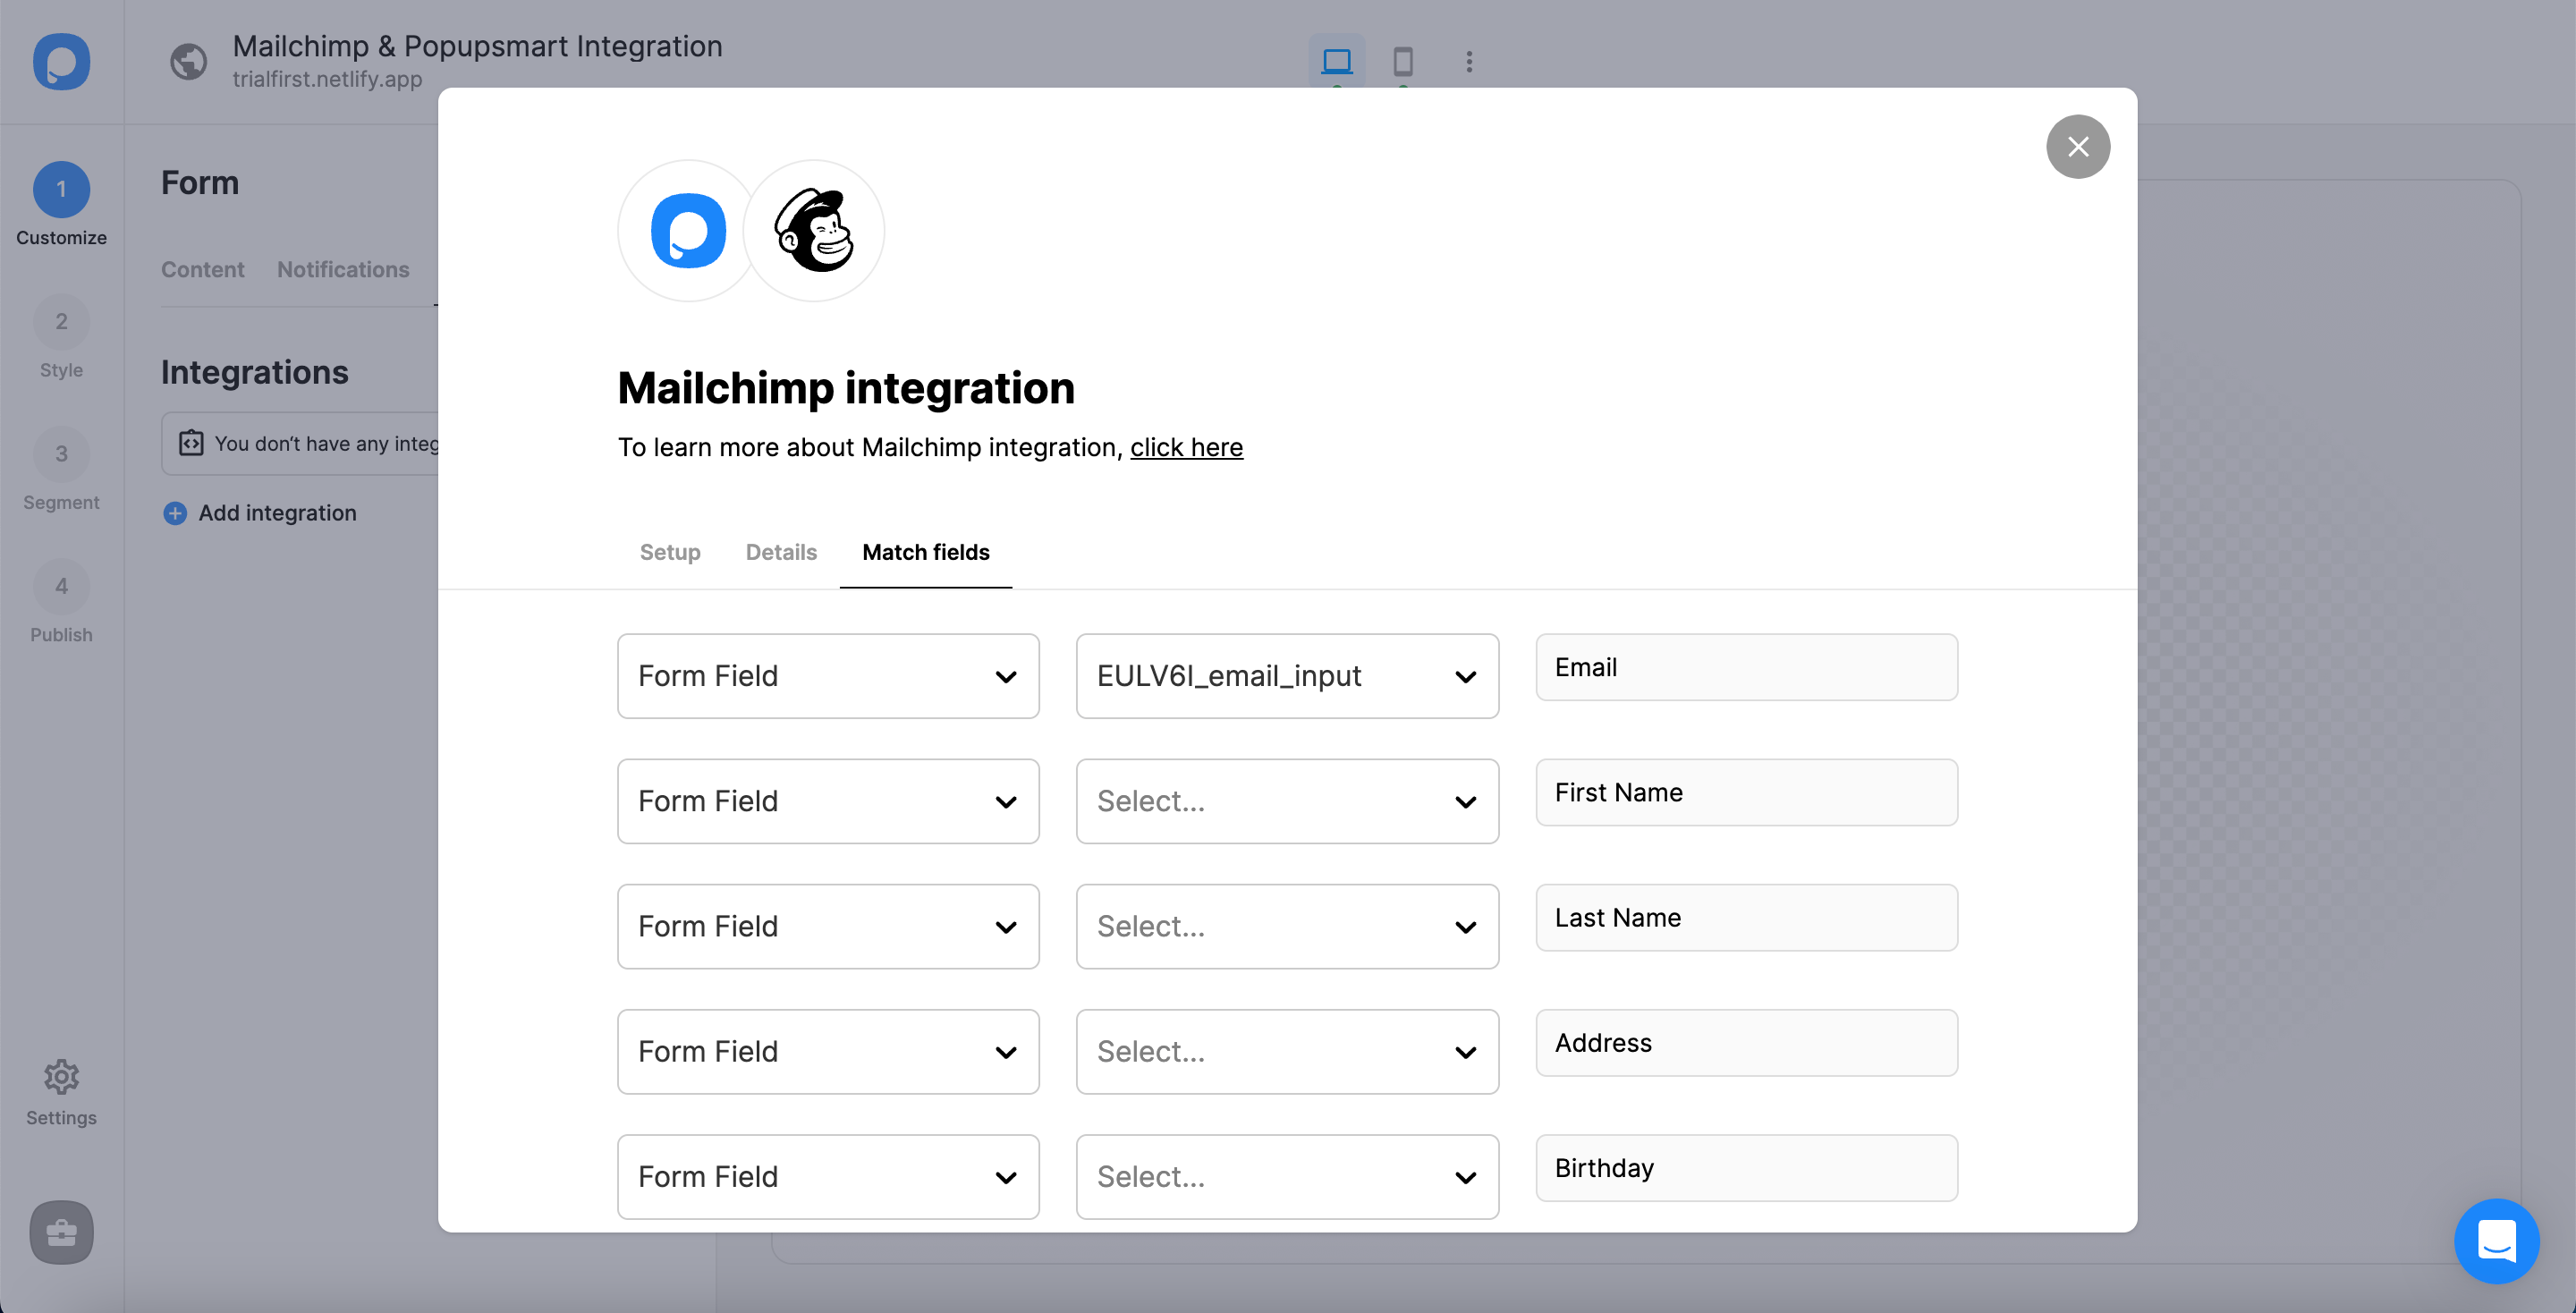
These fields may change according to the elements you include.
✅ Form Field: It is used if you put form elements in your popup. If you don't use any form element, you will see 'No options' on the dropdown.
✅ System Field: You need to choose your option based on what you demand to get as data. For example, you can get the Browsers or Devices of the people who filled the popup.
✅ API Field: You can transfer the data you sent to Popupsmart JS API with the integration again. You can get your data from your Mailchimp account.
✅ Static Field: You need to determine the specific data you want. For example, you may want to have sales or downgrades so that you can put them as 'sales' or 'downgrade.'
After saving, your integration is ready!
The status of your integration is on by default, and you can change it by clicking on the three-dot and toggling on/off the status.

If you have any other questions about Mailchimp integration, feel free to mail us!
What is a Mailchimp popup?
Mailchimp popups are sign-up popups that will help you grow your email list.
You can create a sign-up popup with Popupsmart and embed a one-line JavaScript code to your website’s header sections.
Once you start displaying conversion-ready popups on your website, your customers will easily see and click on the popup.
After providing their emails, they will be automatically added to your Mailchimp email list.
Who should use Mailchimp popup?
If you would like to maximize your conversions and obtain high-quality email leads, you should use a Mailchimp popup.
Popupsmart can seamlessly integrate with Mailchimp via Zapier.
You can enjoy effortlessly converting targeted visitors into email leads and make more profit by your Mailchimp email marketing.
Where to embed Mailchimp popup code Shopify?
First, you need to find the right popup code and the email list that you want to direct new subscribers to.
Then, after logging in to your Mailchimp account, click on Lists. Under the Lists, choose Signup forms for the targeted email list.
Select Subscriber pop-up and copy the generated code.
Log in to Shopify, select Edit code under Themes section’s dropdown menu.
Find the theme you are using under the Layout section and paste your code right before the tag. Then, save and publish!
Do you know that it is even easier adding Mailchimp popup code to Shopify with Popupsmart?
Popupsmart can integrate with both Mailchimp and Shopify. All you need to do is to copy a one-line JavaScript code and paste on to your website’s header sections.
How to add a Mailchimp popup form to Wix ?
Copy the popup code that you will use. Log in to your Wix website admin panel and go to settings.
Find and click the Tracking & Analytics Tab under Advanced Settings. Then, you need to click on the “+New Tool” and select Custom.
Paste your popup code and save.
Simplify the process by integrating your Popupsmart account with both Mailchimp and Wix.
You can easily create Mailchimp popups via Popupsmart and add them to your Wix website.
Where to put Mailchimp popup code in WordPress?
Log in Mailchimp and click on Lists. Choose Signup forms for the email list you will direct your subscribers to. Then, select Subscriber pop-up.
After copying the generated code, paste it to your WordPress website’s HTML just before the closing < / head > tag.
Popupsmart is fully compliant with Wix and Mailchimp. Save the effort and start using Popupsmart for stunning popup designs and easy-to-use popup builder.
Do I need coding skills to create a MailChimp popup for my website via Popupsmart?
Popupsmart does not have a coding tool to provide a simple user experience!
Anyone can create a MailChimp popup in 5 minutes via Popupsmart.
Integrate your Popupsmart account with MailChimp via Zapier and add a one-line embed code to your website’s source code.
This is all coding you need to create a MailChimp popup via Popupsmart.
Who should use MailChimp popups via Popupsmart?
If you need to obtain new subscribers for your MailChimp campaigns by presenting popup forms on your website, you should use Popupsmart!
Popupsmart offers easy usage, various customizable template options, and targeting features to help you fulfill your business goals easily.
