Webflow popup: how to add one without building a modal
 By Mert Özeren
To add a popup to Webflow, paste Popupsmart's embed code into the Footer code box in Site settings, publish the site once, then build popups in the Popupsmart dashboard. Webflow has no popup builder of its own; you'd build a modal by hand with a form and Interactions. Popupsmart adds exit intent, URL rules and lead delivery without a republish.
Custom code in Site settings needs a paid Site plan or a paid Workspace plan.


Setup at a glance
- Runs on
- Webflow
- Where the code goes
Site settings → Custom code → Footer code, then publish- Add-on
- No app needed
Before you start
You need three things, and a developer isn't one of them:
- Access to your Webflow site with permission to edit its settings and publish it.
- A Webflow plan that allows custom code. Webflow unlocks it with a paid Site plan, or a Core, Growth, Agency or Freelancer Workspace plan.
- A free Popupsmart account. The free plan covers one website and one live popup, so you can finish this guide without paying.
How to add a popup to Webflow
A Webflow popup from Popupsmart needs one embed code in the Footer code box of your site's settings, added once, and one publish. After that you build, change and publish popups in Popupsmart without opening Webflow again.
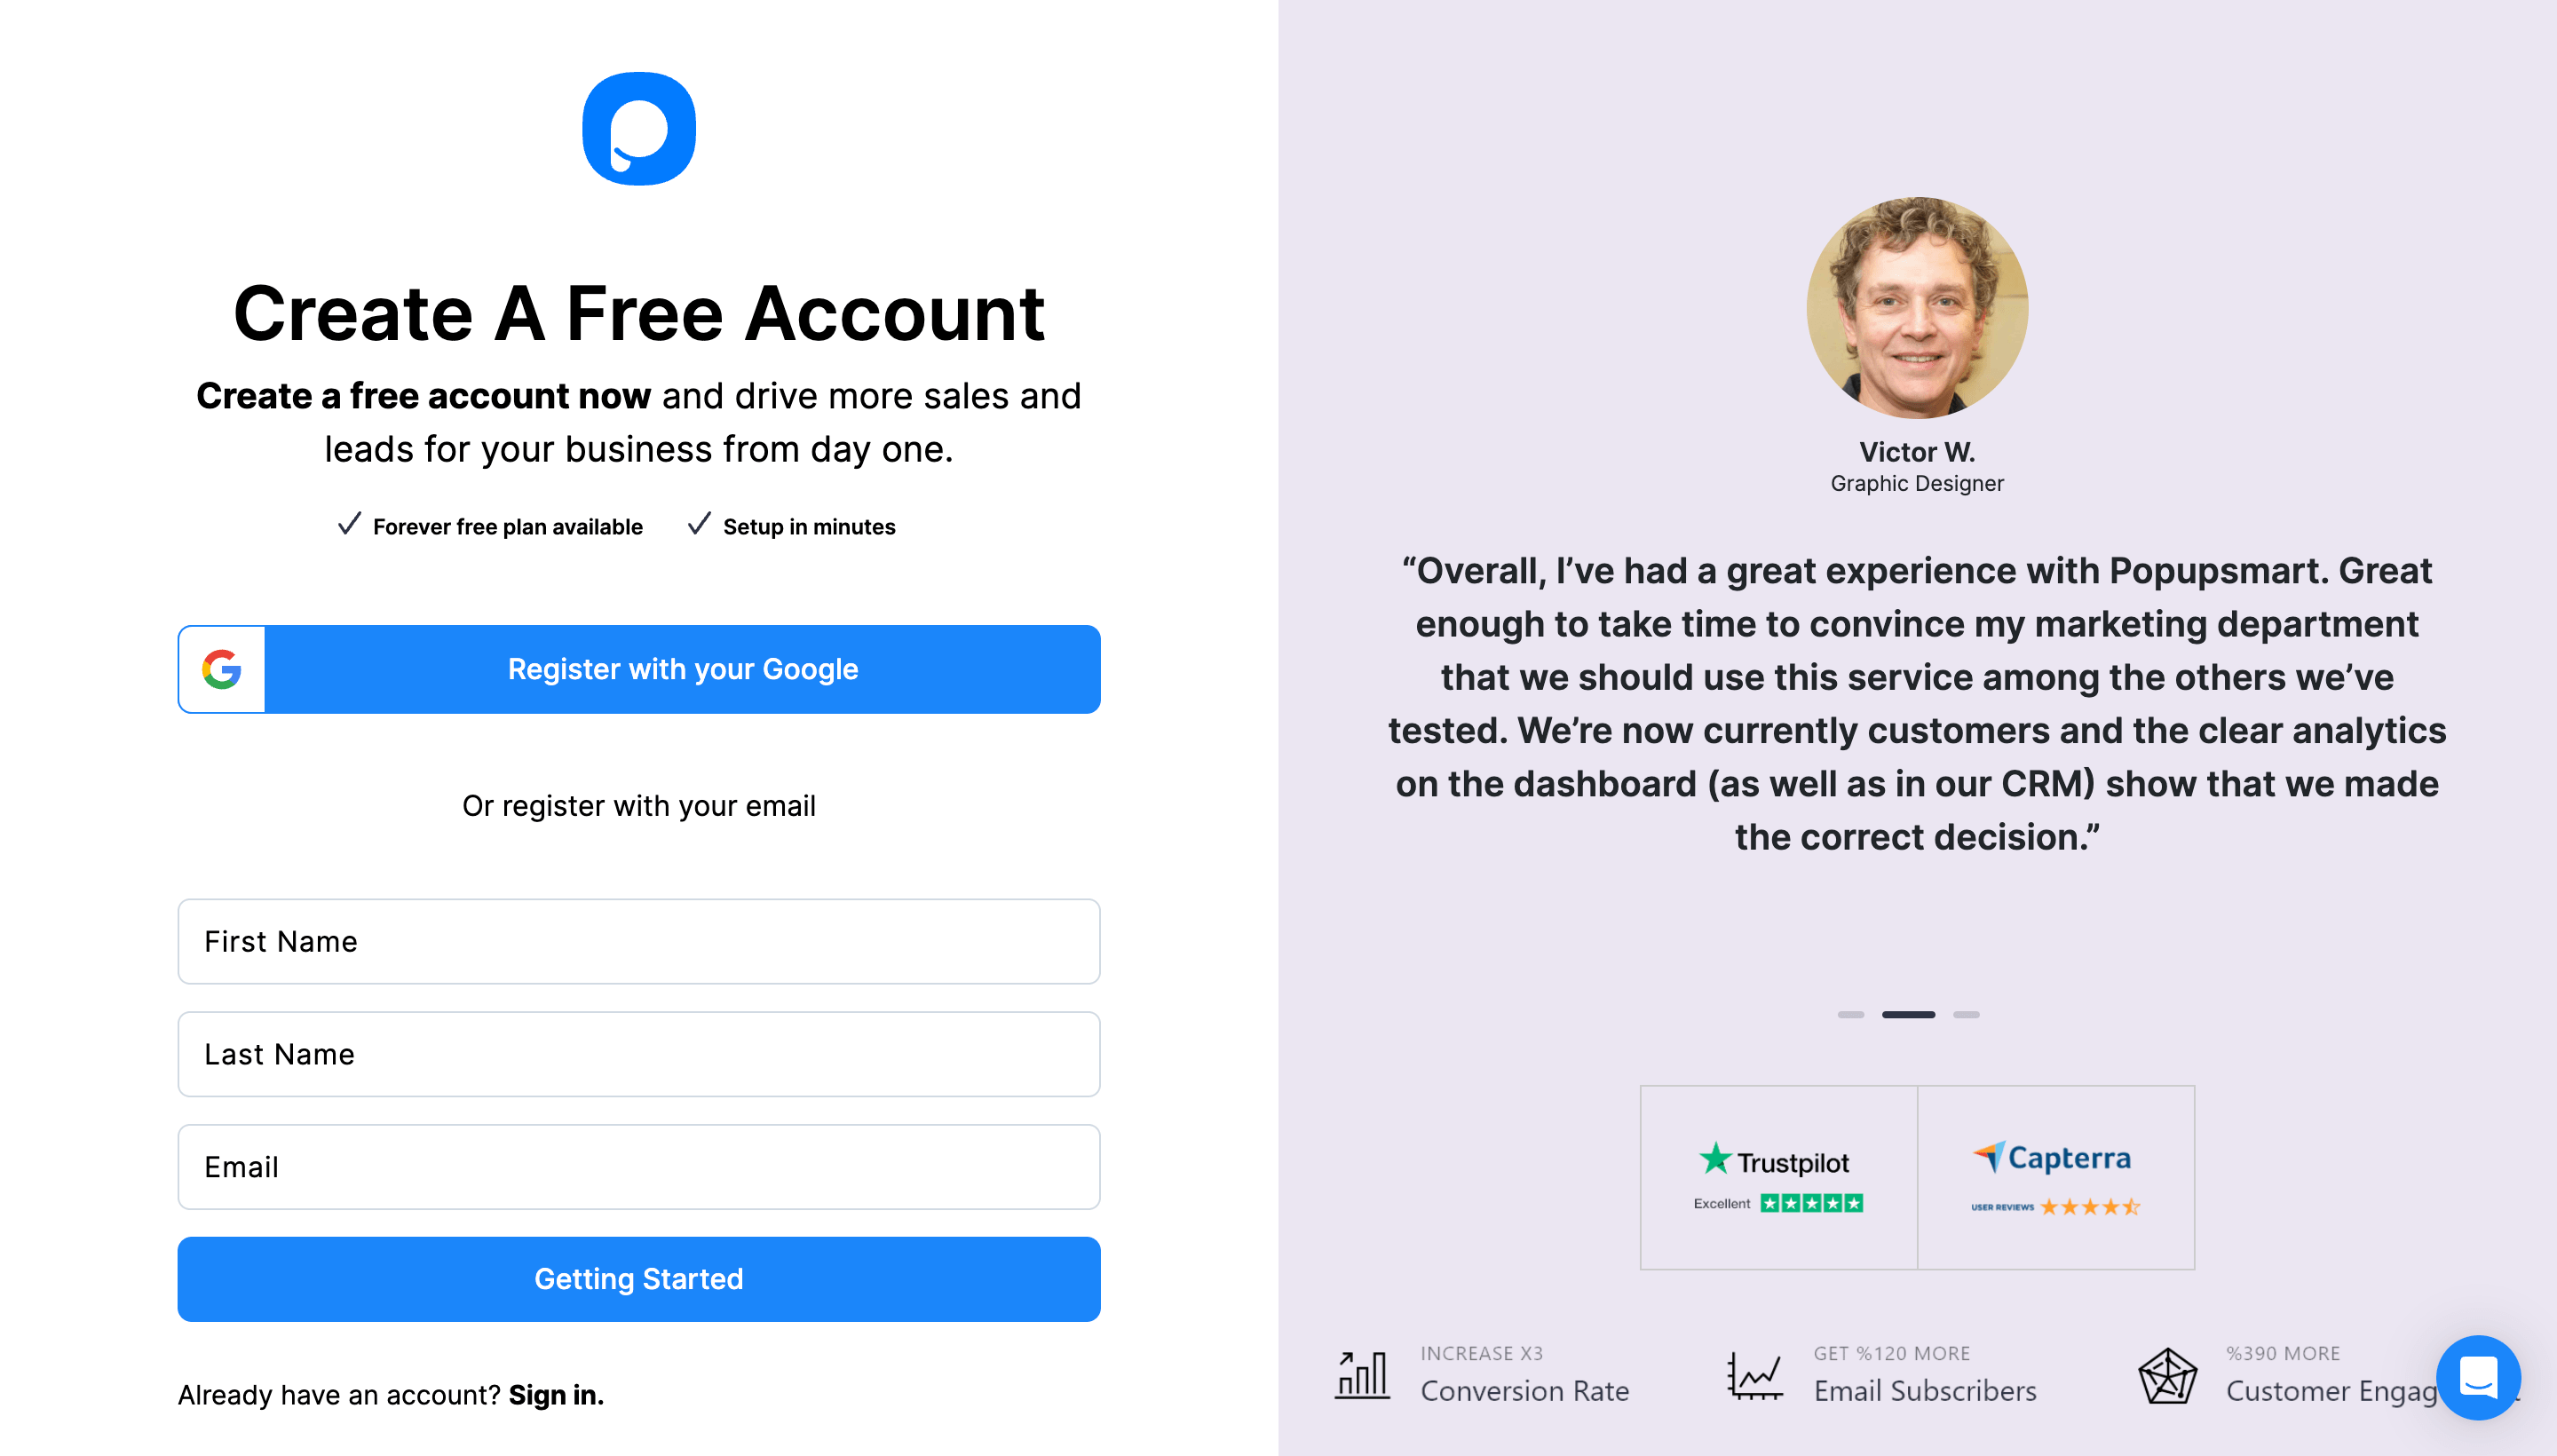
Step 1: Create your Popupsmart account
Create a free Popupsmart account, or sign in to the one you have.
Step 2: Copy your embed code
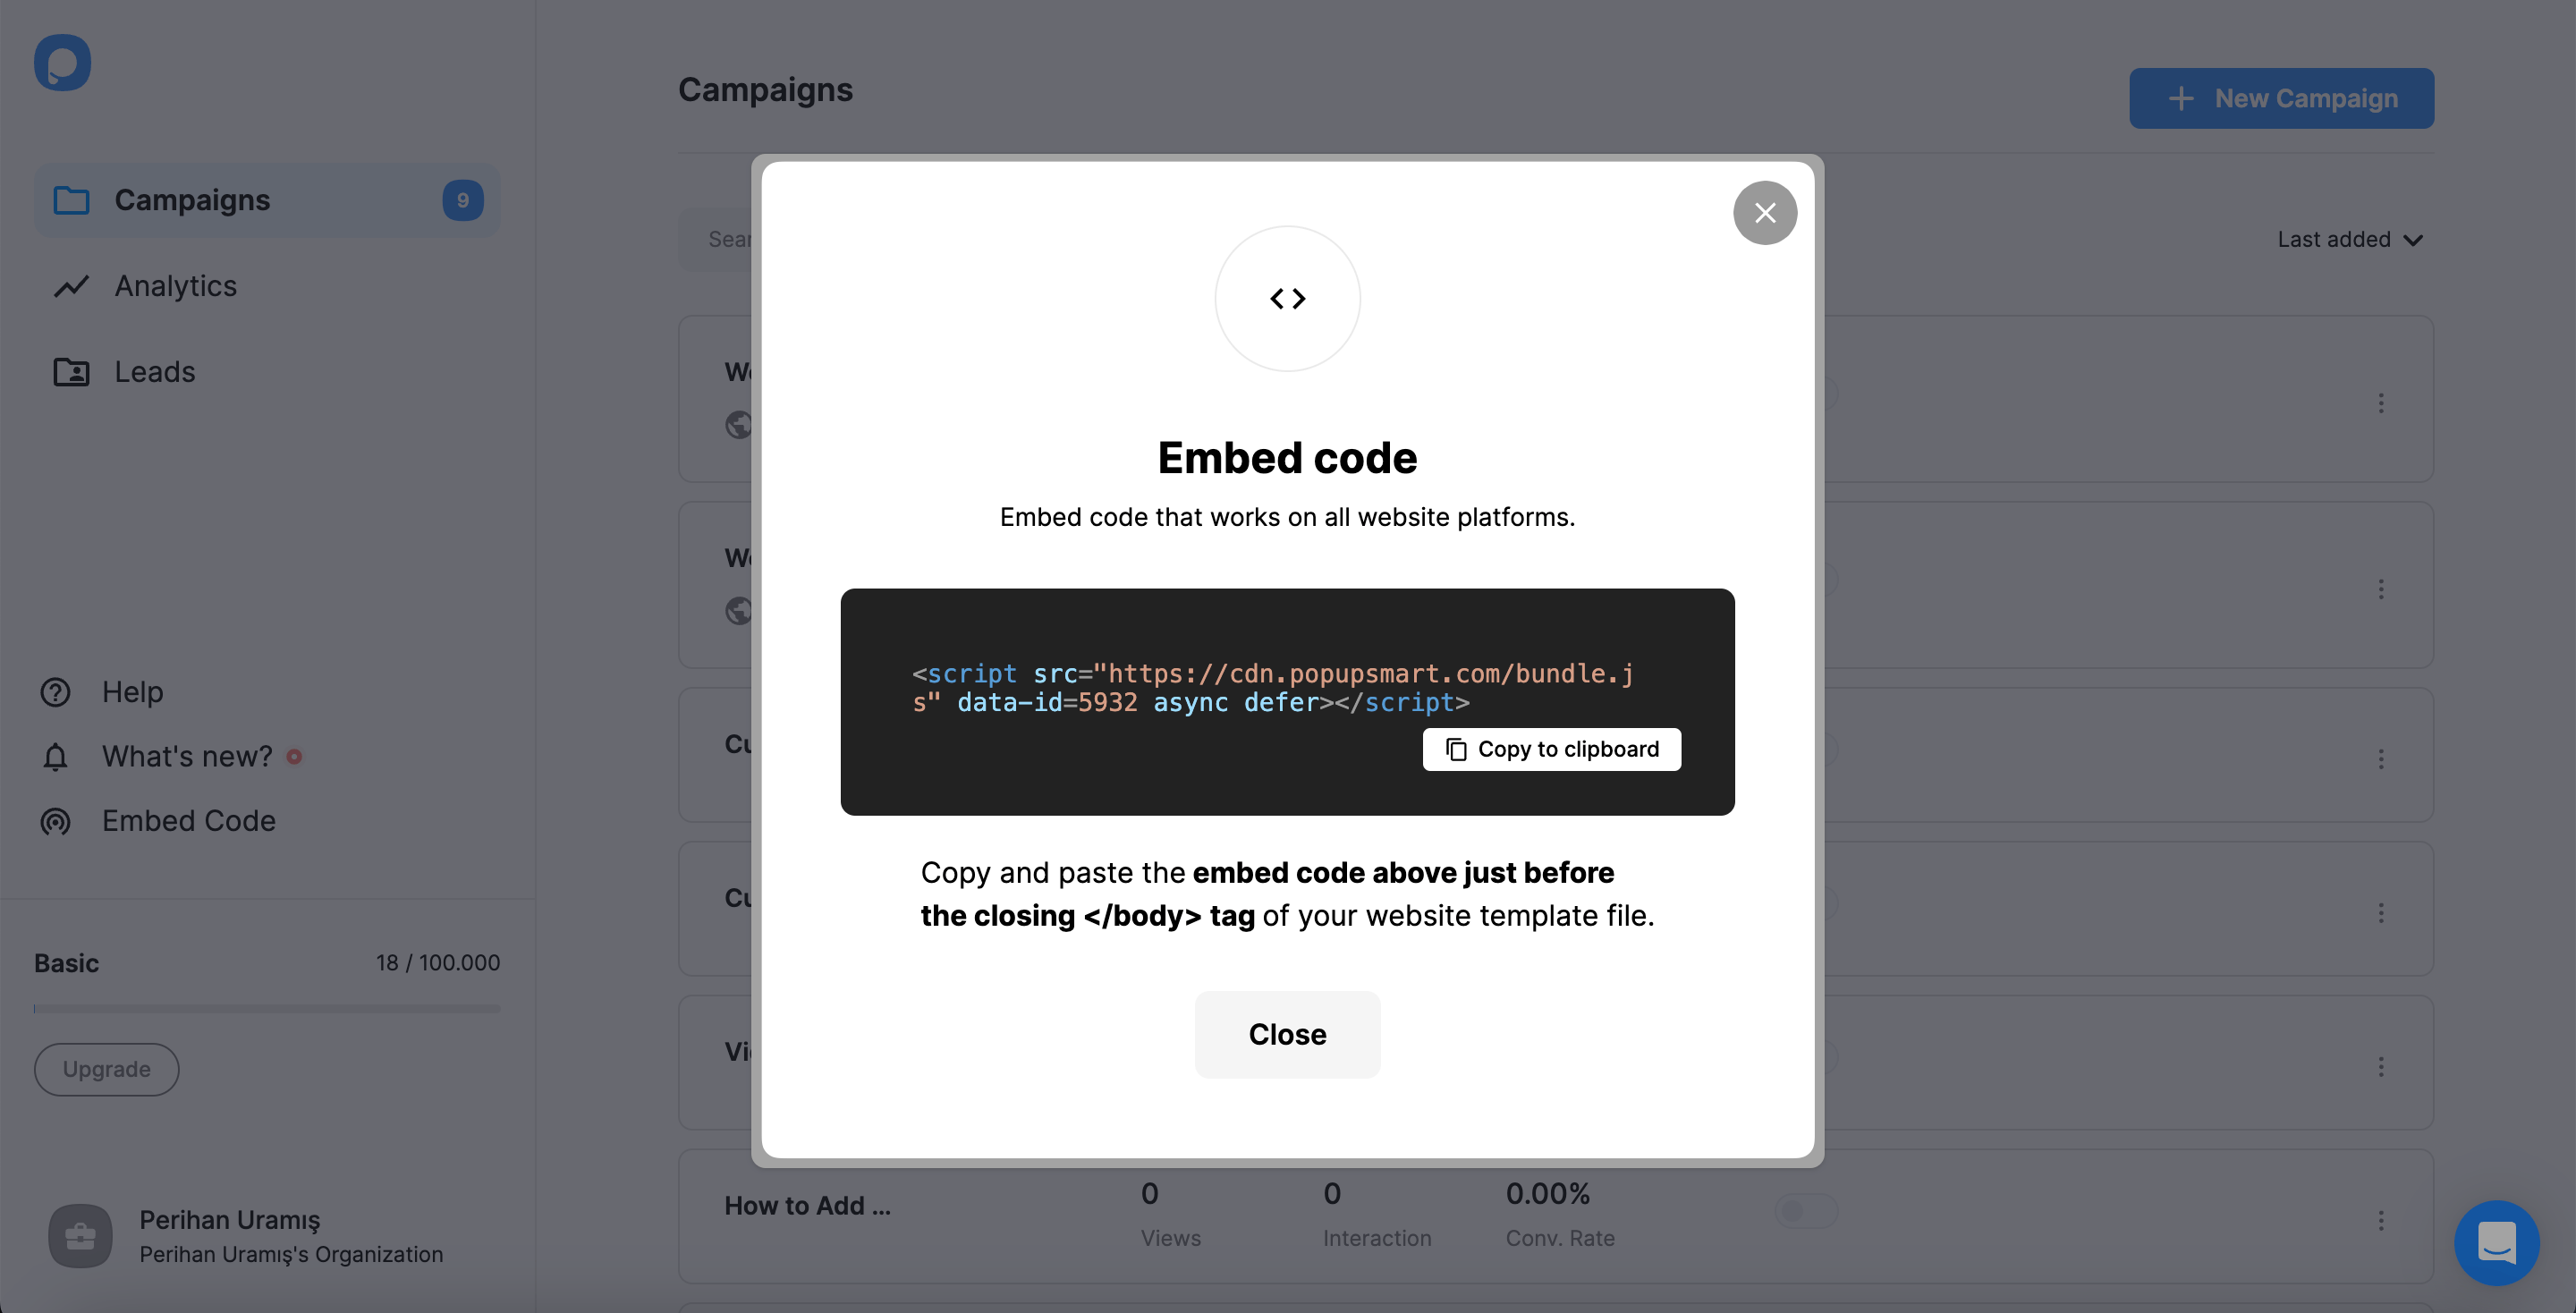
In the Popupsmart dashboard, click Embed Code in the left-hand menu.
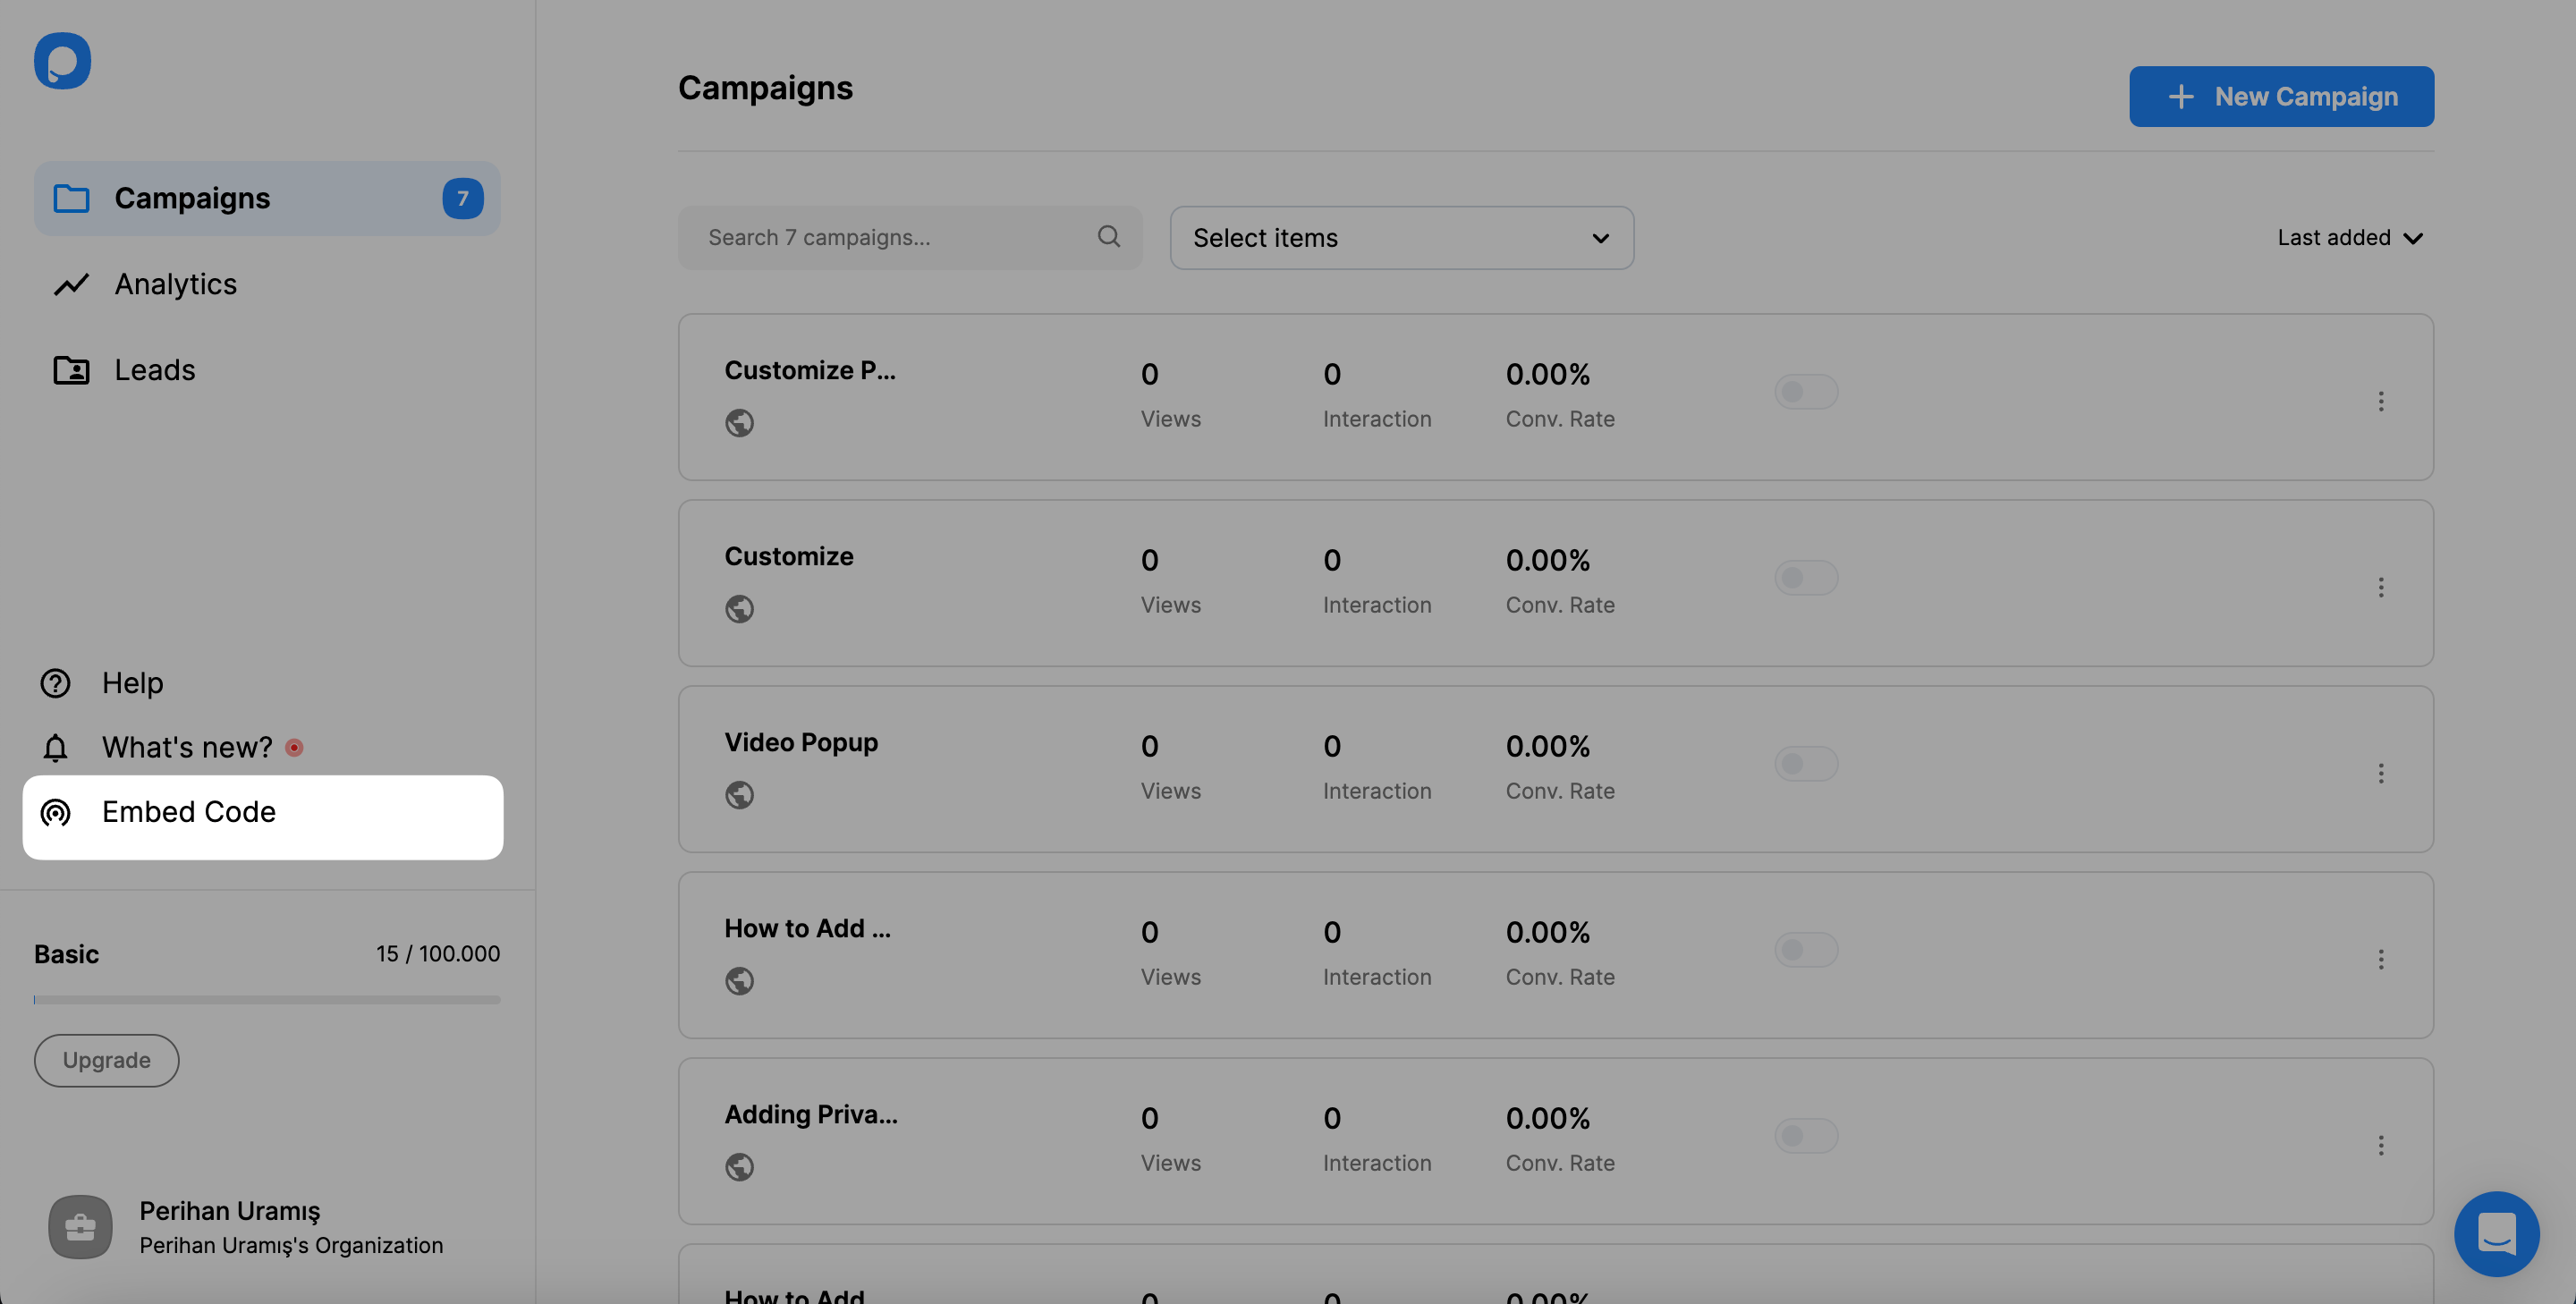
Copy the code to your clipboard. It is one line, <script src="https://cdn.popupsmart.com/bundle.js" data-id="…" async defer></script>, and the data-id belongs to your account.
Step 3: Open your site's custom code settings
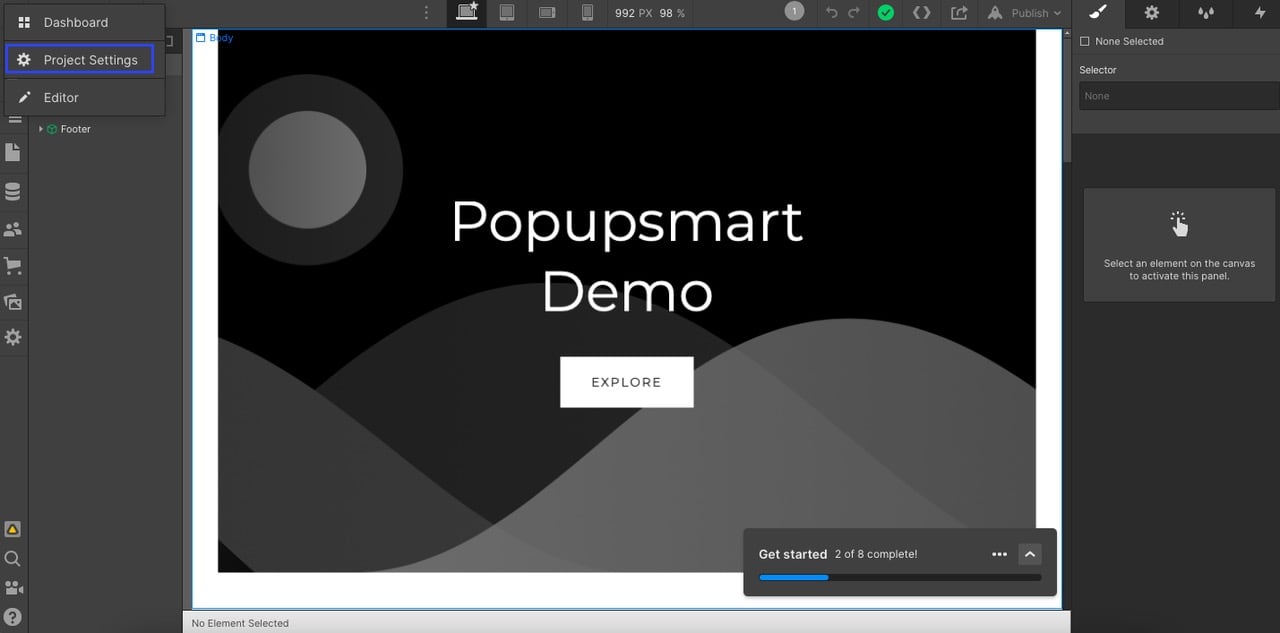
In Webflow, open your site's Site settings, either from the Dashboard or from the Webflow menu at the top left of the Designer. Older versions of Webflow, like the one in the screenshots, call it Project Settings.
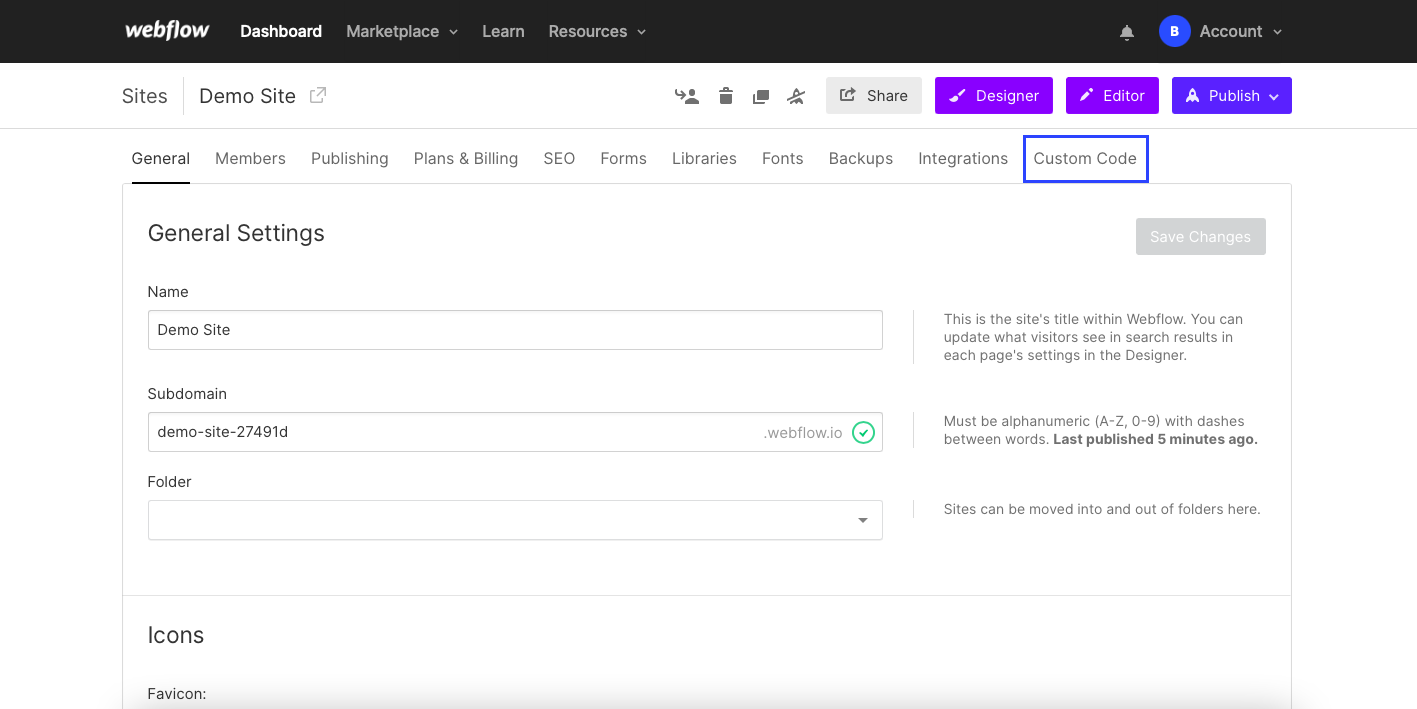
Click the Custom code tab.
Step 4: Paste the code into Footer code
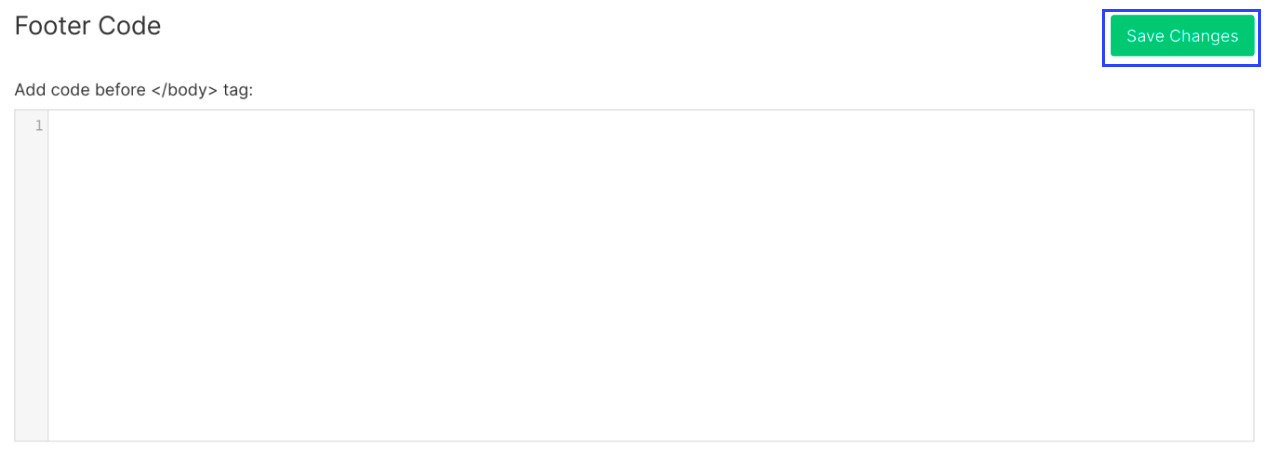
Scroll down to Footer code, the box that adds code before the closing </body> tag on every page. Paste the embed code and click Save Changes. Leave the Head code box as it is.
Step 5: Publish your Webflow site
Custom code goes live only when the site is published. Click Publish and publish to every domain your visitors use: the webflow.io address, your custom domain, or both. When I help with a Webflow install, this is the step I check first, because a saved Footer code box does nothing until the site is published to the domain your visitors actually open.
Step 6: Add and verify your website
Back in Popupsmart, hover over the profile icon at the bottom left and click Websites.
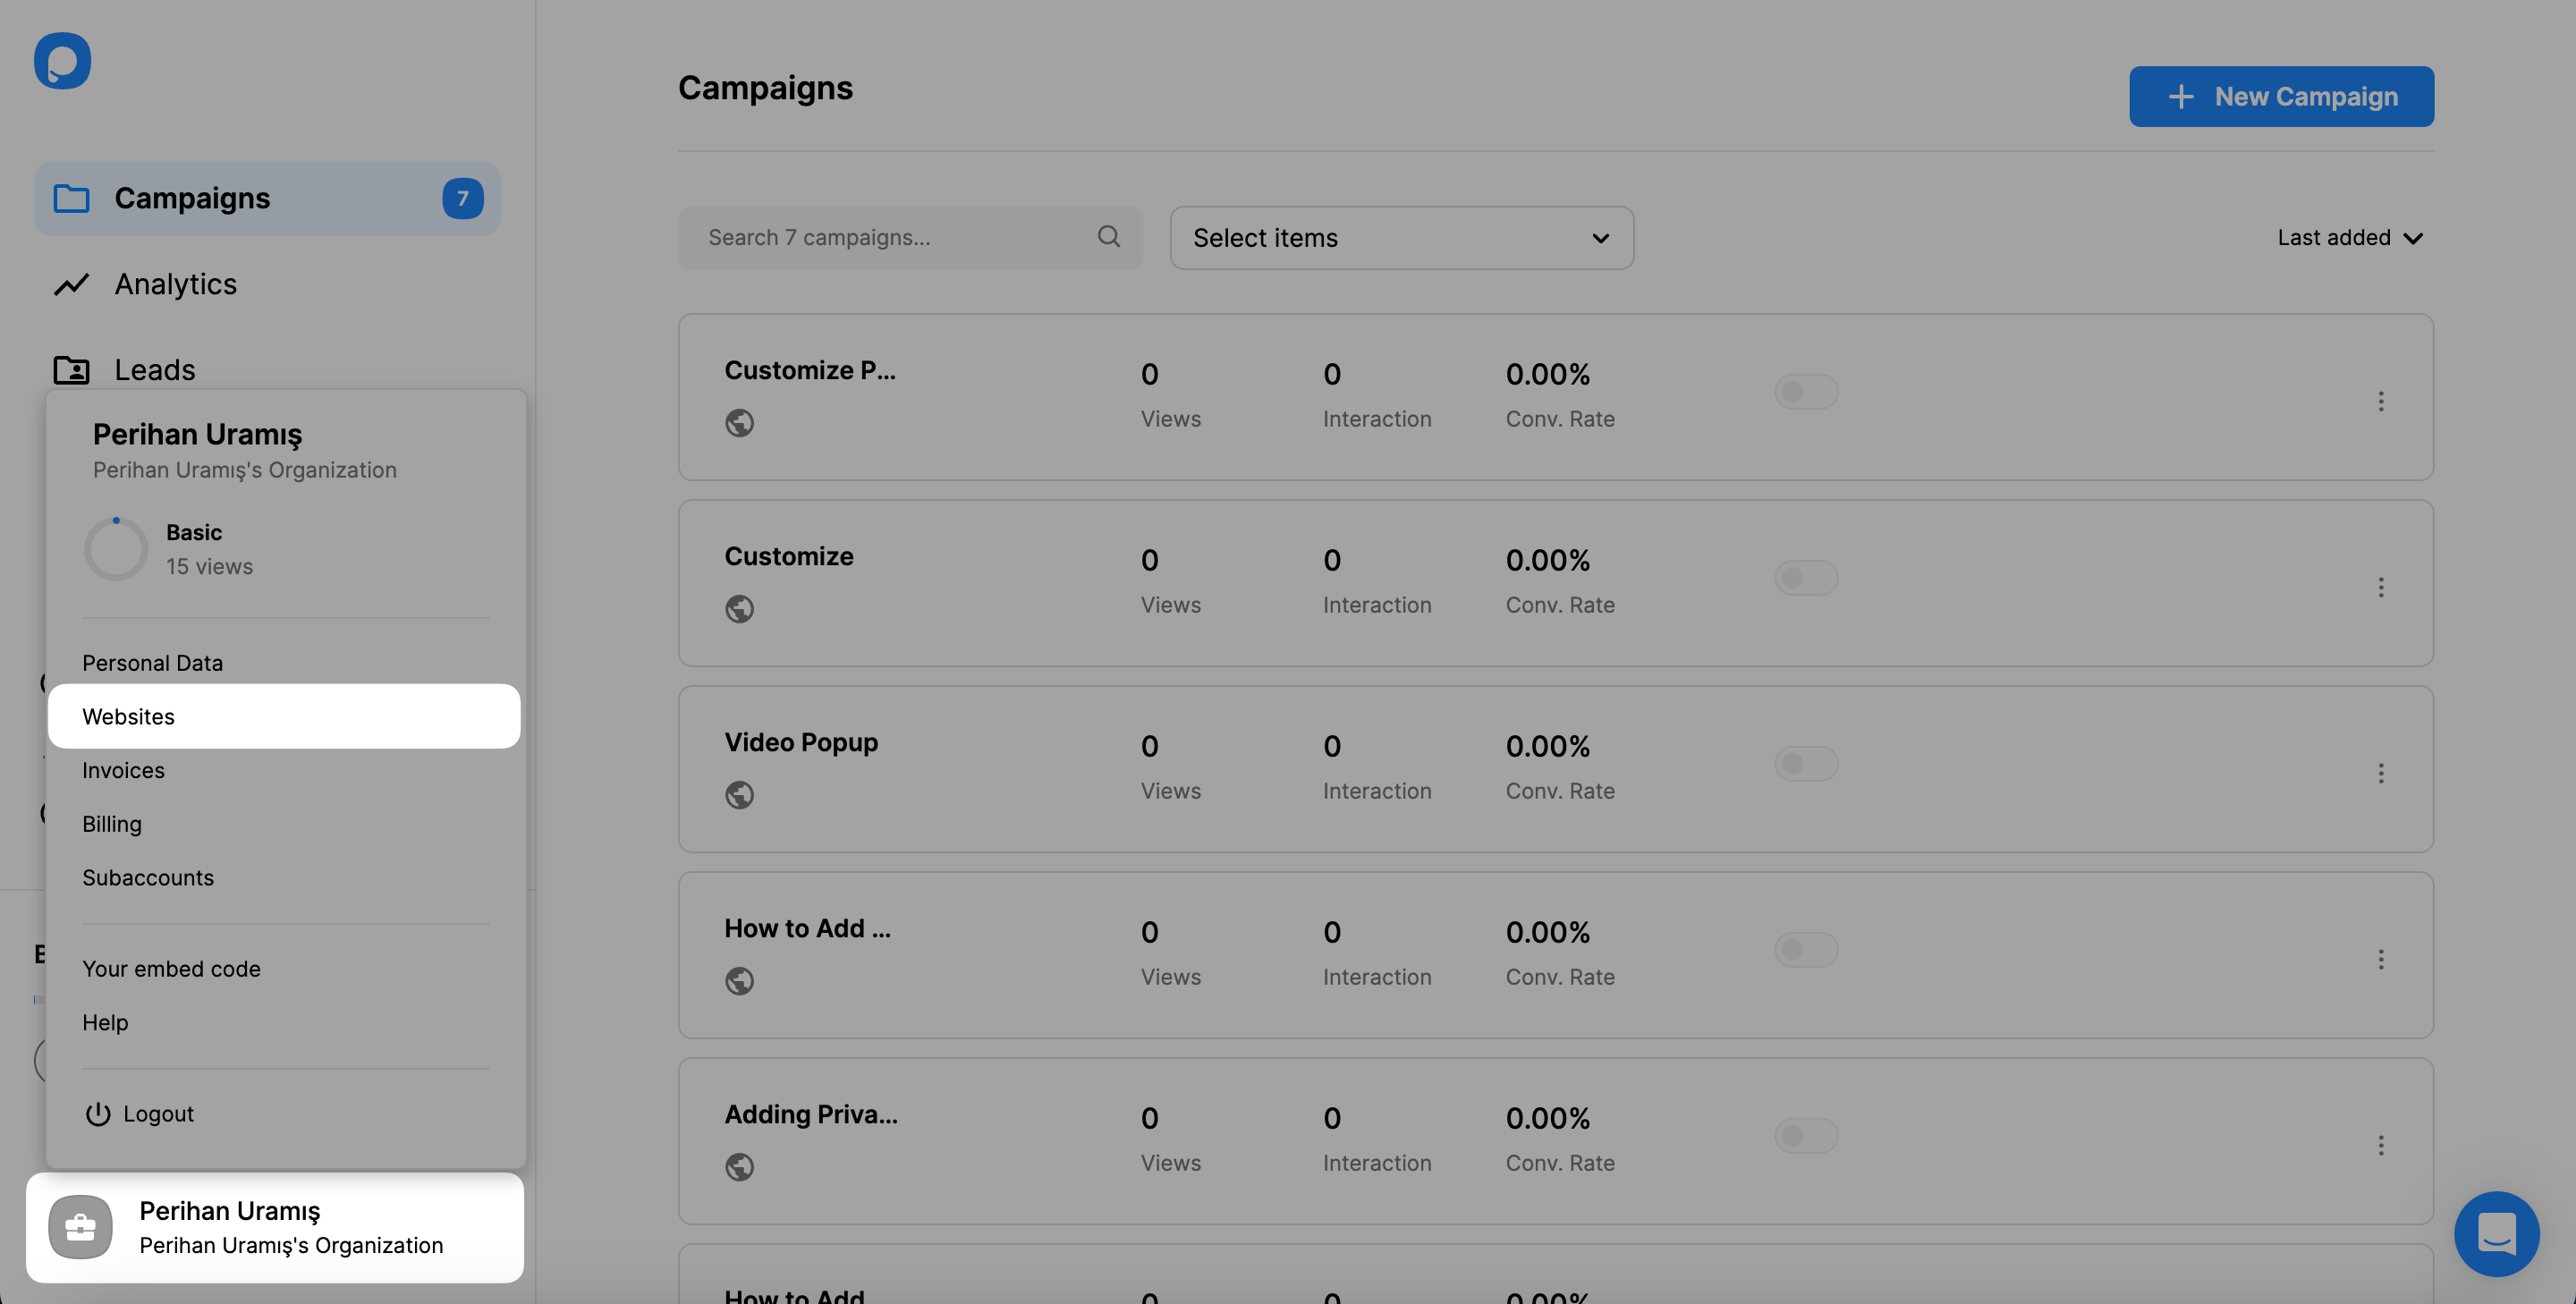
Click + New Website.
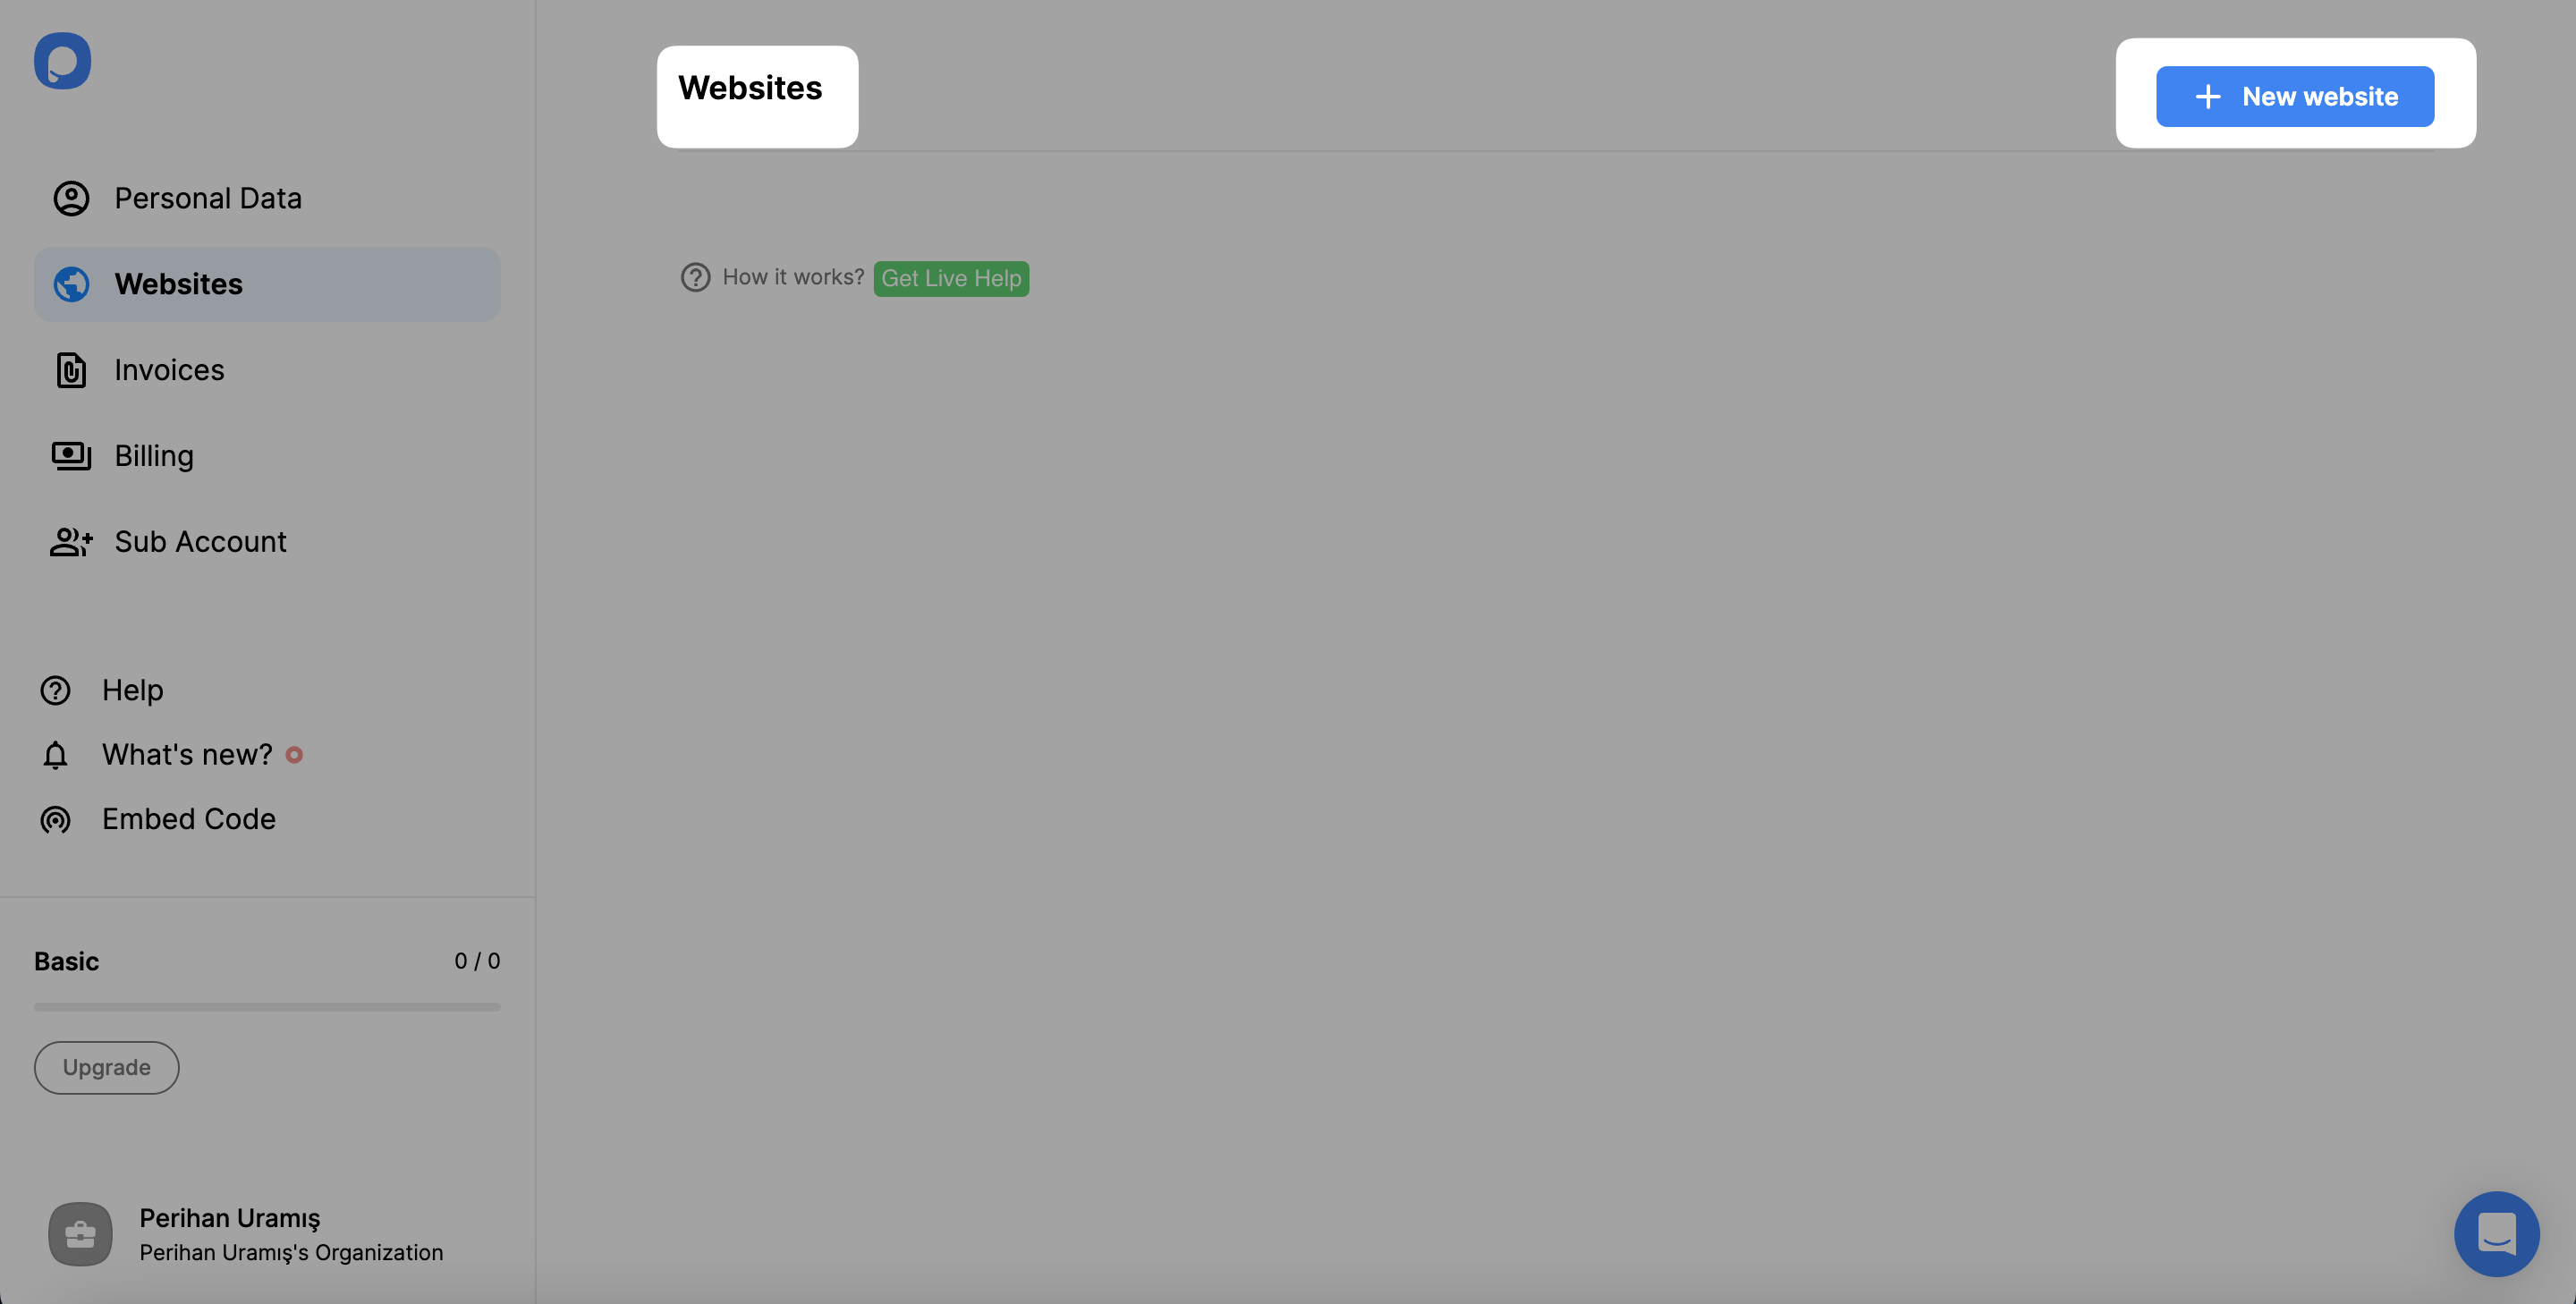
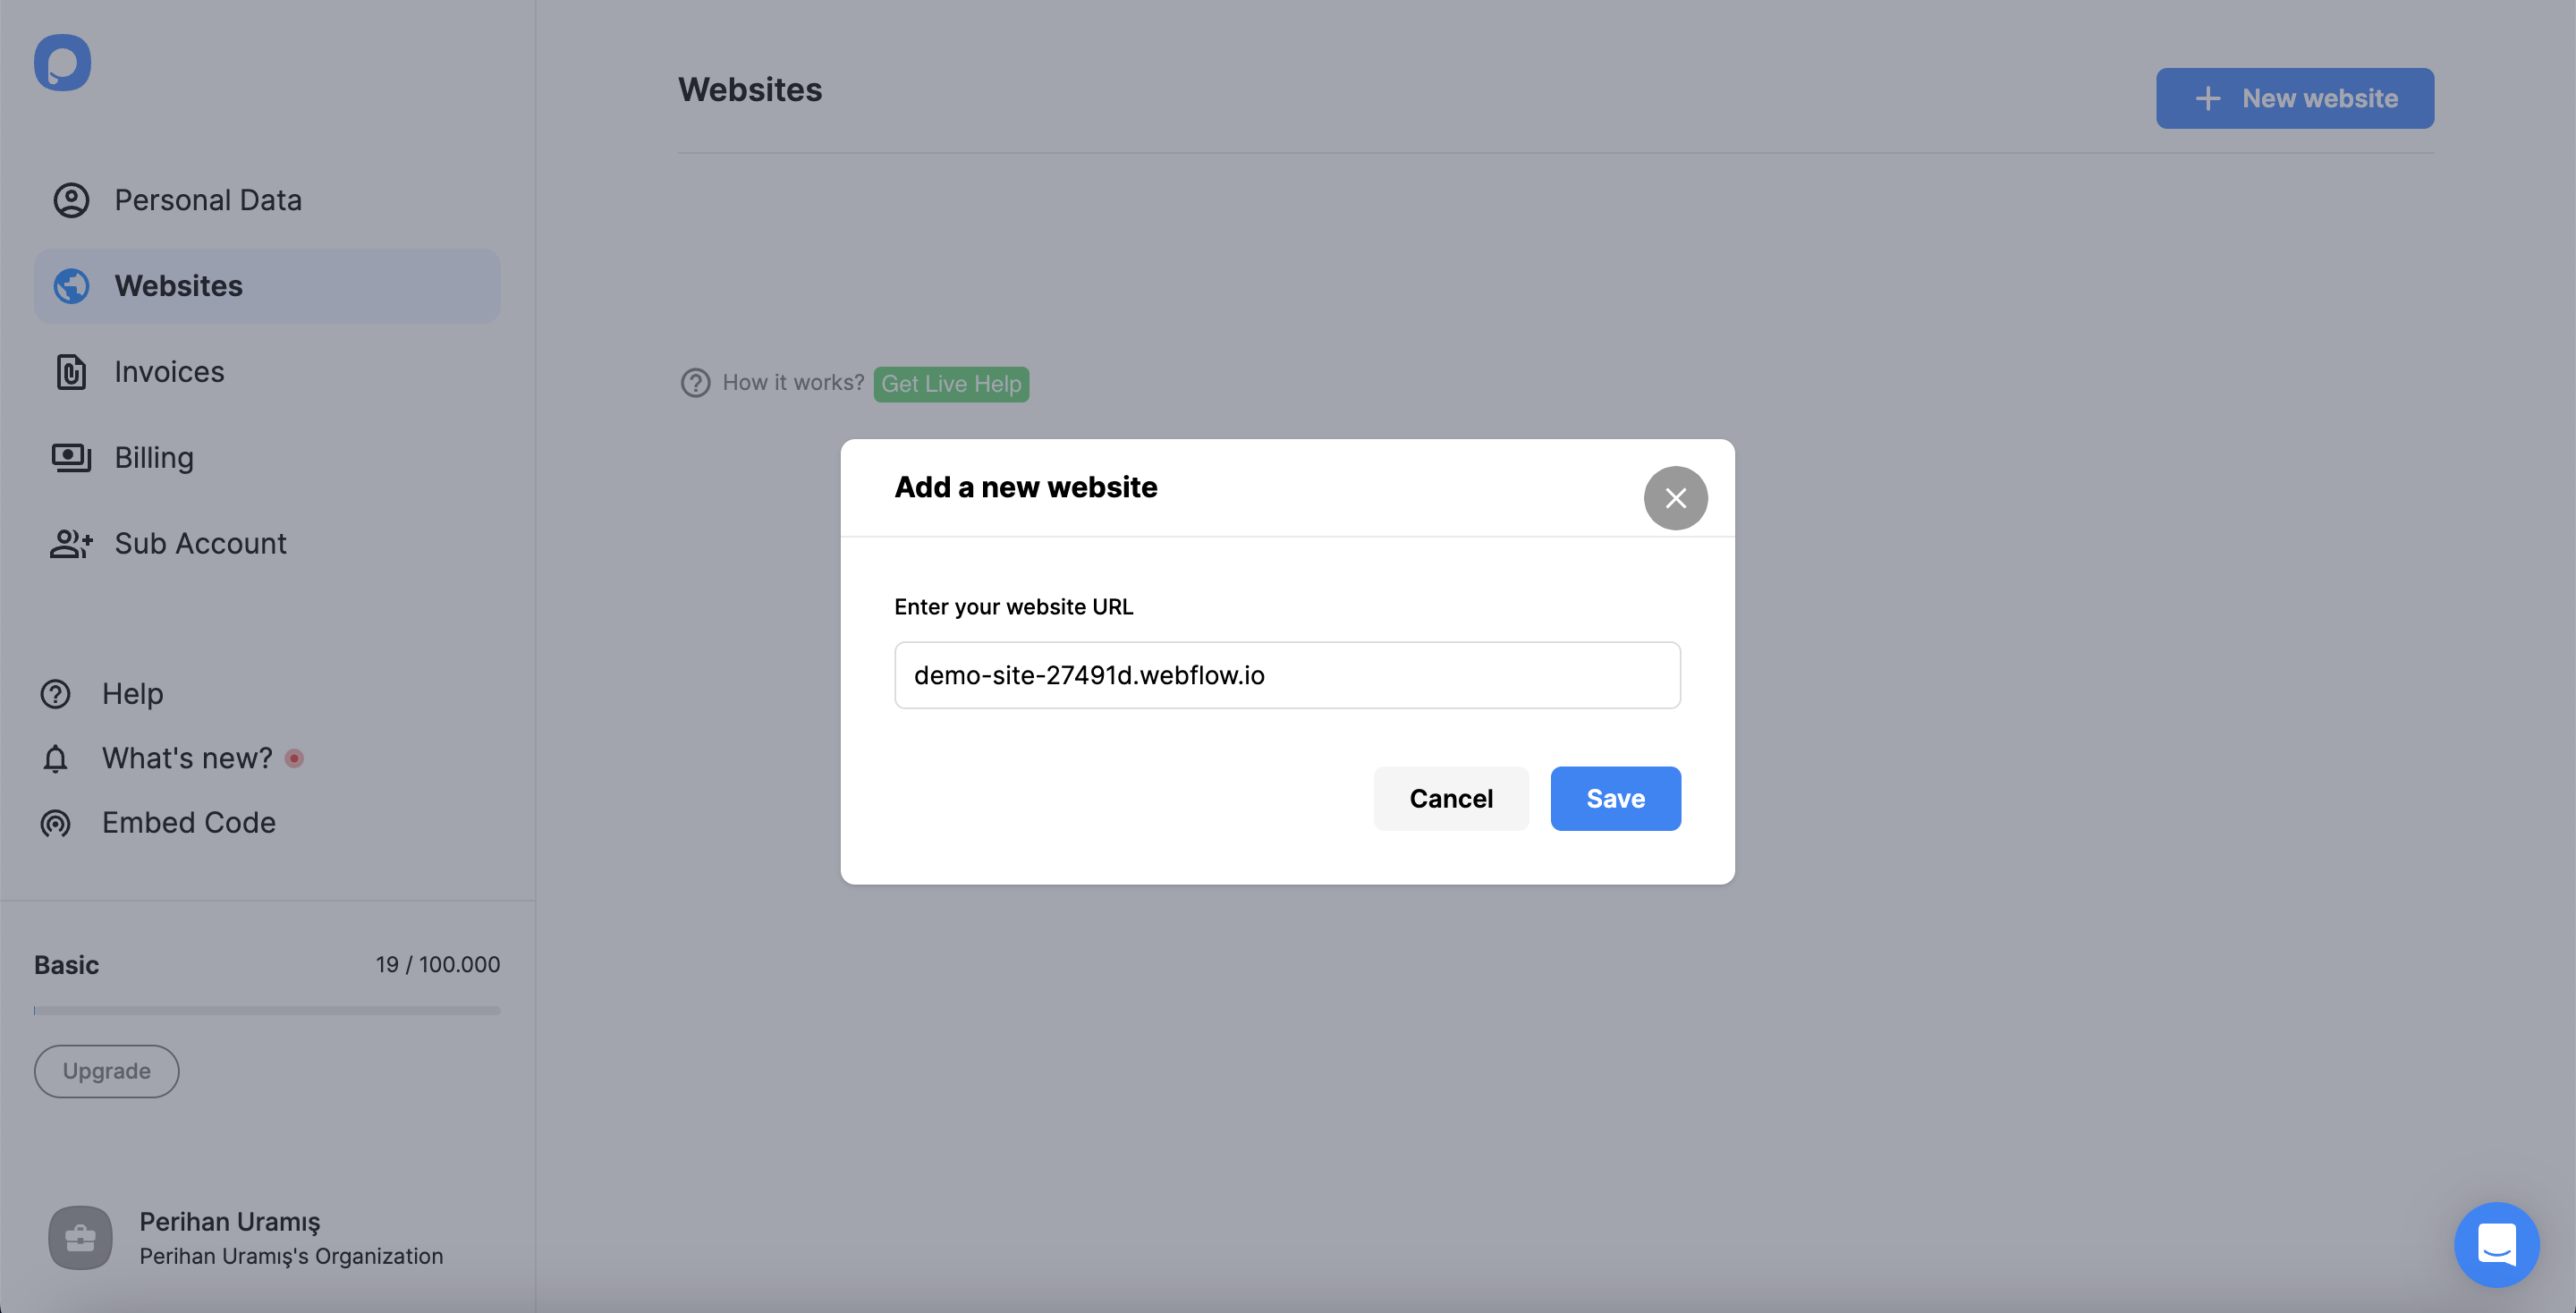
Enter the address your visitors use and click Save. The screenshots use a webflow.io address; if your site has a custom domain, add that instead.
Once Popupsmart finds the code on the published site, the website shows as Verified.
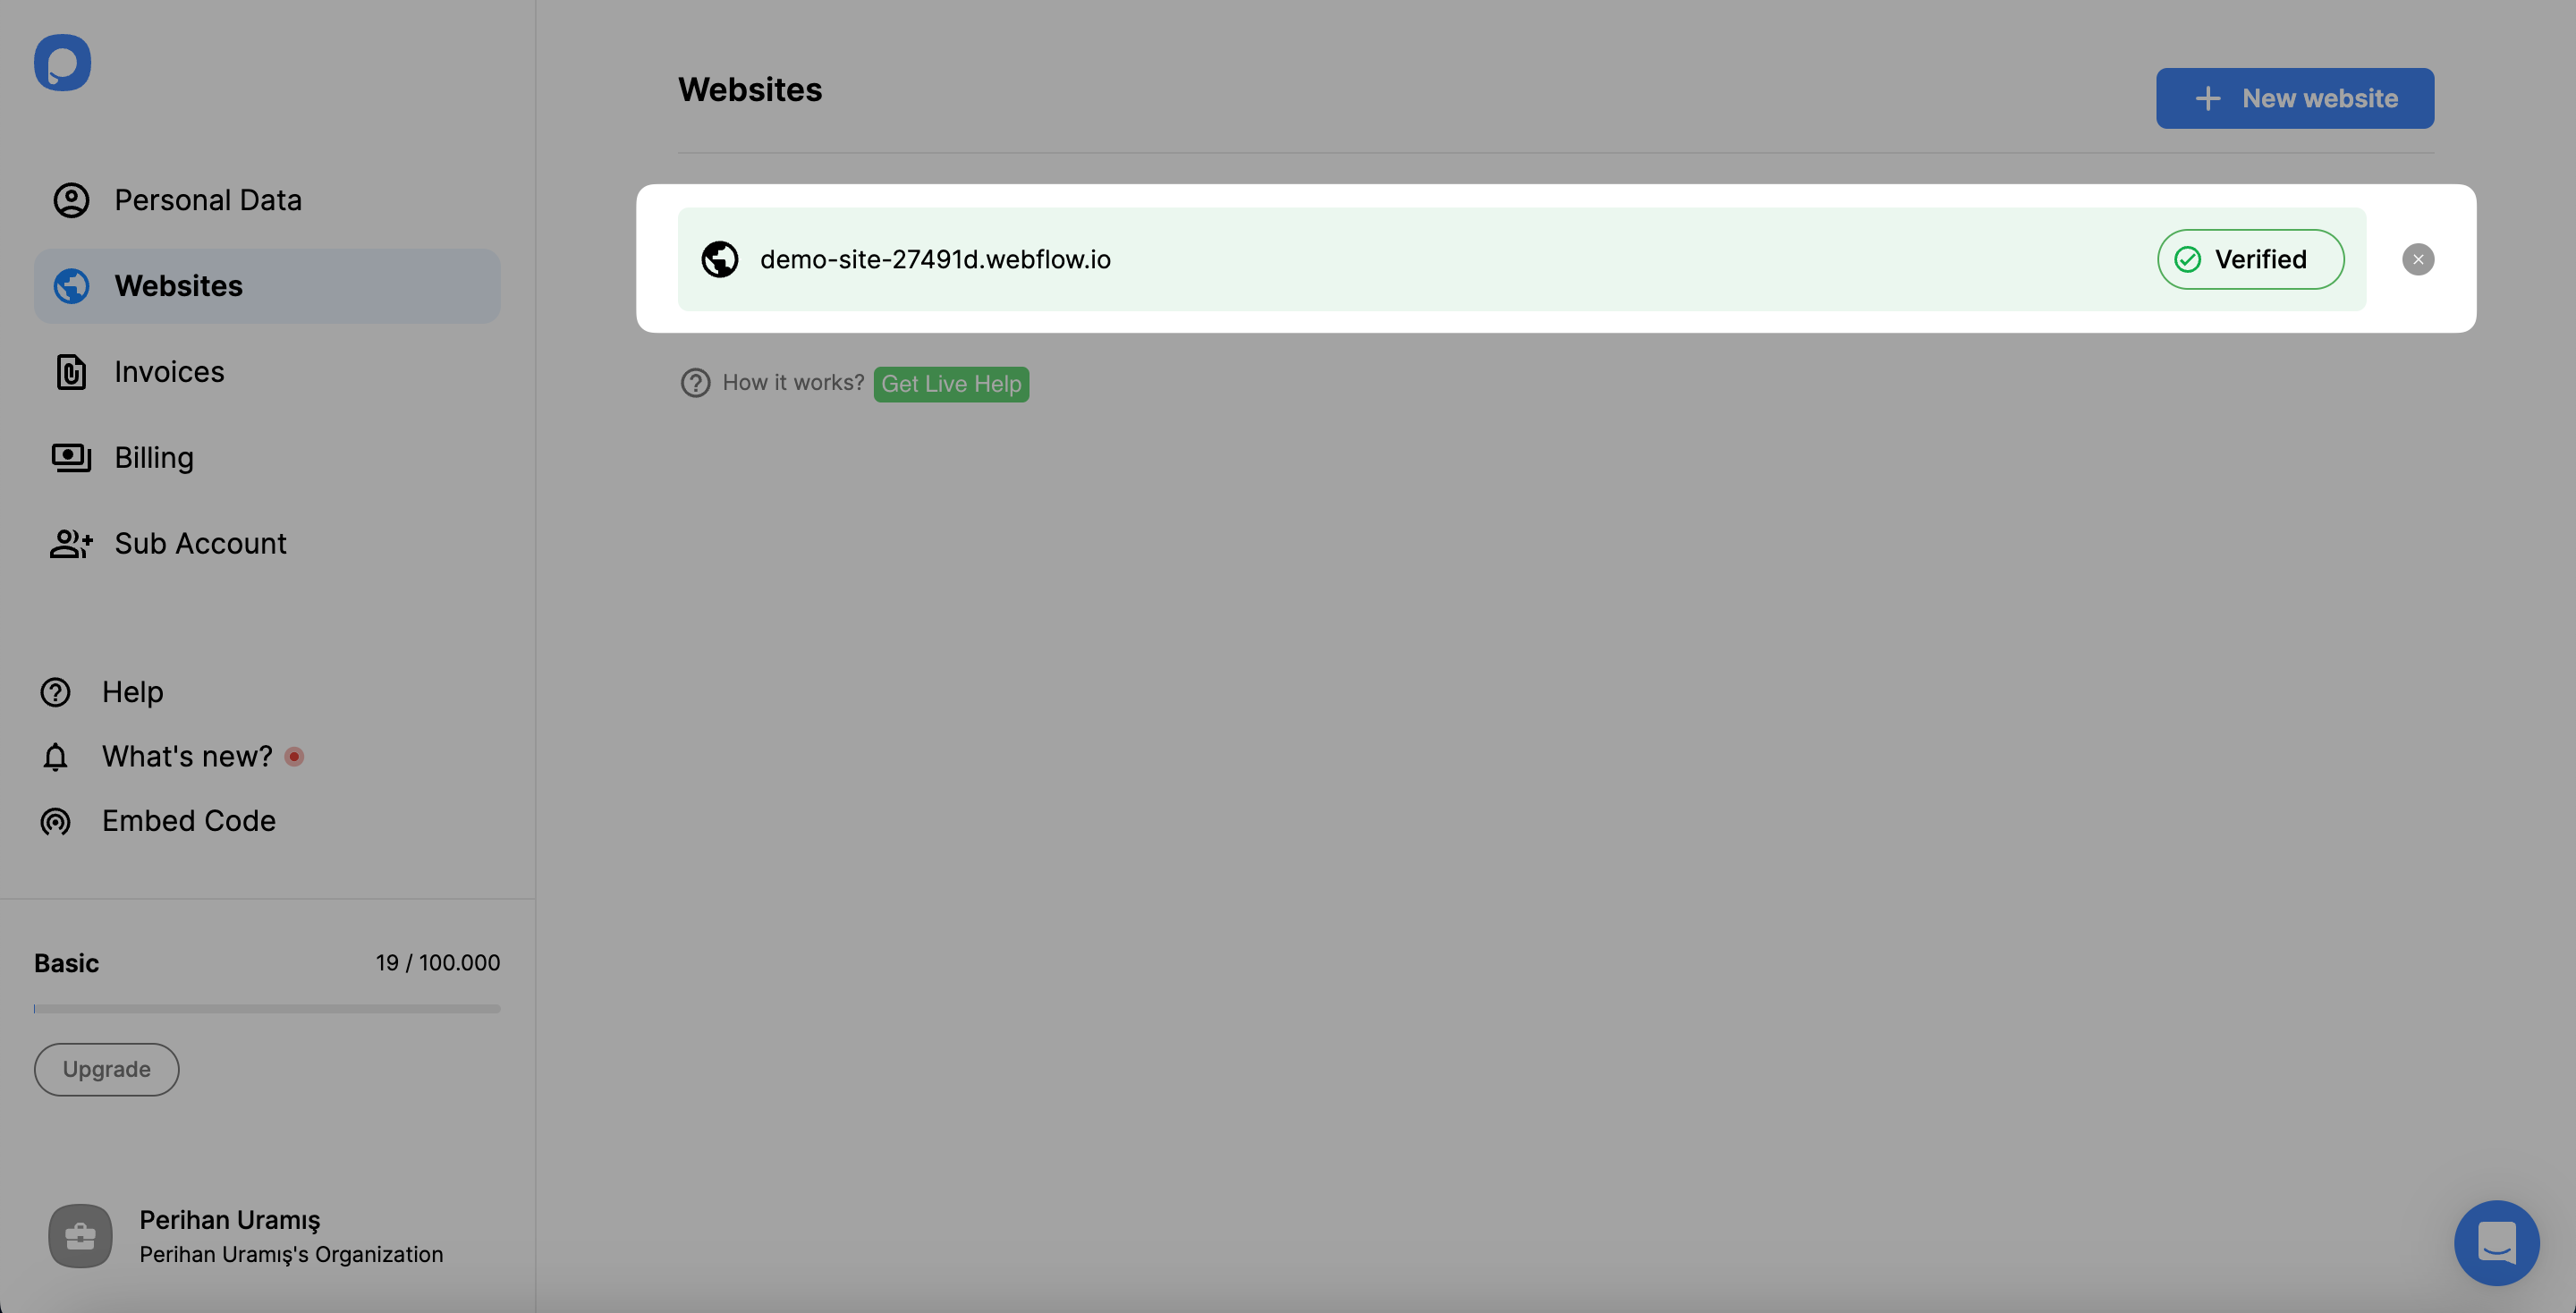
If it shows as Unverified, click Unverified, then Verify website, and go back to the dashboard and click Refresh. The guide to verifying your website covers the other cases.
Step 7: Create your popup
Click + New Campaign. Name the campaign, choose your Webflow website and click Next.
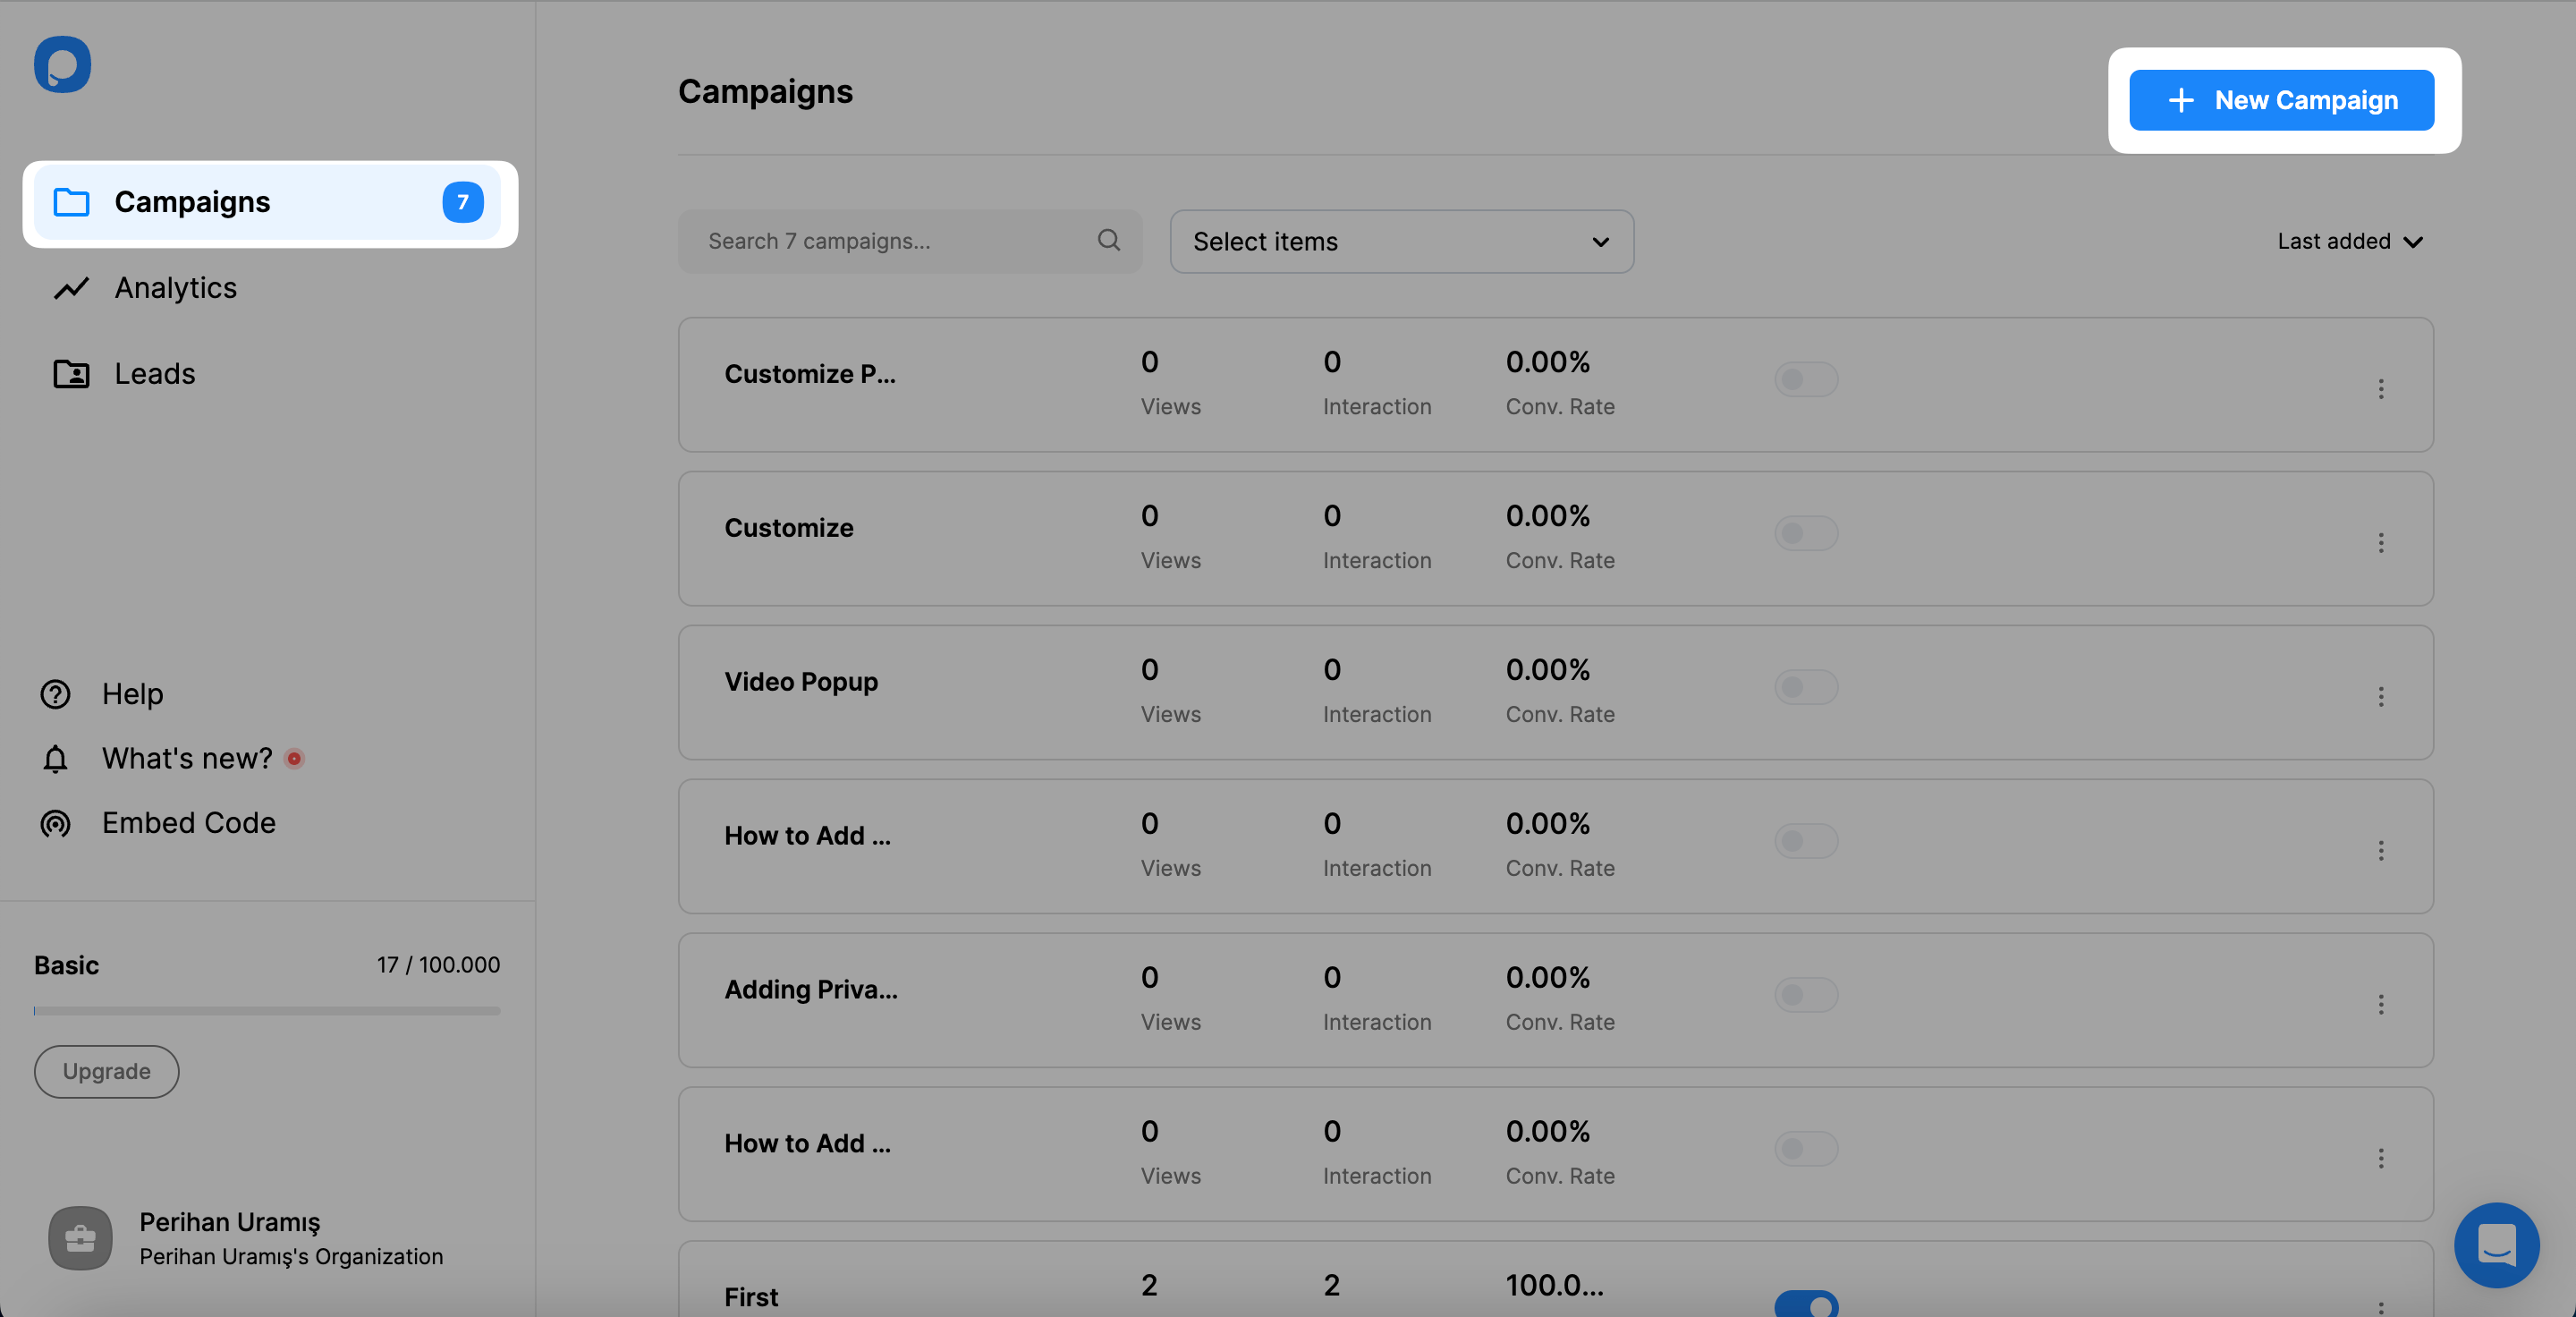
Pick a template. Change its copy, colours and form fields in the Customize and Style steps, choose who sees it in Segment, and click Save.
Step 8: Publish and check the popup on your site
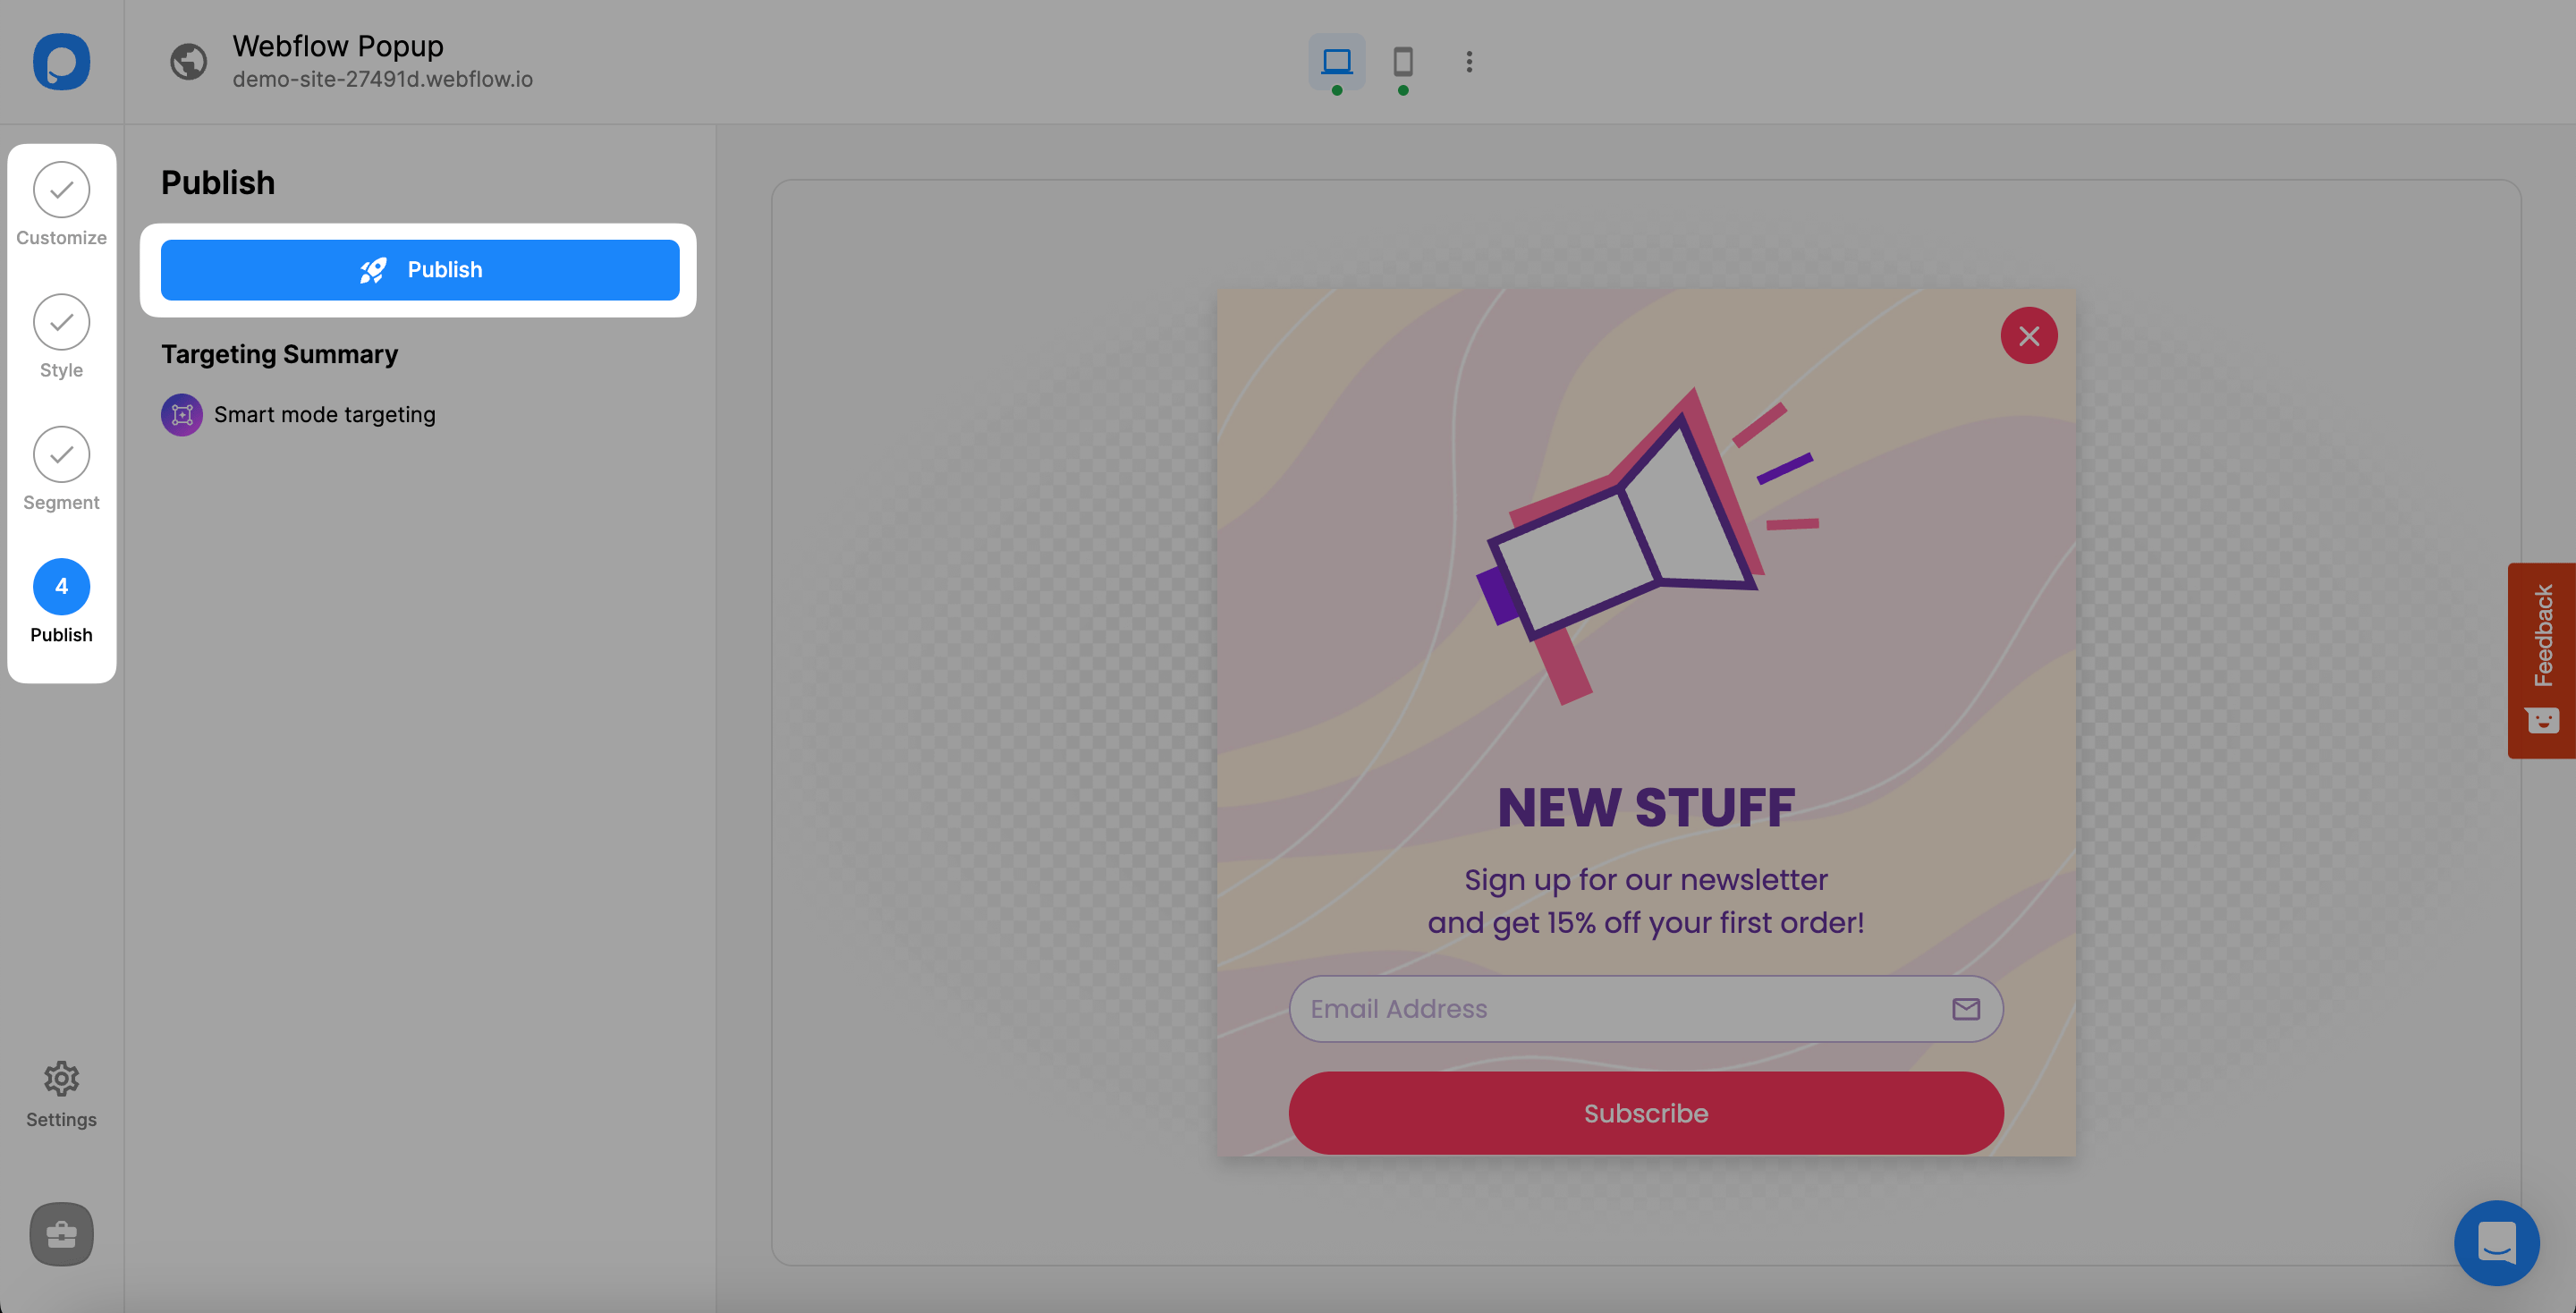
Open the Publish step and click Publish. Then open your published site in a private window. The popup appears when its trigger fires.
Does Webflow have a built-in popup?
No. Webflow has no popup element or popup settings; a pop-up on a Webflow site is a modal built by hand. Webflow's own tutorial builds one from a form block and Interactions: the modal starts hidden on page load and opens when a visitor clicks a button. As of September 2026, the triggers in Webflow's Interactions guide cover clicks, hovers, scrolling, mouse movement and page load, and none of them is exit intent.
| A Webflow modal built with Interactions | Popupsmart | |
|---|---|---|
| How you build it | A div, a form block and Interactions in the Designer | A template in Popupsmart's visual editor |
| When it opens | An Interactions trigger, such as a click, scroll or page load; no exit-intent trigger | Exit intent, scroll depth, time on page, or a click |
| Pages | The pages you add the modal to | URL and device rules on each campaign |
| Where the leads go | Webflow's form submissions, under Site settings → Forms | The help center lists 19 destinations, including HubSpot, Mailchimp and Klaviyo |
| Changing it | Edit in the Designer, then publish the site again | Edit in the Popupsmart dashboard; no republish |
| A/B testing | Not documented | From the Advanced plan |
| Price | Included in Webflow | Free plan: one website, one live popup, 5,000 pageviews a month; paid plans from $39 a month |
A hand-built modal matches your design exactly, which is a real advantage on a design-led site, and for a box that opens on a click it's often all you need. Popupsmart earns its install when the popup needs rules around it: exit intent, a URL condition, leads in HubSpot or Mailchimp instead of Webflow's form submissions, and changes that go live without a republish. The Webflow Apps marketplace also lists popup apps that run inside Webflow.
How do you add a popup contact form to Webflow?
A Webflow popup contact form is a popup with a few form fields whose answers reach your inbox or CRM. You can build it as a Webflow form block inside a modal, or as a Popupsmart popup with form fields.
A form block inside a Webflow modal works like any Webflow form: according to Webflow's form submissions guide, the submissions are stored under Site settings → Forms. In Popupsmart, you drag the fields into the popup on the Customize step: Short Text & Long Input for a name or a message, Email, Phone, Dropdown for a topic, and Notice and Consent for a consent line. Every submission lands in the Leads section of your dashboard.
To send the contacts to a CRM or email tool, connect it in the campaign's Integration section. The HubSpot popup guide and the Mailchimp popup guide walk through a connection; the help center lists 19 destinations, and a webhook, Zapier or Make covers a tool that isn't one of them. Popupsmart collects the contacts; your email tool or CRM sends the follow-up.
How to add an exit-intent popup on Webflow
Webflow's Interactions have no exit-intent trigger, so an exit-intent popup on Webflow needs either custom JavaScript or a tool that detects exit intent for you. In Popupsmart, exit intent is a setting on the campaign.
Open the campaign's Segment step, click Add user behavior targeting and add Exit Intent. On desktop, Popupsmart reads the visitor's mouse movement, with a Low, Medium or High sensitivity; on mobile, it reads how fast the visitor scrolls back up the page. The help center's exit intent targeting guide covers the settings, and exit-intent popup examples has an offer to start from.
The trigger is a lever worth testing. In Popupsmart's 2026 benchmark, popups that wait before appearing convert 0.83% against 0.61% for popups shown the instant the page loads (median campaign), a lean rather than a proven gap, and exit intent shows no statistically reliable advantage. If your Webflow popup opens on page load today, the trigger is worth deciding on purpose.
What is a modal vs. a popup?
A modal is a window that sits over the page and blocks it until the visitor closes it; a popup is any window that appears over the page, whether it blocks it or not. Webflow's tutorials call their build a "pop-up modal" because it's both: a popup that blocks the page.
The difference matters for how intrusive a message feels. Popupsmart's campaign types cover both: light popups and fullscreen popups sit over the page, while a floating bar sticks to the top or bottom of the page and leaves it usable. A signup offer on a blog post can live in a floating bar; a last offer before a visitor leaves suits a popup that asks for attention.
Where to find Webflow popup templates
Webflow popup templates come in two kinds: cloneable modals you copy into your Webflow project, and ready-made popup templates that run through the embed code. The first kind gives you the design; the second gives you the design and the rules.
Made in Webflow's pop-up modal collection lists community projects you can clone, then wire into your own pages and forms. Popupsmart's popup template library has templates you pick in + New Campaign, change in the editor and target from the Segment step, without touching the Designer. Popup ideas that fit a Webflow marketing site:
- Webinar and demo registrations on product pages: B2B lead generation popups.
- Feedback from visitors and trial users: popup survey examples.
How do you show a popup only on some Webflow pages?
Keep the code in Site settings and set the pages on each campaign in Popupsmart, with a URL rule such as "the URL contains /blog". Webflow also has custom code per page (the page's settings, then Custom code, before the </body> tag), but code placed there loads only on that page, so every other popup you build later is tied to it. The help center's page on URL targeting shows how to show or hide a popup by address.
Does a popup slow down a Webflow site?
A Popupsmart popup doesn't hold up your Webflow pages: the embed code sits before the closing </body> tag and loads asynchronously (async defer), so the browser builds your page before it fetches Popupsmart. It adds one script tag to your published pages and nothing to the Designer.
Popup not showing on Webflow? Check these
When a Webflow popup doesn't appear, work down this list; the first three causes are specific to Webflow.
- The site hasn't been published since you added the code. Custom code goes live only on publish; publish to every domain again.
- The plan doesn't allow custom code. Webflow unlocks site-wide custom code with a paid Site plan or a paid Workspace plan.
- You're looking in the Designer. Check the published site in a private window, not the Designer canvas.
- The address doesn't match. Your webflow.io address and your custom domain are different sites to a browser, and so are
www.example.comandexample.com. Add the address your visitors actually use. - The website isn't verified. A campaign runs only on a verified website; see Step 6.
- The trigger hasn't fired yet. An exit-intent or scroll trigger waits for the visitor to leave or scroll; test in a private window and behave like a visitor.
Webflow popup FAQ
Is there a free way to add a popup to Webflow?
Yes, on the Popupsmart side. Popupsmart's free plan is permanent, not a trial: one website, one live popup and 5,000 pageviews a month, with Popupsmart branding. On the Webflow side, custom code in Site settings needs a paid Site plan or a paid Workspace plan.
The Popupsmart pricing page compares the free plan with the paid plans.
Do I need to republish my Webflow site every time I change a popup?
No. You publish Webflow once, after adding the embed code. After that, the campaigns you create, edit or pause in Popupsmart go live from the Popupsmart dashboard, because the same embed code loads all of them.
Can a Webflow popup open on click or on page load?
Yes, both. A Popupsmart campaign can open as soon as the page loads or after a number of seconds you set, and On-Click targeting opens it from a button: the Segment step gives you a line of code to attach to the button's click event. A hand-built Webflow modal uses the page load and click triggers in Interactions for the same two jobs.
The help center's On-Click targeting guide shows where the code goes.
How long does it take to add a popup to Webflow?
The Webflow side is one paste into Footer code and one publish; the rest is building the popup. Among people who published a campaign in the 90 days to 16 September 2026, the median time from signup to the first published campaign was 32.5 minutes, and 287 of 332 published within a day, according to Popupsmart's own product data. That figure covers every platform, not Webflow alone.
Do I need a Webflow app for popups?
No. Popupsmart runs from the embed code in your site's custom code settings, so there is nothing to install from the Webflow Apps marketplace and nothing to update.