5 Best Popup Overlay Examples That Convert in 2026
Explains popup overlays, best practices (clear goals, strong CTA, brief copy, contrast, brand-fit, minimal fields, mobile), and showcases brand examples (D&G, Nike, Brunomagli, CoSchedule, Revolve). Includes a quick Popupsmart no-code setup guide.
Believe it or not, pop-ups convert! And, If you use them right, they can be an asset for lead generation and email list building.
There are a variety of options available as popup use-cases you can use to promote your business and improve your overall revenue. However, creating a brief, customized, and engaging popup overlay can be tricky.
These five popup overlay examples from Dolce & Gabbana, Nike, Bruno Magli, Coschedule, and Revolve show what high-converting overlays look like in 2026. Each teardown breaks down the design choices, the targeting logic, and the underlying conversion principle so you can rebuild the pattern on your own site this week.

What is a popup overlay?
A popup overlay is a website element that opens on top of the page content with a darkened or blurred background behind it. The background dim does the heavy lifting. It pulls focus, narrows attention, and forces a single decision: act on the offer or close the window.
Designers also call this pattern a lightbox or a modal popup. The names mean roughly the same thing in marketing, even if the underlying code differs. The shared trait is the focus-stealing layer that sits between the visitor and the rest of the page.
I've audited dozens of popup overlay campaigns across e-commerce and SaaS sites since 2022. The ones that perform always do one of three jobs well: capture an email, deliver a discount, or rescue an exit. The ones that flop usually try to do all three at once, with cluttered copy and a CTA that fights itself.
Overlays are different from interstitial popups (which take over the full screen and block scroll), welcome popups (a use-case category that often runs as an overlay), and slide-ins or sticky bars (which never dim the background). Knowing which format you're choosing is the first decision before you write a single line of copy.
Why popup overlays still work in 2026
Popups have a reputation problem, but the data tells a different story. After writing about popup conversion for years, I keep seeing the same pattern: a well-targeted overlay outperforms a banner or a slide-in by a wide margin, even as overall opt-in rates trend down.
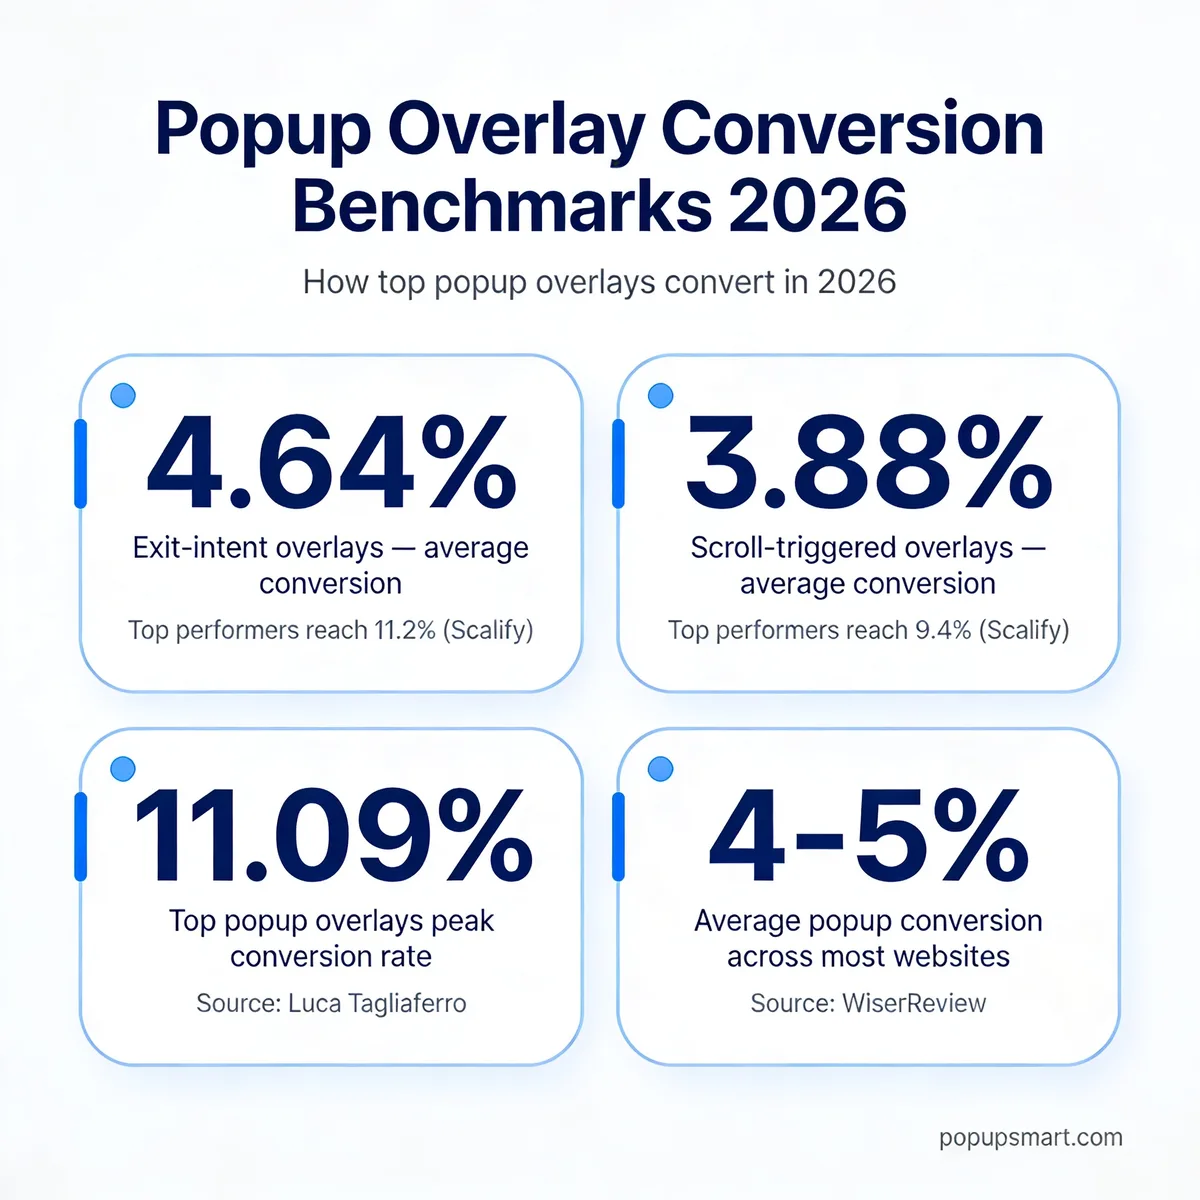
Popup overlay conversion benchmarks for 2026.
According to Oscar Chat, average popup conversion rates sit around 4% to 5%, while top campaigns climb much higher. The exit-intent format pulls even better numbers. Data from Scalify shows exit-intent overlays converting at 4.64% on average and 11.2% for the strongest performers, which is the difference between a campaign you forget about and a channel that funds itself.
The trend line isn't pure good news. Build Grow Scale reports email-capture popups dropped 43% year-over-year, with the 2026 average opt-in rate at 2.2% versus 3.8% in 2025. Translation: lazy popups are losing ground fast. The overlays winning in 2026 do four things the losing ones don't — they target a specific visitor segment, lead with a concrete offer, run on a sensible trigger, and respect mobile users.
There's also the case for upside. A Zotabox case study documented a fashion store lifting overall conversion 25% after adding a sale popup tied to its sales calendar. That's the gap between treating popups as decoration versus treating them as a paid-traffic asset.
5 best popup overlay examples that convert
I picked these five overlays because each one teaches a different lesson. One nails brand-matched aesthetics, one cuts copy to the bone, one trades a discount for an email, one rescues exits with a soft sell, and one combines a coupon with a refusal option that still serves the brand. Read them in order and you'll have five distinct patterns you can layer into one campaign.
1. Dolce & Gabbana — newsletter overlay
The Dolce & Gabbana popup is the textbook example of brand-matched design. It looks like a page from the editorial. The same model imagery, the same black-and-white palette, the same typography. Nothing about it feels like a third-party widget bolted onto the site.
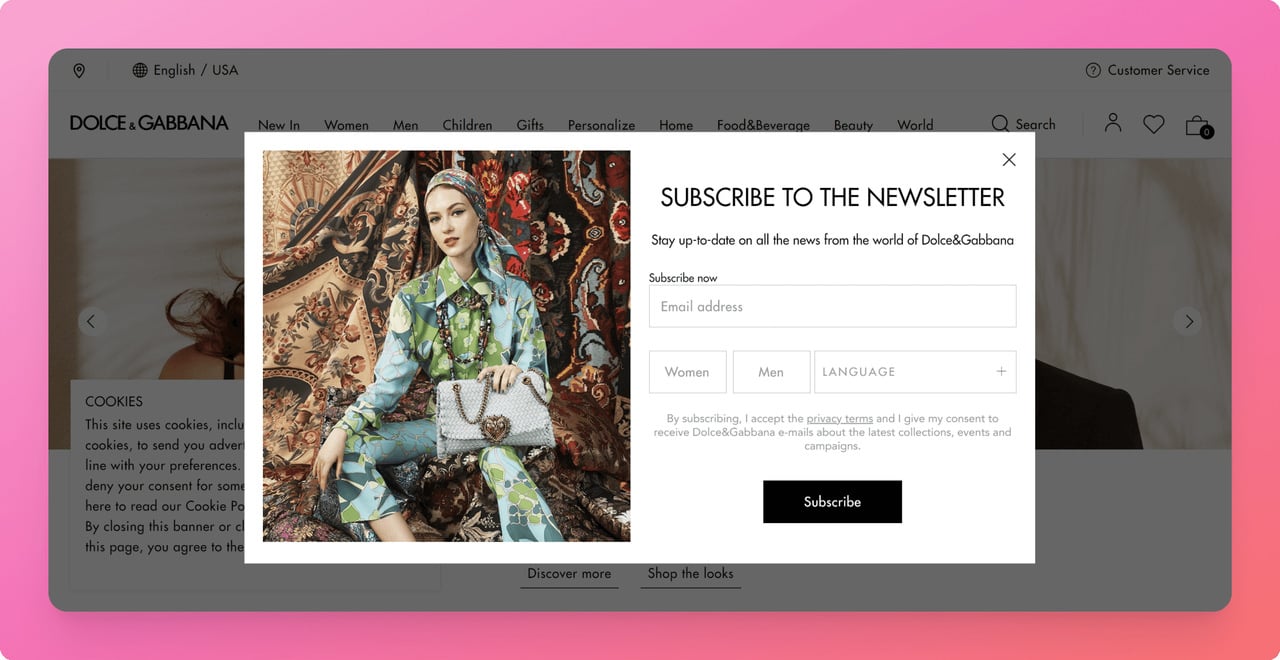
Dolce & Gabbana newsletter overlay using full-bleed editorial imagery.
What it does: The overlay captures email plus two preference fields — gender and language. It runs on entry, takes up most of the viewport, and dims the catalogue behind it. The copy promises early access to new collections rather than a discount, which fits the luxury positioning.
Why it works: Luxury buyers don't respond to "10% off" the way mass-market shoppers do. The brand swapped the price hook for an exclusivity hook, then used the two extra fields to segment the list from the start. Because the popup matches the editorial style, the visual interruption is small. Your eye registers it as part of the experience, not an ad. The two extra fields slightly raise friction, but for a luxury list where each subscriber is worth more, the trade is worth it.
Key takeaway: Match your overlay to your editorial design system, not to a generic template. If your average order value justifies a smaller list, ask for the segmentation field upfront.
2. Nike — minimal email overlay
Nike took the opposite path from Dolce & Gabbana. Where D&G uses imagery, Nike uses near-empty space. Where D&G adds preference fields, Nike asks for the bare minimum and saves the rest for the welcome email.

Nike's minimalist email overlay built around a single promise.
What it does: One headline, one short subhead, one email field, one button. The promise is "be the first to know" — early access to drops, which for Nike's sneaker audience reads as inventory access on limited releases. The visual restraint matches the brand's product photography, which already relies on white space.
Why it works: This is Hick's Law in action. The fewer choices you give a visitor, the faster they decide. By stripping every element except the email field, Nike forces a binary: enter the address or close. There's no birthday picker, no preference grid, no second CTA competing for attention. The result is the popup form converts in seconds, not minutes. The early-access angle taps loss aversion — sneakerheads care more about missing a drop than getting a discount.
Key takeaway: Cut your popup form to one field. Collect email first and ask for everything else inside the welcome email — you'll convert 20-30% more visitors and lose almost no segmentation power.
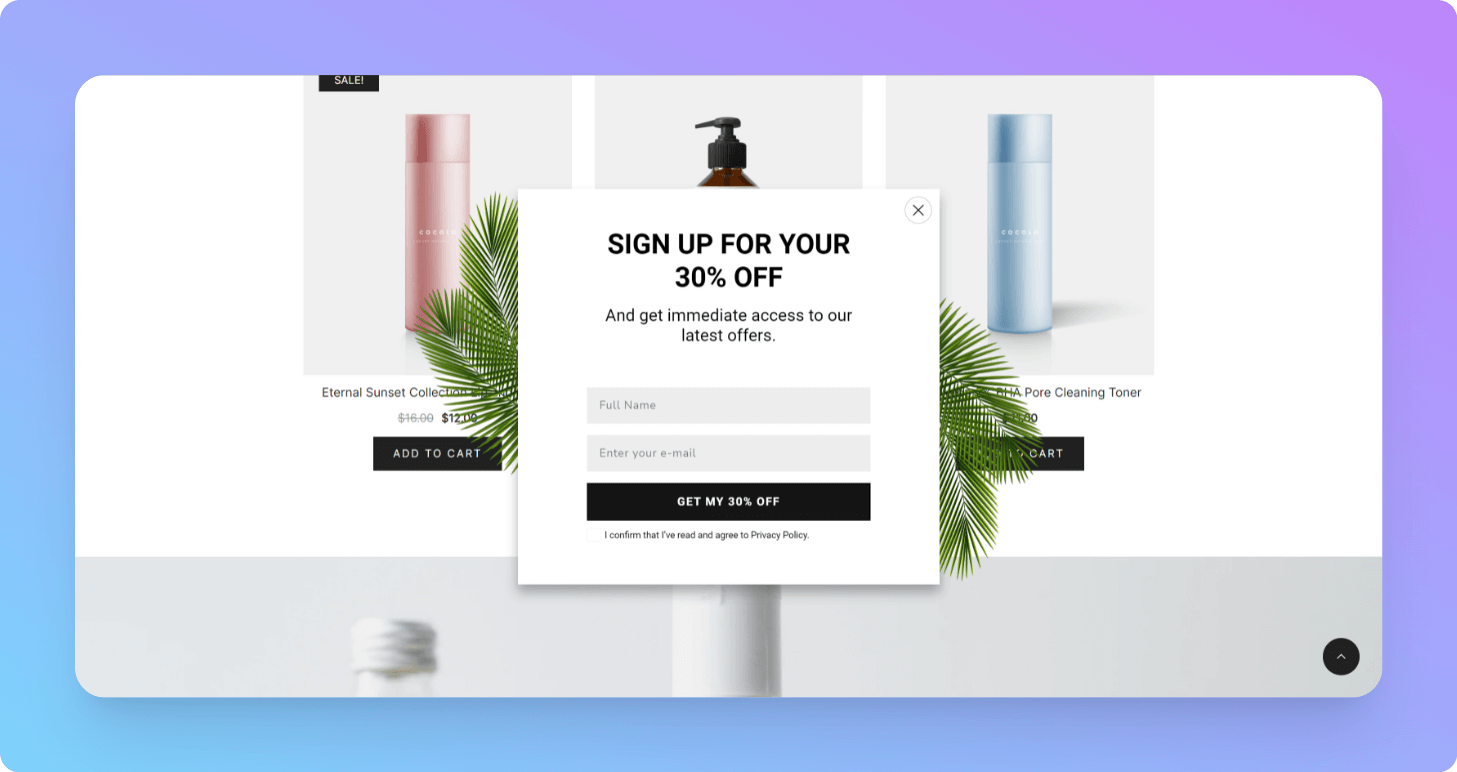
3. Bruno Magli — 15% off discount overlay
Bruno Magli runs the most copied pattern in e-commerce: enter your email, get a discount code. Yet the execution still teaches something. The overlay is tightly cropped, the offer is specific, and the visual ties the popup to the product behind it.
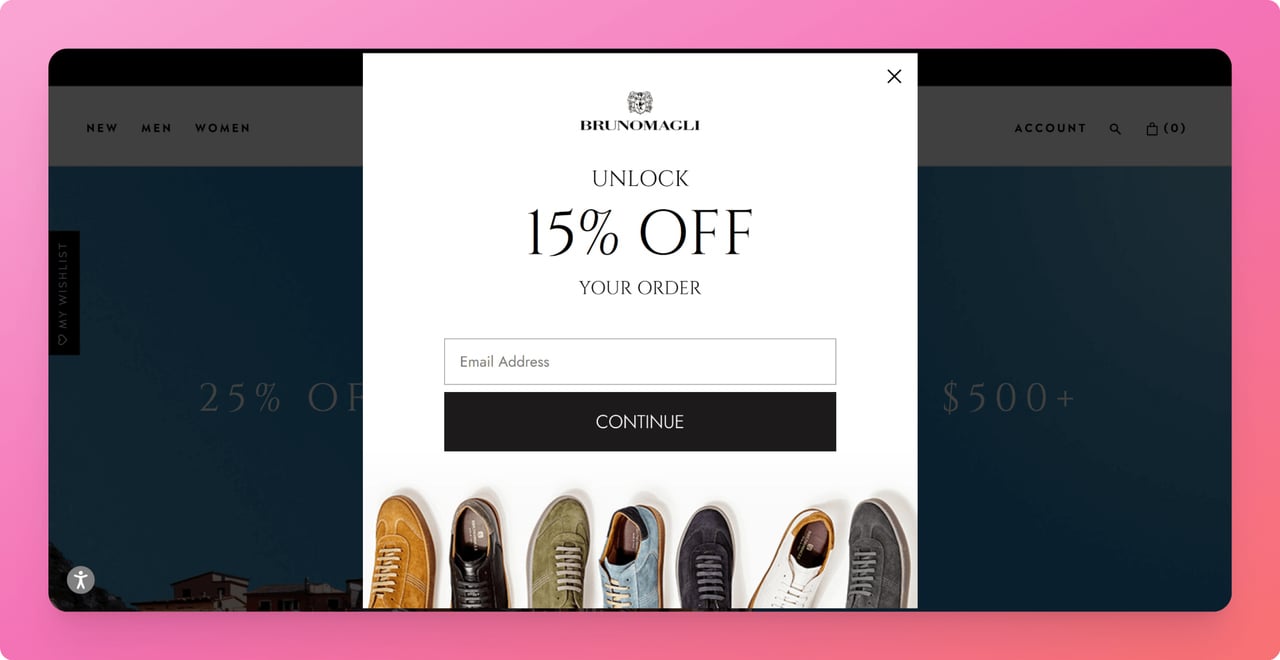
Bruno Magli's classic discount-for-email exchange.
What it does: Trigger fires on entry with a clear "15% off your order" headline. One field, one button, one optional dismiss link. The CTA color picks up a tone from the shoes shown in the background, which makes the popup feel like a continuation of the product page rather than an interruption.
Why it works: The discount is concrete and immediate, which beats vague "save more" promises every time. Discount overlays work because they reframe the email exchange as a transaction with a known payoff. The visitor isn't subscribing to a newsletter — they're buying a 15% coupon with their address. The cost-of-color match is small, but it sells the idea that the popup belongs to the brand. A misaligned color in this slot is one of the fastest ways to make an overlay feel cheap.
Key takeaway: If you run a discount overlay, name the exact percentage and pair the CTA color to a hero image on the page behind it. Vague offers ("save more today") consistently underperform specific ones.
4. Coschedule — exit-intent overlay
Coschedule's exit-intent overlay is one of the better B2B SaaS examples I've saved over the years. Instead of begging the leaver to stay, it pivots the offer — book a demo of the marketing calendar — and ties the imagery directly to the product they're selling.
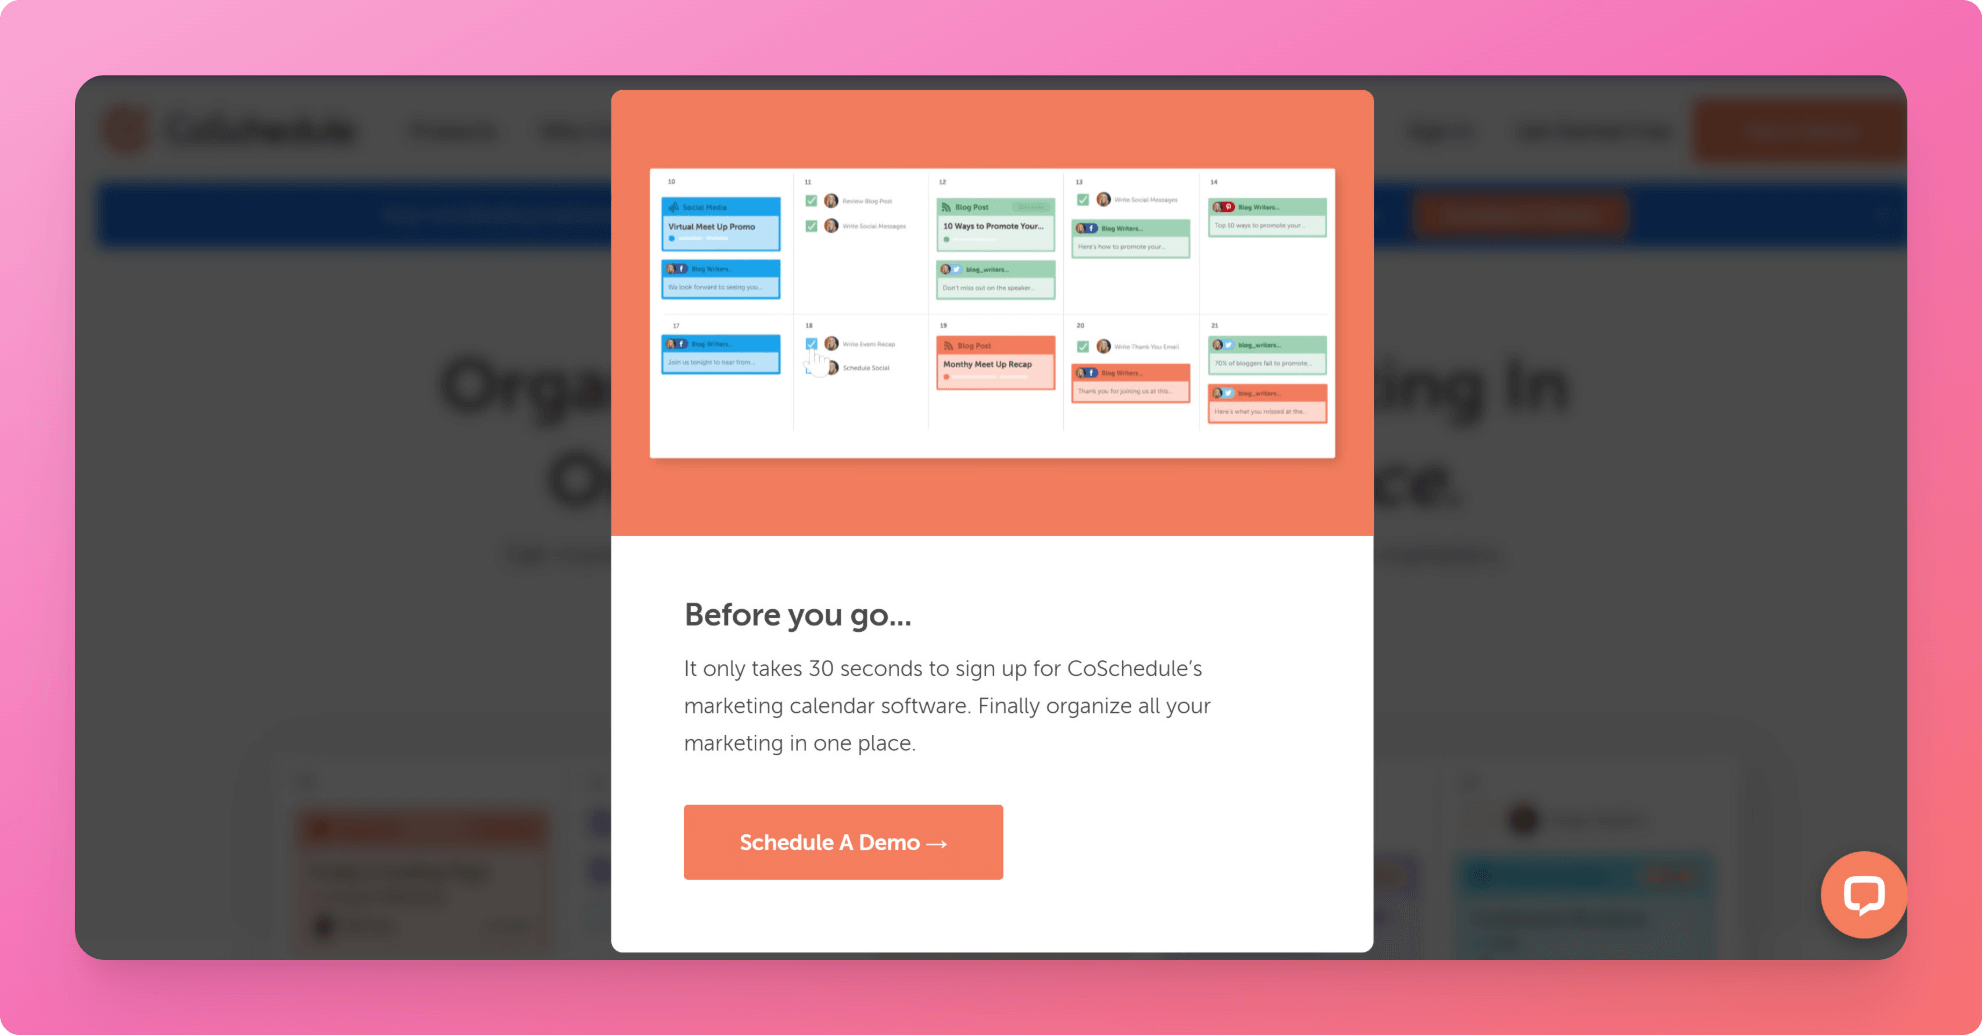
Coschedule's exit-intent overlay pivoting the visitor to a demo.
What it does: Fires when the cursor moves toward the browser's close button or the URL bar. Promotes the marketing calendar product with a screenshot and a "schedule a demo" CTA. The brand colors carry through, and the copy speaks to the visitor's likely job title rather than to a generic shopper.
Why it works: Exit-intent triggers catch visitors at the lowest-intent moment — they were leaving anyway, so the cost of interruption is near zero. Coschedule recognized that someone bouncing from the product page isn't going to convert with another "10% off" offer, since SaaS pricing doesn't work that way. A demo request is the right next step for a high-intent visitor and a useful retargeting hook for everyone else. The format is closer to a guided handoff than a save attempt, which is the right tone when your buyer is researching, not impulse-shopping.
Key takeaway: For B2B SaaS, swap the discount on your exit overlay for a demo or a high-value content offer. The visitor's exit intent signals research mode, not buying mode — your popup should respect that.
5. Revolve — discount-targeting overlay
Revolve's overlay is the most complete pattern of the five. It hits a first-time buyer with a discount, asks only for an email, and gives a respectful escape hatch that still leaves the visitor on the site.
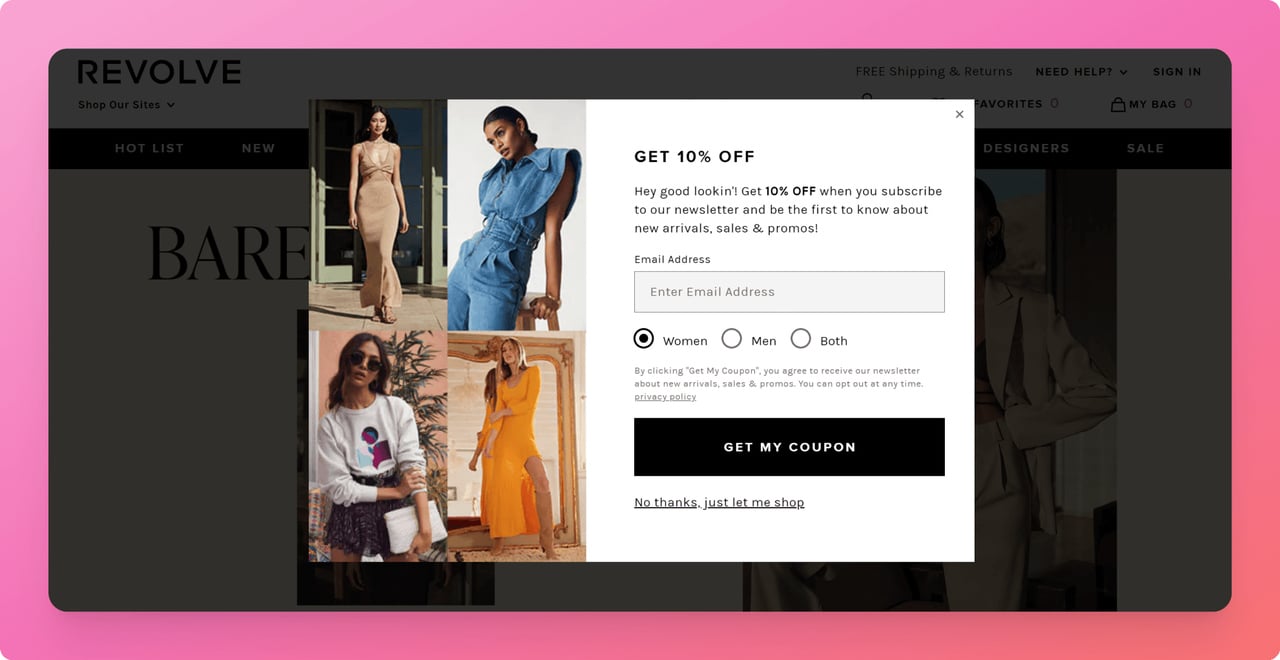
Revolve's first-time buyer overlay with a polite opt-out.
What it does: Targets first-time visitors only, fires on entry, offers a percentage discount in exchange for an email. The dismiss link reads "No thanks, just let me shop" — a soft refusal that doesn't punish the visitor for declining. There's a model image on one side and the form on the other, with the CTA in the brand's signature pink-red.
Why it works: The "first-time buyer only" segmentation is doing more work than most readers notice. Repeat visitors don't see the popup at all, which solves the most common complaint about overlays: showing the same offer over and over. The dismiss text is the second smart move. Cision PR Newswire reports 92% of first-time retail visitors aren't there to buy, so an overlay that lets the non-buyers continue browsing without guilt protects future intent. Revolve hedges the conversion bet without losing the email opportunity.
Key takeaway: Add segmentation by visit count to every discount overlay. Pair the offer with a dismiss link that returns the visitor to the page, not a closed tab.
Common patterns in high-converting popup overlays
Five overlays, five different brands, five different audiences. Yet the patterns repeat. After studying these and dozens of others in our team's testing, here's what shows up in every winner.
• One value prop per overlay. Every example above promises one thing — early access, a 15% discount, a demo. None of them tries to sell three benefits at once. When you stack offers, conversion drops because the visitor has to evaluate each one before deciding.
• One primary CTA, one secondary action. The button does the work. The dismiss link is small, polite, and never competes for visual weight. There's no third option ("Maybe later," "Tell me more"), because every extra choice slows the decision.
• Brand-matched design. Dolce & Gabbana's editorial style, Nike's white space, Revolve's pink CTA — each overlay reads as part of the site, not as a third-party widget. A misaligned overlay raises the visitor's defensive instincts within the first second.
• Minimal form fields. Email-only beats email-plus-name almost every time we test it. Nike's overlay collects exactly one piece of data. Dolce & Gabbana adds two preference fields, but only because their luxury list demands the segmentation upfront.
• Trigger that matches intent. Entry triggers work for first-time discount offers. Exit-intent works when the visitor has already shown research-mode behavior. Time-based and scroll-based triggers fit content sites where engagement signals come later. Wrong trigger, wrong popup.
• Mobile-first sizing. Every example I kept renders cleanly on a phone, with thumb-reachable CTAs and dismiss buttons. An overlay that traps a mobile visitor is a refund request waiting to happen.
• Segmentation rules that protect repeat visitors. Revolve's "first-time only" rule is the simplest version. Frequency caps, visitor type, and URL targeting all prevent the same person from seeing the same popup forever. This is the single biggest fix for the "popups are annoying" complaint.
How to build a popup overlay in Popupsmart
Popupsmart is a no-code popup builder that lets you ship an overlay in five steps. The dashboard walkthrough below covers the full path, from sign-up to live campaign. I've grouped the eleven screens into the five decisions you actually have to make.
Step 1: Sign up and create your campaign
Create a free Popupsmart account and click "Create a new popup" from the dashboard. The first screen asks you to name the campaign and pick a business objective — grow your email list, recover abandoning carts, promote a product, and so on. The objective you pick filters the templates you see in the next step, so don't skip it.
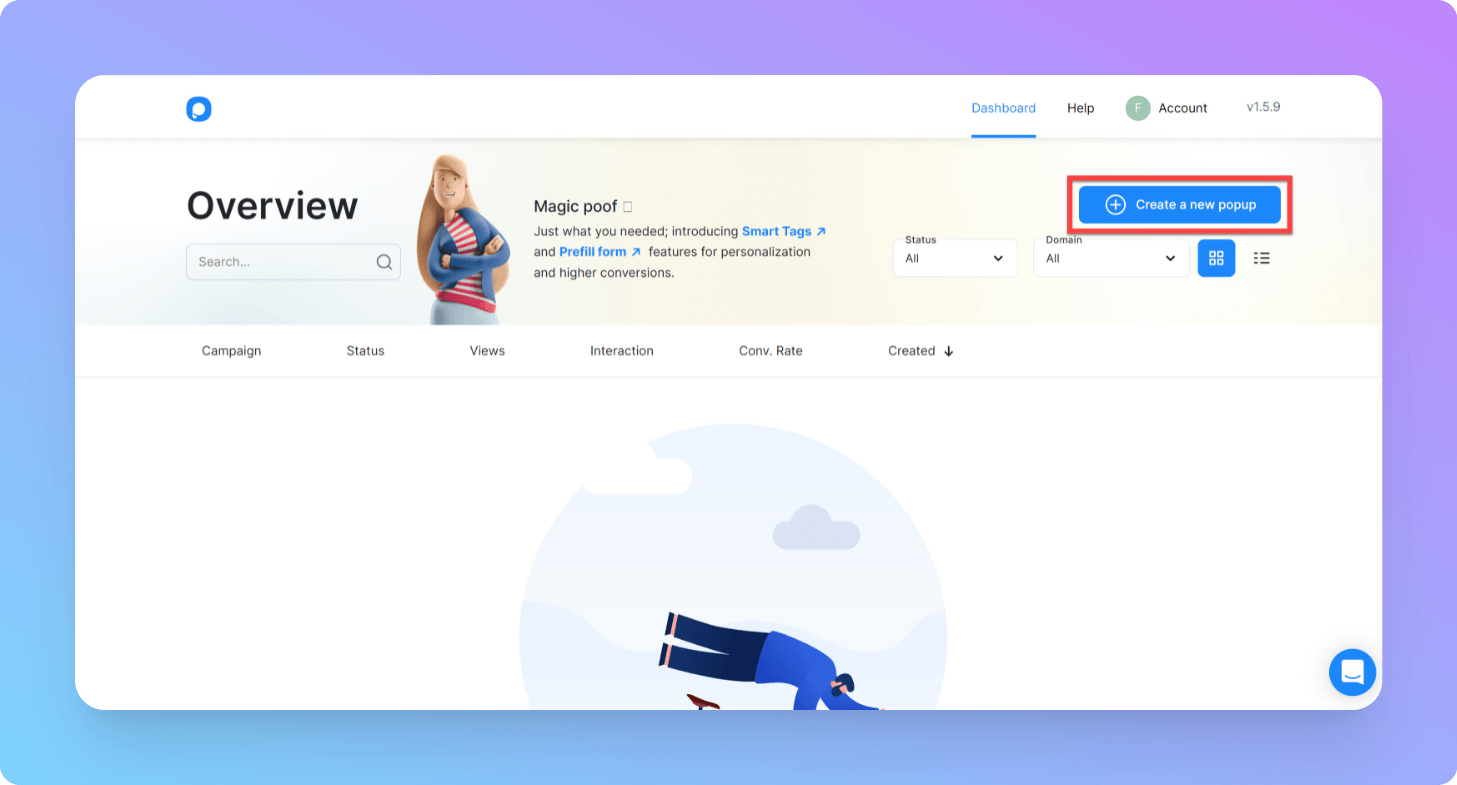
Step 1: Create a new popup from the Popupsmart dashboard.
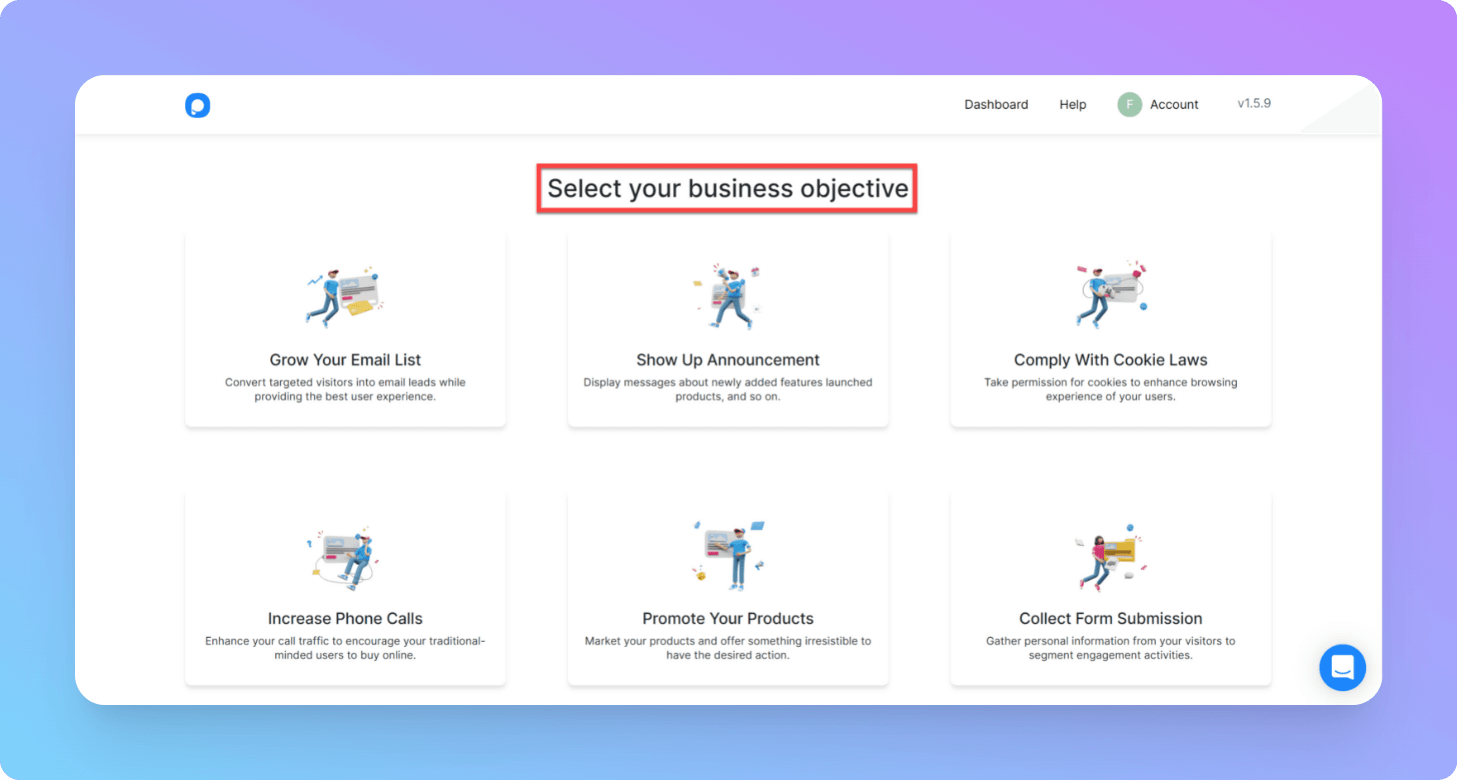
Pick a business objective to filter the template library.
Step 2: Pick a template from Playbook
Playbook is the template library. Pick a layout that matches the overlay shape you want — most teams start from a center-screen lightbox for entry triggers or a focused exit-intent layout for cart pages. You can browse popup design templates for inspiration before committing. If nothing fits, scroll to the blank canvas and build from scratch.
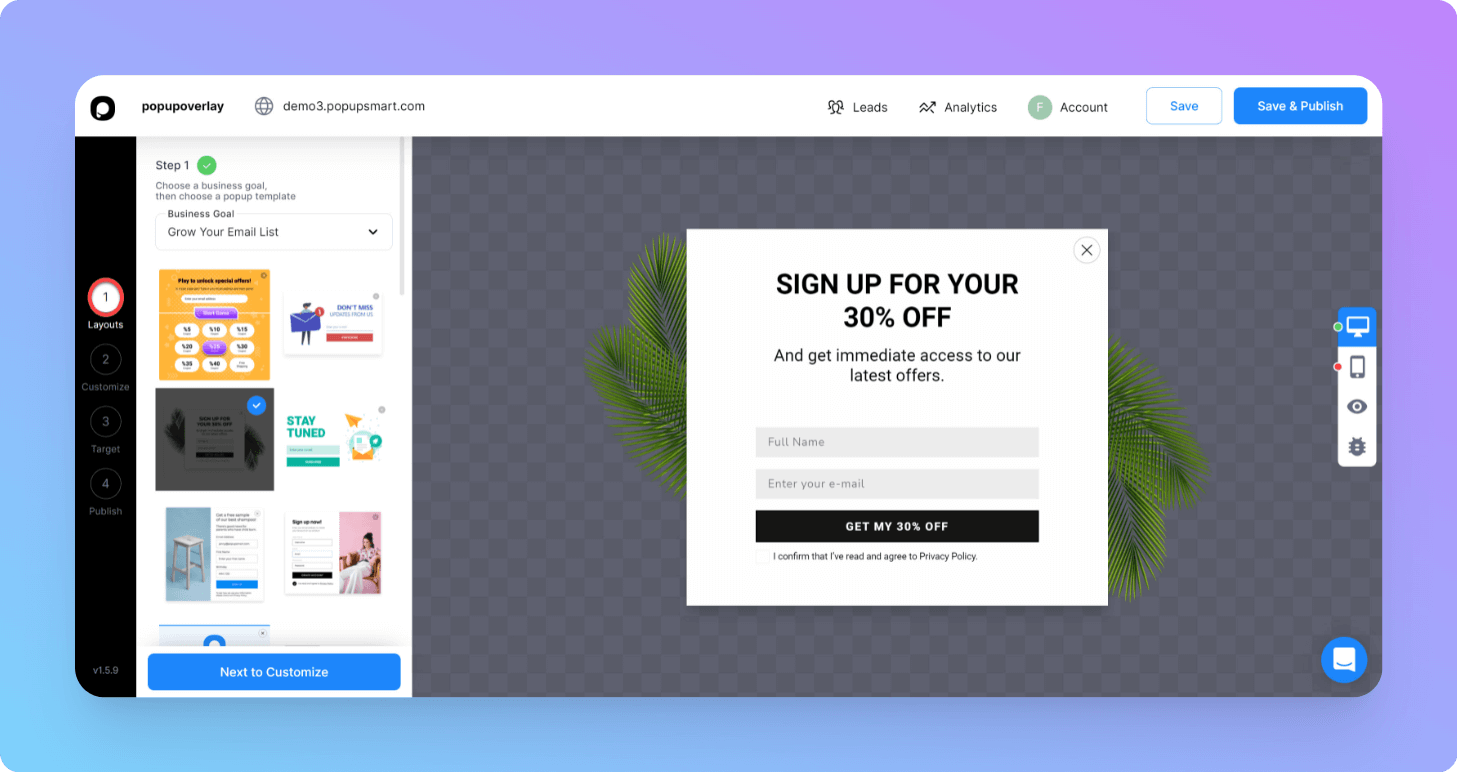
Step 2: Browse the Playbook template library.
Pick the layout that matches your trigger and goal.
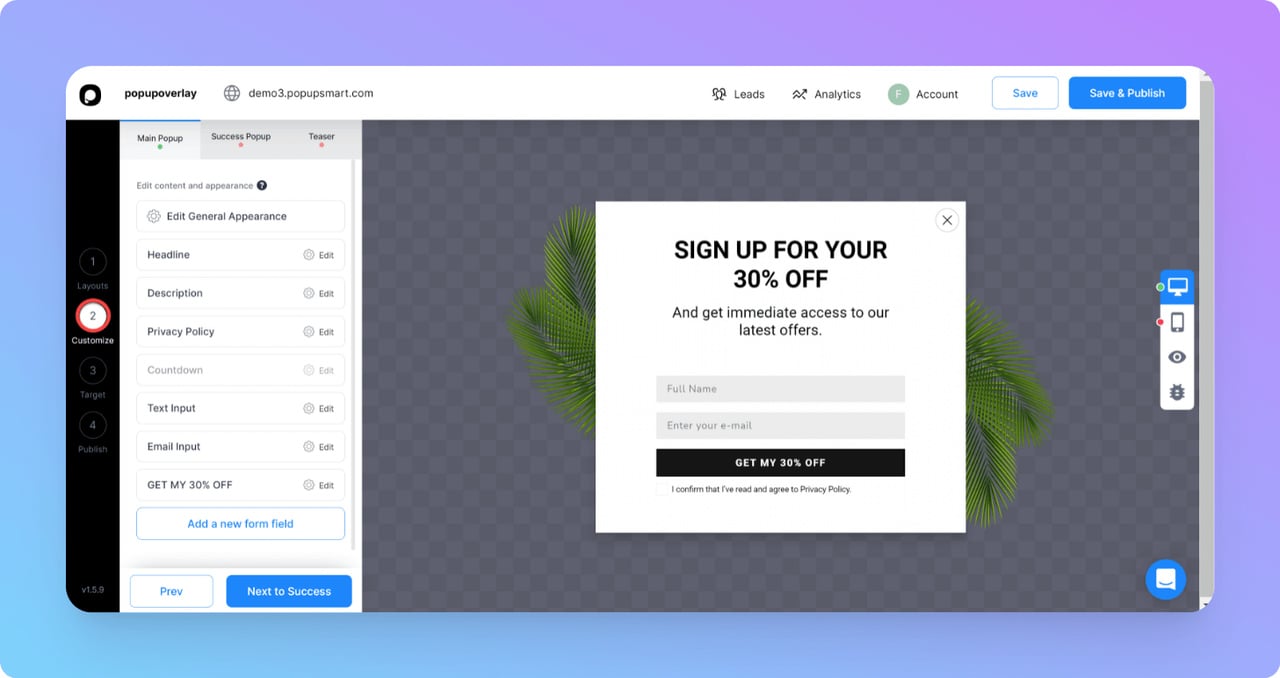
Step 3: Customize design and copy
The Customize tab is where the overlay starts to look like yours. Update the headline, subhead, CTA button text, color palette, image, and privacy line. Match the design system on the page behind the popup — the Bruno Magli example earlier shows what good color matching looks like. This is also where you write the offer copy. Keep it short and concrete.
Step 3: Customize design from the Customize tab.
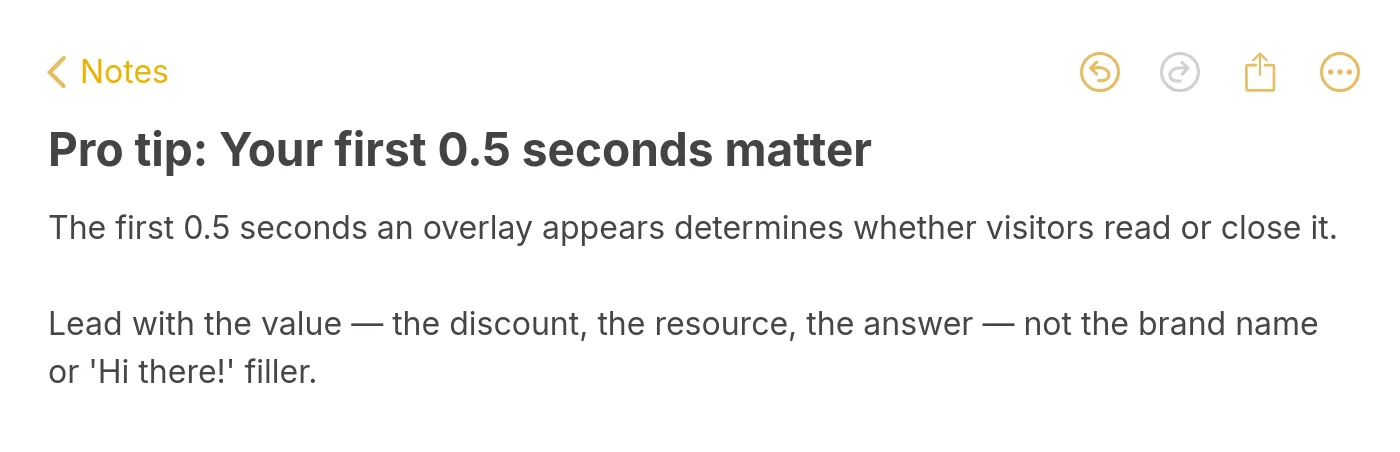
Pro tip: lead with value, not greetings.
Edit the headline, subhead, and CTA copy.
Preview the design before moving on.
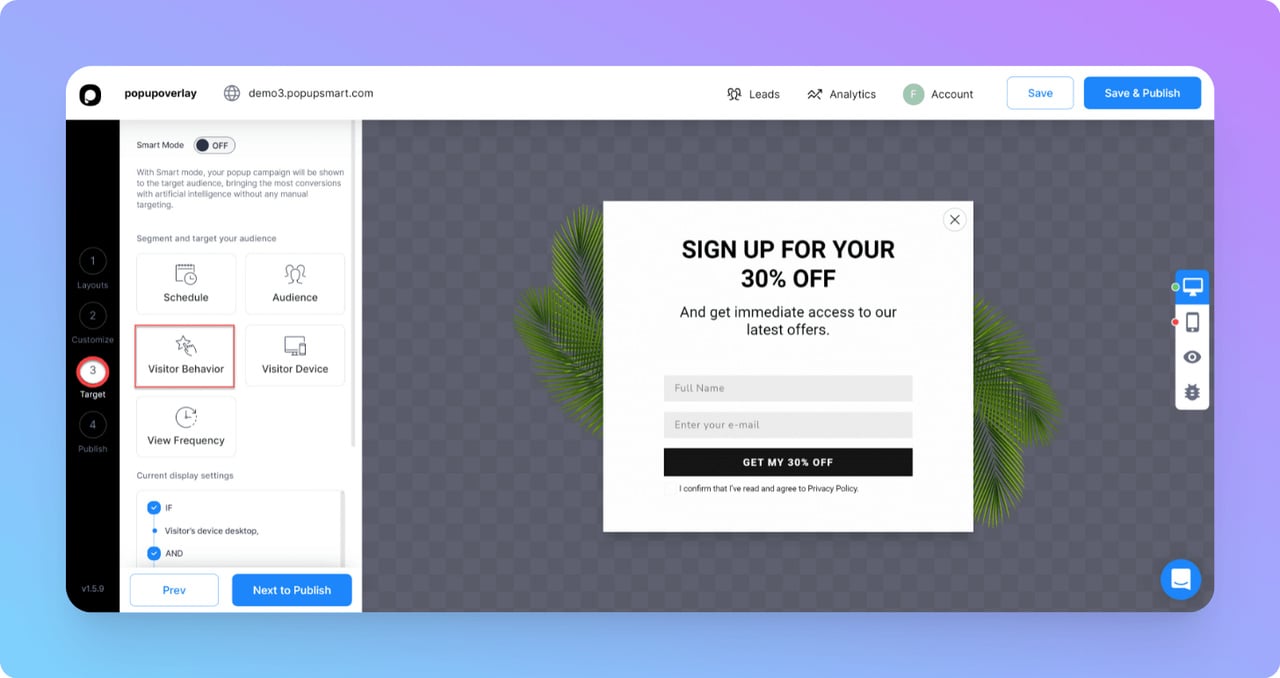
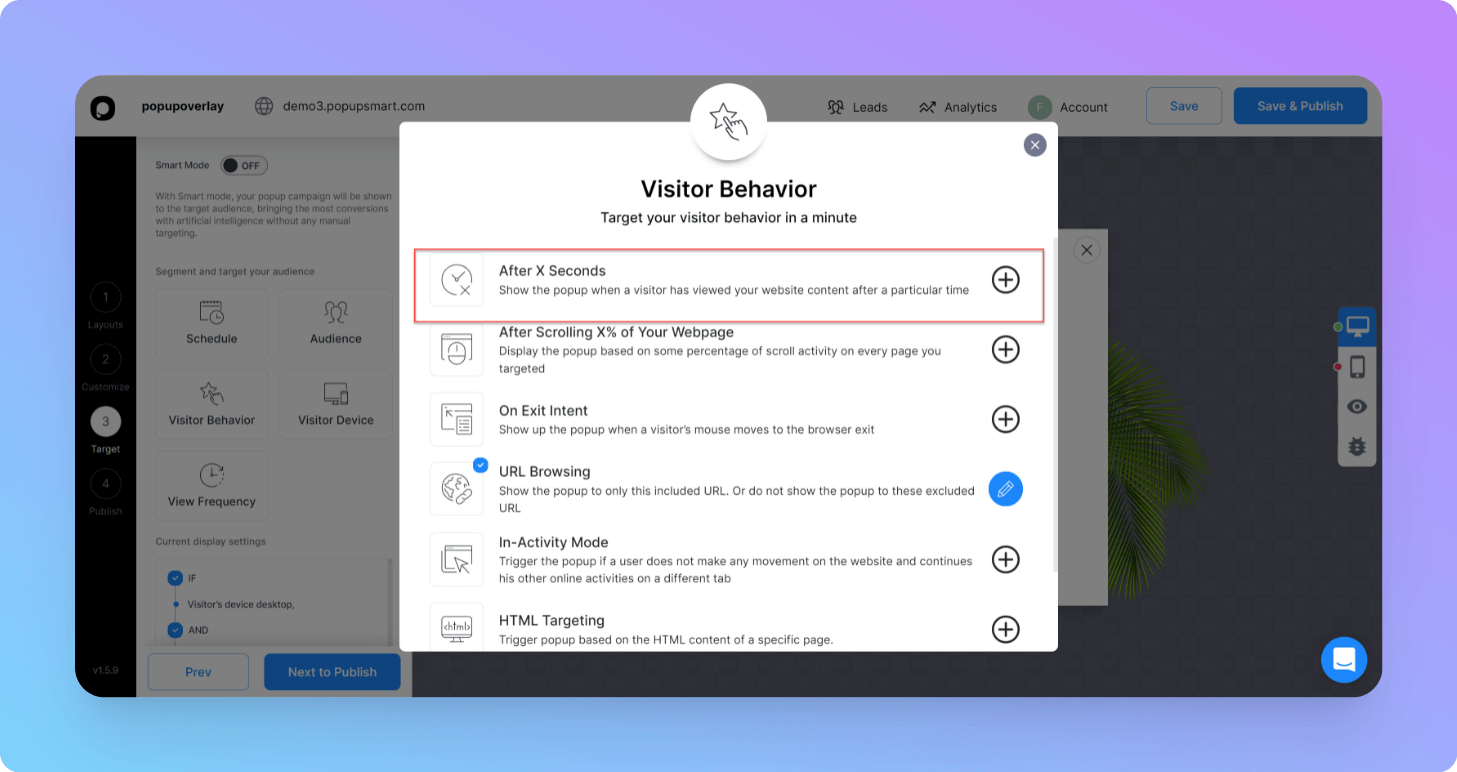
Step 4: Add form elements and targeting
Move to the Target tab. This is where you decide who sees the overlay and when. Pick visitor type (first-time, returning, both), device (desktop, mobile, tablet), URL path rules, schedule windows, and frequency caps. Keep the form fields lean — every field after email cuts opt-in rate noticeably. If you need name or phone, ask in a follow-up email instead.
Step 4: Configure form fields and validation.
Set targeting rules for visitor type, device, and schedule.
Step 5: Set triggers and publish
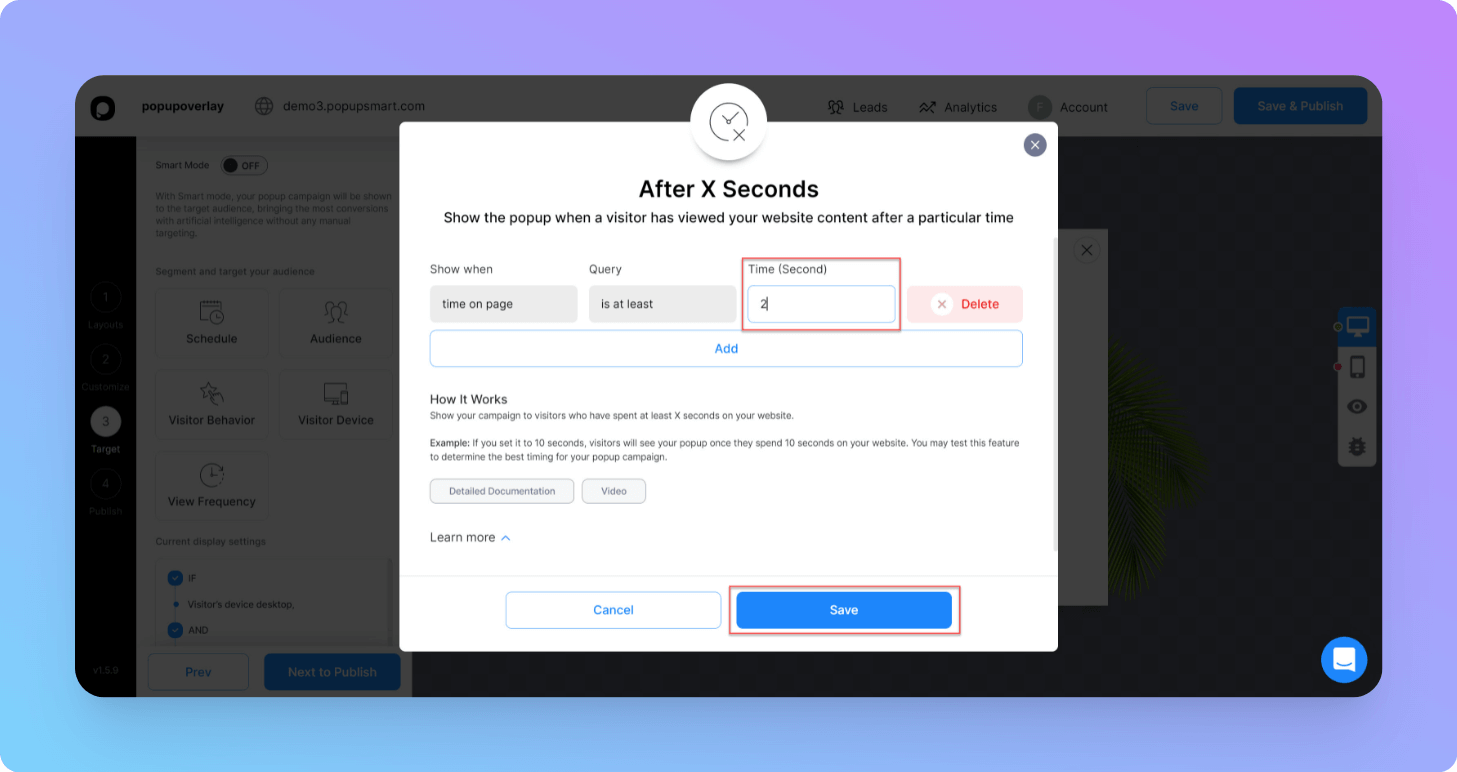
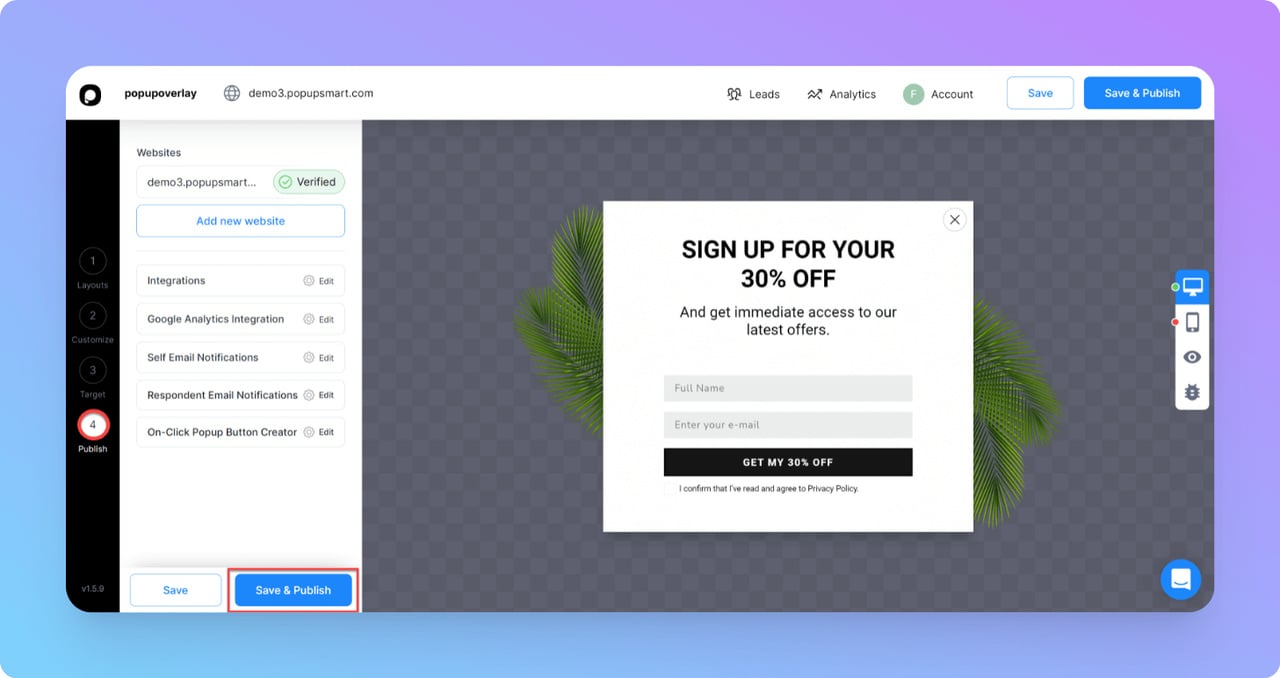
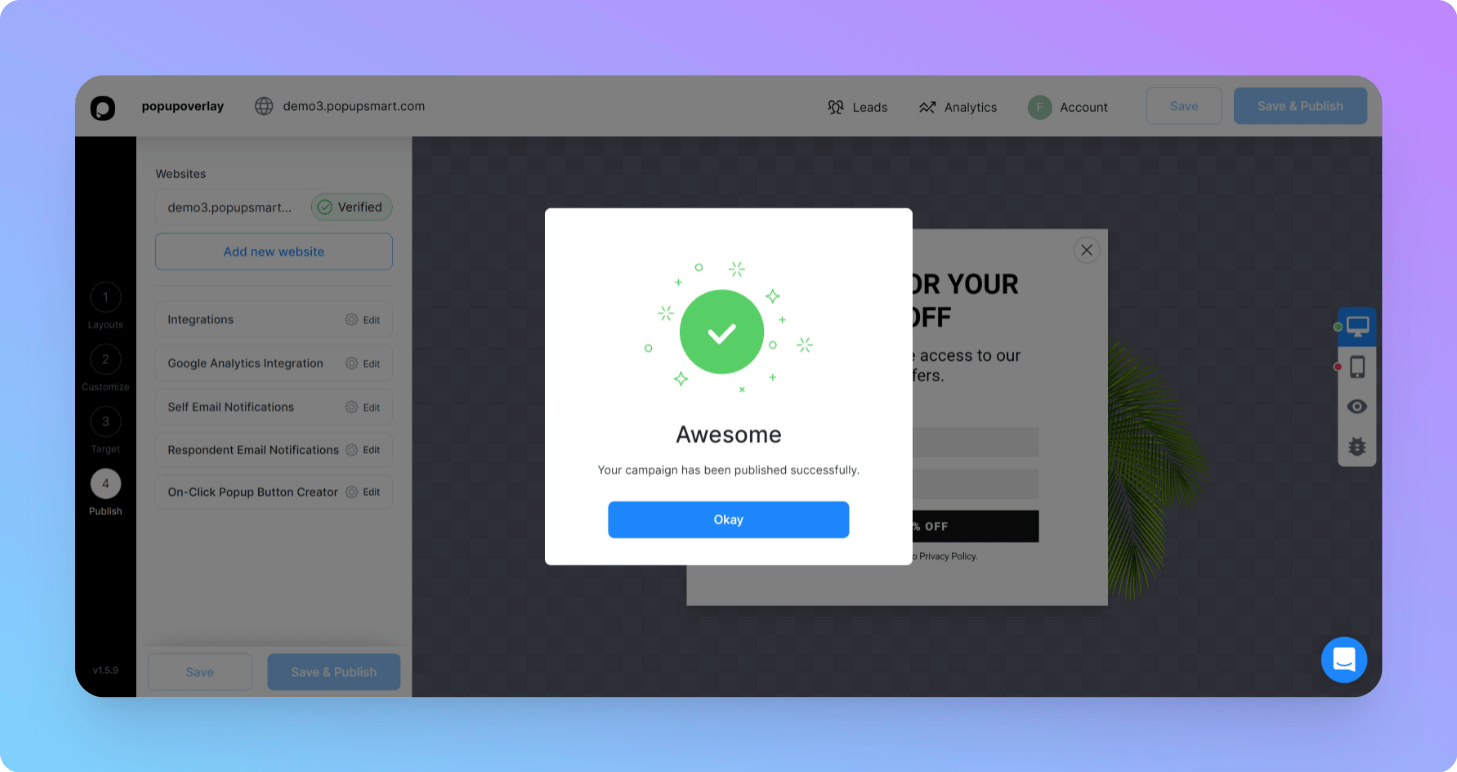
Pick the trigger. Page load works for first-visit discount overlays. Exit intent works when you want to catch leavers, like the Coschedule example. Scroll depth (50% or 70%) works on long-form pages. Click the Publish tab, copy the embed snippet, and paste it into your site's footer or your tag manager. Verify the domain, hit Save & Publish, and load the page to confirm the overlay fires the way you set it.
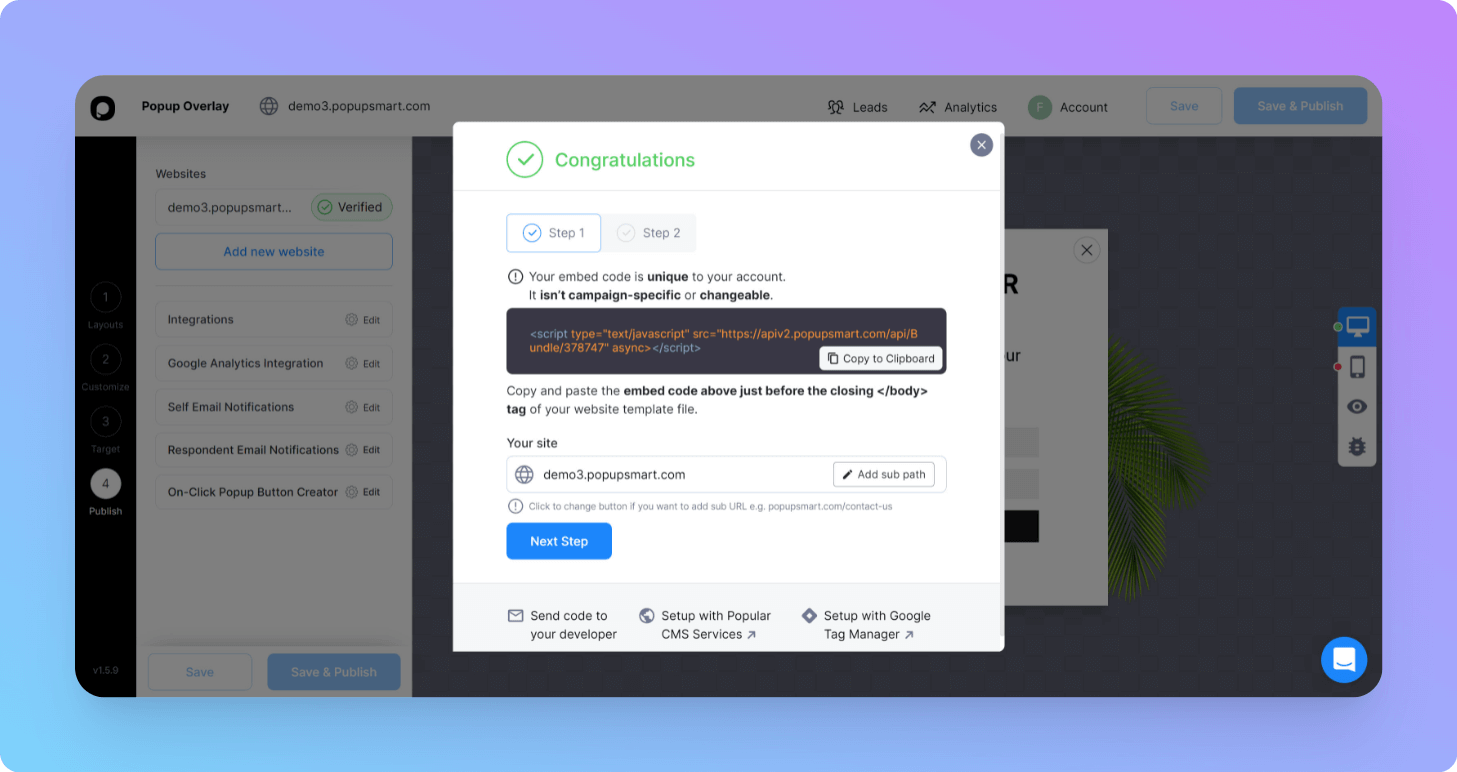
Step 5: Copy the embed code from the Publish tab.
Confirm the campaign is live and test on the front end.
Popup overlay best practices
Average opt-in rates are dropping. The teams beating the average aren't using fancier tools — they're tightening five basics. Here's what I'd hold every overlay to before you ship it.
• Time the trigger to intent, not impatience. Don't fire an entry overlay before the page has rendered. Wait at least 2-5 seconds, or use scroll depth to catch visitors who actually started reading. Exit intent should fire only on the first detected exit motion, never every time the cursor wanders.
• Cut copy to under 20 words. Headline, subhead, and CTA text combined should fit on a phone screen without scrolling. The first 0.5 seconds decide whether the visitor reads or closes. Bury the offer in a paragraph and you've already lost.
• Hit a 4.5:1 contrast ratio between CTA and background. WCAG AA is the floor, not the ceiling. A button that blends into the panel costs you clicks even when the offer is good. Test it in grayscale — if you can't tell the button from the background, neither can a colorblind visitor.
• Design mobile first. 60-70% of e-commerce traffic is mobile in 2026. Make the close button at least 44x44 pixels, keep the form within thumb reach, and never block the entire viewport on a phone. Google's mobile usability guidelines treat intrusive interstitials as a ranking signal, so this is also an SEO concern.
• Cap frequency at one impression per 7 days. Showing the same overlay every visit trains the visitor to dismiss without reading. One impression per week is the most aggressive cap I'd run for a non-converted visitor. Once they convert, suppress the popup permanently for that user.
Common popup overlay mistakes to avoid
The same handful of mistakes show up in almost every audit I run. Fix these first before chasing fancier tactics.
• Asking for too much data. Email plus name plus birthday plus phone is the fastest way to halve your opt-in rate. Ask for the minimum to start the relationship. Enrich later through behavior or a follow-up email.
• Using one overlay for every visitor. A first-time visitor and a returning customer want different things. Skipping segmentation is the difference between a popup that converts and a popup that gets reported as spam. Build at least two variants — first-time and returning — before you go live.
• Triggering on every page. Site-wide popups feel desperate. Pick the pages where the offer is relevant (category pages for discounts, blog posts for content offers, pricing for demos) and exclude the rest.
• Forgetting the close button. Some overlays bury the X behind a small gray icon or rely on background-click to close. Both behaviors trigger user reports and Chrome's intrusive interstitial penalties. Make the close button visible, large, and standard-position.
Launch your first popup overlay this week
You've now seen five overlays that work, the patterns they share, the build steps in Popupsmart, and the practices that separate the winners from the average. The fastest way to test what you've read is to ship one campaign this week. Start with a single first-time visitor offer, fire it on the highest-traffic page on your site, cap frequency at once per week, and watch the opt-in rate over seven days. Iterate from there.
Frequently asked questions
What's the difference between a popup overlay and a modal?
The terms overlap heavily in marketing. A popup overlay is any popup that opens on top of the page with a dimmed background. A modal is the same idea on the engineering side — a window that blocks interaction with the rest of the page until the user dismisses it. In day-to-day use, "modal popup," "lightbox," and "popup overlay" describe the same pattern. Slide-ins, sticky bars, and floating widgets are different formats — they don't dim the background or steal focus.
When should I fire a popup overlay?
Match the trigger to the visitor's likely intent. Fire on entry (with a 2-5 second delay) for first-visit discount offers, since the visitor hasn't formed an opinion yet. Fire on exit intent when you want to catch leavers from a product or pricing page. Fire on scroll depth (50-70%) for content pages, since a deep scroll signals real engagement. Avoid same-page time triggers under 5 seconds — they read as broken before the visitor has seen the page.
How do I measure popup overlay performance?
Track three numbers at a minimum: impression-to-conversion rate (what percentage of people who saw the popup completed the form), revenue per impression (for discount popups, divide attributed revenue by impressions), and unsubscribe or complaint rate within 30 days of the opt-in. The conversion rate alone is misleading. A popup with a 12% opt-in rate that produces a 60% unsubscribe rate is a worse channel than a 4% popup with a 5% unsubscribe rate.
Can popup overlays work on mobile without annoying visitors?
Yes, but the rules tighten. Use a smaller overlay that doesn't fill the screen, place the close button where a thumb can reach it (top right or bottom of the modal), and avoid firing on entry. Exit intent on mobile is harder to detect — most builders use a back-button signal or a fast upward scroll instead of cursor motion. Frequency caps matter more on mobile because re-engagement after a bad popup experience is much harder than on desktop.
Related Articles:

How would you rate your experience with this article? 😊