How to Add a MailChimp Popup to WordPress
Covers key considerations for adding a MailChimp popup to WordPress (targeting, UX, GDPR, design, testing, device fit, analytics, updates, integration), then gives step-by-step setup via MailChimp embed code or Popupsmart plugin/API, plus benefits like more leads, engagement, retention, and conversions.
If you have a WordPress website, just hear us out and explore the easiest way to add a MailChimp popup to WordPress.
Then, you’ll be ready to collect leads, engage with visitors, and increase sales.
What to Consider When Adding MailChimp Popup to WordPress

We can make you sure about the easiness of adding a MailChimp popup to a WordPress site.
However, there are some criteria that you need to take into consideration while doing this.
Examining these criteria can help you be more apt to this process:
- Audience-Based Targeting: You should consider your audience and whether they are ready for this activity. Keep their interest, attention, timing, and behavior on your site in mind to specify the target.
- User Experience Improvement: No matter what, user experience is one of the most essential parts of a website. Thus, you should contemplate whether or not adding a MailChimp popup will affect your user experience.
- GDPR-Compliant: Since user consent is critical, you must display privacy notices to get their consent.
- Designing and Customization: Branding is branding. You cannot publish a popup irrelevant to your brand identity and content. Consider the colors, fonts, and images you use.
- A/B Testing: To test your popups and see how they fit your audience, A/B testing is an optimizing action for your popup campaign.
- Device-Based Customization: If your popup doesn’t fit the devices you aim for, you need to customize or find an alternative solution to make your campaign go.
- Analytics: You should be able to check your rates and control your performance after a while to see if your campaign is working correctly.
- Updated Content: Your popup can be about anything, but you should keep your content updated. Let it be an image or writing to inform your visitors; your popup should include up-to-date information.
- Seamless Integration between Tools: The most crucial point and the reason for our research is the integration of MailChimp and WordPress. If you successfully integrate these tools, you can have a smooth process to go without any doubt.
How to Make a MailChimp Popup on a WordPress Site
Before you start the process, we imagine you have a WordPress site and want to add a MailChimp popup.
If you do not have a WordPress site, you should start by having a WordPress site, deciding on your theme and settings, and then publishing it as you like.
Then, the next step is to start the process below for adding a MailChimp popup to your WordPress site.
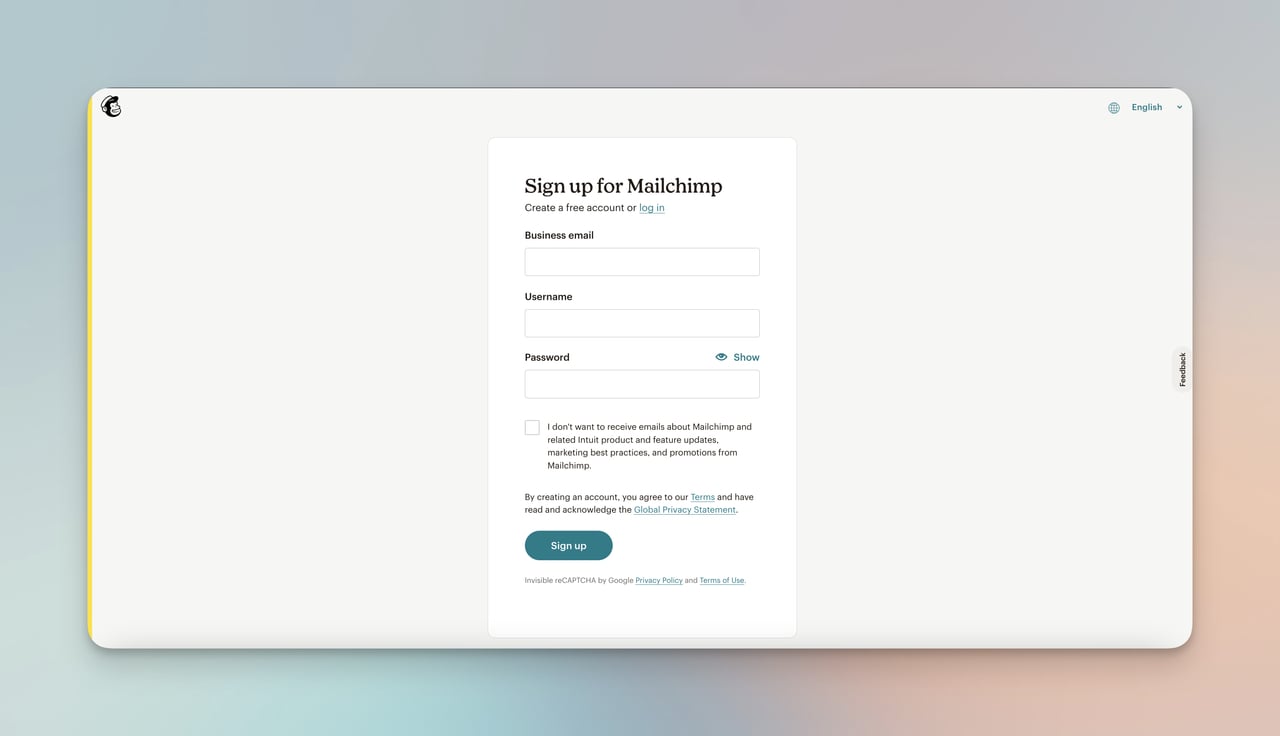
Step 1- Create a MailChimp Account.
While creating your account, make sure you have a group on MailChimp to create audiences for the leads collected with your popup.
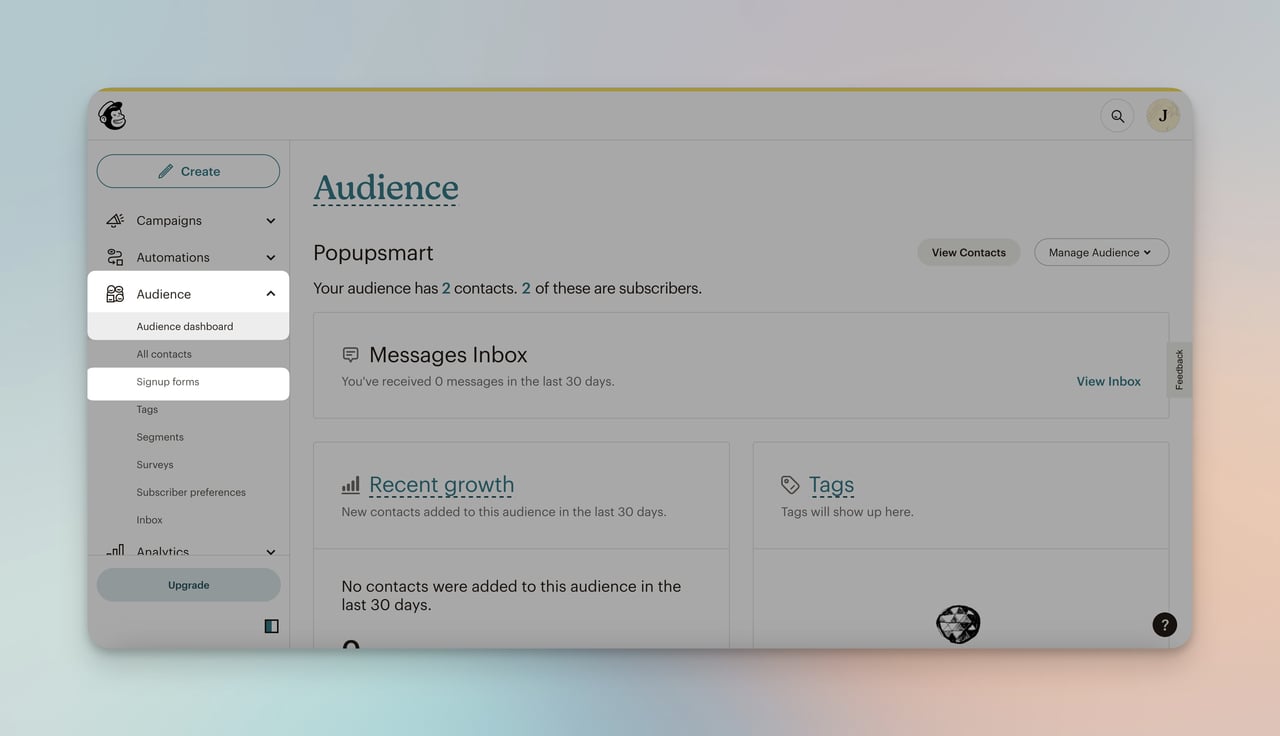
Step 2- Click on “Audience” and “Signup forms” on the Left Sidebar.
Step 3- Scroll down the Page. Then, Find and Select the “Subscriber pop-up.”

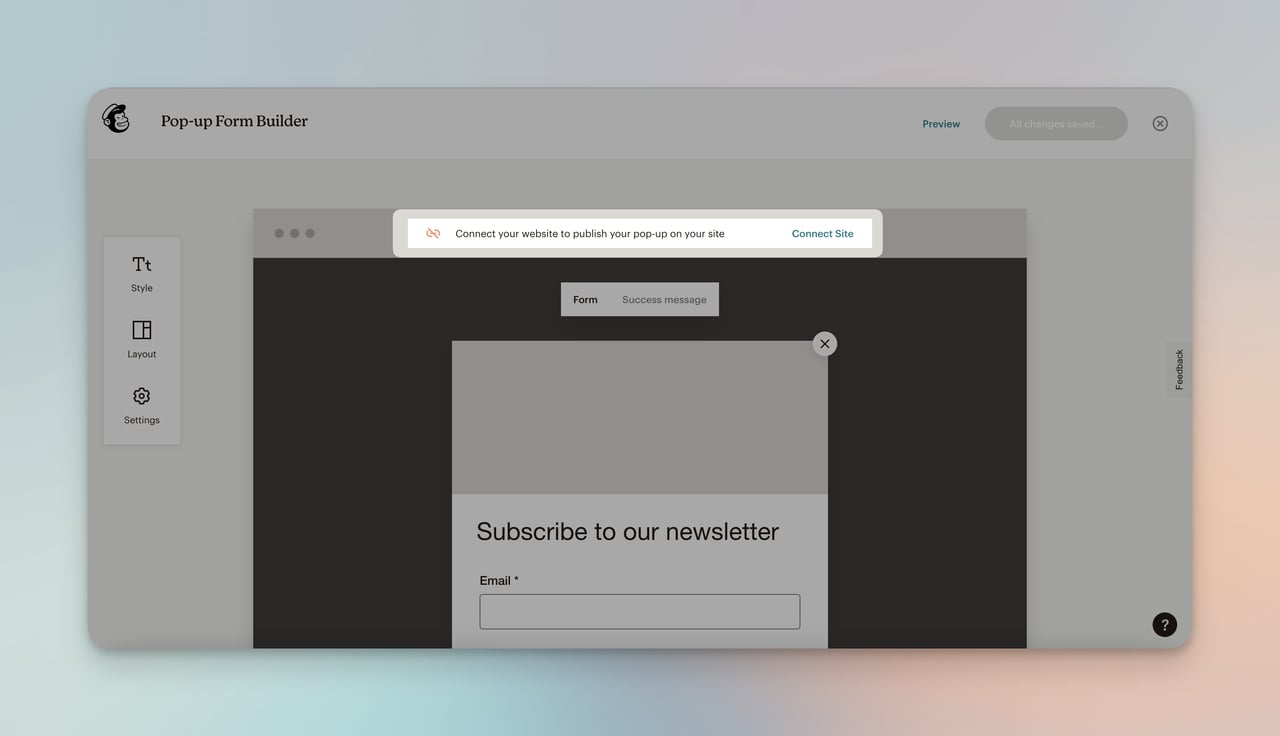
Step 4- On Your MailChimp Dashboard, Choose “Connect Site.”
It is also the place where you can customize your MailChimp popup.
Therefore, it is better to focus on popup design best practices at this point while customizing your popup and then go forward with connecting your site.
Step 5- Enter the Website URL into the MailChimp Modal.
You should accept the additional terms for connecting your website to Connected Sites.
That’s how you give permission to collect your leads from your WordPress site on your MailChimp account.
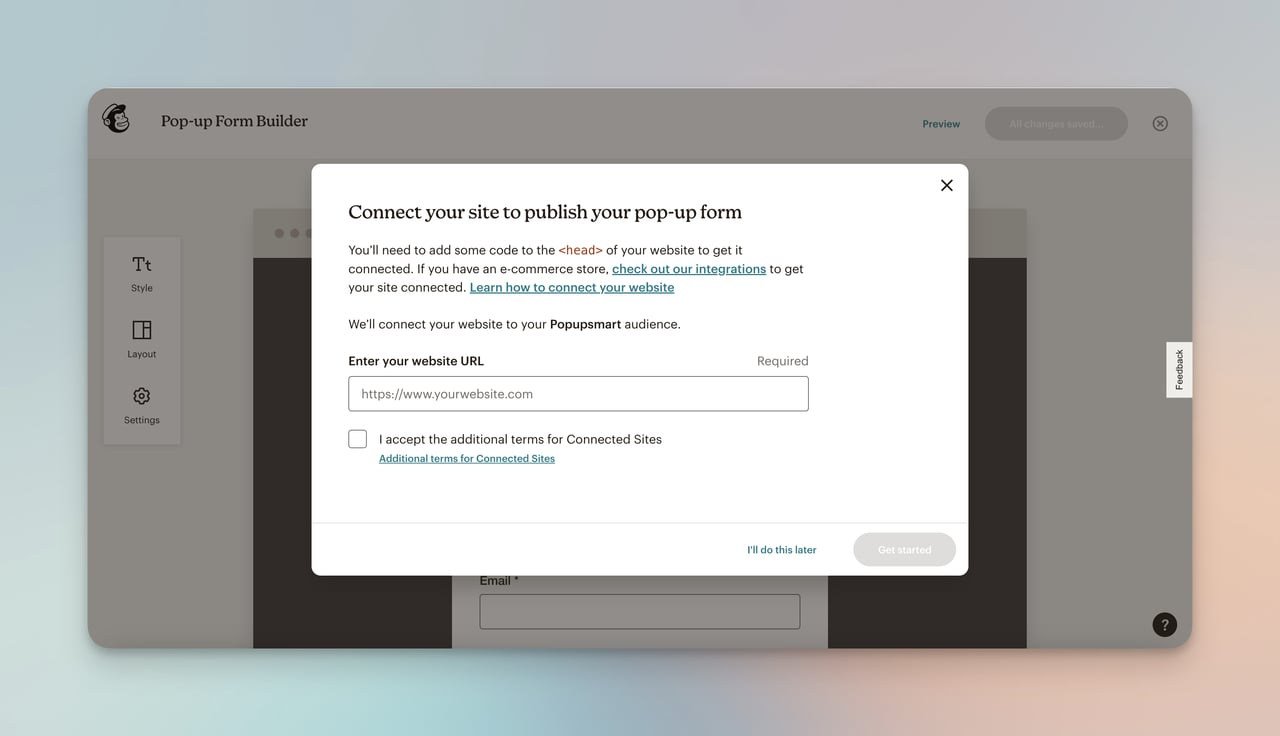
After doing this, you will get a code to embed your website. You should copy this code.
Step 6- Now, Go to Your WordPress Admin Panel. Click “Appearance” and “Theme File Editor” on the Left Sidebar.
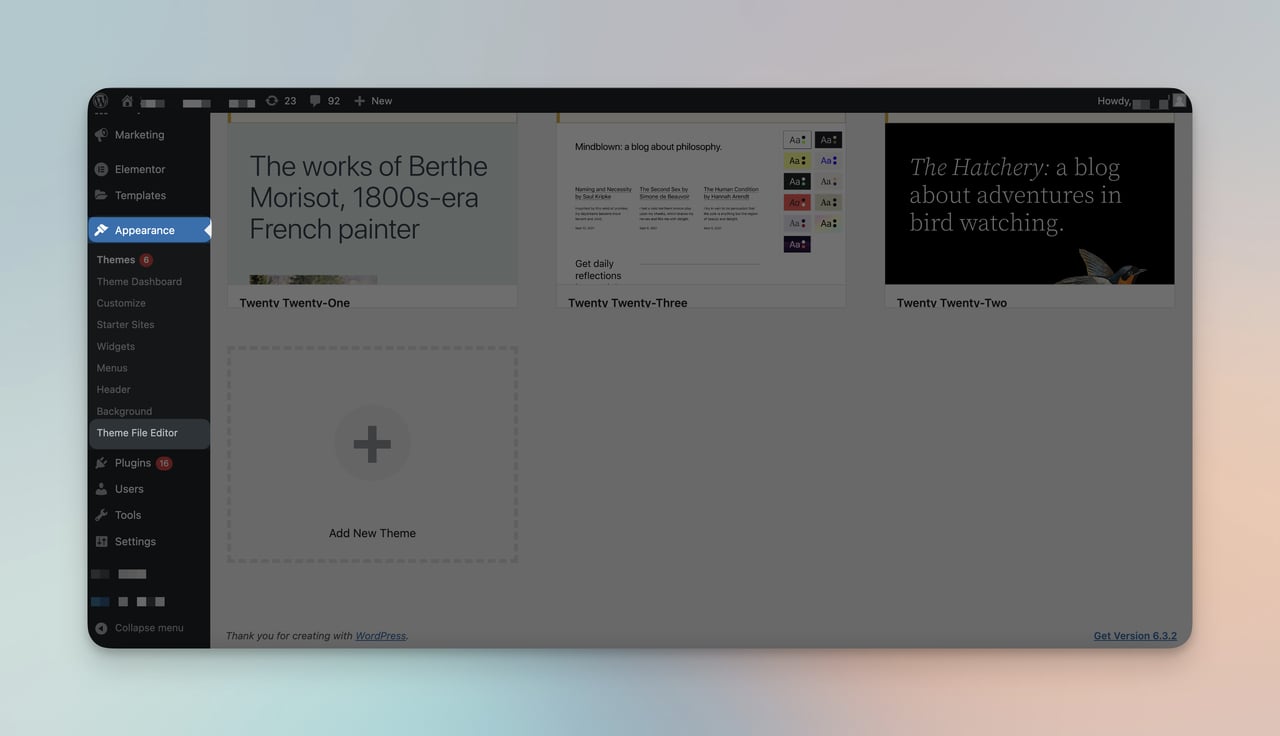
Step 7- Under the Theme Files on the Right Side, Find “Theme Header (header.php) File.”
You need to paste your code just before the tag.
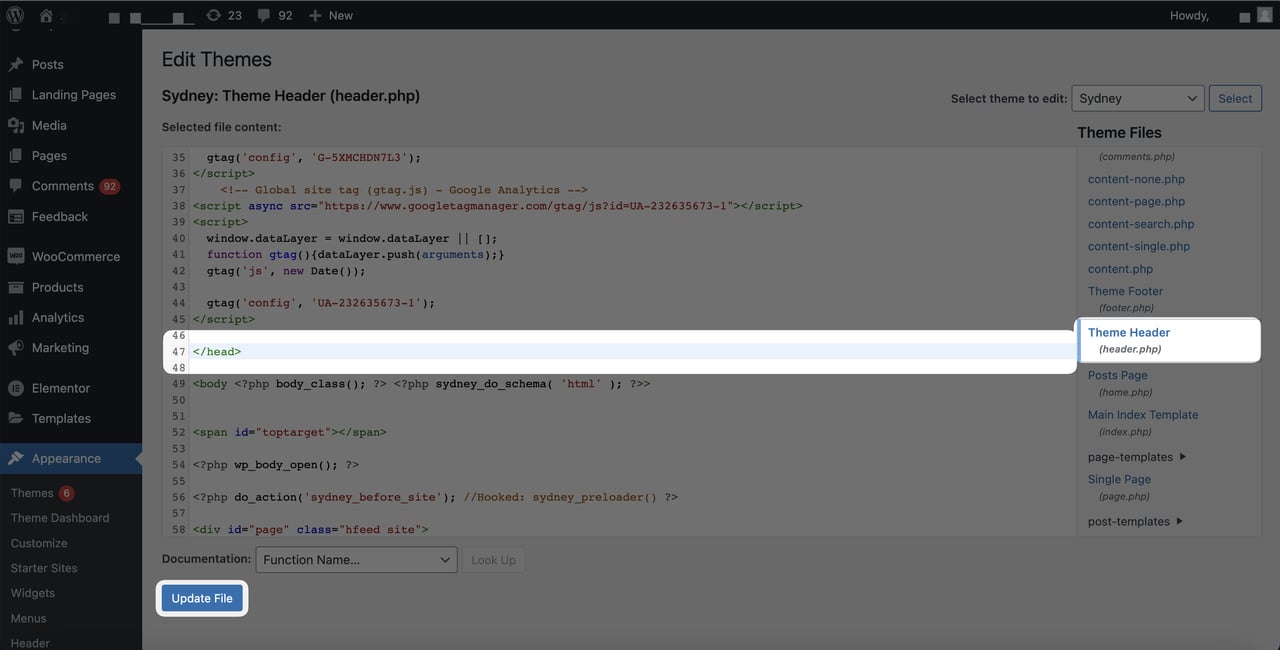
Lastly, you need to click Update File at the bottom of the page.
Step 8- That’s All! It’s Time to Check the Connection.
To check your connection, you need to go back to your MailChimp account and click “Check connection” on the same modal.
It will be verified, and you will get a verification message.
Yes, it is that simple! :)
How to Add MailChimp Popup to WordPress using Popupsmart
If you want to spice up your WordPress website and engage your visitors to grow your email list with eye-catching popups, you can also use Popupsmart’s WordPress plugin and integrate it with MailChimp!
Let’s explore the process of adding Popupsmart to your WordPress website with easy steps.
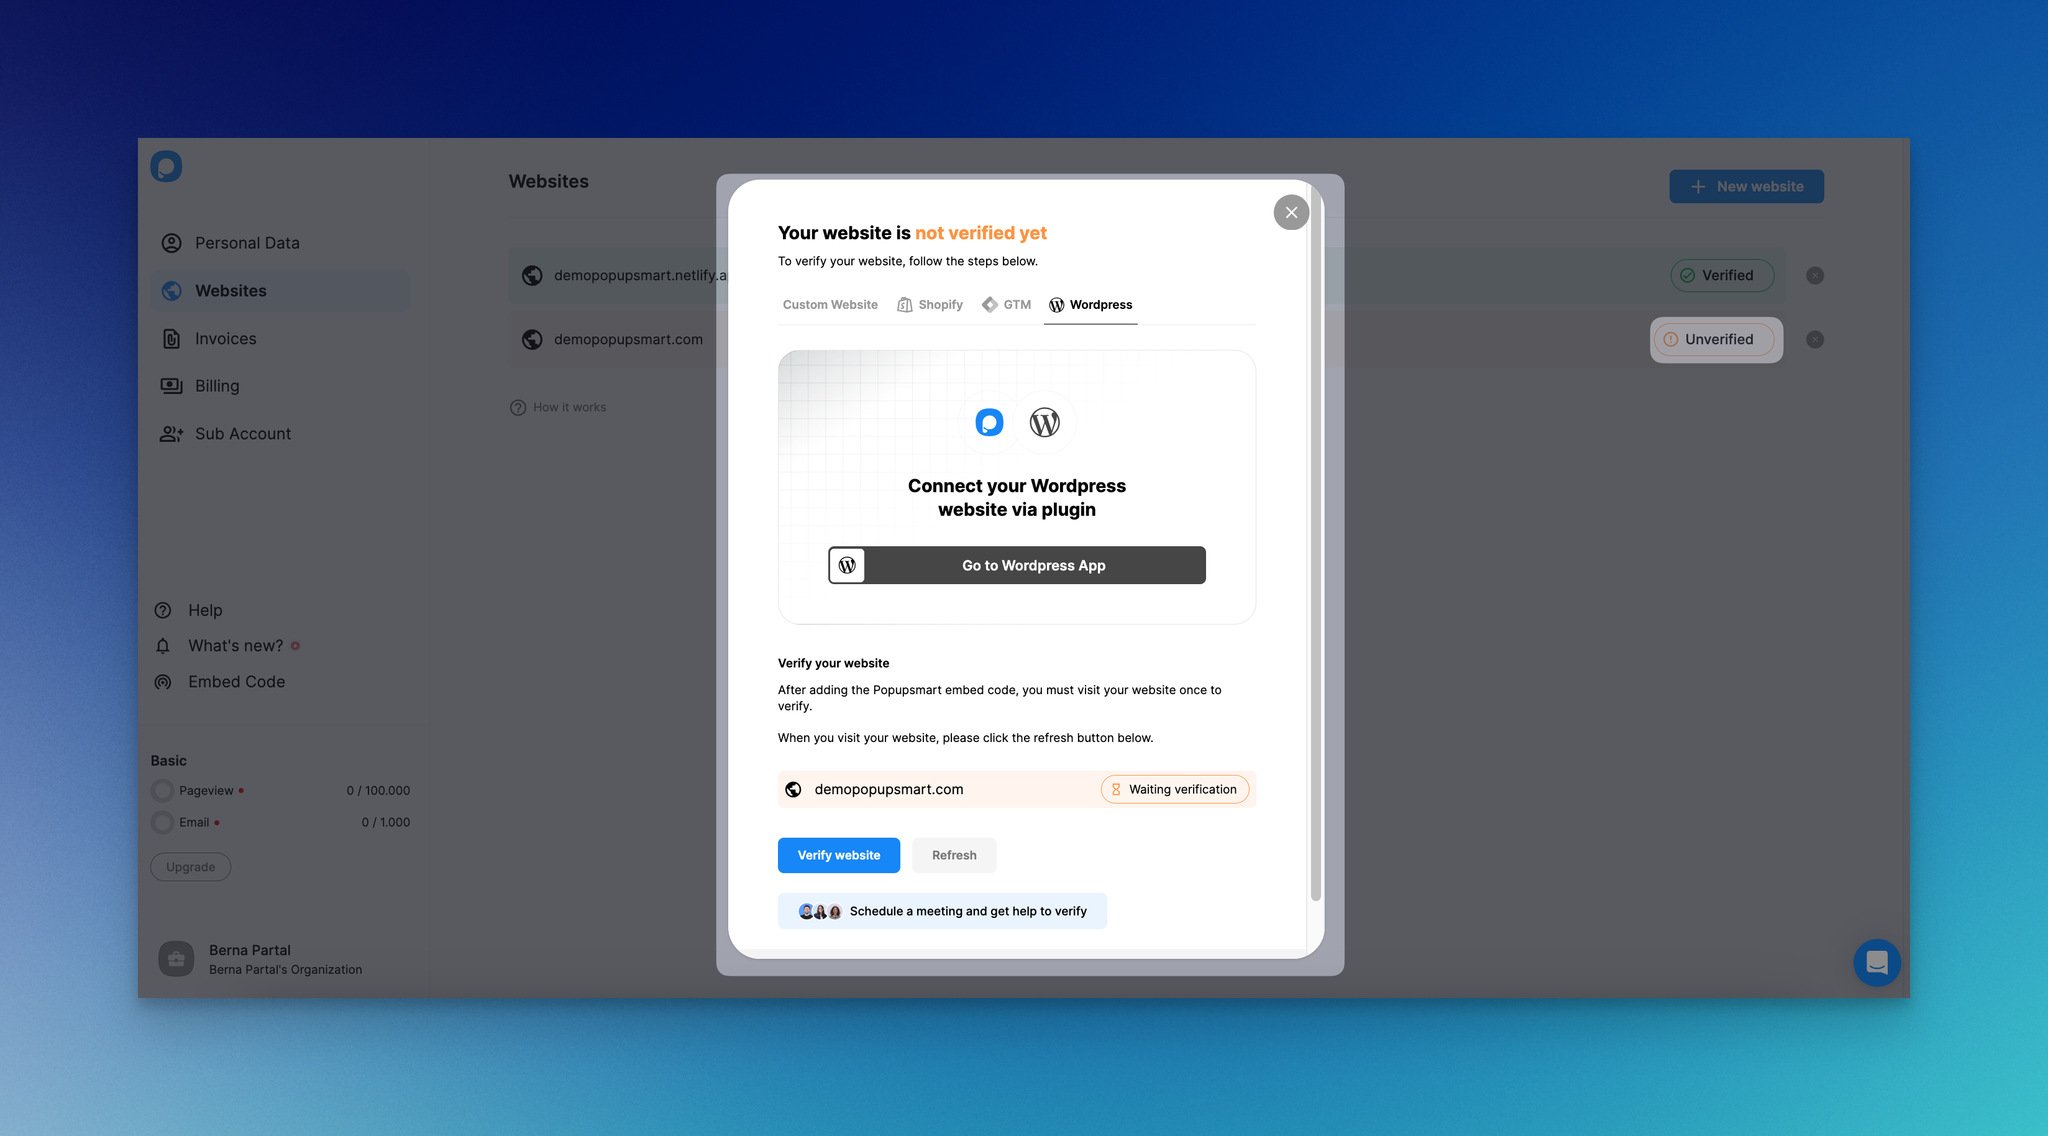
Step 1: Sign in to Popupsmart. Click on your account in the left menu. Then, locate the "Websites" option.
Add your website URL. Then, click the "Unverified" button next to it.
Once you add your website, you’ll see the “Unverified” button. If you click on it, the verify modal will appear, taking you to Popupsmart WordPress plugin once you click “Go to WordPress App.”
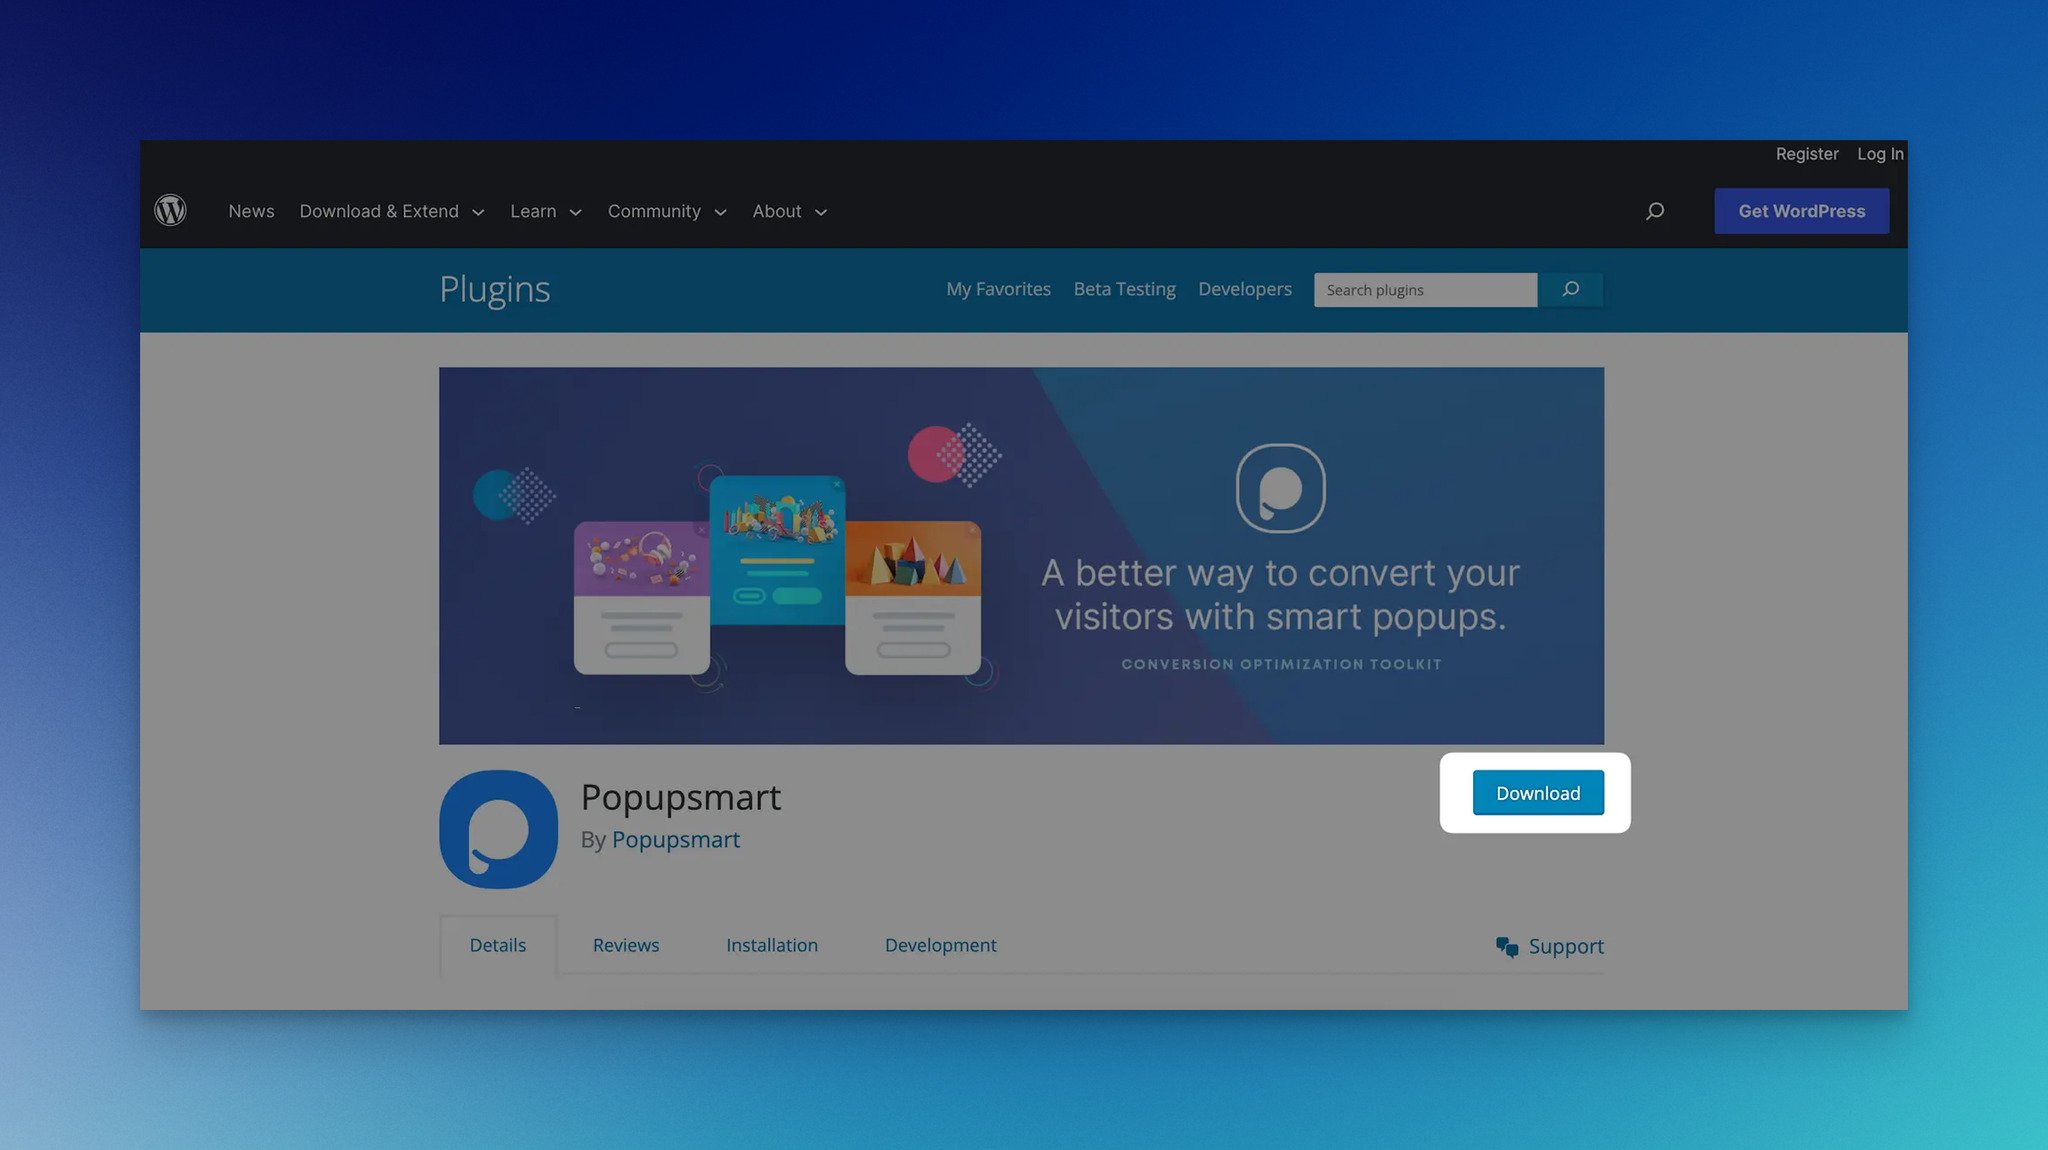
Step 2: Click "Download" and wait for Popupsmart.zip to save to your device.
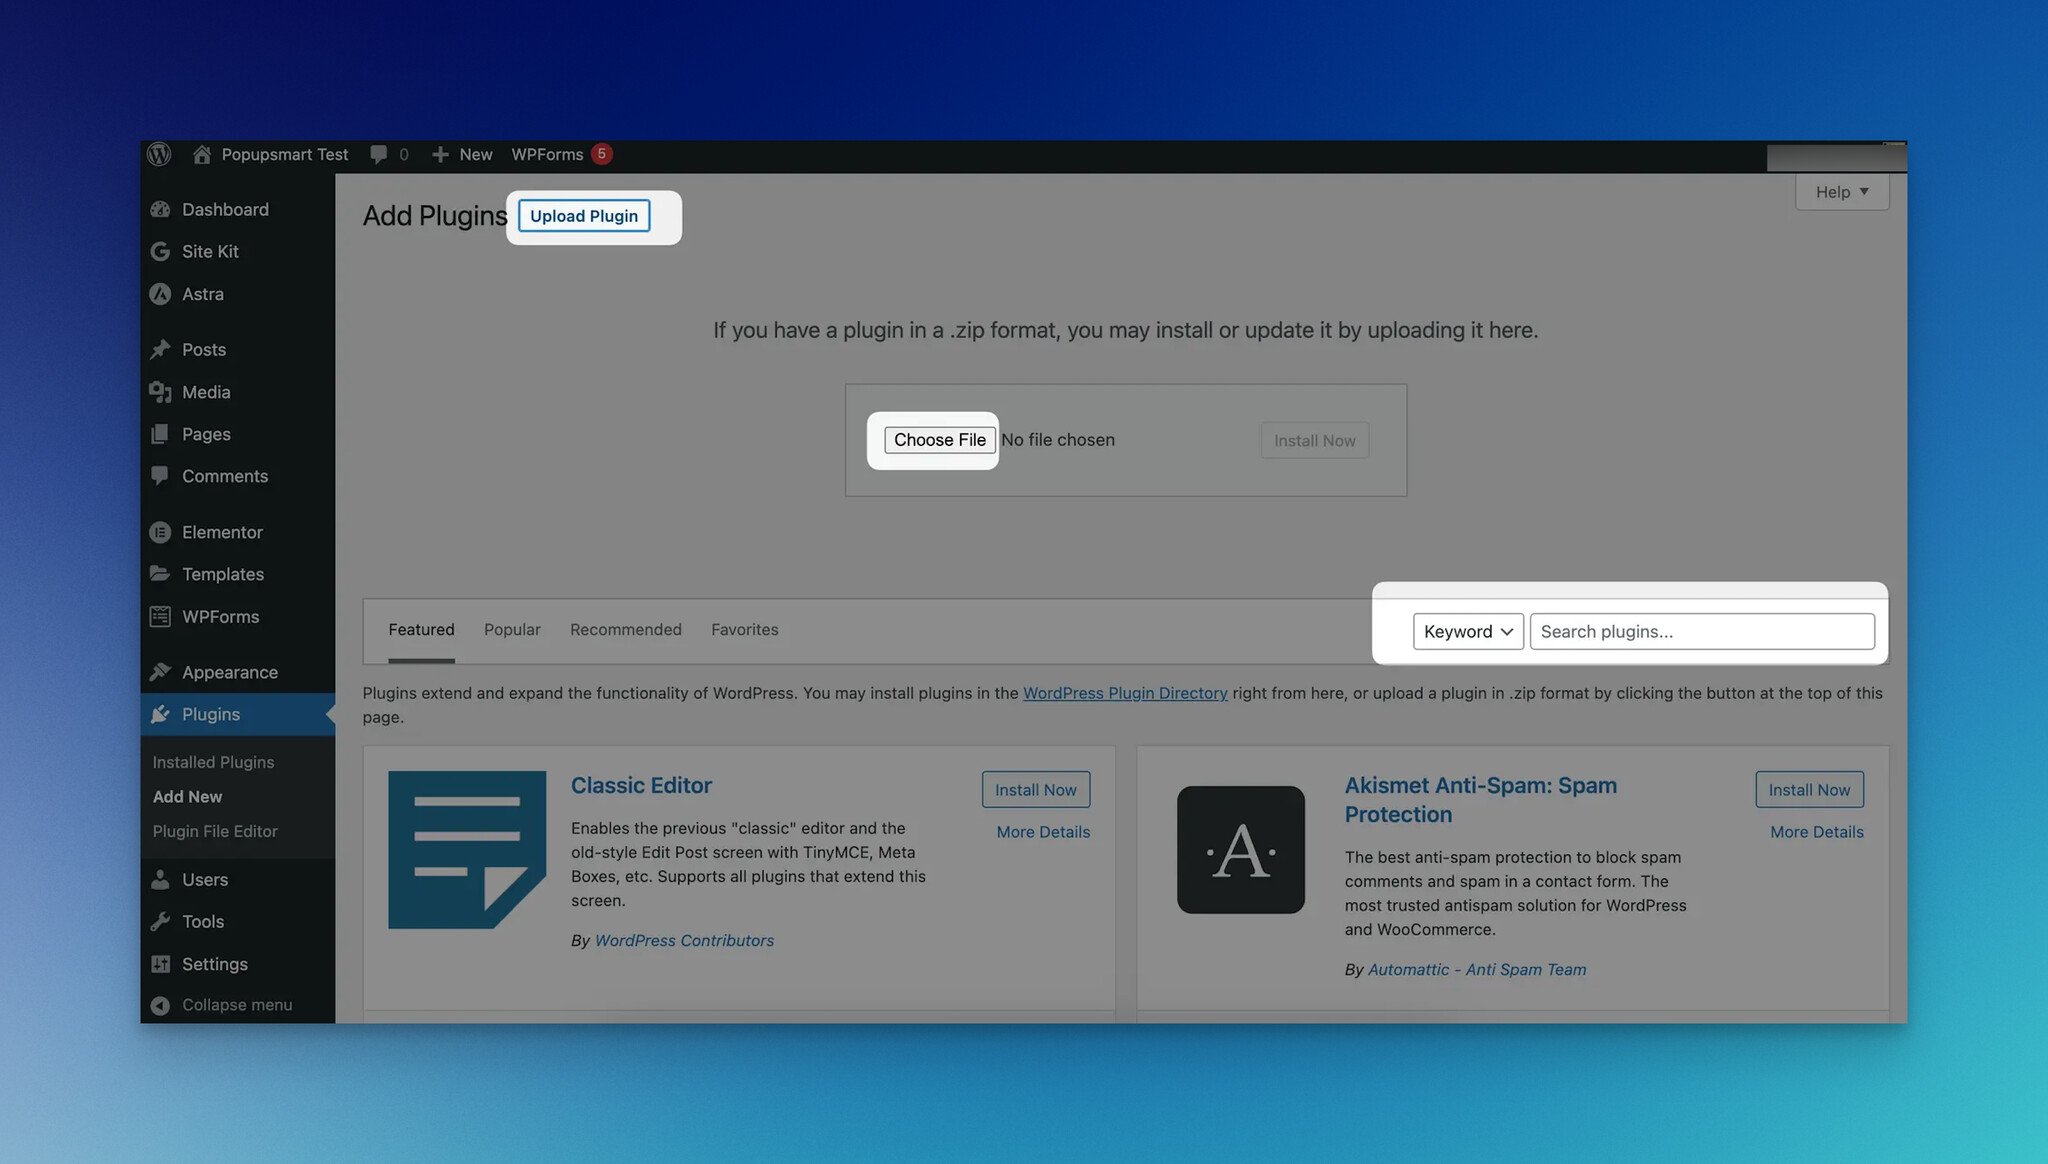
Go to your WordPress dashboard. Navigate to Plugins and click "Add New."
Step 3: Either upload Popupsmart.zip using the "Upload New" button or find it in the search bar.
After installation, click "Activate Plugin" to proceed.
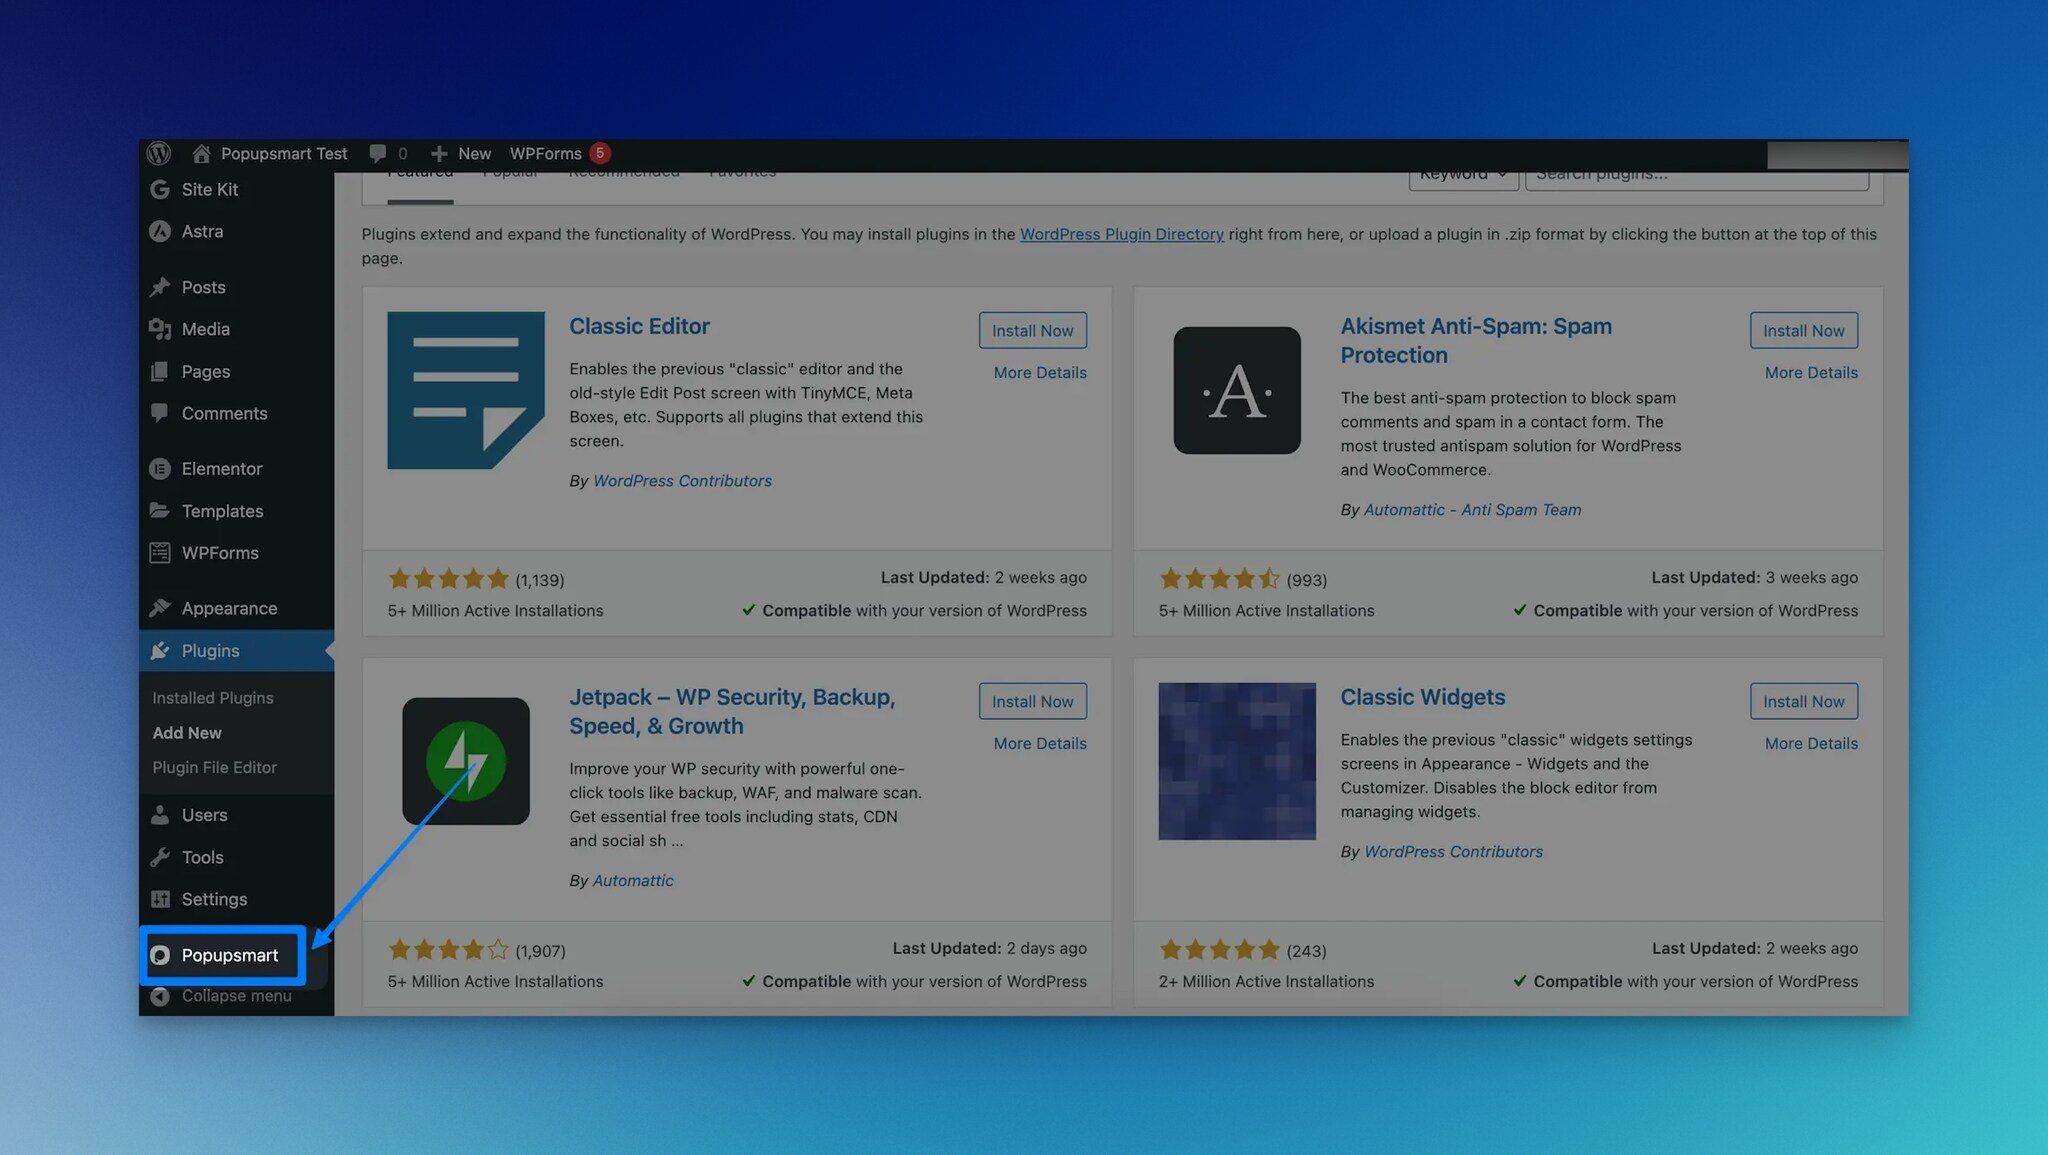
Step 4: Locate "Popupsmart" under Settings in the left menu.
Step 5: On the displayed page, identify your "Account ID."
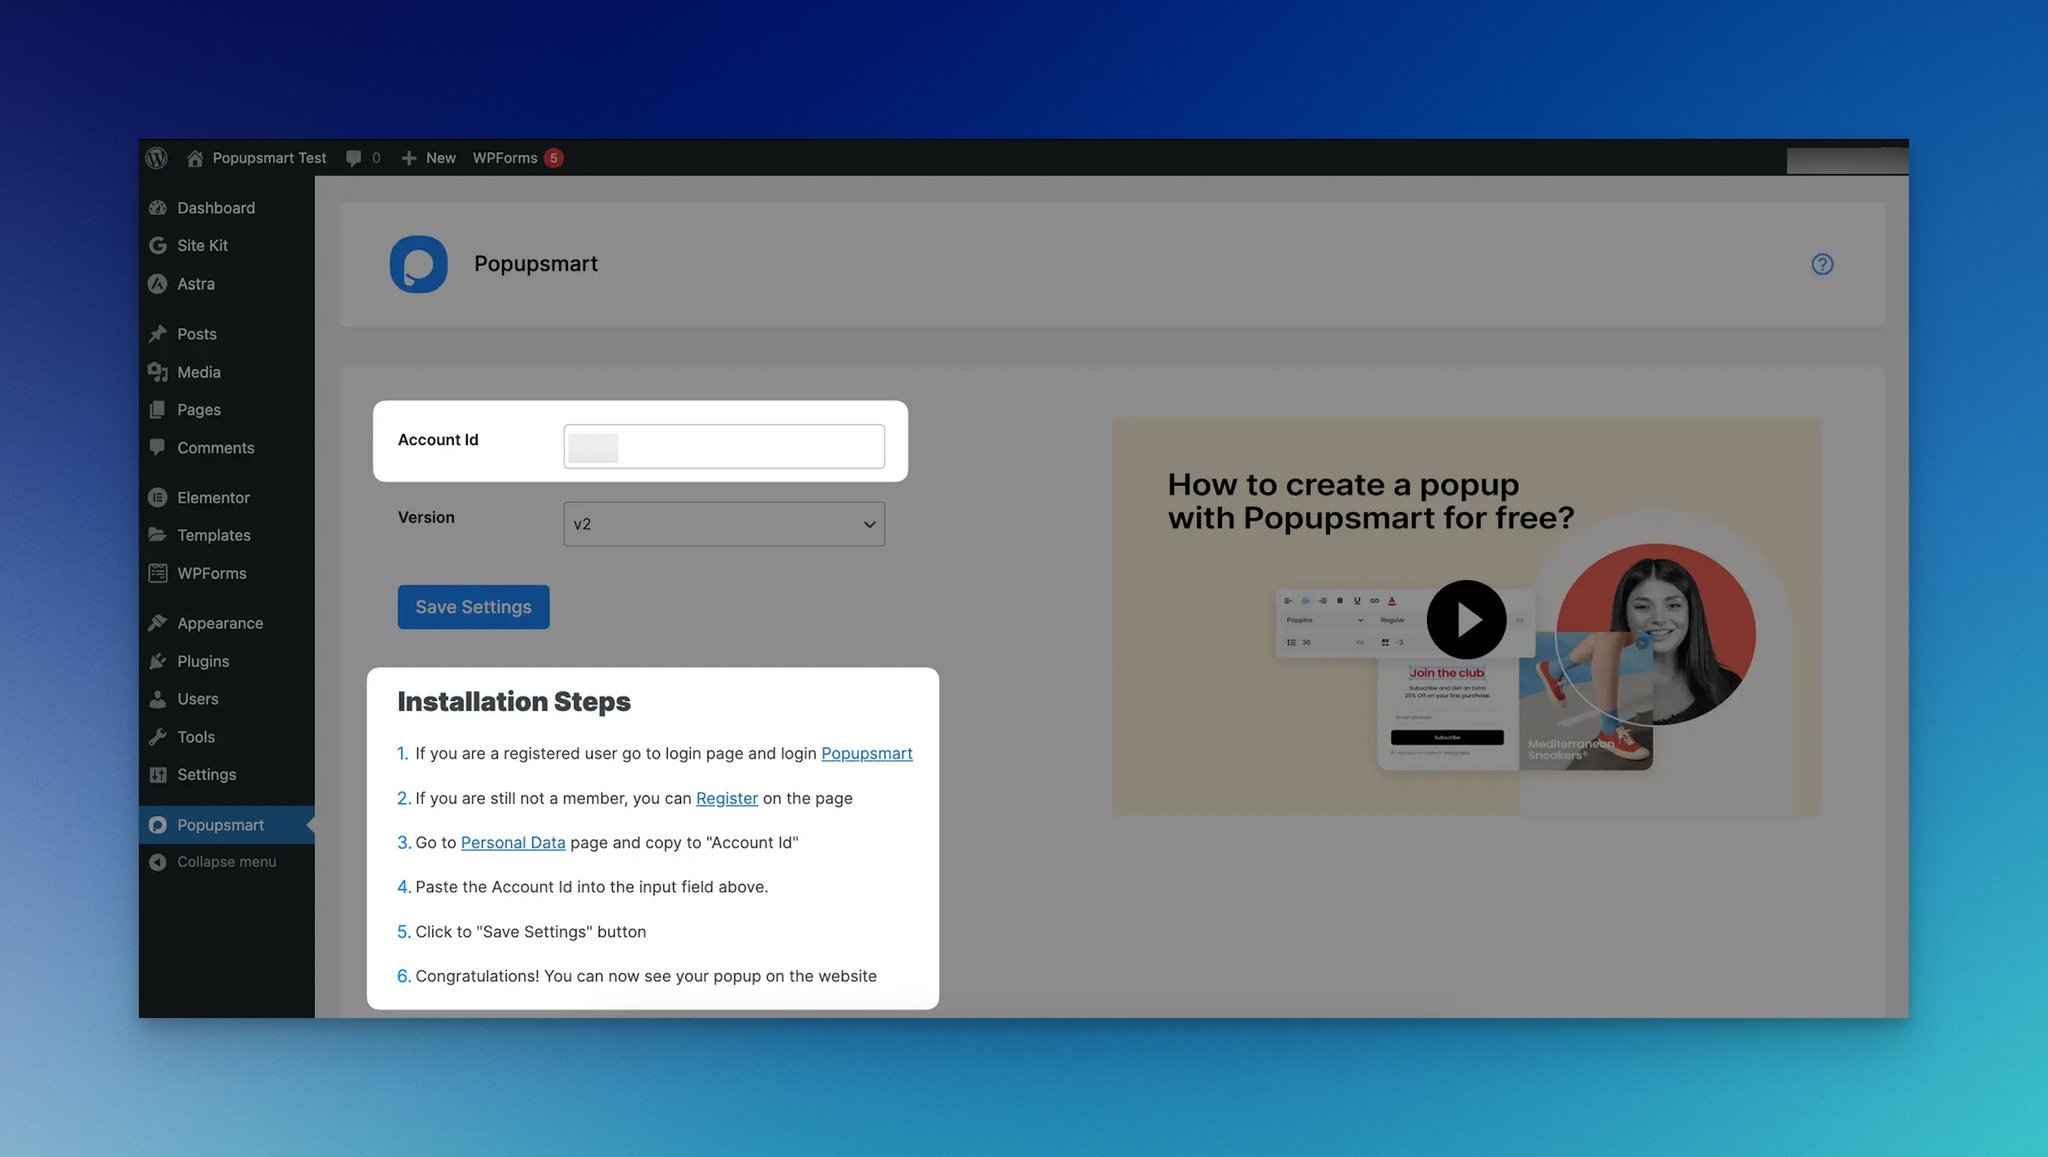
Step 6: Return to Popupsmart dashboard. Click on "Account" and go to "Personal Data." Copy the Account ID.

Paste the Account ID in the WordPress "Account ID" field, as shown before.
You can explore our documentation about WordPress popup for more details.
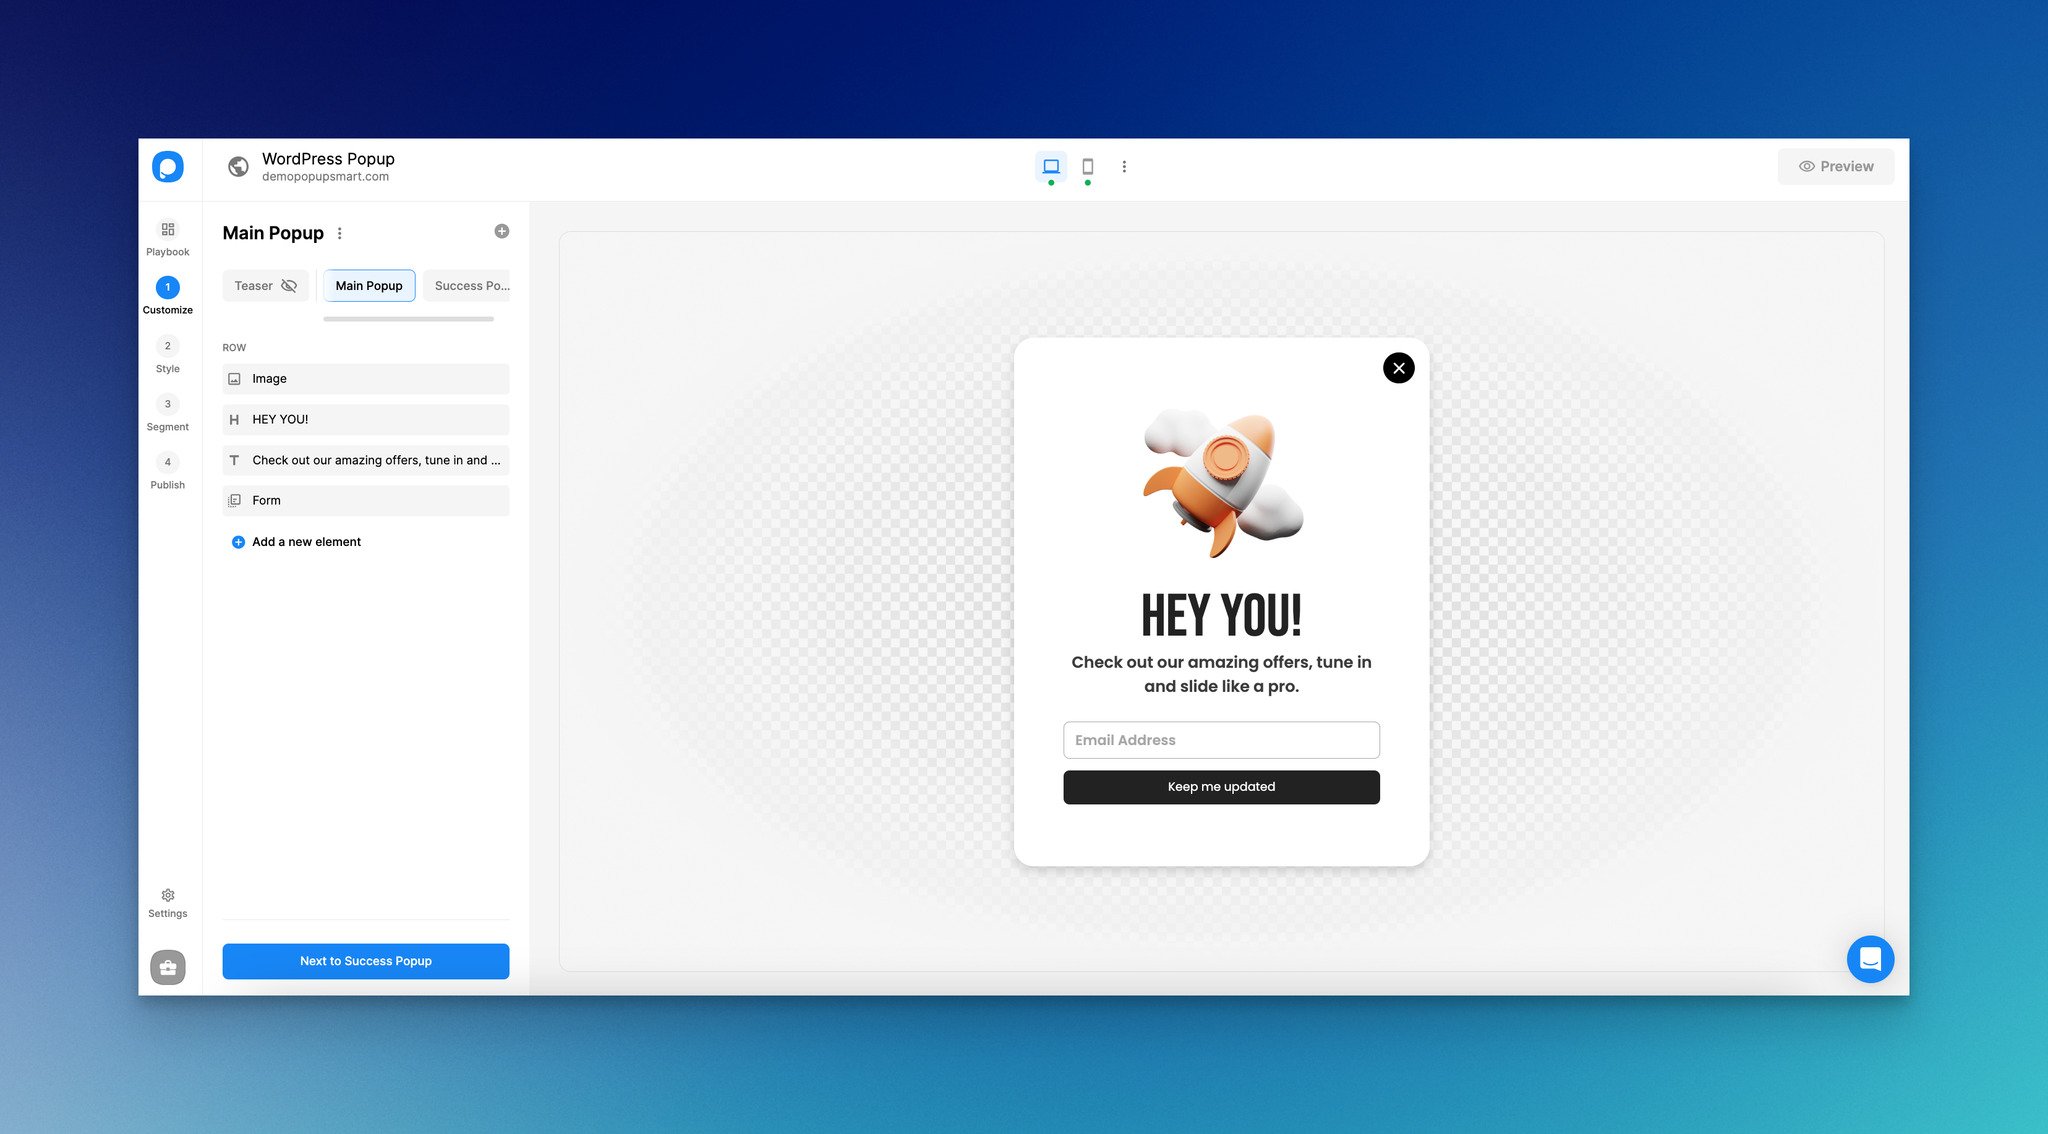
Step 7: Go to the “Campaigns” page & click “New Campaign” to create your popup campaign.
Create your popup & customize it according to your goals & brand identity.
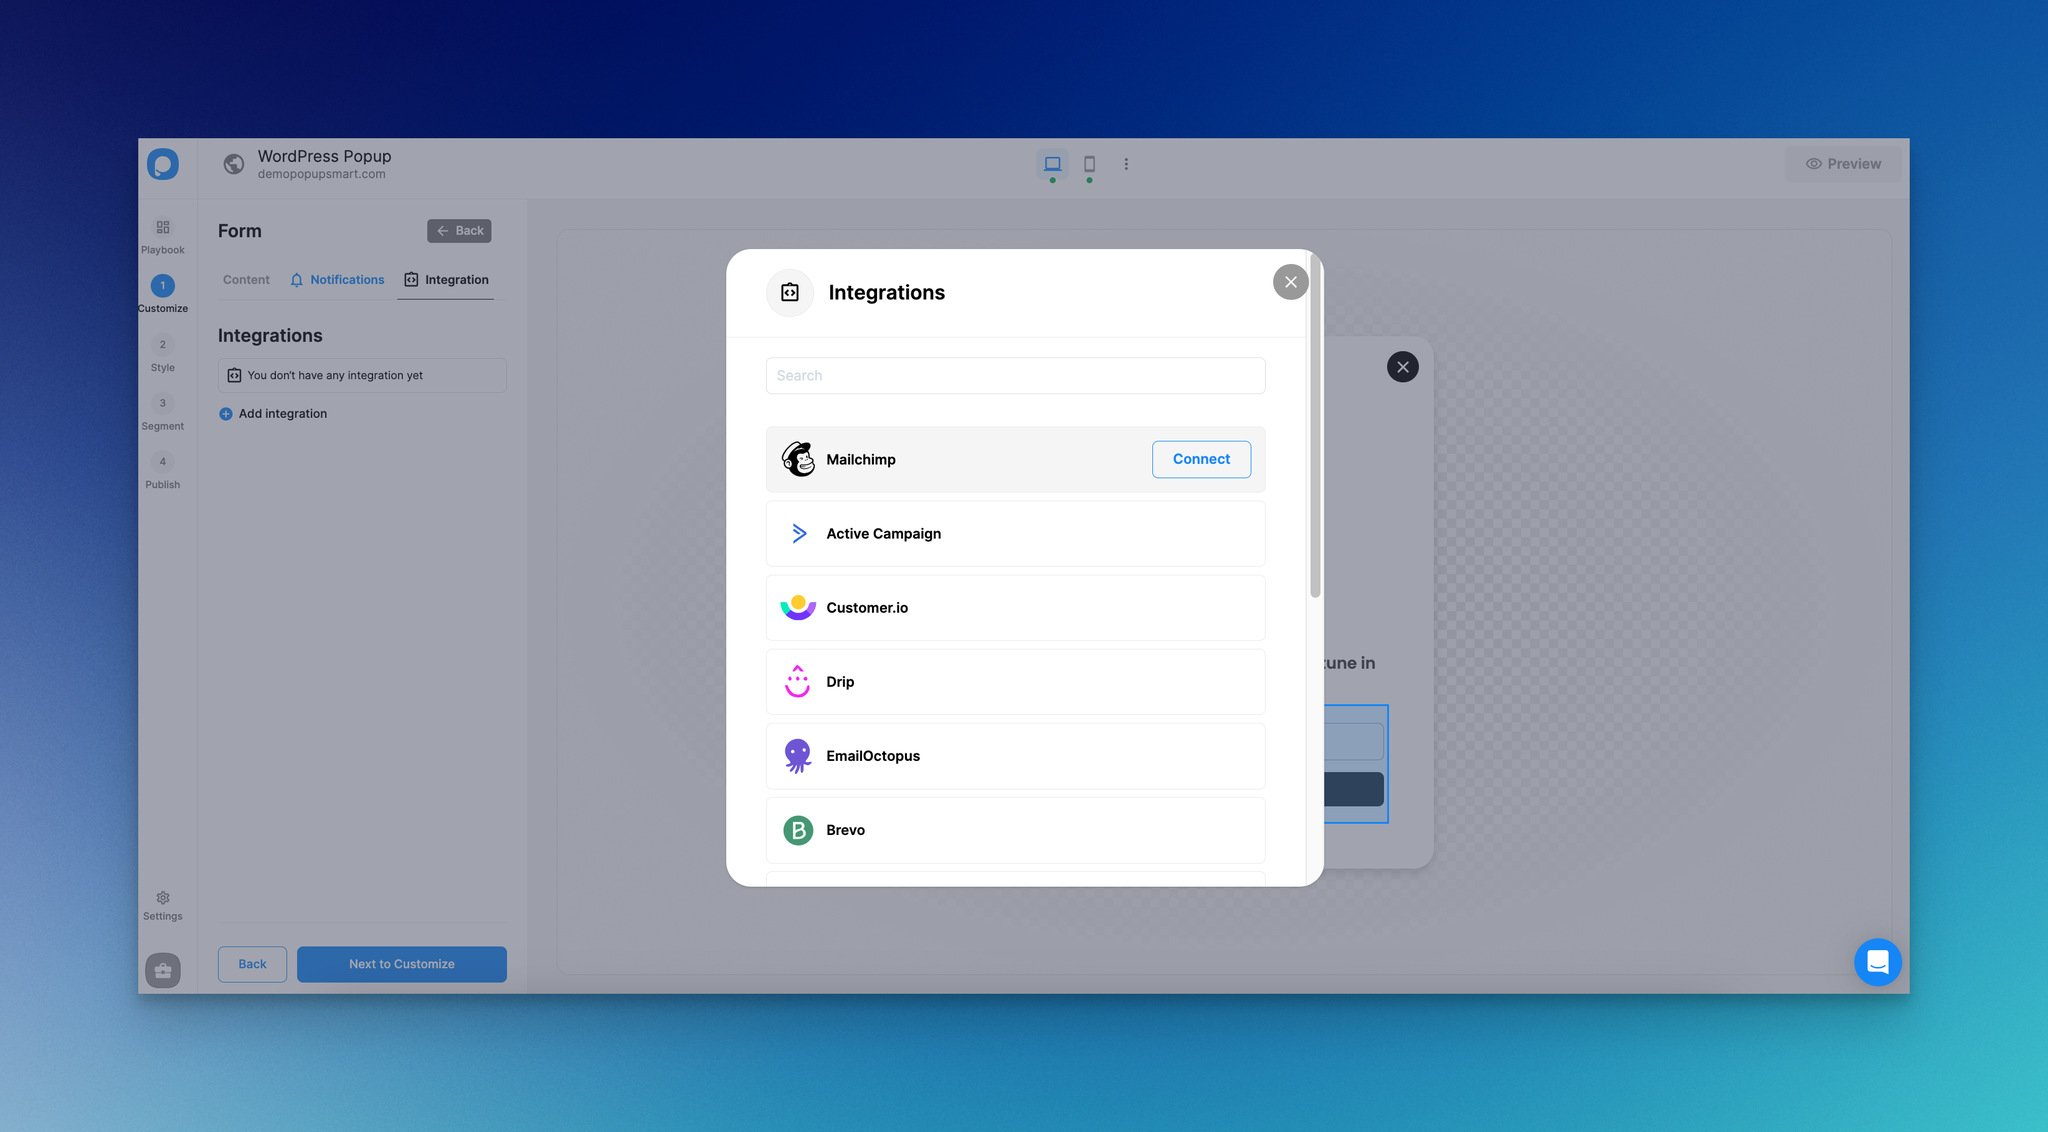
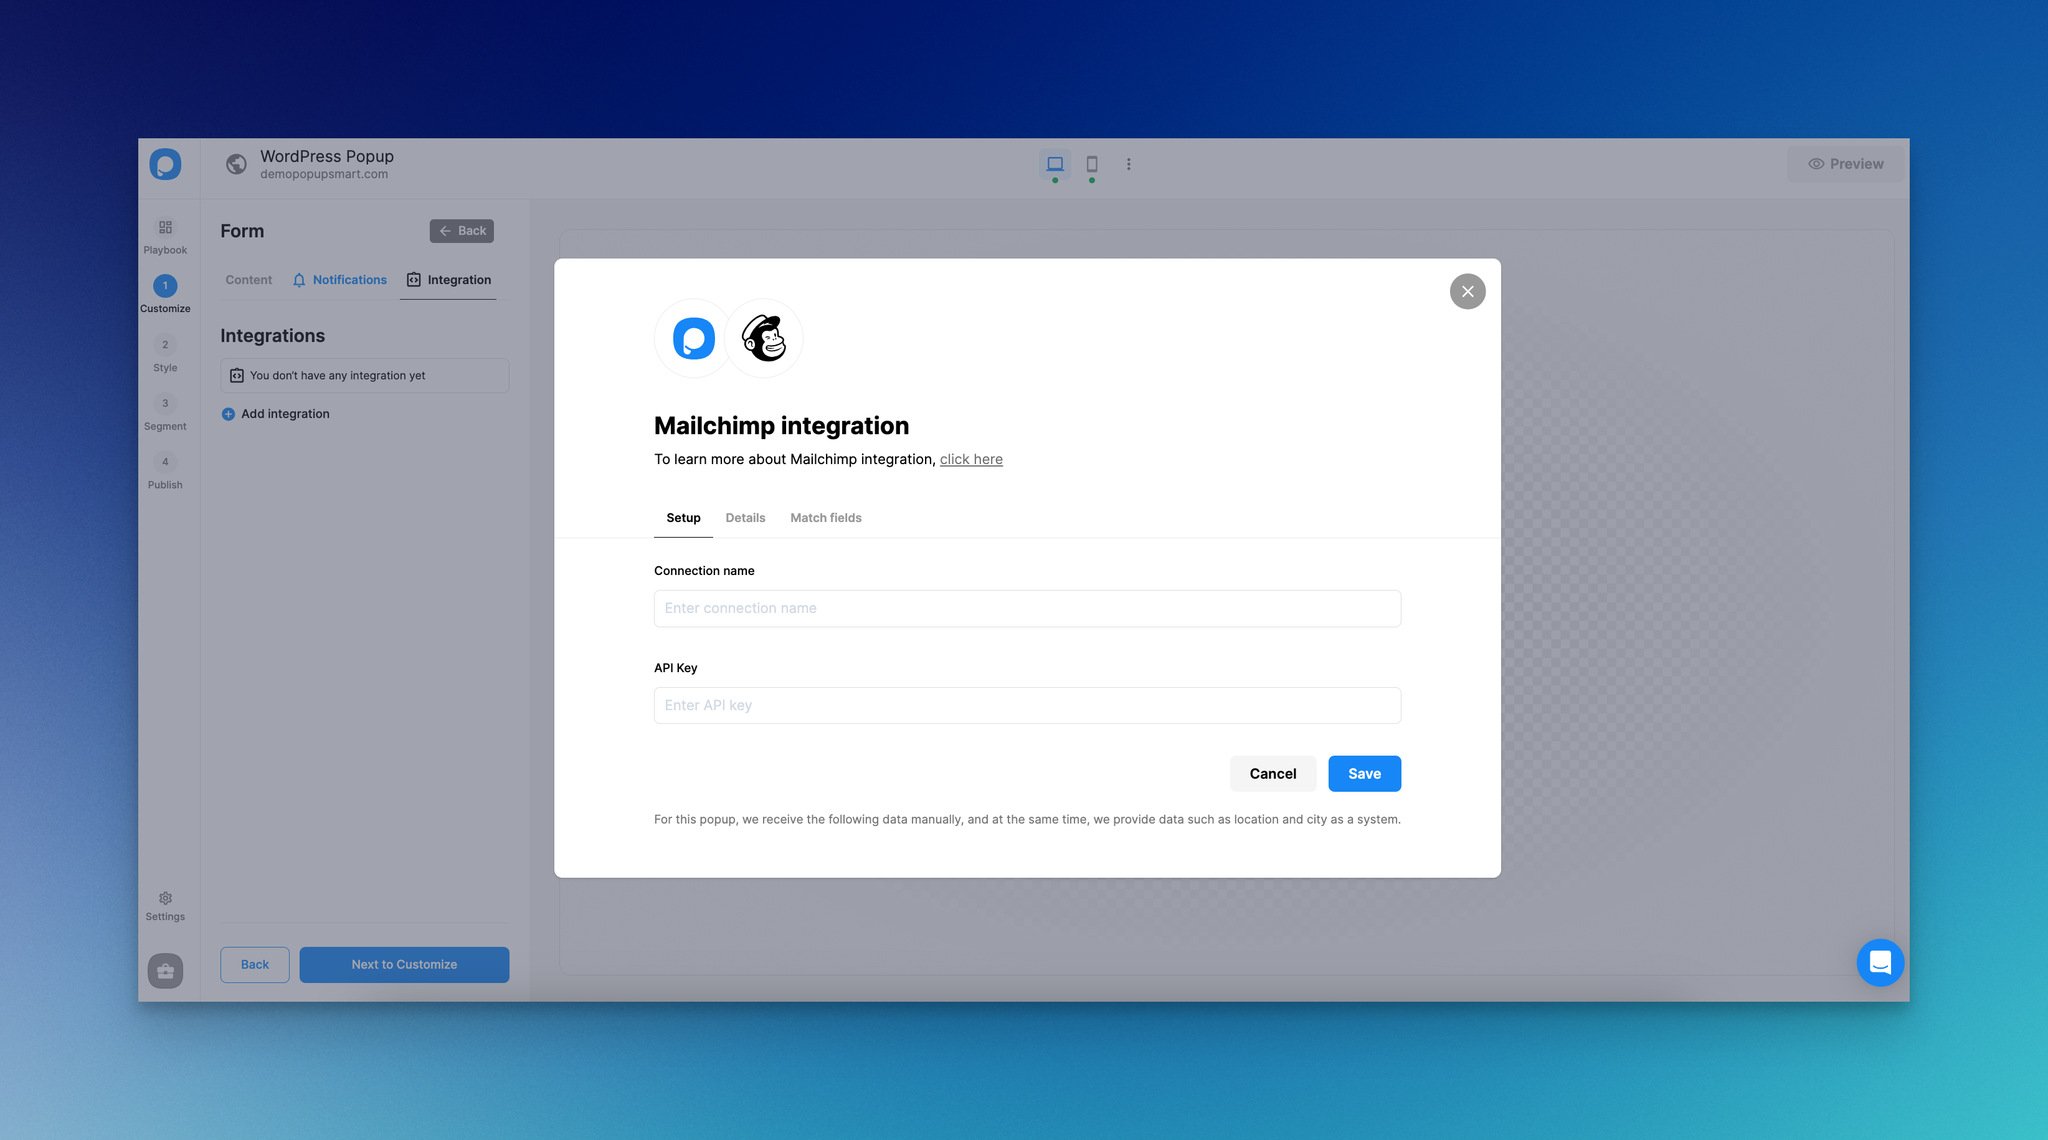
Step 8: Click on your campaign's form element and click the "Add integration" button.

Then, select MailChimp from the list and click the “Connect” button.
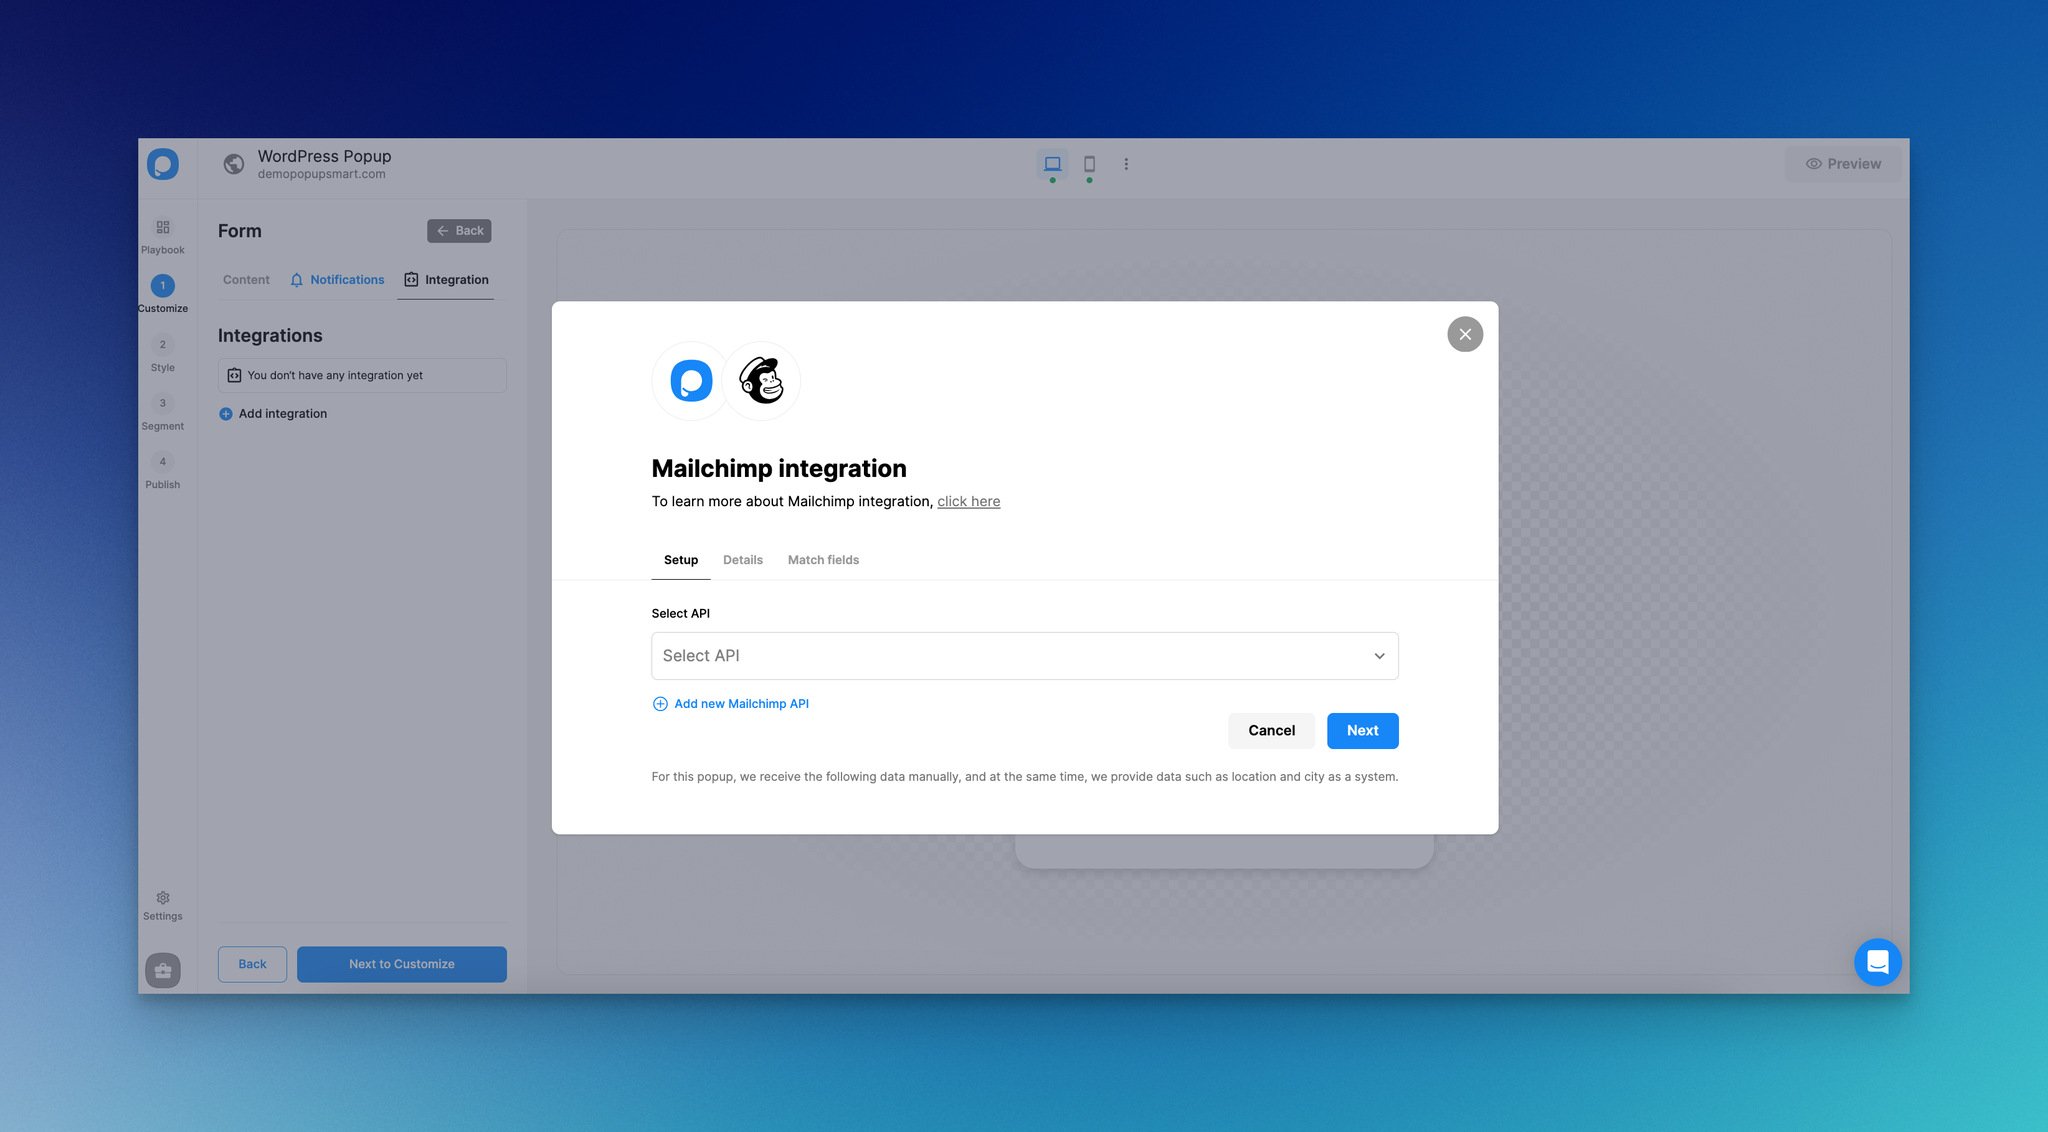
Step 9: Select "API" or "Add new MailChimp API."
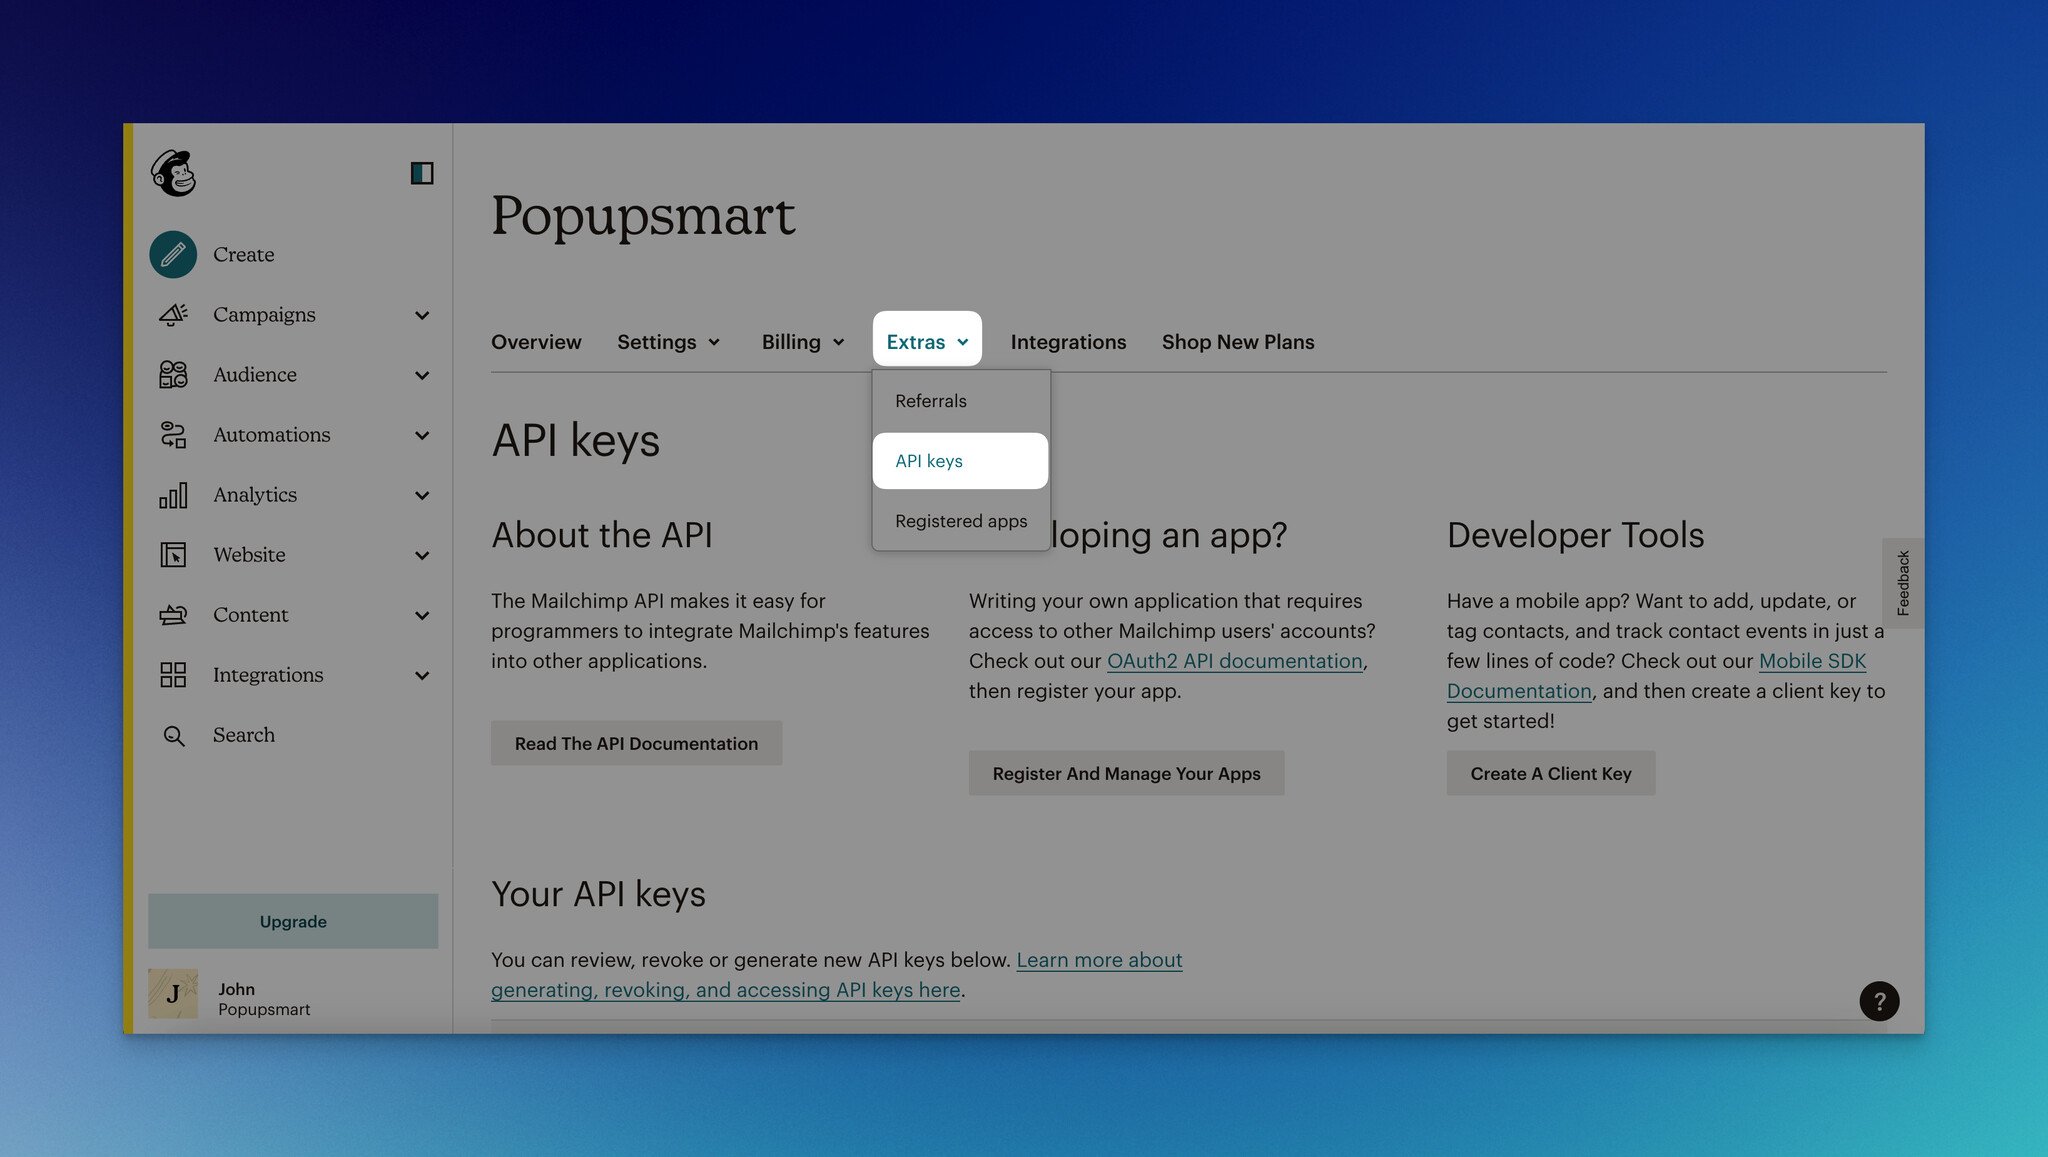
Step 10: Log in to your Mailchimp account, click on your profile, and select "Account & billing." Navigate to "Extras" and click "API keys."
Step 11: Click "Create New Key." Then, generate a name for your API key.
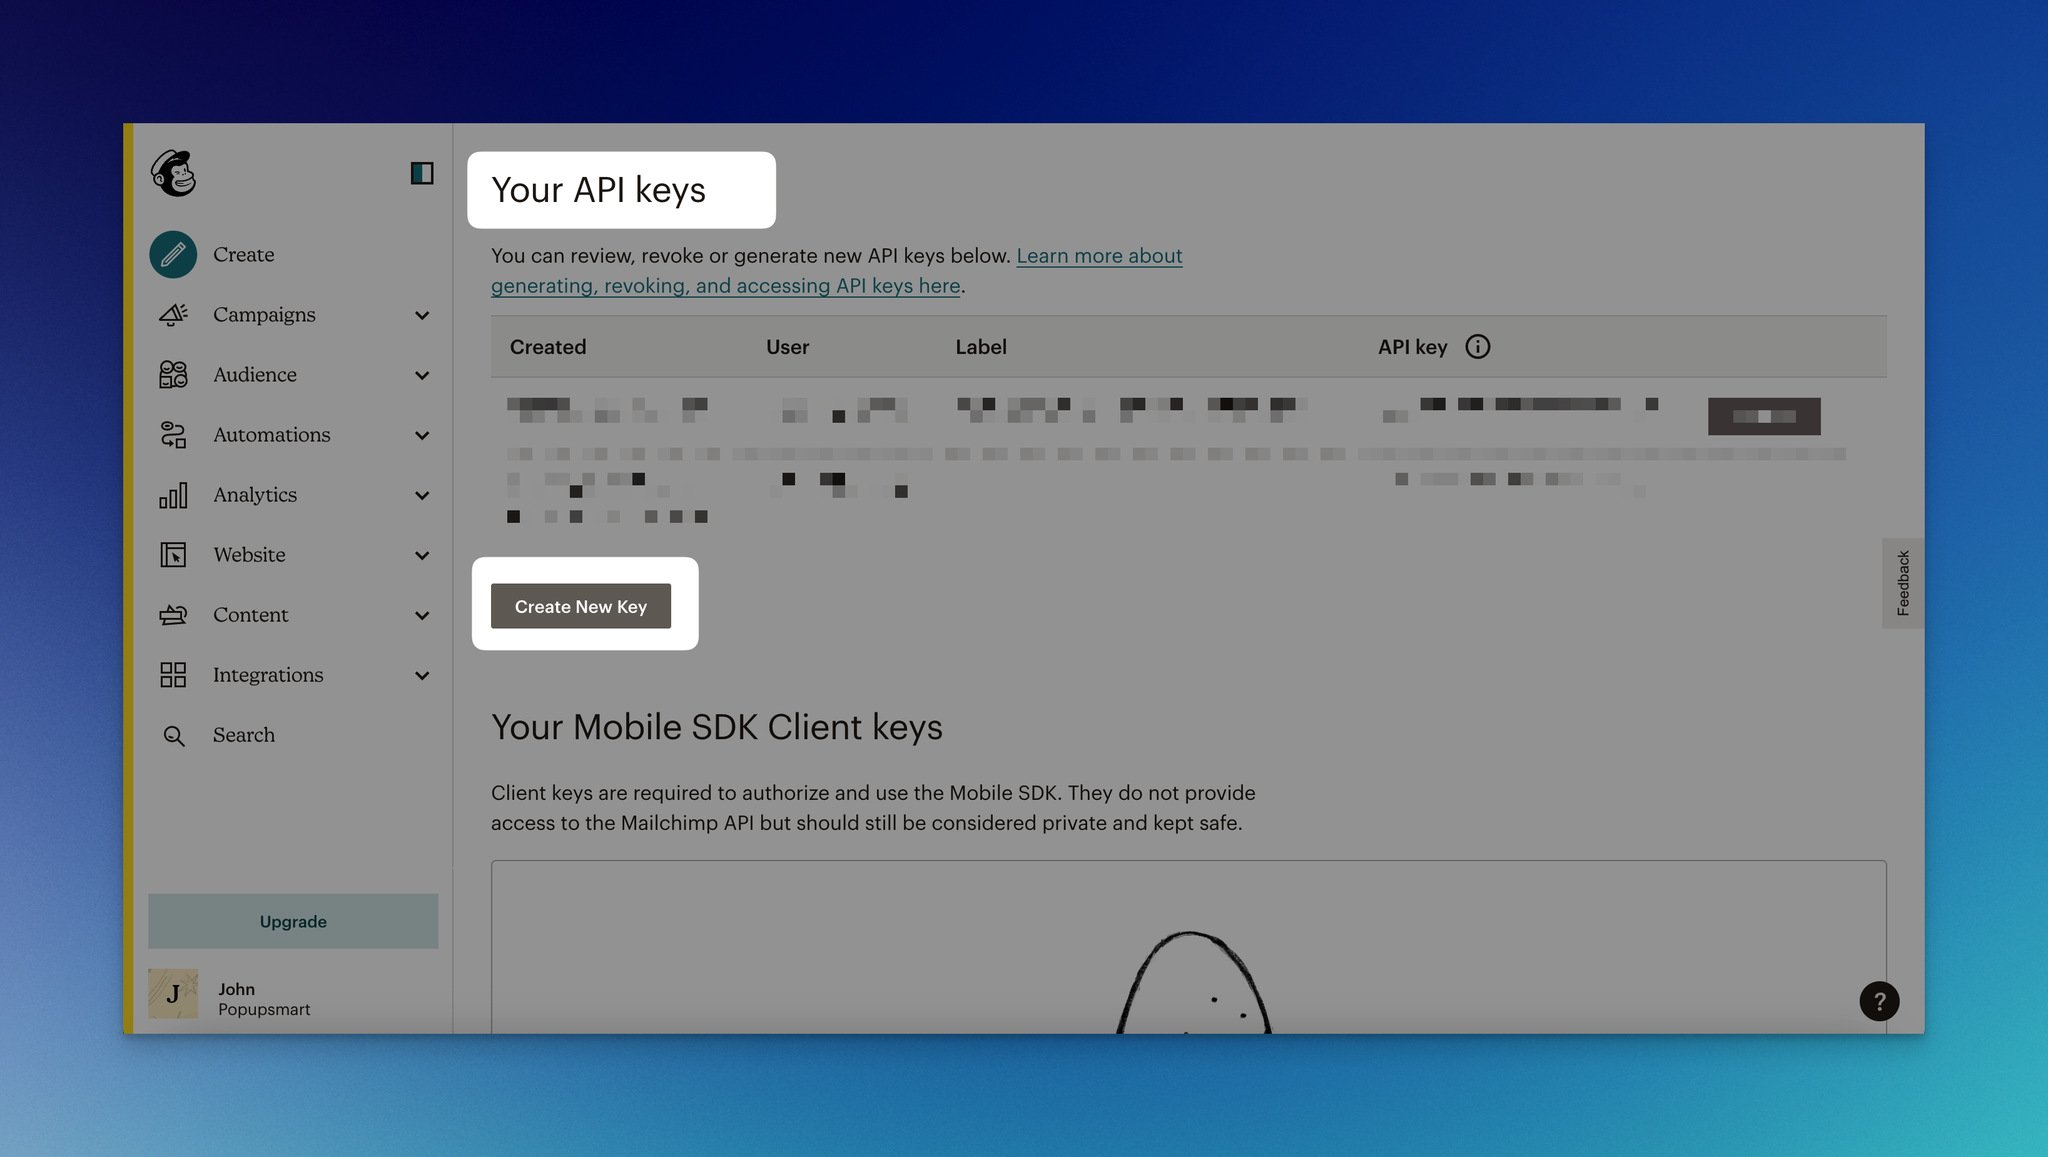
Your API key is ready now! You can copy it & paste it on Popupsmart by returning to the dashboard. Enter your key to the “API Key” part.
Then, select your list from the dropdown. Fill in the blanks according to the data you desire. Options include Form Field, System Field, API Field, and Static Field.
Save your settings, publish your popup & that’s all! The integration status is on by default; you can adjust it by toggling on/off in the three-dot menu.
Now, you can use the popups you create with Popupsmart on WordPress and integrate them with MailChimp for your business goals.
Learn more by reading: “How to Integrate Popupsmart with Mailchimp”
Top Benefits of Adding a MailChimp Popup to WordPress Site

You will inevitably have incredible benefits after you have added a MailChimp popup to the WordPress site.
Simply put, your site will be abundant after you generate leads.
Hence, let’s focus on some benefits of connecting MailChimp and WordPress.
1. Better Engagement: Because people will tend to engage with your popup depending on your campaign, your website will be enriched.
2. Strong Customer Relationship: If you plan to use your leads for email marketing, you will contact your customers so that they will feel the closeness of your brand.
3. Determined Marketing: Using popups will help you determine your aims more effectively, so you will increase the possibility of being successful.
4. Sharing and Caring: If your campaigns have appealing promotions and offers, your MailChimp popups will be happy to help while highlighting.
5. Retaining Customer: Did you know you can stop customers from leaving your store with a simple popup? Yes, popups can hold your customers.
6. Increasing Website Traffic: Since popups will leave a mark in people’s minds, they will come back to see if popups are valid, or you can get email subscribers and lead them to engage with your website.
7. Cost-Effective Solution: Since popups are not only for one aim, like collecting email subscribers, you can hit two birds with one stone.
8. Enhanced Conversion Rates: This is the best part, we know. If the targeting, customizing, and analyzing are at the right point, there is no other way than enhancing your conversion rate.
To Wrap Up
All in all, you only have to go through eight steps to have effective popups on your WordPress account with MailChimp.
Since it is a smoothly continuous process, you can determine every step as you like.
After you have completed the connection of MailChimp and WordPress, you will see its impact gradually.
When you start to see that the leads are gathered and you can have more sign-ups for your newsletters, blogs, or any business-related section, you will easily get the gist of adding a MailChimp popup to your WordPress site.
We hope you can see the significance and benefits of this process after applying by following the steps.
Frequently Asked Questions
We have answered the most common questions about adding a MailChimp popup to a WordPress site.
You can check them to have more knowledge during or after the process.
Is It Important to Display My MailChimp Popups on My WordPress Site Are GDPR Compliant?
Yes, it is. GDPR is a very important point in general, whether the topic is about popups or not. Hence, one of your main aims should be to ensure your visitors are not in danger while sharing their personal information with you.
How Can I Use Custom Designs for MailChimp Popups on My WordPress Site?
It depends on your creativity and brand identity. If your brand needs an interactive popup, your CTAs and images can even change. You should decide the image you want to reflect and show yourself ready to engage with your visitors.
How Can I Ensure That My MailChimp Popups Are Compatible With Different Devices?
This has a direct answer: You need to test your popups. After creating your MailChimp popup and publishing it on your WordPress site, you need to test it on different devices to see if it fits or not. Next, you can customize or arrange it depending on your chosen device.
Recommended Blog Posts
Since adding a MailChimp popup to WordPress takes some minutes, and you might need more improvement on your WordPress site, take a look at these blog posts as well!

How would you rate your experience with this article? 😊