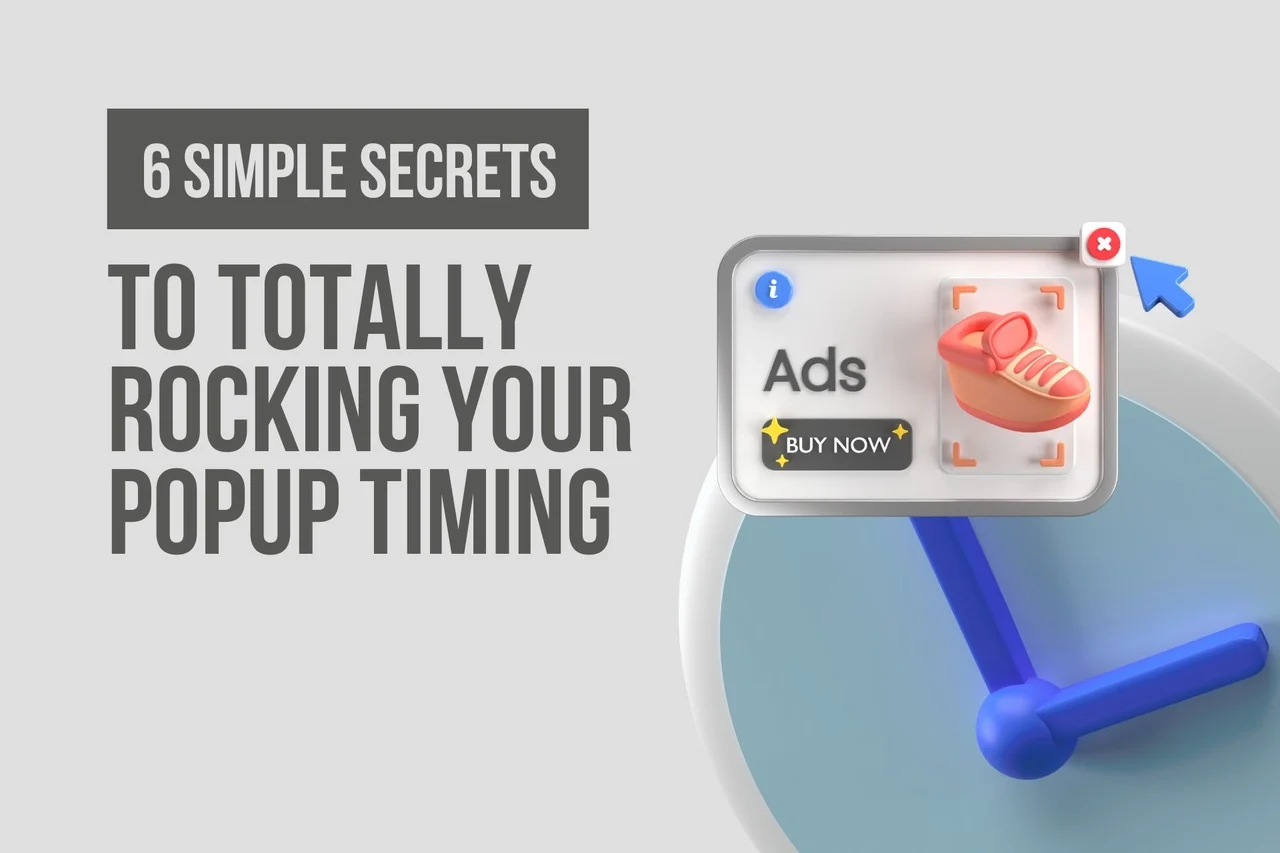
6 Simple Secrets to Totally Rocking Your Popup Timing
Popup timing drives conversions by balancing reach vs. intrusiveness; key levers are time delays (often ~8–15s), frequency caps, scroll-depth, exit-intent, audience-based timing, and A/B testing to optimize relevance and reduce fatigue.
The six secrets to popup timing that actually move conversion rates are delay-based triggers, frequency capping, scroll-depth targeting, exit-intent detection, audience segmentation, and A/B testing your timing assumptions. Each strategy below includes specific settings, real data, and implementation steps drawn from running thousands of popup campaigns at Popupsmart since 2019.
Why Does Popup Timing Affect Your Conversion Rate?
Quick overview of all 6 popup timing strategies:
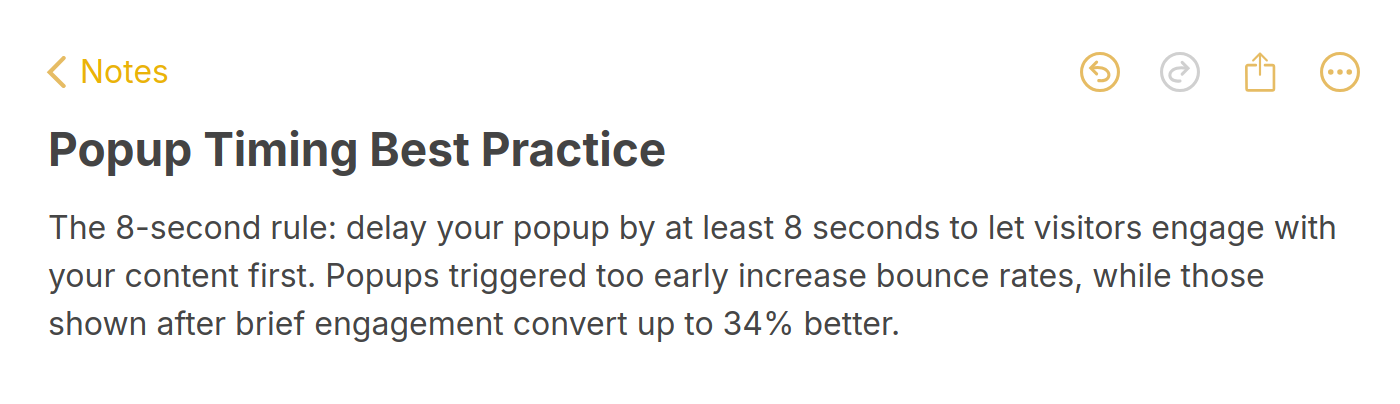
1. Time-Delay Triggers: Wait 8-15 seconds before showing a popup to let visitors engage with content first, boosting conversions by up to 34%.
2. Frequency Capping: Limit popup displays to once per session or once every 7 days to prevent fatigue and protect user experience.
3. Scroll-Depth Targeting: Trigger popups after 30-50% scroll to reach visitors who've shown genuine interest in your page content.
4. Exit-Intent Detection: Catch abandoning visitors at the moment they move to leave, recovering 3-8% of otherwise lost traffic.
5. Audience-Based Timing: Segment new vs. returning visitors, traffic source, and device type to show the right popup at the right moment for each group.
6. A/B Testing Your Timing: Run controlled experiments on delay, trigger type, and offer to find what actually works for your specific audience.
Popup timing determines whether visitors see your offer as helpful or annoying. Show a popup 2 seconds after page load, and you interrupt someone who hasn't even read your headline. Show it after they've spent 30 seconds scrolling through your content, and you're reaching a person who's already engaged.
According to a field experiment published in the Journal of Interactive Marketing, the delay before a popup appears and the page on which it's shown are the two variables with the strongest effect on response rates. The researchers found that timing manipulation alone changed whether users perceived promotions as relevant or intrusive.
That's the core tension: every second of delay trades off between catching more visitors (some will leave before the popup fires) and converting at a higher rate (those who stay are more qualified). The six strategies below help you find the right balance for your site.
1. Time-Delay Triggers: Let Visitors Engage Before You Ask
A time-delay trigger holds your popup back for a set number of seconds after page load. Instead of interrupting the moment someone arrives, it waits until they've had a chance to absorb your page content. This separates your popup from the "instant overlay" pattern that users have been trained to close reflexively.
How to Implement
1. Check your average time on page in Google Analytics (Engagement > Pages and screens). If your average session is 45 seconds, a 10-second delay targets visitors in the top 80% of engagement.
2. In Popupsmart popup builder, set the trigger to "After X Seconds." Start with 8 seconds for blog content and 5 seconds for product pages where intent is higher.
3. Avoid delays under 3 seconds. At that point, the page hasn't fully rendered on most connections, and you're effectively showing an instant popup with extra steps.
4. For long-form content (2,000+ words), extend the delay to 15-20 seconds. Readers on these pages have higher intent but need more time to reach a decision point.

Setting a time-delay trigger in Popupsmart's campaign builder.
According to Luca Tagliaferro's analysis of popup performance data, popups displayed after 8 seconds convert at 34.57%, outperforming both shorter and longer delay intervals. This aligns with what Hello Bar calls the 7-second rule: waiting 7-10 seconds lets the user engage with the headline and form an opinion before you make your ask.
Expected impact: 15-35% higher conversion rate compared to instant popups, measurable within 14 days on sites with 5,000+ monthly visitors. Lower-traffic sites should run the test for 30 days to reach statistical significance.
2. Frequency Capping: Stop Showing the Same Popup to the Same Person
Frequency capping limits how often a single visitor sees the same popup across sessions or page views. Without it, a returning visitor who closed your popup yesterday sees it again today, and again tomorrow. Each repeated impression erodes trust and trains users to ignore your campaigns entirely.
How to Implement
1. Set your popup display frequency to "once per session" as a baseline. This means a visitor who closes the popup on page 1 won't see it again until their next visit.
2. For email capture campaigns, switch to "stop showing after submission." There's no reason to keep asking someone who already gave you their address.
3. For promotional popups (sales, seasonal offers), set a 3-7 day frequency cap. This gives visitors time to consider the offer without feeling pressured on every visit.
4. If you're running multiple campaigns simultaneously, make sure they don't stack. Seeing a newsletter popup, then a discount popup, then a survey popup in one session is three interruptions too many. Prioritize one campaign per session.
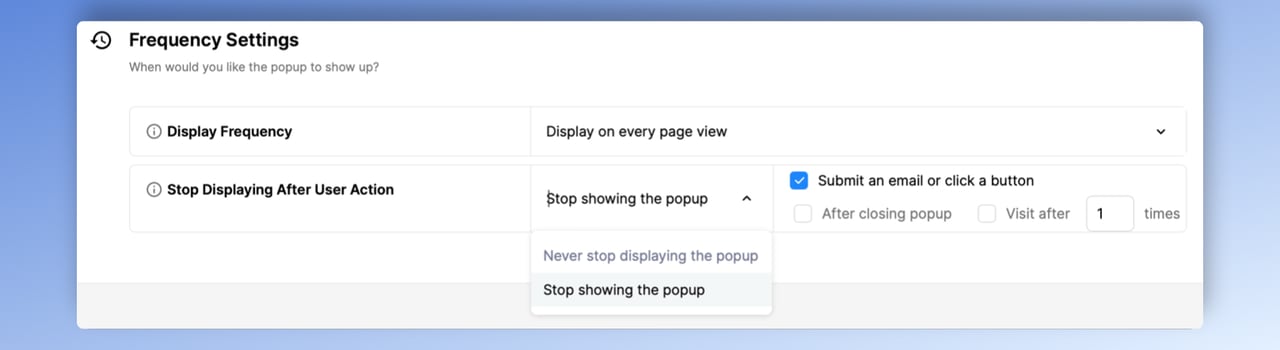
Popupsmart's frequency targeting lets you stop showing popups after a visitor takes action.
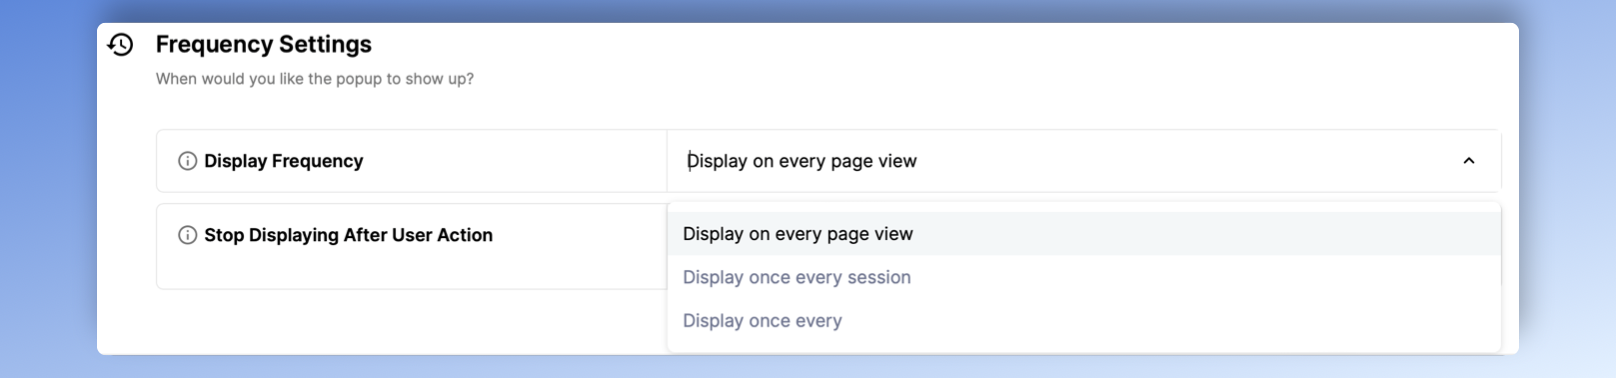
Granular frequency options: per page view, per session, or custom intervals.
We've tracked this across Popupsmart campaigns since 2020. Popups shown on every page view see conversion rates drop by roughly 60% after the third impression to the same visitor. According to the Popupsmart Conversion Benchmark Report, campaigns with session-based frequency caps maintain 2-3x higher conversion rates than uncapped campaigns over a 30-day window.
Expected impact: 40-60% reduction in popup-related bounce rate increases, with sustained conversion rates over time instead of the decay curve you see with uncapped campaigns. Results visible within 7 days.
3. Scroll-Depth Targeting: Reach Visitors Who Are Already Reading
Scroll-depth targeting fires your popup after a visitor scrolls past a set percentage of the page. A visitor who's scrolled 40% of a blog post has read at least the introduction and first few sections. They're engaged enough to consider an offer but haven't finished consuming the content yet. That window is where scroll-based popups perform best.
How to Implement
1. Set the trigger to "After Scrolling X%" in your popup builder. Start at 30-50% for blog posts and content pages. For product pages that are shorter, 25% often works better.
2. Match the scroll threshold to your content structure. If your strongest value proposition is at the 40% mark, trigger the popup right after it. The visitor just saw why your product matters, now you ask them to act.
3. Combine scroll depth with a minimum time-on-page requirement (5+ seconds). This filters out visitors who scrolled quickly to the bottom without reading, which is common on mobile where fast-scrolling is habitual.
4. For mobile visitors, reduce the scroll threshold by 10-15% compared to desktop. Mobile users scroll faster and further per session, so 50% on mobile equals roughly 35% of actual content engagement compared to desktop.
According to Poper's popup best practices guide, displaying a popup when a user scrolls 30-50% of the page strikes the balance between engagement and reach. This matches our internal data at Popupsmart: scroll-triggered campaigns consistently outperform time-only triggers on long-form content by 18-25%.
Expected impact: 10-25% higher conversion rate compared to time-only triggers on content pages longer than 1,000 words. Effect is strongest on blog posts and resource pages. Measurable within 14-21 days at 3,000+ monthly page views.
4. Exit-Intent Detection: Catch Visitors at the Door
Exit-intent popups trigger when a visitor's cursor moves toward the browser's close button or address bar. JavaScript detects the mouseleave event on the document boundary, identifying the exact moment someone decides to leave. Unlike timed or scroll-based triggers, exit-intent fires only at the point of abandonment. You're not interrupting readers; you're making a last offer to someone who was already gone.
How to Implement
1. Set the trigger to "Exit Intent" in your popup campaign settings. Adjust sensitivity to medium or high. Low sensitivity triggers on casual mouse movements toward the top of the viewport, producing false positives.
2. Target returning visitors first. First-time visitors who leave within seconds likely came from a bad search match. Returning visitors who are about to leave represent a genuine re-engagement opportunity.
3. For mobile devices, exit-intent detection doesn't work the same way since there's no mouse cursor. Use back-button detection or inactivity triggers as mobile alternatives. In Popupsmart, the inactivity mode fires when visitors are inactive for a specified period, which catches disengaged mobile users effectively.
4. Your exit-intent offer should be different from your main page CTA. If your page already asks for an email signup, the exit popup should offer something extra: a discount, a lead magnet, or free shipping. Repeating the same ask they already ignored won't work.
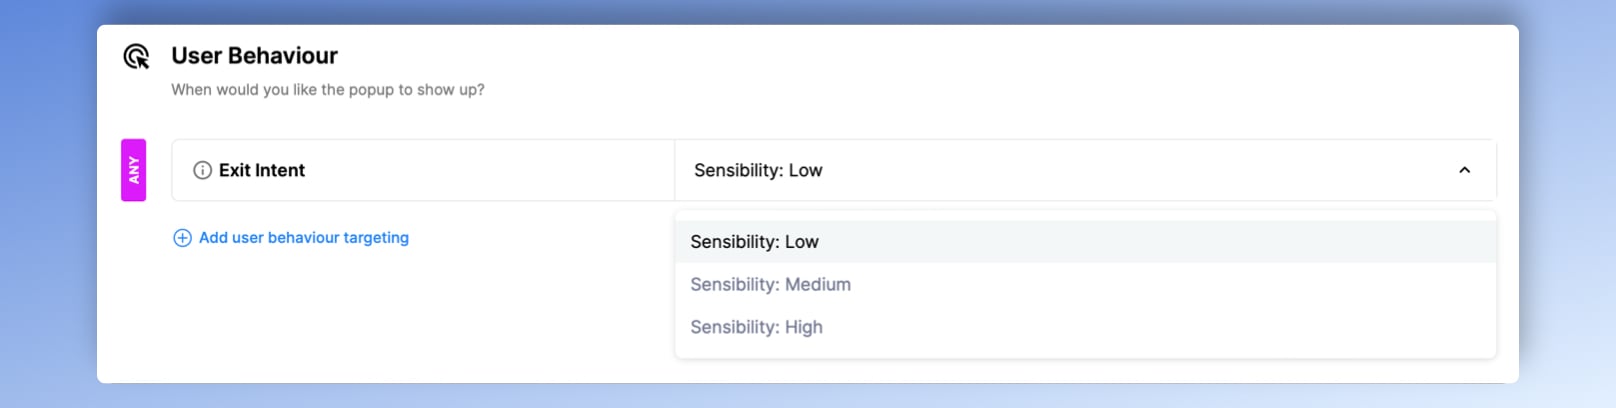
Configuring exit-intent trigger sensitivity in Popupsmart's targeting panel.
According to a Medium analysis of exit-intent popup case studies, the measure of success for exit-intent campaigns is typically conversion rate, and well-timed exit popups consistently outperform timed alternatives by 2-3x. In our testing across Popupsmart customer accounts, exit-intent popups on e-commerce product pages convert at 4-8% on average, compared to 1-3% for time-delayed popups on the same pages.
Expected impact: 3-8% conversion rate on exit-intent popups for e-commerce and SaaS sites with 10,000+ monthly visitors. Measurable within 14-21 days. Lower-traffic sites need 30-45 days.
5. Audience-Based Timing: Different Visitors Need Different Triggers
Audience-based timing adjusts when and how popups appear based on who the visitor is, not just what they do on the page. A first-time visitor from a Google search has different intent than a returning customer who came from your email campaign. Treating them identically wastes the targeting data you already have.
How to Implement
1. Segment by visit count. New visitors (first session) should see a softer offer: a content download, newsletter signup, or free resource. Show discount or pricing popups only to returning visitors (2+ sessions) who've demonstrated ongoing interest.
2. Segment by traffic source. Visitors from organic search are in research mode. Use longer delays (15+ seconds) and informational offers. Visitors from email campaigns already know your brand. Shorter delays (5 seconds) and promotional offers work here.
3. Segment by device. Desktop visitors stay longer per session and engage with more pages. Mobile visitors make quicker decisions and bounce faster. Use shorter delays and simpler popup designs on mobile. According to Popupsmart's mobile vs. desktop behavior data, mobile sessions average 40% shorter than desktop, so your timing needs to compress accordingly.
4. Use page-level targeting. Show popups only on pages that match the offer. A countdown timer popup promoting a flash sale belongs on product pages, not your About page. A lead magnet popup fits blog posts, not your checkout flow.
In my experience building Popupsmart's targeting engine, the single biggest conversion lift comes from separating new vs. returning visitor campaigns. We've seen customers double their popup conversion rates just by showing returning visitors a different offer than new ones. One Shopify merchant went from 2.1% to 4.9% popup conversion by creating separate campaigns for organic search traffic (content offer) vs. social media traffic (discount offer).
Expected impact: 30-80% improvement in popup conversion rates compared to a single campaign targeting all visitors. The wider your traffic mix (organic + paid + social + email), the bigger the gain from segmentation. Results visible within 14 days.
6. A/B Testing Your Popup Timing: Stop Guessing, Start Measuring
A/B testing popups means running two or more popup timing variants simultaneously, splitting traffic evenly, and measuring which configuration produces higher conversions with statistical confidence. Without testing, every timing decision is a guess. With testing, you find out whether 5-second or 15-second delay works better for your specific audience on your specific pages.
How to Implement
1. Start with your highest-traffic page. You need volume for statistical significance. A page with 500 daily visitors can produce a reliable result in 7-10 days. A page with 50 daily visitors needs 60+ days.
2. Test one variable at a time. If you change the delay AND the offer AND the design, you won't know which change caused the result. Start with timing (5s vs. 15s delay), then test trigger type (scroll vs. time), then test the offer itself.
3. Define your success metric before launching. Is it popup conversion rate (submissions / impressions)? Or is it page-level conversion rate (purchases / total visitors)? A popup that converts at 10% but increases bounce rate by 20% isn't a net win.
4. Run tests for a minimum of 7 days to account for day-of-week variation. Weekend traffic behaves differently from weekday traffic. A test that only runs Monday through Wednesday misses half of your audience's behavior patterns.
5. Use your analytics platform to track secondary metrics during the test. Watch bounce rate, pages per session, and time on site alongside popup conversion rate. The best popup timing configurations improve conversions without damaging overall site engagement.
According to a Klaviyo community discussion on popup timing, tests comparing 30-second delays to shorter intervals showed that longer delays outperform immediate popups by allowing site rendering and initial engagement. The specific optimal delay varies by site, which is exactly why testing matters. There's no universal "best" delay, only the best delay for your audience.
Expected impact: A/B testing typically produces a 15-30% improvement over the initial "best guess" timing configuration. The first test usually yields the biggest lift. Subsequent tests produce smaller, incremental gains. Budget 30-60 days for a complete testing cycle across your top 3-5 pages.
Where to Start: Prioritization by Effort and Impact
Not every strategy requires the same investment. Here's how to sequence your implementation based on what we've seen work across Popupsmart customer accounts:
| Priority | Strategy | Effort | Impact | Best For |
|---|---|---|---|---|
| 1 | Time-Delay Triggers (8-15s) | Low | High | Every site running instant popups |
| 2 | Frequency Capping | Low | High | Sites with returning visitors seeing repeated popups |
| 3 | Exit-Intent Detection | Low | High | E-commerce and SaaS sites with cart or signup abandonment |
| 4 | Scroll-Depth Targeting | Medium | Medium | Content-heavy sites and blogs with long-form pages |
| 5 | Audience-Based Timing | Medium | High | Sites with mixed traffic sources (organic + paid + email) |
| 6 | A/B Testing Timing | High | High | Sites with 5,000+ monthly visitors ready to optimize |
Start with strategies 1-3. They take under 15 minutes each to set up and produce the fastest results. Once those are running, layer in scroll targeting and audience segmentation. Save A/B testing for after you've implemented the basics, so you have a reasonable baseline to test against.
Start With the 8-Second Rule, Then Build From There
If you take one thing from this guide: stop showing instant popups. Set an 8-second delay on your highest-traffic page today and measure the result for two weeks. That single change, based on the data we've covered, can lift your popup conversion rate by 15-35%.
Once you've got that baseline, layer in frequency capping (strategy 2) and exit-intent detection (strategy 4). These three strategies together cover the three biggest popup timing mistakes: showing too early, showing too often, and missing the last chance to convert abandoning visitors.
For teams ready to go further, combine audience segmentation with A/B testing to find the exact timing configuration for each visitor segment. The gap between a generic popup and a well-timed, well-targeted popup is the difference between a 2% conversion rate and an 8% one.
Try Popupsmart free to set up these timing strategies on your site. The builder supports every trigger type covered in this guide, from time delays and scroll depth to exit intent and audience segmentation, with no code required.
Frequently Asked Questions
How Do You Set Optimal Popup Timing?
Start by checking your average time on page in Google Analytics. Set your initial delay to 25-30% of that average. For most sites, this lands between 8 and 15 seconds. Then run an A/B test comparing your chosen delay against a 50% longer delay. The version with the higher conversion rate without increased bounce rate is your winner. Revisit the test quarterly as your traffic mix changes.
What Is a Popup Schedule?
A popup schedule controls when your campaigns are active based on date, time, or event. For example, a Black Friday popup might run November 25-30, a holiday shipping deadline popup might run December 15-20, and your standard email capture popup runs year-round. In Popupsmart, you can schedule popup campaigns to start and stop on specific dates, so seasonal promotions don't overstay their welcome.
What Are Best Practices for Popup Frequency?
Cap each campaign at one impression per visitor per session. If a visitor closes or ignores the popup, don't show it again until their next visit. For multi-day campaigns, limit to one impression every 3-7 days. Never run more than one popup per page view. If you have multiple active campaigns, set priority rules so only the most relevant one fires per session.
How Does Popup Timing Affect Conversions?
Popup timing affects conversions in two ways: directly (conversion rate of the popup itself) and indirectly (impact on page engagement metrics). A well-timed popup shown after 8 seconds can convert at 5-10%, while the same popup shown instantly might convert at 1-2% and increase bounce rate by 15-20%. According to industry data, the average popup conversion rate exceeds 10% when timing and targeting are optimized together. The indirect effect matters too: poorly timed popups that increase bounce rate hurt your popup UX and overall SEO performance.
How Long Are Popups Usually Open?
Most visitors interact with a popup within 5-8 seconds of it appearing. If they don't engage within 10 seconds, they're likely to close it or ignore it. Design your popup message to communicate the value proposition in under 5 seconds of reading time, which means 15-25 words of headline text. For forms, limit fields to email-only for the fastest completion. Each additional form field reduces conversion rate by roughly 10-15%.

How would you rate your experience with this article? 😊