
What Are Facebook Lead Ads?
Firstly, it is crucial to get to know Facebook Lead Ads.
They are a type of Facebook ad specifically designed to collect lead information with minimal effort from interested users.
This is how it works - when a user clicks on a lead ad, a form pops up prefilled with their Facebook account information, allowing them to quickly submit it with a single click.
This reduces friction in the lead generation process, thus increasing conversion rates.

Why Is Sending Facebook Leads Ads Important?
We can answer this question with various helpful reasons, and here they are!
- Allows you to gather valuable user information directly from Facebook.
- Provides high-quality leads since users who fill in the form are likely to be interested in your product or service.
- Reduces the time and effort required for a user to become a lead, resulting in higher conversion rates.
- Increases user engagement since they support personalized marketing by segmenting users.
- Directs you for a better ROI because it both expands the customer base and targets the right audience.
- Reduces the risk of human error and speeds the process up by cutting out manual data entry.
- Offers real-time updates whenever a prospective lead fills out your form on the ad to have data on time.
Getting to Know Google Sheets
Google Sheets is a web-based spreadsheet program. It's a part of the free, web-based software office suite offered by Google as part of its Google Drive service.
This platform allows users to create, modify, and store spreadsheets online while allowing real-time collaboration with other users.
For most businesses, Google Sheets is an essential tool for:
- Maintaining and organizing data related to your leads.
- Sharing and collaborating on data with other members of your team.
- Analyzing data with a range of powerful tools and features, including charts, formulas, and Google Analytics integration.
Therefore, the automation you are setting up is significant for understanding the role of Facebook Lead Ads in generating high-quality leads with minimal effort and the power of Google Sheets for organizing, sharing, and analyzing lead data.
Step-by-Step Guide to Connect Facebook Lead Ads to Google Sheets on Zapier
It is the exact action we need to touch upon. We will guide you through how you can connect Facebook to Google Sheets for Facebook As Leads.
Since there is a need for a third-party solution for connecting Facebook Lead Ads and Google Sheets, we decided to proceed with this scenario on Zapier.
However, you need to have a paid plan on Zapier to connect Facebook Ad Leads.
Here are the steps for integrating Facebook Ad Leads to Google Sheets:
Step 1- Prepare Your Facebook Ads Manager and Google Sheet Spreadsheet.
Ensure you have an active Facebook Ads Manager account with active lead ads and administrative access to your Google Sheets spreadsheet.
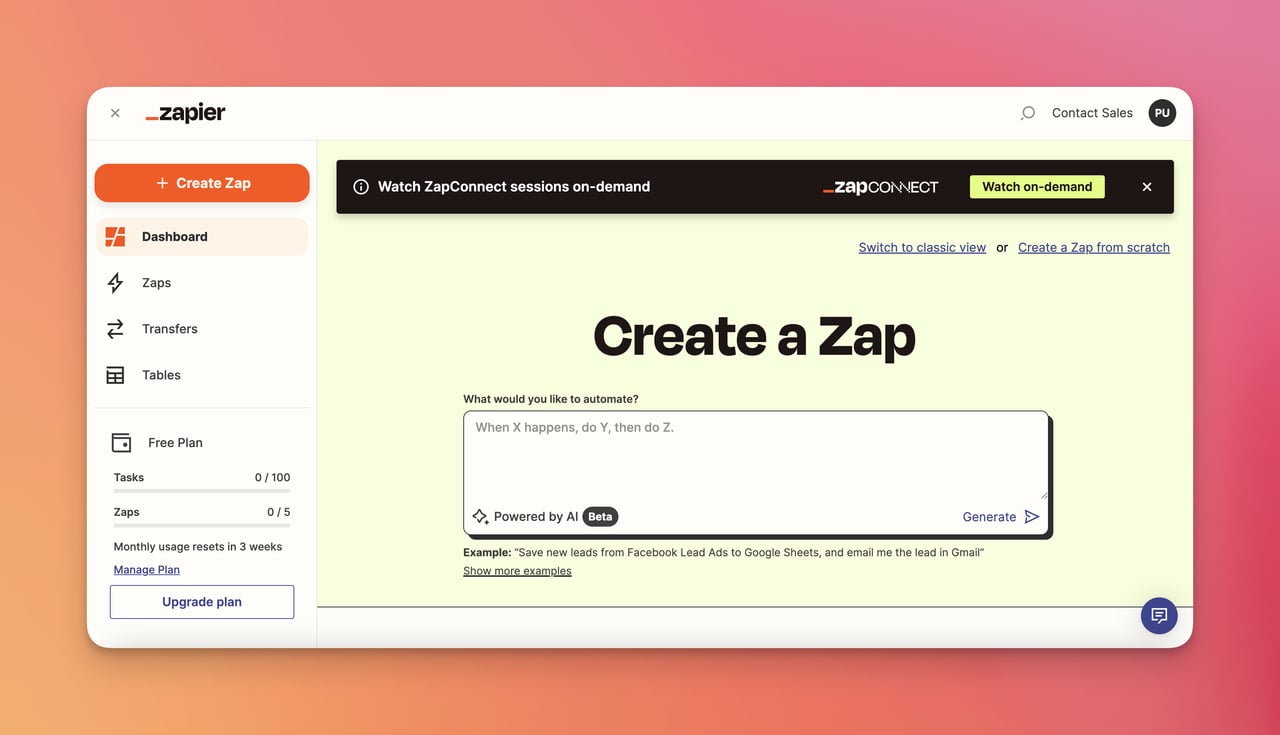
Step 2- “Create Zap” on Zapier Dashboard.
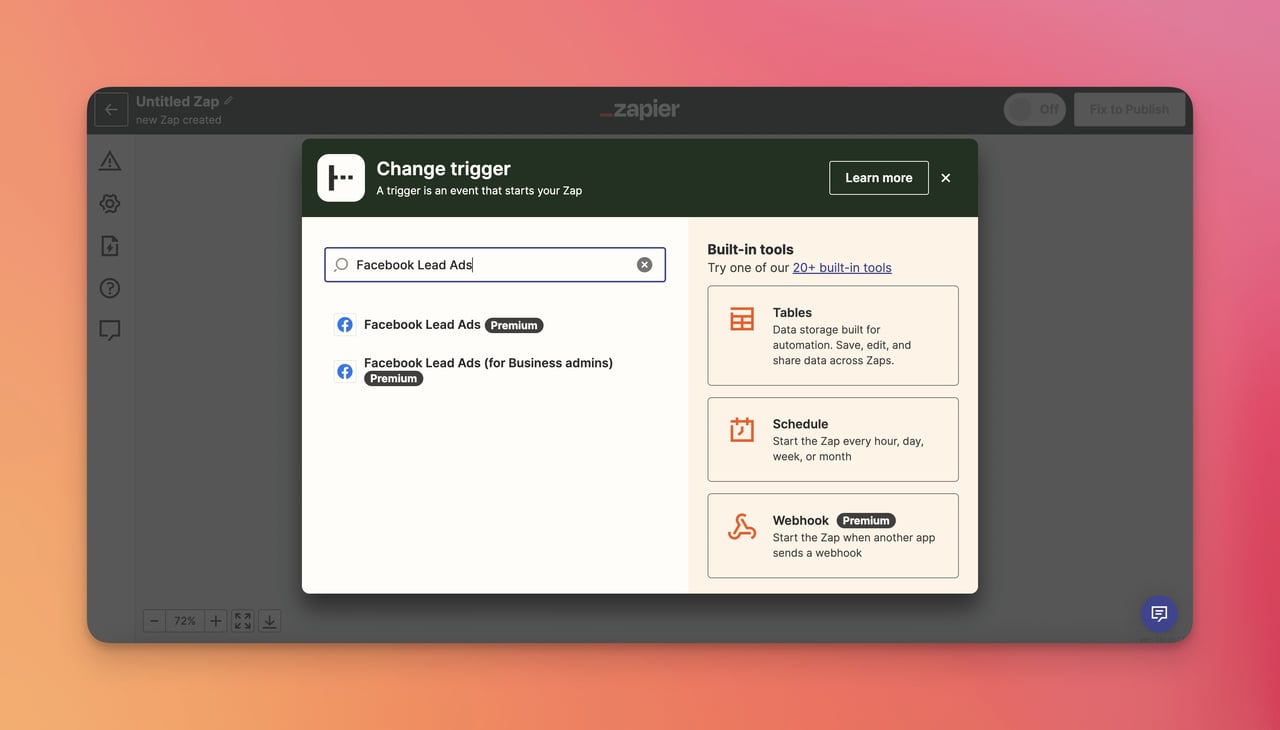
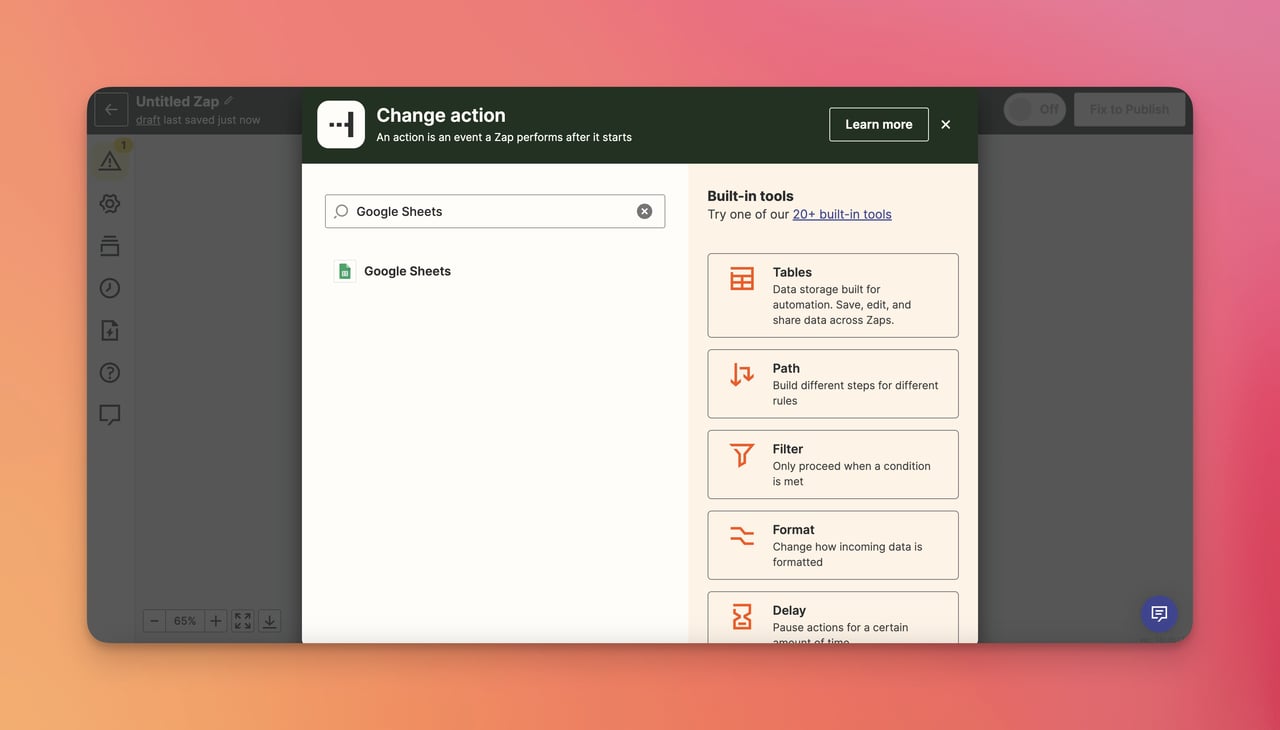
Step 3- Choose 'Facebook Lead Ads' as your 'Trigger' and 'Google Sheets' as your 'Action.'
Here is how you can choose Google Sheets as your Action.
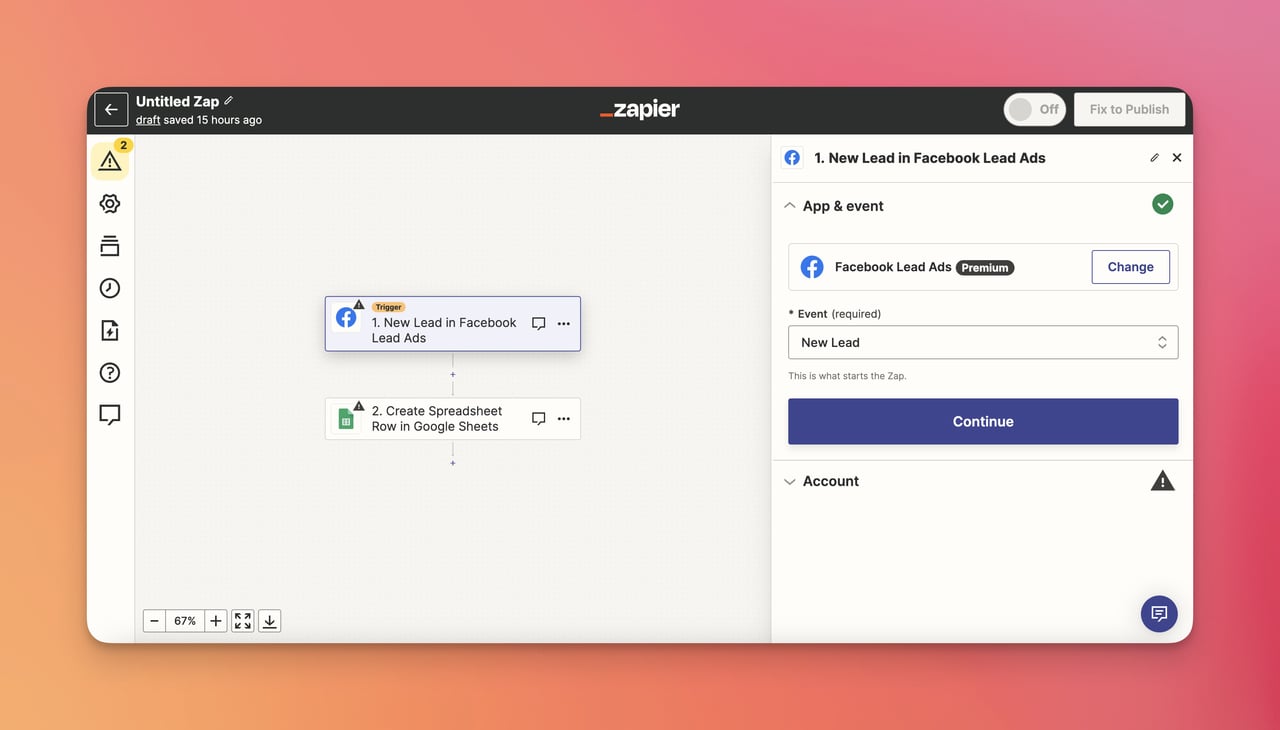
Step 4- Select Event as “New Lead” and Click “Continue” to Connect Your Facebook Ad Leads Account.
Once you've logged in, the platform will automatically fetch all your Facebook pages.
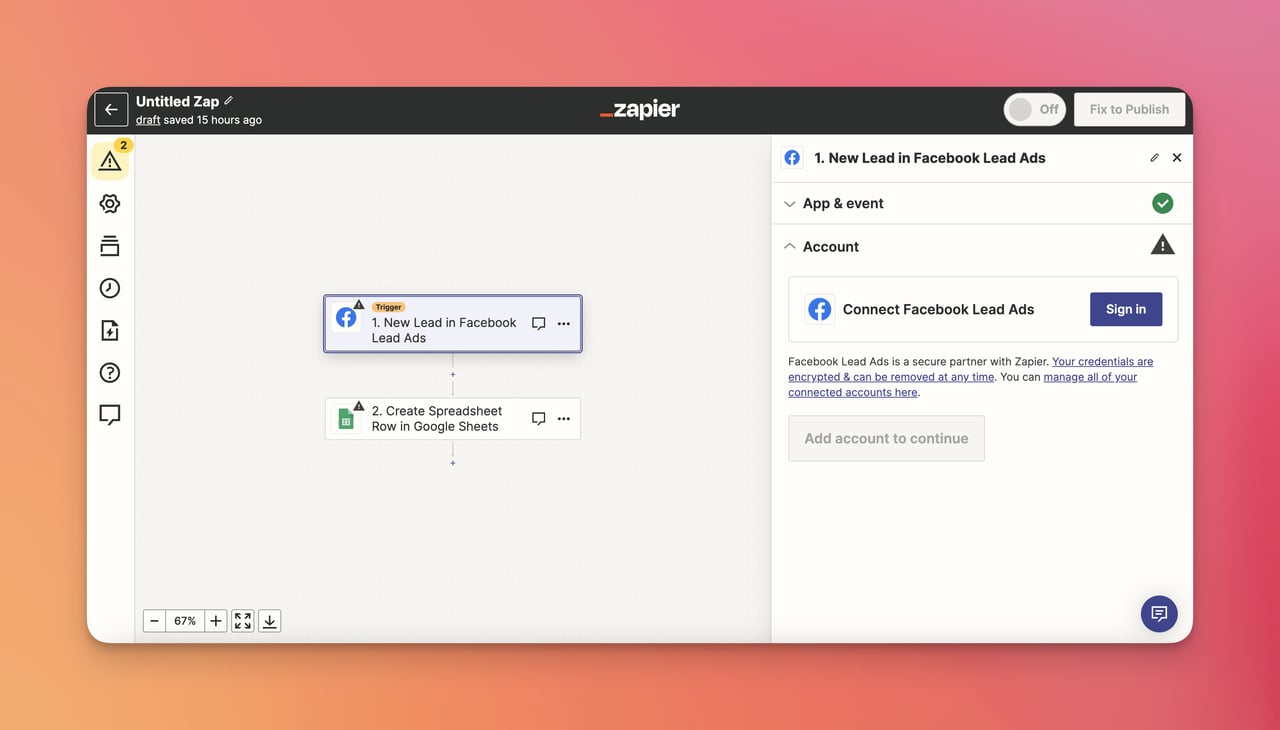
Step 5- Connect Your Facebook Ads Manager Account to Zapier.
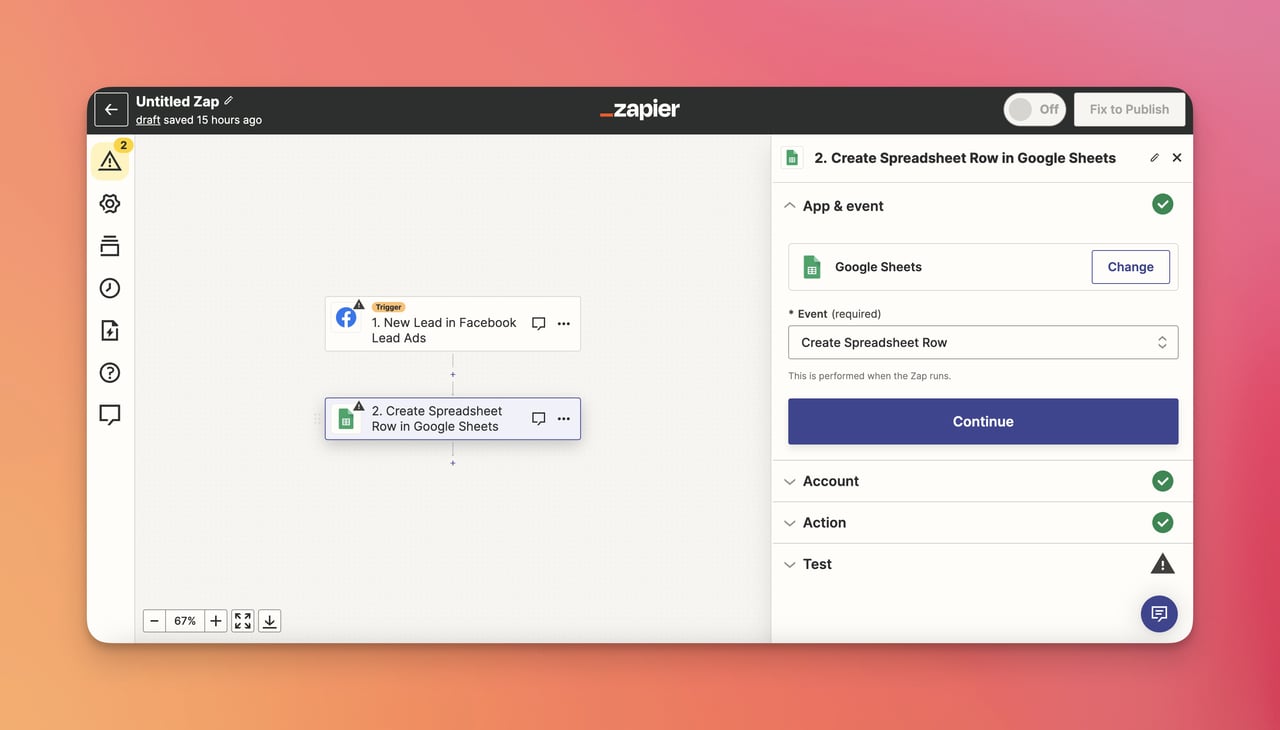
Step 6- Now, Select “Google Spreadsheet Row” as the Event and Connect Your Google Account.
Next, you should remember to click on “Continue”.
You need to choose the Event in this section to collect all the leads in one place.
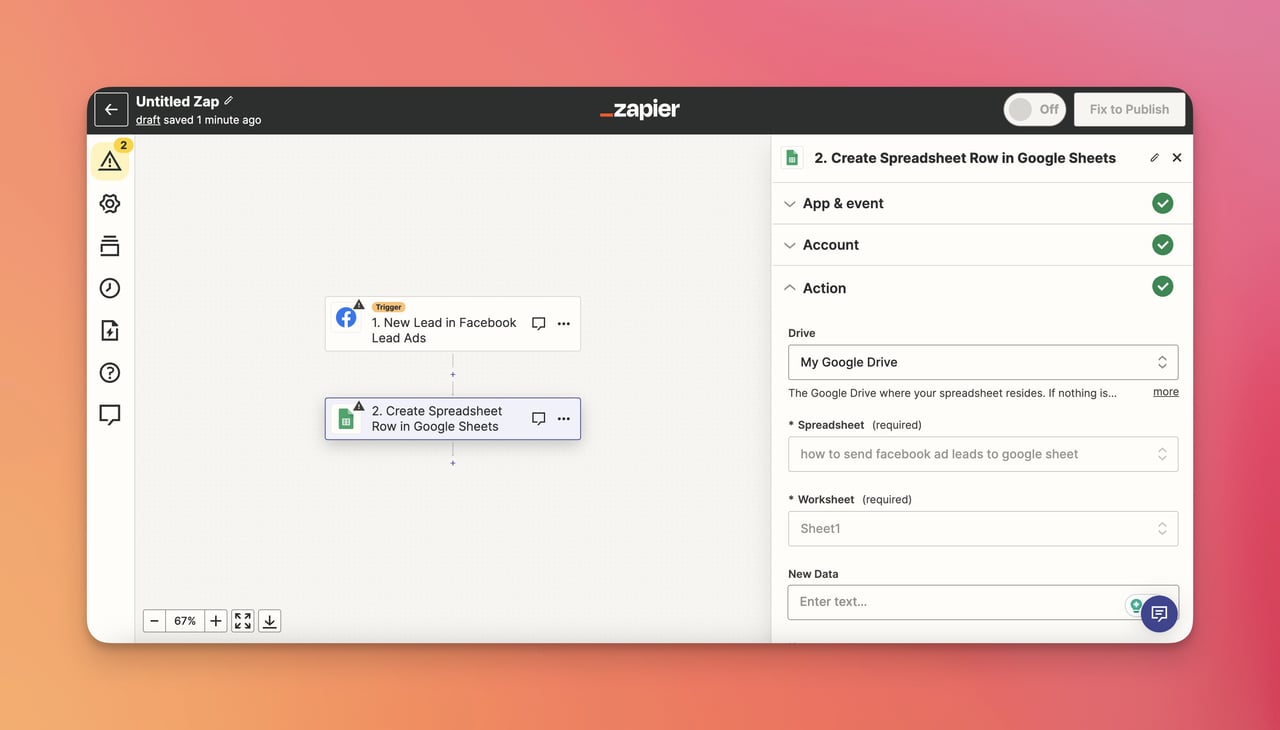
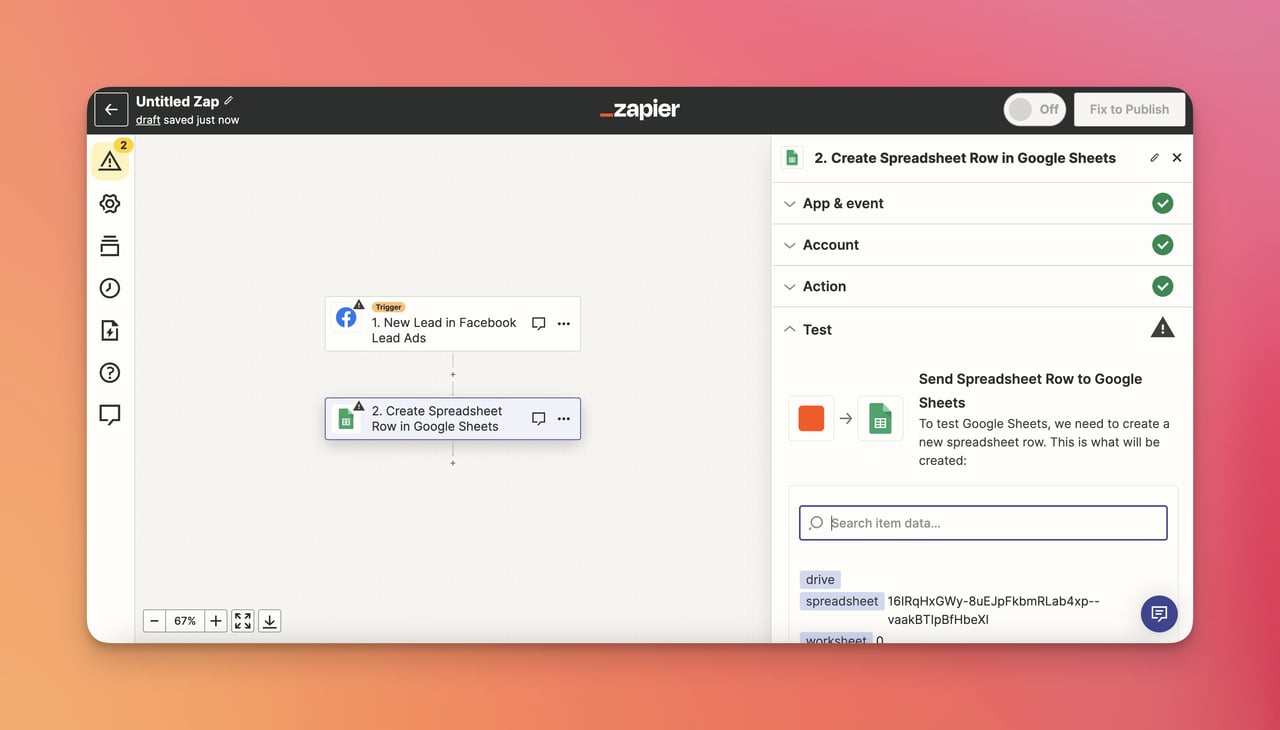
Step 7- Arrange the Action for Determining Your Google Sheets.
Pinpoint the specific Google Sheet and the tab where you want the lead data to be sent.
For the action, you need to choose your Drive folder, spreadsheet, and worksheet specifically.
Step 8- Conduct a Test to Confirm Whether the Connection is Working.
Step 9- If the Test Runs Successfully, 'Turn On' Your Zap.
When you turn on your Zap, the new leads will start populating your sheet.
Mastering all these steps one by one will help manage leads much more effectively.
Considering the Zapier, the process went easier, but if you think about other tools to create automations, you can check Zapier alternatives.
Essential Aspects to Include in Your Google Sheet
Your Google Sheet will serve as the hub of your Facebook Lead Ad data, making it essential you structure it well from the start.
We've singled out some elements that you must incorporate to manage, analyze, and leverage your lead information effectively.
Here's a list of these critical aspects:
1. Lead Data Columns: First and foremost, you'll need separate columns for different data fields collected through your Facebook Lead Forms. This data could range from the lead's name, phone number, and email address to other particulars, depending on your lead form's layout.
2. Timestamp: A timestamp column will store the exact date and time the lead submitted the contact form. It can be crucial for tracking lead activity and creating follow-up or engagement strategies.
3. Lead Status: It's always beneficial to have a 'Status' column that allows you to track the stage of communication with the lead (e.g., contacted, converted, not interested).
4. Notes: A column for adding comments, observations, or special considerations about a particular lead could be extremely useful. Consider it as a virtual sticky note for each lead.

Formatting Tips for Easier Data Management
Formatting your Google Sheet correctly can go a long way in reducing effort and maintaining a faster workflow.
Here are our top tips that will make your data management essentially effortless:
1. Freeze Rows: If your sheet starts to fill up with hundreds of leads, you might lose sight of your column headers as you scroll. Google Sheets provides an option to 'freeze' these header rows so you can scroll while still viewing your headers. Just click on "View" in the top menu, hover over "Freeze," and select "1 row."
2. Data Validation: Data validation helps you control what information can be entered into a cell. For example, in the 'Status' column, you can set a list of options (Engaged, Converted, etc.), and only these entries are permitted. To set this, go to your cell, click "Data" > "Data Validation," and create your rules.
3. Conditional Formatting: This feature can automatically change a cell's color based on the data it contains. For, you can set cells in the 'Status' column to turn red if they contain 'Not-Interested' to draw attention. To use it, select your cell, click on "Format" > "Conditional Formatting," and set your conditions.
4. Use Filters: You can create filters to view and analyze specific subsets of your data without disrupting the original data. Hover over the top of your sheet, a filter icon will show up, click it and define your filter.
5. Create a Template: Once you have everything set up, save this as a template. This way, you can use it for every new campaign without starting from scratch.
Remember, your Google Sheet is a dynamic tool that will morph as your lead generation strategy evolves. So you can find what works best for you.

Check Facebook Lead Ads Permissions
By setting this automation, there are some technical points that you should consider. It includes the significance of permissions of Facebook Lead Ads.
When we speak of permissions, we mean the ability given to an application or tool to access certain information within another application.
When we want to connect Facebook Lead Ads to Google Sheets, we need permissions in place to allow Facebook and Google Sheets to communicate with each other.
Without the correct permissions, the platforms can't share meaningful information, and our automated lead updating system might not work correctly.
Hence, it's incredibly crucial to review and fix them if needed.
To review and manage permissions for your Facebook Lead Ads,
- You can go to your Facebook account settings,
- Select 'Apps and Websites' from the tabs on the left,
- Then, select 'Google Sheets.'
- Under the tab 'Active Apps' and 'Websites', you can see the permissions you've given and make any necessary changes.
How to Fix Issues with Permissions

Let's take a look at some typical permission-related issues you might bump into and how to fix them:
1. Incomplete Permissions: To successfully implement our lead auto-update system, Facebook needs full permissions to read ads and ad sets, manage ads, and read user content. If any permission set is missing, you must manually add it by going back to your Facebook account settings and modifying the permission details.
2. Revoked Permissions: Permissions may be revoked accidentally or due to security reasons. In this case, you must re-authorize the connection and cue the necessary permissions back.
3. Expiry of Permissions: Sometimes, permissions have an expiration date. Make sure to regularly check and renew your permissions to prevent this from impacting your system.
Remember, permissions are like your best friend who introduces two unfamiliar people at a party. They make it acceptable for Facebook Lead Ads and Google Sheets to 'mingle,' exchange 'details,' and form an 'alliance.'
Troubleshooting Common Issues While Connecting Facebook Ad Leads and Google Sheets
There may be times when this automated process doesn’t work as smoothly as we expect; however, we have prepared some solutions for you.
Here are the most common issues you might face and how to troubleshoot them:
1. The rows are not updating: Check if your permissions have been revoked, expired, or changed. Also, verify if any updates or changes in Facebook’s API or Google Sheets may be causing interruptions.
2. Data is incorrect or incomplete: Review your Facebook Lead form and the way your fields are mapped to columns in Google Sheets. Any changes here could lead to inconsistencies in your data.
3. Automation delays: While unusual, sometimes there could be a slight delay due to server load or connectivity issues. If the delay persists, reach out to the customer support of your automation tool.
To sum it up, we've successfully navigated another fantastic turn in our journey to connecting Facebook Ad Leads to Google Sheets. We've checked permissions, learned about automated updates and how they work, and prepared ourselves to troubleshoot common issues.

Setting Up Multi-step Zaps
Multi-step zaps are as easy to set up as well.
For instance, when we get a new lead, in addition to updating the Google Sheet, we can also set off an automatic email to the lead, add them to our CRM, send a notification to our team's Slack channel, and so on.
- Step 1: After setting up your original Trigger and Action, click on the '+' sign to add another step.
- Step 2: Choose your app (e.g., Gmail, Slack, CRM), define your action (e.g., send an email, send a notification, create contact), and hit 'Continue.'
- Step 3: Set up the action using the data from your trigger and map it as you did before.
- Step 4: Test, verify, and turn on your Zap with its new multi-step capabilities. With multi-step Zaps, you get to explore new dimensions, increasing efficiency and productivity.
Key Tips to Consider for Sending Facebook Ad Leads to Google Sheets
This interactive exposition was not just about unraveling the process of connecting Facebook Ad leads to Google Sheets.
It was about the enormous possibilities that lie within the realm of automation. The prime takeaways from our journey include:
1. Amplified Efficiency: Automation is a robust method that minimizes manual labor, encouraging maximum productivity in the minimum possible time.
2. Enhanced Accuracy: Automation nearly nulls the possibility of manual errors, ensuring highly accurate outcomes.
3. Multitasking Made Easy: With the Multi-step zap feature, we learned how one trigger can set off multiple actions, helping you do more in less time.
4. Continuous Learning: Technology is a swiftly changing domain, with new advancements popping up now and then. Staying open to continual learning can undoubtedly be game-changing for digital marketers.
To Wrap Up
All in all, we have covered the process, beginning from understanding the basics of Facebook Lead Ads and Google Sheets to setting up triggers and actions.
By considering the importance of the process of connecting Facebook Lead Ads to Google Sheets, it is possible to format them for comfortable lead management.
Besides, since we touch upon the permissions and points to take care of, we believe that you will have a successful and solution-based lead generation.
If you are interested in sending your leads to Google Sheets, this process will help you with a seamless experience.
Frequently Asked Questions
Facebook Ad Leads and Google Sheets integration on Zapier is an easy-to-manage process, but more question marks are efficient when they are answered.
How Do I Manage Leads After They Are Imported?
After you have completed connecting Facebook Ad Leads to Google Sheets, your leads will be automatically sent to your target Google Sheets. Therefore, all you need to do is to manage and control your leads on your sheet to be updated.
How Often Does Zapier Check for New Facebook Ad Leads?
Besides the fact that you can set the frequency of the lead management, the default time is 15 minutes. Hence, you can check your leads in 15 minutes to help you find the target audience easily.
What Happens If There is an Error in Sending Leads to Google Sheets?
Generally, Zapier displays the errors and issues in your automation while you are creating your Zap. The solution depends on your checking at the exact time you realize the error in your automation. You can fix the issue on your Zapier interface. Thus, it will help you have seamless automation at the end.
Can I Get Notified When New Leads are Added to Google Sheets?
Yes, if you want to. You can customize your automation and add the notification type that you want. The most common type of notification is by connecting your email account to get the direct notification, like Gmail, Outlook, or Apple Mail, and so on.
Recommended Blog Posts
Lead generation is a crucial part of managing your business, so there are other blog posts that you might want to check out.
- 16 Must-Know Lead Generation Automation Solutions
- How to Add Facebook Pixel to Shopify in 2024 & Useful Tips
- 10 Best SMS Popup Tips & Examples to Capture Quality Leads
- 15 Best Lead Generation Form Examples to Convert More


