How to Add a Contact Form to a Website: Comprehensive Guide
Guide to adding website contact forms: create a Popupsmart contact-form popup by embedding code, choosing/customizing a template, setting notifications/integrations, targeting, and publishing; alternatives include Jotform embeds, HTML forms, or Formcarry endpoints, plus conversion tips.
Having a contact form on your website is essential for building solid relationships with your audience. It offers a convenient way for website visitors to contact you, whether they want to give feedback or have questions about your goods or services.
However, you may be unsure how to add a contact form to a website. The good news is that you have various options, and this blog post will help you navigate them.
We’ll explain how you can add a contact form to your website using various methods.
Let’s dive into it!

Adding Contact Form Popup with Popupsmart
Adding contact form popups to your website is the easiest and most convenient way to interact with your visitors. By including engaging and attractive form popups on your website, you can grab your visitors’ attention & encourage them to fill out your contact form.
Using Popupsmart, you can add contact form popups quickly and easily!
See how you can do that with quick steps:
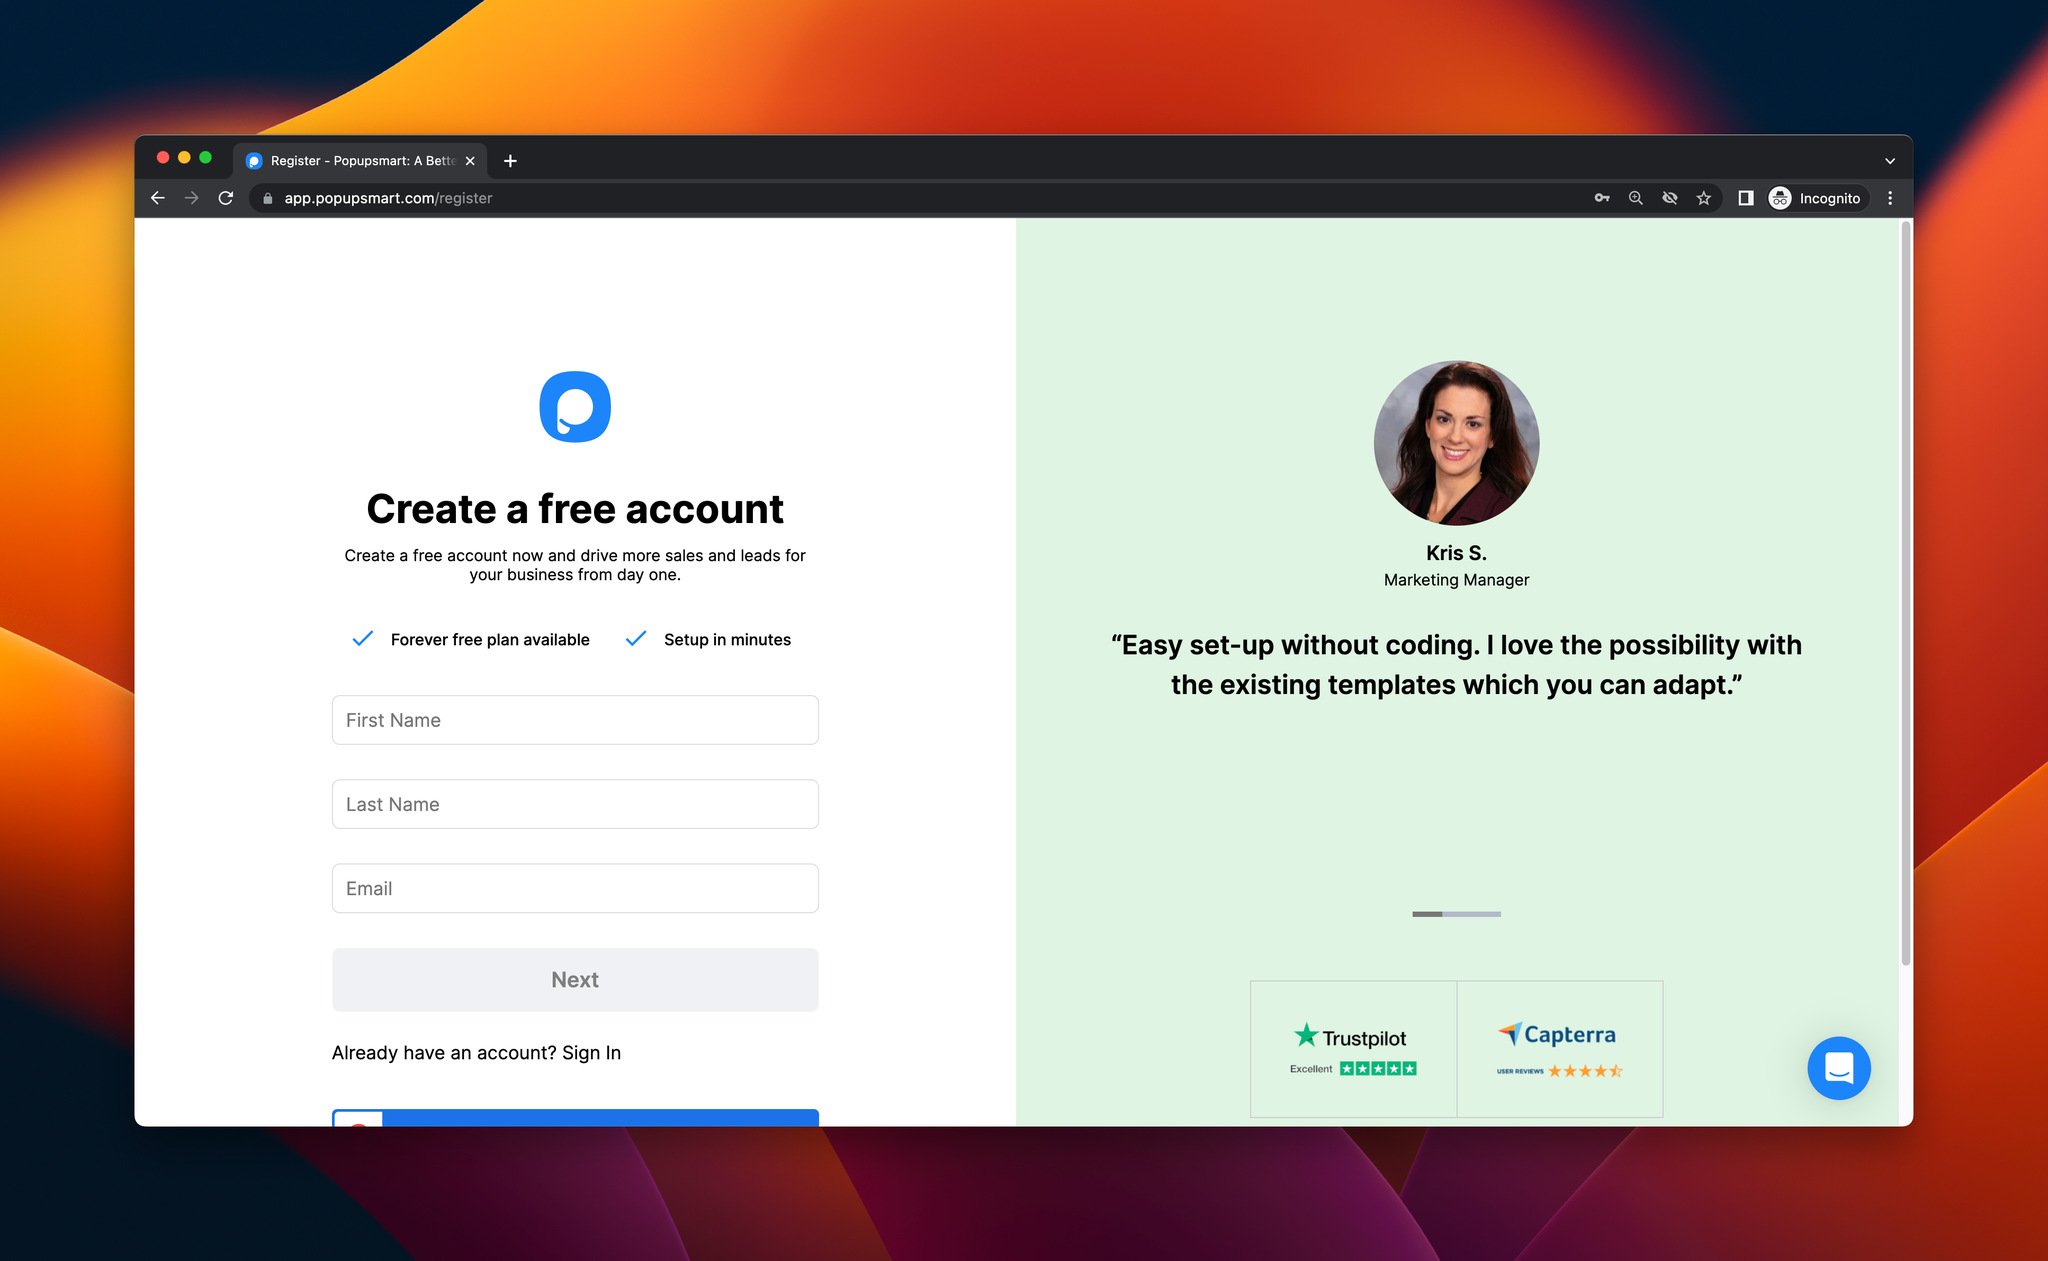
Step 1: Register to Popupsmart and sign in to your account.
Step 2: Go to the “Websites” part from your profile, click “New website” and type down your website. Then, get your unique embed code by clicking “Unverified” next to your website.
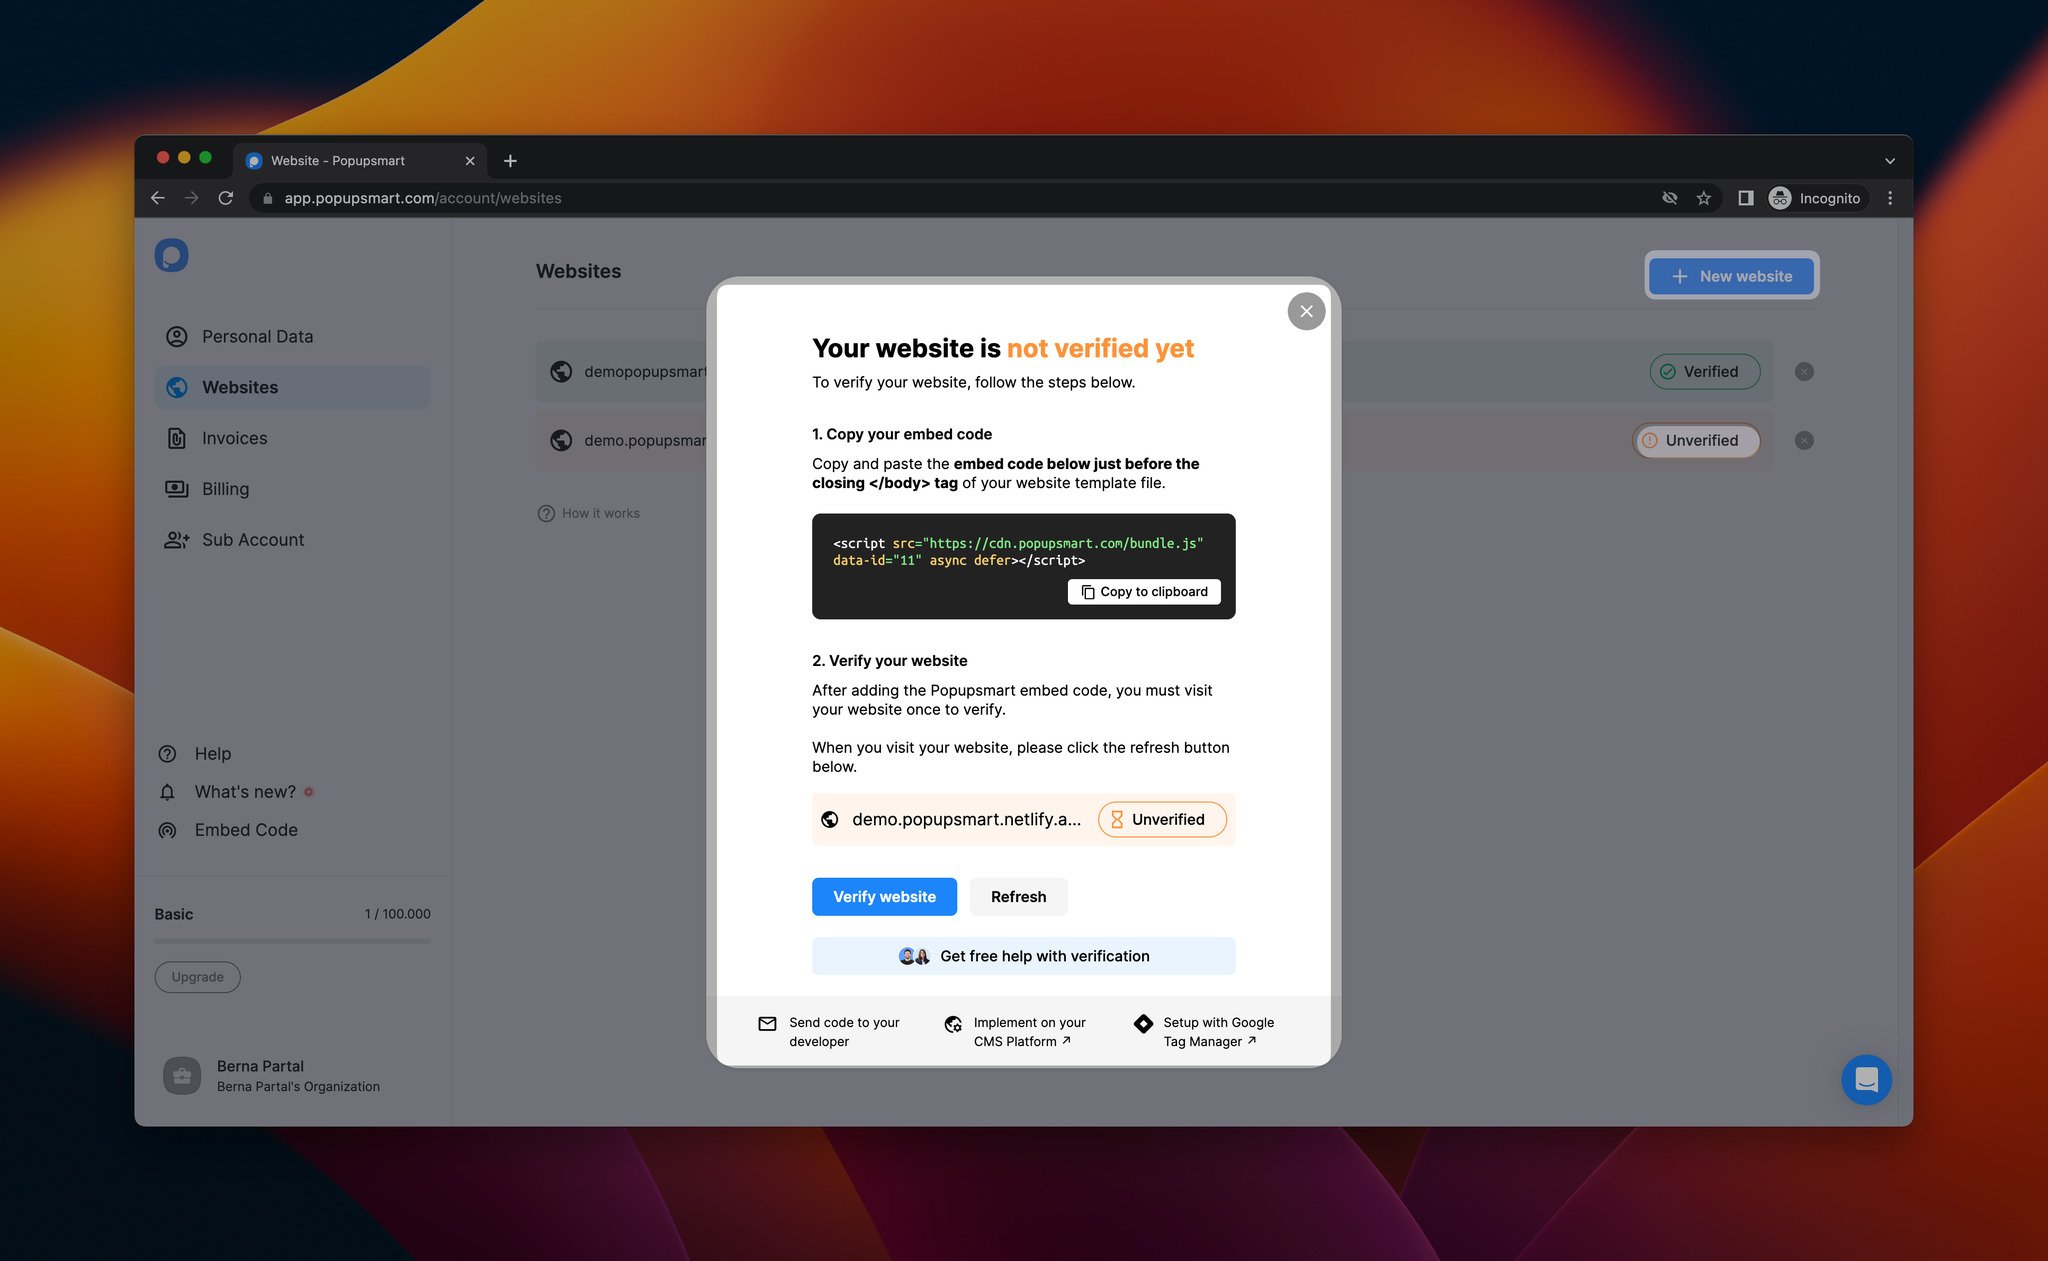
As shown above, you can copy and paste the code into your website’s code injection part. Go to your website’s admin panel and paste your embed code just before the closing </body> tag.
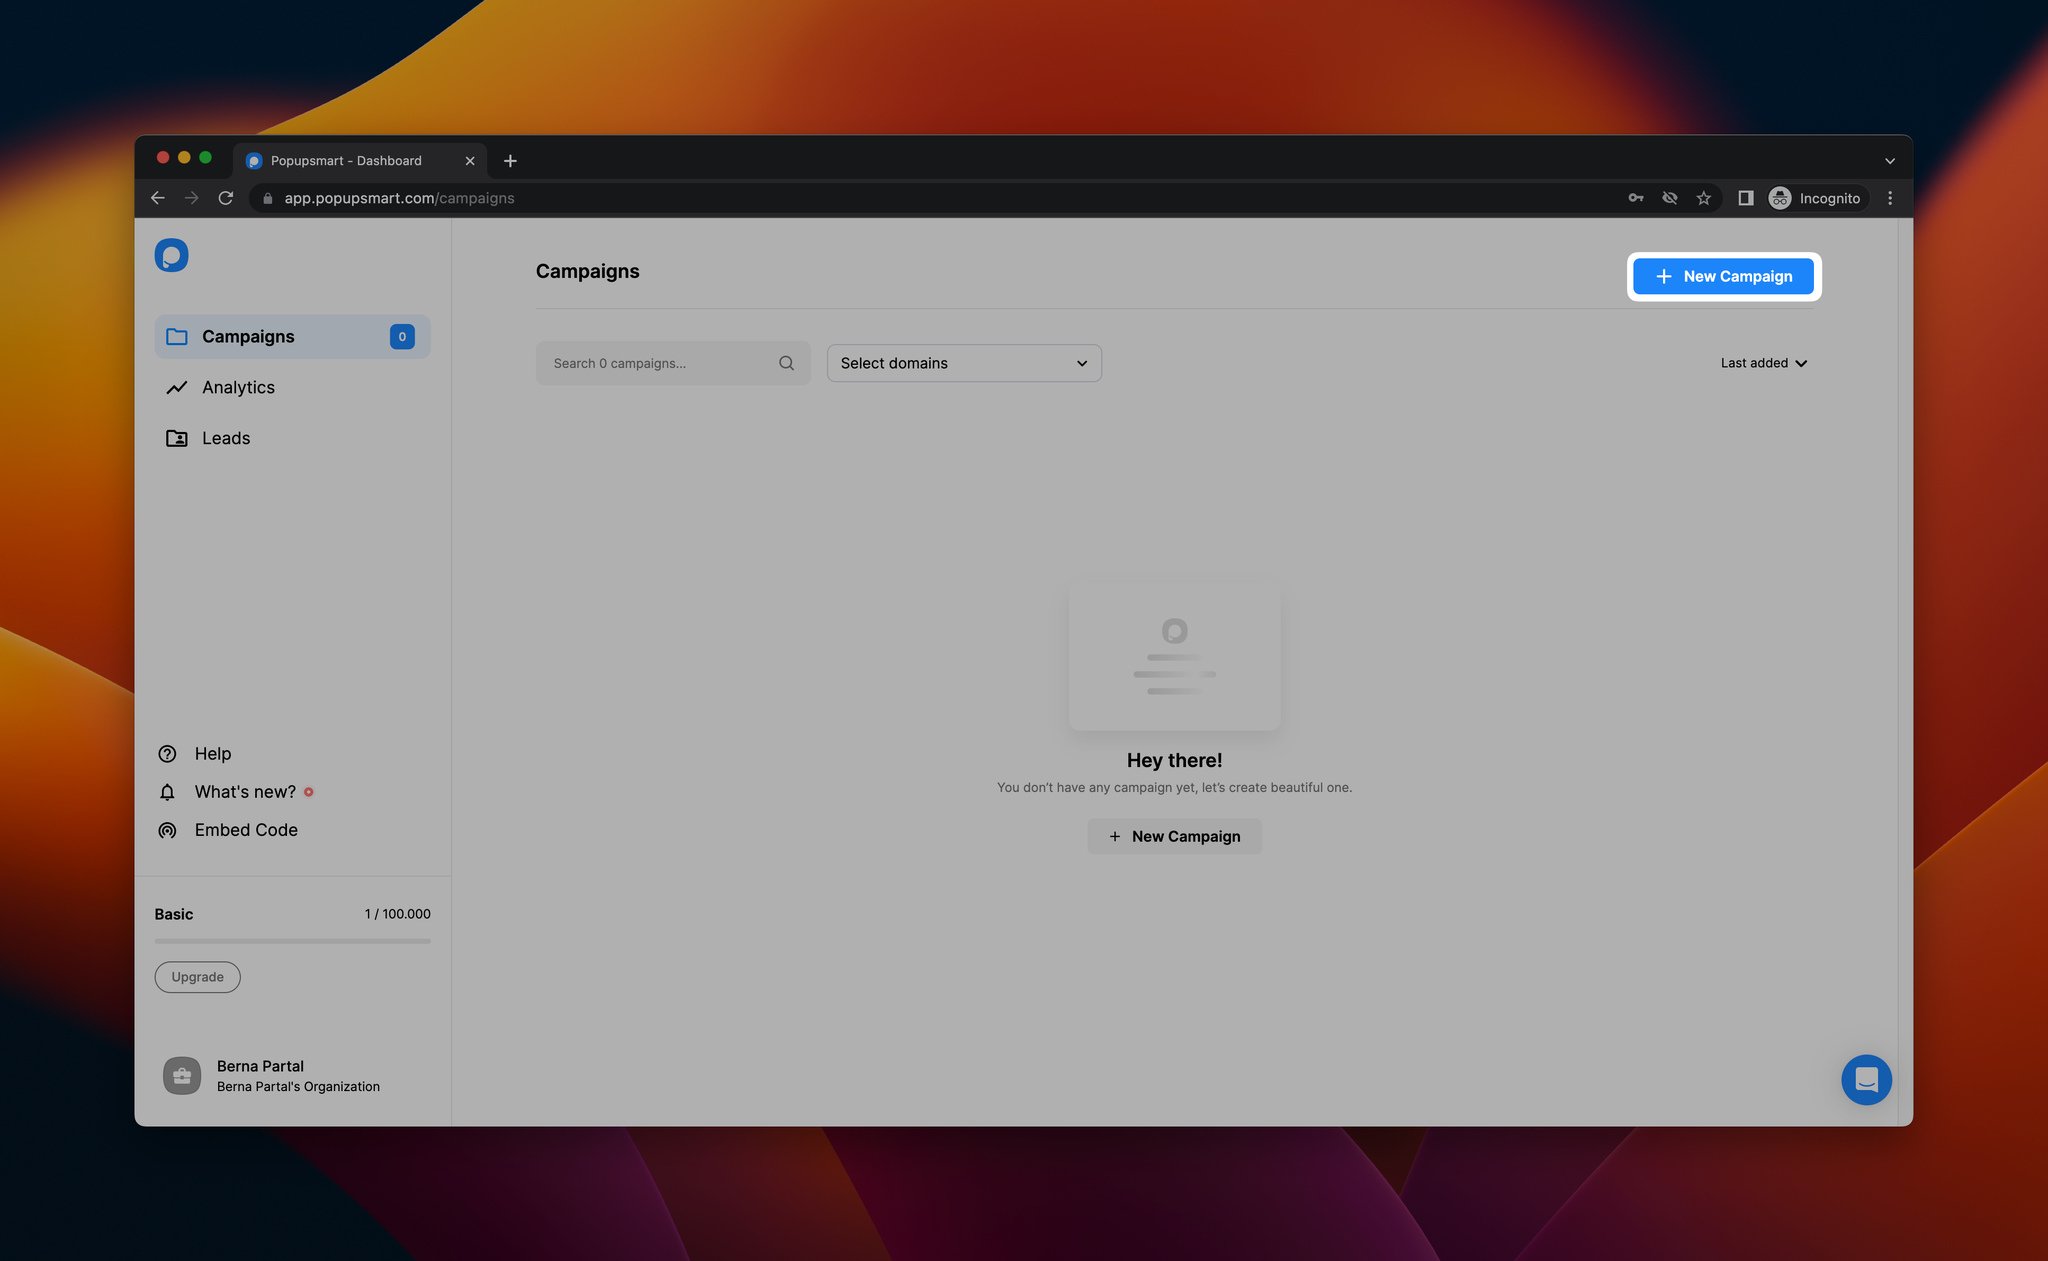
Step 3: Go to the “Campaigns” section and create a new campaign by clicking on “New Campaign” and give a name to your campaign.
Step 4: You will be redirected to the template page, where you can select a ready-to-use popup template.
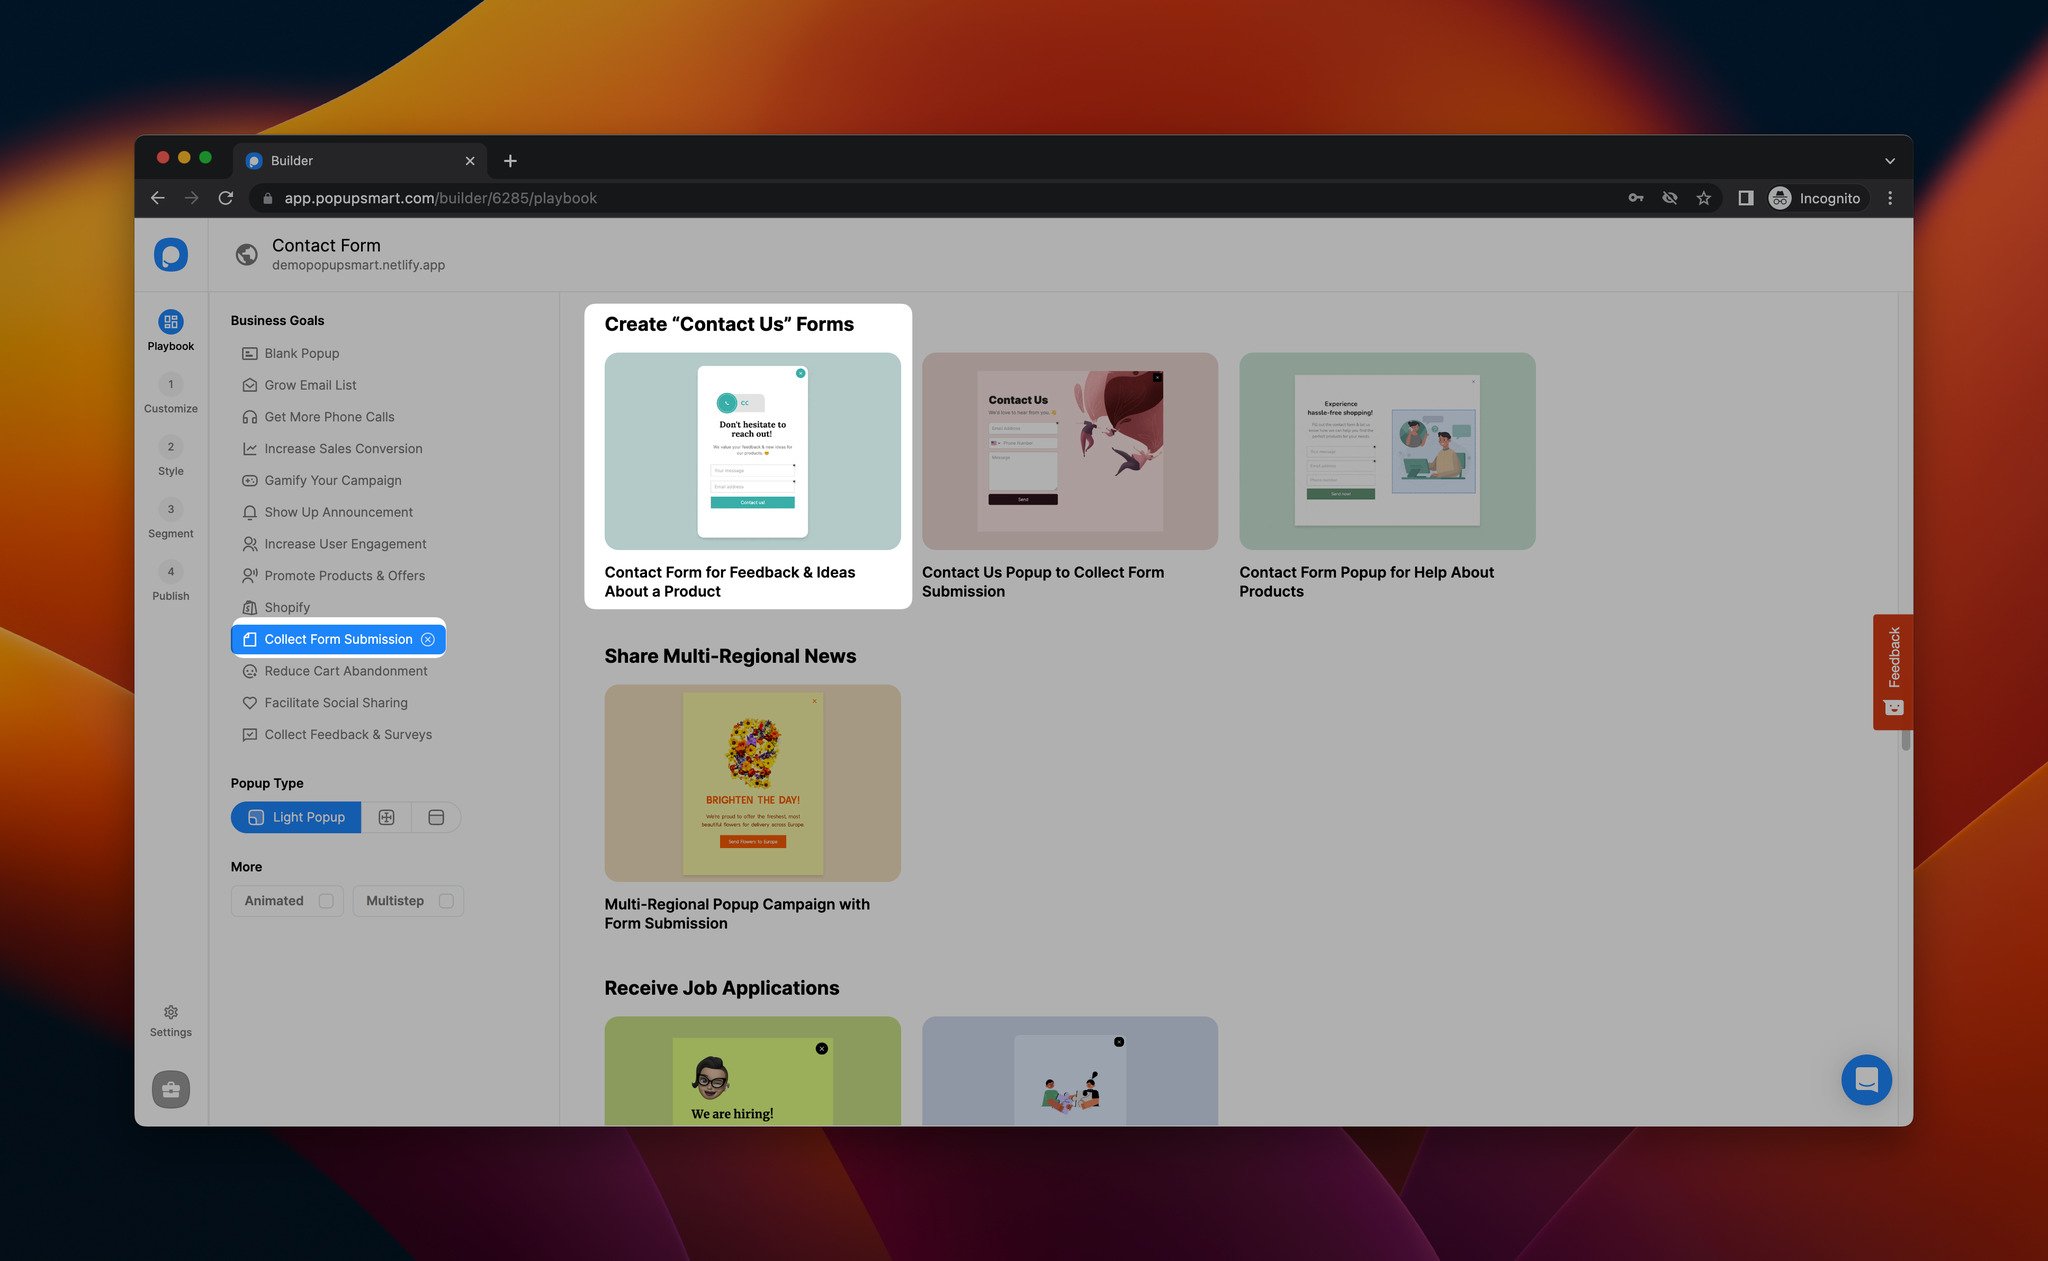
For this guide, we selected a contact form popup template that fits our business goal, which is to collect form submissions.
You can explore our conversion-ready popup templates from the Popupsmart playbook page.
Step 5: After you select your popup template, you can customize it according to your needs and your website’s style.

Also, you can add new elements on the “Customize” step and adjust your popup as you like.
Step 6: By selecting the “Form” element, you can add new form elements and adjust them according to your goals.
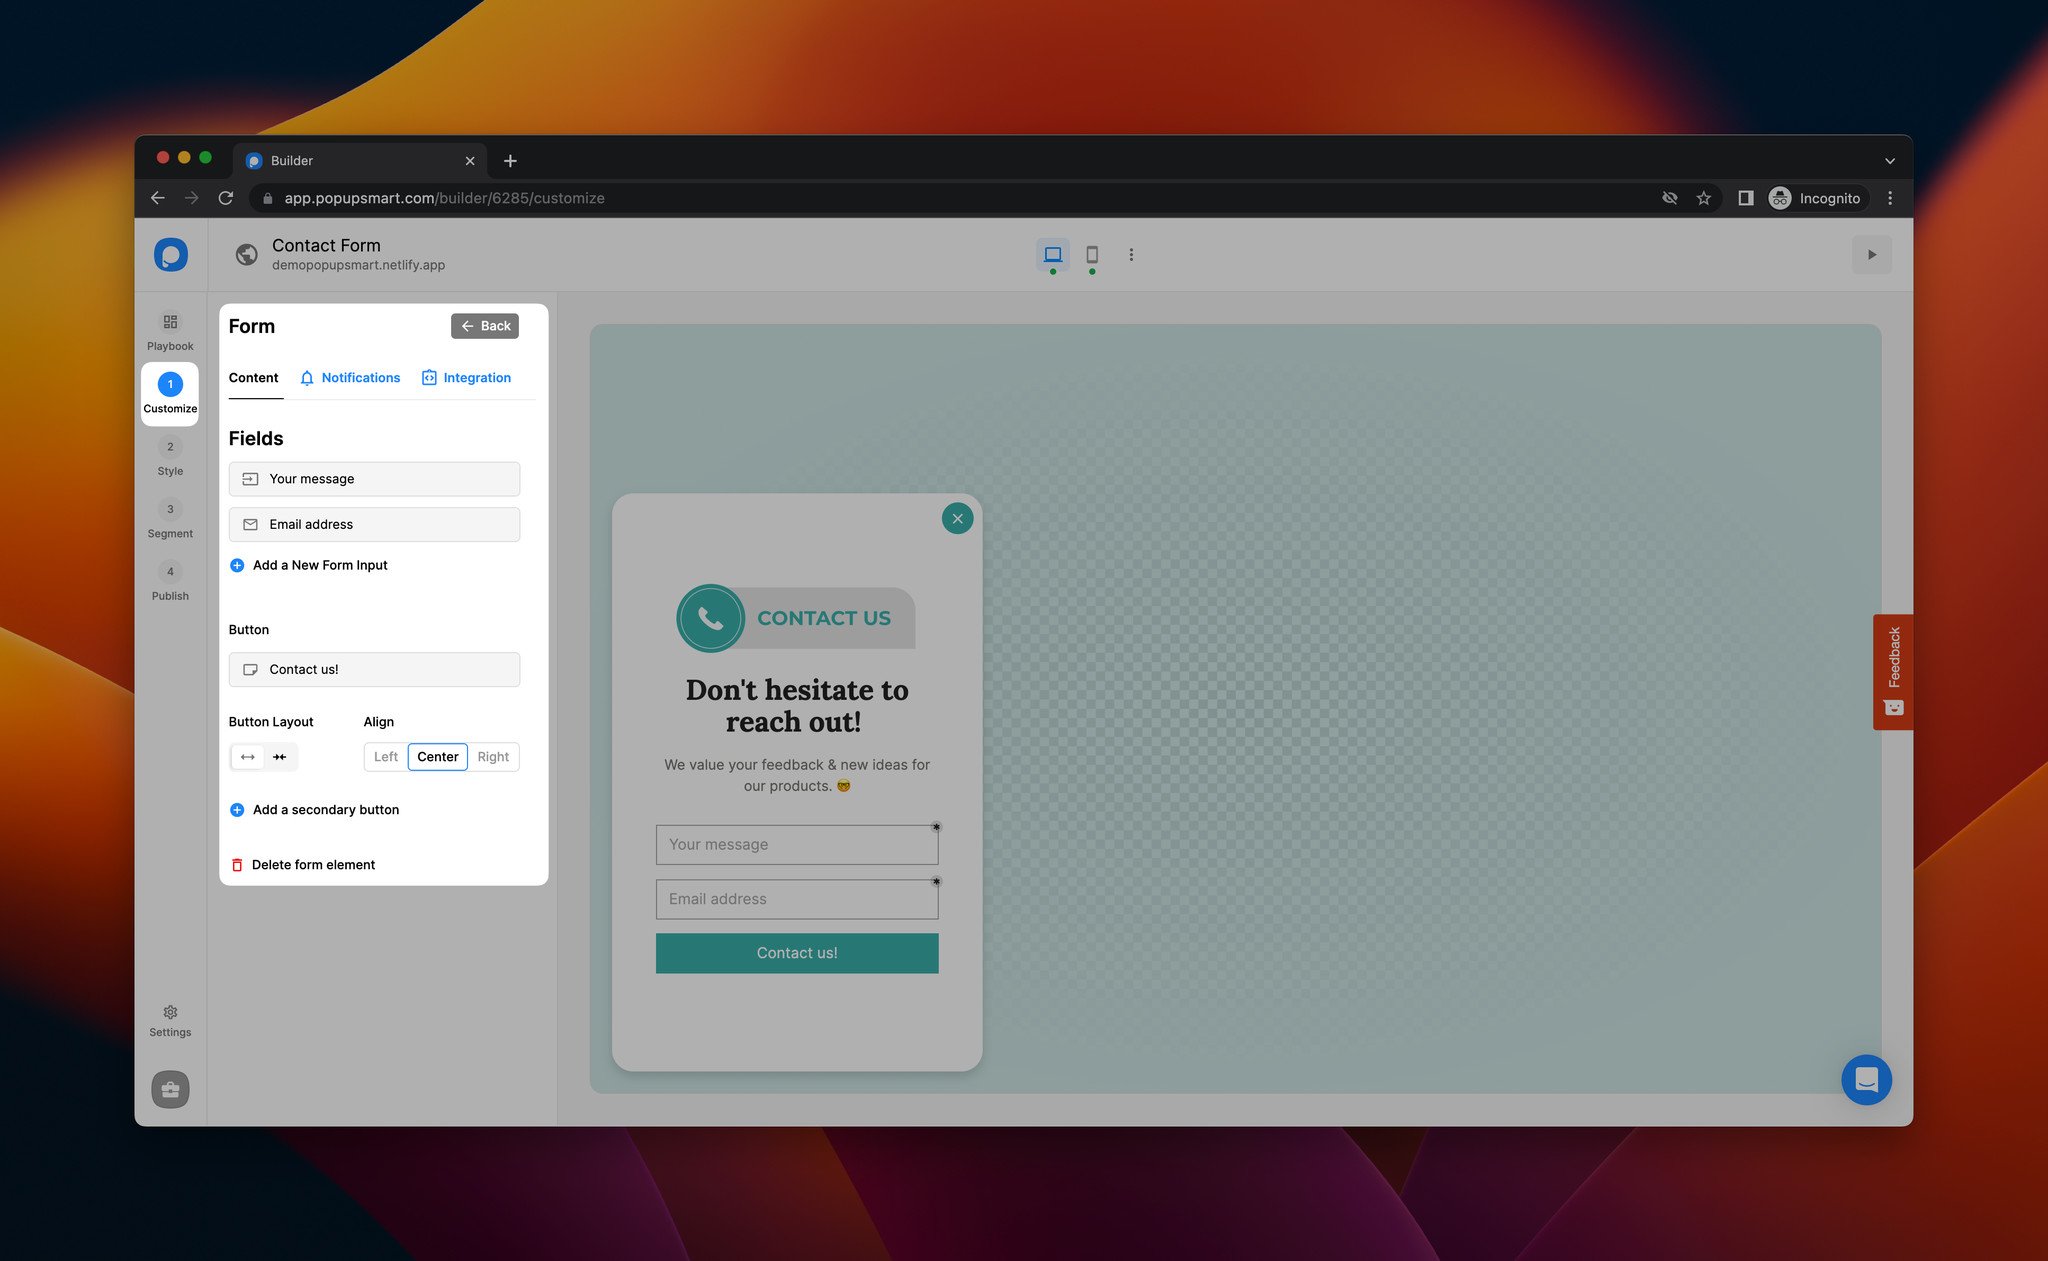
You can adjust the button layout, align your button and add a secondary button as well.
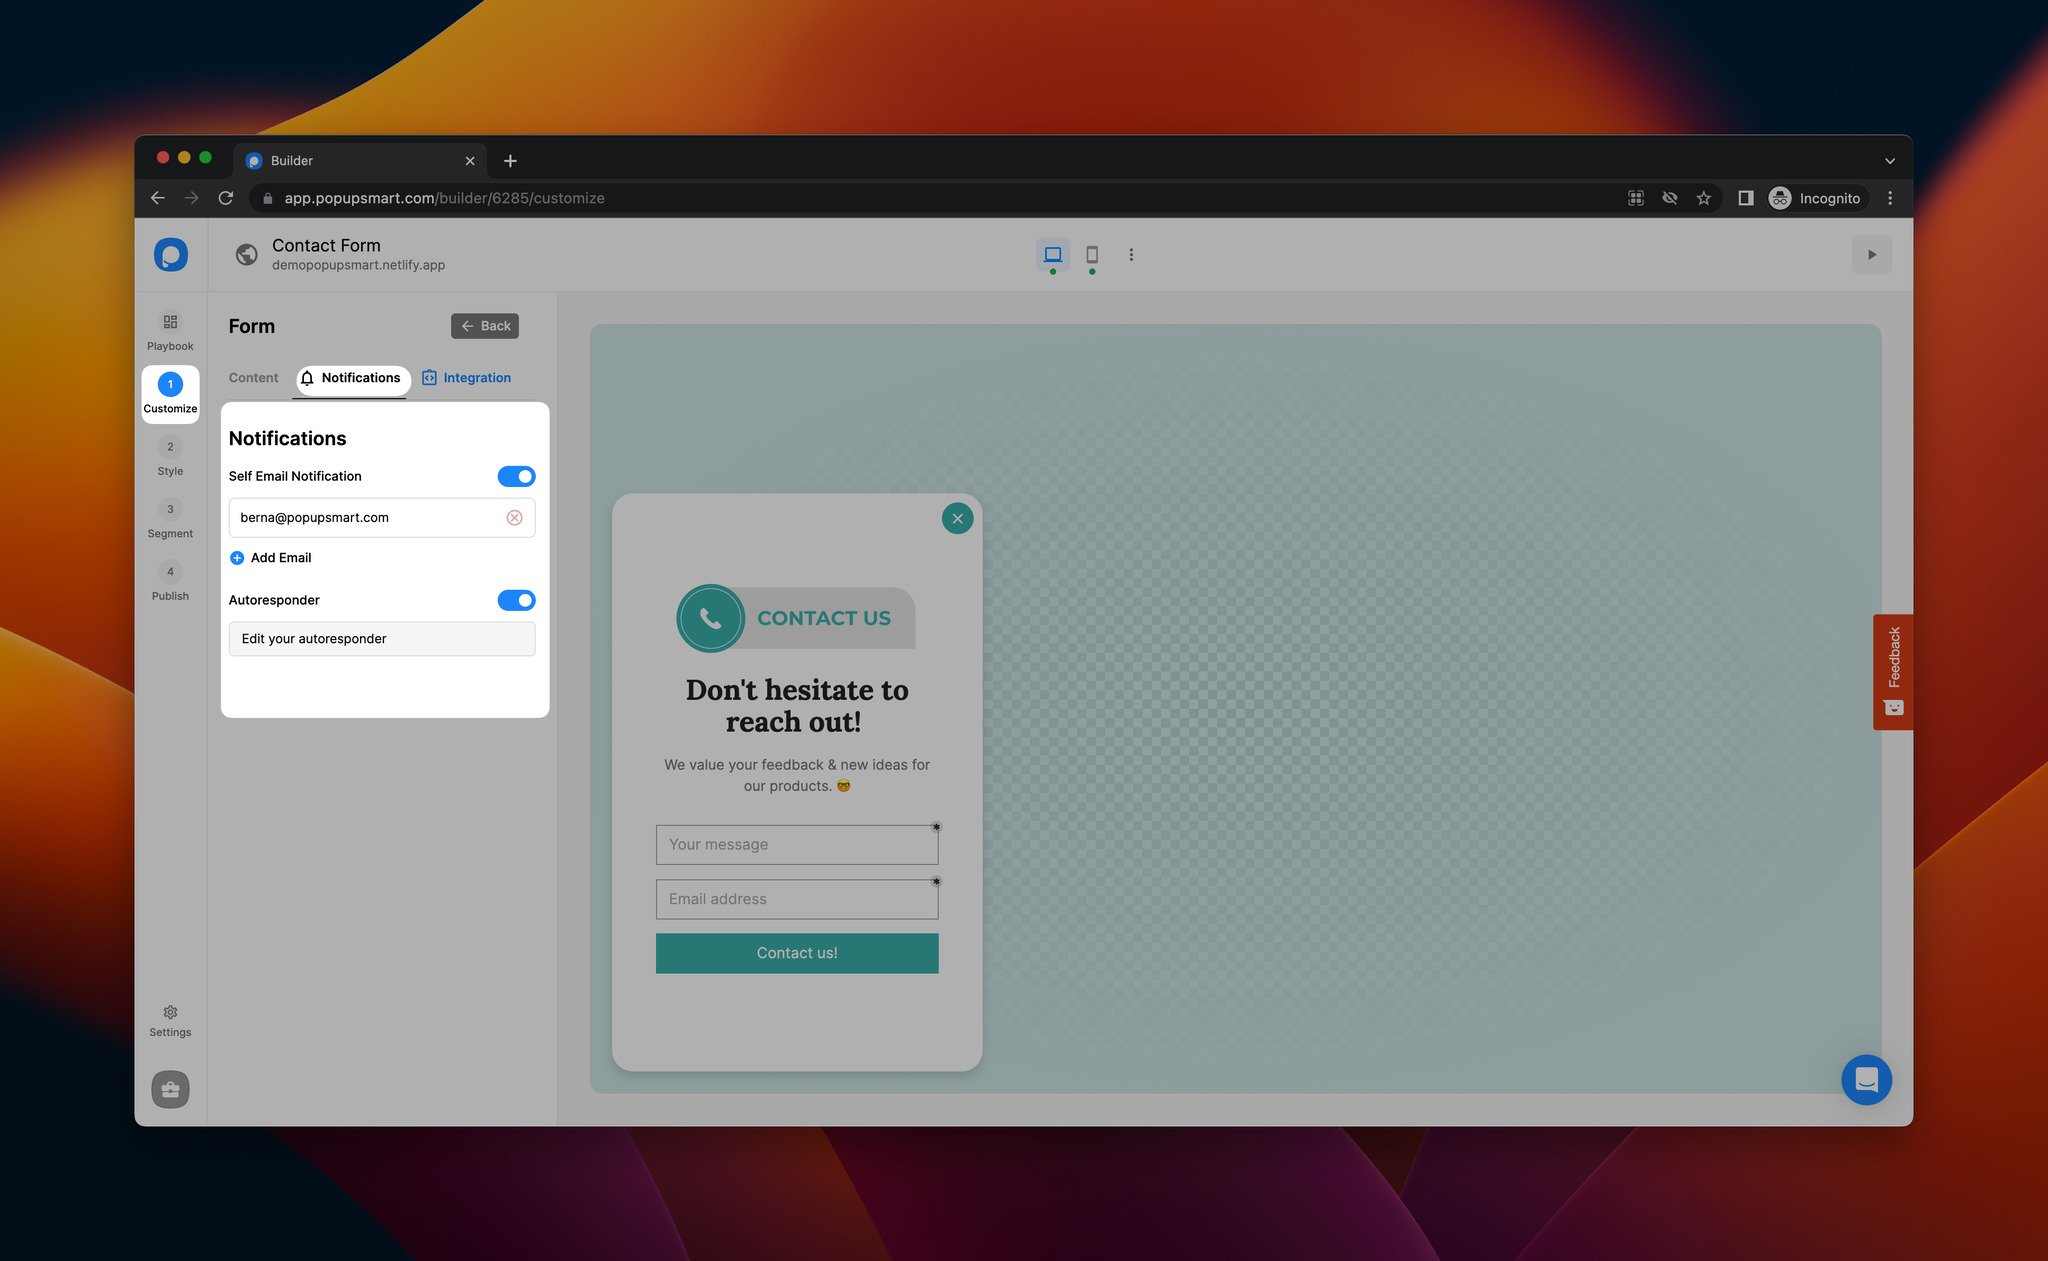
Step 7: By going to the “Notifications” part of your form element, you can set self-email notifications to be notified about your contact form.
Step 8: Then, you can connect your favorite email service provider from the “Integration” part.
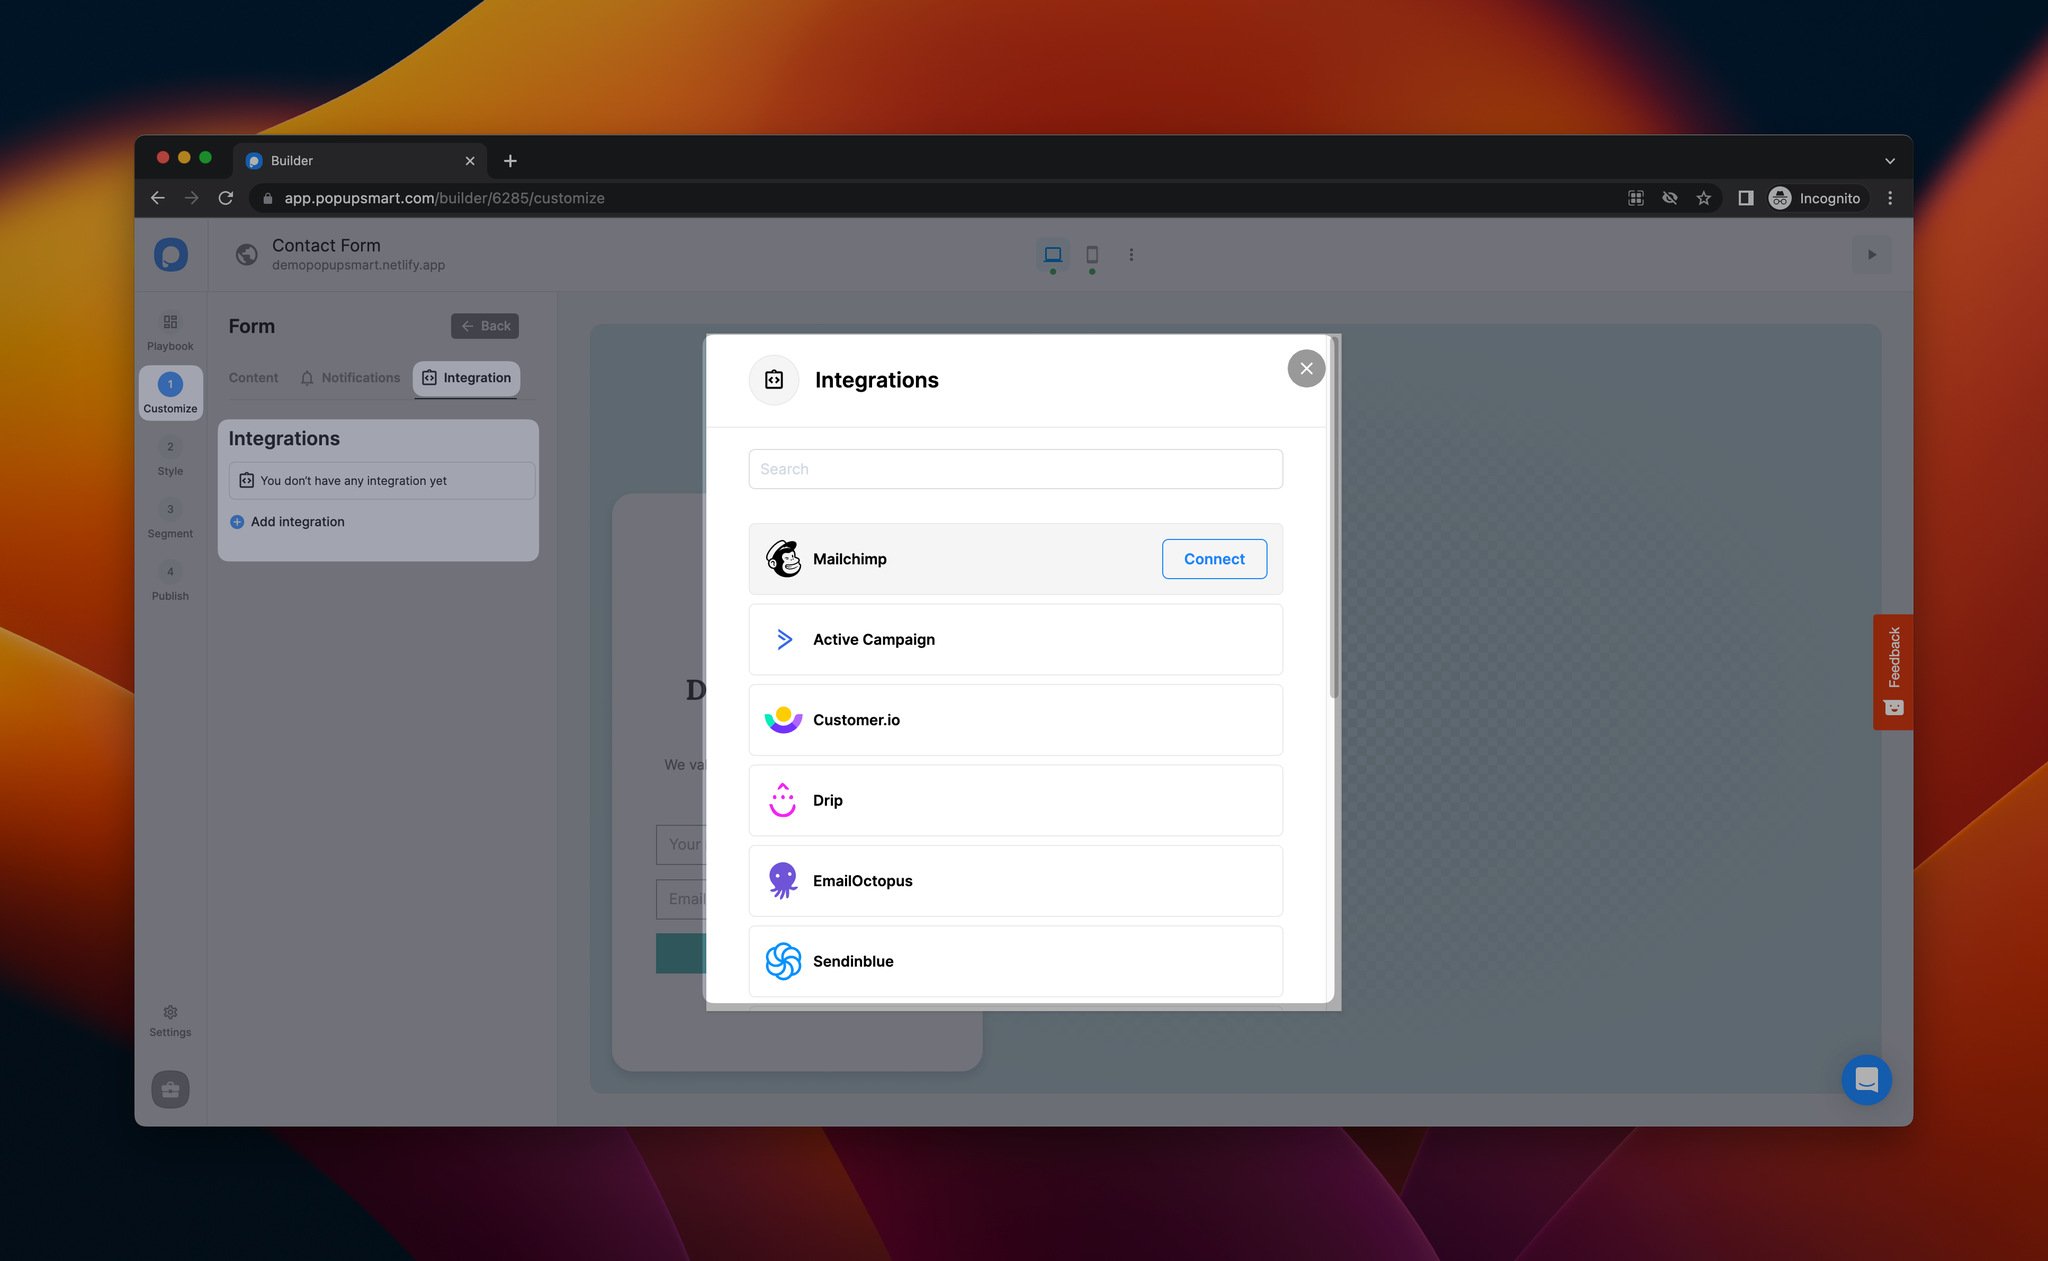
Click “Add integration” and select from direct integration options or connect any app you like with Make.com and Zapier integrations.
Note: Popupsmart has various targeting solutions that you can find in the “Segment” section so that you can show your contact form popup to the right people at the right time.
Step 9: Once you complete all your adjustments, go to the “Publish” step to publish your popup campaign.
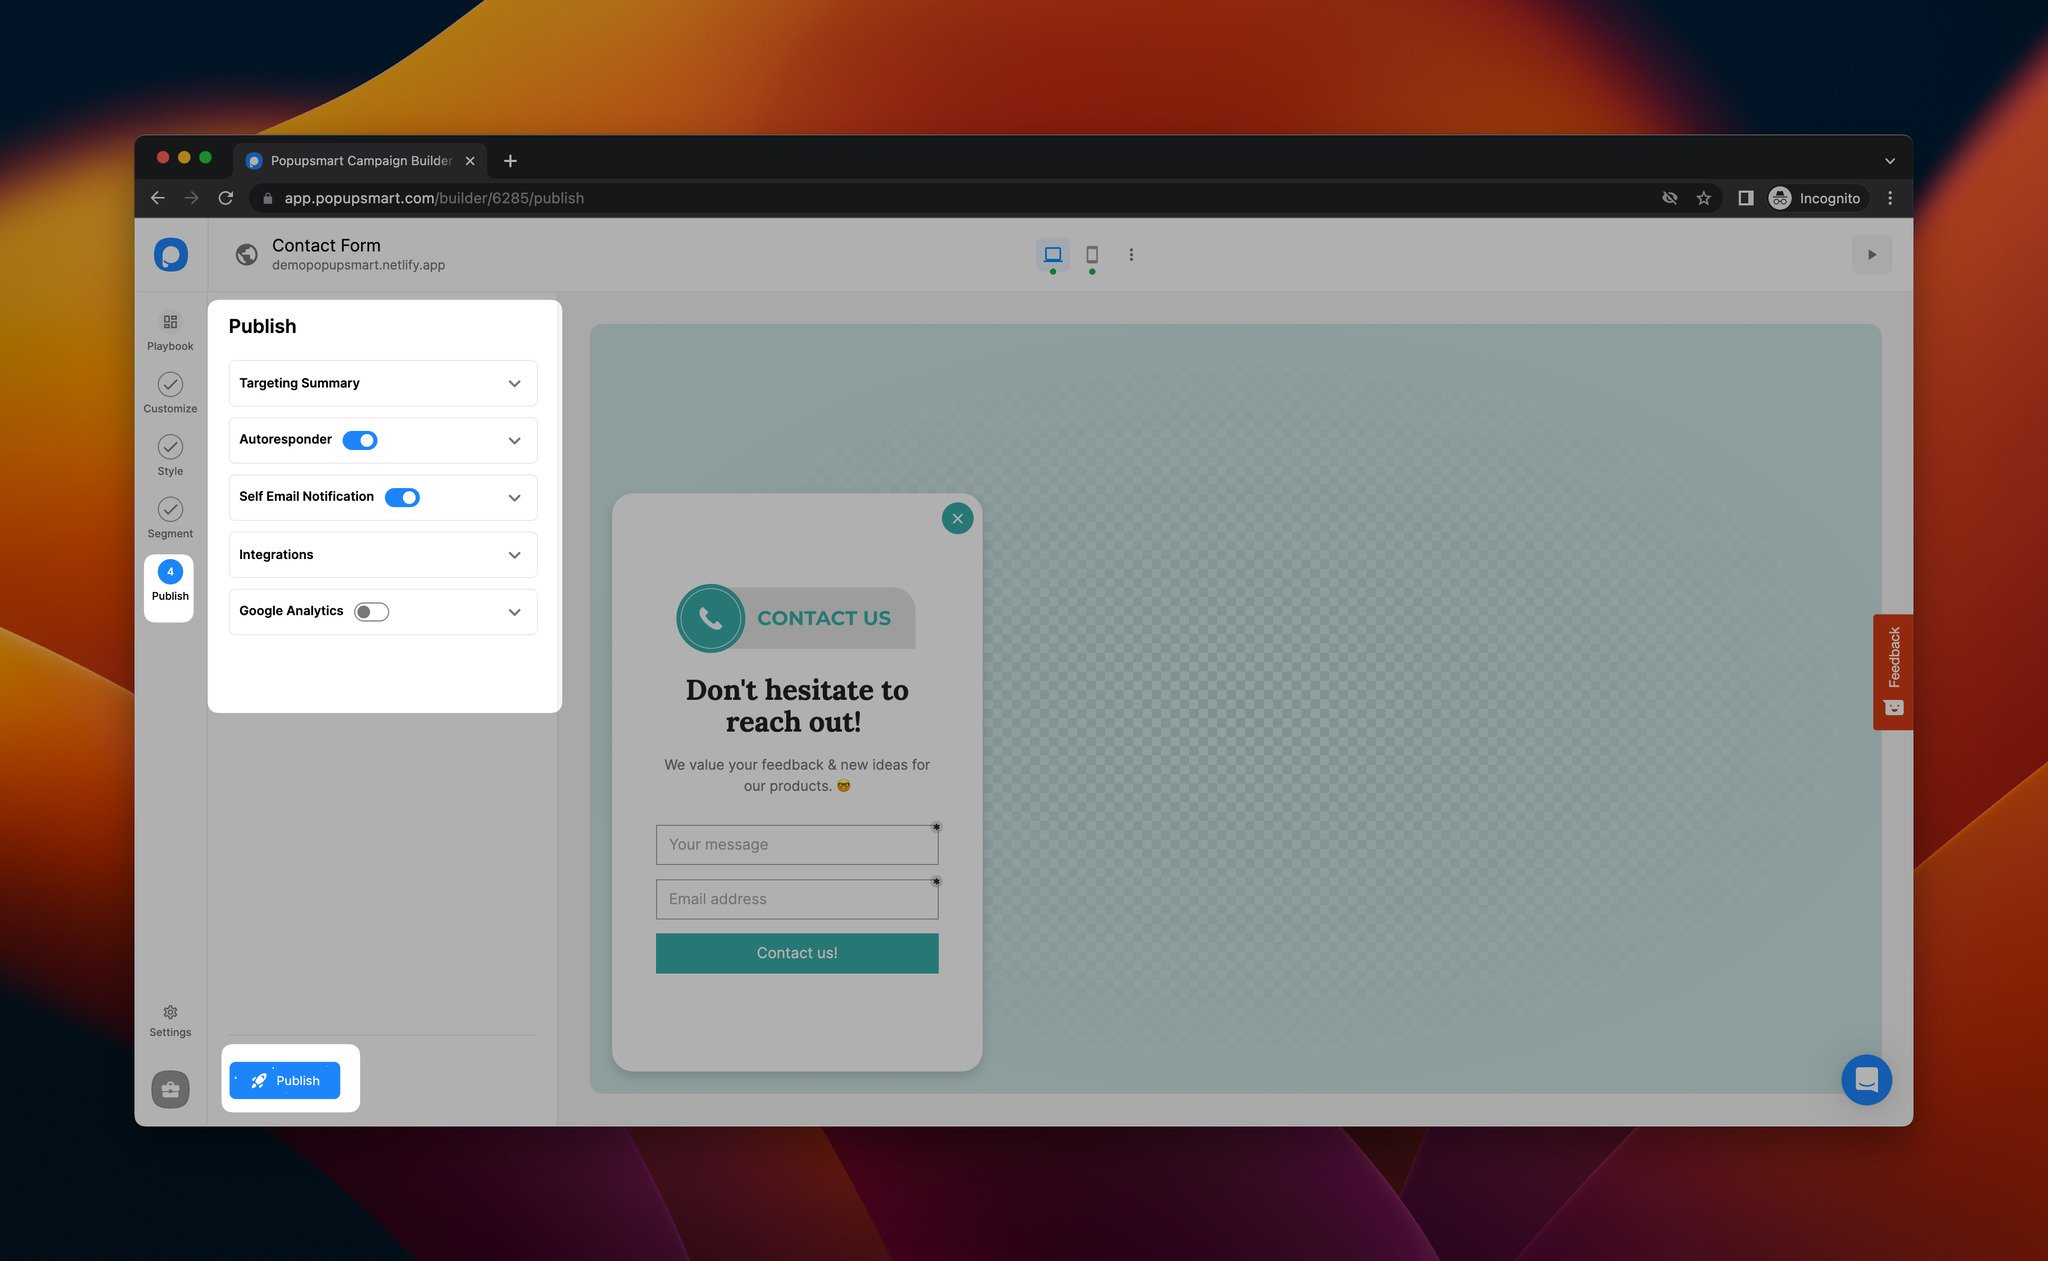
That’s it! By following these steps, you can display attractive contact form popups to your visitors without having design or coding experience easily.
Adding Contact Form with a No-Code Form Builder
You can add a contact form using a no-code form builder as well. There are various form builder tools.
You can find out how to add a contact form with Jotform with the quick steps below.
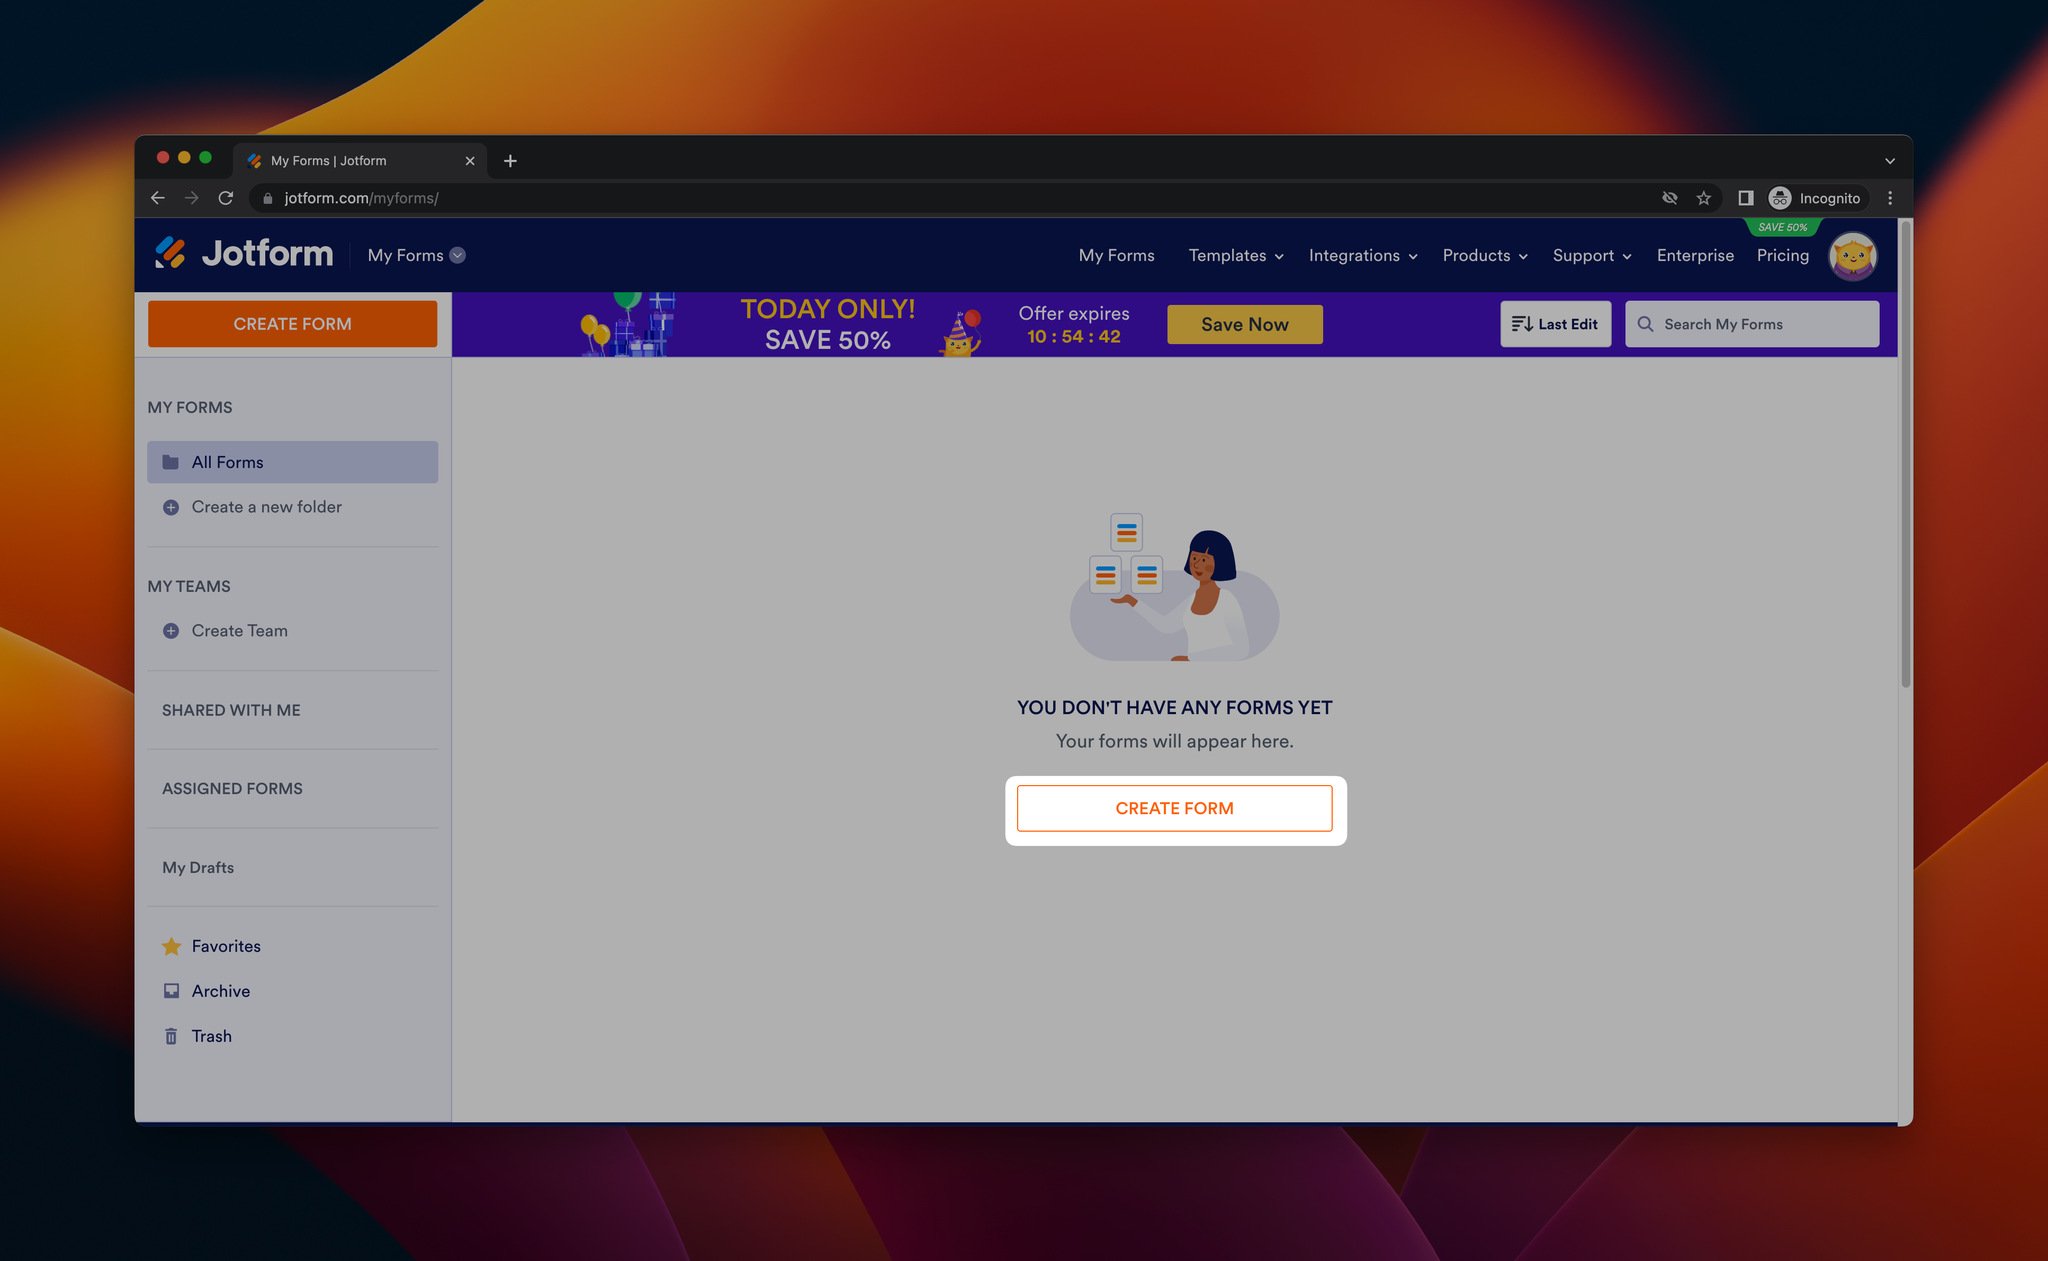
Step 1: After you register and sign in to your account, you’ll be redirected to “My forms” part where you can see your forms. Click the “Create form” button.
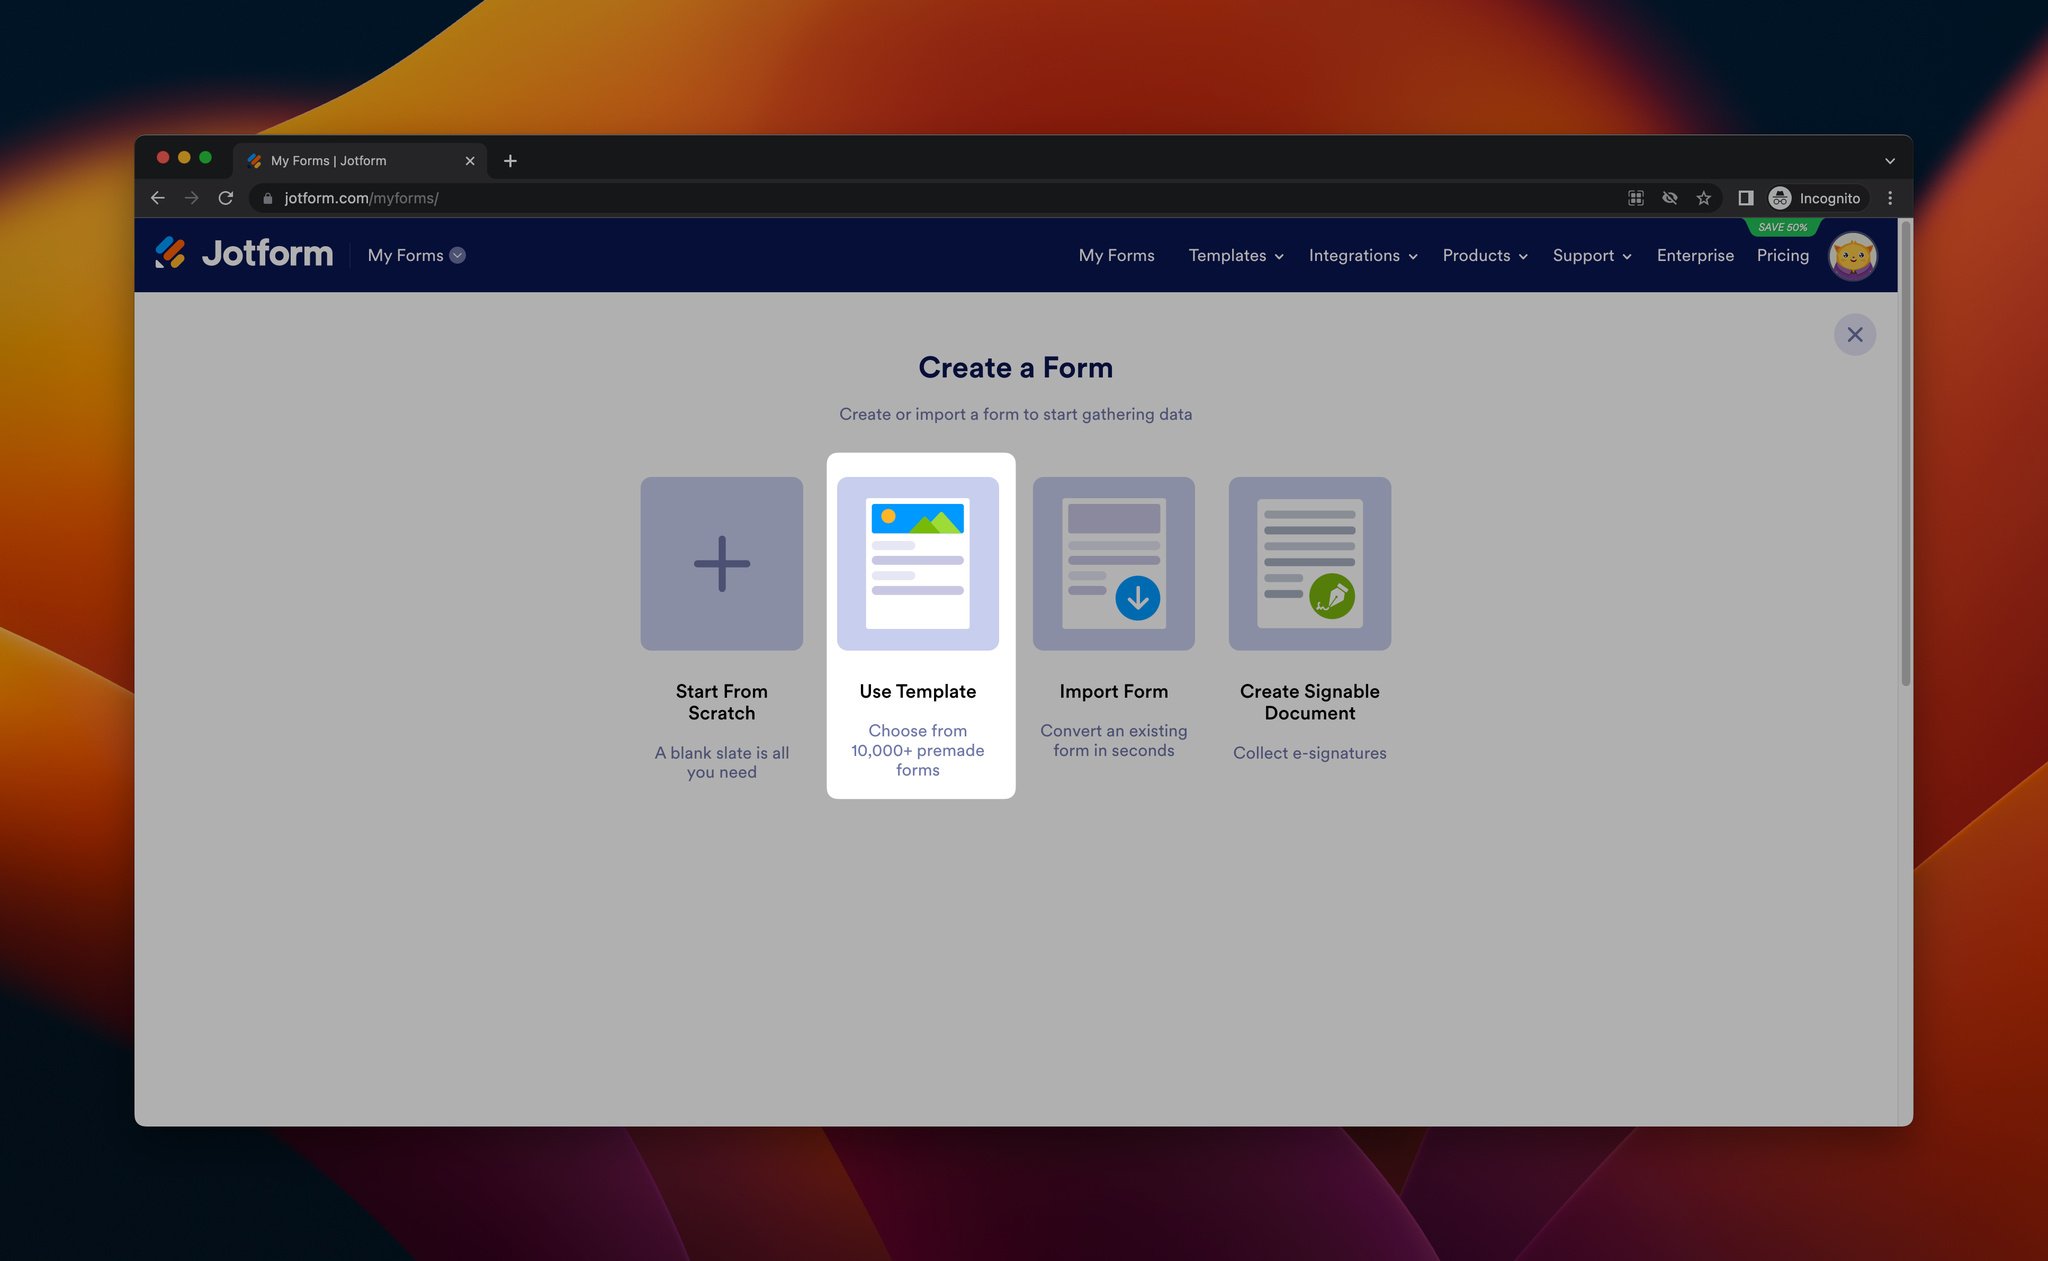
Step 2: For this guide, we’ll select a template, but you can also create a form from scratch.
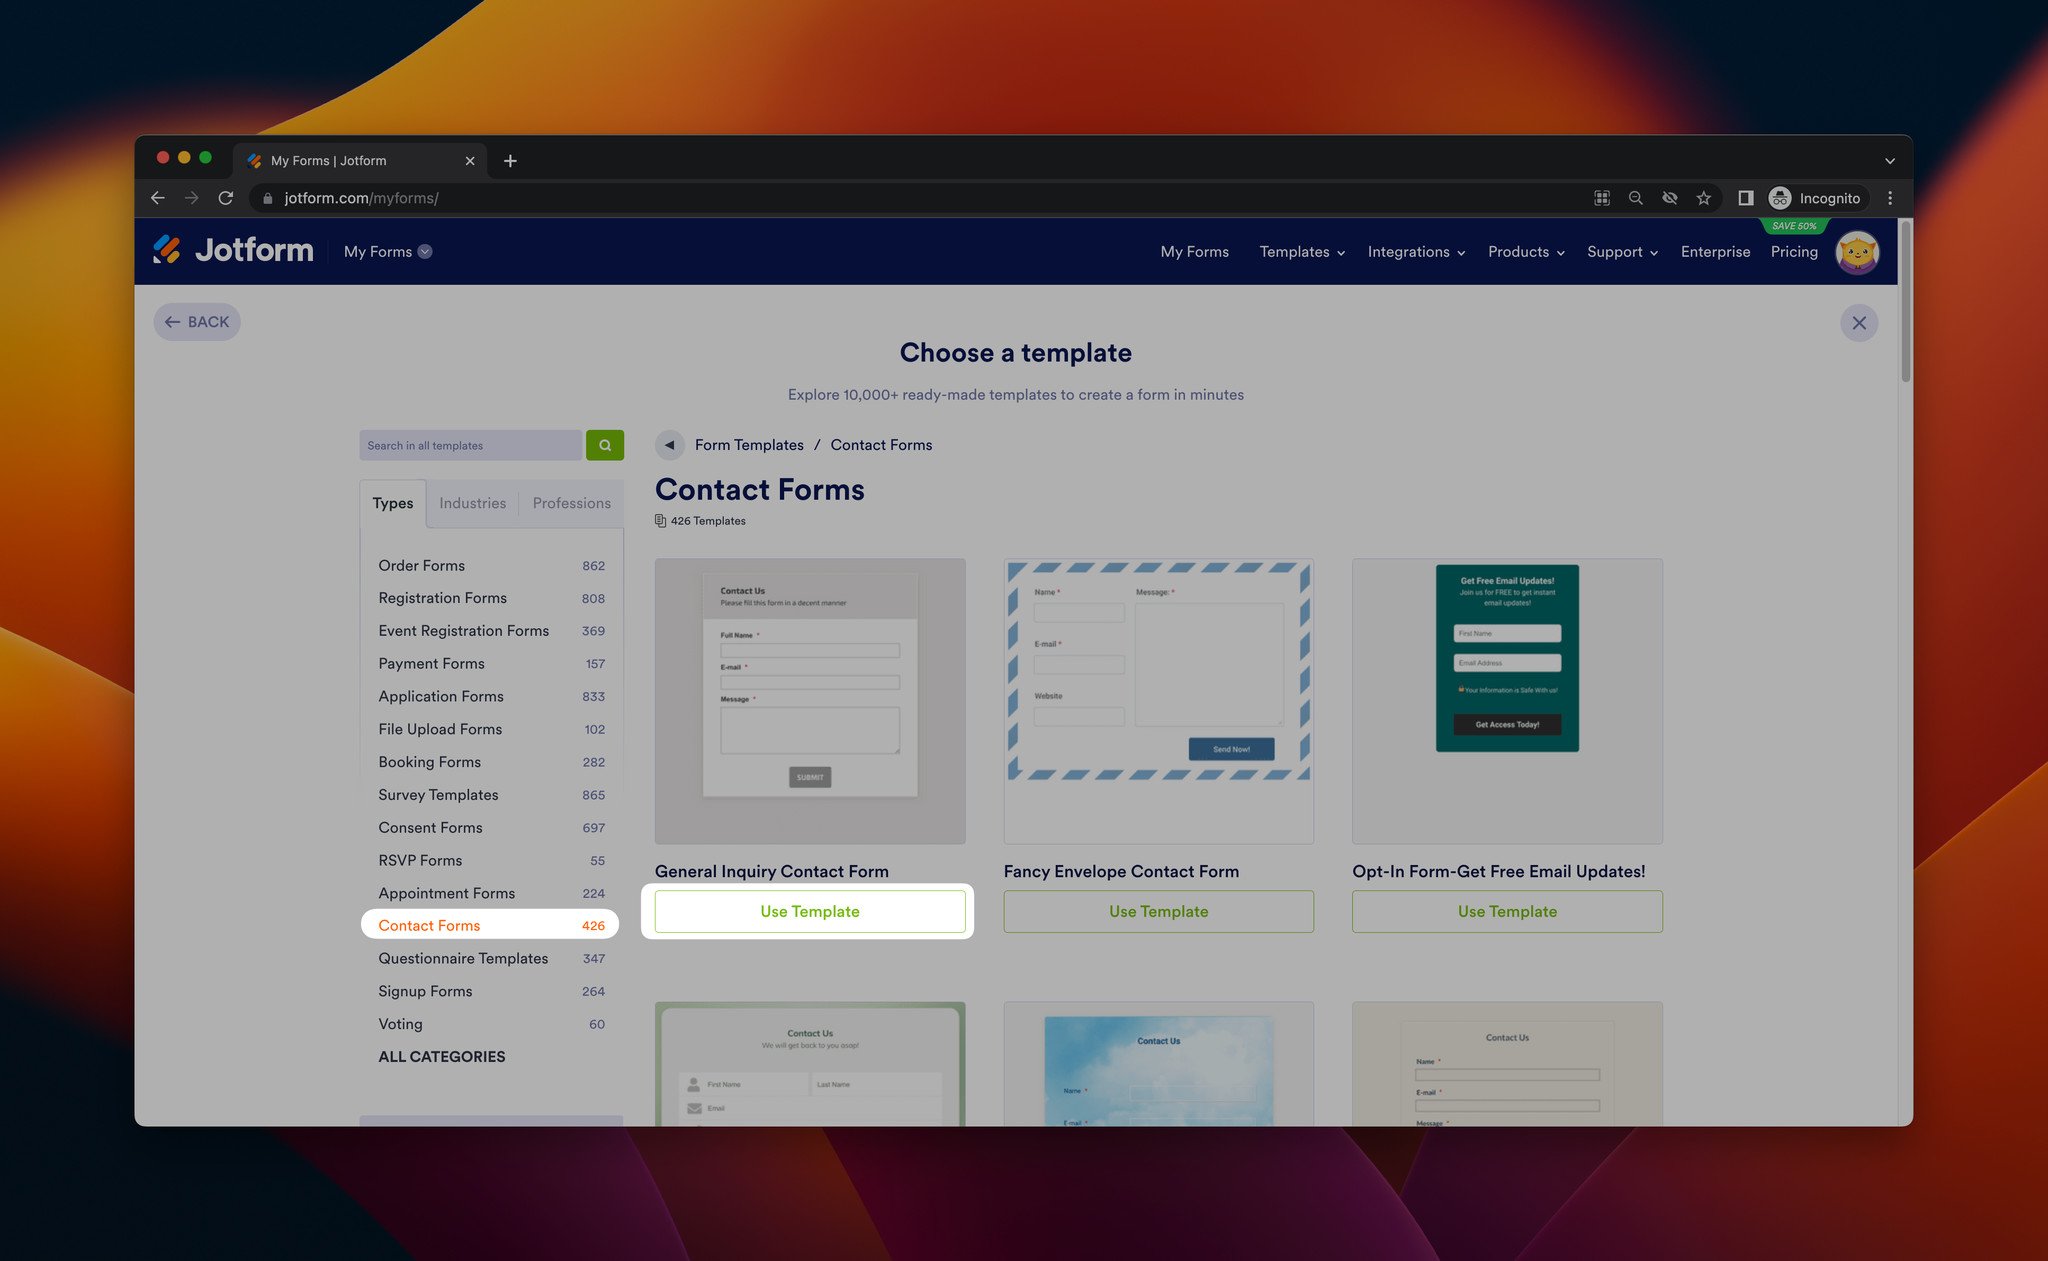
Step 3: From the templates page, you can find contact forms and click the “Use template” button.
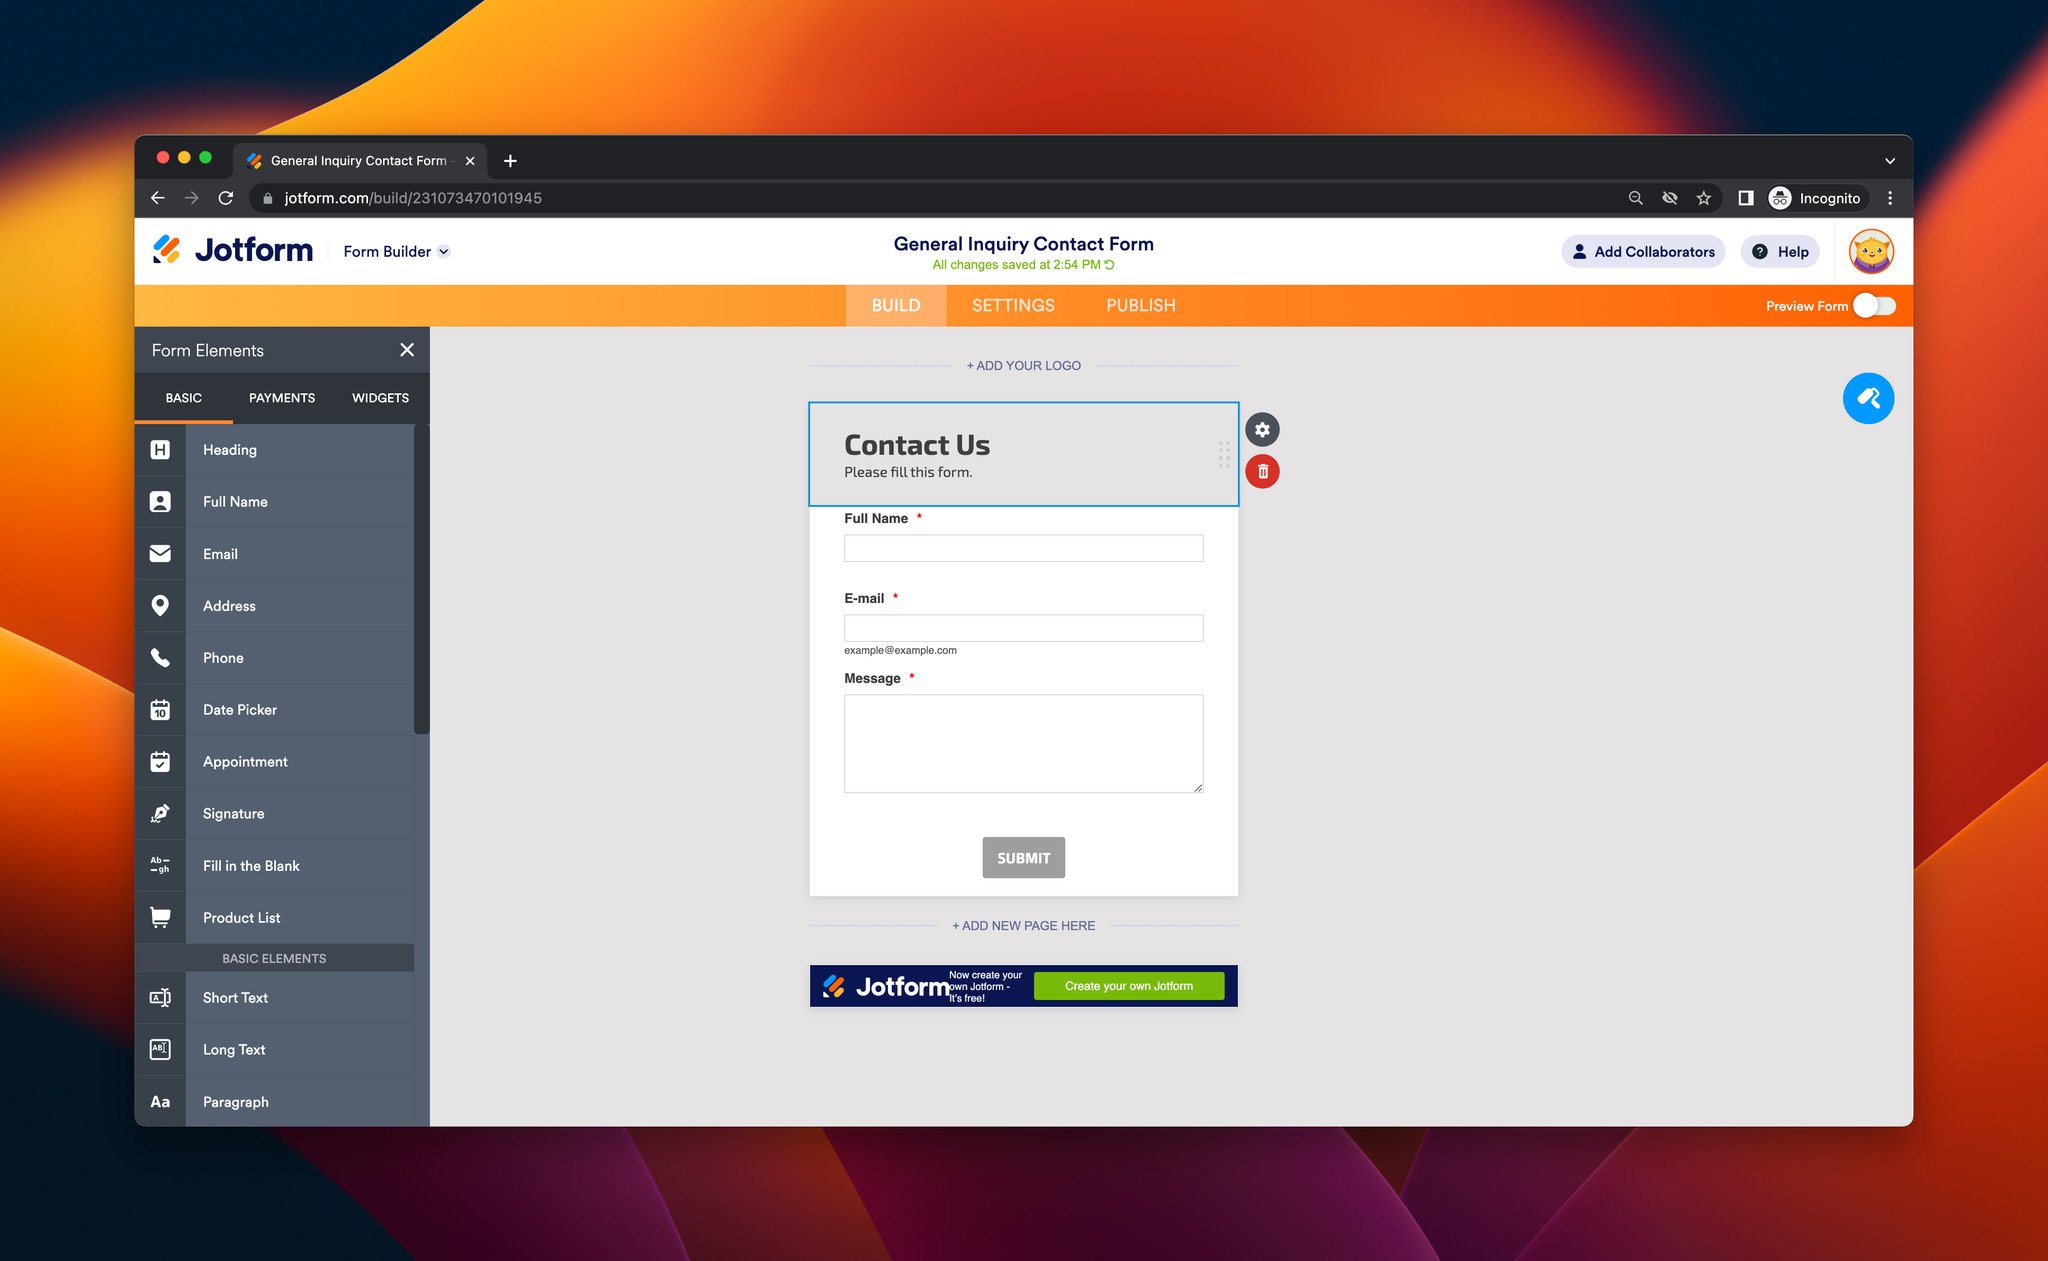
Step 4: You can customize the template from the “Build” part.
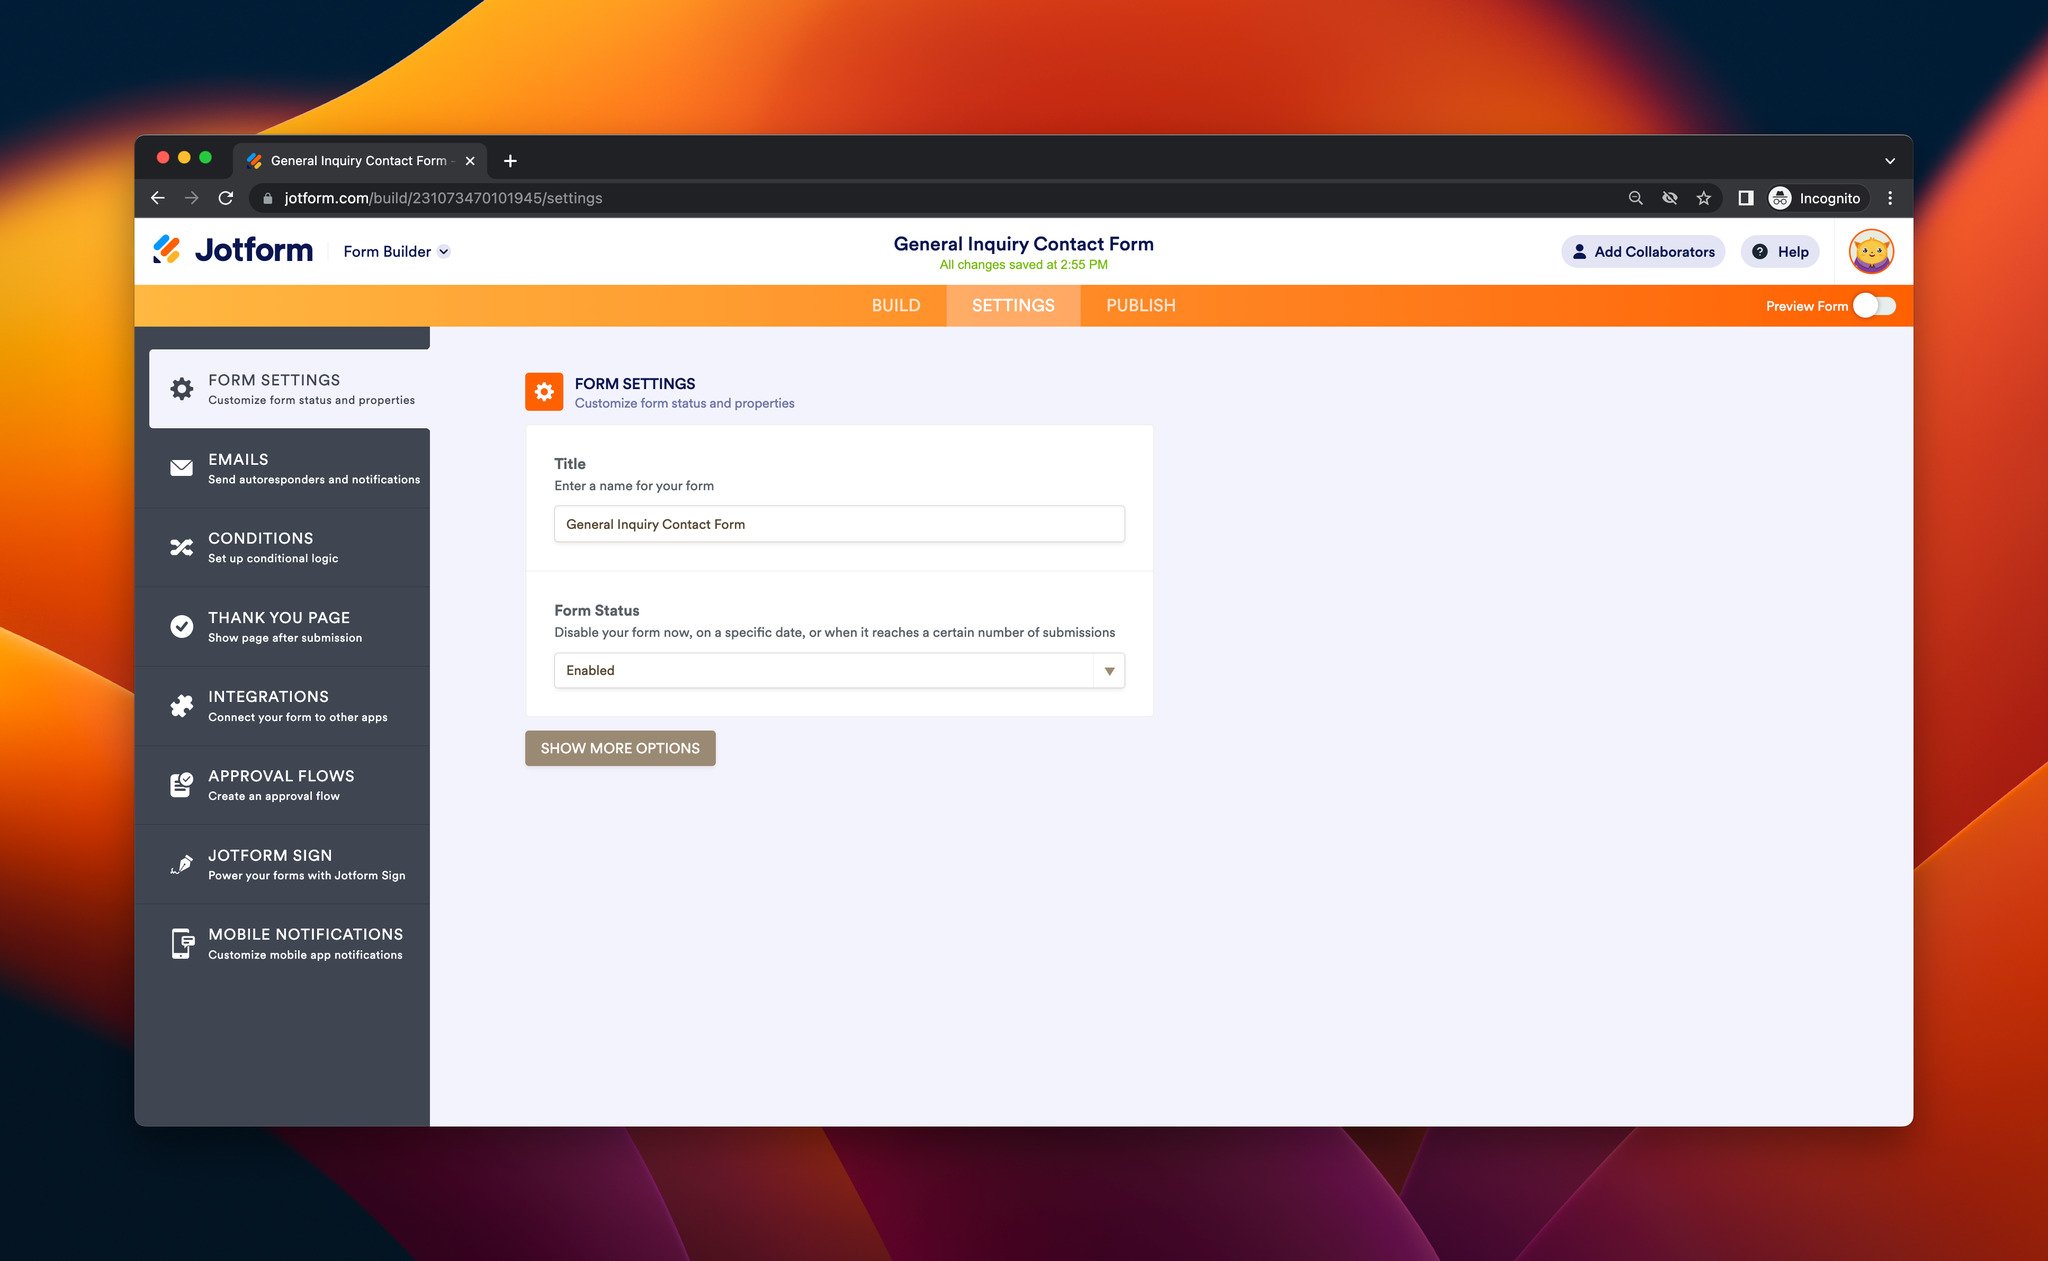
Step 5: You can adjust your contact form’s settings on the “Setting” part.
Step 6: Then, go to the “Publish” part and navigate to the “Embed” section to get your form’s embed code.
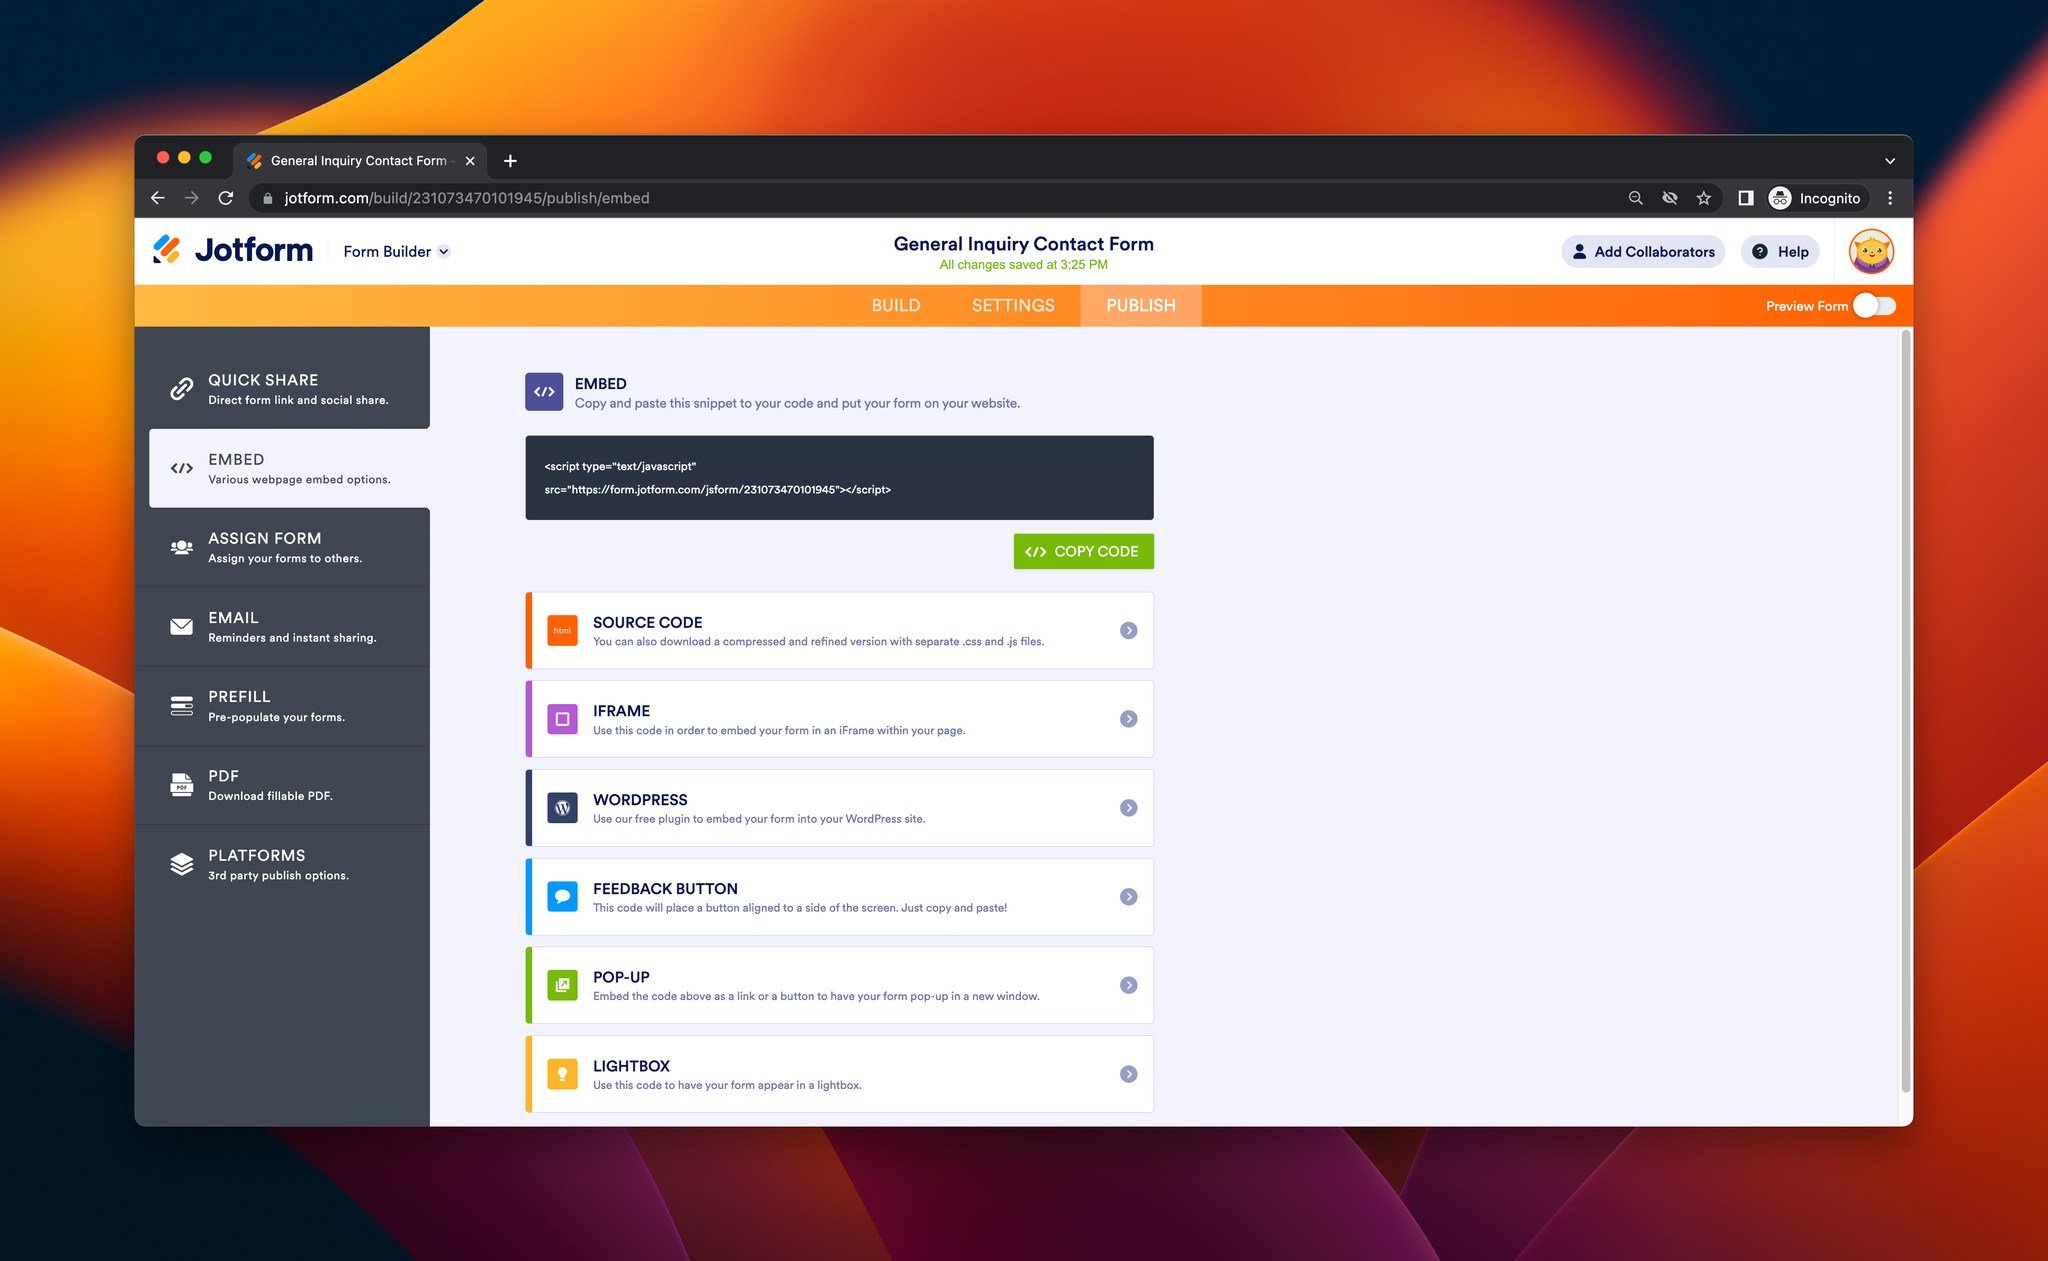
You can copy your code and paste it into your website’s code injection part. Also, you can adjust third-party publish options, prefill features to your forms, and set instant email sharing and reminders from this page.
That’s it!
Adding Contact Form with HTML
If you want to create a contact form with HTML, you need to be familiar with basic coding. Although simple HTML contact forms are very basic, you might think of using this method as well.
Here’s how you can add a contact form using HTML:
Step 1: You need to use <form> element to process your code input.
Your contact form’s code can look like this:
<!DOCTYPE html>
<html>
<head>
<meta name="viewport" content="width=device-width, initial-scale=1">
<style>
body {font-family: Helvetica, sans-serif;}
* {box-sizing: border-box;}

input[type=text], select, textarea {
  width: 100%;
  padding: 12px;
  border: 1px solid #ccc;
  border-radius: 4px;
  box-sizing: border-box;
  margin-top: 6px;
  margin-bottom: 16px;
  resize: vertical;
}

input[type=submit] {
  background-color: #04AA6D;
  color: white;
  padding: 12px 20px;
  border: none;
  border-radius: 4px;
  cursor: pointer;
}

input[type=submit]:hover {
  background-color: #45a049;
}

.container {
  border-radius: 5px;
  background-color: #f2f2f2;
  padding: 20px;
}
</style>
</head>
<body>

<h3>Contact Form</h3>

<div class="container">
  <form action="/action_page.php">
    <label for="fname">First name</label>
    <input type="text" id="fname" name="firstname" placeholder="Your name...">

    <label for="lname">Last name</label>
    <input type="text" id="lname" name="lastname" placeholder="Your last name...">

    <label for="subject">Subject</label>
    <textarea id="subject" name="subject" placeholder="Write your message..." style="height:200px"></textarea>

    <input type="submit" value="Submit">
  </form>
</div>

</body>
</html>
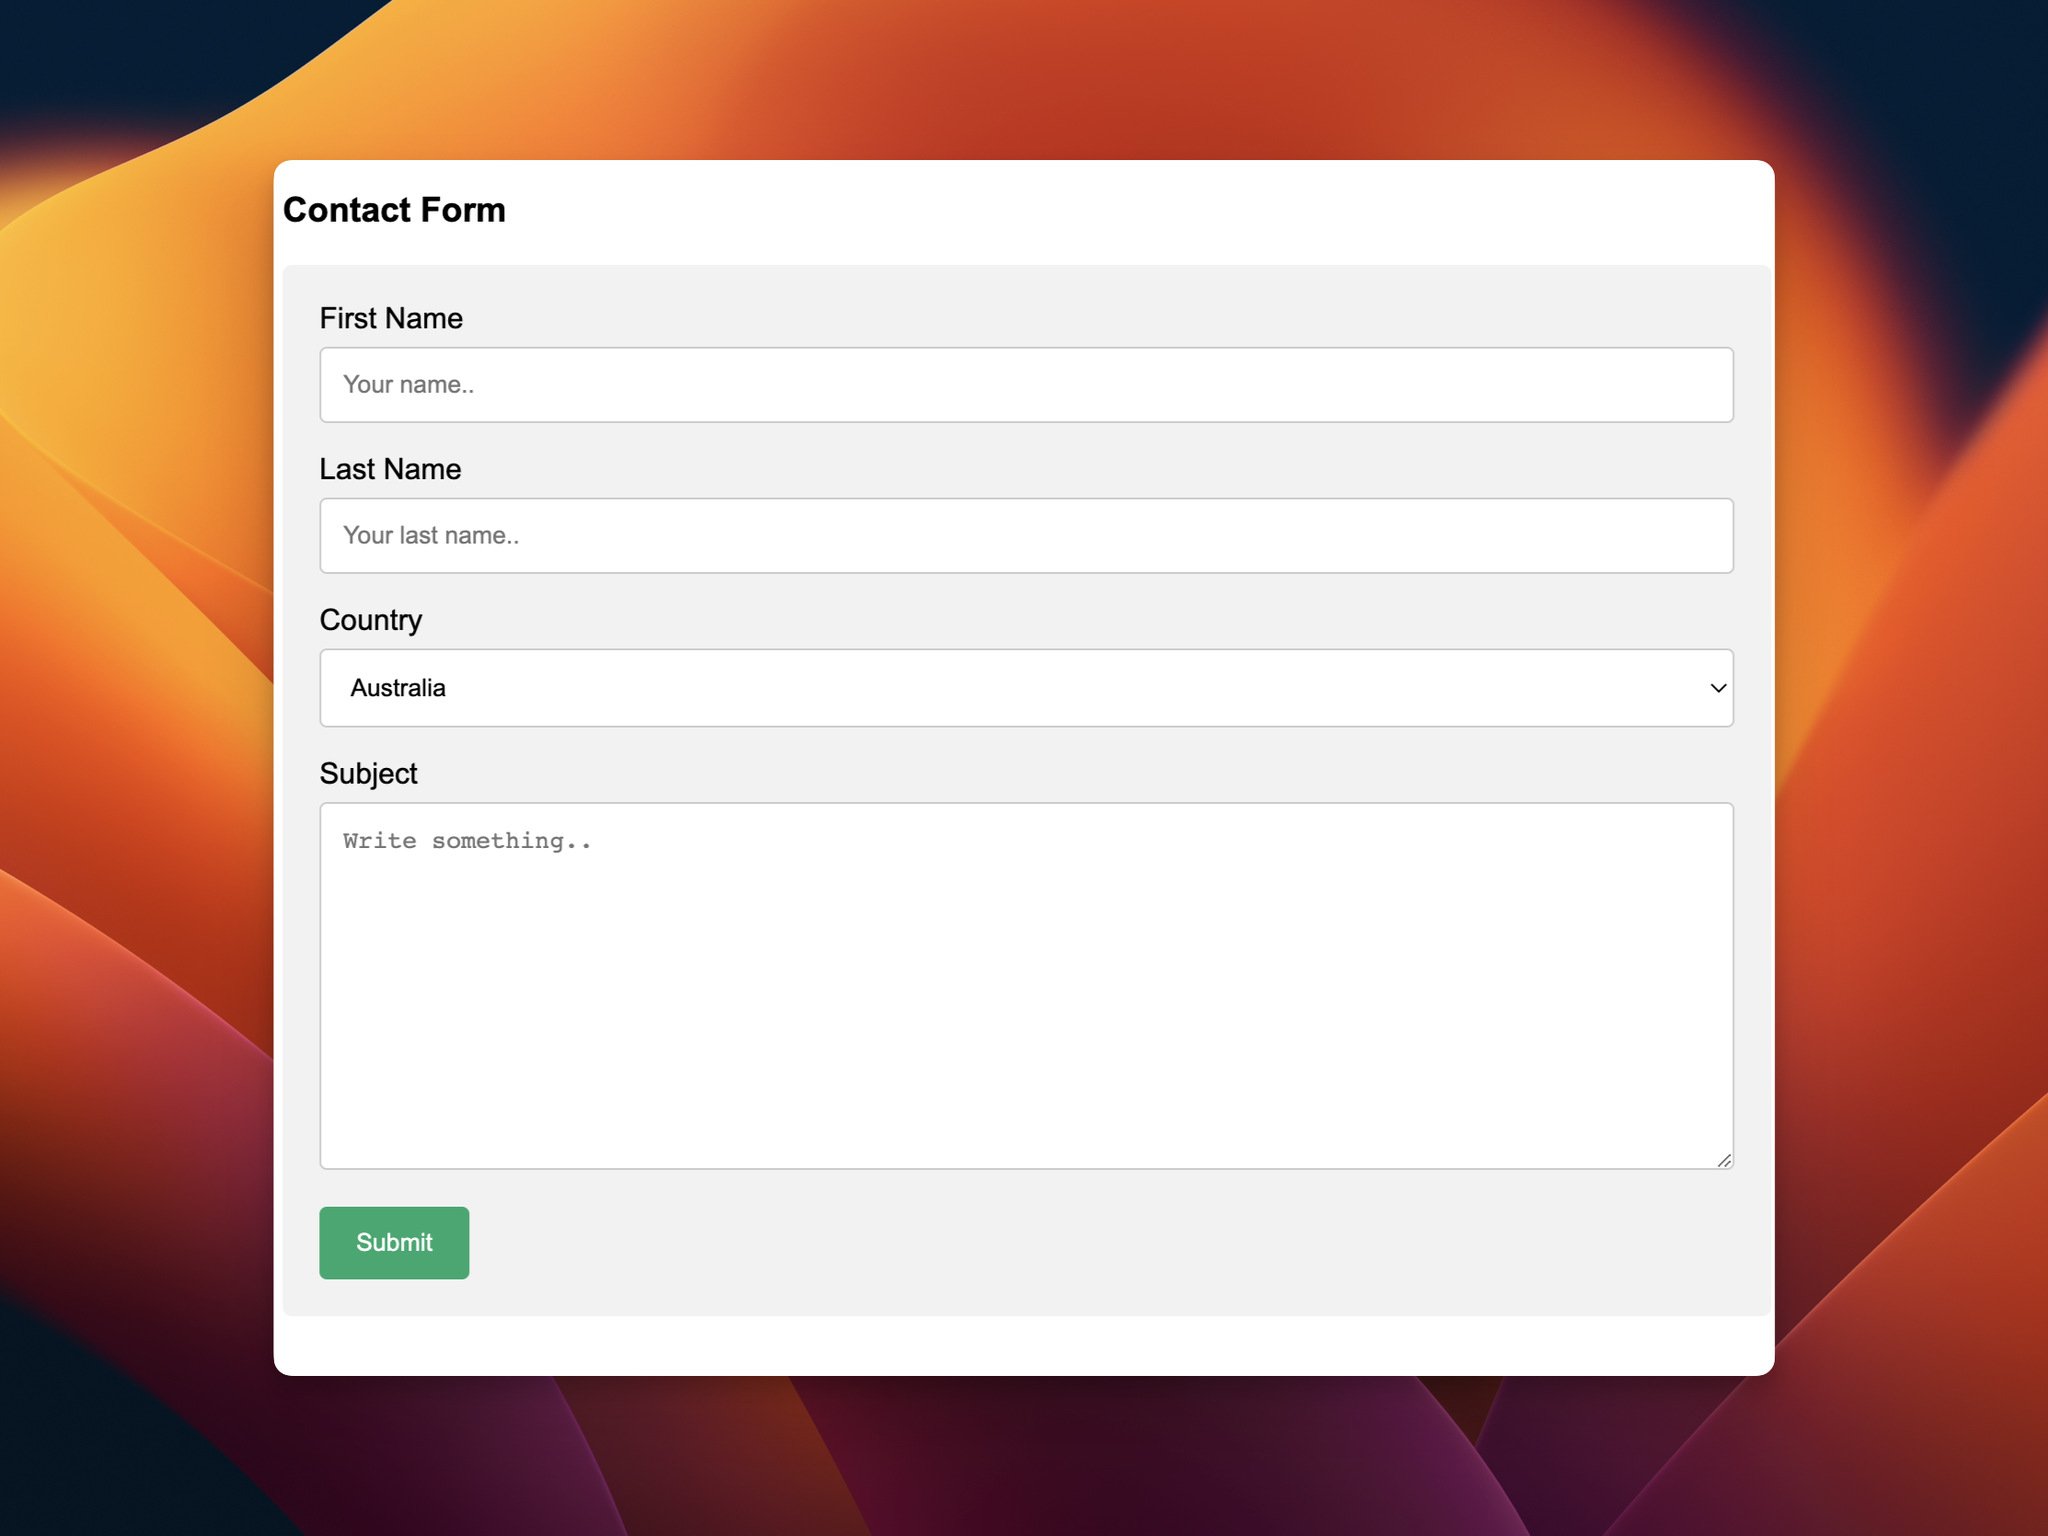
And when you add this code to your website, the result will look like this:
Step 2: You can add CSS to adjust your contact form’s style.
For example, you can add CSS that looks like this example:
<!DOCTYPE html>
<html>
<head>
<meta name="viewport" content="width=device-width, initial-scale=1">
<style>
body {font-family:Helvetica, sans-serif;}
* {box-sizing: border-box;}

input[type=text], select, textarea {
  width: 100%;
  padding: 12px;
  border: 1px solid #ccc;
  border-radius: 4px;
  box-sizing: border-box;
  margin-top: 6px;
  margin-bottom: 16px;
  resize: vertical;
}

input[type=submit] {
  background-color: #04AA6D;
  color: white;
  padding: 12px 20px;
  border: none;
  border-radius: 4px;
  cursor: pointer;
}

input[type=submit]:hover {
  background-color: #ECC9EE;
}

.container {
  border-radius: 5px;
  background-color: #F2E3DB;
  padding: 20px;
}
</style>
</head>
<body>

<h3>Contact Form</h3>

<div class="container">
  <form action="/action_page.php">
    <label for="fname">First Name</label>
    <input type="text" id="fname" name="firstname" placeholder="Your name..">

    <label for="lname">Last Name</label>
    <input type="text" id="lname" name="lastname" placeholder="Your last name..">

    <label for="subject">Subject</label>
    <textarea id="subject" name="subject" placeholder="Write something.." style="height:200px"></textarea>

    <input type="submit" value="Submit">
  </form>
</div>

</body>
</html>
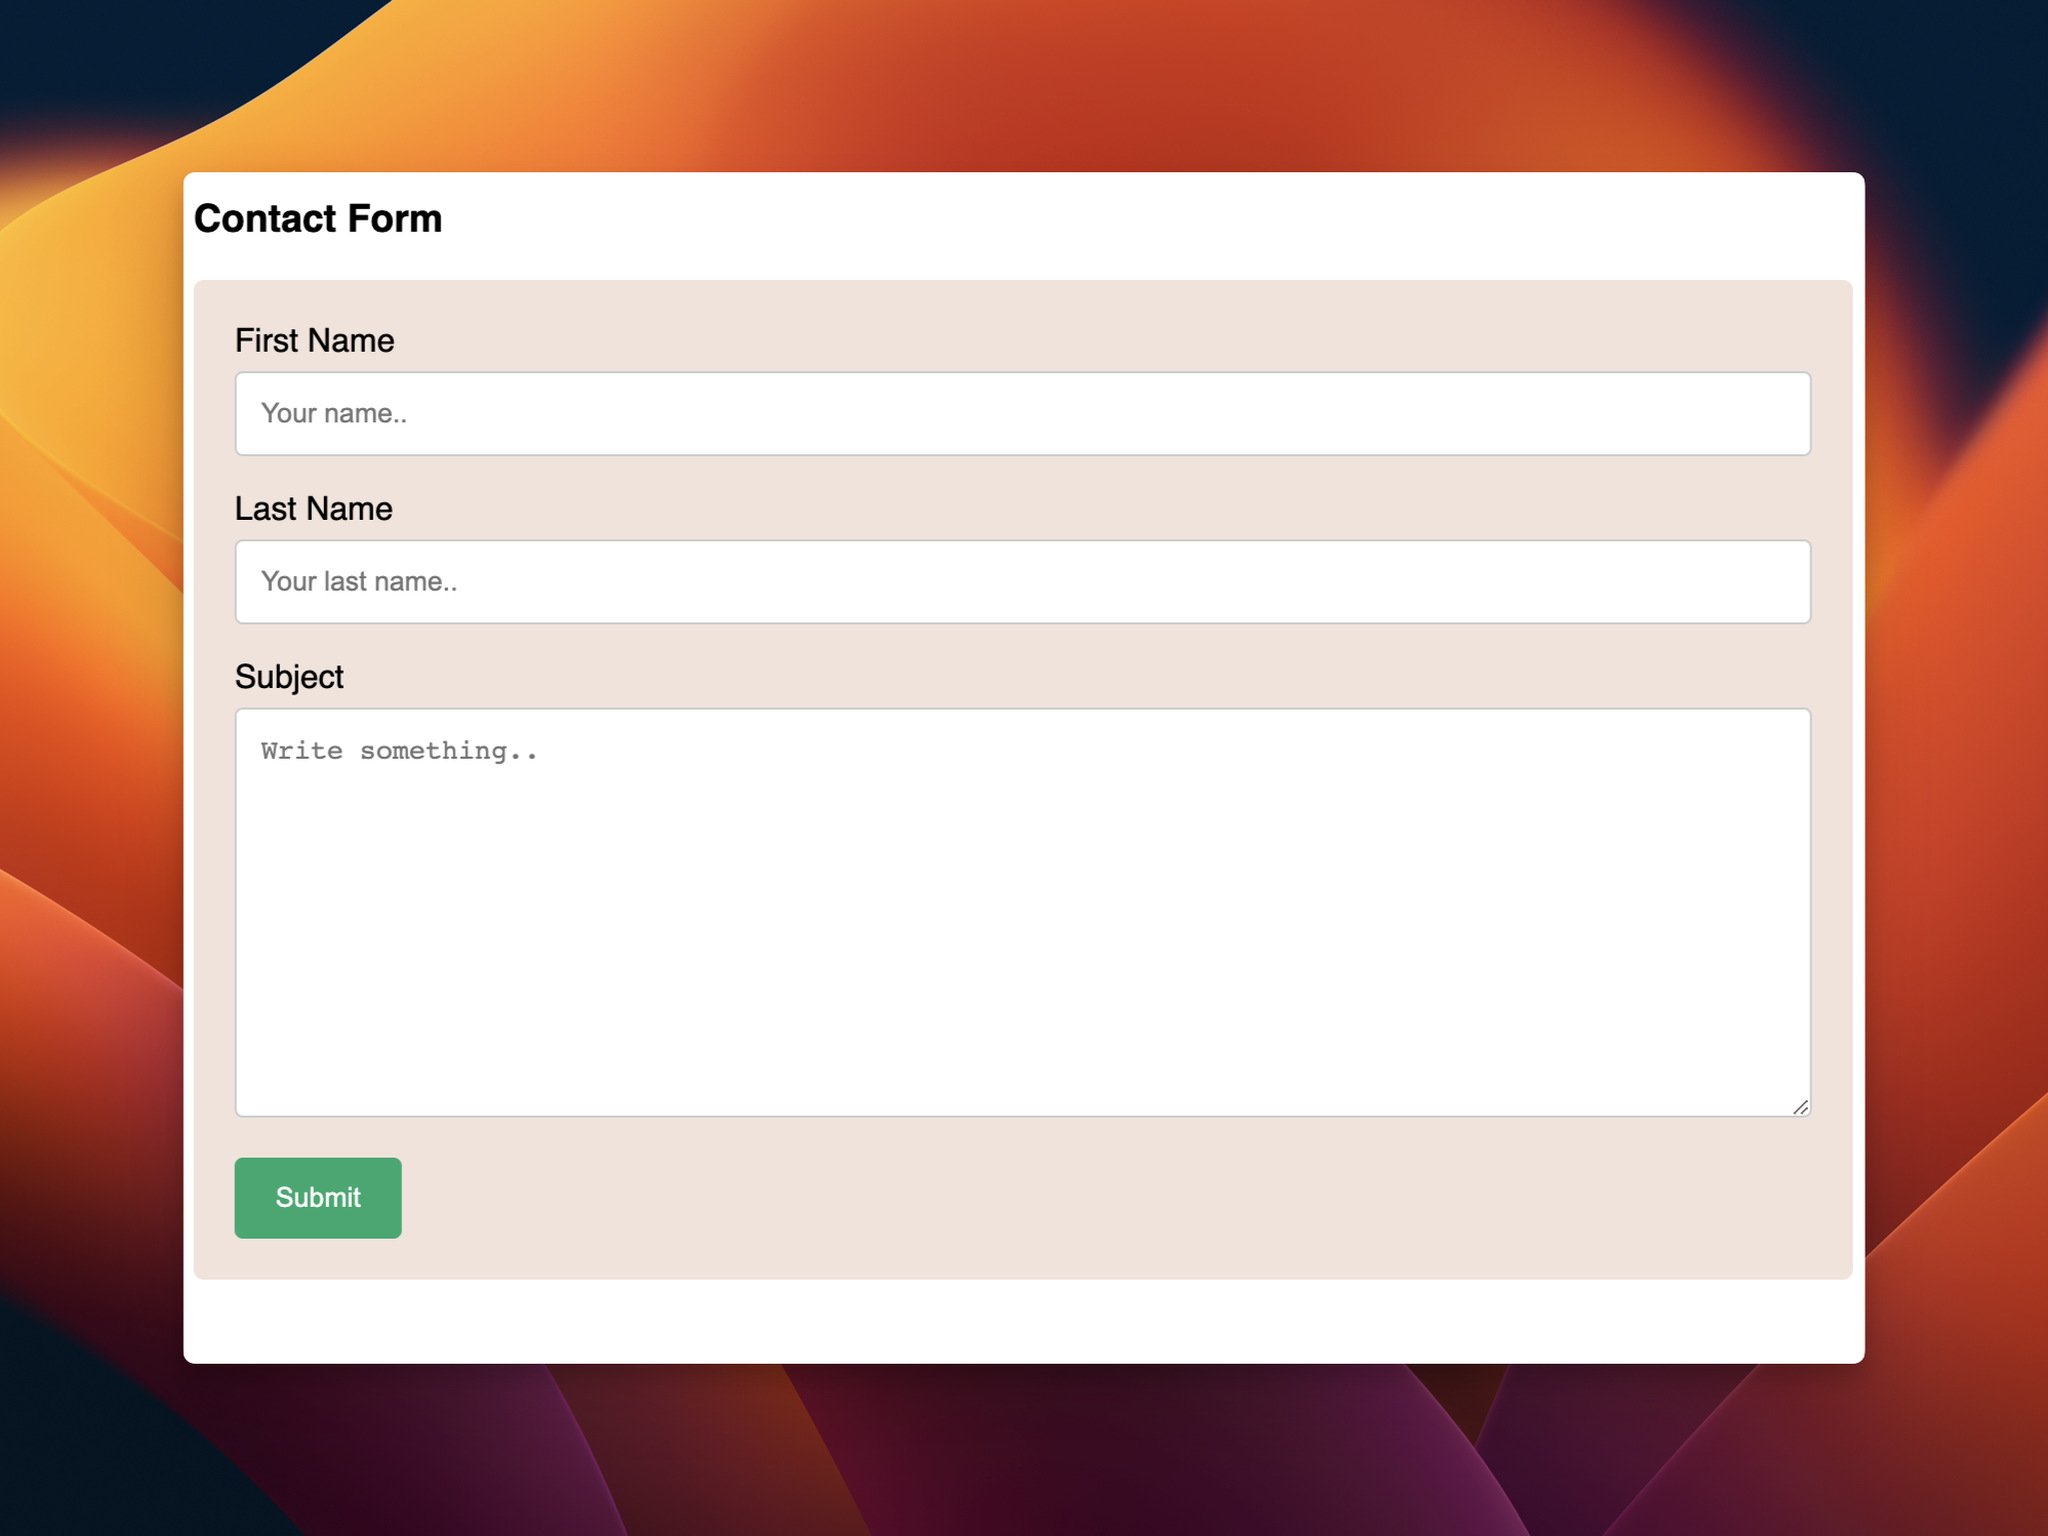
Then, it’ll change your contact form’s look to this:
That’s it!
Adding an HTML contact form can be restrictive for some people. You might not style it as you like and add engaging elements. Also, for those who are not familiar with coding, this method might seem challenging.
Adding Contact Form Using a Form Endpoint
You can add a contact form to your website by using a form endpoint/form backend tool. For this guide, we’ll explain how to do that with Formcarry.
Note: You need to be a little familiar with HTML codes and create contact forms with HTML for this method.
Step 1: First, you need to create your HTML form and CSS.
Your HTML form code can look like this:
<form class="formcarryForm" action="#" method="POST">
  <label for="firstNameInput">First Name</label>
  <input type="text" id="firstNameInput" />

  <label for="lastNameInput">Last Name</label>
  <input type="text" id="lastNameInput" />

  <label for="emailInput">Email</label>
  <input type="email" id="emailInput" />

  <label for="messageInput">Message</label>
  <textarea id="messageInput" cols="30" rows="10"></textarea>

  <button type="submit">Submit</button>
</form>
It will give you the basic contact form that has a first name, last name, email, message areas, and a submit button.
Then you can use a CSS code to adjust its look. Your CSS code can look like this, according to Formcarry’s guide:
<style>
    @import url("https://fonts.googleapis.com/css2?family=Inter:wght@400;700&display=swap");

    /*
    CONTACT FORM EXAMPLE FOR FORMCARRY

    IMPORTANT NOTE:
    PLEASE ADD formcarryForm class to your form element
    to apply the styles.
    */

    * {
        box-sizing: border-box;

        /* colors */
        --color-blue: #2552d0;
        --color-light-blue: #3266e3;
        --color-gray: #e5e7eb;
        --color-dark-gray: #9da3ae;
        --color-pink: #edadd2;

        /* container */
        --c-width: 50%;
        --c-max-width: 500px;
    }

    body {
        font-family: "Inter", sans-serif;
    }

    .formcarryContainer {
        width: var(--c-width);
        max-width: var(--c-max-width);
        display: block;
        margin: 10vh auto 0 auto;
    }

    .formcarryForm label {
        display: block;
        padding: 12px 0 2px 0;
        letter-spacing: -0.2px;
        cursor: pointer;
        font-size: 16px;
        font-weight: 700;
    }

    .formcarryForm input,
    .formcarryForm textarea {
        font-size: 16px;
        display: block;
        width: 100%;
        padding: 10px;
        background-color: var(--color-gray);
        border: none;
        border: 4px solid var(--color-gray);
        outline: none;
        border-radius: 8px;
        color: var(--color-dark-gray);
    }

    .formcarryForm input:focus,
    .formcarryForm textarea:focus {
        background-color: #fff;
        color: var(--color-dark-gray);
    }

    .formcarryForm input:focus:required:invalid {
        border-color: var(--color-pink);
        background-color: #fff;
    }

    .formcarryForm button {
        display: block;
        margin-top: 12px;
        width: 100%;
        padding: 12px 20px;
        border-radius: 8px;
        background-color: var(--color-blue);
        color: #fff;
        font-weight: 700;
        font-size: 18px;

        transition: 300ms all;
    }

    .formcarryForm button:hover {
        background-color: var(--color-light-blue);
    }

    .formcarry-alert {
        padding: 12px;
        border-radius: 10px;
        color: #fff;
        font-size: 14px;
        font-weight: 400;
        margin-top: 12px;
        display: none;
    }

    .formcarry-alert.visible {
        display: block;
    }

    .formcarry-alert.success {
        background: #69cf9d;
    }

    .formcarry-alert.error {
        background: #de524c;
    }
</style>
If you don’t have an HTML form code and want to use one that can be customized, you can use Formcarry’s Contact Form Generator.
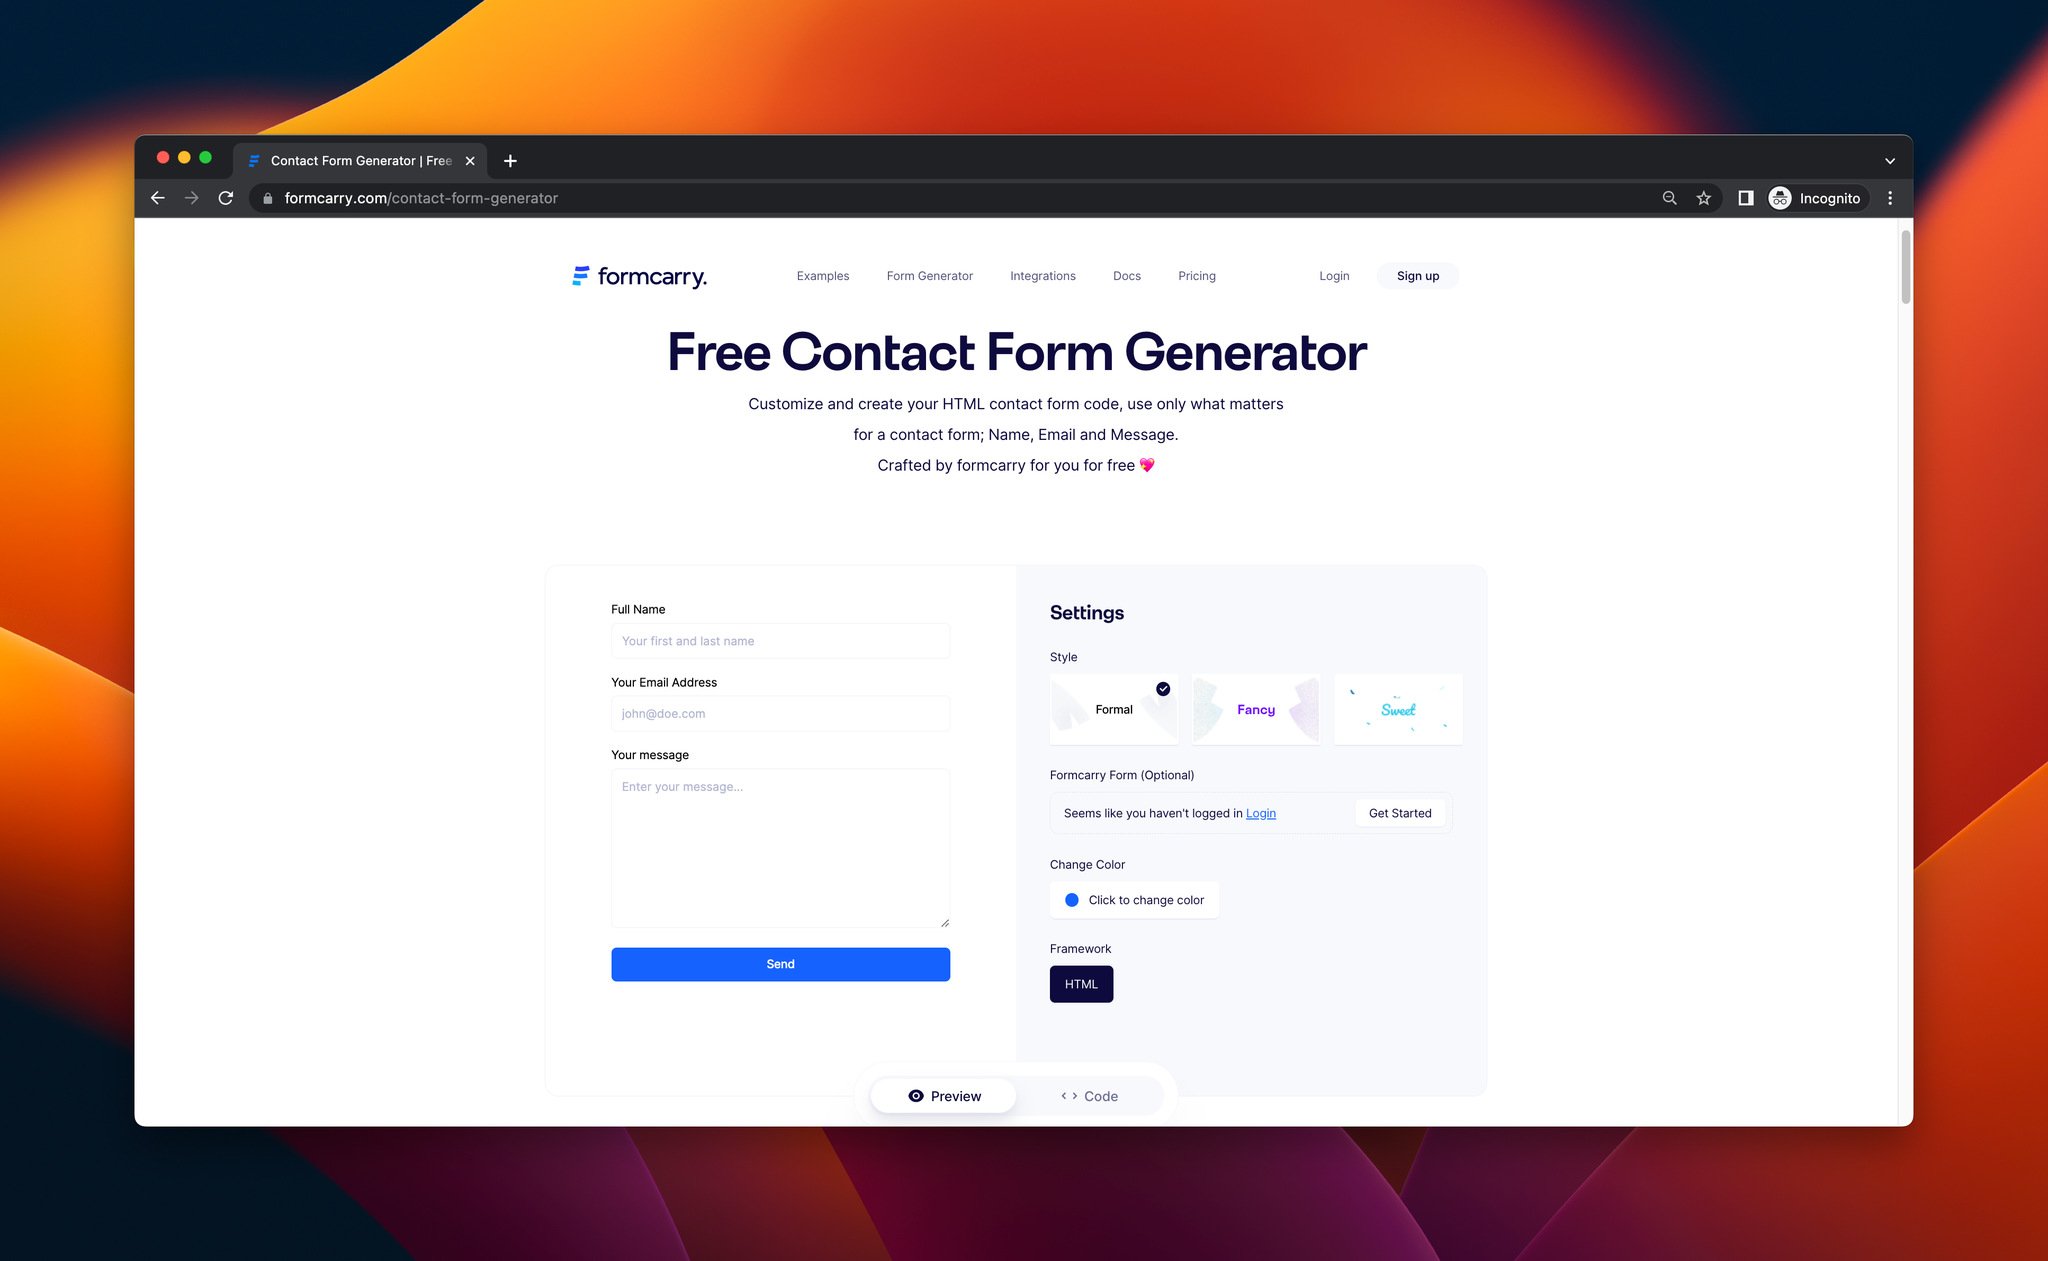
By adjusting your contact from this generator, you can create and get your form’s code.
Step 2: Then, you need to structure your contact form’s data by adding the fields you want.
You can name your fields by using name attribution & your code can look like this, according to Formcarry’s guide:
<form class="formcarryForm" action="#" method="POST">
  <label for="firstNameInput">First Name</label>
  <input type="text" id="firstNameInput" name="firstName" />

  <label for="lastNameInput">Last Name</label>
  <input type="text" id="lastNameInput" name="lastName" />

  <label for="emailInput">Email</label>
  <input type="email" id="emailInput" name="email" />

  <label for="messageInput">Message</label>
  <textarea id="messageInput" cols="30" rows="10" name="message"></textarea>

  <button type="submit">Submit</button>
</form>
Step 3: Now you can create a form in Formcarry by signing up and clicking the “Create Form” button. That way, you can get your form backend URL.
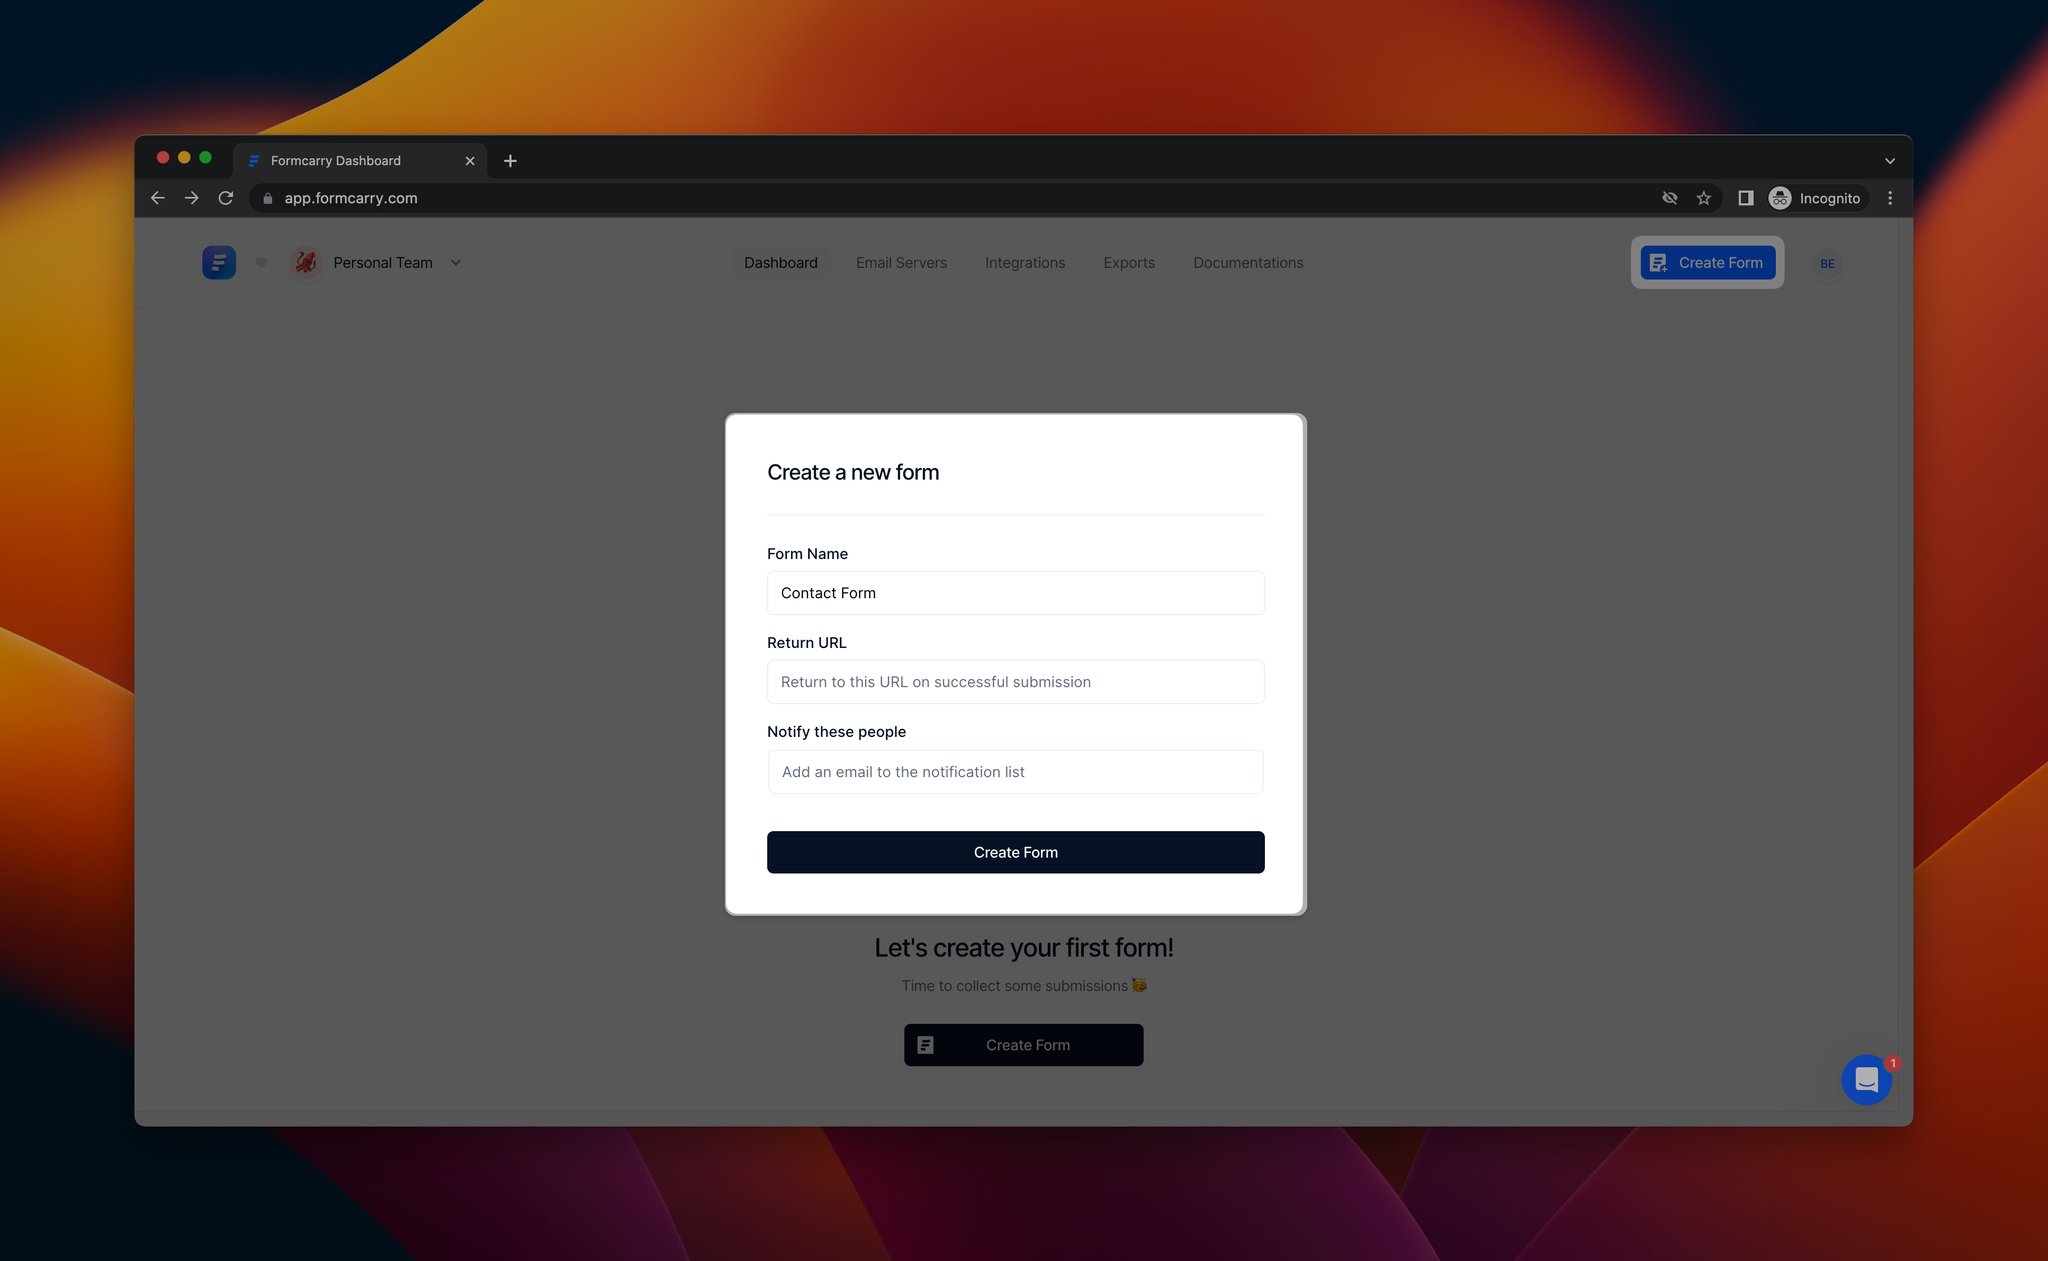
Create your form, give it a name, and save it.
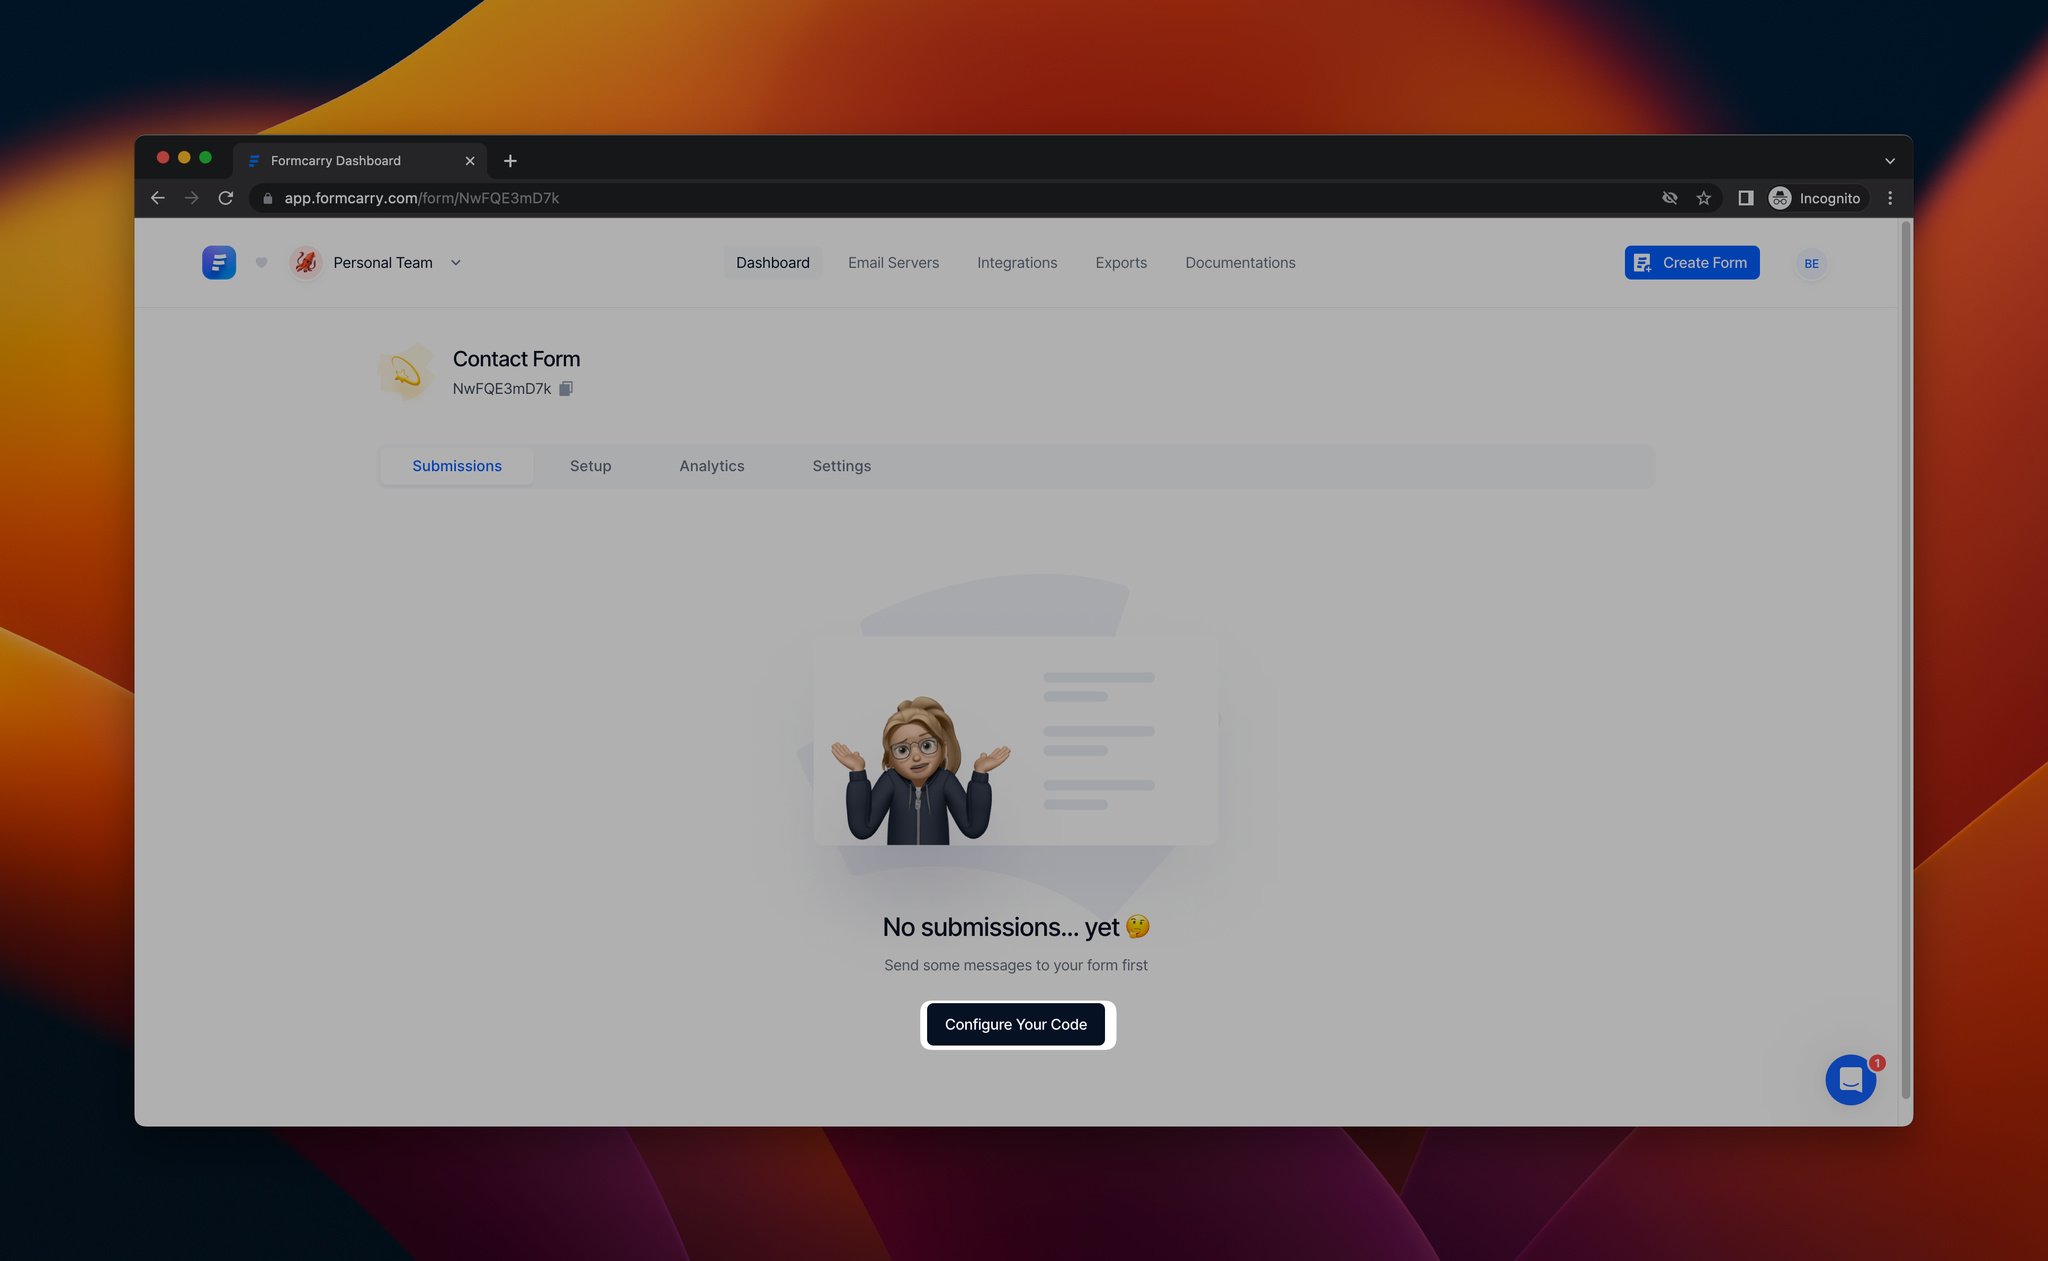
Step 4: By clicking “Configure your code,” you can integrate your form with Formcarry.
Step 5: Copy your form endpoint, and paste it into your form code’s action part.
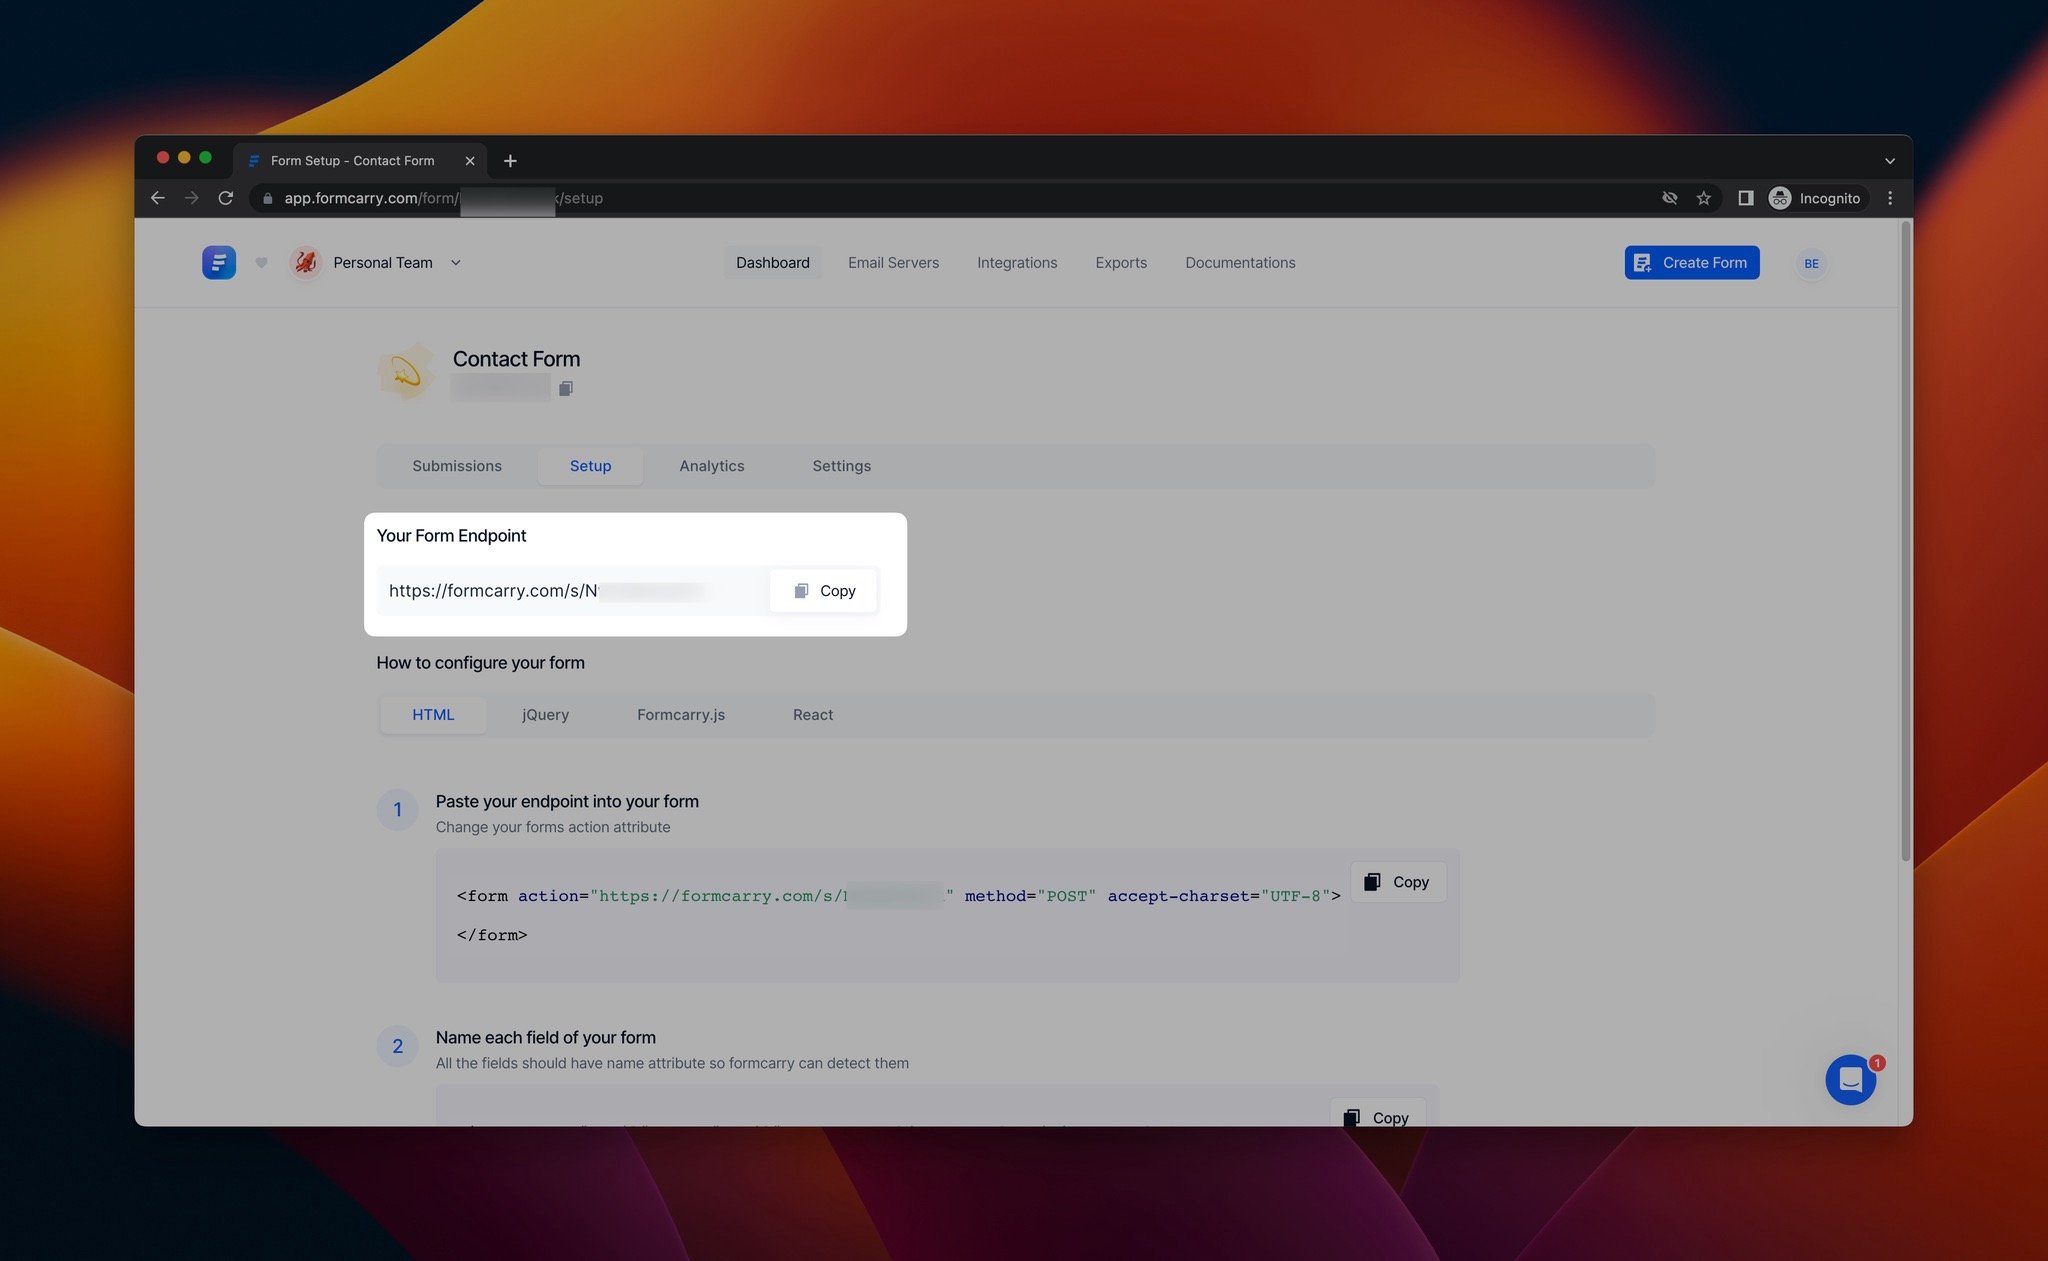
Your form’s action part can look like this, as shown below:
<form class="formcarryForm" action="#" method="POST">
You need to delete this form class part and paste your endpoint to the area that says {Your-Unique-Endpoint} on the example below:
<form class="formcarryForm" action="https://formcarry.com/s/{Your-Unique-Endpoint}" method="POST">
You are done creating your form, and you can collect contact form submissions! If you want to monitor them, you can go to your Formcarry dashboard and check them from the “Submissions” part.

You can monitor your form submissions from this part quickly.
Tips for Effective Contact Forms that Convert

► Keep it simple: A contact form shouldn't be difficult to use or have too many fields or challenging queries. Ask for the required data to react to requests properly and keep your form short and easy.
► Provide clear instructions: Make sure the information on your contact form on how to use it and what information to send is clear. Visitors will feel more comfortable using the form, as a result, increasing the likelihood that they will enter accurate information.
► Test your form regularly: Be sure to test your contact form frequently to ensure it is working properly and receiving all submissions. A/B testing can also test various form layouts and text to determine which is most successful.
► Use an attractive & engaging style: You can add images and your brand logo and use consistent colors so that your forms can fit your brand identity.
By following these quick tips, you can make a contact form that works well, increases user engagement, and facilitates deeper connections with your audience.
To Cut a Long Story Short…
In conclusion, including a contact form on your website is an essential first step in building a close relationship with your visitors. The process is quite simple, regardless of whether you're using a popup builder, form builder tool, or manually coding your form.
You can develop a contact form that looks professional and makes it simple for site visitors to get in touch with you by following the instructions provided in this blog post.
Ensure that you use a clear message and catchy headline to achieve your goals for contact forms, and start strengthening your relationships with your visitors!
Frequently Asked Questions

What are The Benefits of Using A Contact Form on My Website?
Visitors may easily contact you using contact forms, whether they have inquiries about your goods or services or just want to offer feedback. Additionally, using a contact form, you can keep your email address safe from scammers and guarantee that all queries are collected in one location.
Can I Customize My Contact Form?
Your contact form can be modified to fit the branding and style of your website. Numerous widgets and plugins provide customization possibilities, and if you manually code your form, you may change the HTML and CSS to get the appearance and feel you want.
Do I Need Technical Skills to Add A Contact Form to My Website?
It depends on the option you choose. You typically don't need technical skills if you're using a no-code tool. If you're manually coding your form, you will need some coding skills, including knowledge of HTML and CSS.
Visit these blog posts while you are here:

How would you rate your experience with this article? 😊