SiteData Targeting
Enhance targeting precision with Popupsmart's SiteData targeting feature. Learn how to optimize engagements based on user site interactions.
Thanks to SiteData targeting, you can get the most out of the data that is already on your website. With this smart targeting option, your popups will serve the right customers at the right time.
Use Cases
SiteData targeting can be used for upselling products to visitors whose cart total reaches a specified amount, targeting first-time buyers only, and much more. In this article, we'll show you how to set up SiteData targeting with the example of a free shipping popup for visitors with a cart total of $100.
How to Set Up SiteData Targeting
Navigate to Segment
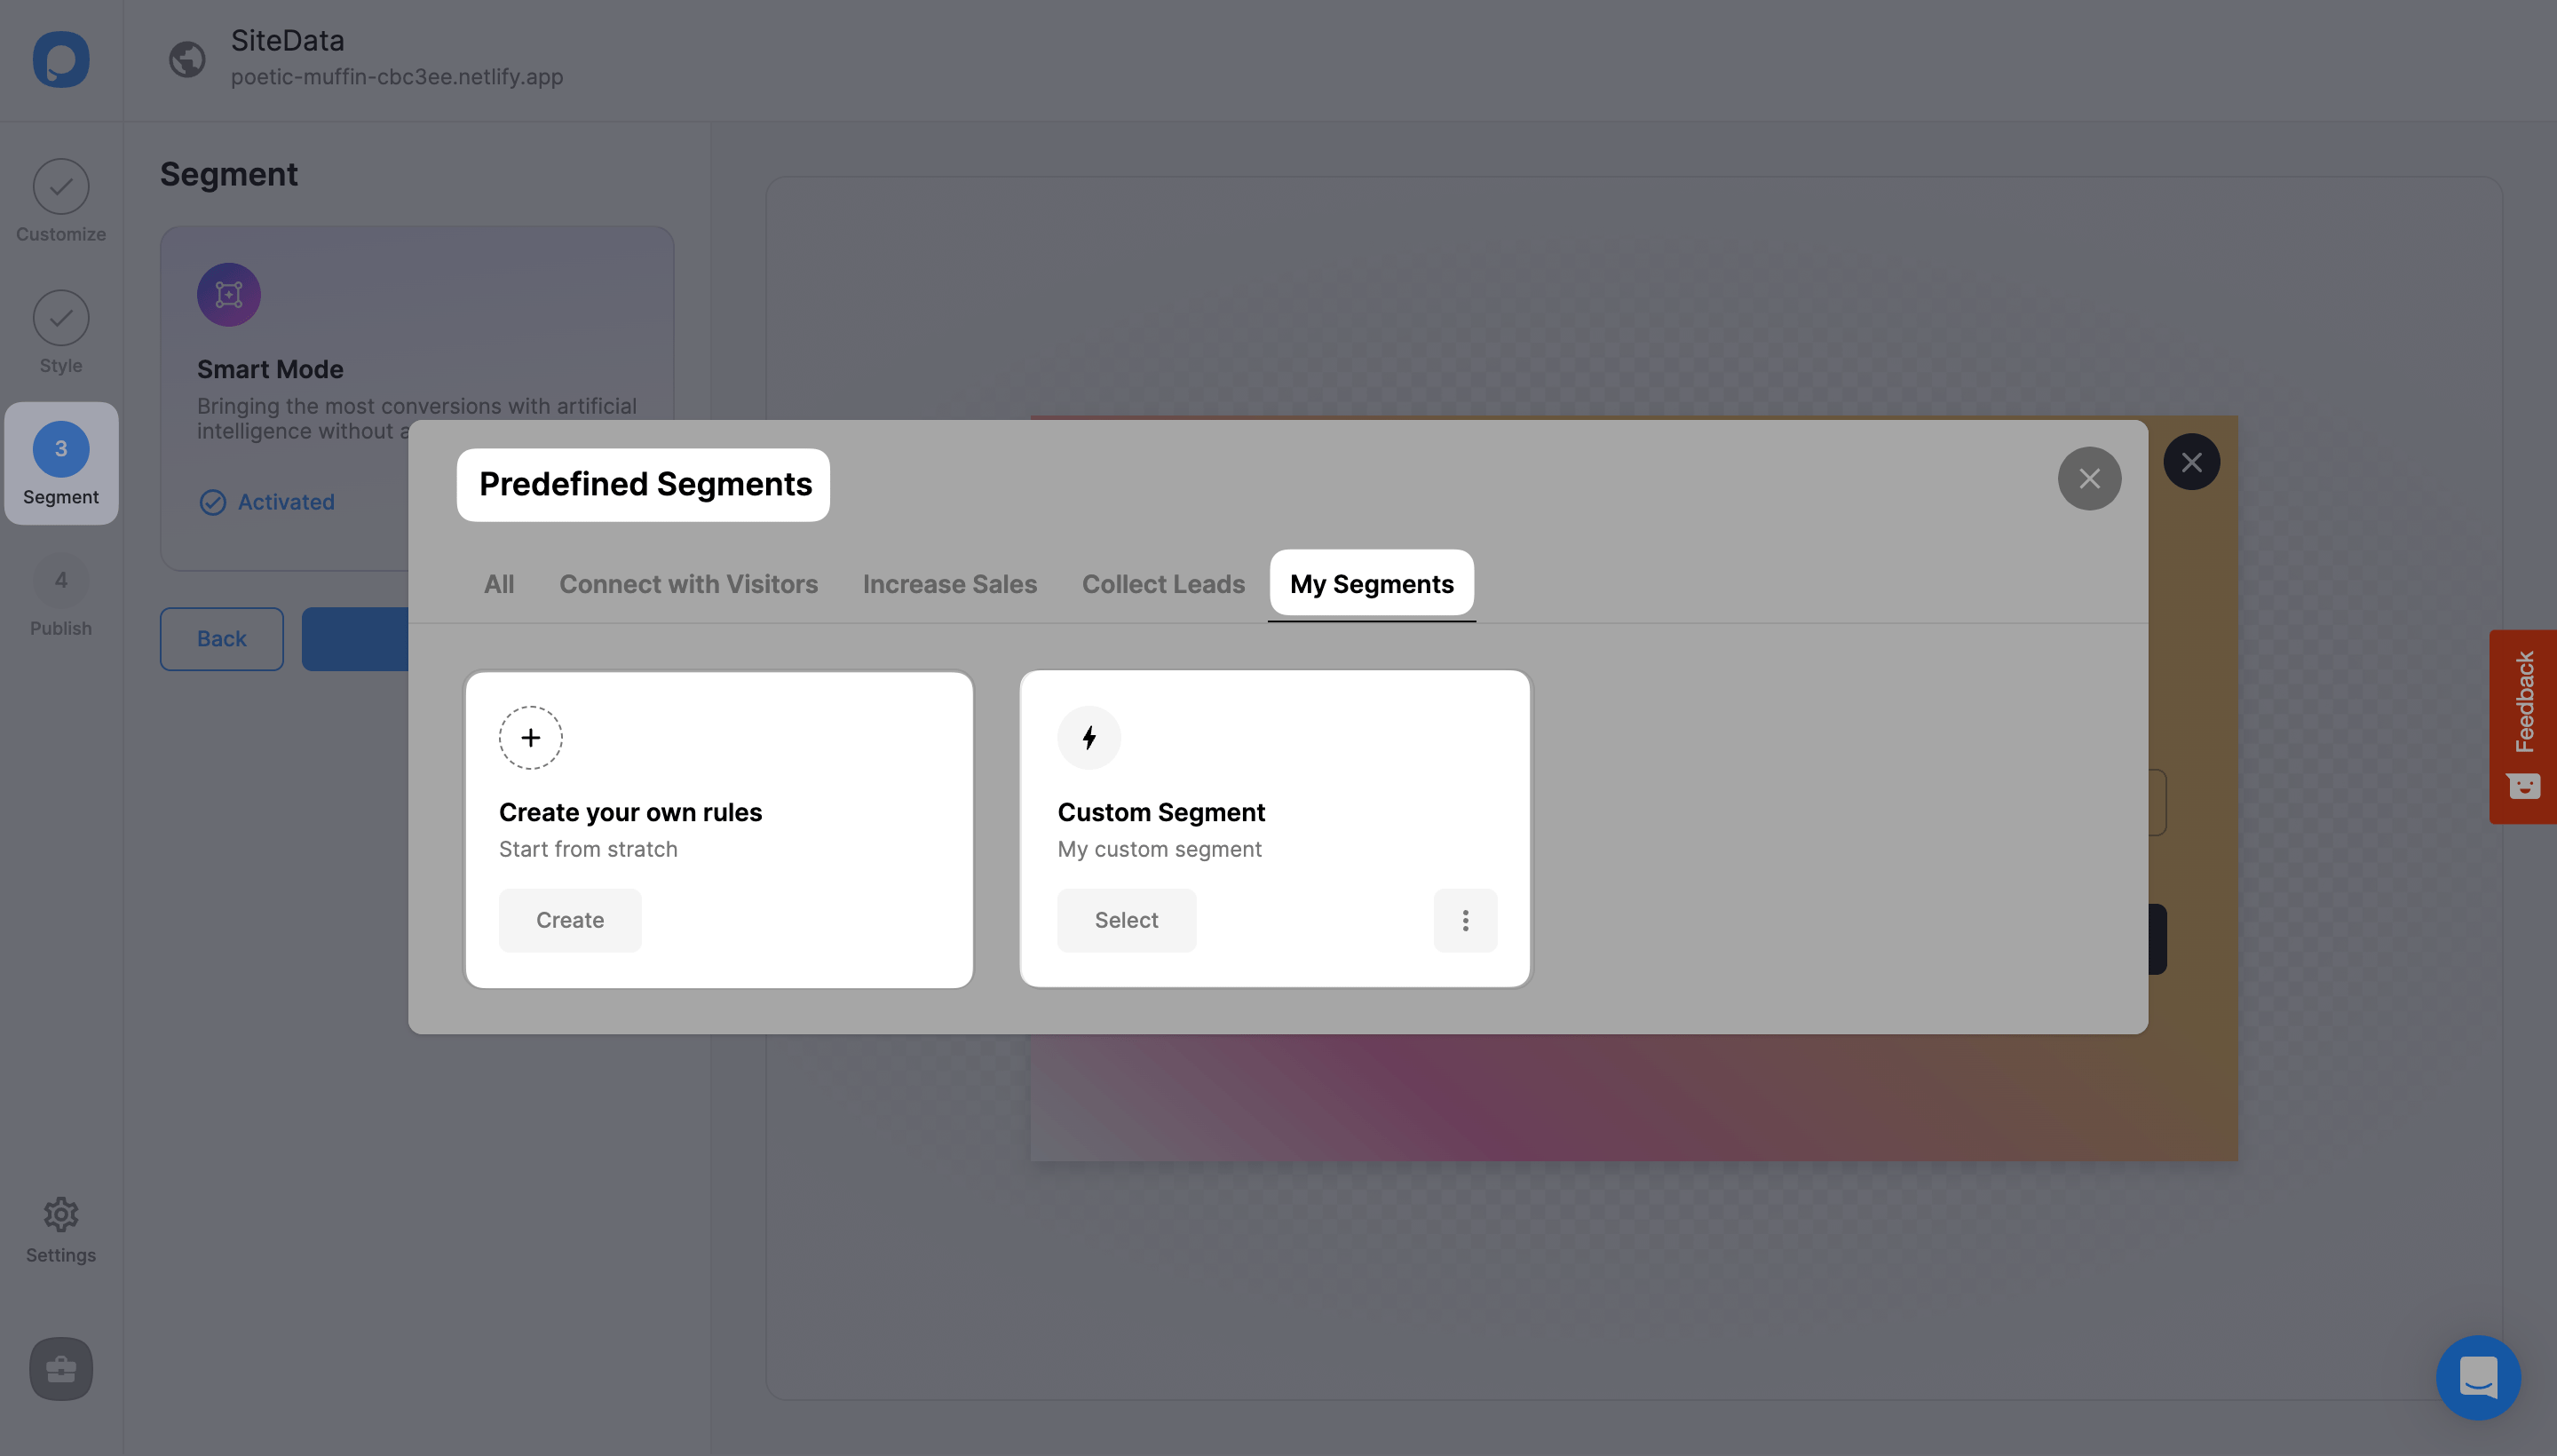
After logging into your Popupsmart account, create/edit a popup campaign. Navigate to the "Segment" step. All templates come with predefined segments by default, but you can click "Change" to see predefined segments or create your own rules on "My Segments." You can also click "Edit" to edit the segment you already have.
Add SiteData Targeting
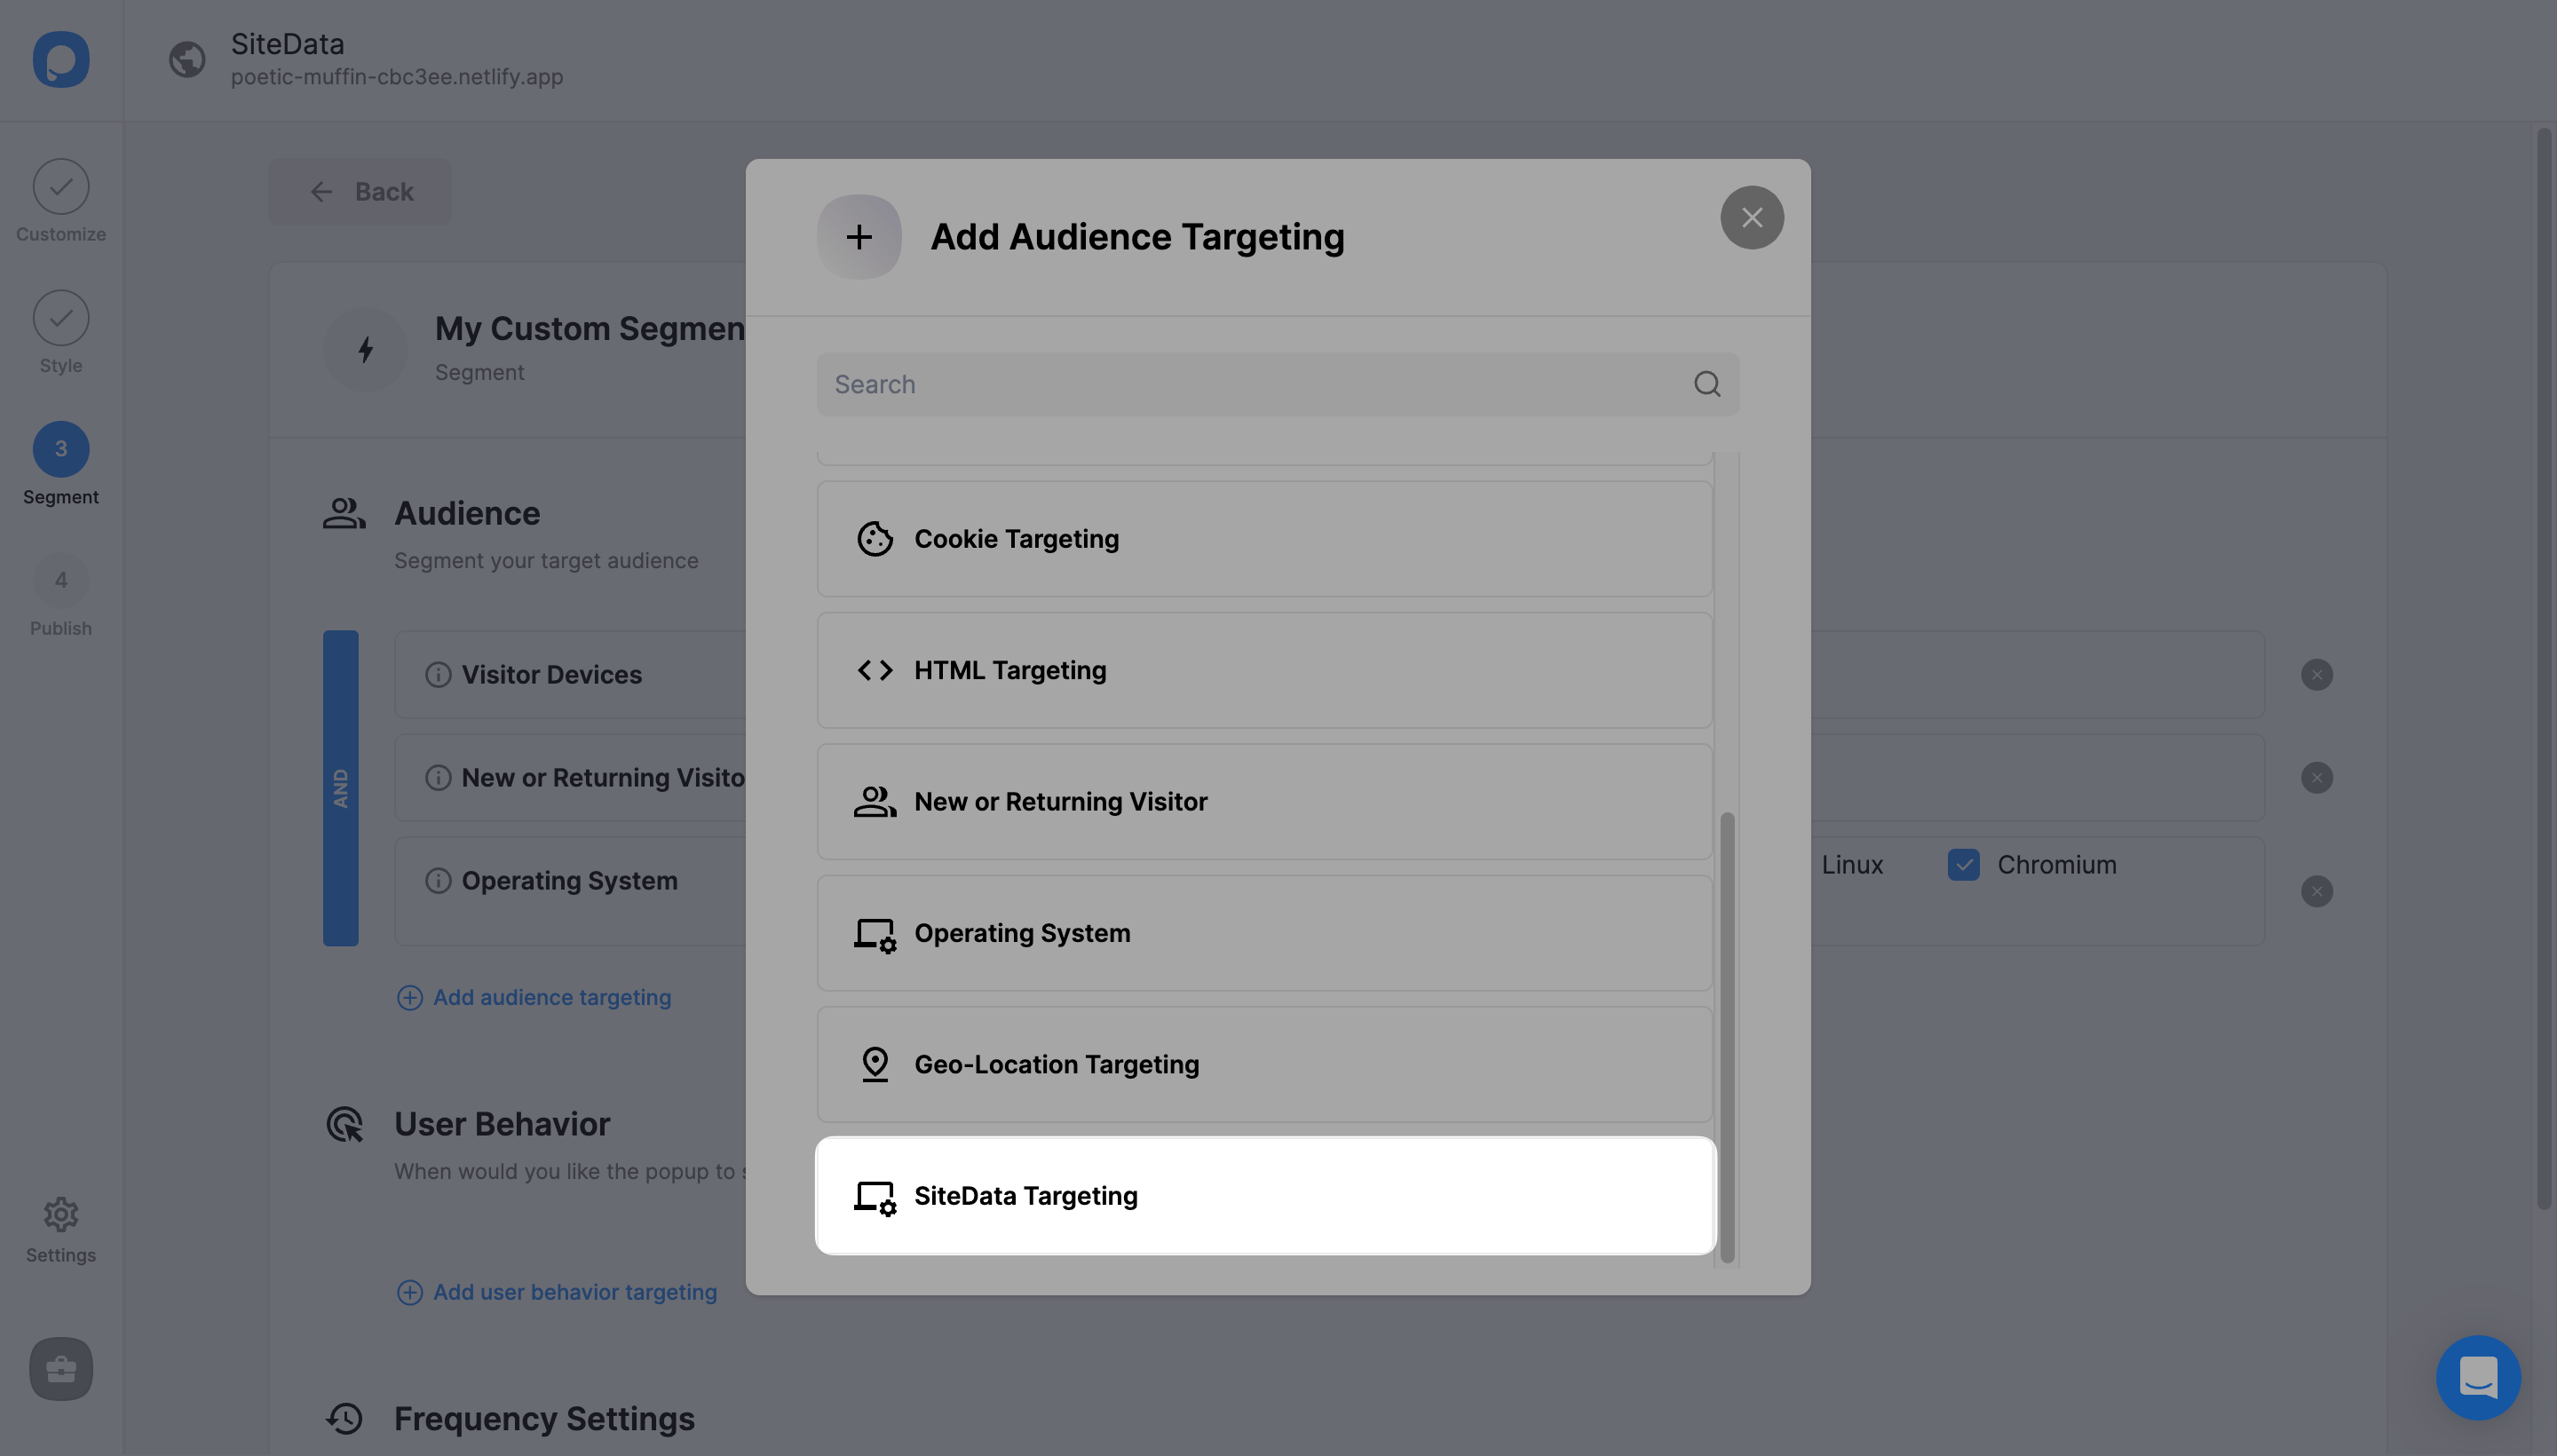
Click "Add audience targeting" under "Audience". Then, click "Add" next to "SiteData Targeting".
Configure Show/Hide Rules
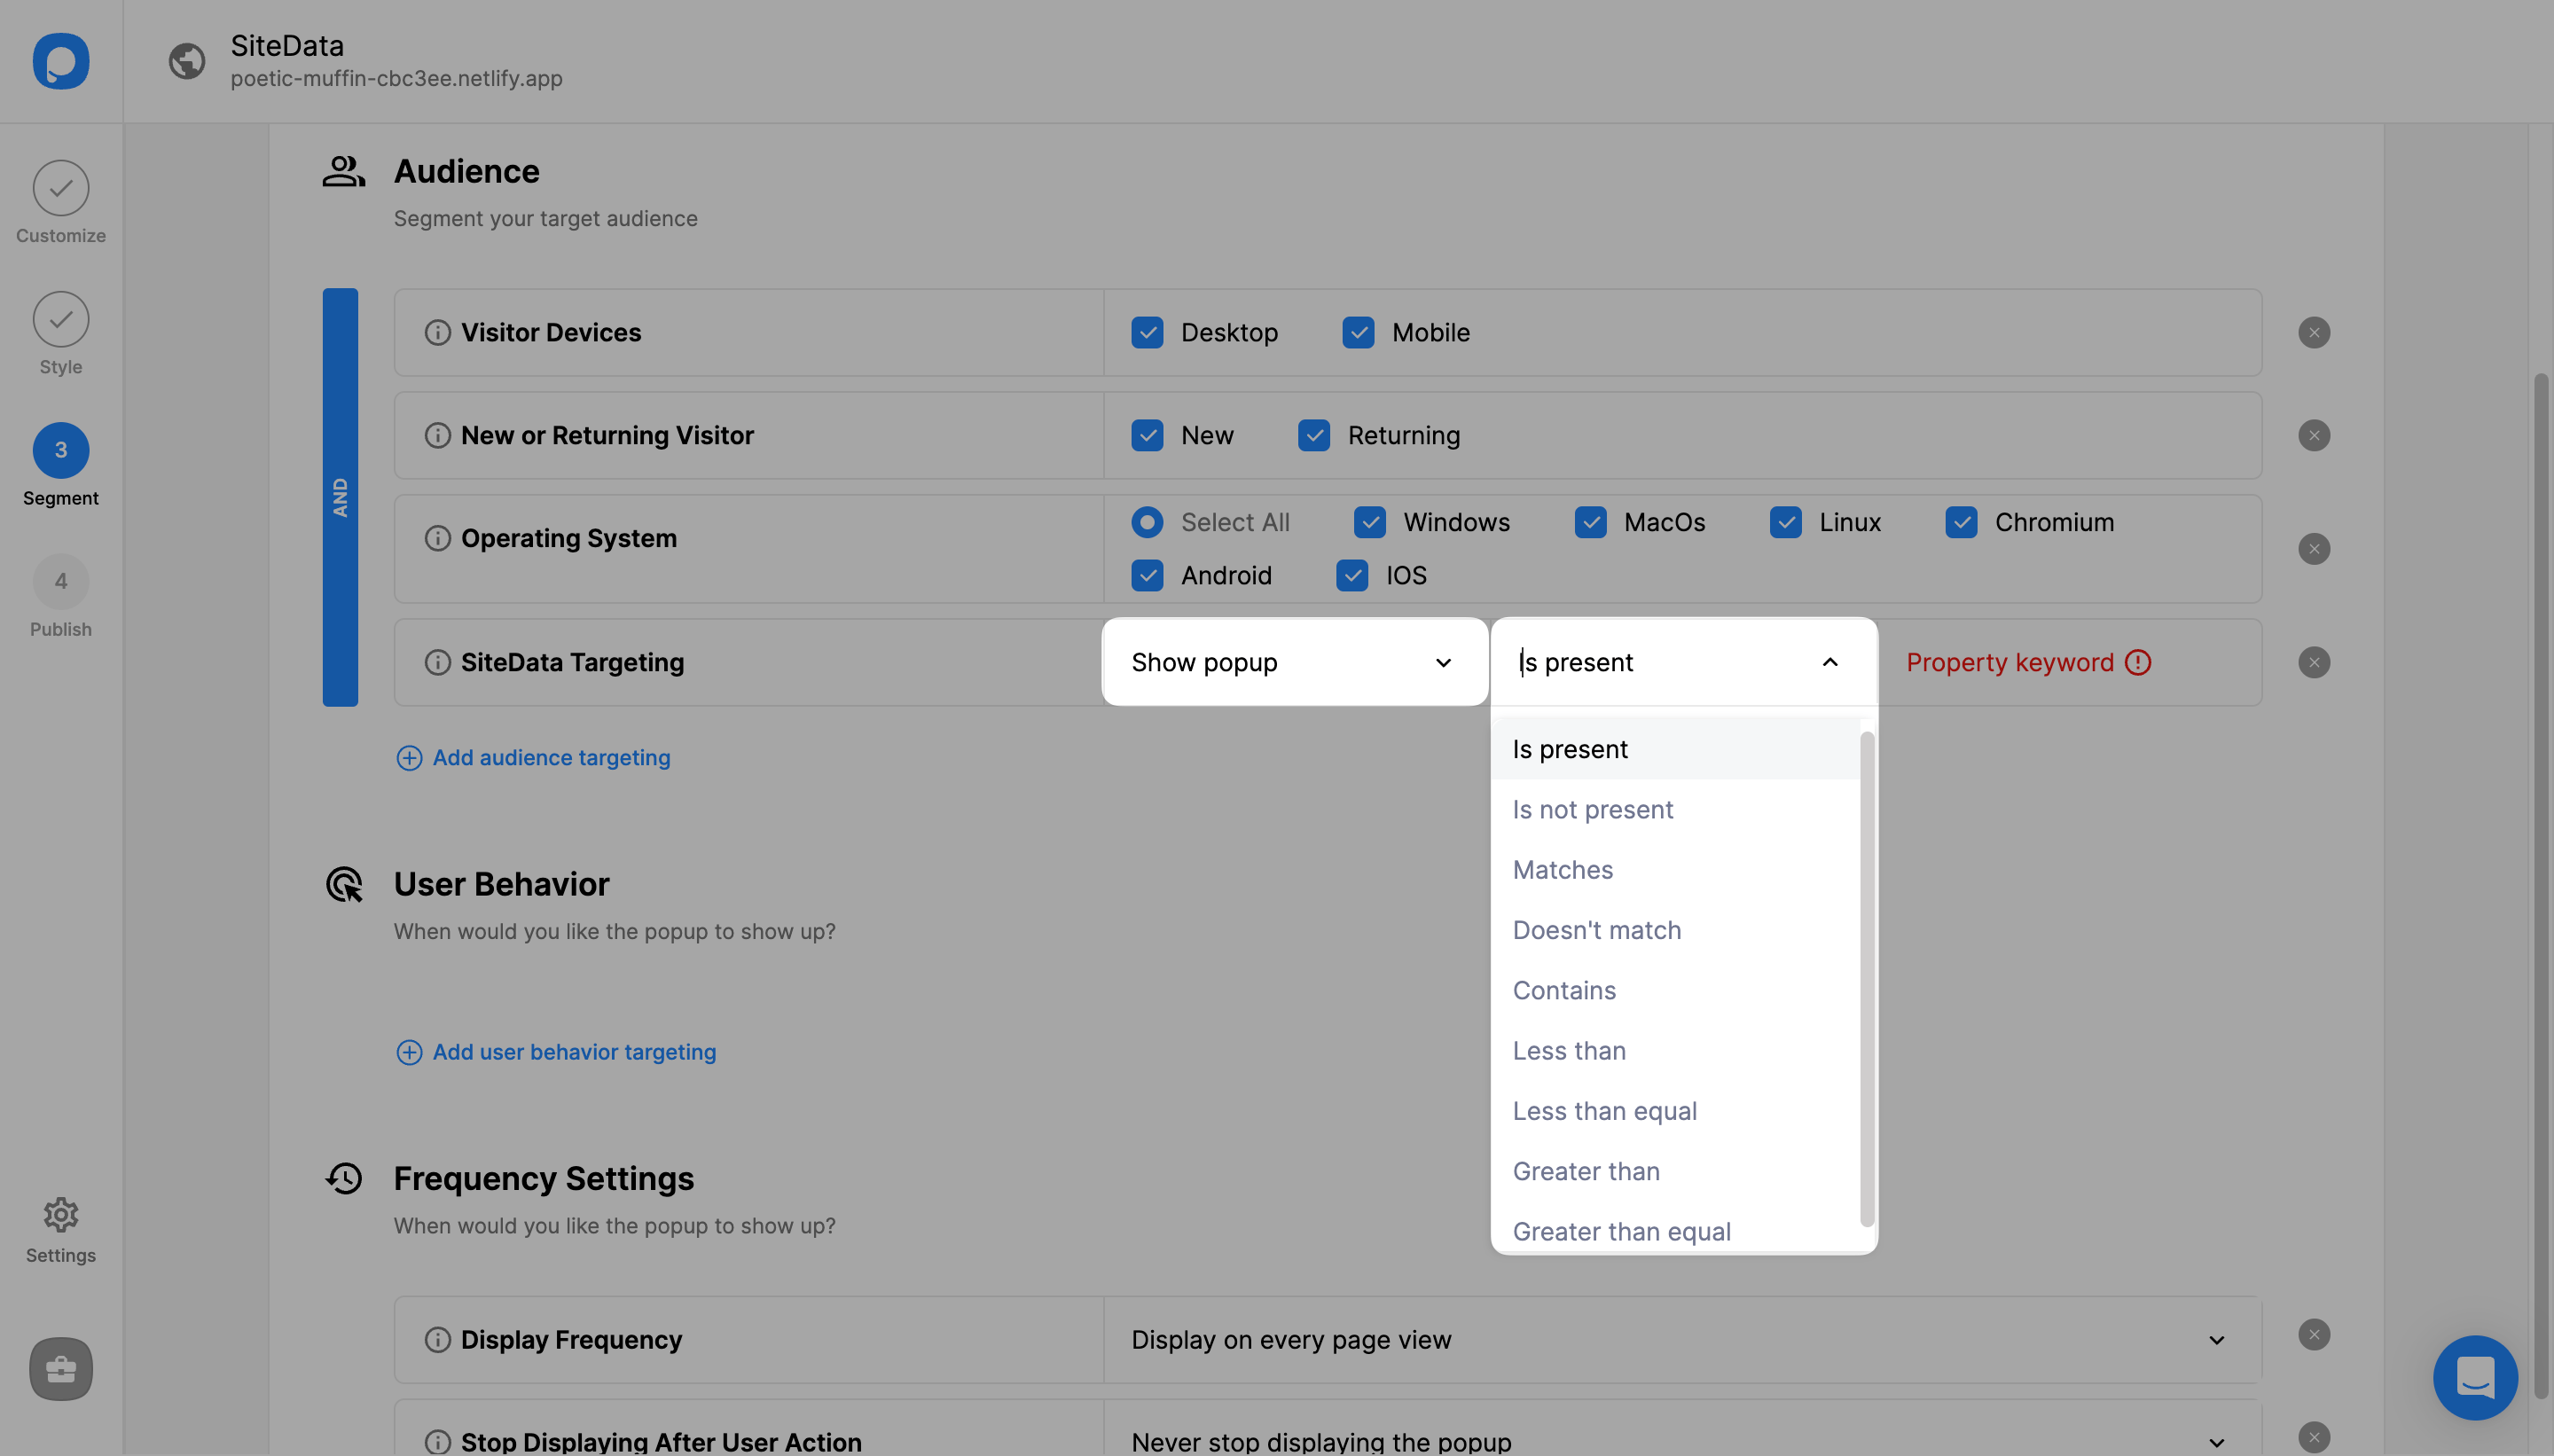
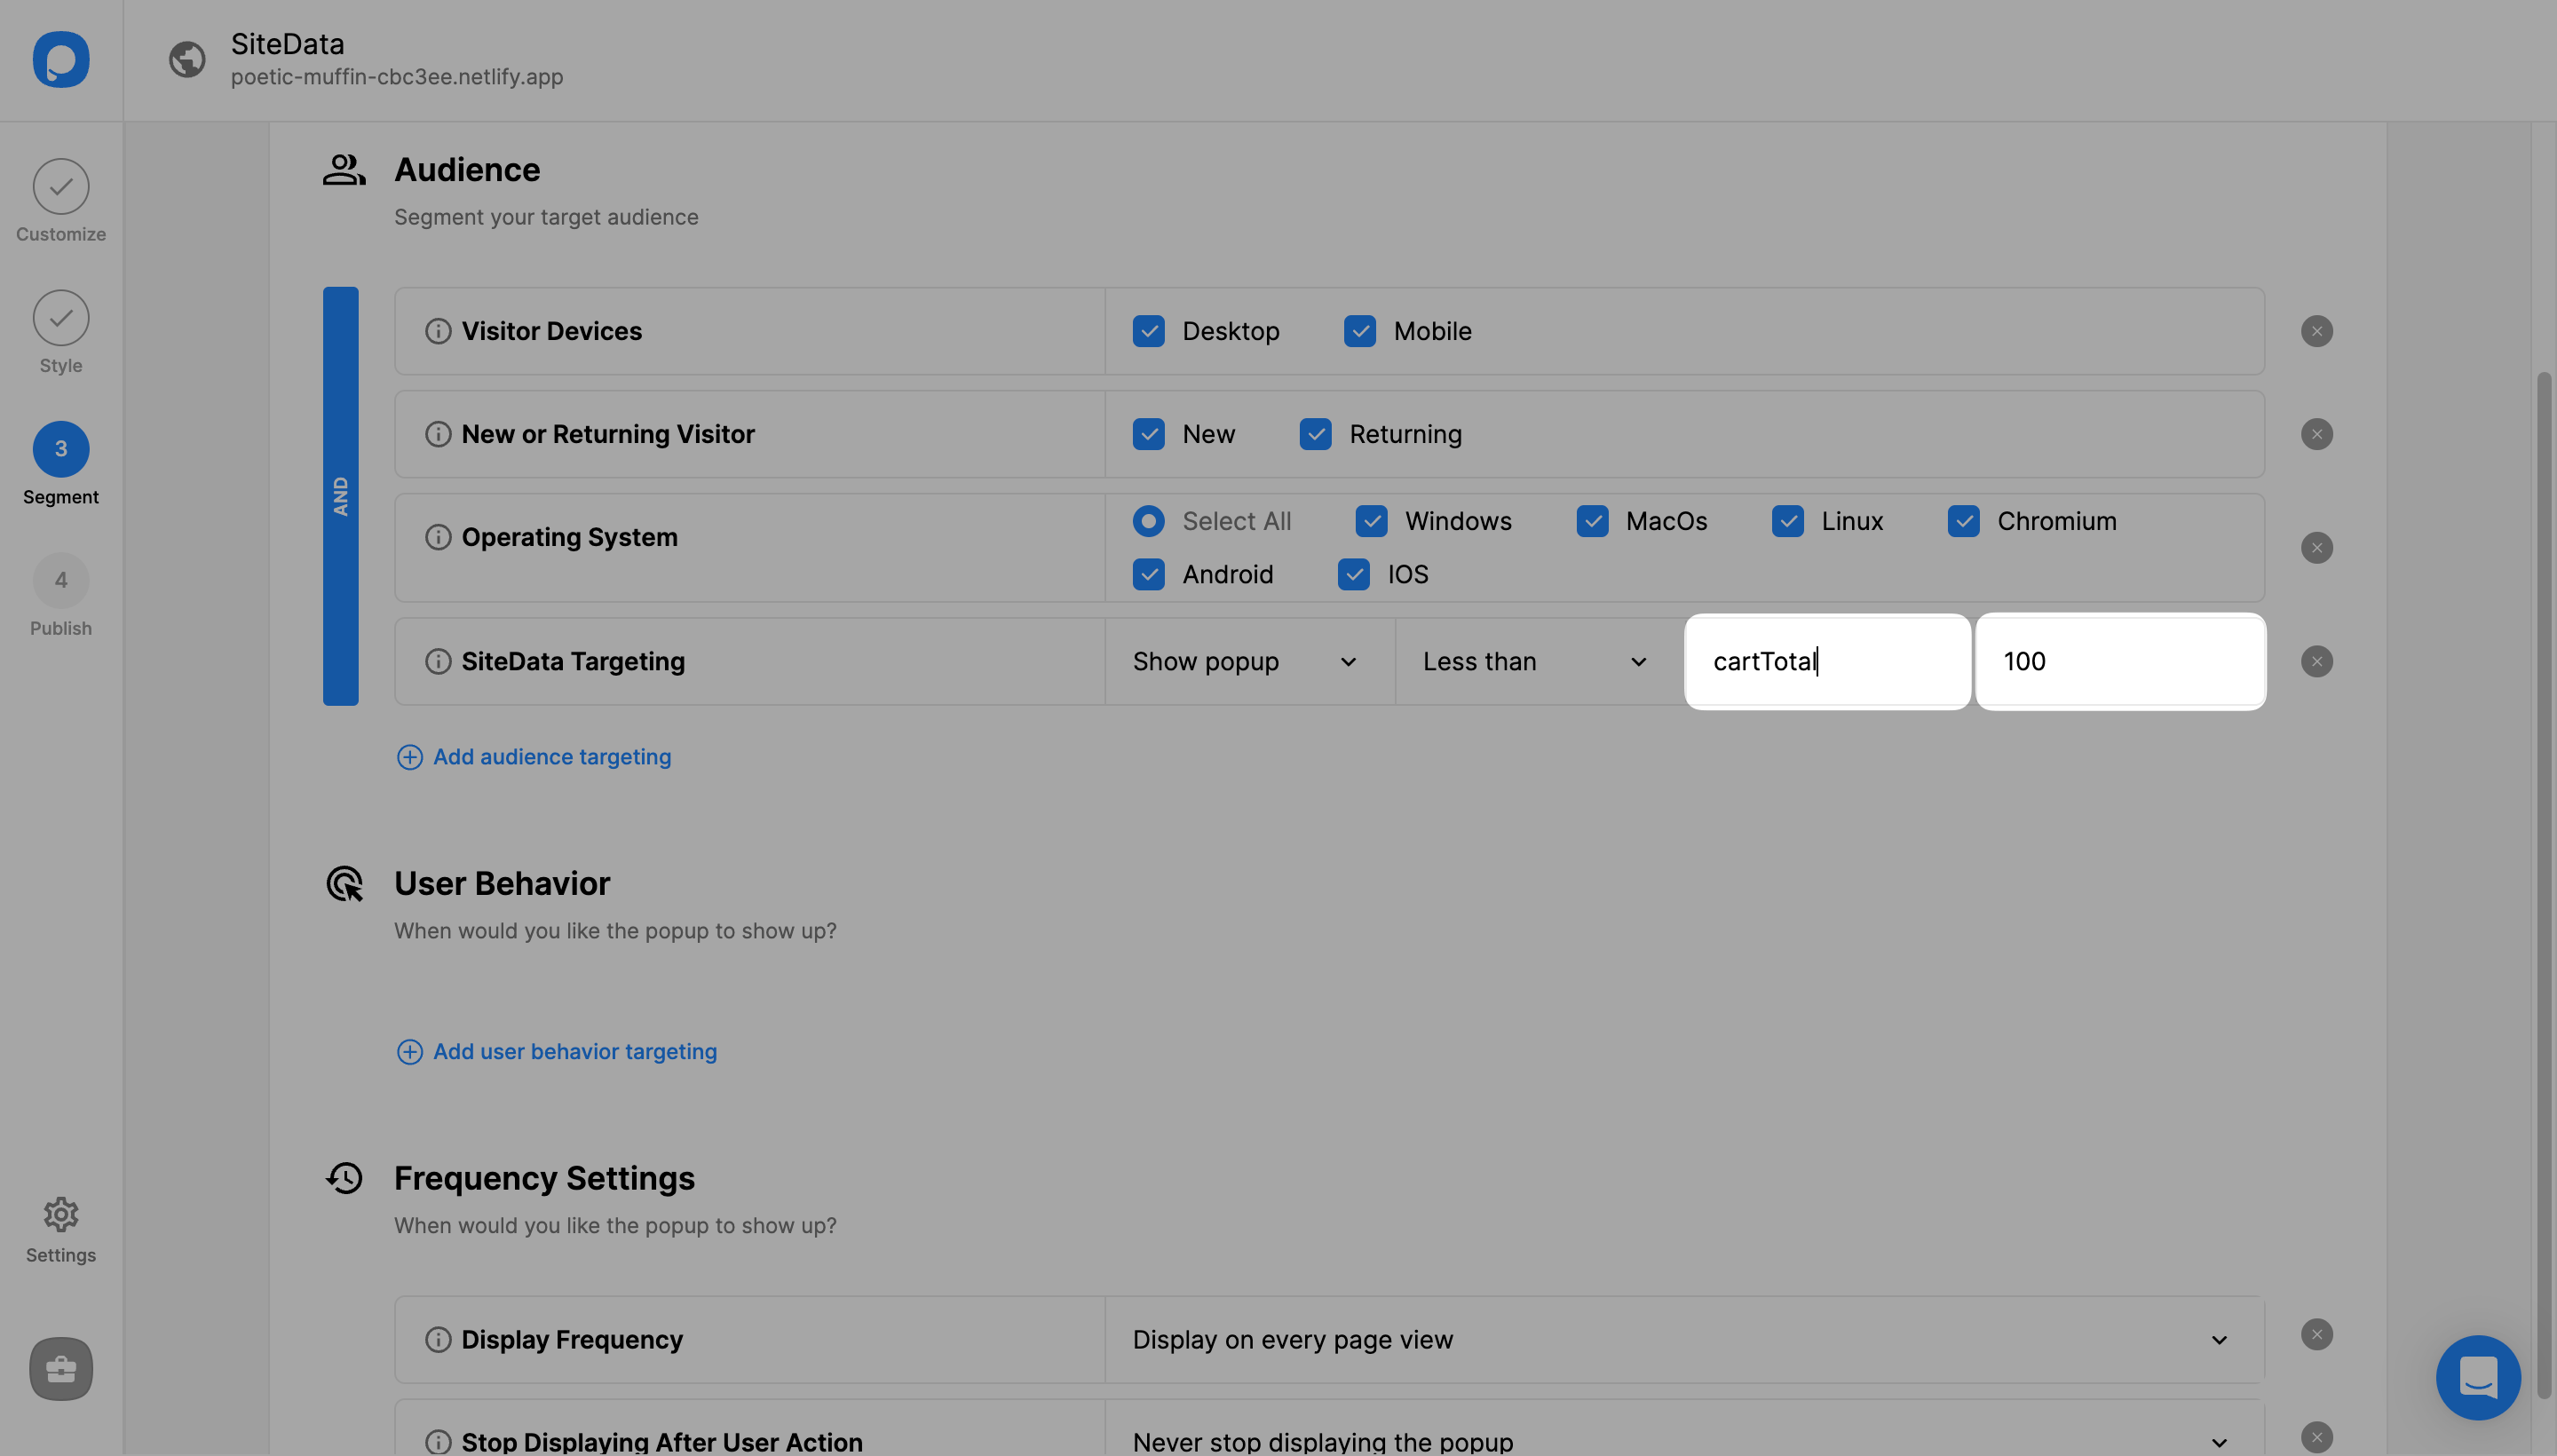
From the first dropdown menu, choose to show or hide your popup to a specific query. In this example, we'll choose to "show popup" to those whose cart total is "less than" $100.
Enter Property Value
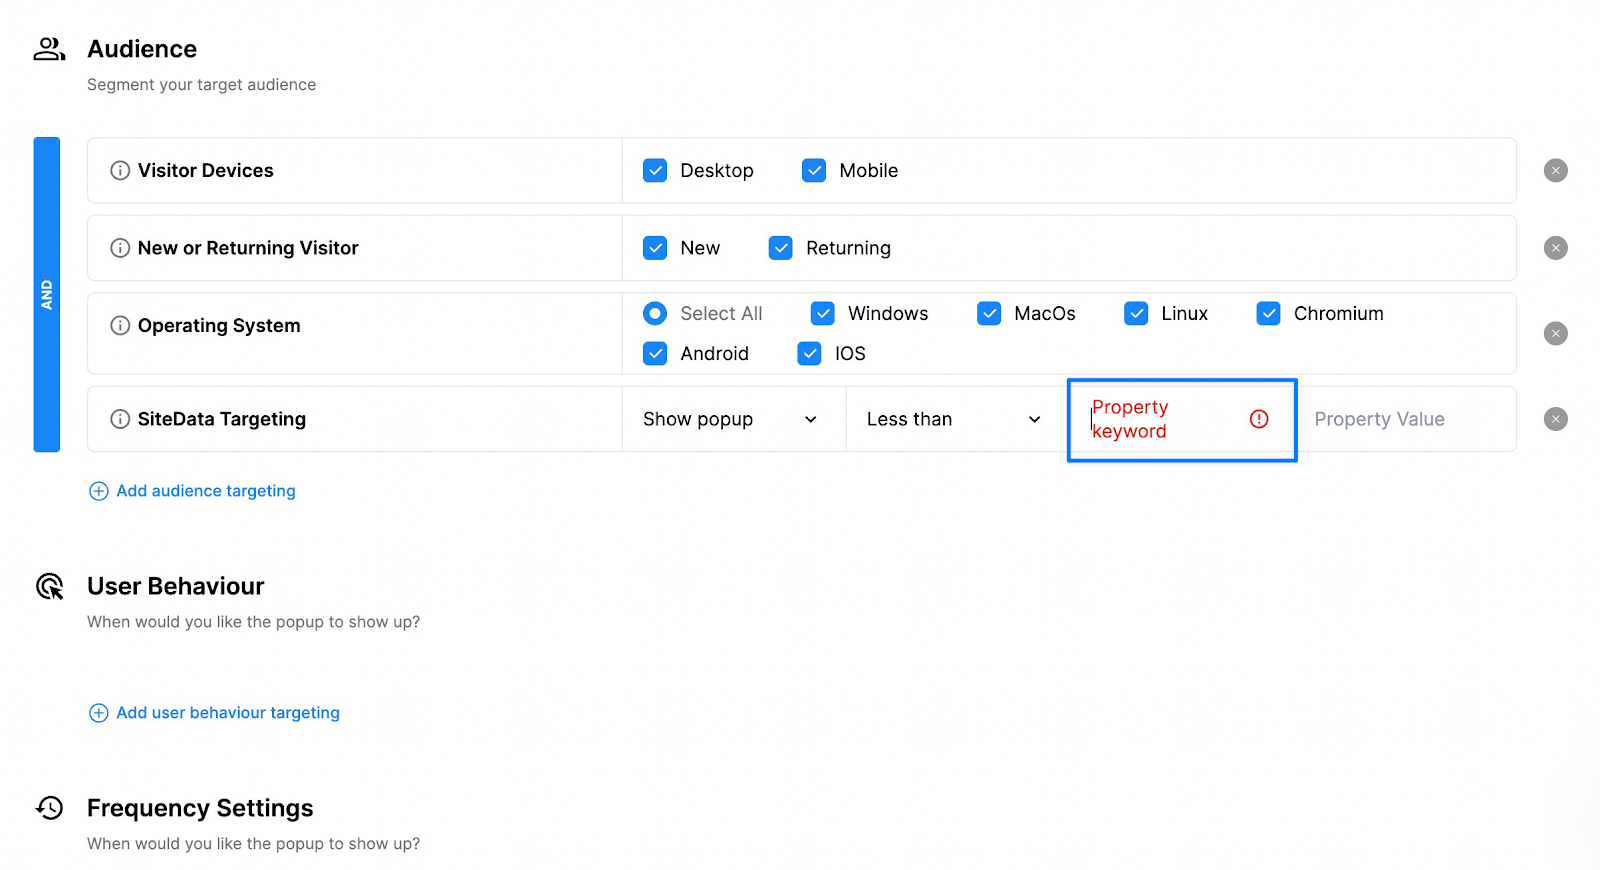
After entering the property keyword, enter your property value. If you target shopping carts, it should be a number like "100" or "25". In this example, we want to show the popup to customers whose cart is less than $100, so we write "100" as the property value.
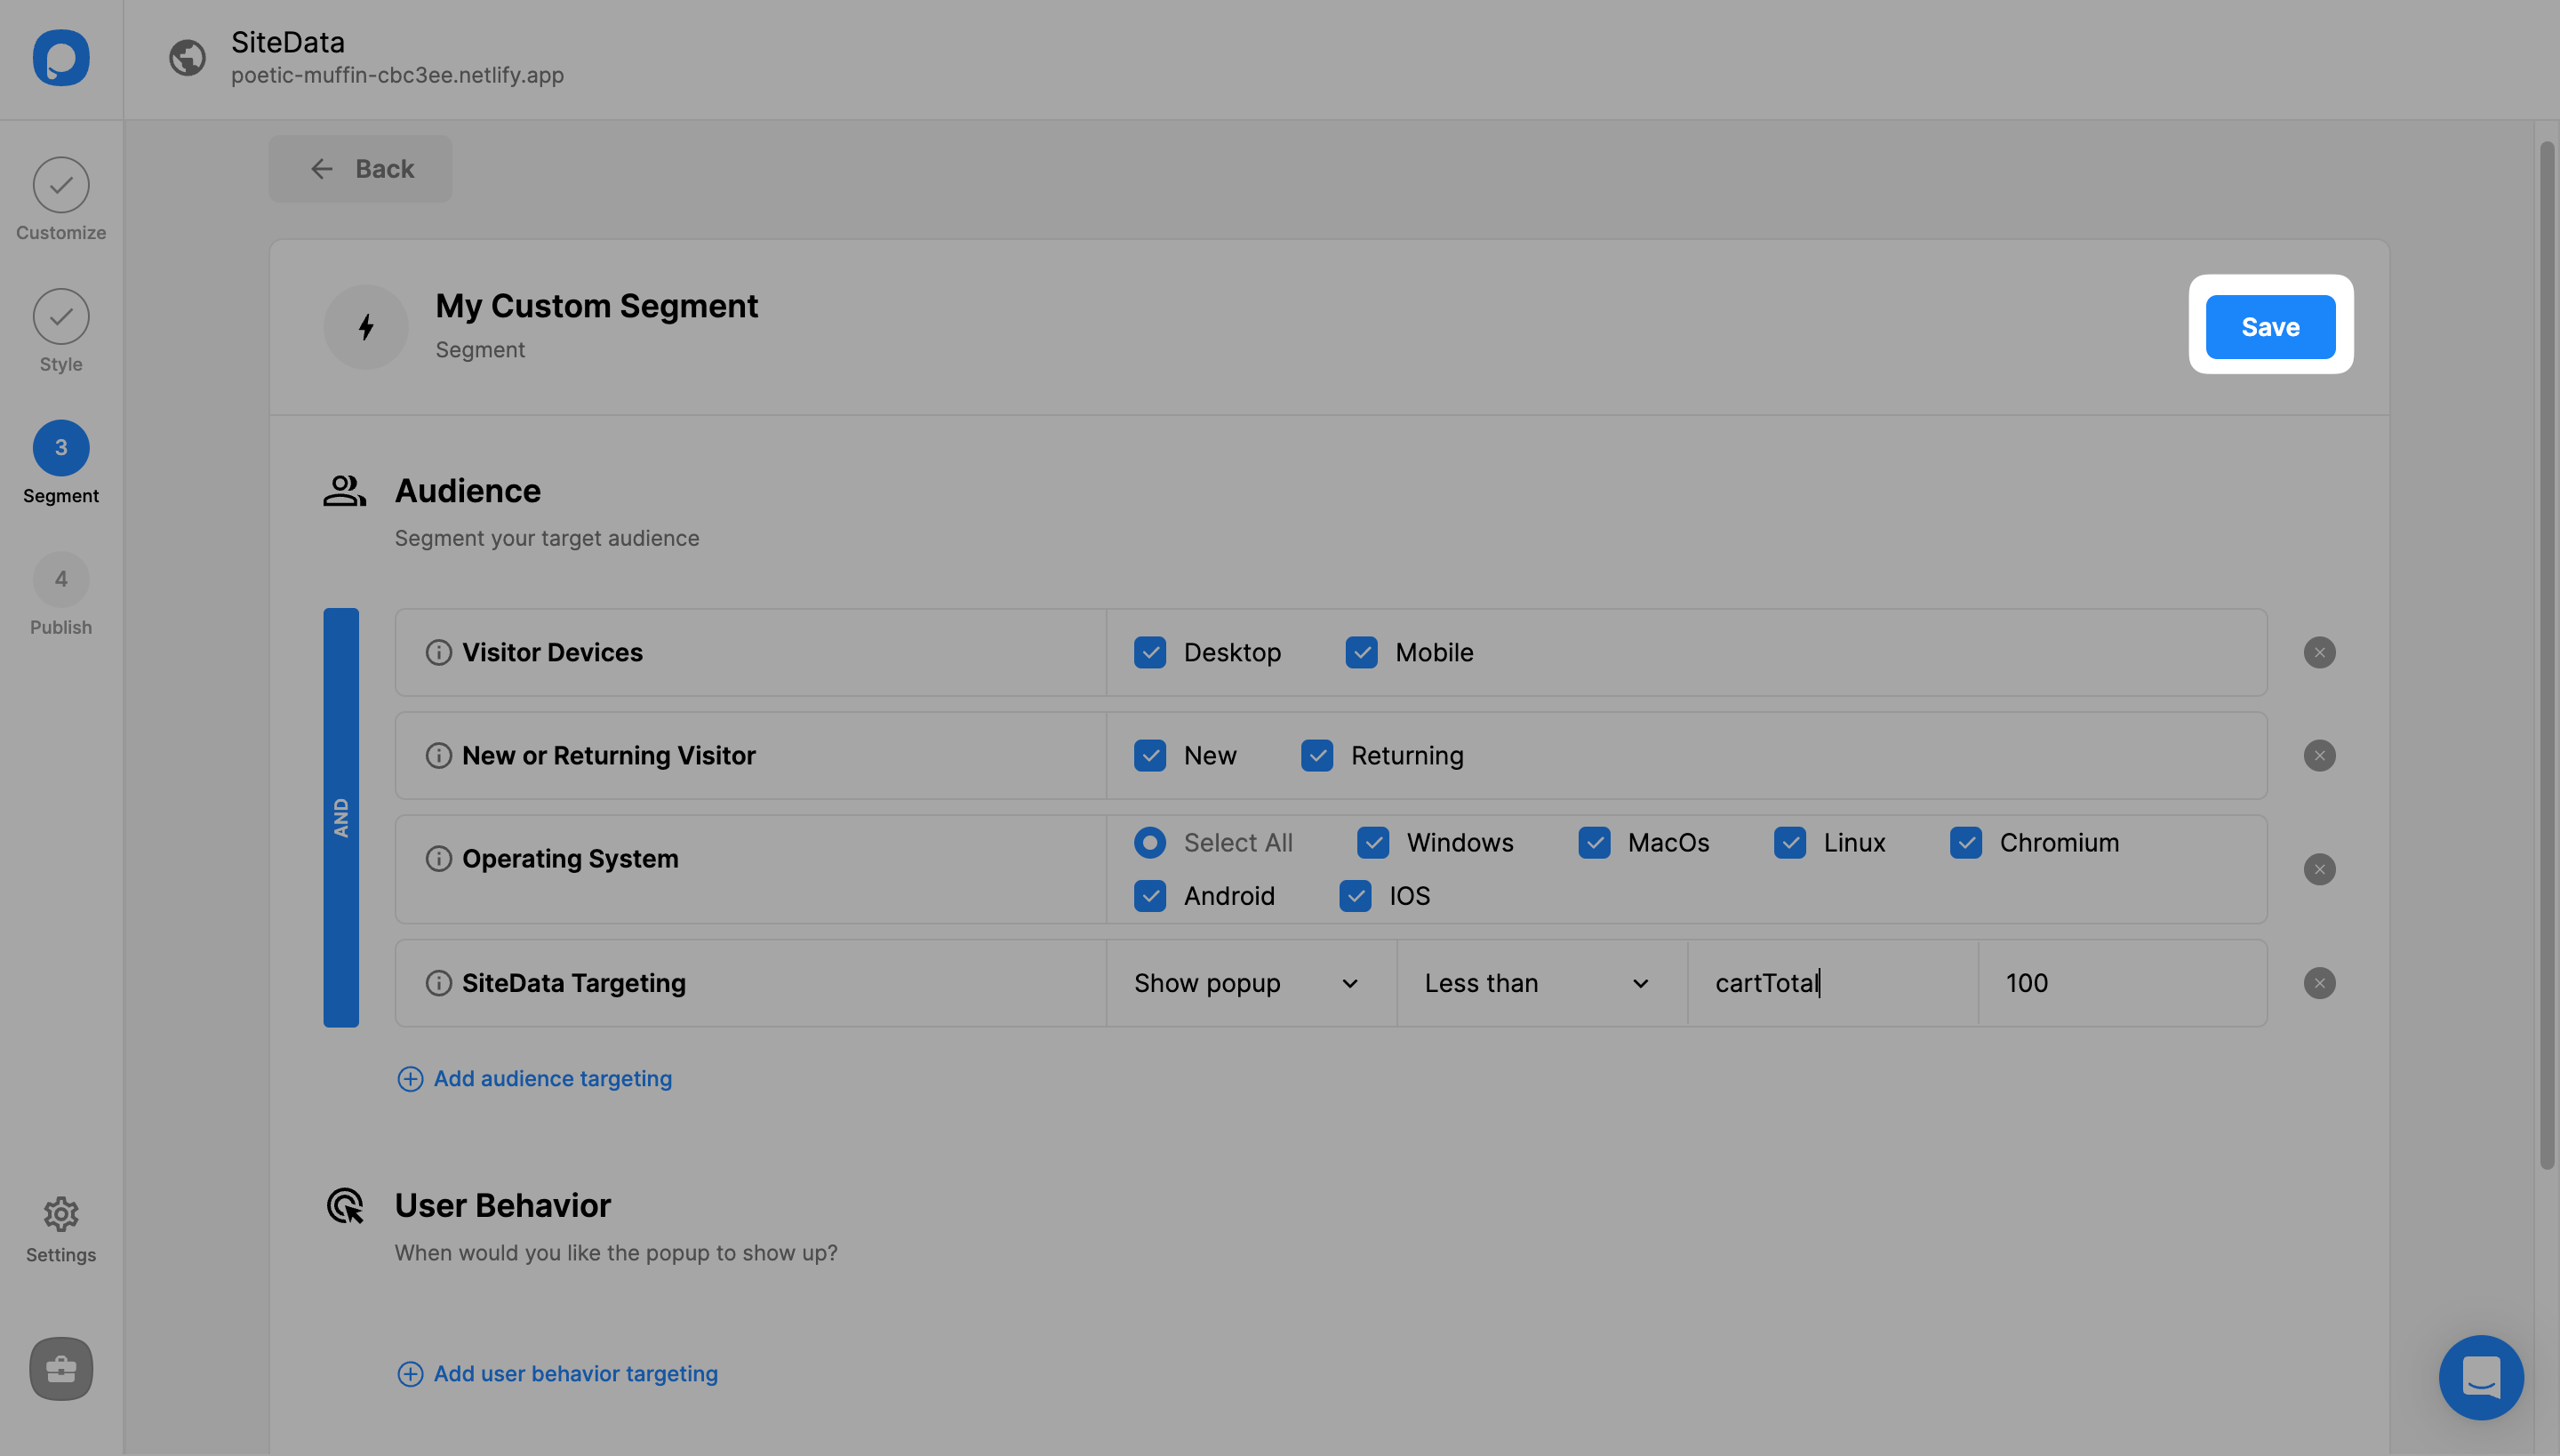
Publish Your Campaign
Don't forget to publish your campaign if everything is done, and continue with the "Publish" step to see your Targeting Summary.
Adding Meta with JavaScript API
To add meta and trigger your popup, use this code snippet:
code { color: #c7254e; background-color: #f9f2f4; border-radius: 4px; padding: 2px 4px; font-size: 90%;}
window.ps.addMeta({cartTotal: 89.90});
P.S. "{cartTotal: 89.90}" This part of the code snippet is created by you/your developer according to what you want to target.
JavaScript API
For any information you want to target with SiteData, add the Popupsmart code snippet (window.ps.addMeta) to your website and enter your property keyword and property value on the Popupsmart builder.
Alternatively, you can find property keywords using URL parameters.
Typically, URL parameters contain user information such as order ID, product ID, or username. At their core, URL parameters are simply query strings.
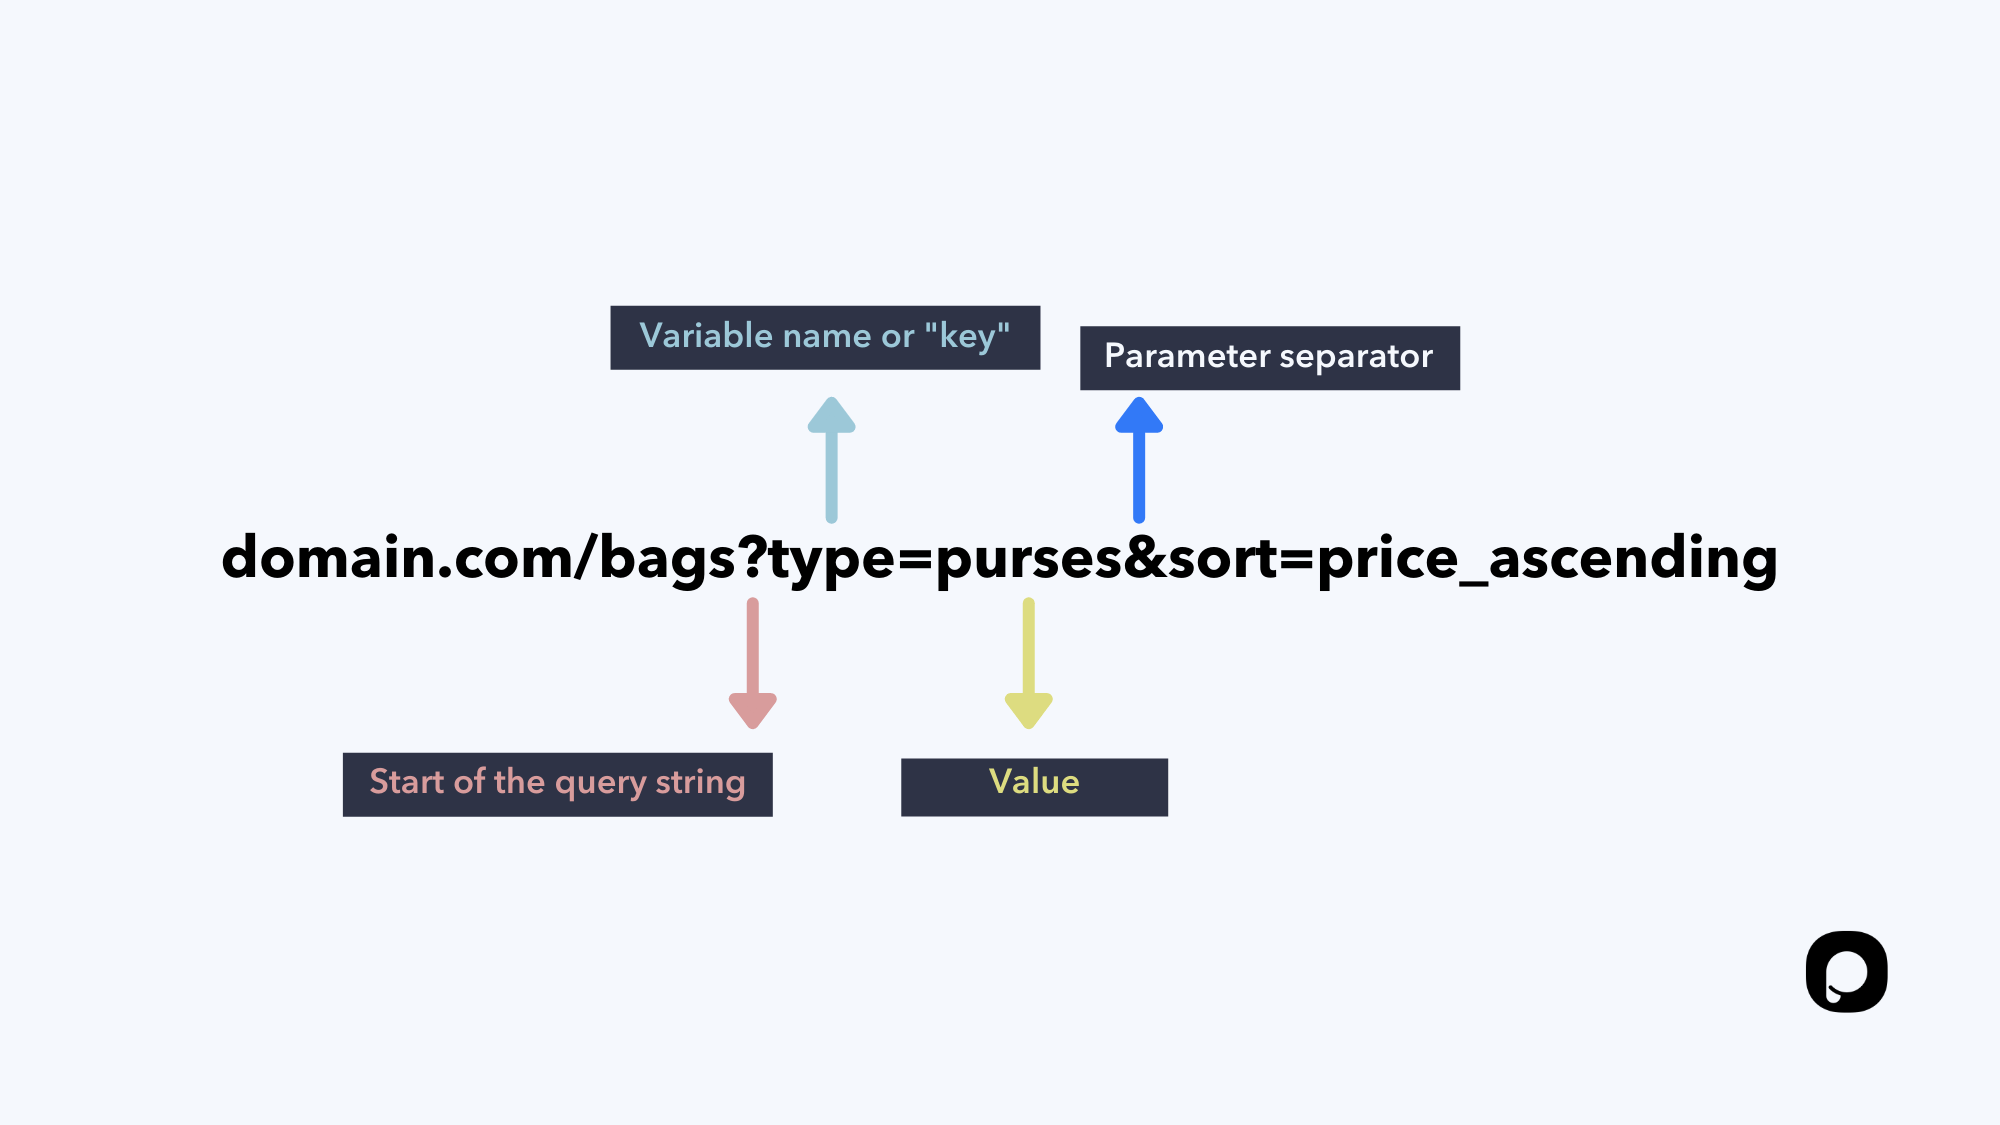
After "?", you can see your property keywords, and "&" separates the keywords from each other so you can choose the one you want to target with SiteData targeting.
Example
When the URL parameter is something like "domain.com/?name=firstname", the property keyword is "name" and the value is "firstname".
Enjoy your conversions!
Need a hand? Contact Popupsmart!
How is this guide?