Geo-Located Targeting
Geo-targeting allows your popup campaigns to appear only to visitors from specific location/s. It’s one of the best practices if you have campaigns that target based on locations like a country or a city.
Your Popupsmart campaigns are set to display on all locations by default.
To customize geo-targeting, follow the steps below after opening your Popupsmart dashboard and clicking “Edit” a campaign or creating a new campaign.
But remember, you can always use Popupsmart’s ready-to-use popup templates equipped with precise segmentation options.
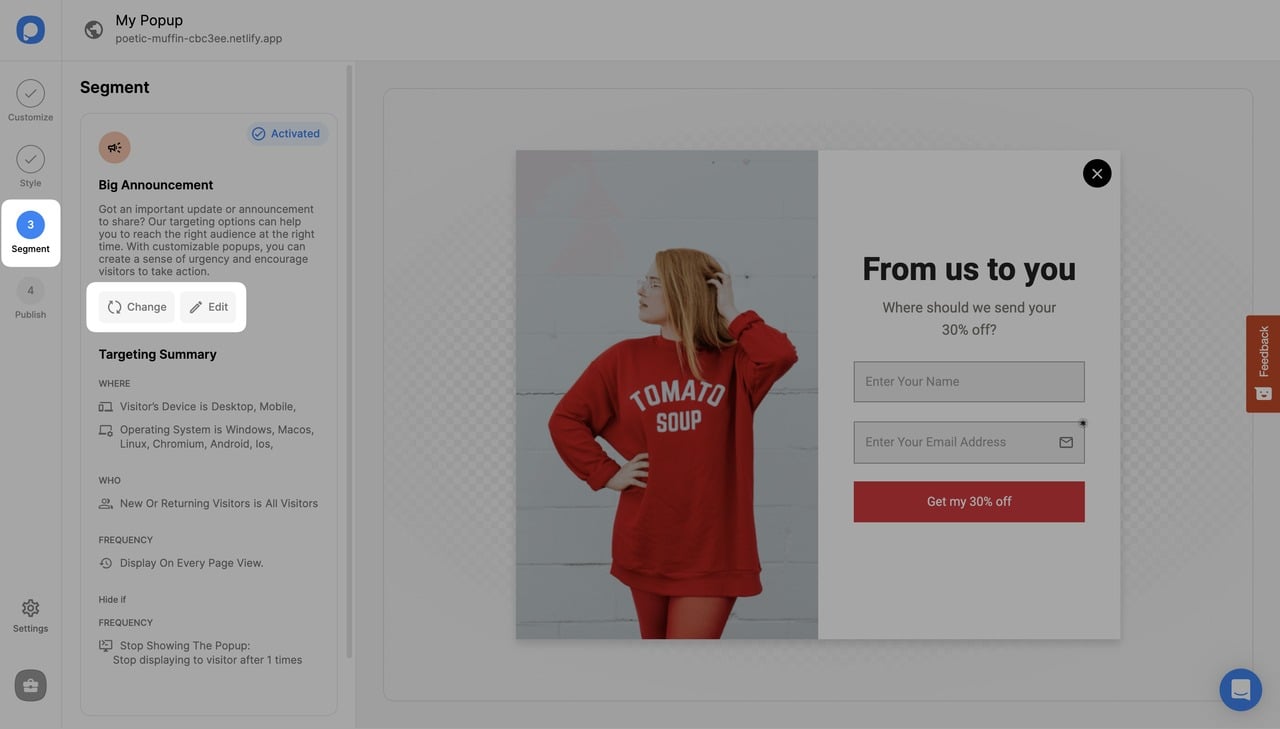
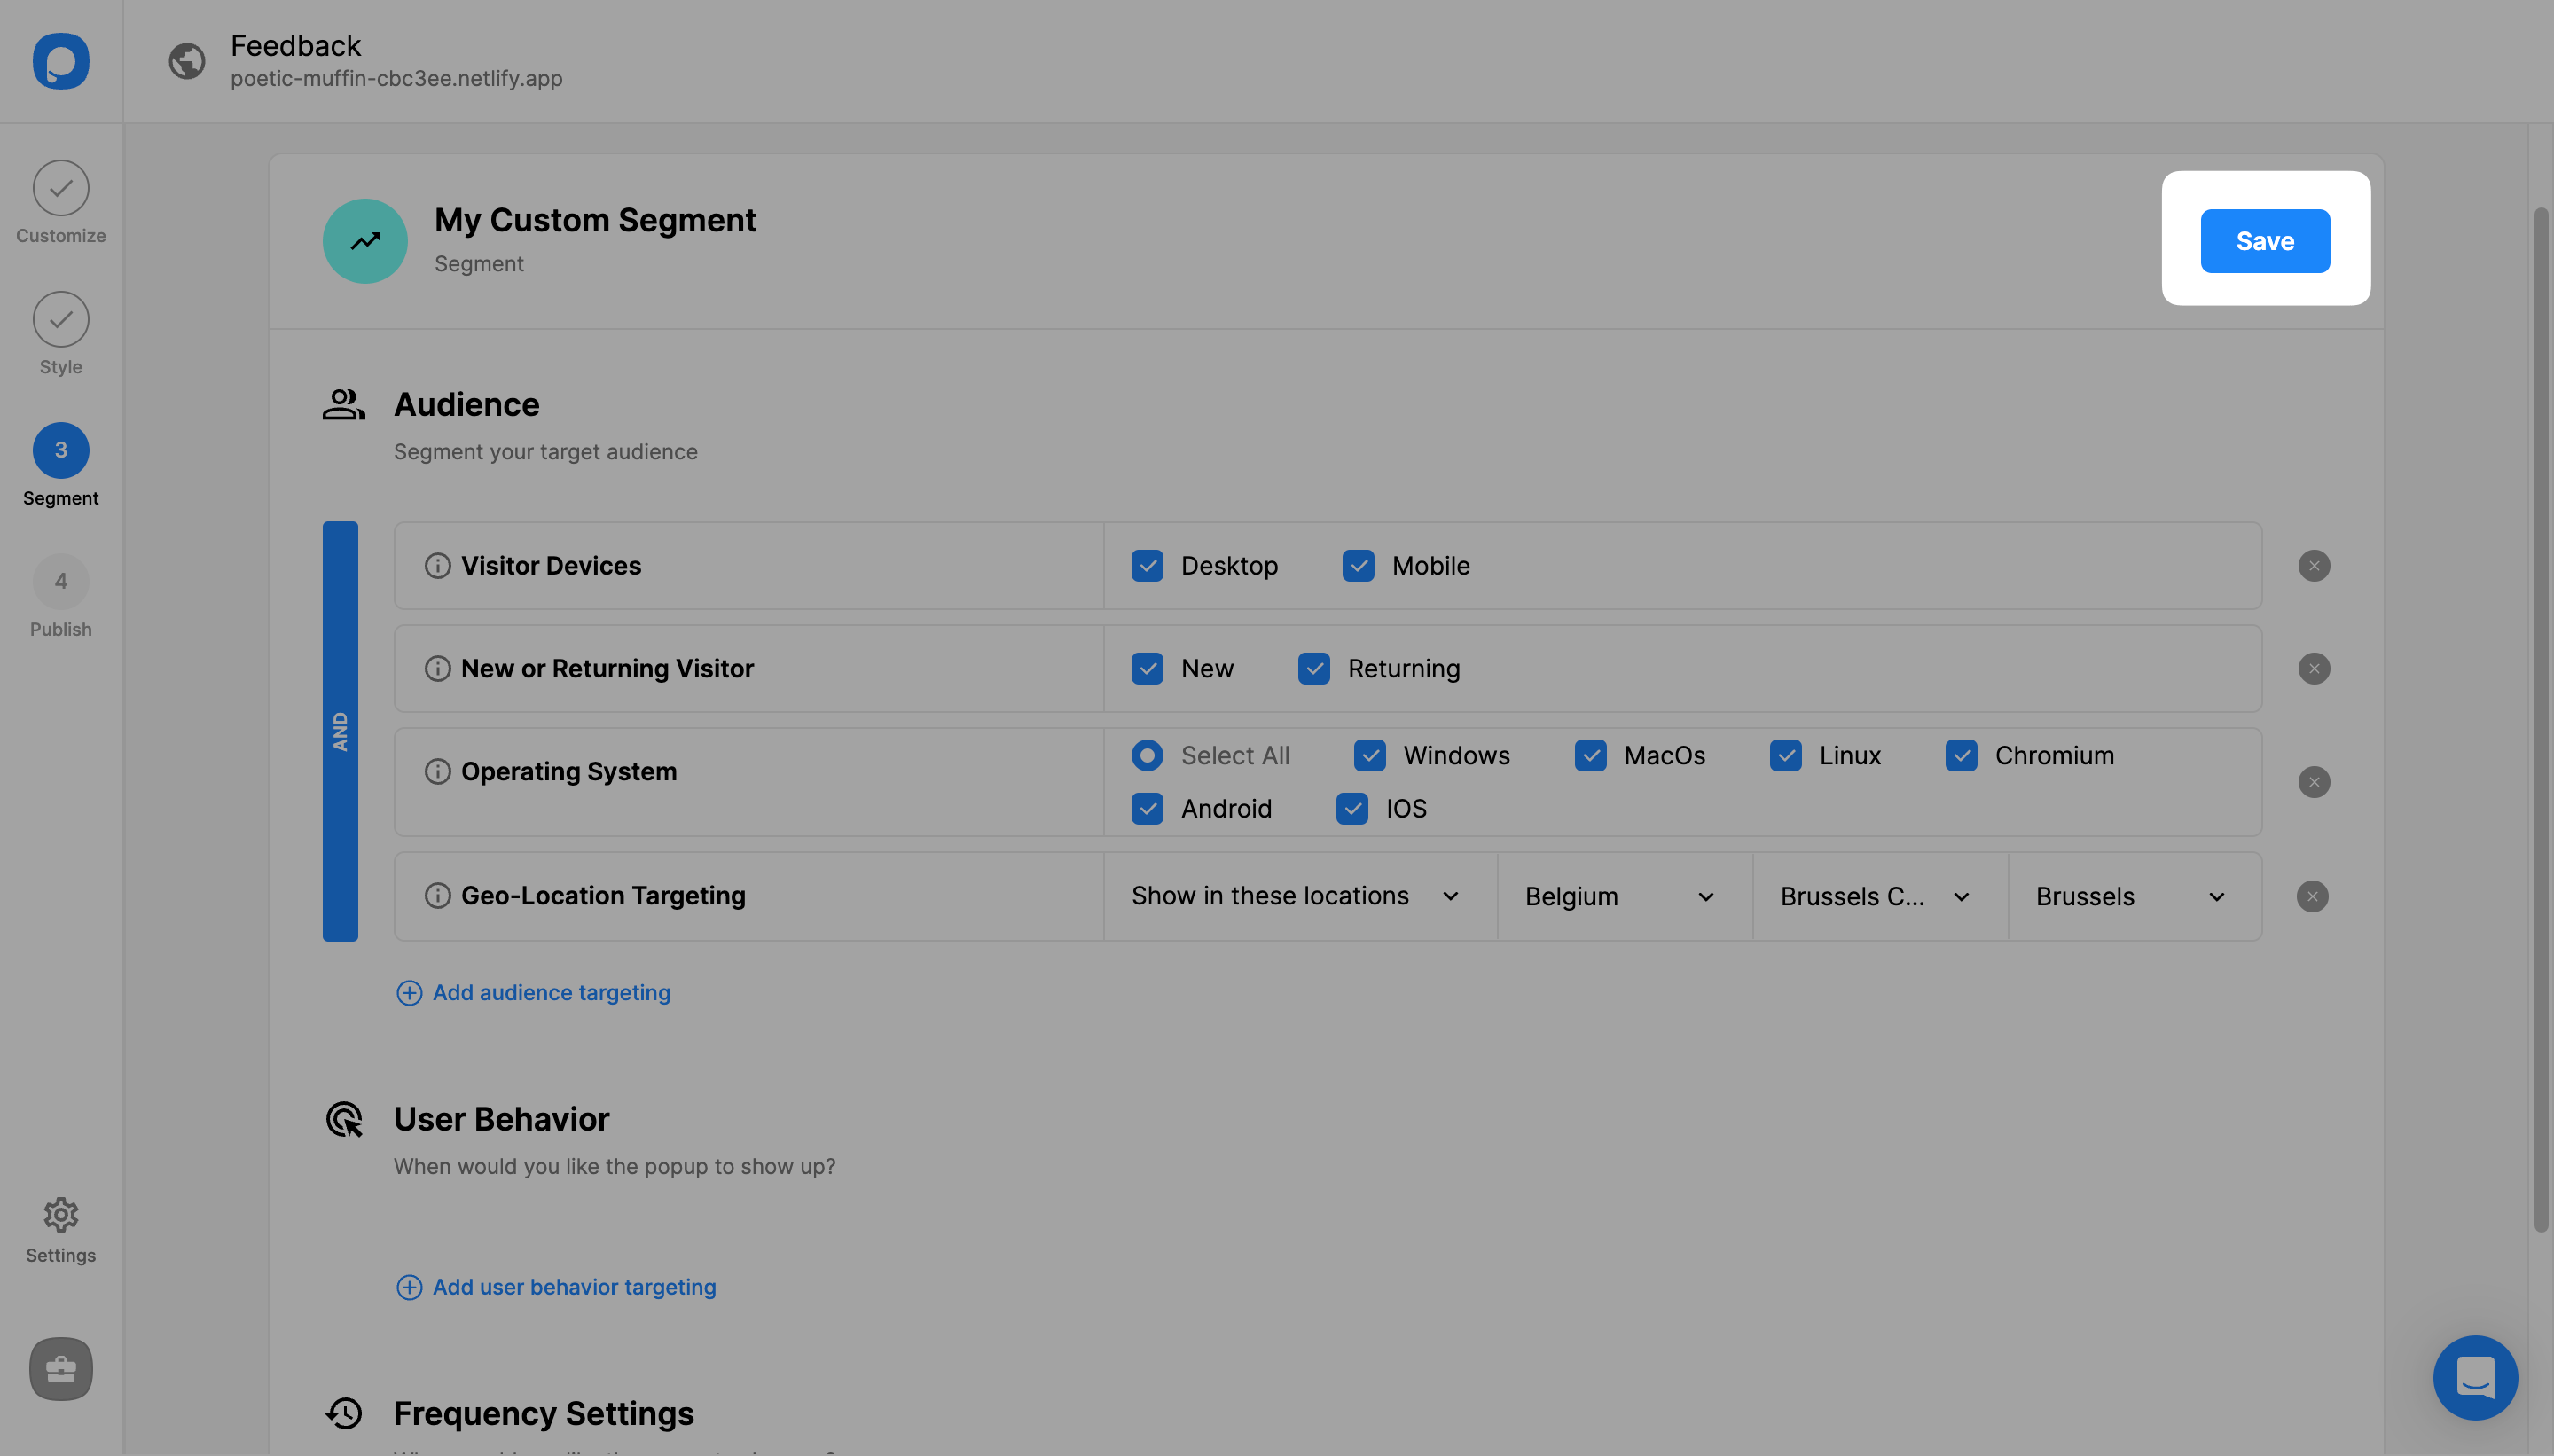
1. On the popup builder screen, navigate to the “Segment” section and click “Edit Segment.” (If it’s a new campaign, click the two circular arrows to choose a predefined segment or create one from scratch in “My Segment.”)
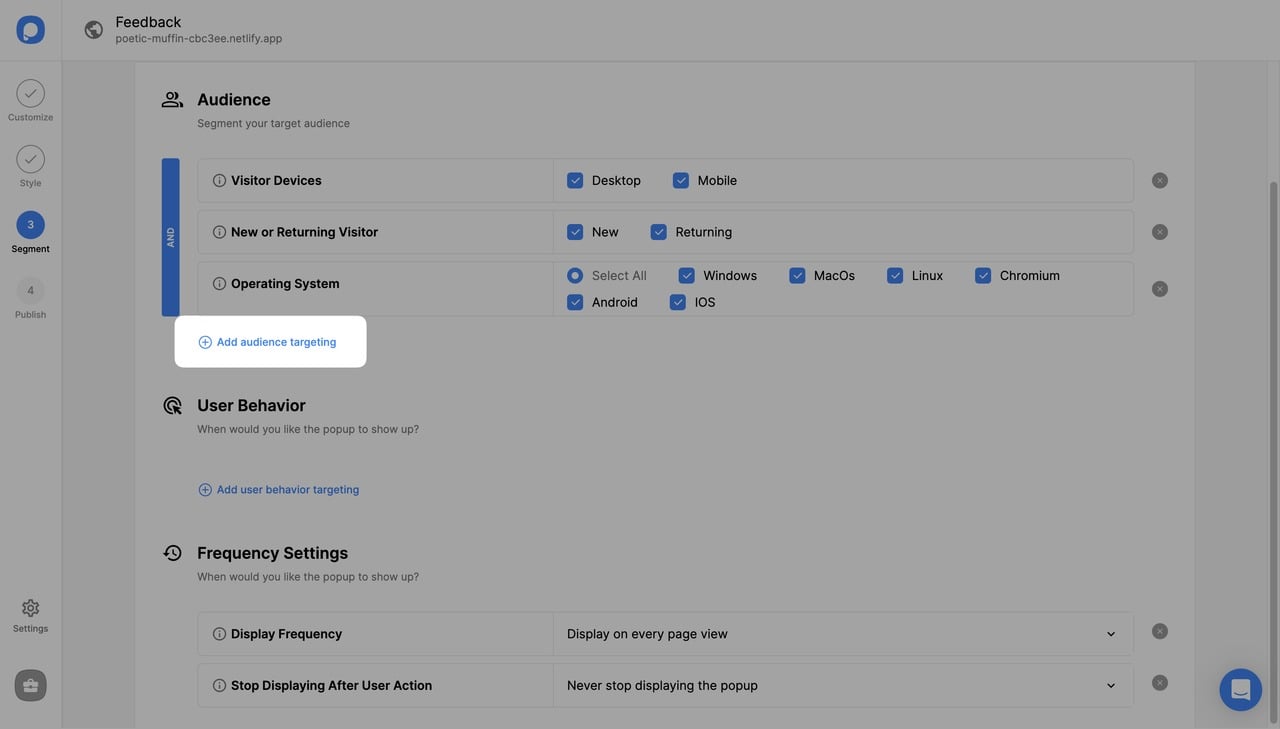
2. Then, click “Add audience targeting” under "Audience".
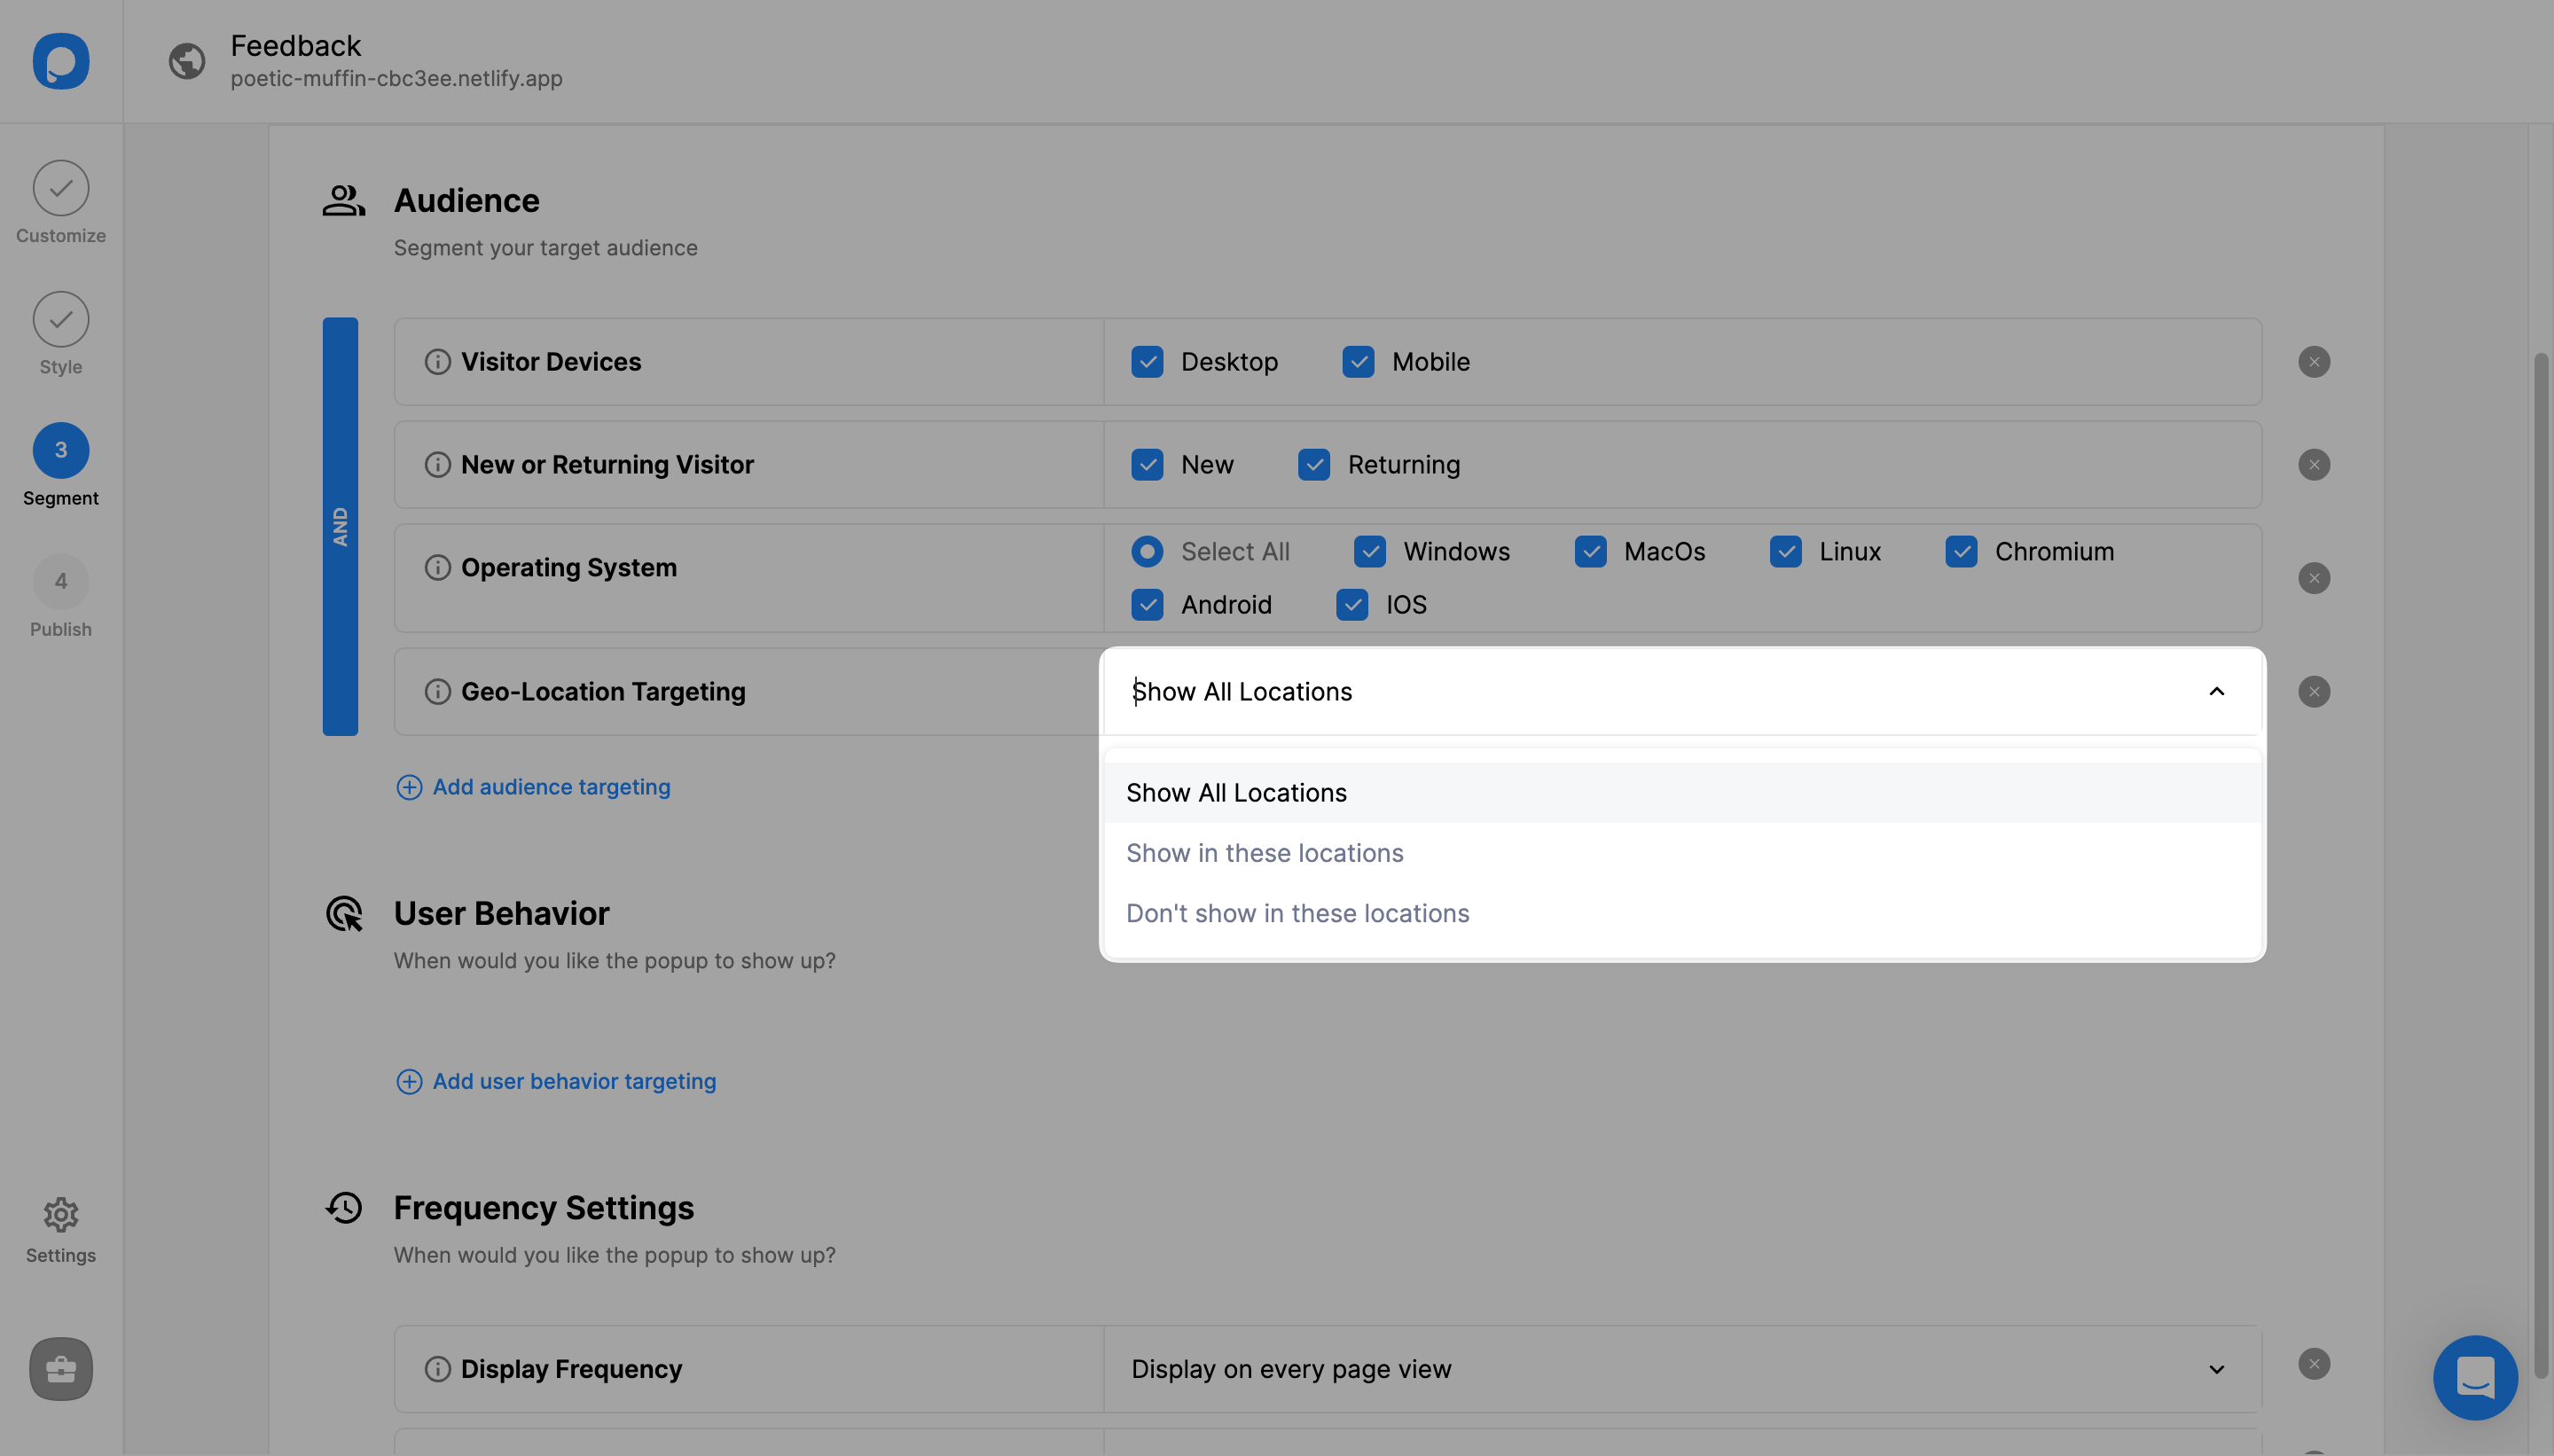
3. Click on “Add” next to “Geo-Location Targeting”.

4. There are three options to choose from.
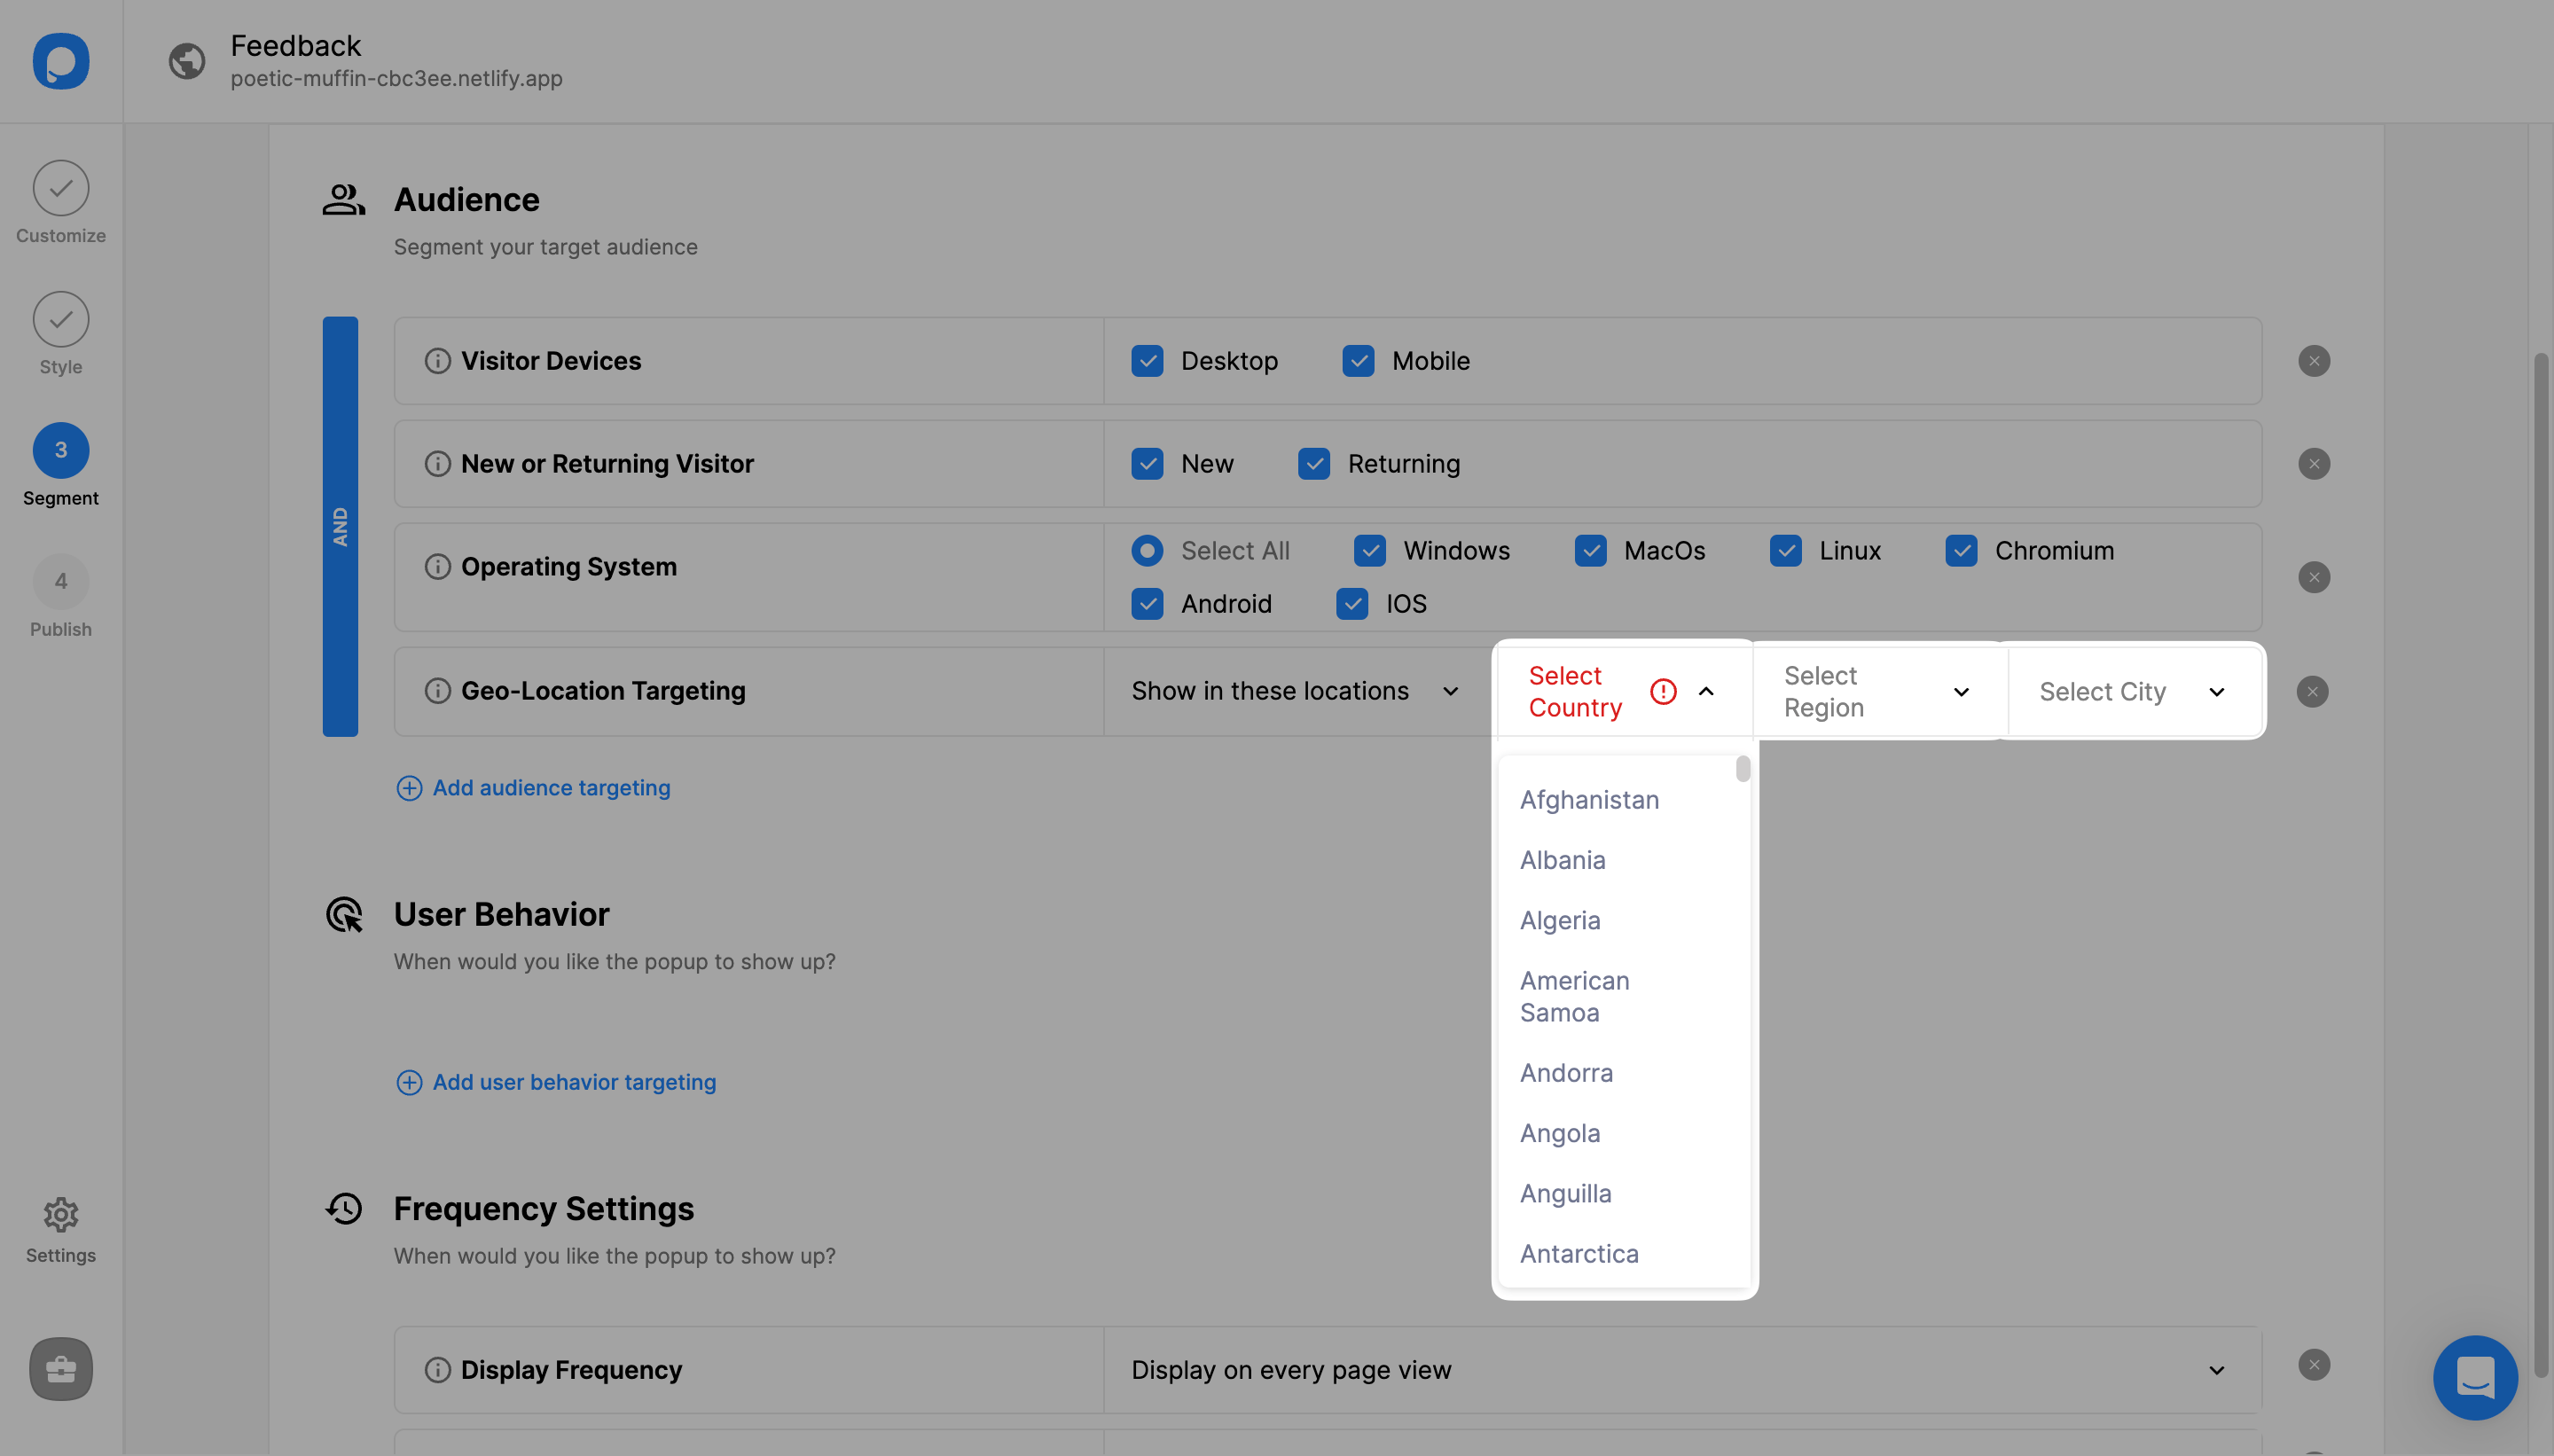
5. If you select one of the last two options, click on the drop-down to choose a “Country”, “Region” and “City” or you can simply type in a location name.
6. Once you have configured location-specific settings, click "Save" from the upper-right corner.
Note that you can add more than one location by repeating Step 3.
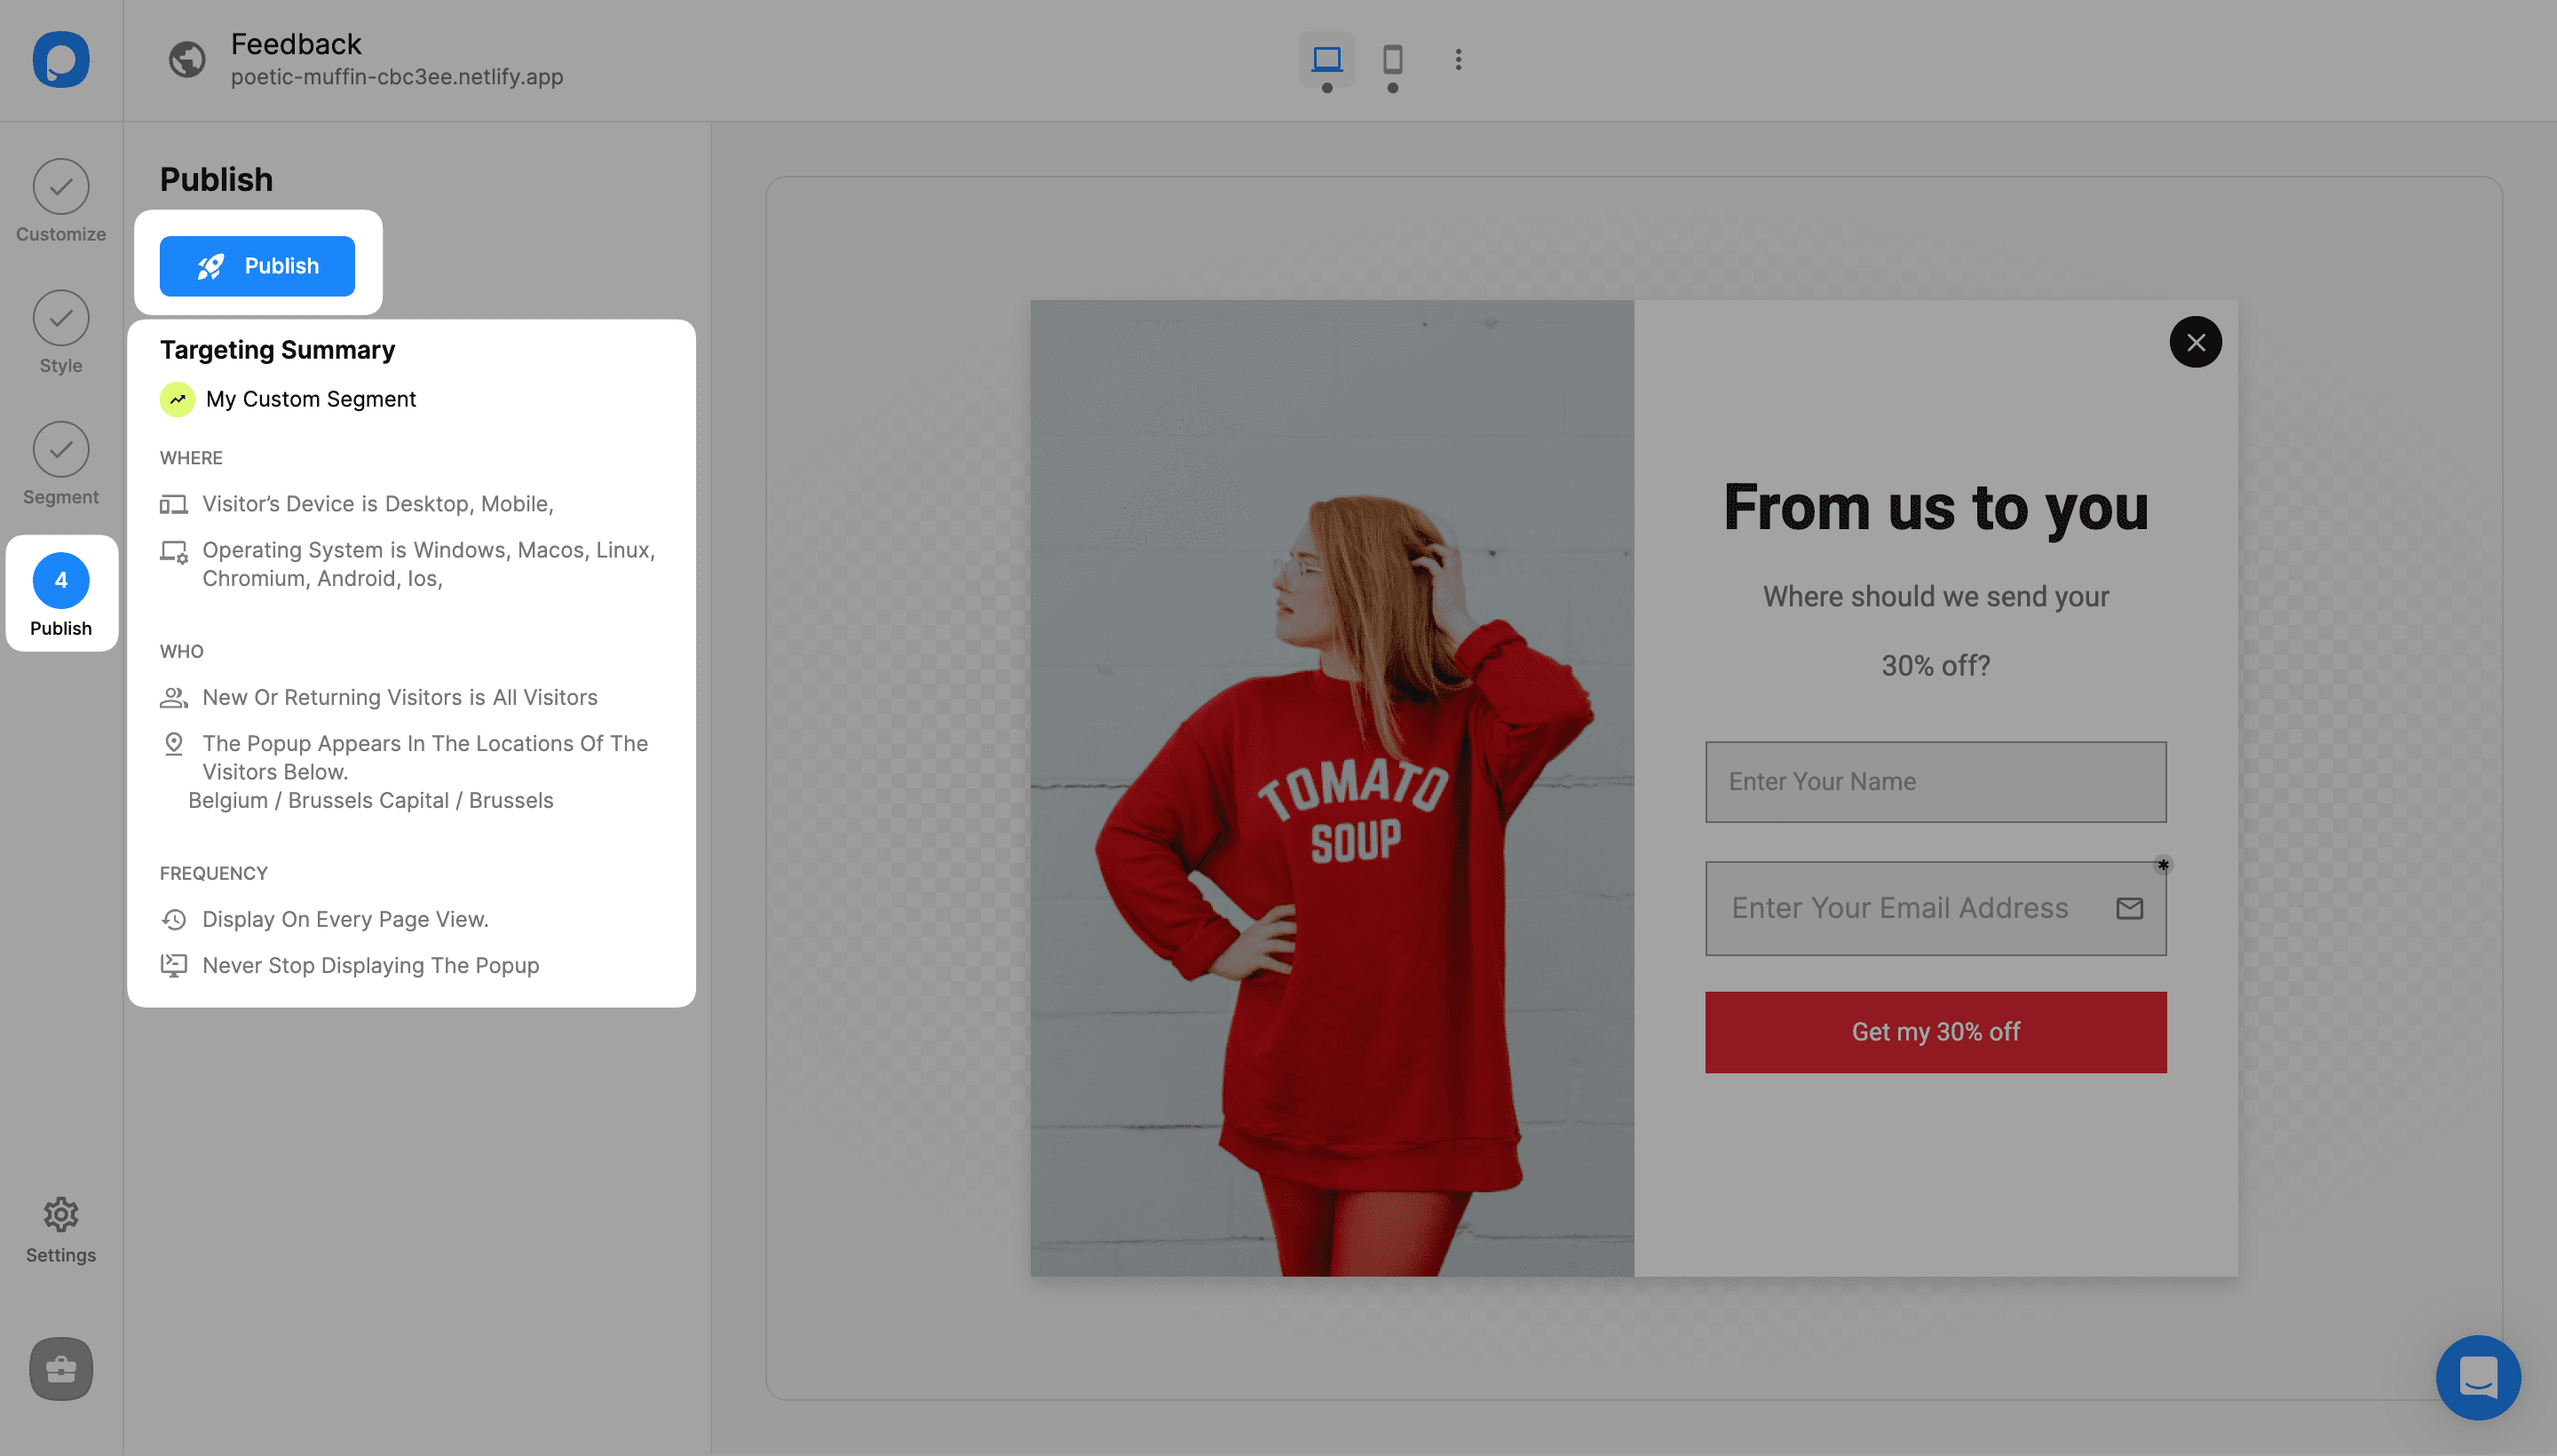
7. You can also continue with “Publish” from the left-hand panel to see all your current display settings, including the geo-location targeting you’ve just set up under “Targeting Summary”.
That’s it! Need a hand? Contact Popupsmart!
