Shopify Lightbox: How to Add Lightbox in Shopify without an App (For Free)
Use Popupsmart to add Shopify lightbox popups without coding: sign up, paste one JS line into theme.liquid, create/customize a lightbox from templates, set display/targeting rules, and integrate email/automation to capture leads and boost conversions.
If you are asking, “How do I add a lightbox in Shopify?” you are at the right place. We will show you how to add a lightbox to your Shopify store without needing any unreliable apps.
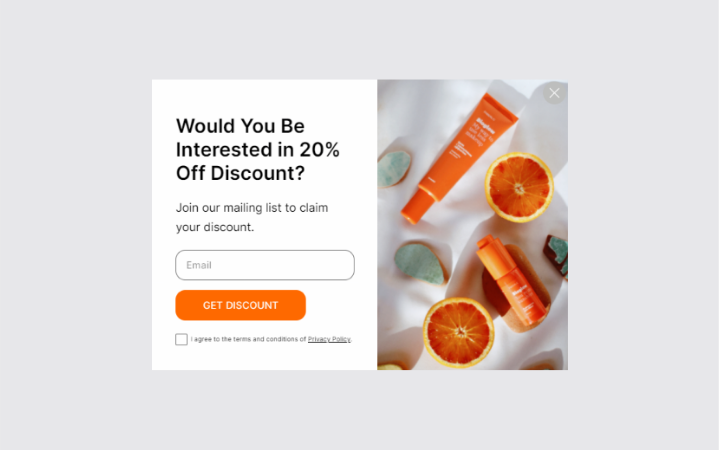
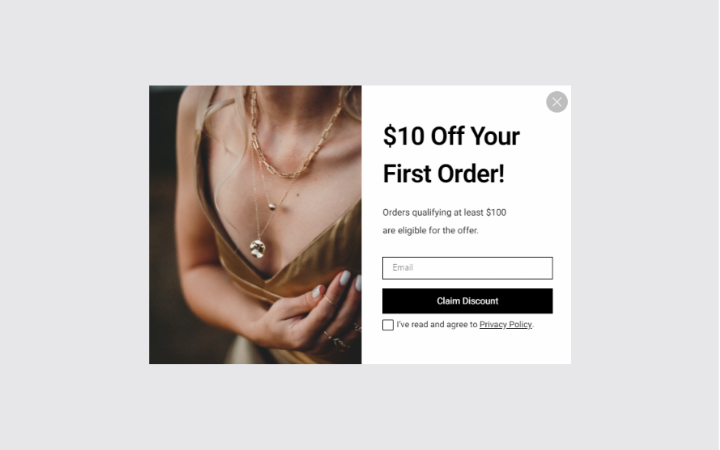
So, what is a lightbox? Lightbox is a type of popup that takes over the browser window with a specific CTA (Call to Action) to encourage visitors to take action, such as checking out a new product or signing up for a newsletter.
Using a lightbox in Shopify is simply a smart strategy to get more sales.
How to Add a Lightbox in Shopify without an App
You might wonder, "How can I incorporate a Shopify lightbox into my store?"
One simple and effective solution is using Popupsmart, a modern and user-friendly popup builder tool, which you can use for free.
Popupsmart stands out in the market with its advanced features like diverse display options and effective audience targeting. Not only can you create a Shopify lightbox, but you can also design other types of popups such as banner, full-screen, or sidebar popups.
With Popupsmart, targeting the right audience at the right time becomes easier due to its smart targeting options. These include geolocation, traffic source, cookie use, and exit-intent targeting.
What else can you do with Popupsmart?
- Video lightbox Shopify popups
- Shopify survey popups
- Responsive lightbox popups for mobile
- Gamification popups for Shopify
Setting up Popupsmart to add a popup to your Shopify store is straightforward and does not require any coding skills or software installation.
All it takes is copy-pasting a single line of JavaScript code into your website template file. This way, you can display conversion-ready Shopify lightbox popups that load faster than many Shopify apps.
Here are the step-by-step instructions on how to add a lightbox in Shopify:
- Sign up to Popupsmart.
- Set up Popupsmart for your Shopify store.
- Create your first popup campaign.
- Choose a template and customize & style it to your liking.
- Determine the display options for your Shopify lightbox.
- Finally, integrate with your preferred email service provider.
1. Sign up to Popupsmart
Signing up to Popupsmart is completely free, and you can create 1 popup for 5,000 pageviews and 1 website for free.
But you can always upgrade your plan to create more popup campaigns for multiple websites and more page views.
2. Set up Popupsmart for Your Shopify Store
✴️The setup for Popupsmart is a one-time process. Once you've added the code, there's no need to repeat the process.
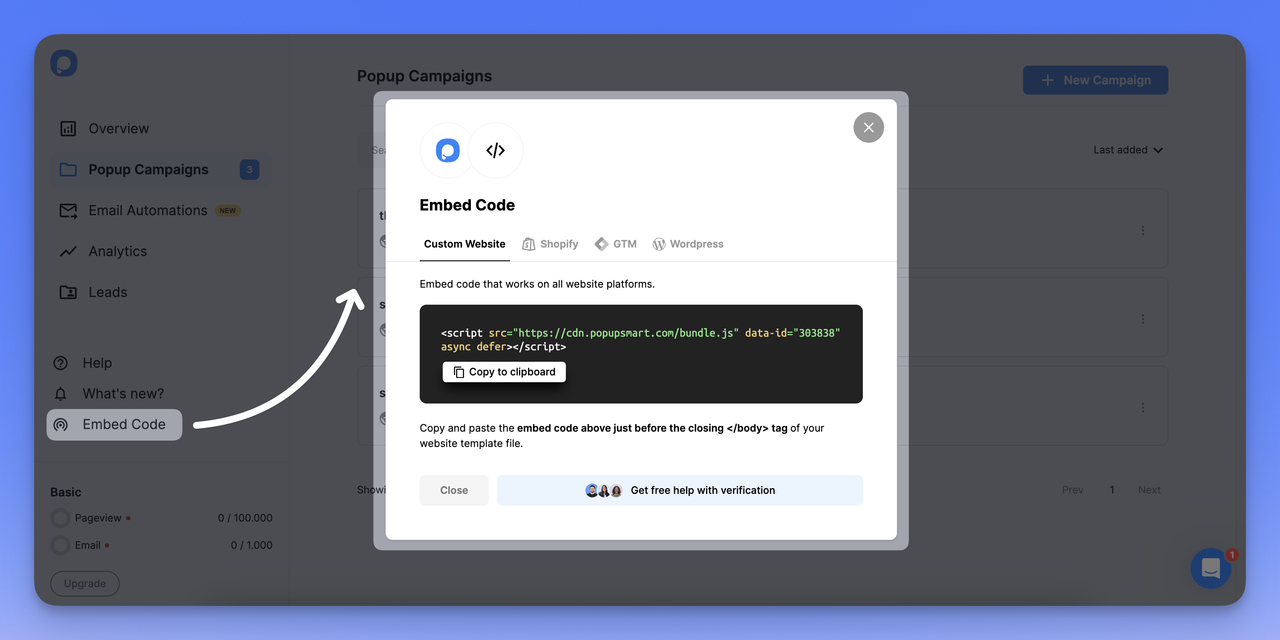
First, once you successfully sign up to Popupsmart, go to your dashboard and click on the “Embed Code” button.
Then, copy the given embed code and head on to your Shopify admin panel.
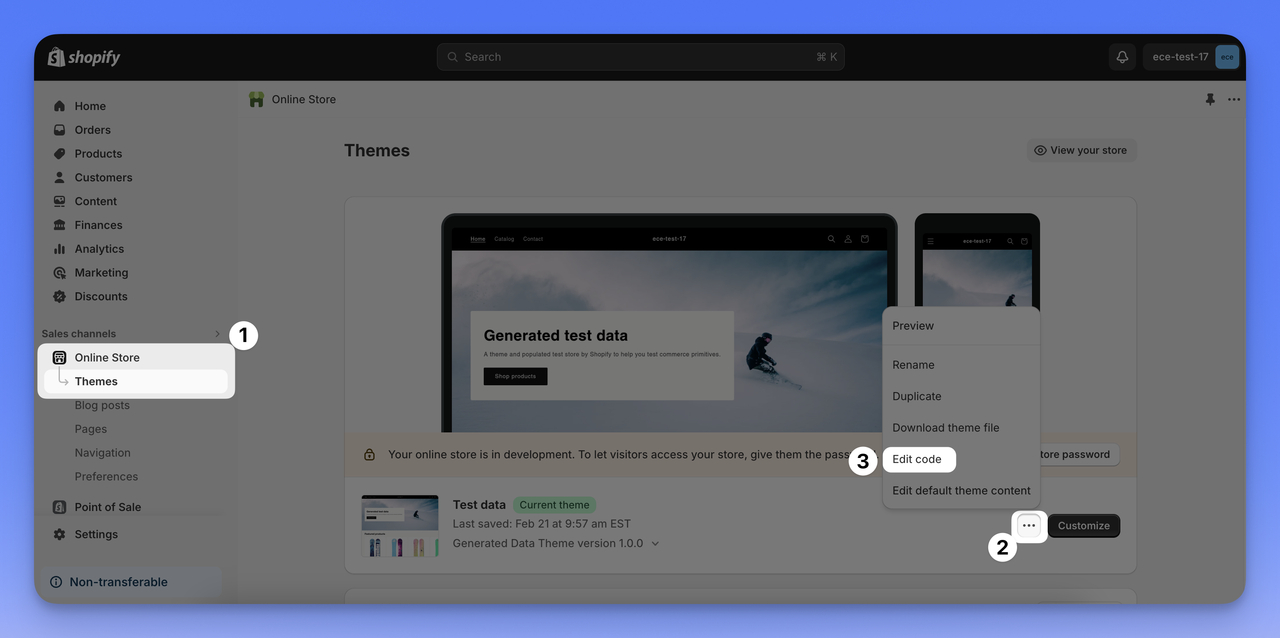
Go to the “Online Store” and then select “Themes”. Click on the “…” button of your live theme and select “Edit code”
Type “theme.liquid” in the search box and click on the result.
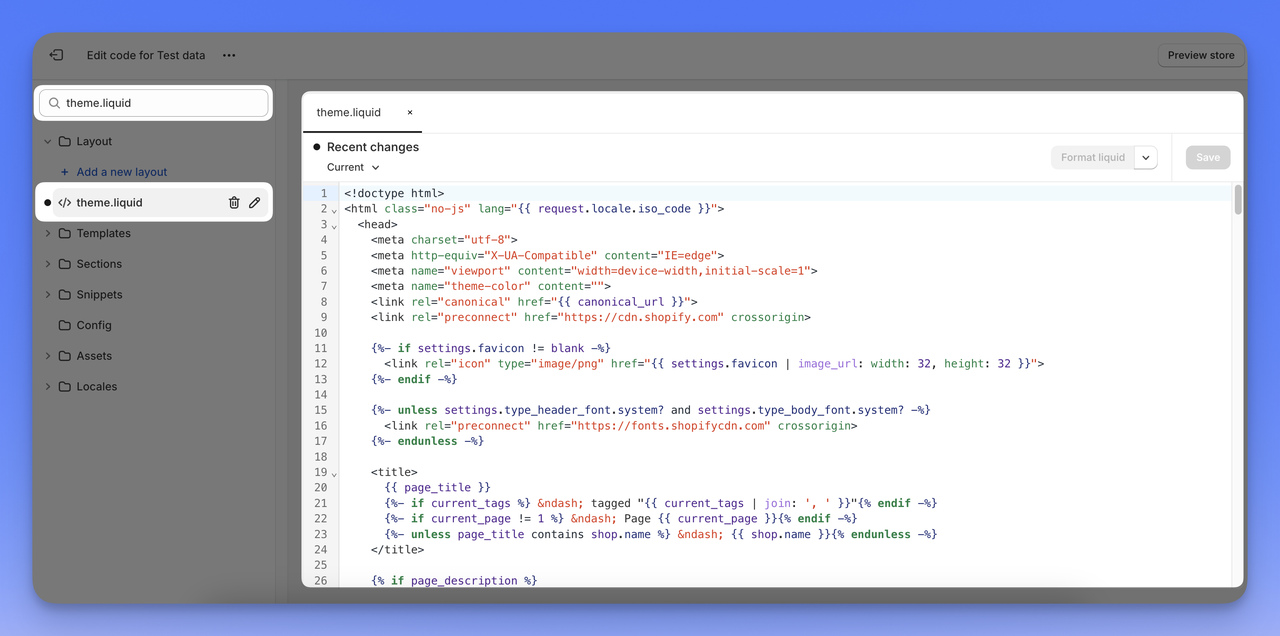
Then paste the Popupsmart code between your
tags.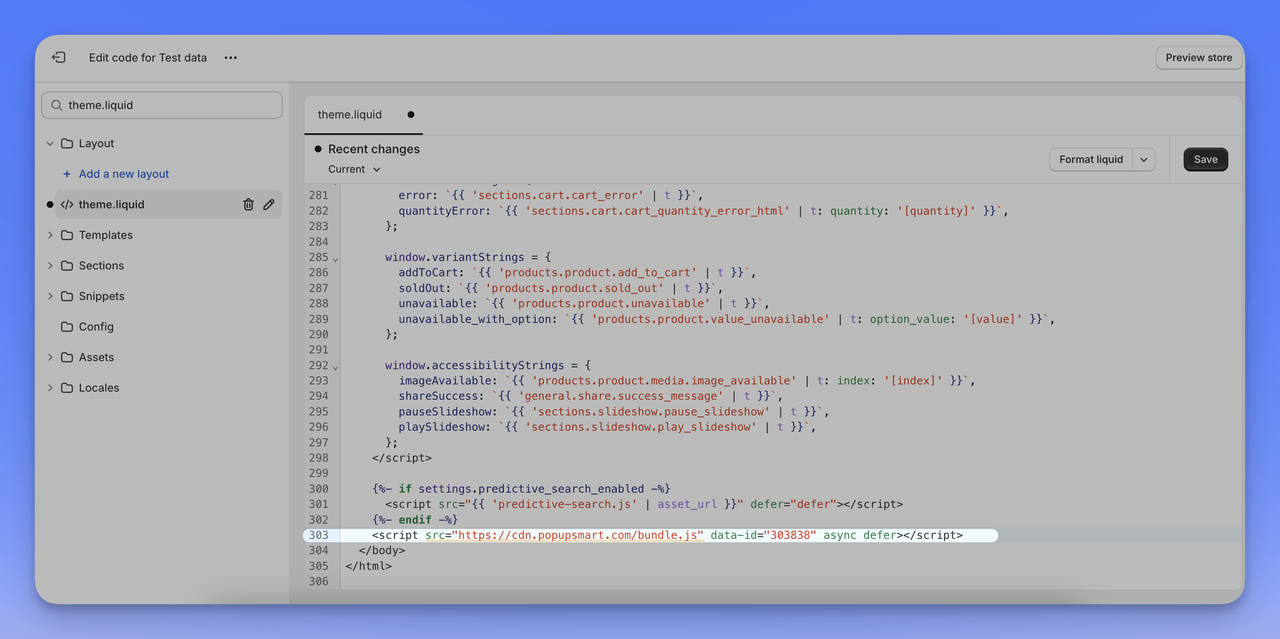
Save the changes before you close the code editor.
That’s it! 🎉Now, you are ready to create your popup campaign.
3. Create Your First Campaign
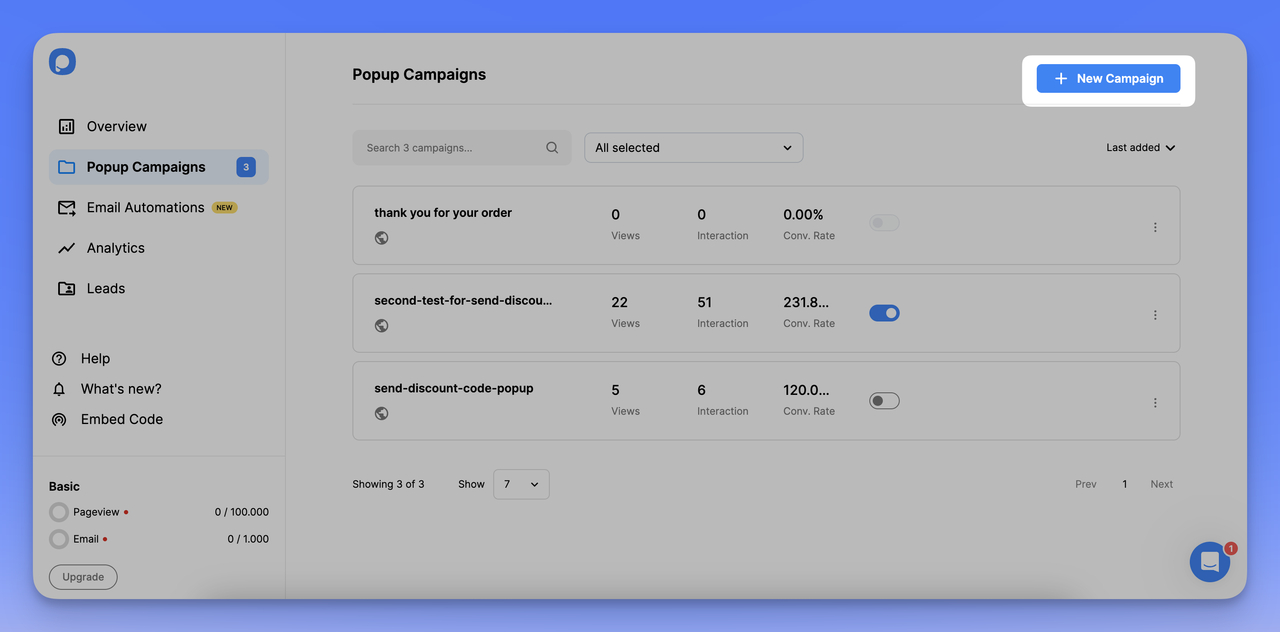
Go back to your Campaign screen and click the "+ New Campaign" button in the upper-right corner.
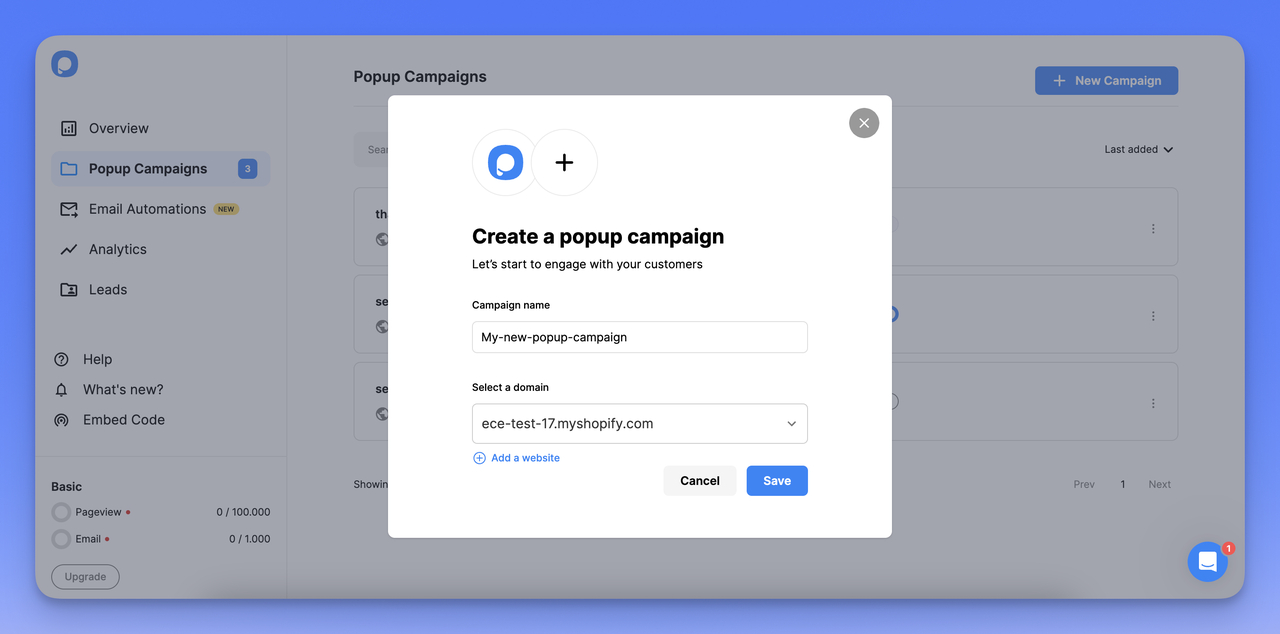
Give your campaign a name and choose a domain for your campaign from the dropdown menu. Then, click Save to proceed to the builder screen.
4. Select a Template and Customize It
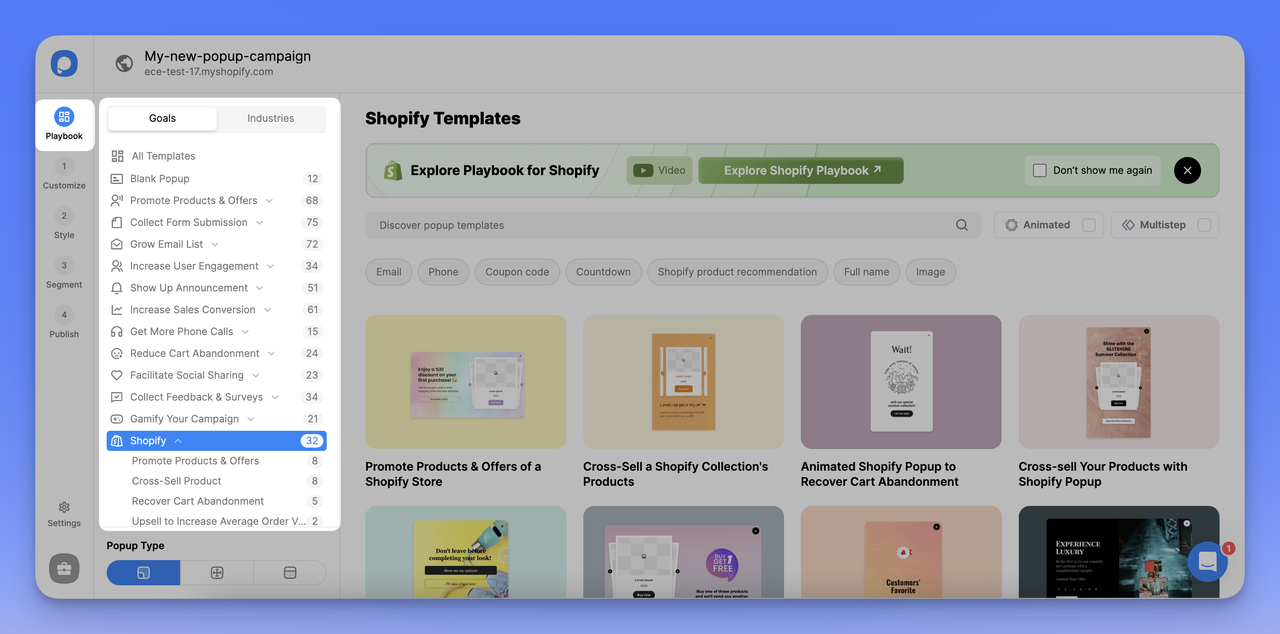
Popupsmart offers more than 350 pre-designed templates, including special ones for Shopify; you can choose the one that suits you and customize it or create one from scratch.
Make sure to select the Light Popup type and its screen position.
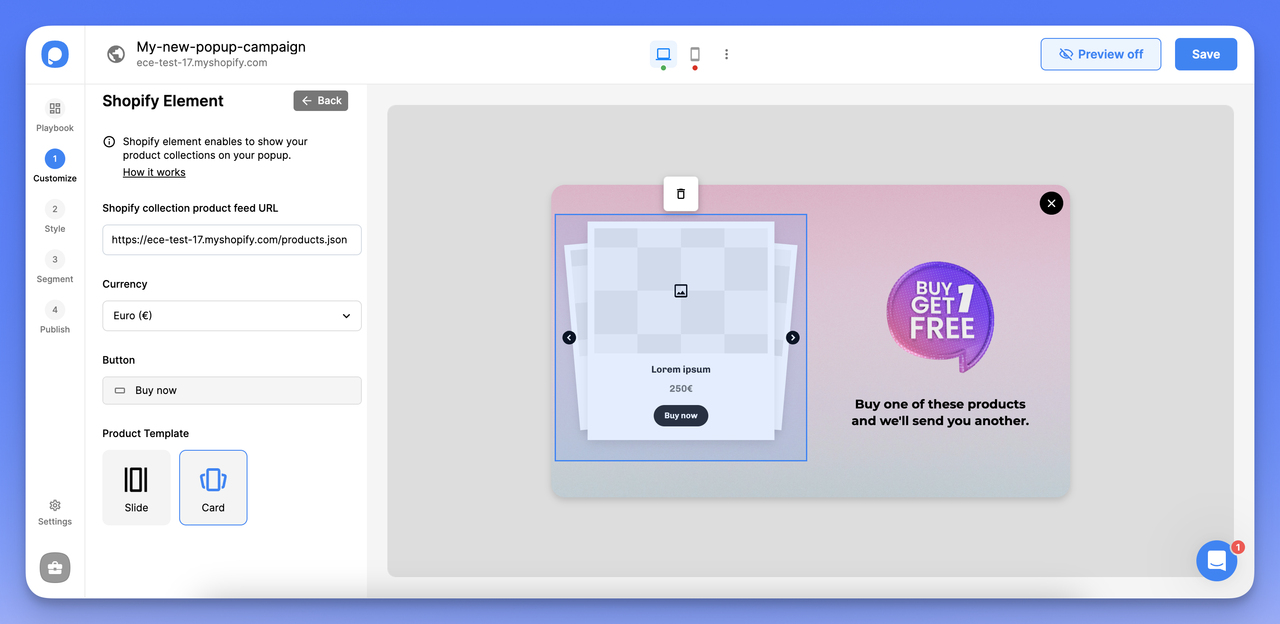
After selecting your popup, enhance it in the "Customize" step with elements like a countdown timer and teasers, and then fine-tune its design in the "Style" step with size adjustments and more.
5. Set up Your Shopify Lightbox’s Display Options
Display and audience targeting options are vital for the success of your popup campaigns. When they are set right, your lightbox for Shopify will display to the people who are most likely to interact with it.
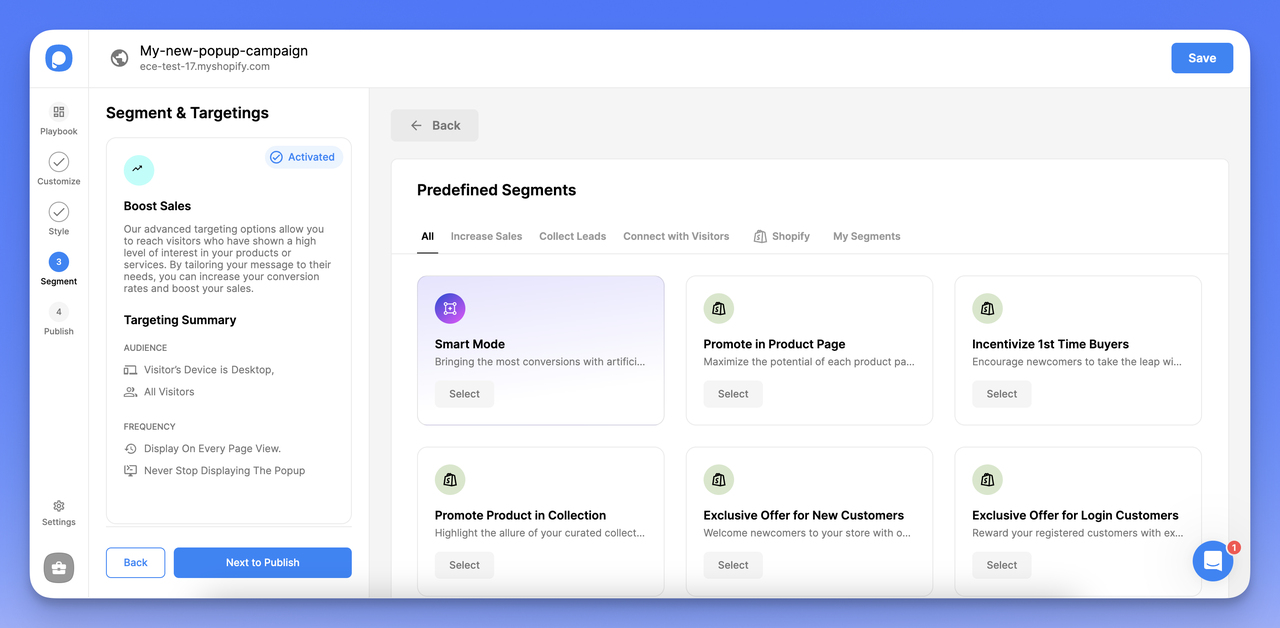
Here, you will see some predefined, ready-to-use segments; you can choose the one that suits you and continue or set your own rules.
To learn more about targeting features, visit the targeting documentation pages.
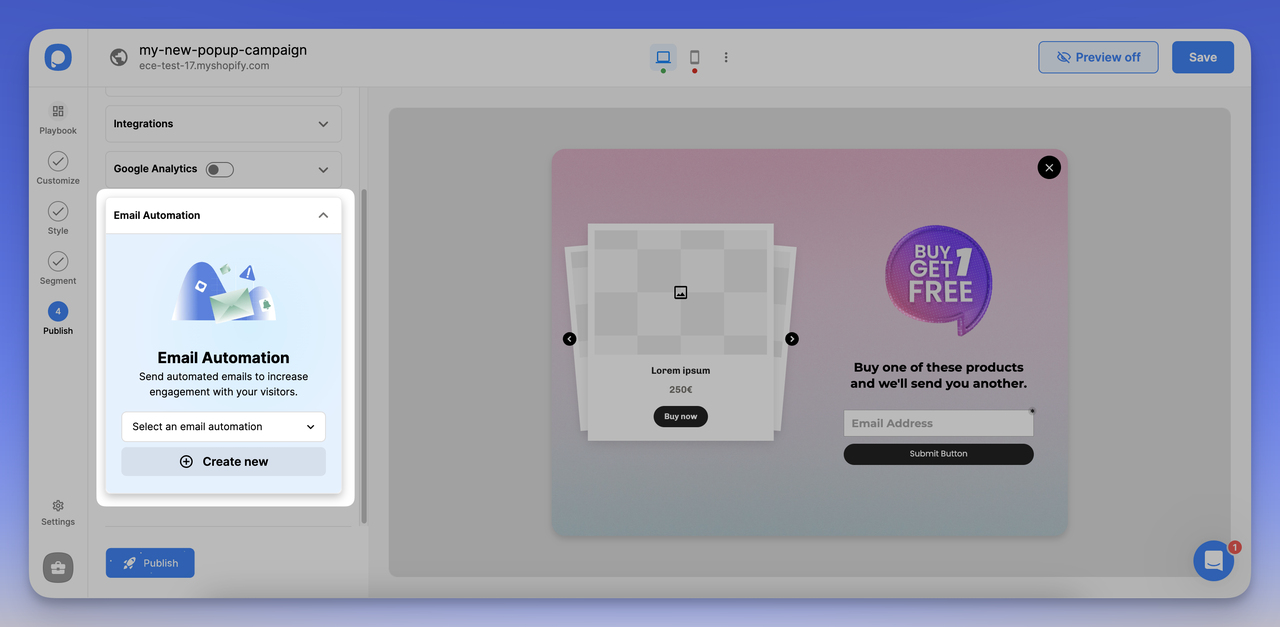
6. Integrate with Your Email Service Provider or Set Up an Email Automation
Finally, to automatically direct the leads you gather from your newsletter popup to your mailing list, you integrate Popupsmart with your email service provider for Shopify.

You can see all the documentation for integration options here.
Also, Popupsmart includes its automation feature for Shopify, allowing you to reach out to your visitors with personalized emails triggered by certain events.
You can target better conversion rates by sending timed welcome messages to new signups, follow-up emails for reducing cart abandonment, and thank you notes after a purchase.
If you want to learn more about maximizing your email strategy, you can discover the email automation feature by visiting our detailed Shopify playbook.
Once your popup is ready to publish, you can Save & Publish it or Save it to publish later.
As easy as that!
Last but not least, we want to add that you can do the above steps faster with Popupsmart's Shopify App!
Why You Should Use Shopify Lightbox Popups
Most online sellers are unsure about using popups on their websites, thinking they might annoy visitors. But let me tell you, this is not the case at all. When used correctly, popups are very effective solutions to capture sales and email leads.
When you display a lightbox, the page content will still be dimmed in the background. Since customers see the background, they don’t feel like they’ve been directed to a spammy site. The lightbox will be at the forefront, catching their attention.
Lightbox popups are particularly lucrative for Shopify e-commerce because:
- You can grow your email list for email marketing campaigns and keep your customers engaged.
- The average popup conversion rate is 3.09% so that you can boost your conversions.
- You can create coupons and offer them through exit popups to win back abandoning customers.
There are many tactics to follow when it comes to drawing passive visitors’ attention and turning them into customers. Even just by offering a discount to customers in return for their email addresses, you get to increase your revenue and expand your email list.
You might like; 55 Exit Intent Popup Examples to Increase Conversions.
Optimizing Your Lightbox Popup for Best Results
For optimal performance of your Shopify lightbox popup, focus on these actionable strategies:
1. Target Timing: Delay the popup until a visitor has spent a specific amount of time on your site, or is about to exit. This ensures they're engaged before seeing your offer. 2. Offer Value: Provide a compelling offer like a discount code or exclusive content. Ensure it's relevant to your visitors' interests to encourage action. 3. Clear CTA: Use a concise and directive Call to Action, such as "Claim Your Discount" or "Subscribe Now." Make sure the CTA button is bold and easy to click. 4. Simplify Design: Keep your popup design clean and straightforward. Avoid clutter to ensure the message and CTA are the focal points. 5. Personalize Content: Tailor your popup content based on visitor behavior or demographics to increase relevance and effectiveness. 6. Mobile Optimization: Ensure your popup looks good and works well on mobile devices, considering the majority of users might visit your site on their phones. 7. Test Variations: Experiment with different versions of your popup (A/B testing) to see which elements (like headlines, offers, or designs) perform better. 8. Gather Feedback:** Use visitor feedback to continuously improve your popup's appeal and effectiveness. This could be direct feedback or based on engagement metrics. Implementing these strategies will make your lightbox popup more engaging and effective, helping to convert more visitors into customers or subscribers on your Shopify site.
Related content:
How would you rate your experience with this article? 😊