How to Integrate Popupsmart with Ontraport via Zapier?
Ontraport is an all-in-one software that enables automated marketing from emails, and popup forms, to CRM. It is suitable for small businesses and entrepreneurs.
You can get the most out of your Ontraport email marketing campaigns by adding smart popups to your website.
Popupsmart integrates seamlessly with Ontraport so that you can grow your email list and reach more visitors.
🔔 Here is how you can integrate Ontraport with Popupsmart via Zapier, but you can also make this integration via Make with 1000 free data opportunity.
To start this process, you need to have Popupsmart, Ontraport, and Zapier accounts and know the basic features of these tools.
1. Log in to your Zapier account and connect your application on “Make a Zap”. Select "Popupsmart" from the "Connect this app…" section. Then, select "Ontraport" from the "with this one!" section.
After you connect these two tools, select triggers from the "When this happens…" and "then do this" parts.
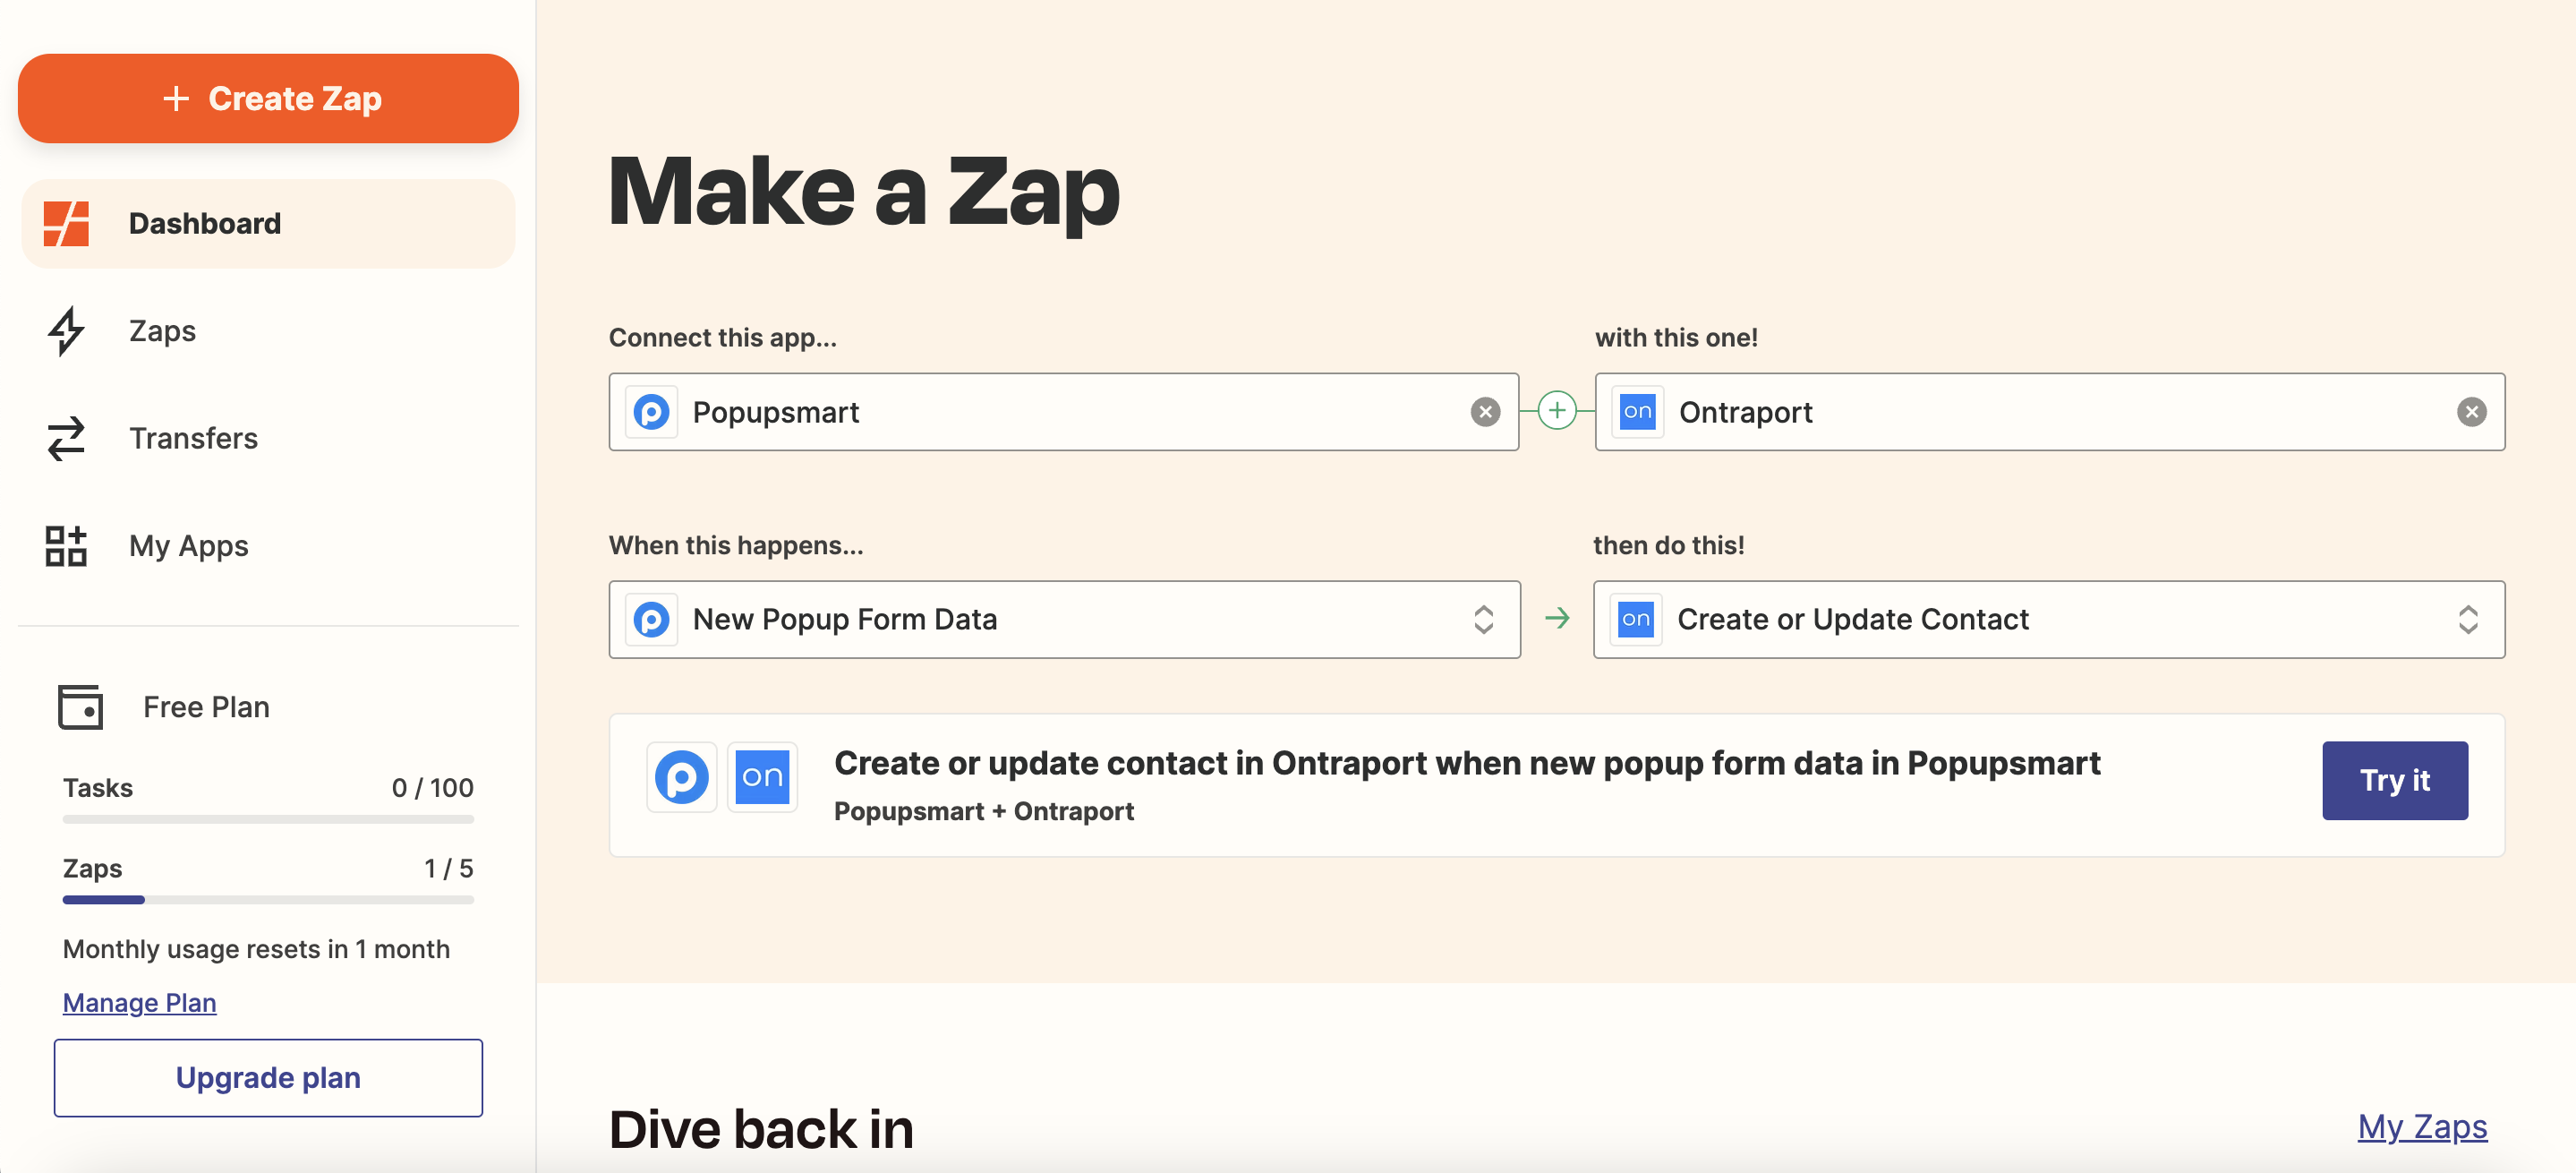
For Ontraport, we want it to create or update contact once a new popup form data comes with Popupsmart. For this reason, you can select triggers, as shown below, to connect your popup form data.
Then, click on the "Try it" button after selecting triggers.
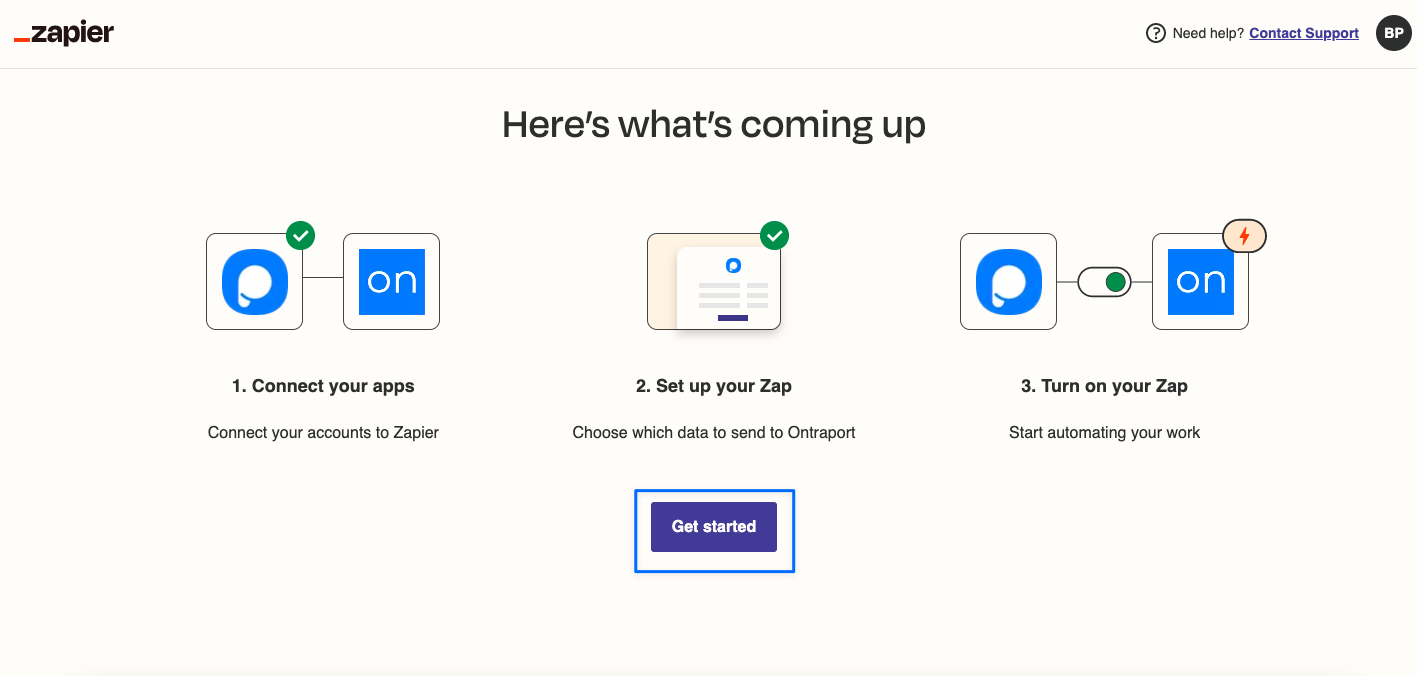
2. Click the "Get Started" button to connect your Popupsmart account with Ontraport.
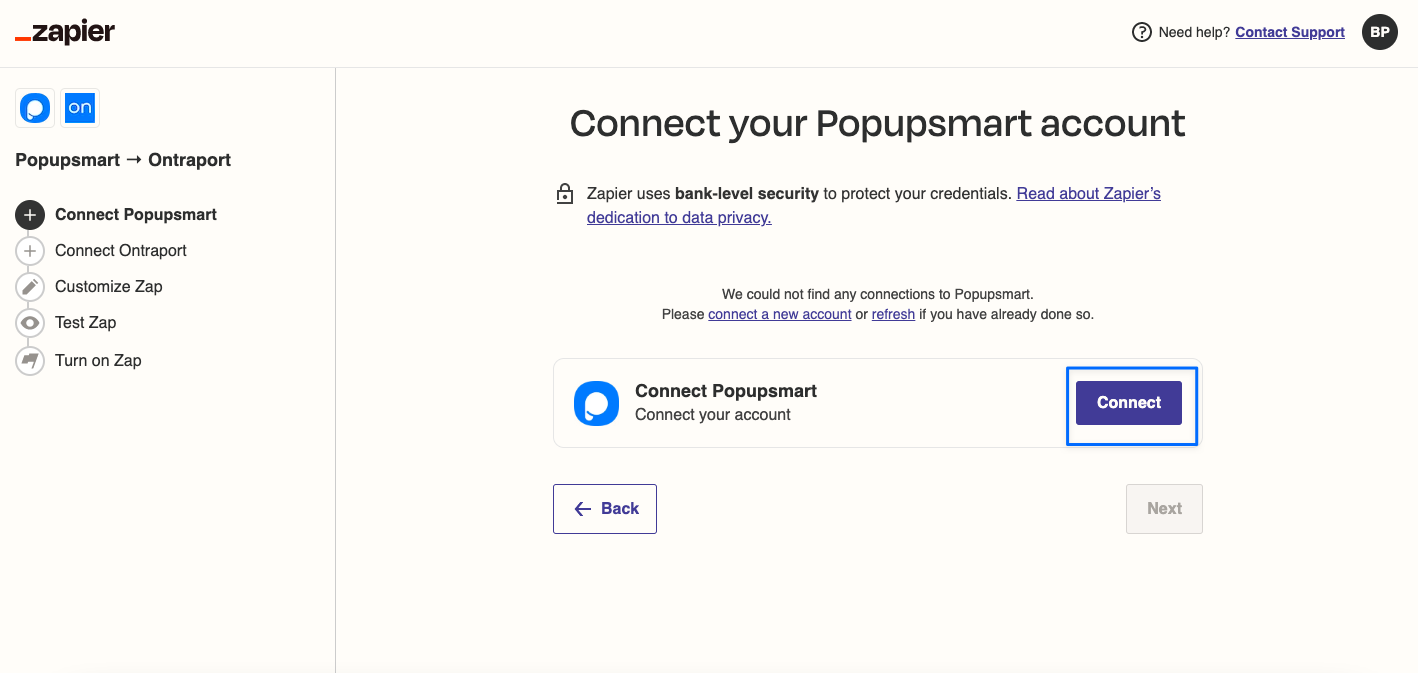
3. Then, click on the "Connect" button, as shown below.
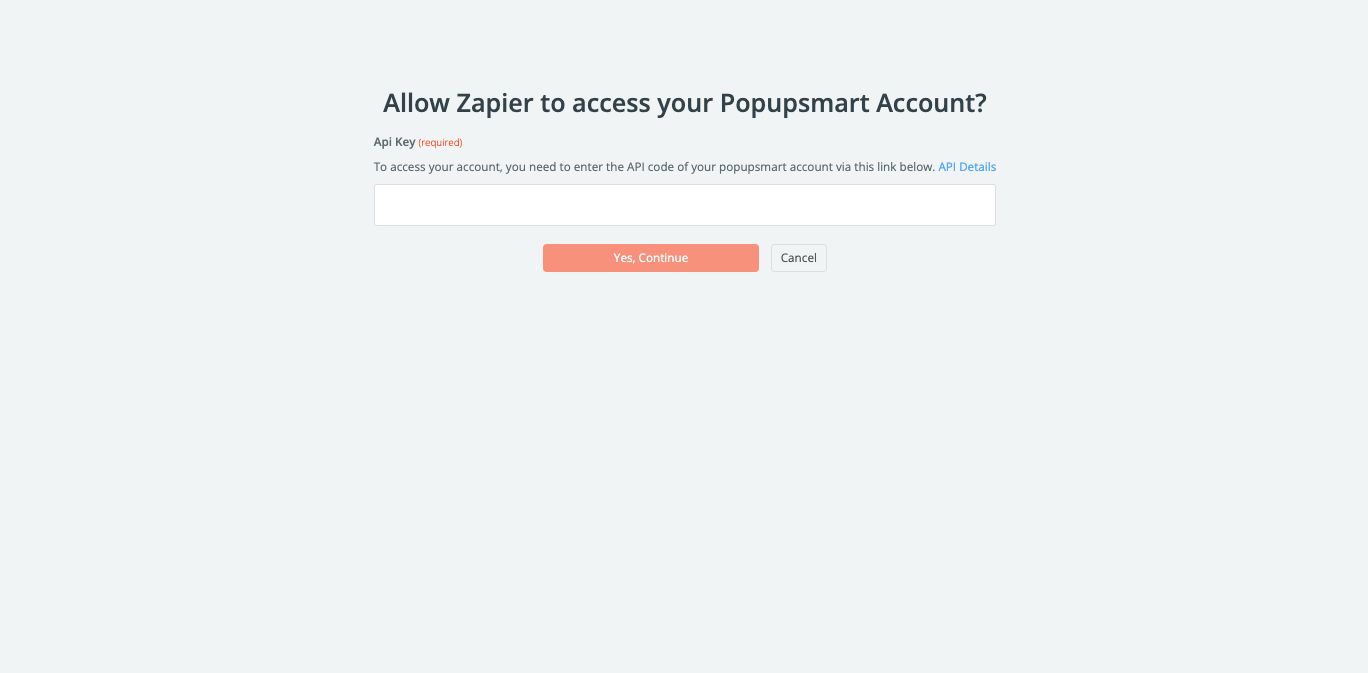
4. You need to go to your Popupsmart dashboard to get the API Key and fill in this field.
5. Go to the Popupsmart builder, and create your campaign. Then, click on your form input element with which you can collect data with your integrations.
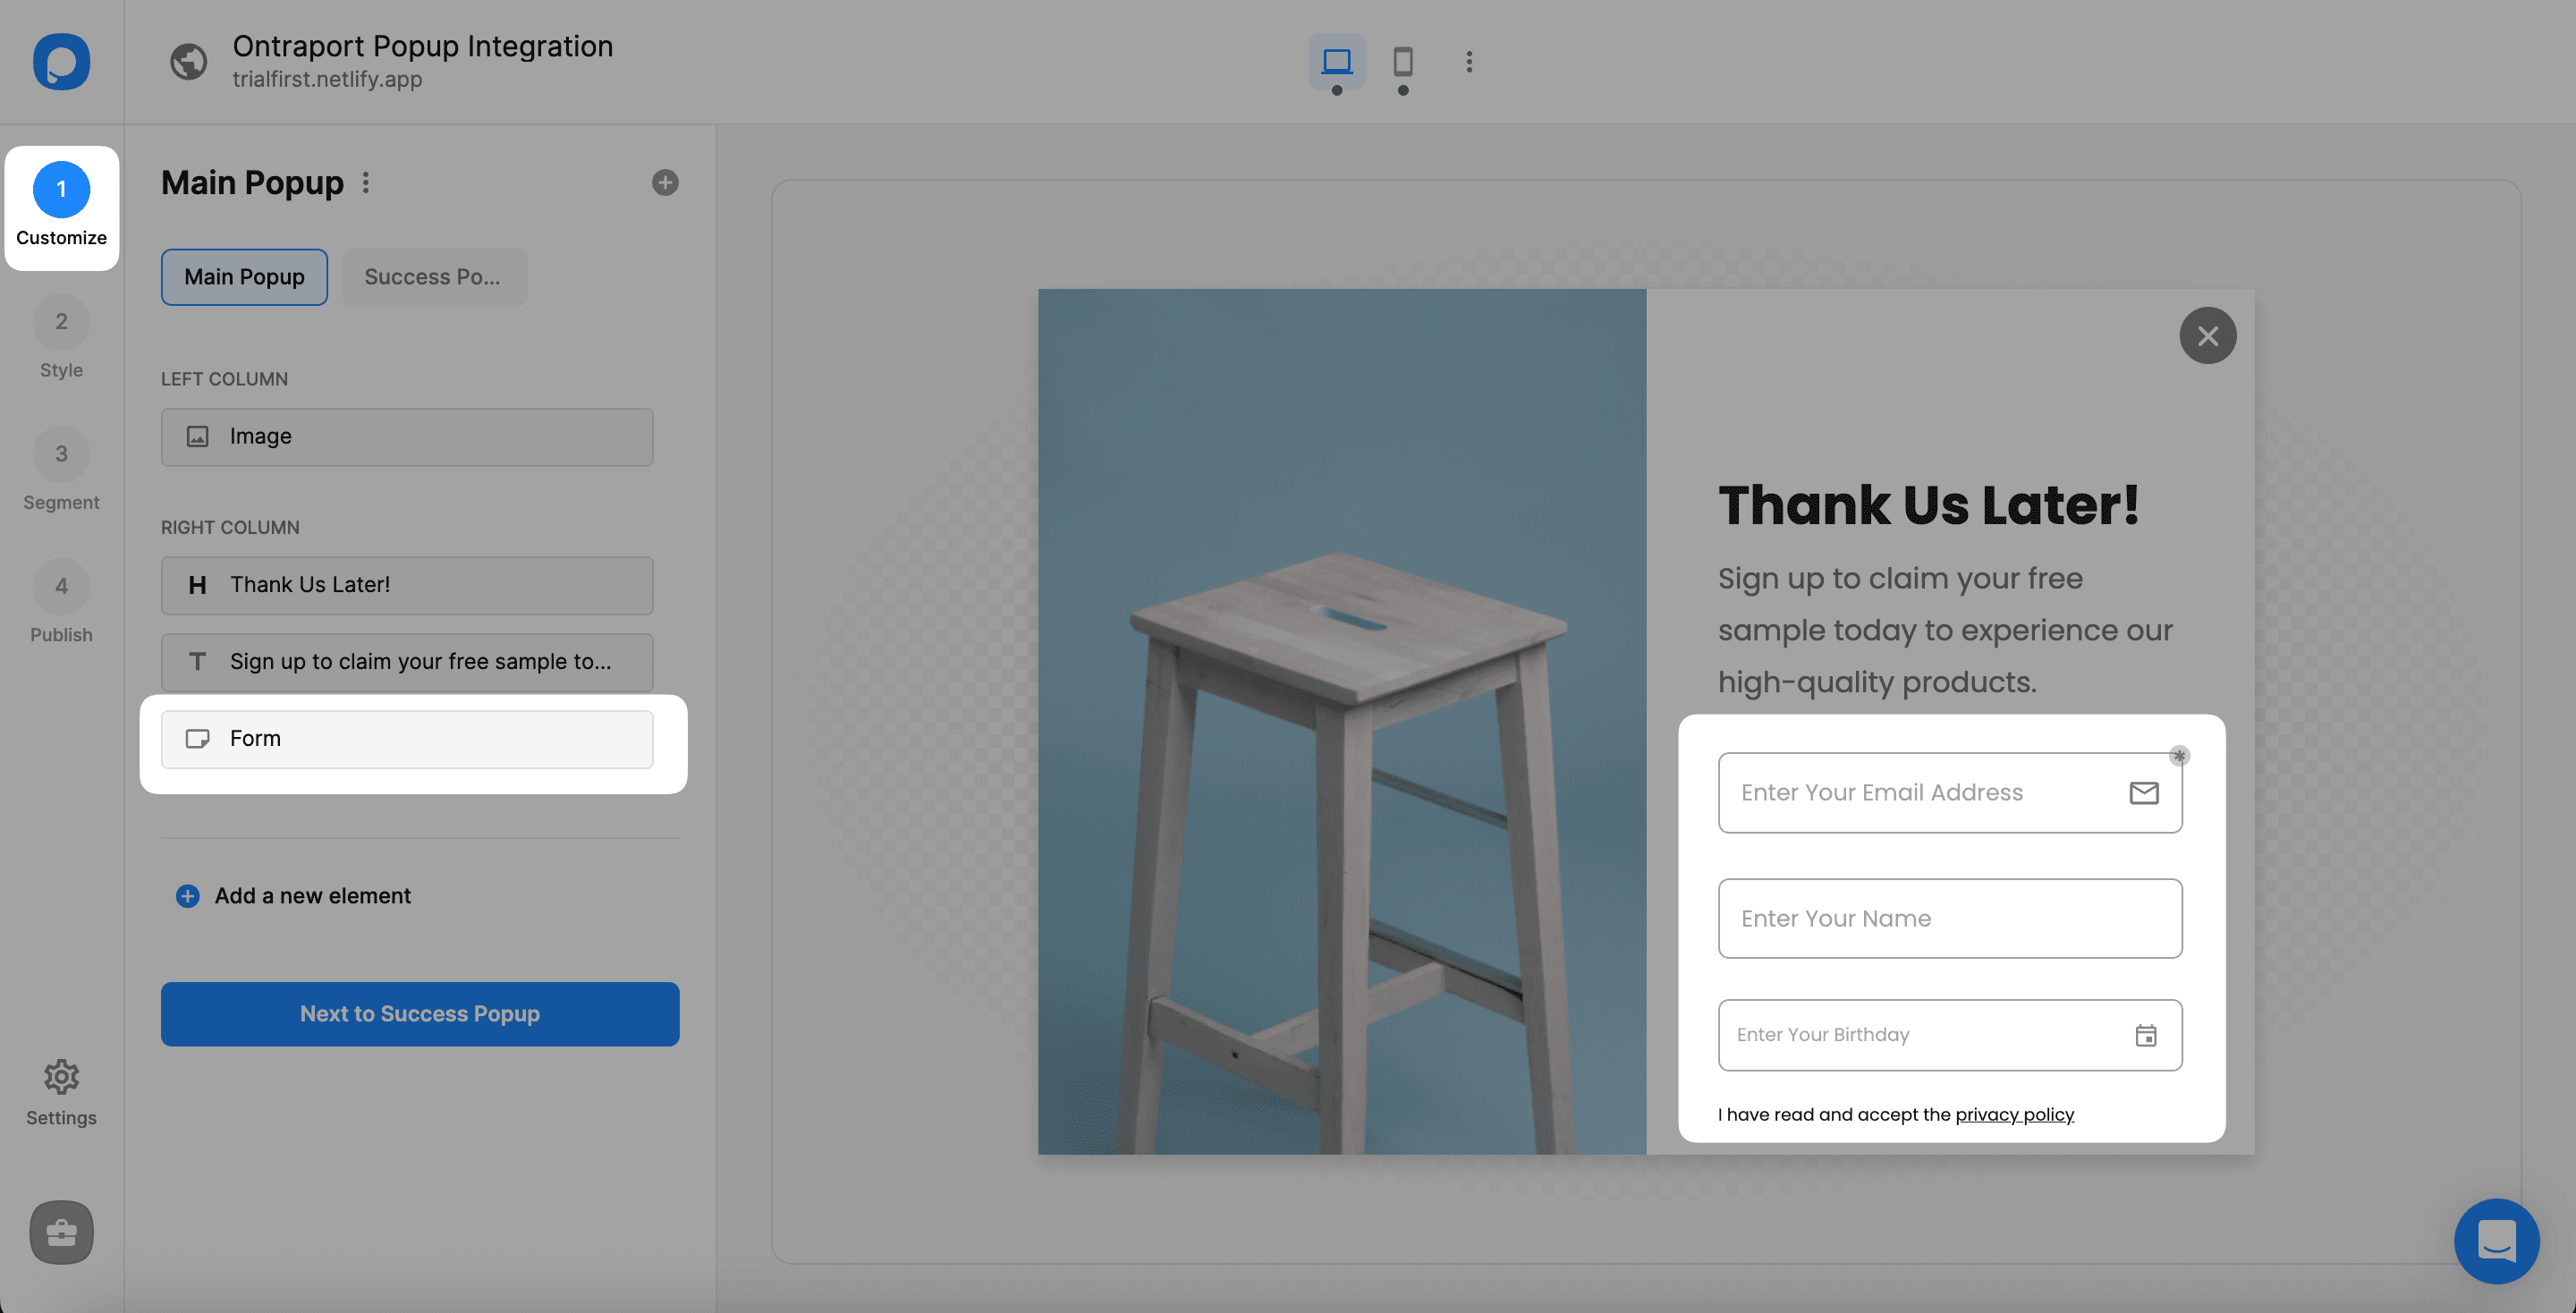
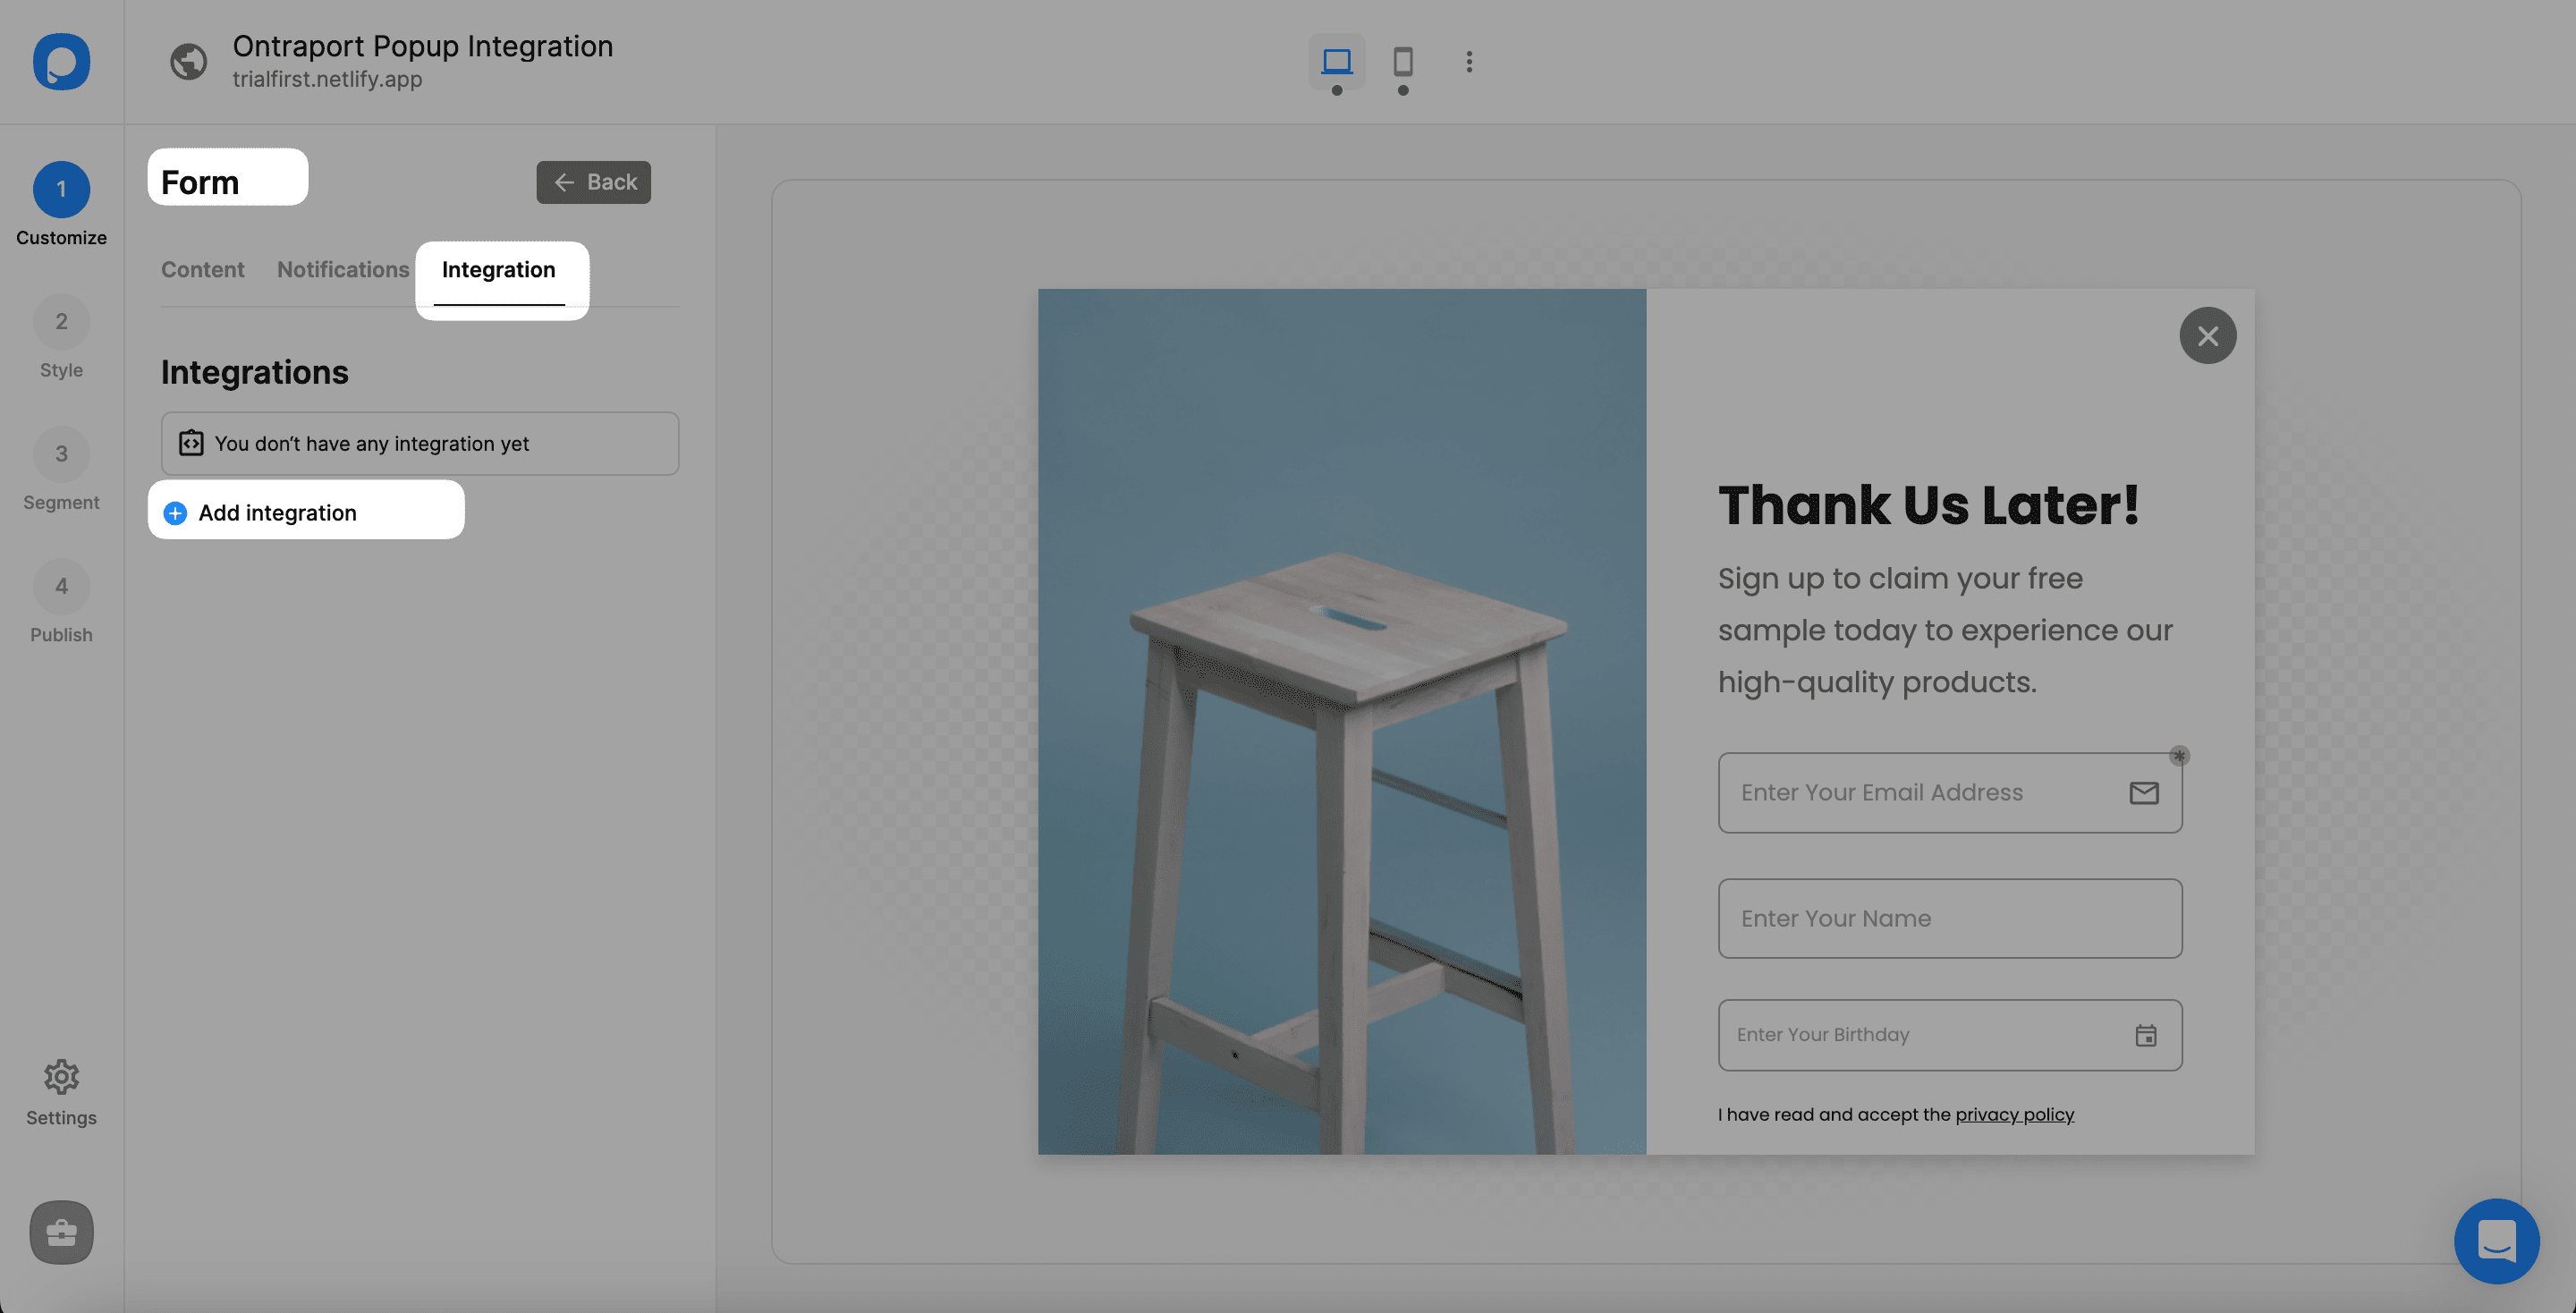
6. Click "Add integration" under the "Integrations" on the form element section to reach Zapier.
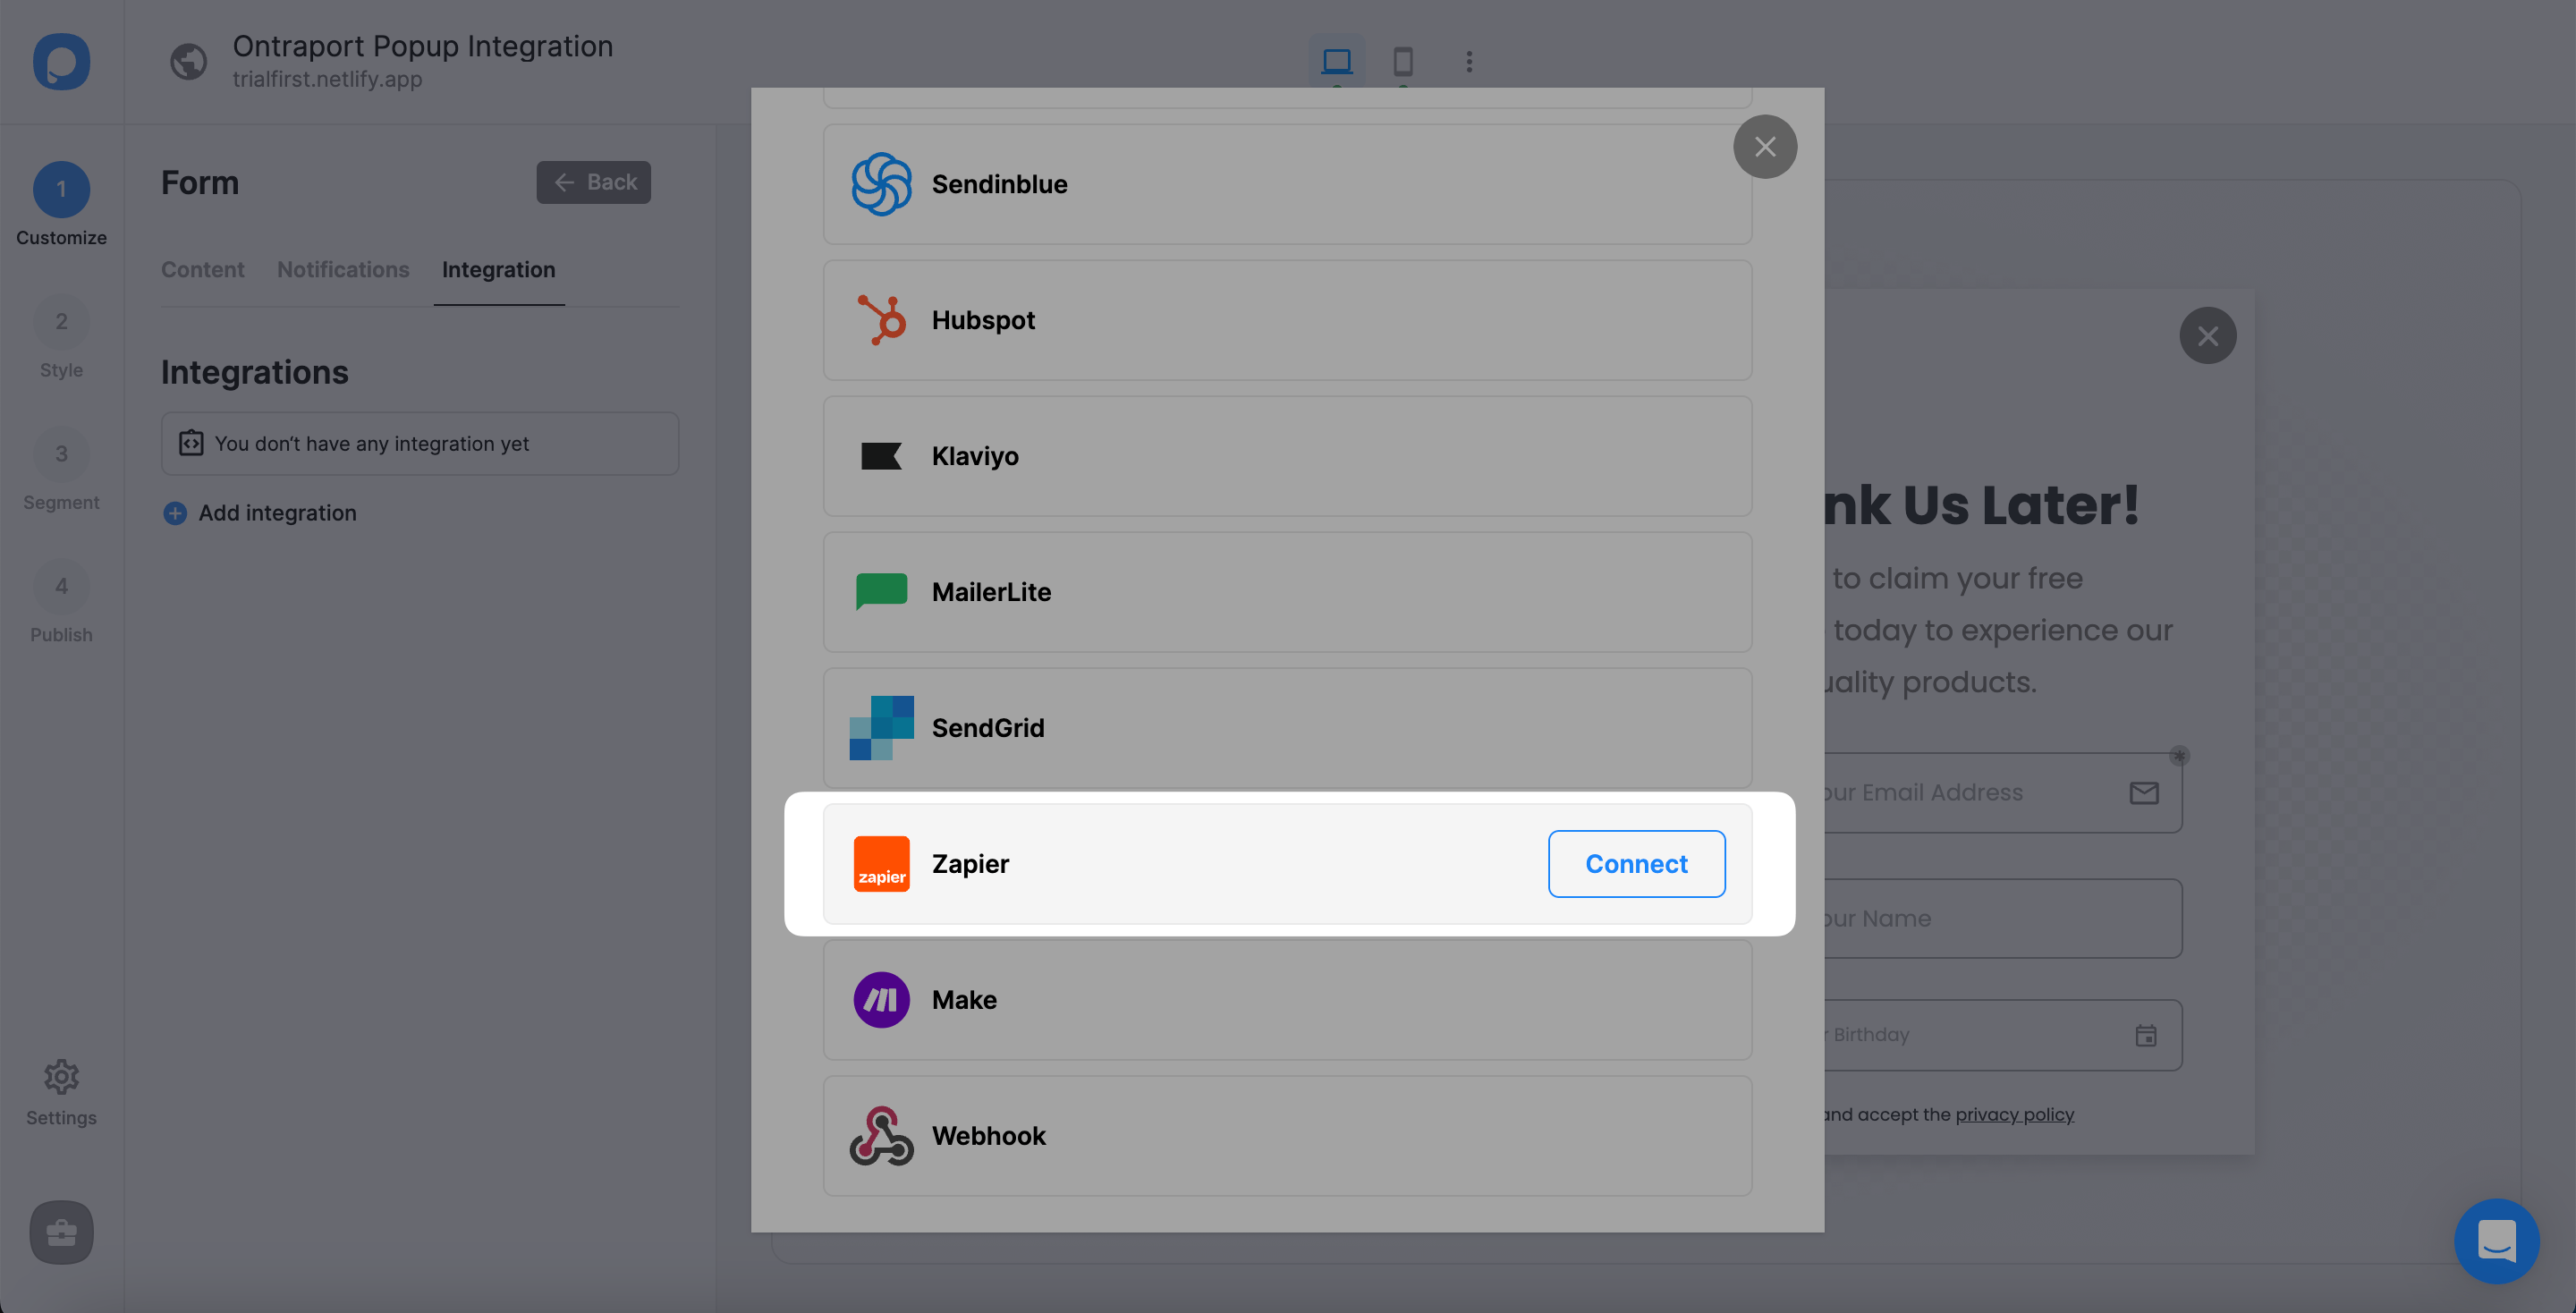
7. Then, click on the "Connect" button when you find Zapier under the Integrations modal.
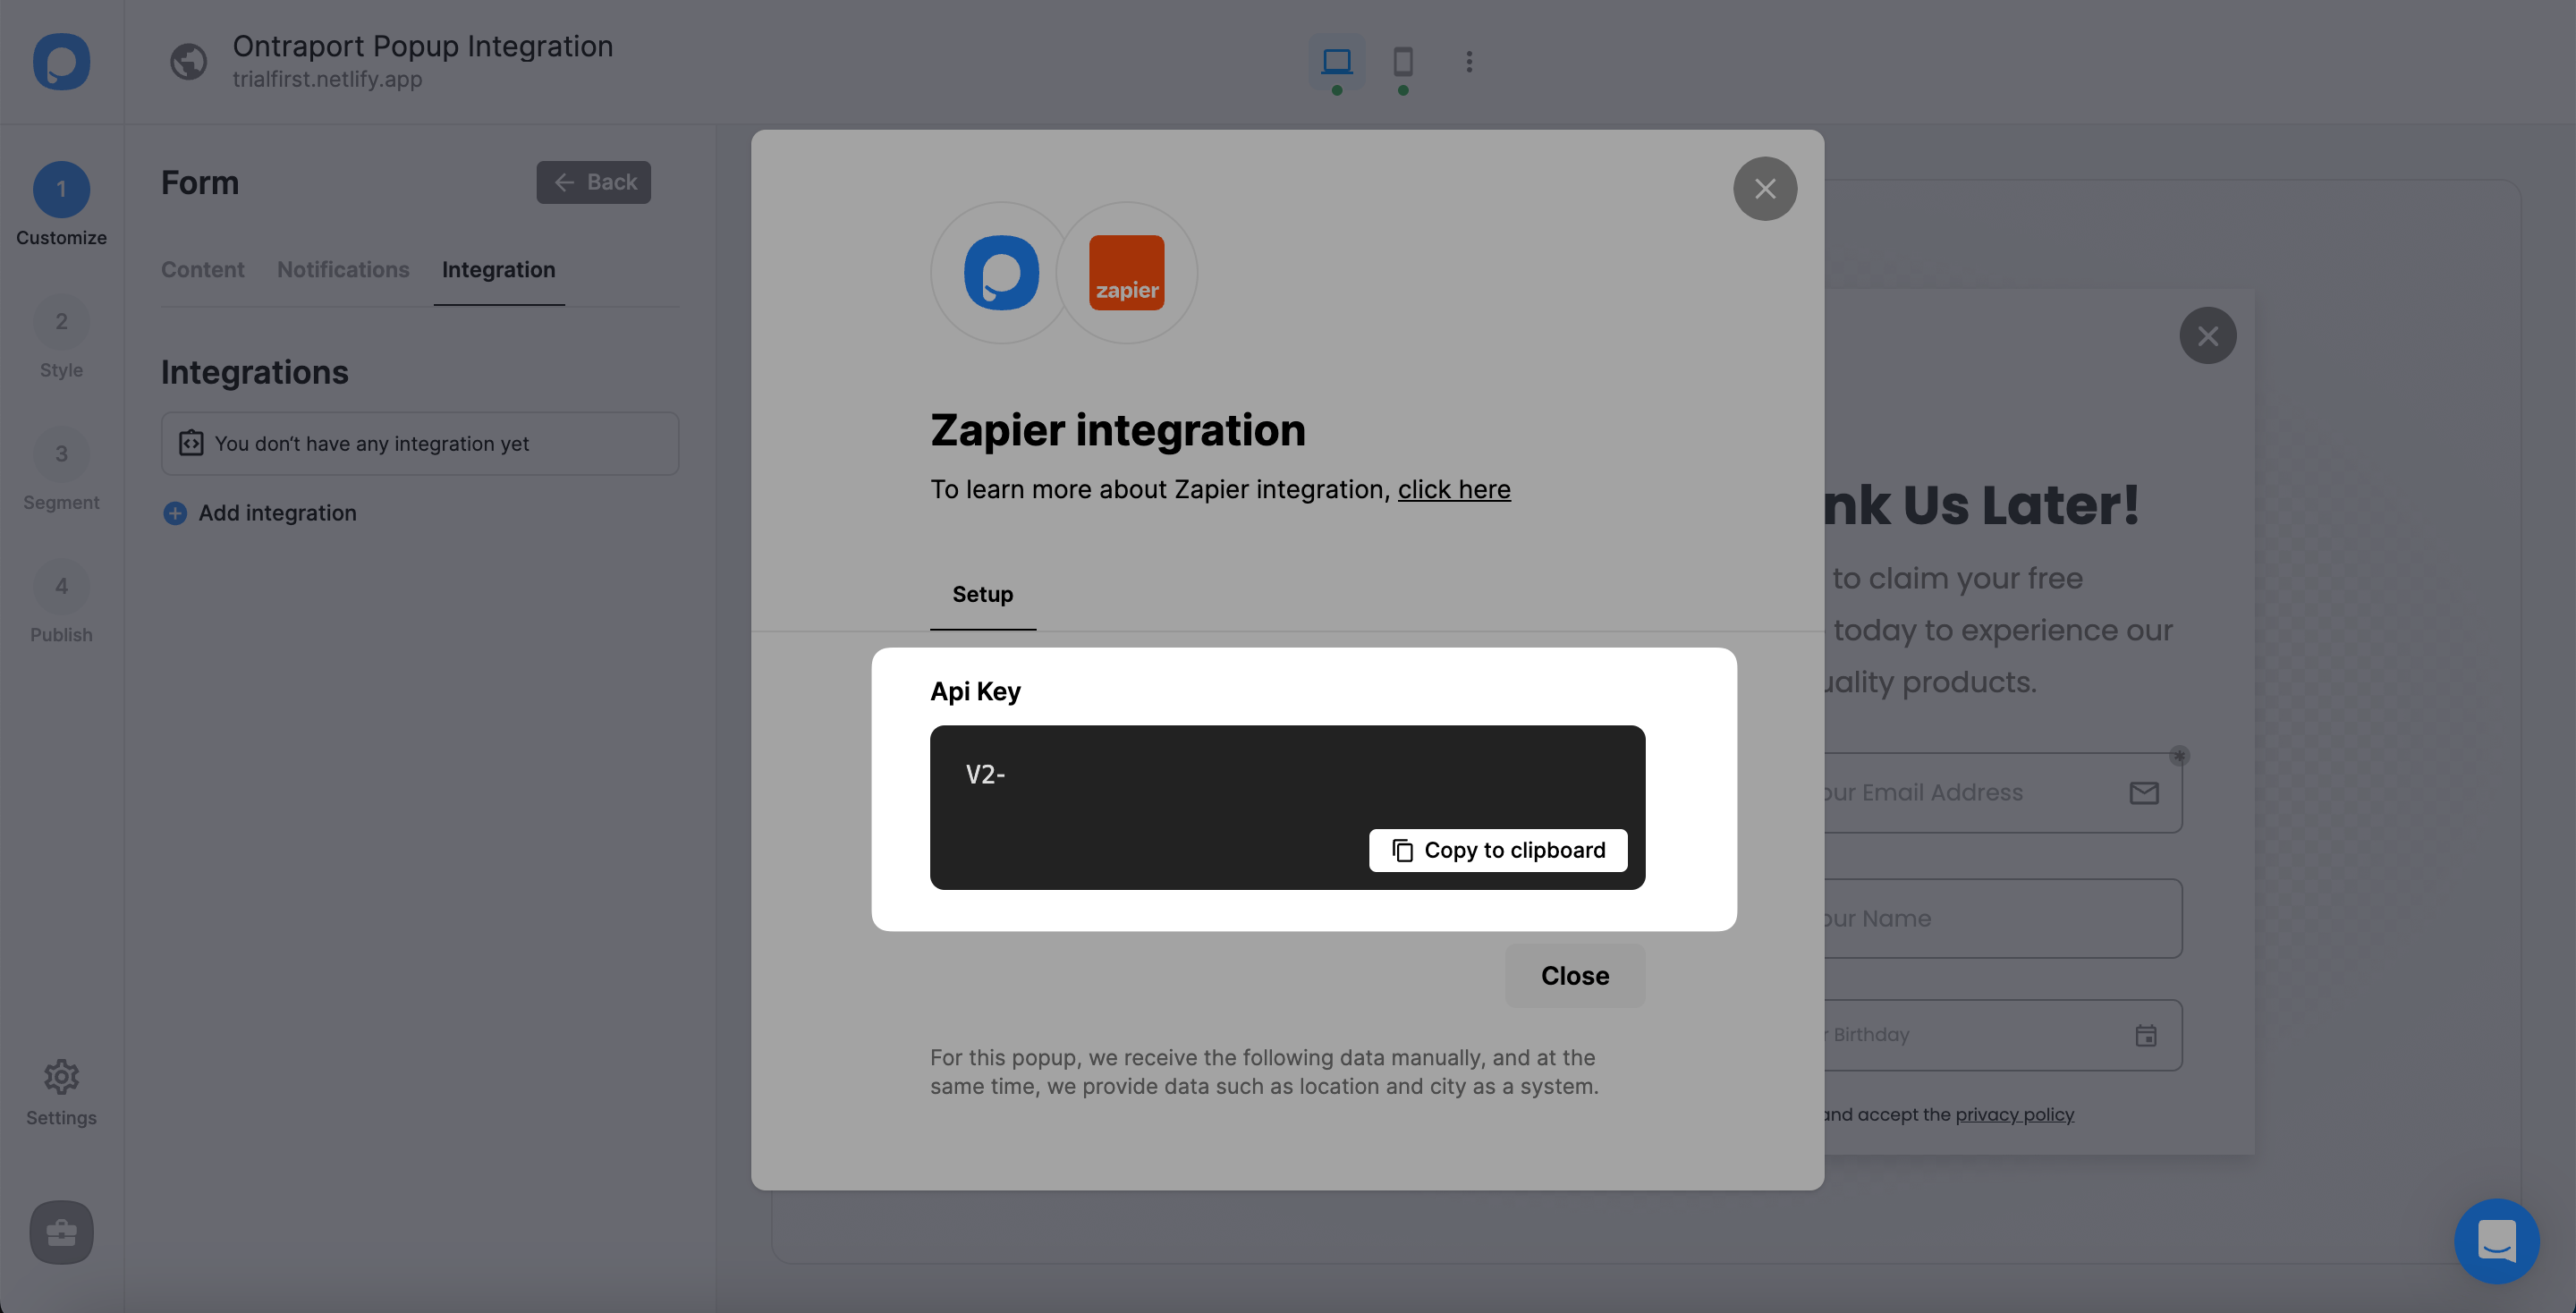
8. Copy your API key on the Zapier option by clicking on the "Copy to clipboard."
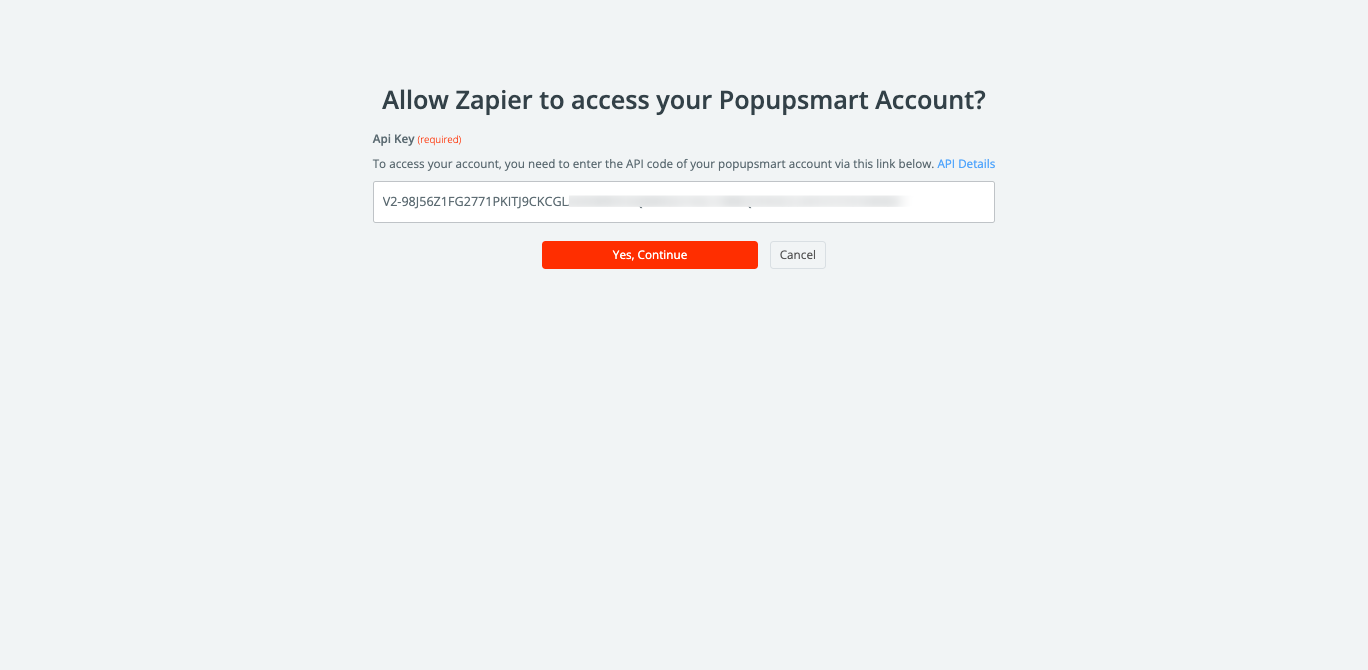
9. Go to Zapier's "Connect an account" page and paste your API key. Click on the "Yes, continue" button.
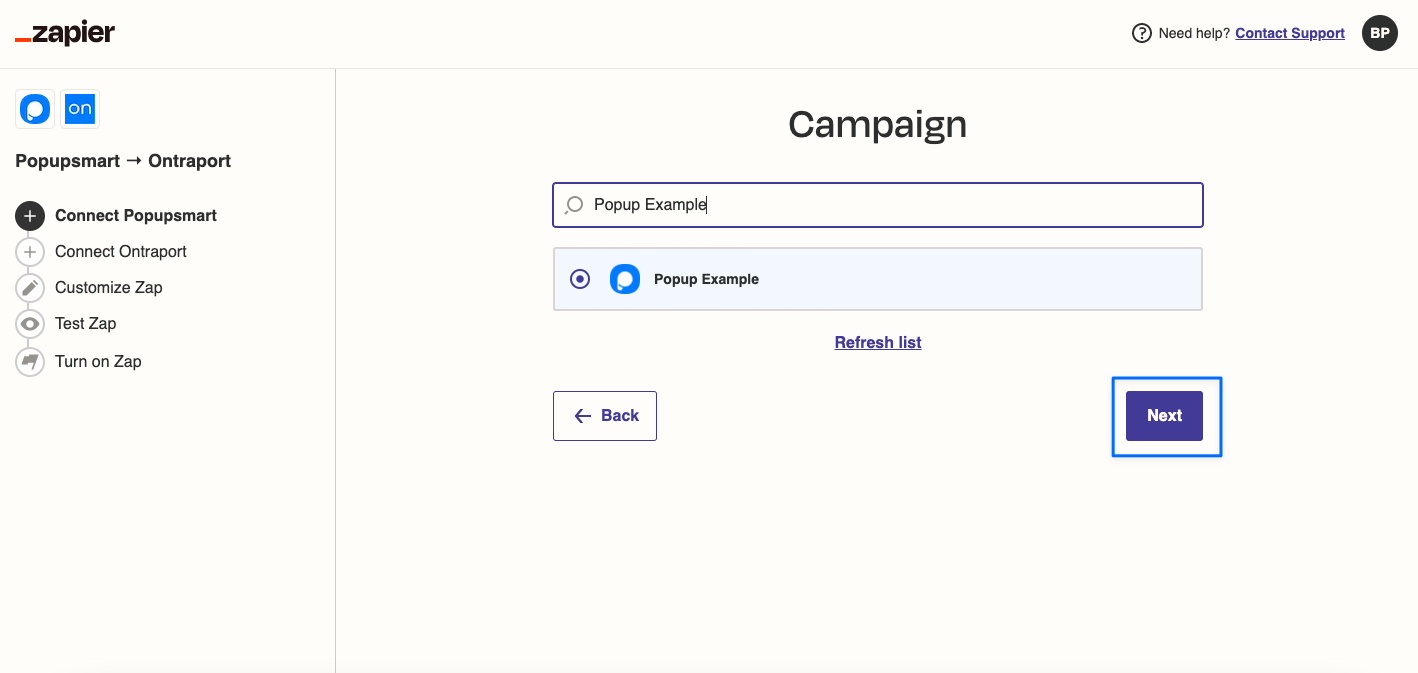
10. Click the "Next" button after connecting your Popupsmart account.

11. You will see your popup campaigns in this section. Select a campaign and click on "Next."
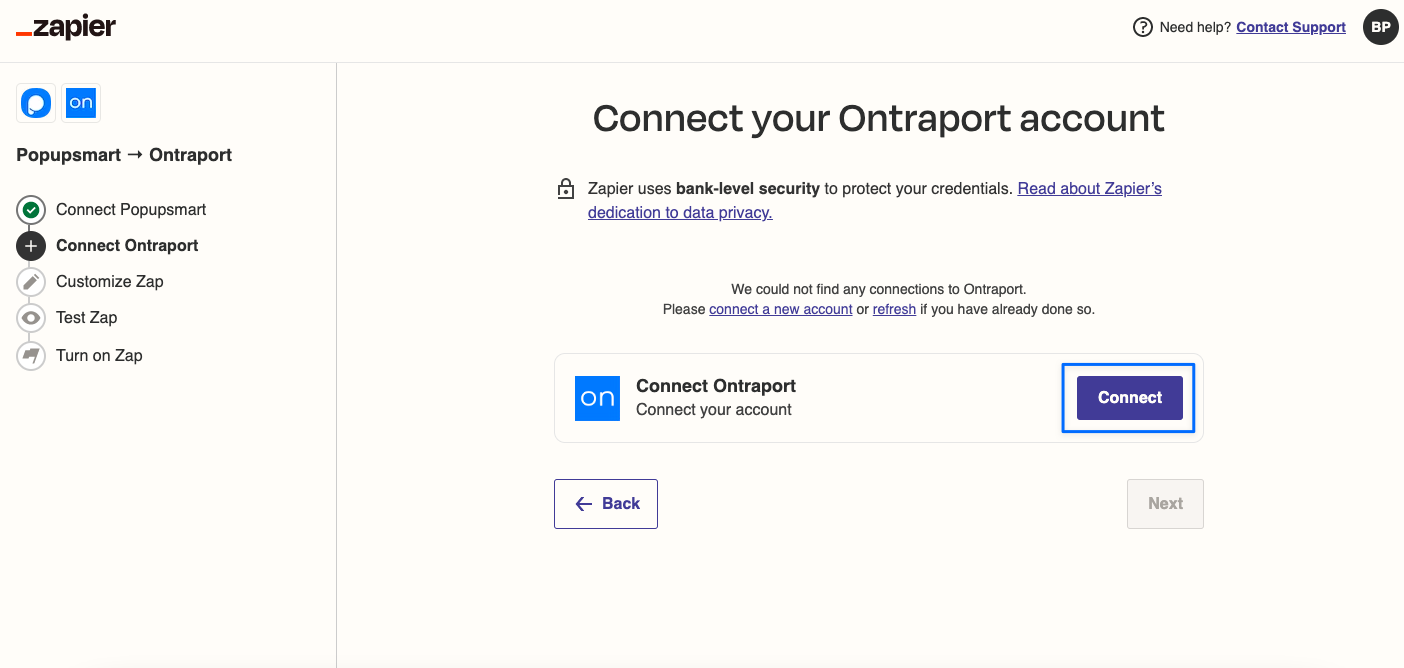
12. Next, click the "Connect" button to connect your Ontraport account.
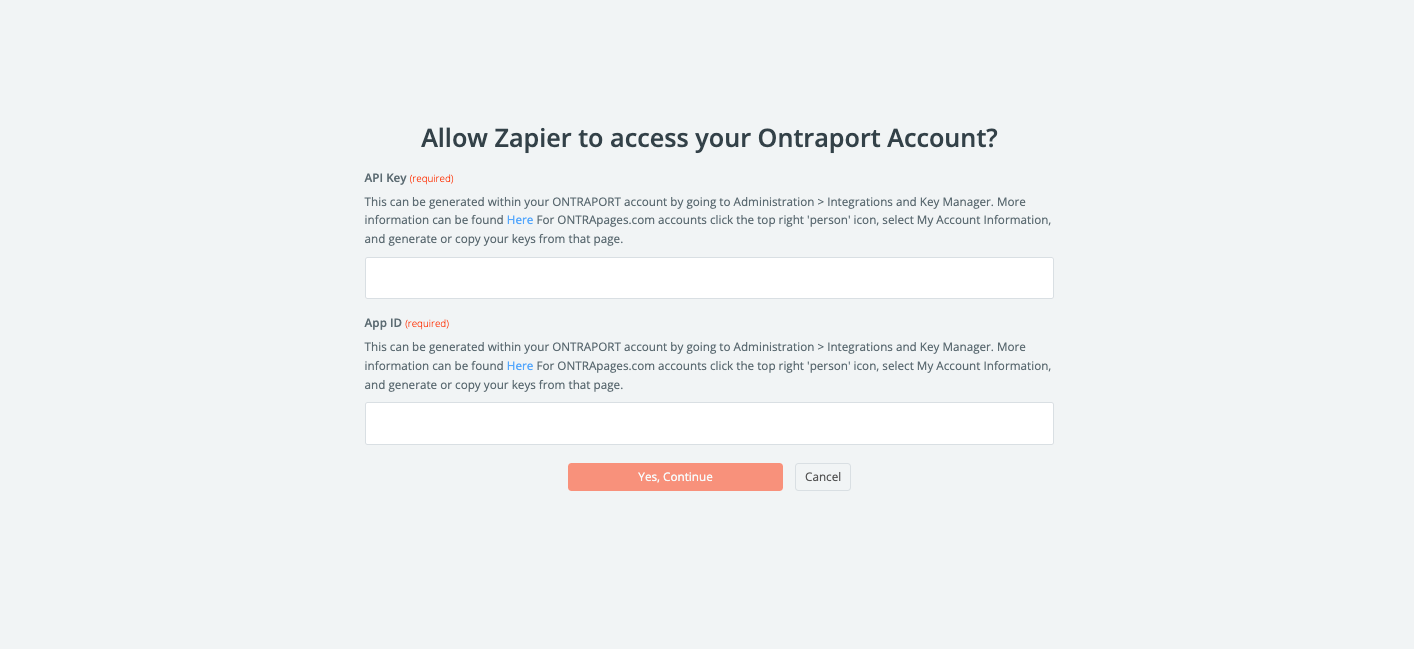
13. "Connect an Account" page will appear once you follow the proper steps. In this section, you must enter your Ontraport account's API Key and APP ID.
14. Go to your Ontraport account's "Administration" part.
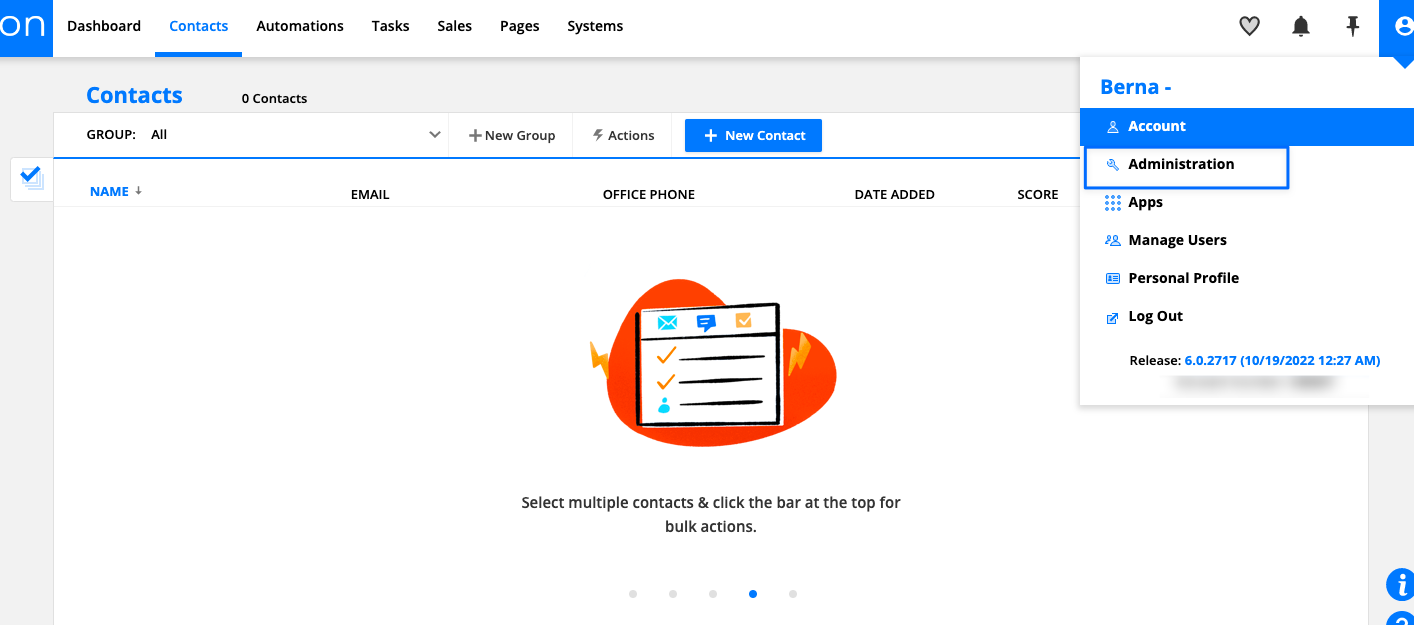
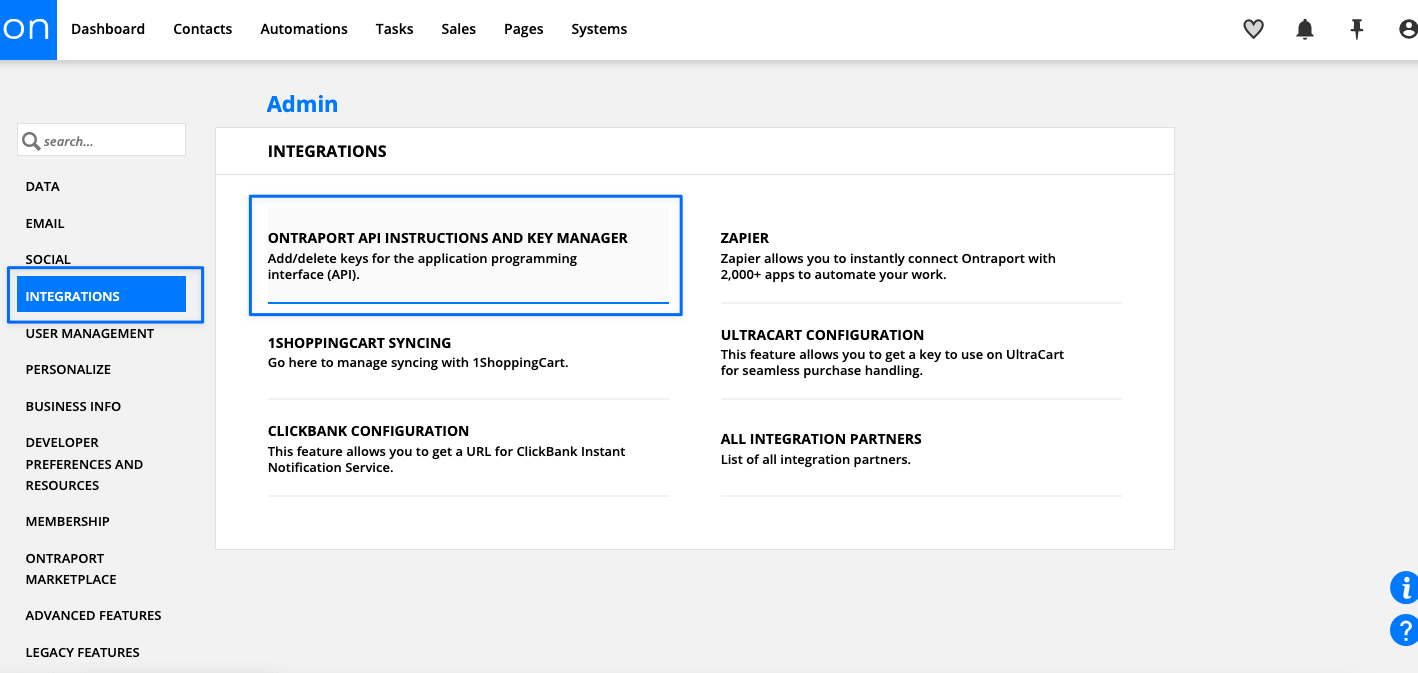
15. Then, go to "Integrations" and "Ontraport Api Instructions And Key Manager" to get your API.
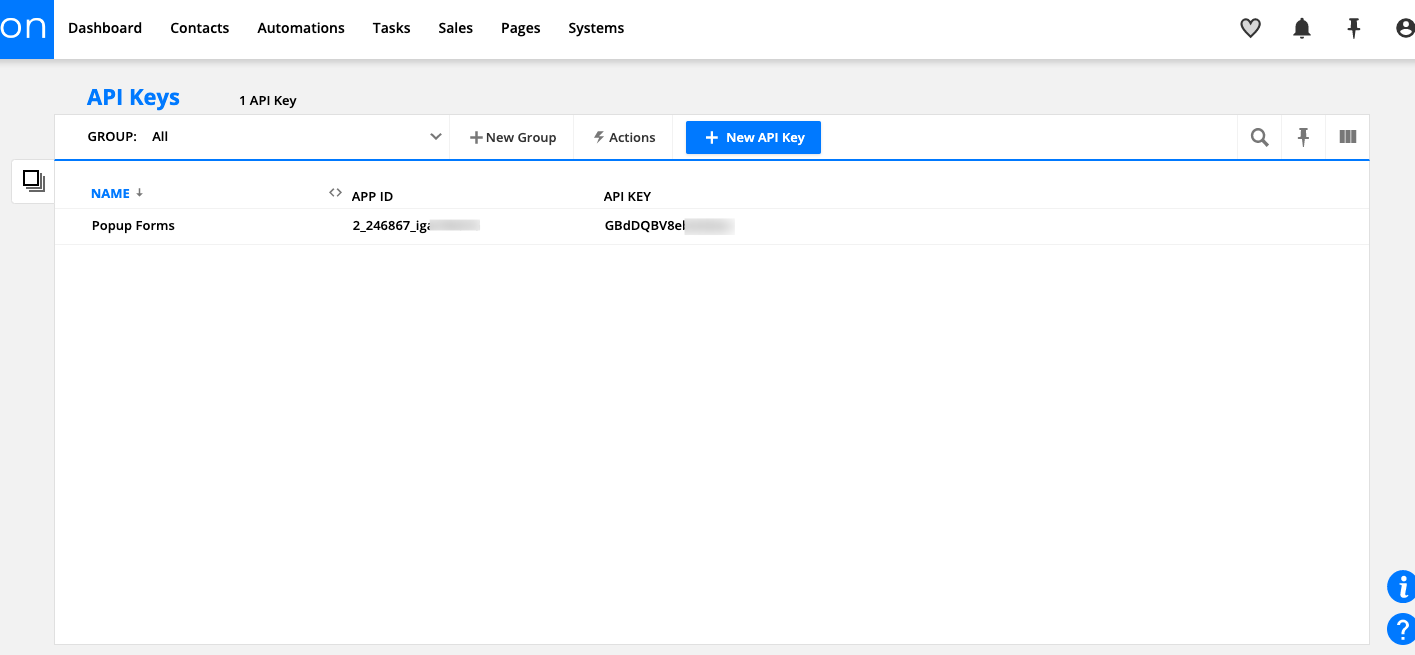
16. In the "API Keys" section, you can find your APP ID and API Key details. Copy them & paste them to Zapier's "Connect An Account" page.
17. Paste your APP ID and API Key to the required inputs on Zapier's "Connect An Account" page. Then, click on the "Yes, Continue" button.

18. Click the "Next" button to connect your Ontraport account.

19. On the "Customize Zap" part, select the fields you want to edit in Ontraport and click on the "Next" button.
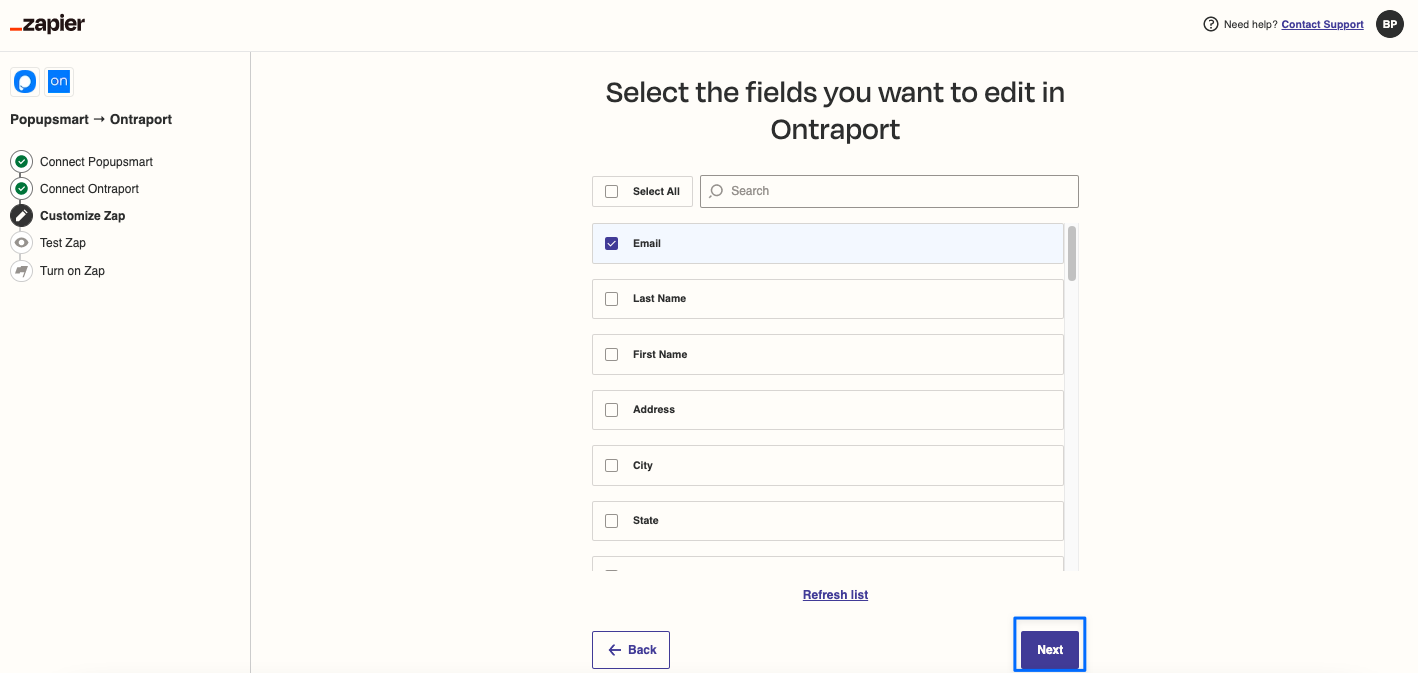
20. Then, you can select map fields from Popupsmart into Ontraport. Set your fields and inputs to connect your data. Then, click on the "Next" button.

21. From the "Test Zap" part, you can test your integration by clicking on the "Send test" button.

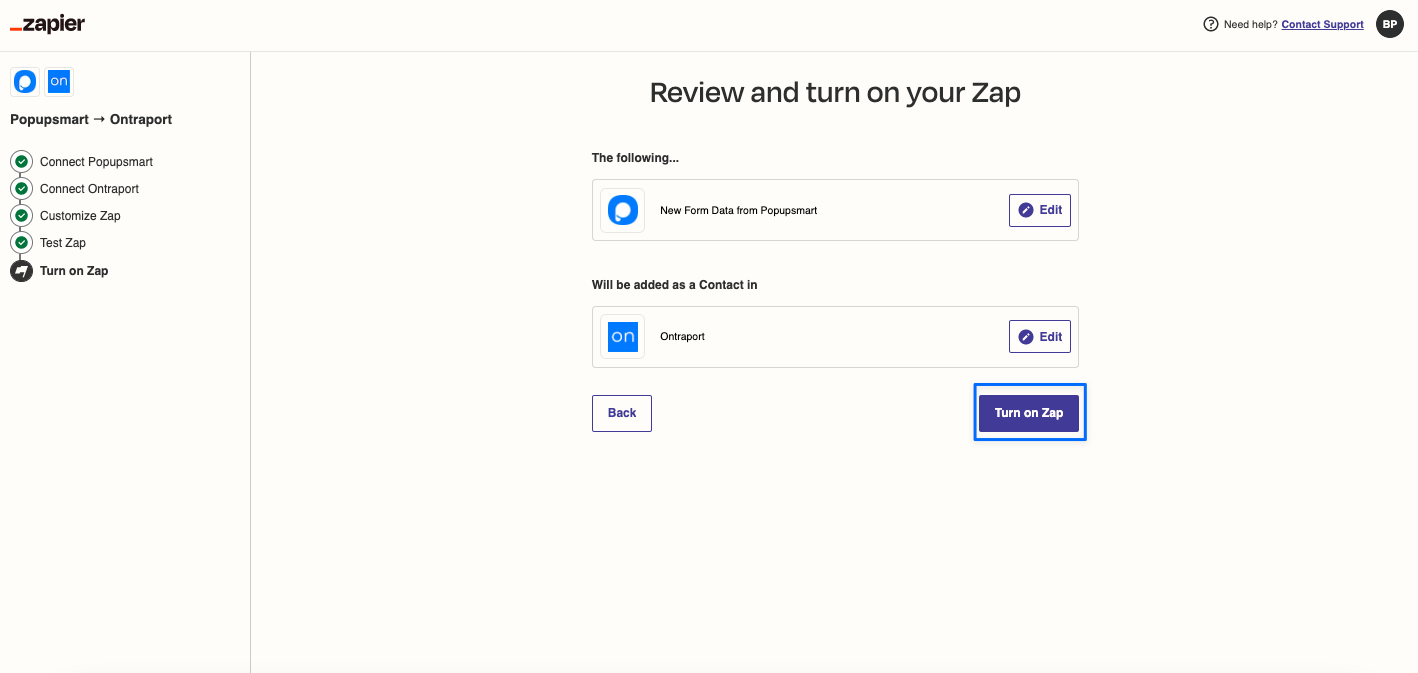
22. After reviewing your Zap, click the "Turn on Zap" button.
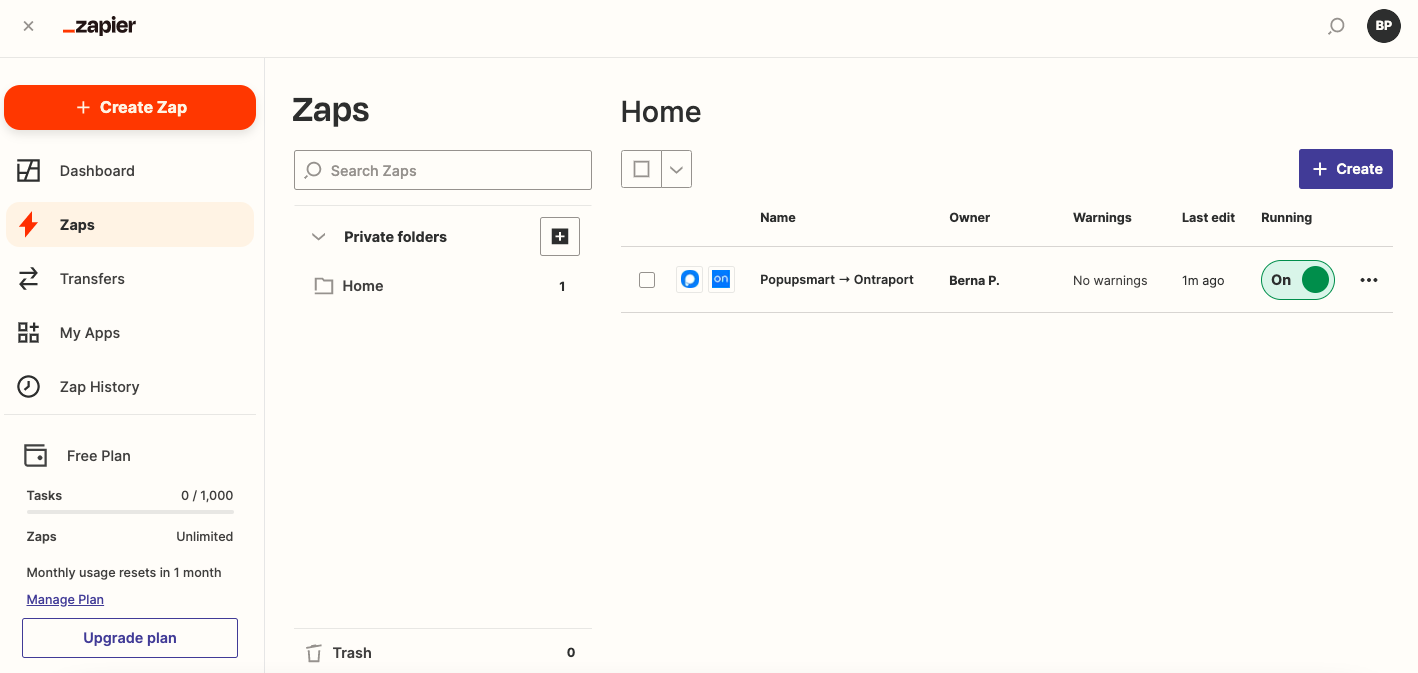
Your Popupsmart & Ontraport integration is now ready to use! You can turn the running toggle off or on by going to the "Zaps" section, as shown below.
Still have questions? Get in touch with us, and we’d be happy to help!
