Adding Custom CSS to Elements
Popupsmart also offers a powerful feature that allows you to apply custom CSS styles to your elements. This gives you the flexibility to create visually appealing popups that match your website's design and branding. In this guide, we will walk you through the process of adding custom CSS to individual elements within your popups.
Let's show you an example of how to customize email input with Custom CSS:
Step 1: Identifying and Selecting the Element
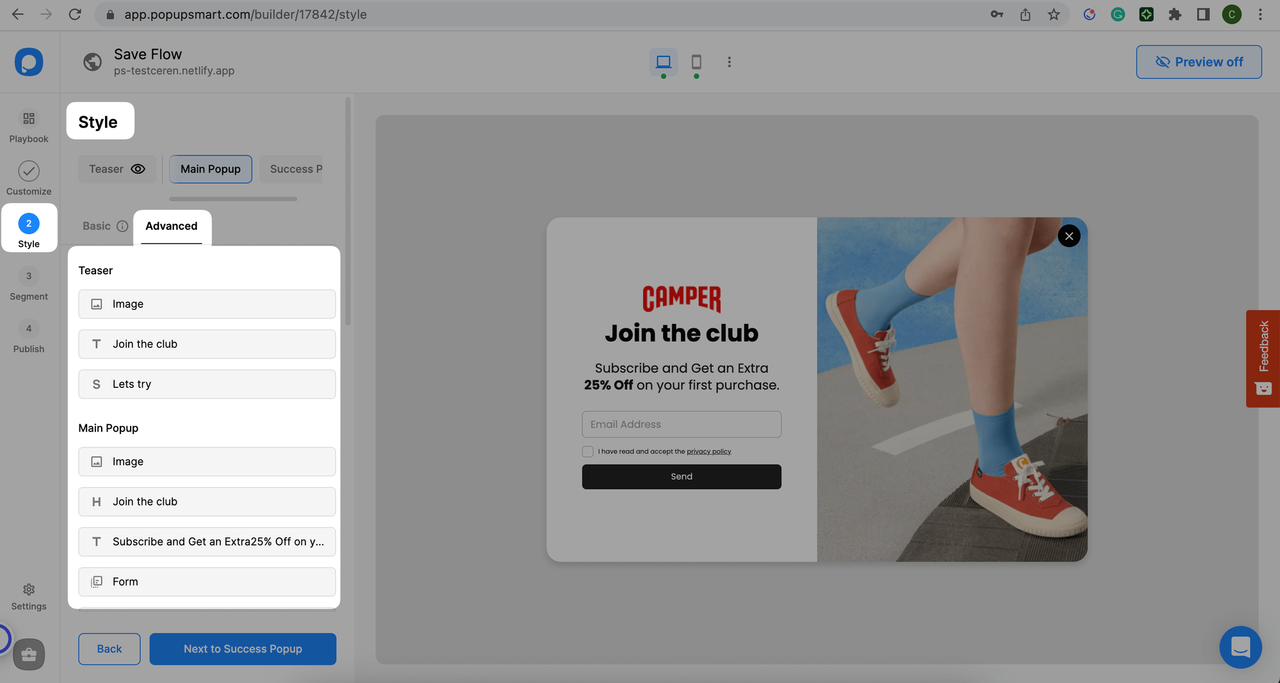
1. First of all, go to Popupsmart's popup builder's "Style" step, as we already mentioned above.
2. Look for the "Advanced" tab within the editor. Click on it to access the advanced customization options.

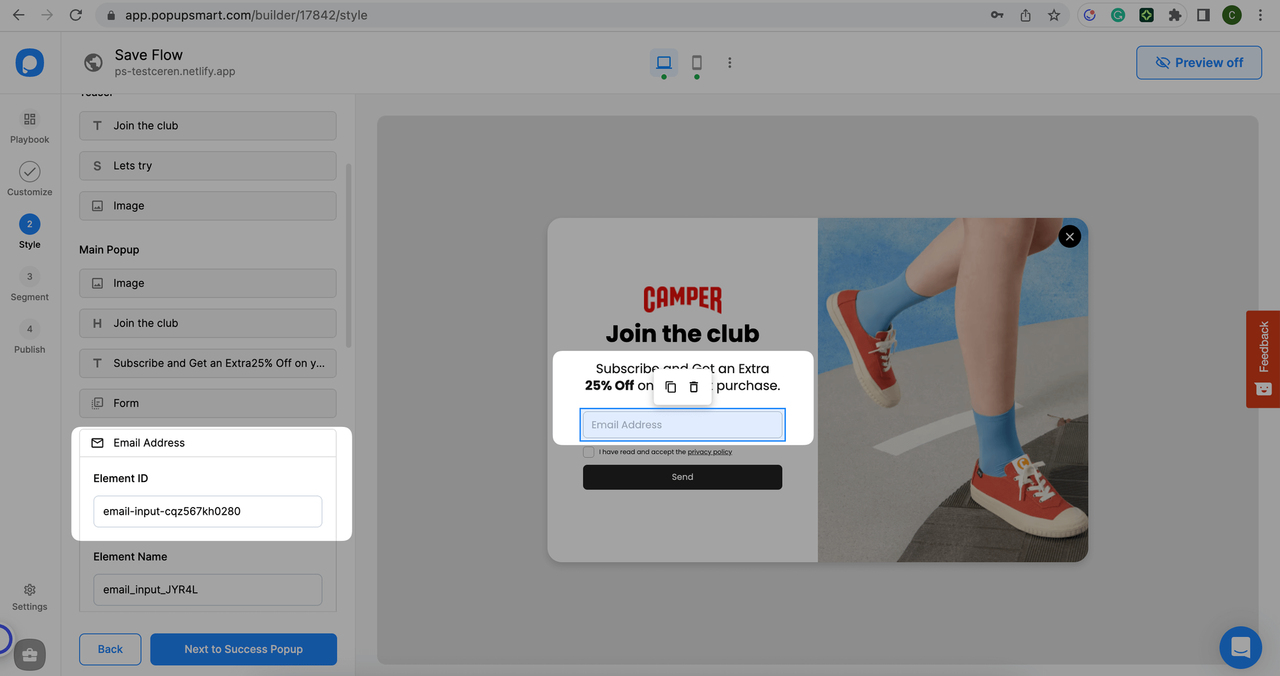
3. In the advanced customization tab, you will see a list of elements that make up your popup Identify the element you wish to modify. This could be the popup headline, button, image, or any other component.
4. Once you've identified the element, copy the element id for customization.

Step 2: Applying Custom CSS Styles
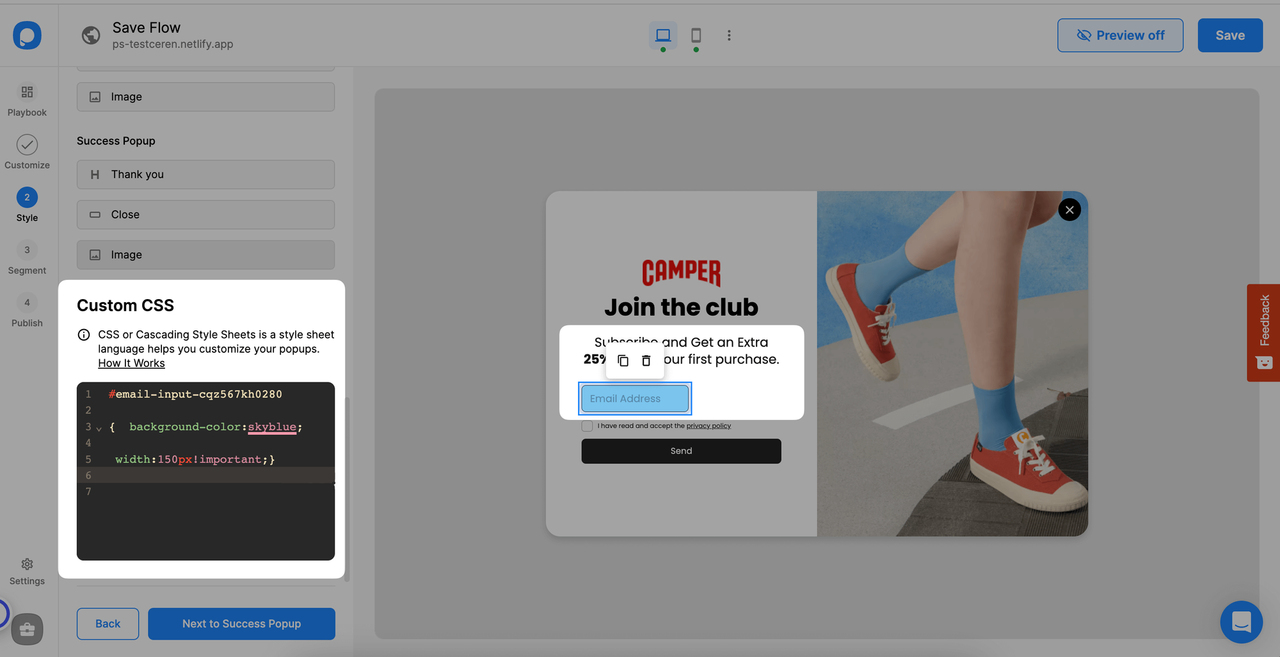
1. After copying the desired element id, you will find a text area where you can add your custom CSS code.
2. Write or paste your CSS code into the designated area. Make sure to follow CSS syntax and rules for proper styling:

For this kind of change, you can use the code below by changing its element id and color name:
3. Experiment with various CSS properties like font size, color, padding, margin, background, and more to achieve the desired visual effect.
4. You can preview the changes in real time within the popup editor to see how they impact the selected element.
💡 Note: Make sure your CSS is correctly formatted. Once you complete all the settings, save and publish the popup. Do not forget to turn the status toggle on to make your popup visible on your website.
Do you have additional questions about how to add custom CSS to your popup? Contact Us!
