How to Edit Shopify Password Page in 2025? (Complete Guide)
Explains what a Shopify password page is and why it’s used (pre-launch, maintenance, restricted access), how to enable/disable it in Preferences, and how to customize it via Theme editor or password.liquid, plus tips for design, conversion, and SEO.
Are you a Shopify store owner struggling to make your password page stand out? An unappealing or generic password page can turn away potential customers before your store even launches. With 68% of e-commerce businesses using pre-launch landing pages to build email lists, a well-crafted Shopify password page is your chance to captivate visitors and boost conversions according to Statista.
In this comprehensive guide, I’ll walk you through how to edit your Shopify password page to align with your brand and drive engagement. Drawing from my five years of experience helping Shopify merchants optimize their online presence, I’ve outlined every step— from enabling the page to advanced customization— to ensure your page converts. Let’s dive in and transform your password page into a powerful pre-launch tool!
What is a Shopify Password Page & How to Create One?

The Shopify password page is a page that customers see when they need to enter a password to access a protected page of the store.
The password page typically includes a field for the visitors to enter the password of the store. If the password is correct, the customer is granted access to the protected part of the store. The password page is an important part of a Shopify store as it prevents unauthorized access to stores’ protected areas.
Apart from these, it is a useful landing page that helps you show your store’s under-construction page when you are not ready to publish it yet. You might grant access to certain visitors by using password-protected pages on your Shopify store.
How to Enable the Shopify Store Password Page?
If you haven’t created a password page for your Shopify store, first, you need to enable it quickly.
To enable the password page, follow these instructions on how to create a password protected page on Shopify:
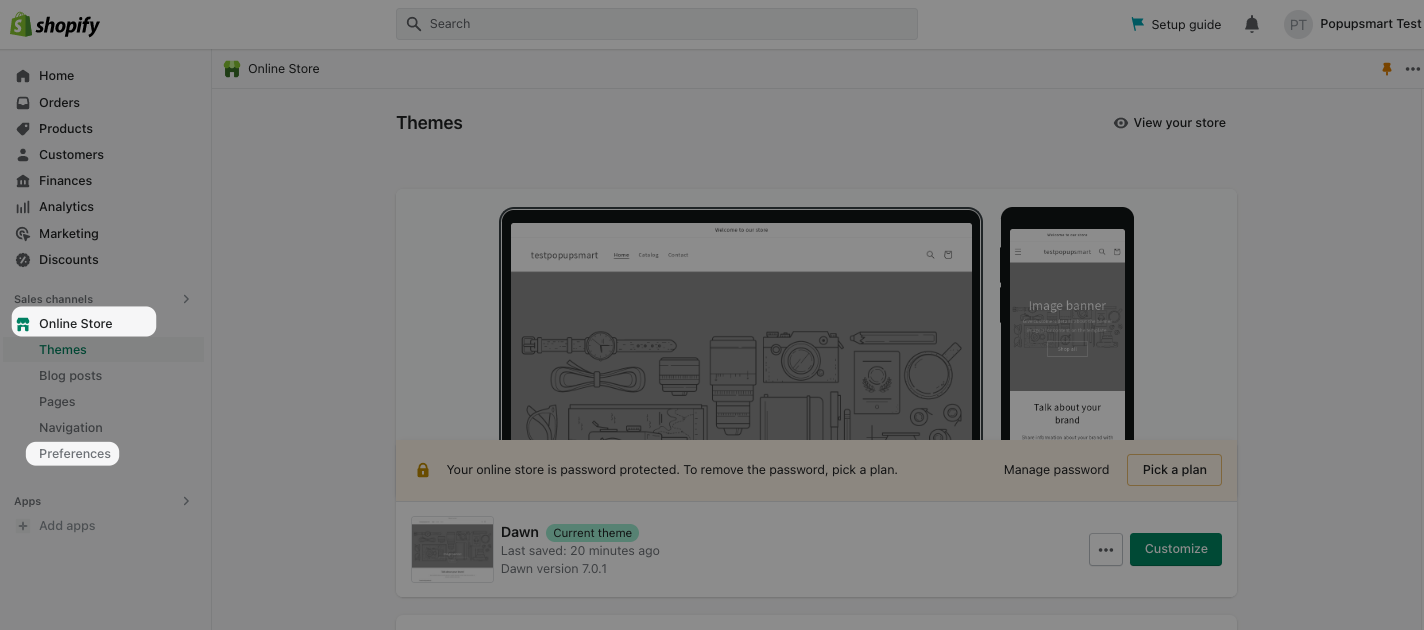
Step 1: Go to your Shopify admin panel and click on the “Preferences” under the “Online Store” section.
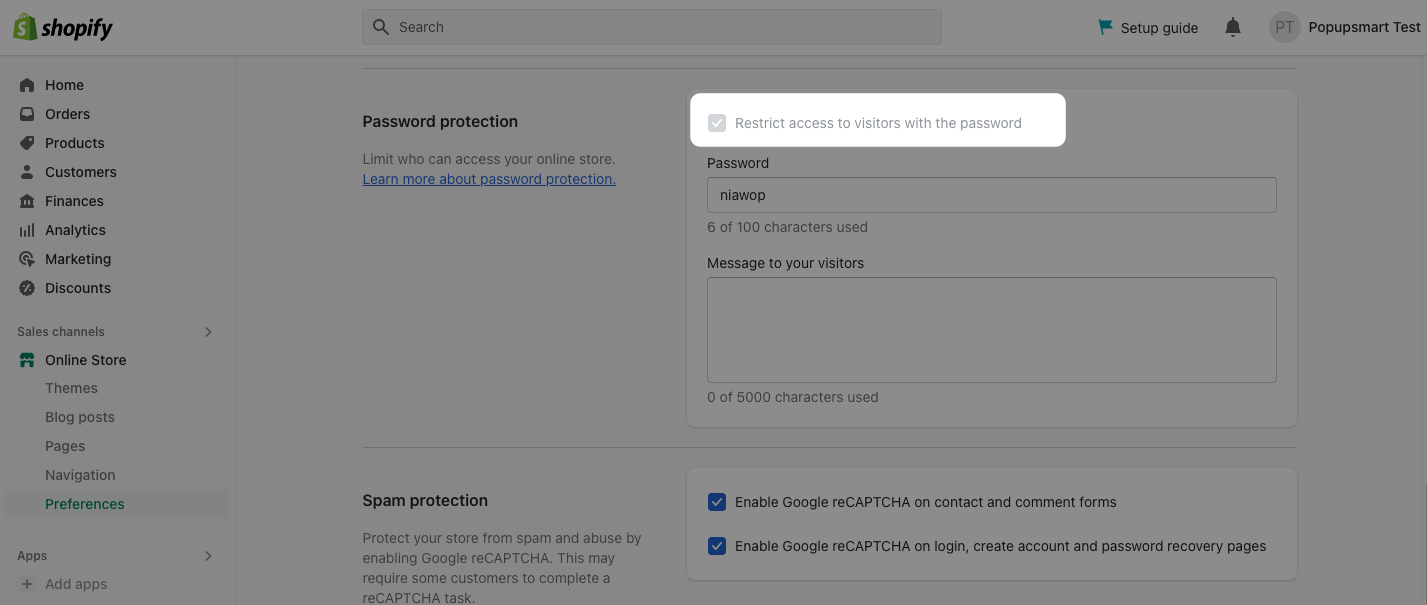
Step 2: Scroll down to the “Password Protection” area and select the “Restrict access visitors with the password” box as shown below. That way, your Shopify store will be password protected, and visitors will not be able to access it without entering a password.
Step 3: Then, you can enter your password to the “Password” section and form a message to show your visitors in the “Message to your visitors” part. When you are finished making the required adjustments, click on the “Save” button.
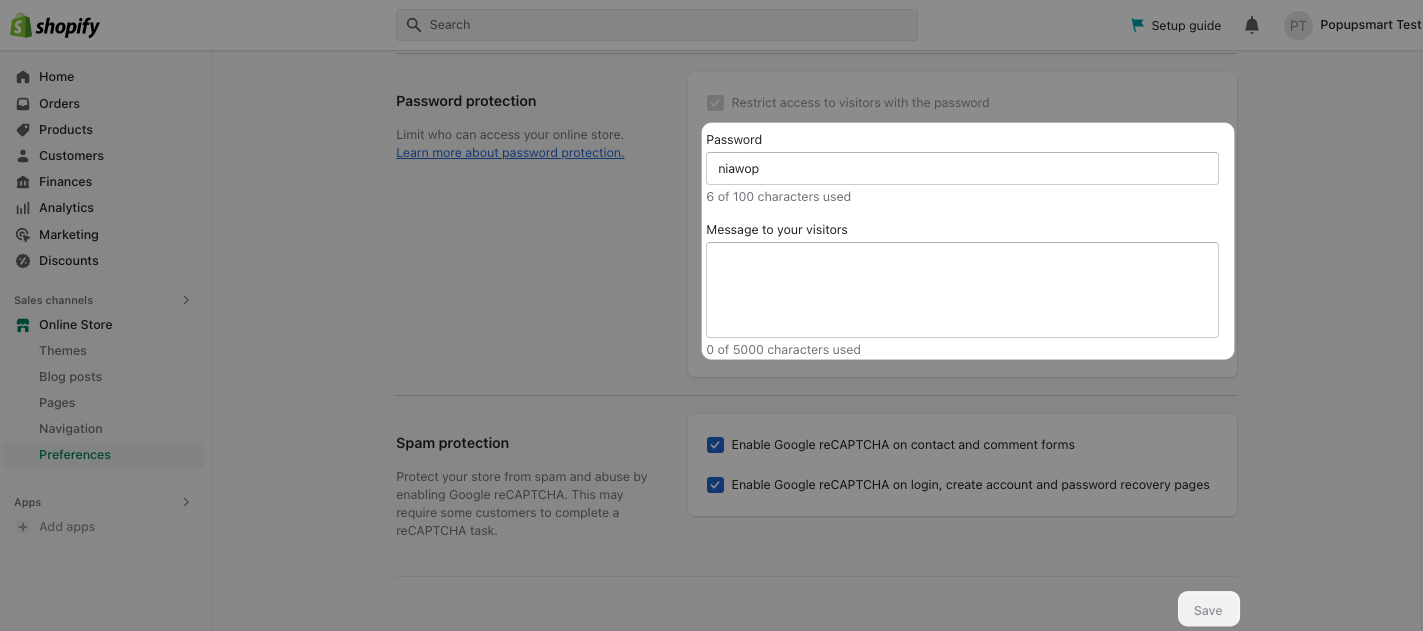
You don’t have to add a message to your visitors; you can skip this step if you want.
Now your Shopify store is ready to be password protected, and you will be able to show a password page to your visitors.
How to Customize Password Page on Shopify?

There are different ways to customize Shopify password pages, and we explained them step by step. By following these steps, you can customize Shopify stores' password pages with ease.
Important: When you activate your Shopify store’s password page, only this page will be visible to search engines. That way, product pages will be hidden and won’t appear in search results.
1. Editing Password Page from Shopify Themes
Step 1: Go to “Online Stores” and “Themes” from your Shopify admin panel.
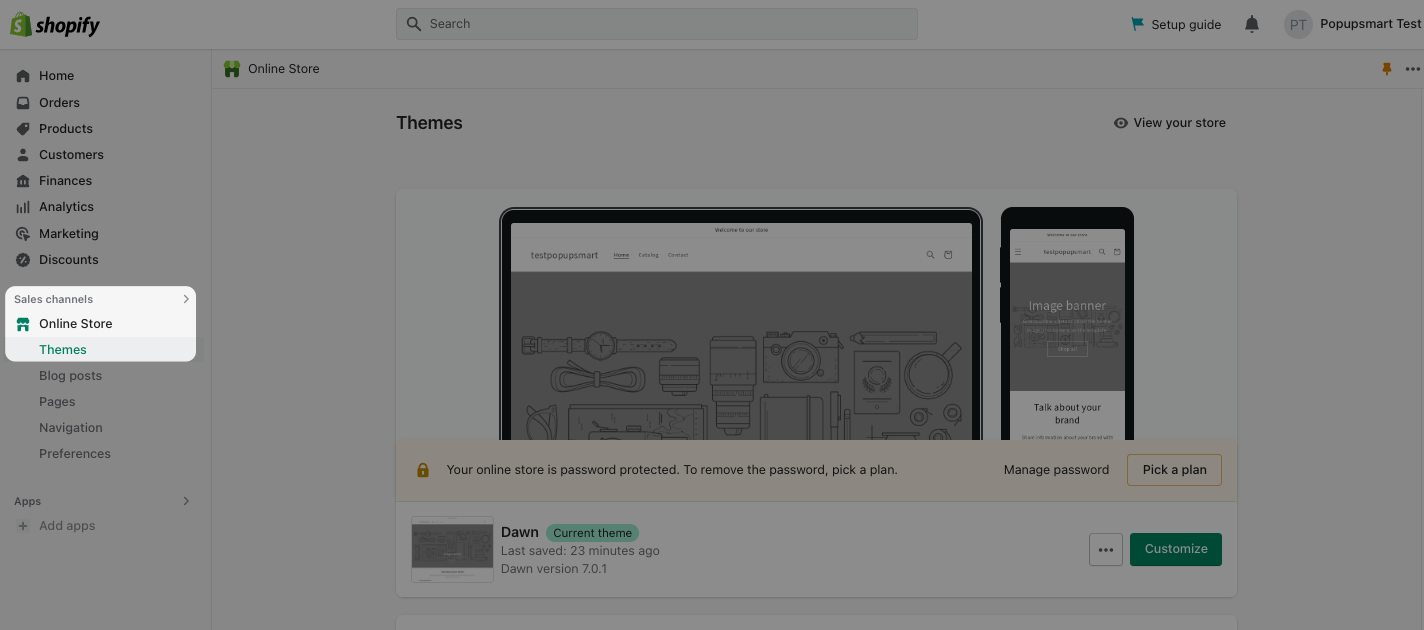
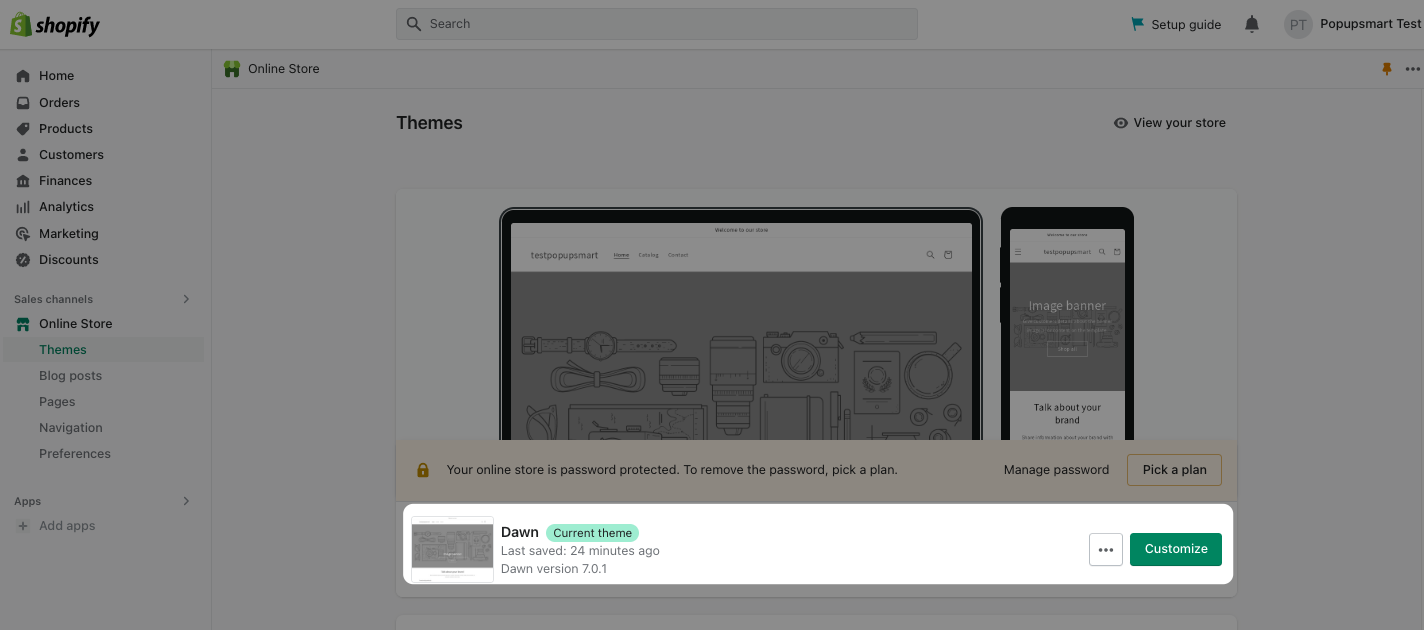
Step 2: Select the theme you want to customize, and click on the “Customize.”
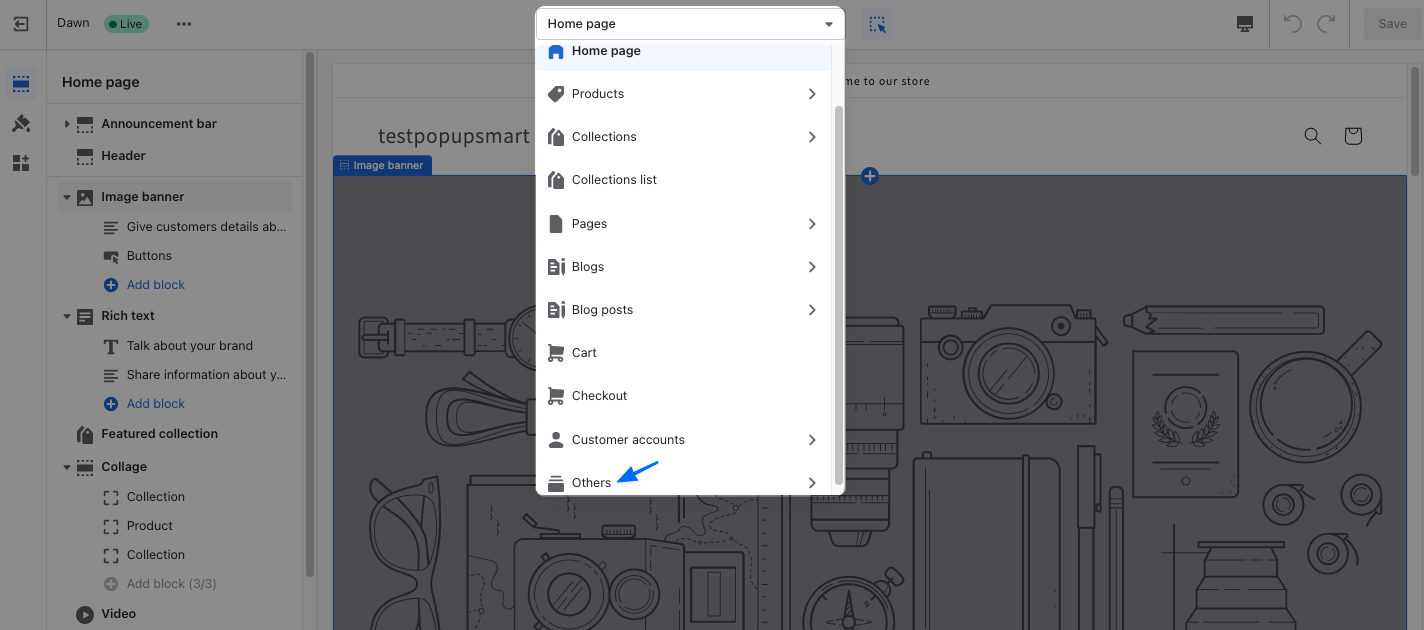
Step 3: Click the drop-down menu at the top and Select “Others” first and choose “Password.” If the Password page is absent from the menu, you need to activate your password page first, as we explained before.
Step 4: Select the section you want to adjust from the left side. Most themes feature parts for the header, content, and footer that can be customized. You can customize each part of your password page by adding images or text.
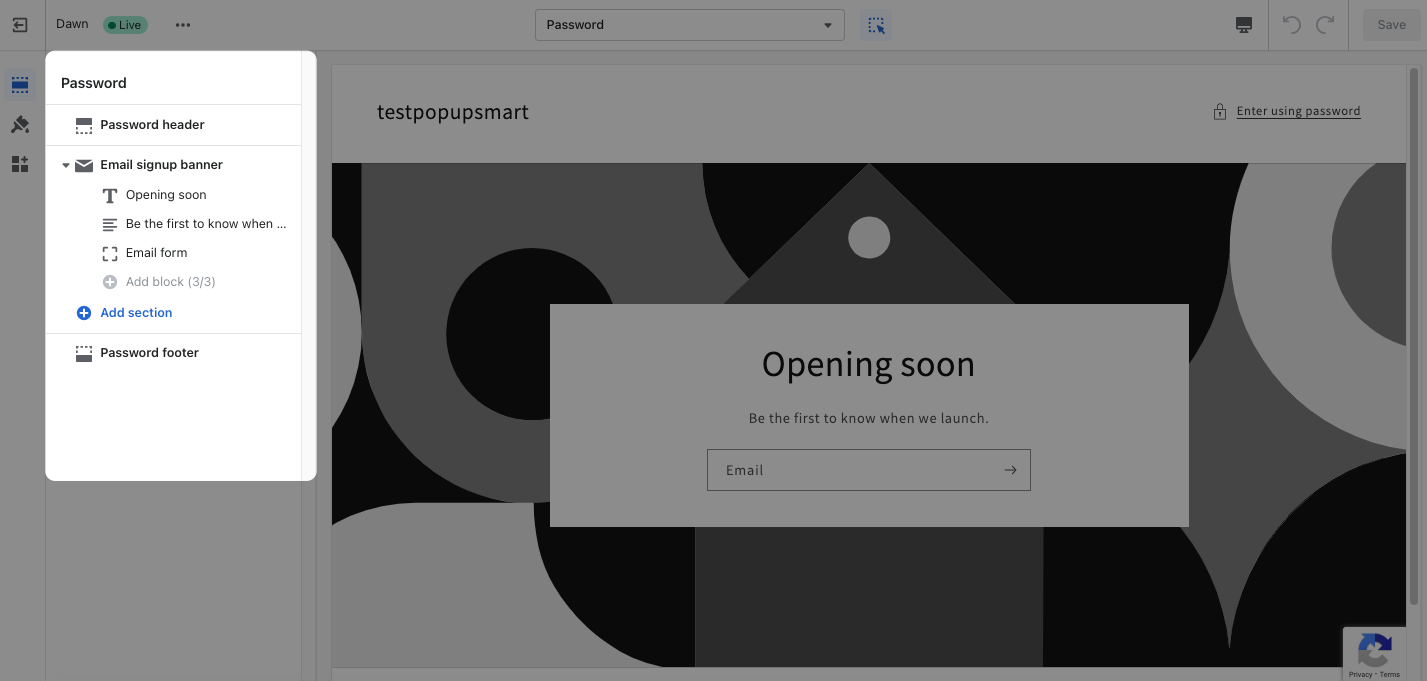
You can add new elements and customize the elements added to your theme independently on this part.
From this section, you can also add a background image to your password page or add your logo.
Don’t forget to add a background image that fits your brand identity and looks appealing.
Step 5: From the “Theme Settings”, you can customize your password page’s colors, typography, layout, buttons, variant pills, inputs, product cards, collection cards, blog cards, content containers, media, and other elements.
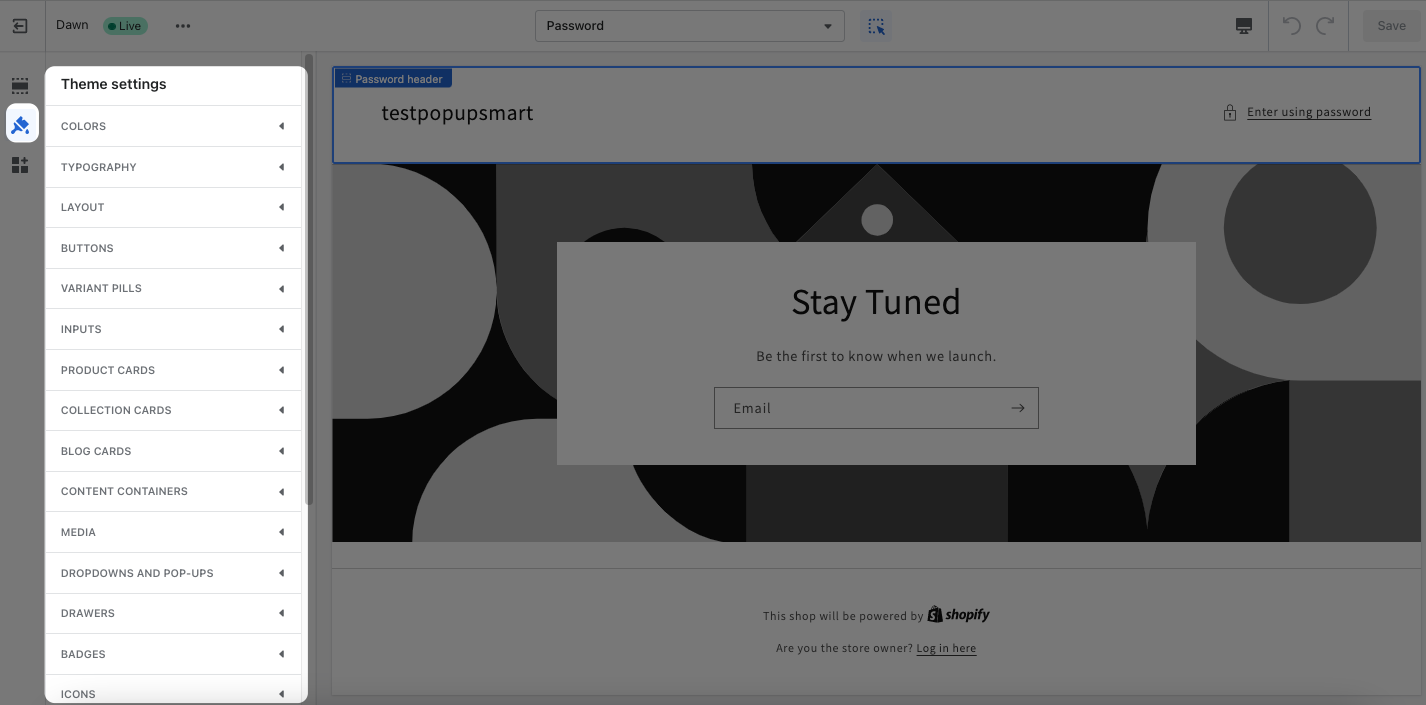
By clicking on each element, you can customize them, considering your website’s style and needs.
Note that these adjustments will be applied to your whole theme.
Step 6: When you finish adjusting the password page’s look, click on the “Save” button.

2. Editing Shopify Password Page with the password.liquid
By adding a custom code to the password.liquid section of your Shopify store, you can customize the password page of your website as well.
Follow these steps to customize your password page by editing your password.liquid templates’ code:
Step 1: First, go to your Shopify admin panel and click the “Themes” on the Online Store section.
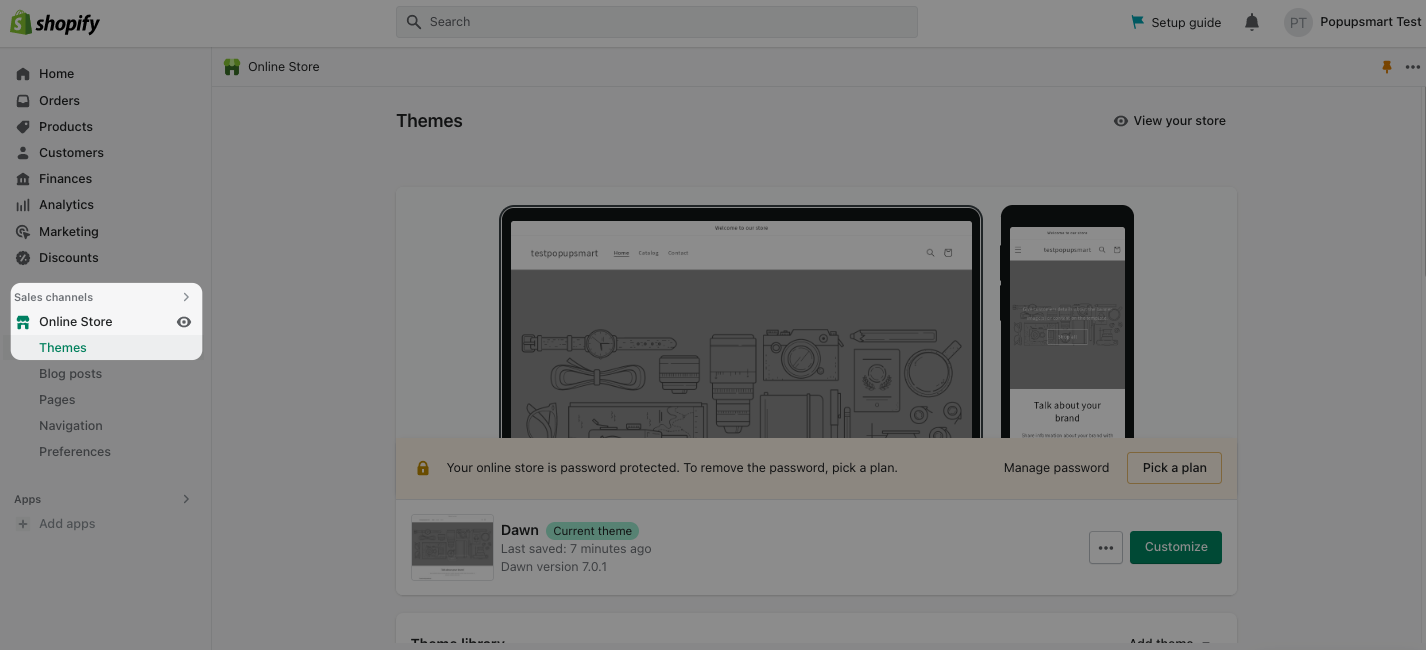
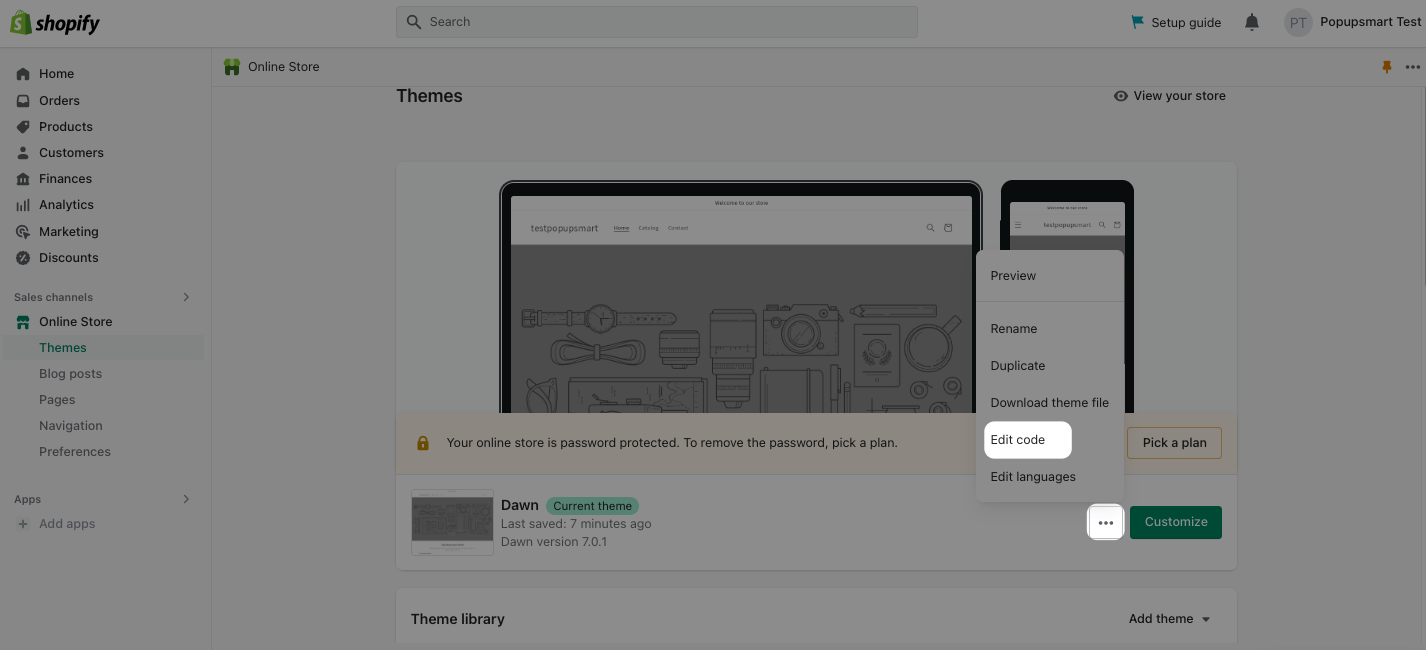
Step 2: Go to the theme you want to edit and select “Edit code” from the settings menu.
Step 3: Then, select password.liquid from the menu.
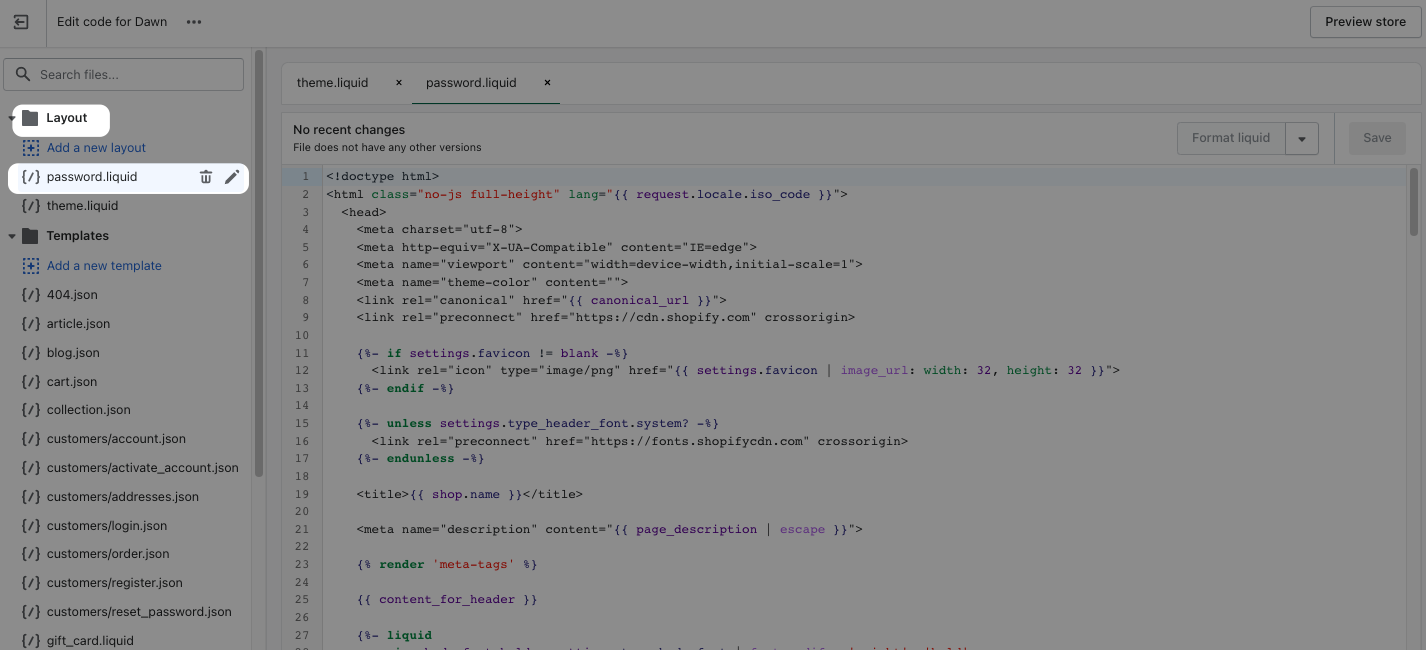
Step 4: In this section, you can see your theme’s Liquid tags that form your password page.
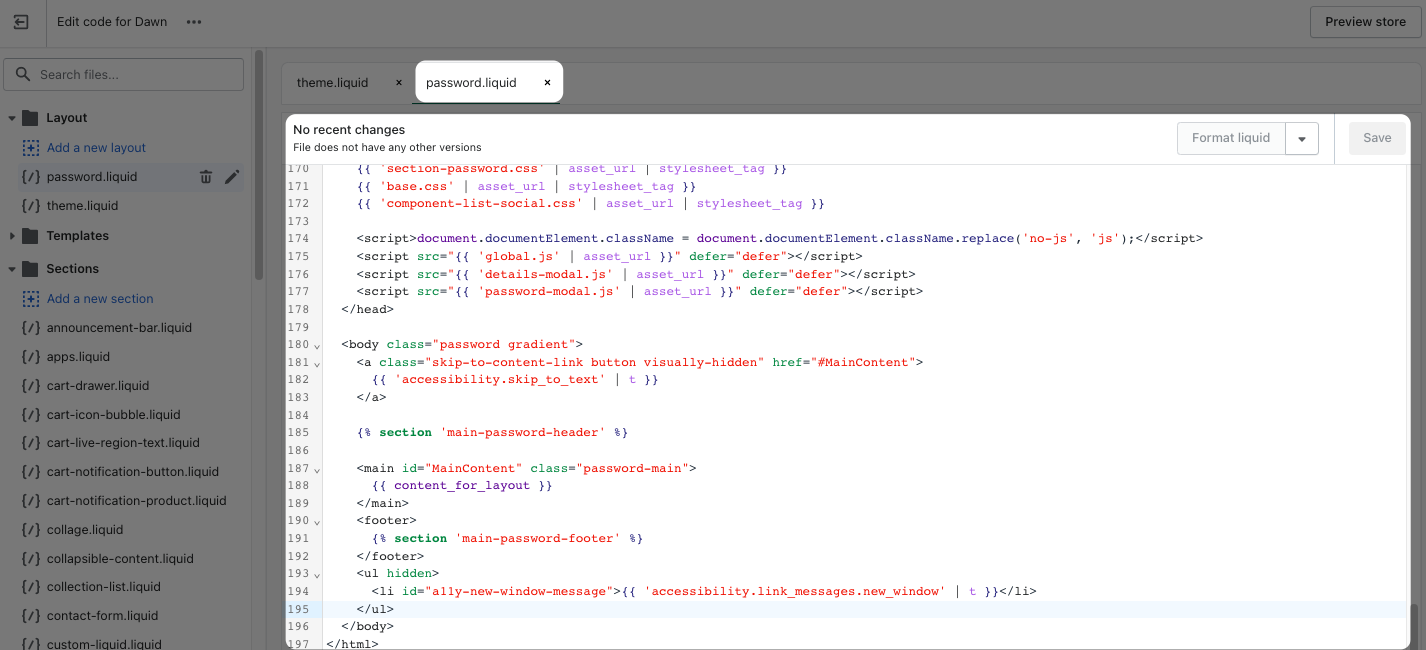
Liquid tags of your password page can be like these:
{% section 'password-header' %}
{% section 'password-content' %}
{% section 'password-content' %}
Step 5: From the “Sections” part, you can select these elements of your password page. These elements can be main-password-footer.liquid and main-password-header.liquid. You can select one of them and modify its code according to your needs.
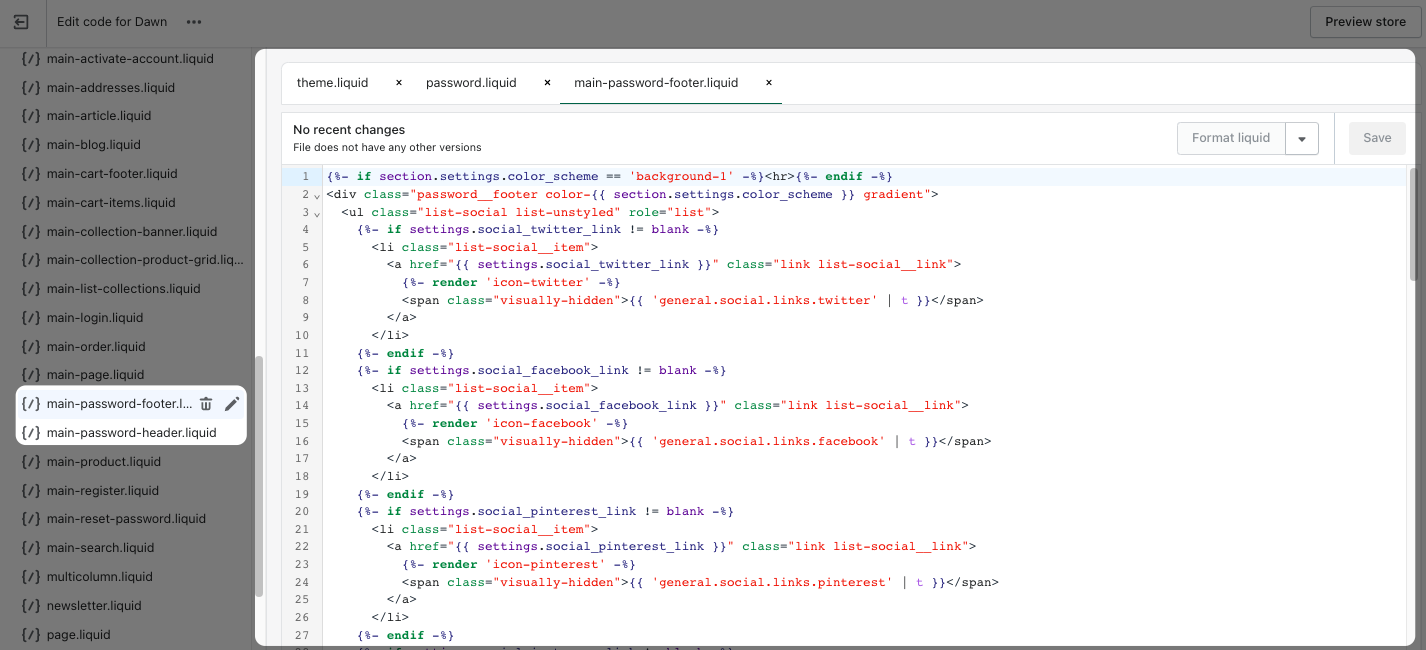
For example, you can display a custom message on your password page by using a code like this:
{% if shop.password_message and shop.password_message != ‘’ %}
{{ shop.password_message }}
{% else %}
<p> Stay tuned for our new store…</p>
{% endif %}
You can use various codes and modify your Shopify password page from the password.liquid section as you want.
Click on the “Save” button when you finish customizing your password page’s theme code.
What Makes a Winning Shopify Password Page?
![]()
A good Shopify landing page is one that converts. You want your visitors to convert into customers, and you want that conversion to happen as quickly as possible.
If you plan to add a password page to your Shopify store, it should be a landing page that is converting and engaging. You need to ensure that it looks professional and appealing to your visitors.
Here are a few factors that make a proper password page template on Shopify:
➤ Password pages should be easy to navigate and mobile-friendly so that both desktop and mobile users can experience them appropriately as well.
➤ It needs to be well-designed and aesthetically pleasing. Also, ensure that it suits your brand’s style and identity overall.
➤ An engaging headline is crucial to grab your visitors’ attention, so adding one with a clear call-to-action can be useful.
➤ Adding a Shopify countdown timer on password page can be great to create a feeling of excitement and announcing the opening date of your store.
➤ Make sure your landing page has the quick information visitors need about your products at first glance. Use a clear copy that indicates the aim of your password page and inform your visitors.
➤ If you want to gather emails and interact with your visitors through email, you can add email input to let them know when your store is opening.
➤ Social media platforms of your store can be added to this page so that you can increase your social accounts’ engagement and redirect your users there to interact with them more.
➤ The password you set to your page should be secure if you don’t want it to be cracked.
Optimizing Your Password Page for SEO
To drive pre-launch traffic, optimize your password page for search engines:
- Meta Description: Write a compelling 160-character description (e.g., “Discover how to access our exclusive Shopify store launch!”).
- Keywords: Include terms like “Shopify password page” and “pre-launch store.”
- Alt Text: Add descriptive alt text to images (e.g., “Shopify admin panel password settings”).
- Social Sharing: Add buttons to encourage sharing on social platforms.
💡 Pro Tip: Use a tool like Yoast SEO to analyze your page’s SEO score.
Wrap Up

Now you can edit your Shopify password page as you like! Thanks to this complete guide for how to edit Shopify password pages, you can add your Shopify store’s password page and customize it from the themes and password.liquid section.
Each Shopify theme might have various elements that can be customized, so you can make necessary changes to your store’s password page to make it look more engaging.
Depending on your business needs for using a password page, you can add new fields to interact with your visitors.
We hope you enjoyed this article! If you have any questions or comments related to this topic, feel free to share them with us in the comments area! 🤓
Frequently Asked Questions

Why is Shopify Password Page Used?
There might be different reasons to use a Shopify password page. Some of the most common scenarios for using a Shopify password page are:
- If a store is getting ready to be launched and is not ready yet
- Store is in the maintenance process, and the final touches are being made
- Trying out the Shopify features to see if it fits business needs and interests.
How to Change Shopify Password Page Background?
The Shopify password page’s background image is crucial, and customizing it is convenient. You can click on the background on your password page’s template customization section, and customization options will appear.
You can add a new image, customize image overlay opacity and banner height, set desktop content position, and make various adjustments on the “Sections” part of your Shopify theme. Make sure it looks appealing and responsive on both desktop and mobile devices, and save your changes when you finish.
How Do I Remove The Shopify Store Password?
If you want to remove your Shopify store’s password, you need to go to the “Online Store” section and select “Preferences.” Then, scroll down to the “Password protection” part and uncheck “Restrict access to visitors with the password.” When you are finished, click the “Save” button.
Apart from this method, you can also remove your password page by going to the “Themes” section and clicking “Remove” on the “Your online store is password protected” banner. That way, your password protection will be removed as well.
Note that removing your Shopify store is possible if you choose a pricing plan. If you are using a trial store, it is not possible to remove your store’s password.
Visit our other blog posts about Shopify while you are here:

How would you rate your experience with this article? 😊