How to Create Shopify-Based Email Automation
Shopify-based email automation allows you to engage with visitors to your Shopify store through personalized, targeted, and timely emails.
To create email automation, follow these steps:
1. Sign in to your Popupsmart account.

2. Go to the Email Automations tab.
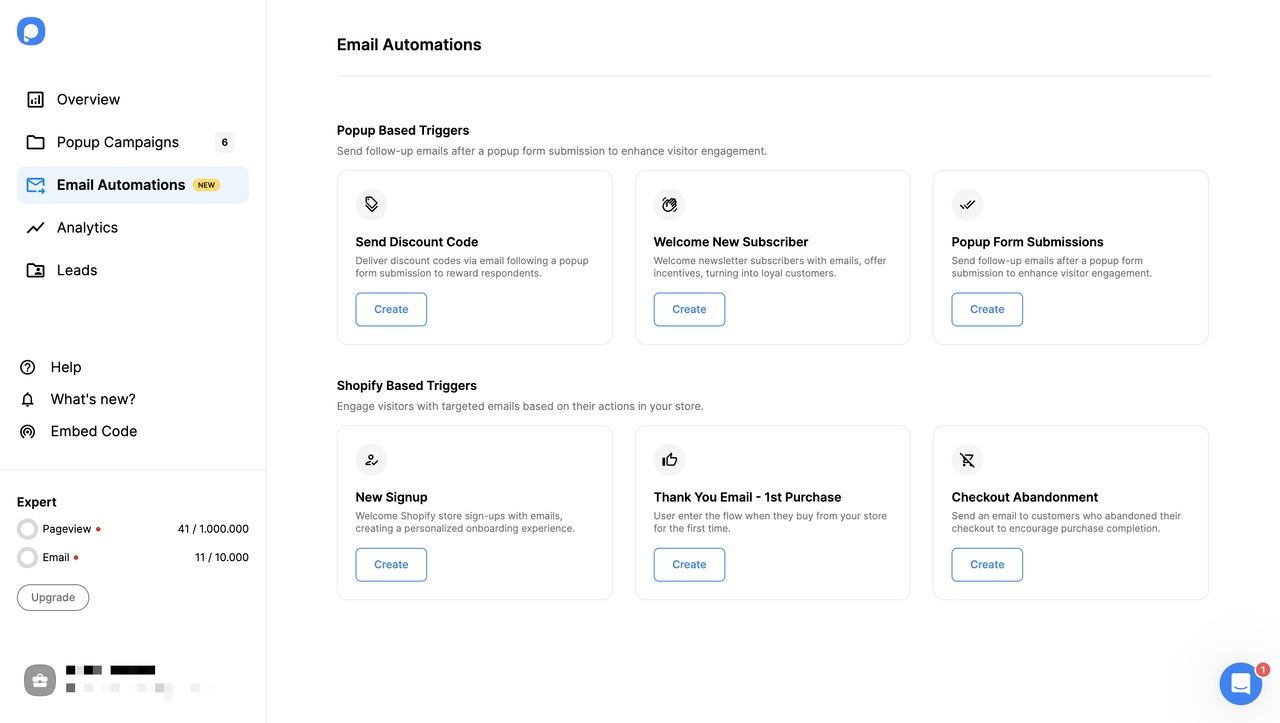
3. Select a trigger. For example, let's continue with "Thank you Email - 1st Purchase".
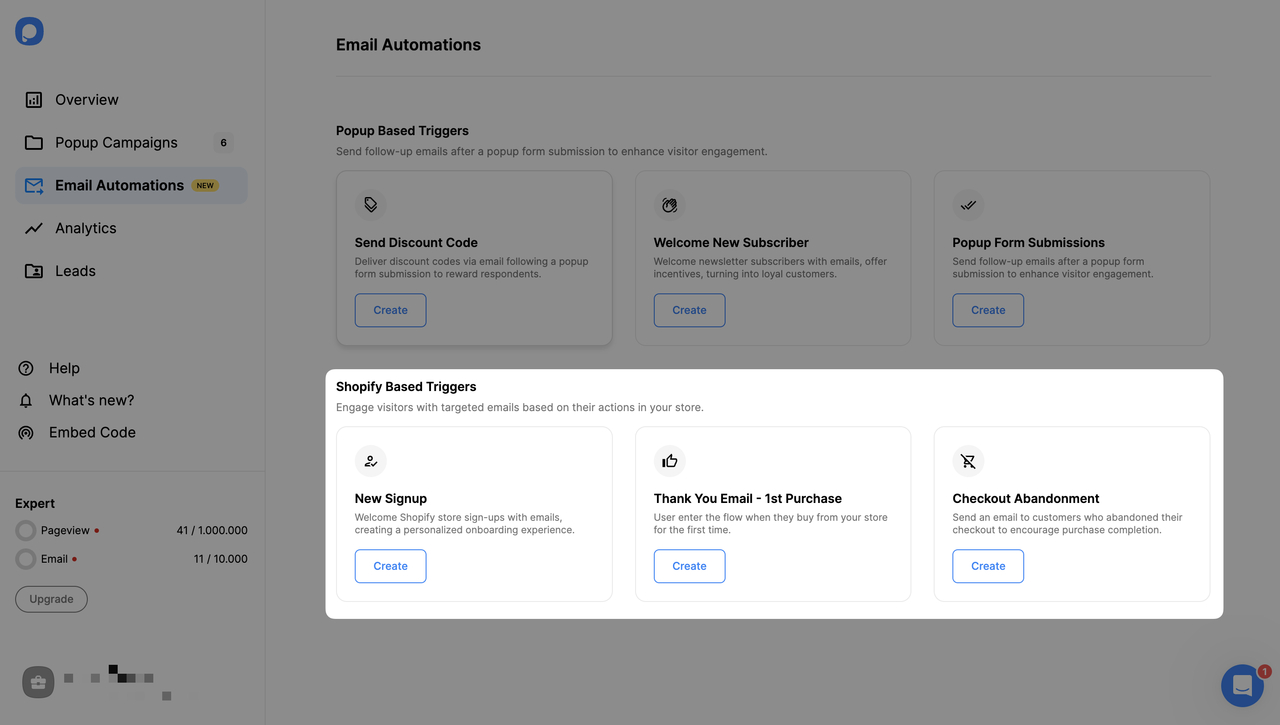
4. Choose the Shopify Store to which you want to add this email trigger and give automation a name.
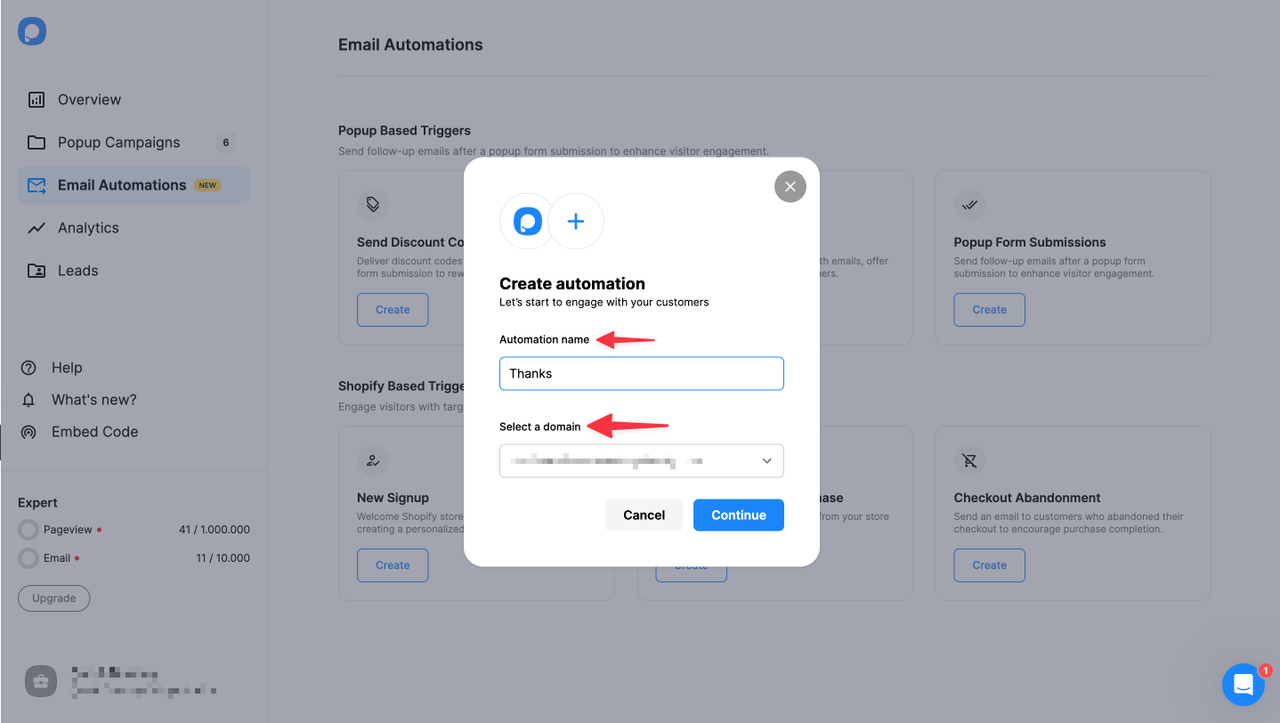
5. After clicking the Continue button, you will be directed to the automation interface. In the first step, you can change the automation trigger to specify your aim at first.
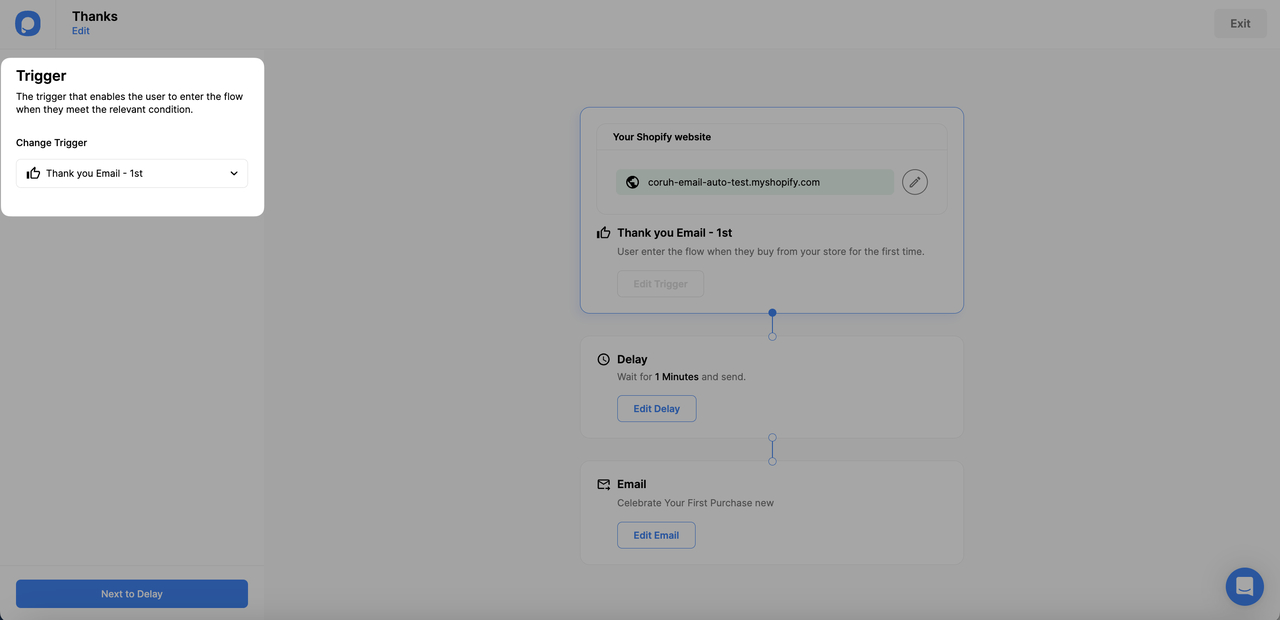
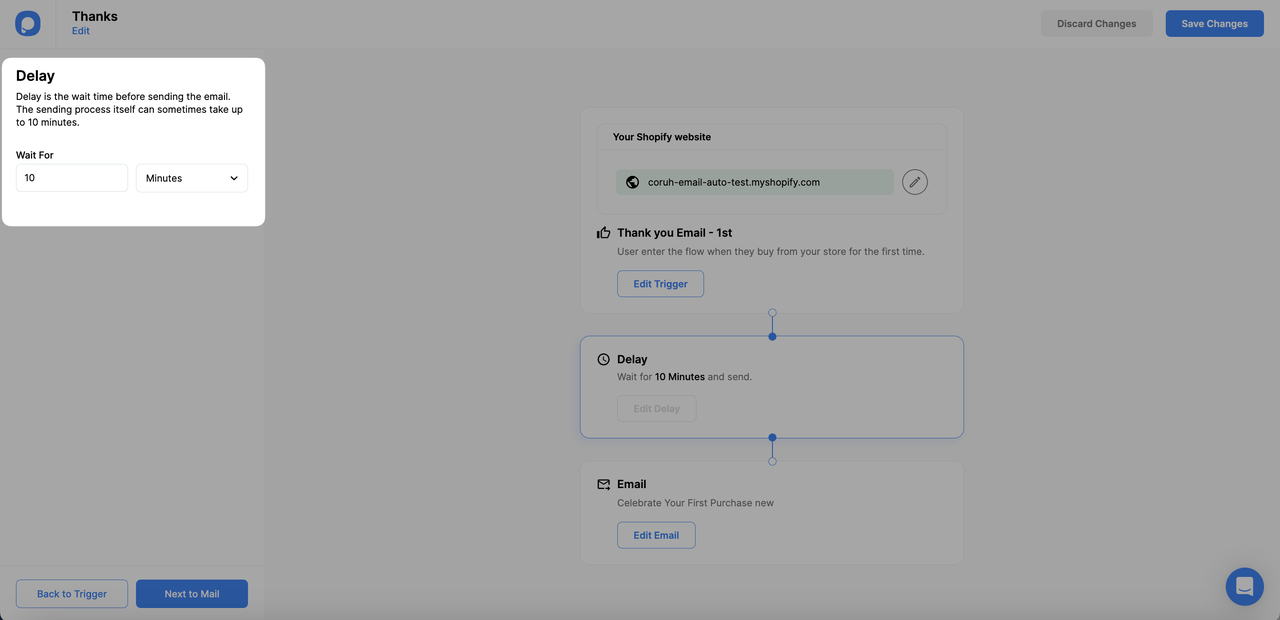
6. Add a delay to your email. You can select 10 minutes to send the email after purchase confirmation. Or, you can decide based on your preference.
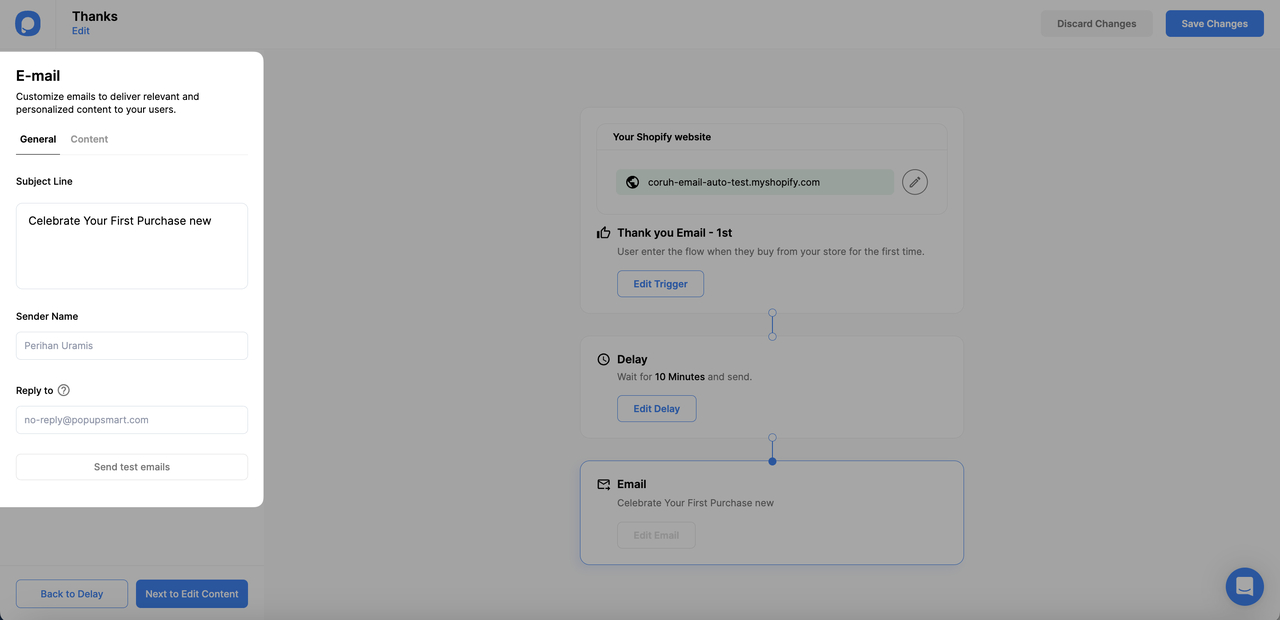
7. Enter the Sender Name and subject Line, and Reply To the Email.
- Sender Name refers to the name that will be displayed as the sender of the email. It can be a person's name or the name of your business or organization.
- Subject Line is the text that appears in the recipient's inbox as the title of the email. It should be concise and attention-grabbing to encourage recipients to open the email. You can check catchy email subject lines to increase the email open rate.
- Reply-to email is the email address where recipients can send their replies or inquiries. It is the email address that will receive any responses or replies from the recipients of the email.
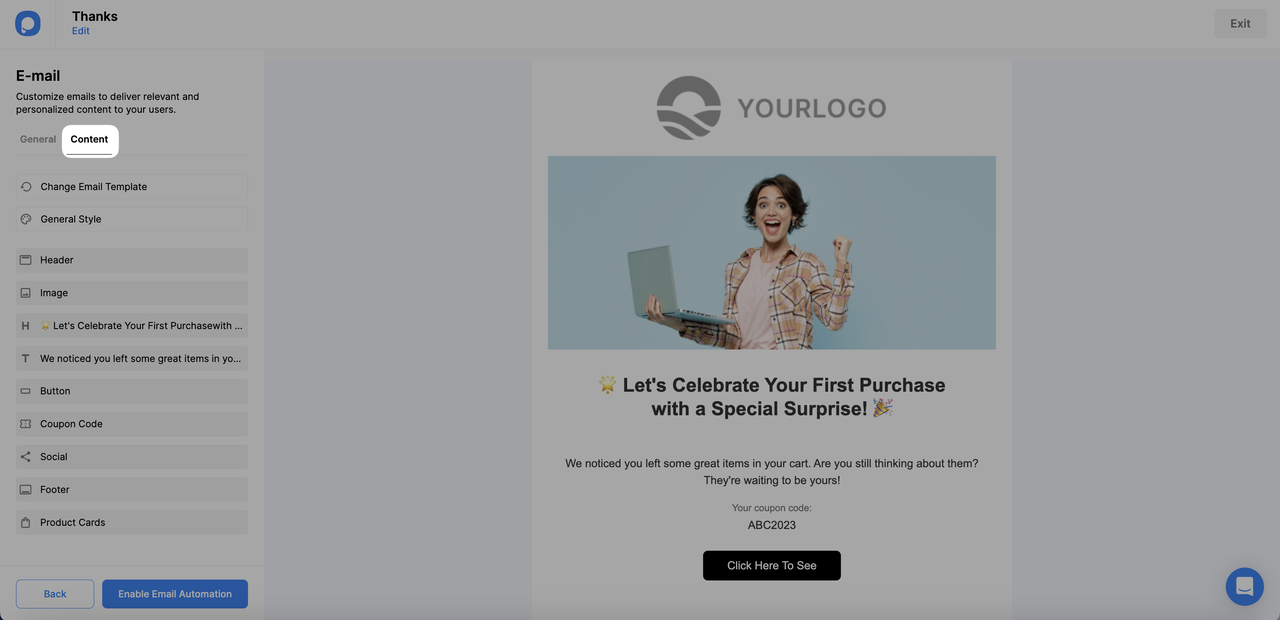
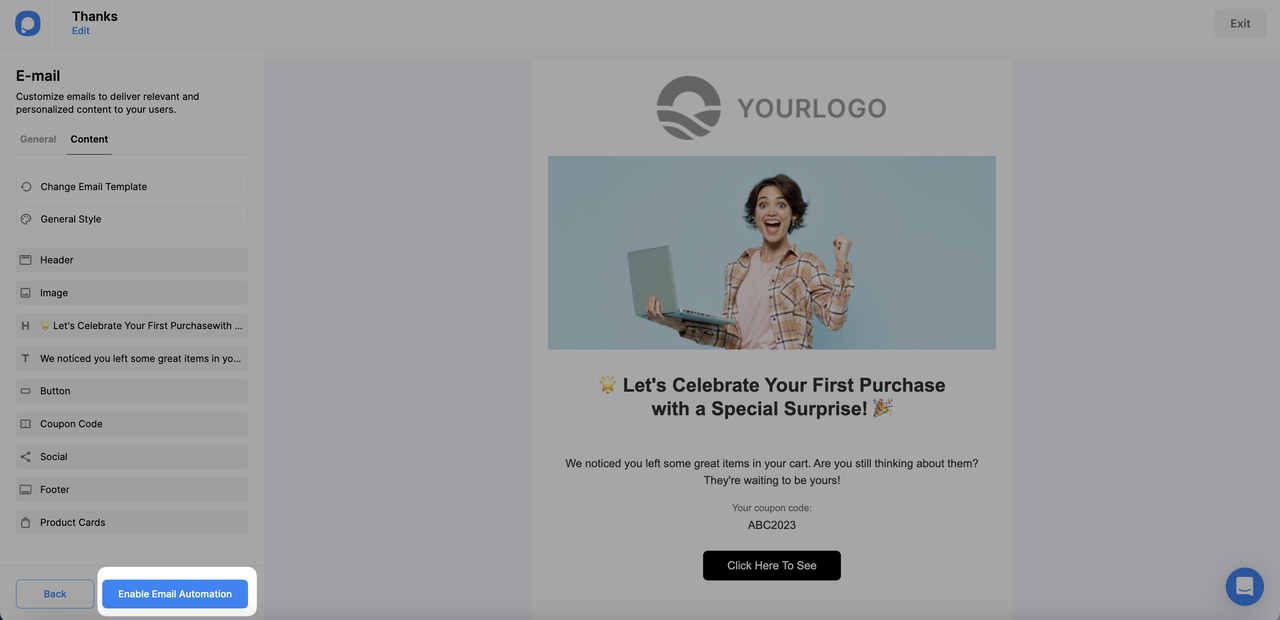
8. Go to “Content” and customize your email by adding the coupon code you want to send and including the customer's name for personalization. Please refer to How to Customize Your Email’s Content document for detailed information
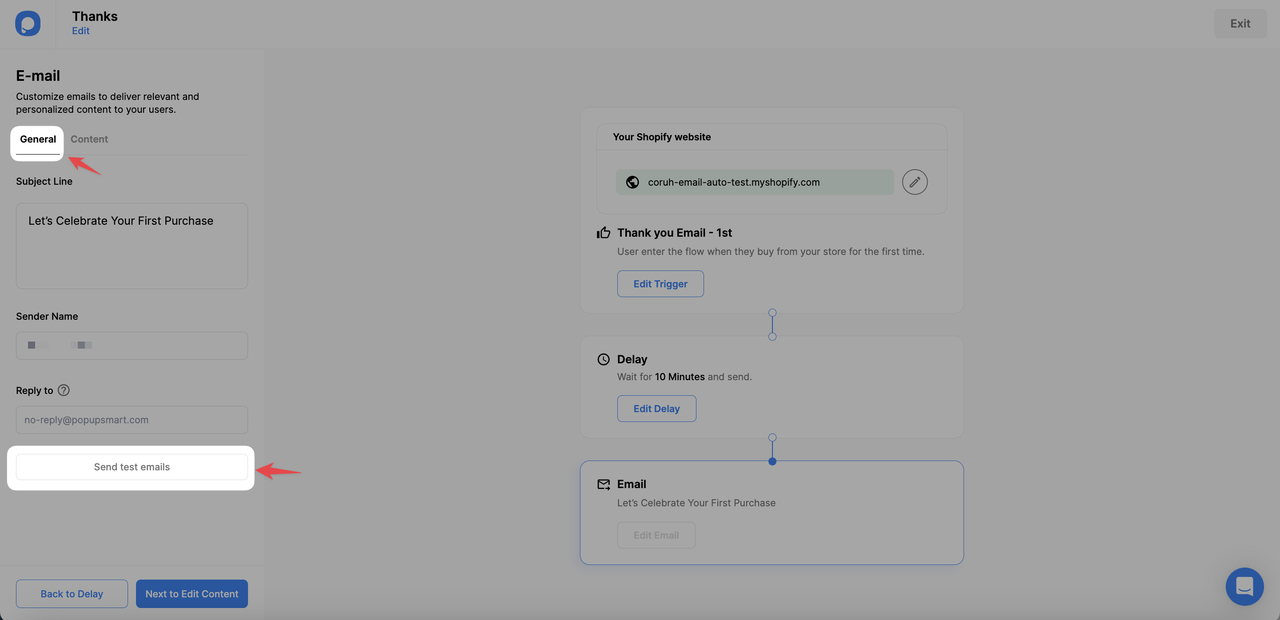
9. Before saving and publishing the email automation, send a test email to yourself or any other interested person to consider your CTOR (click to open rate).
10. Lastly, you can “enable email automation” by clicking the button at the bottom left. If you want to disable email automation, you can click the same button when it turns to “Disable email automation”.
💡 If you want to test the email automation live, please refer to the Testing Email Automation on the Live page.
