
How to Upgrade Your Current Popupsmart Subscription Plan
You can easily upgrade your Popupsmart subscription by following the steps below.
For any upgrades in mid-cycle, unused days of your current paid plan will be automatically calculated and deducted from the price of your upgraded plan.
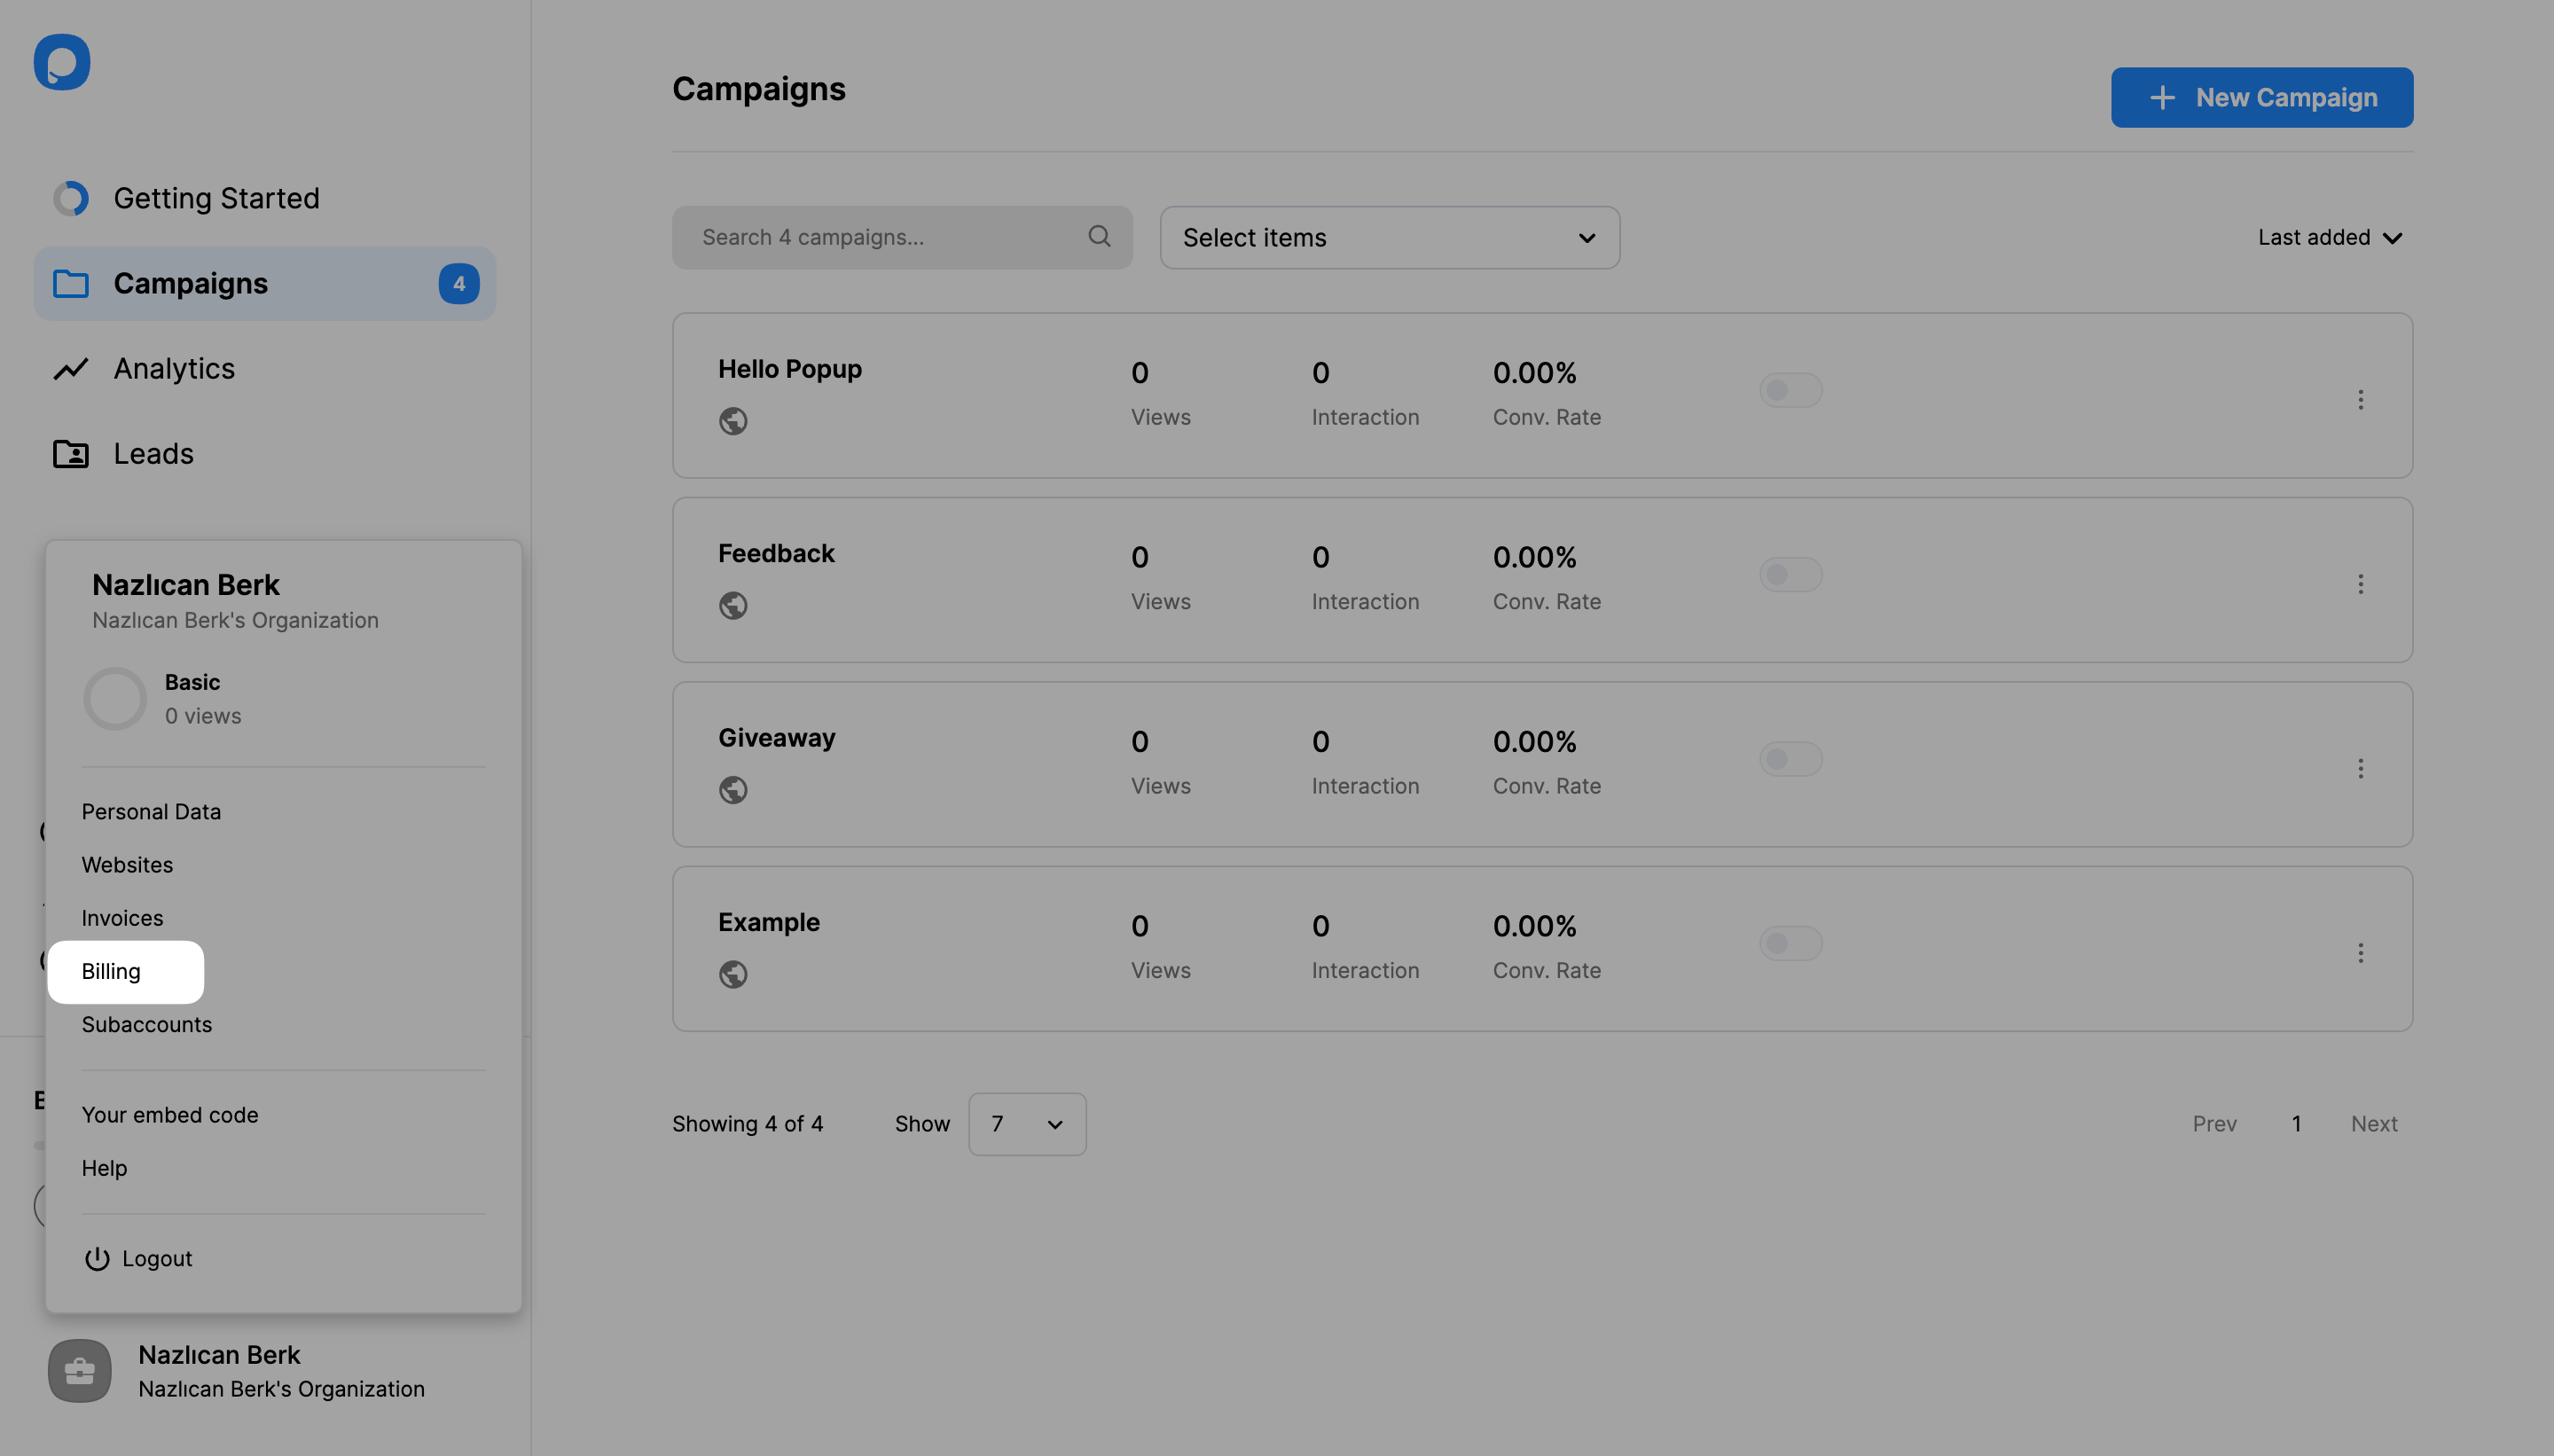
1. Log into your Popupsmart account and click on your account name from the bottom left. Then, continue with “Billing”.
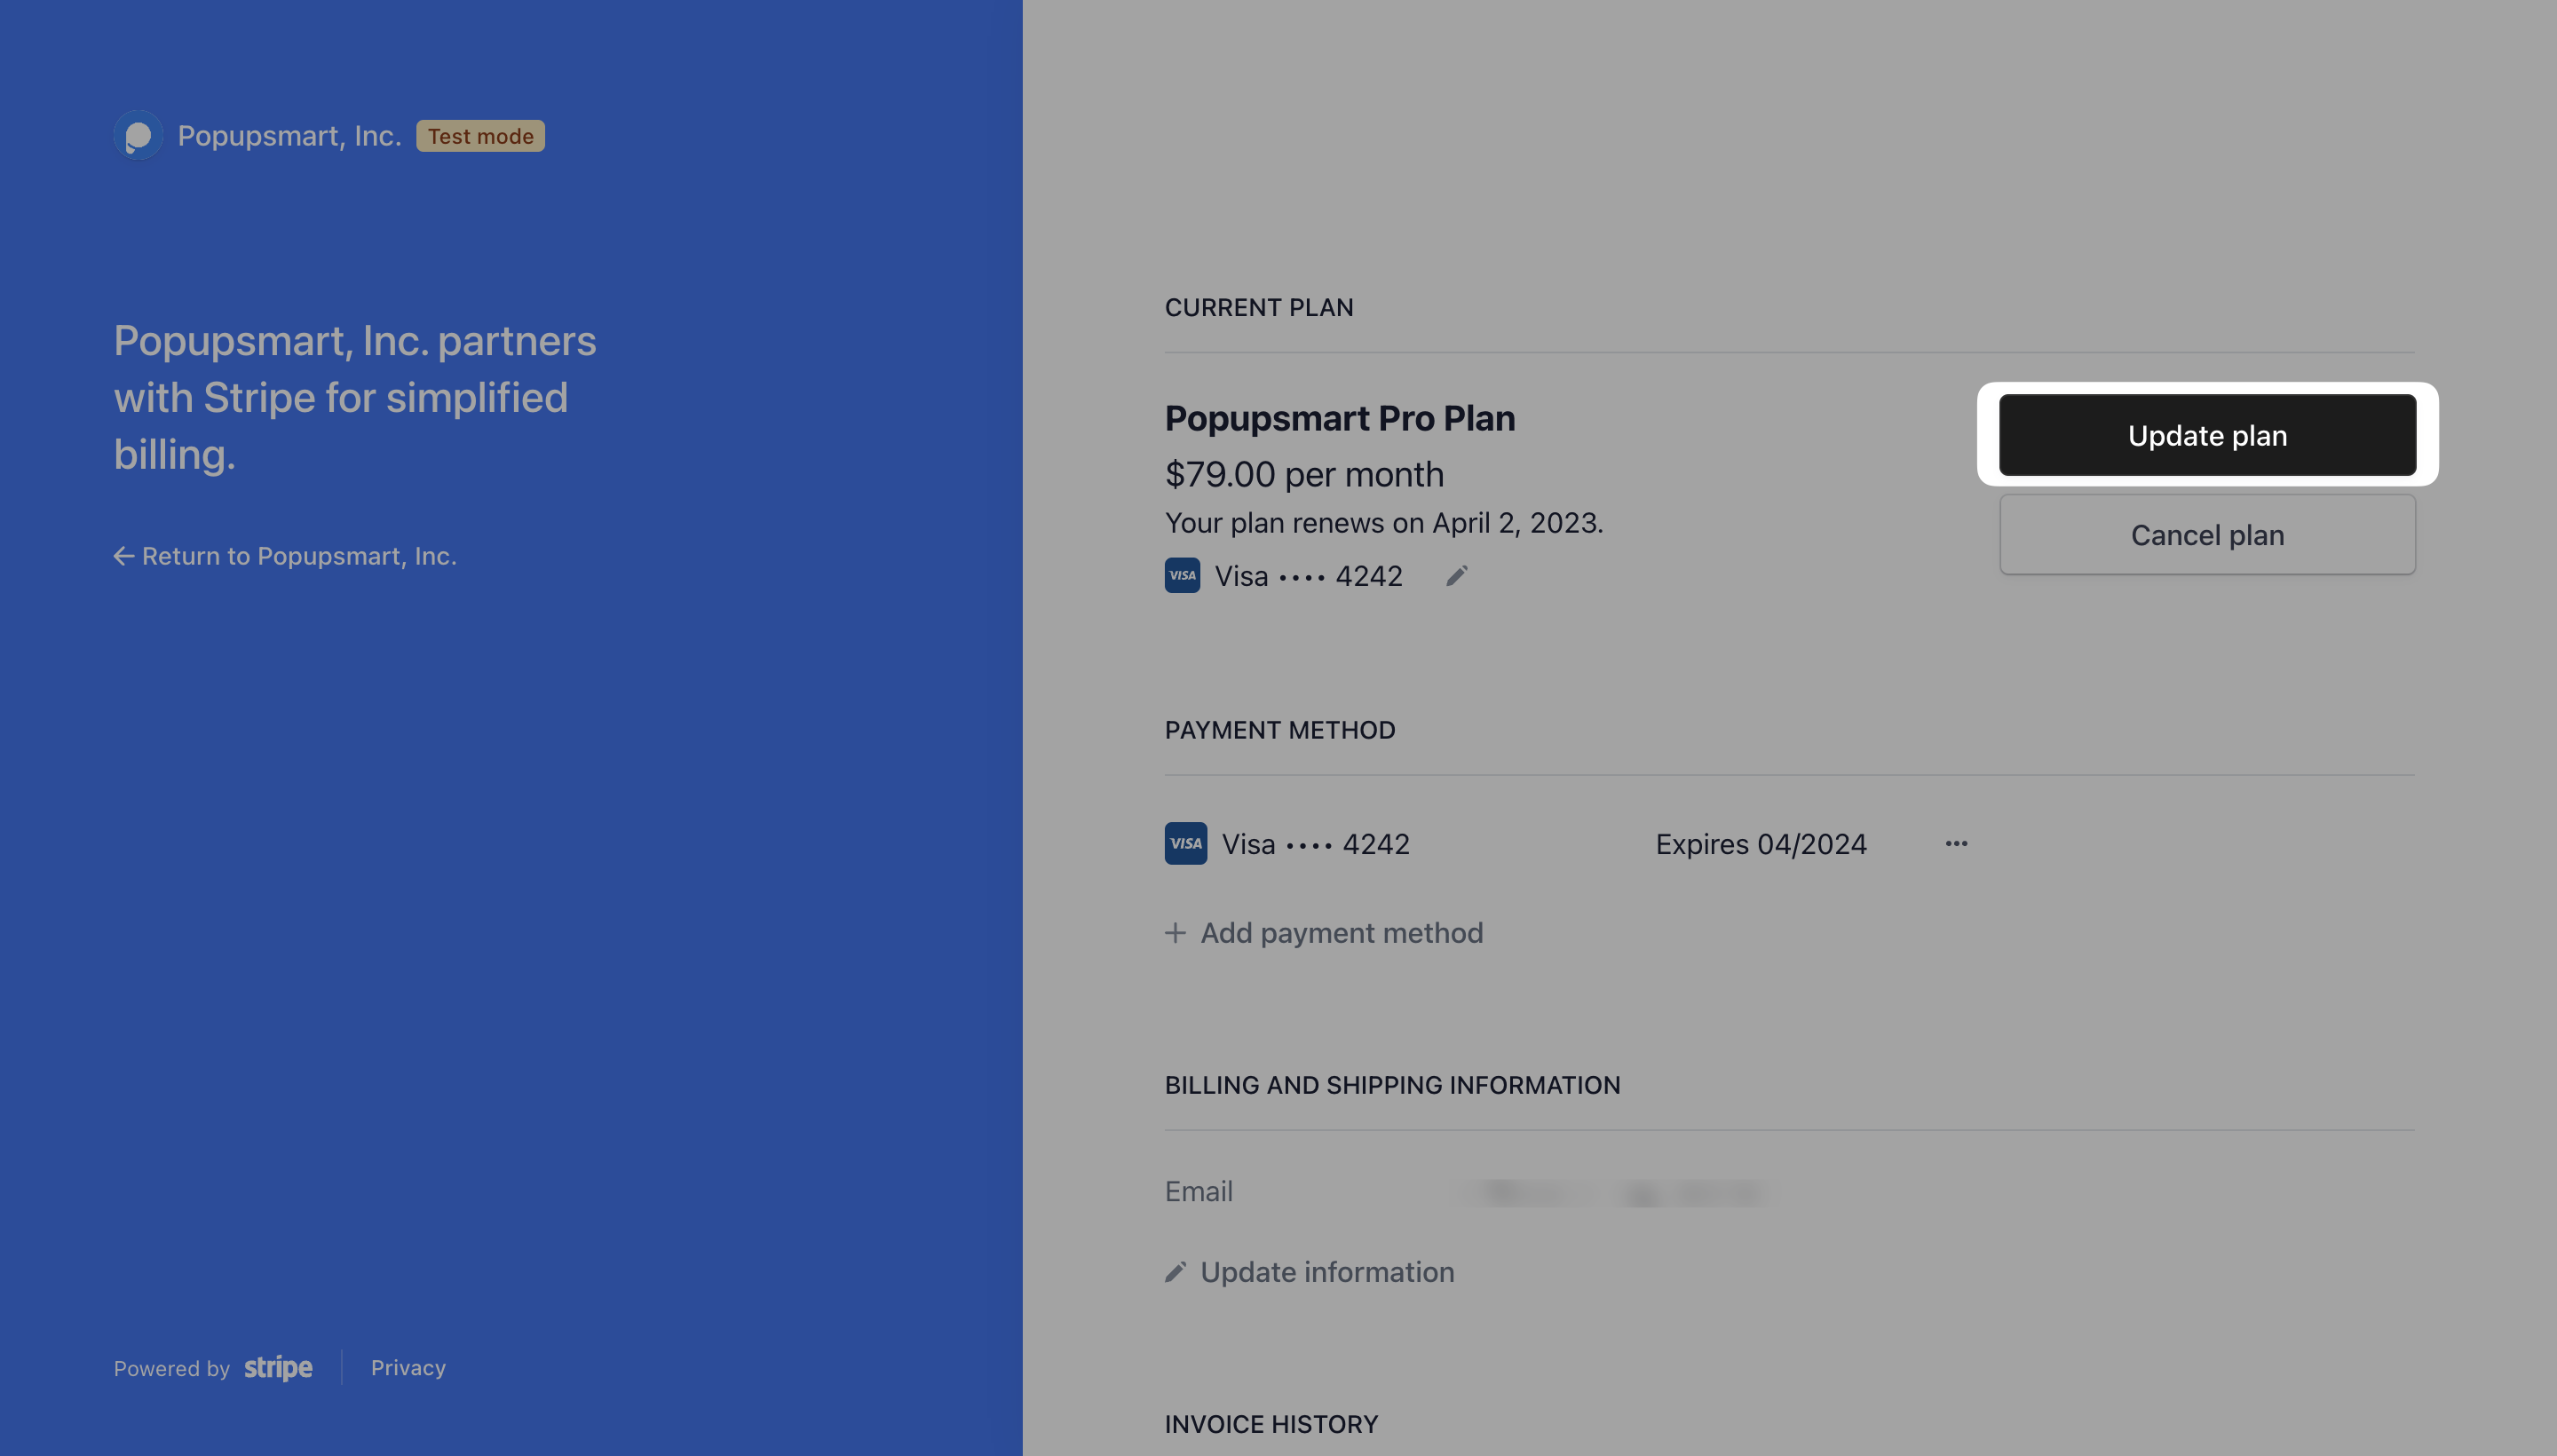
2. On this page, you can upgrade your current price plan.

3. Click on the "Upgrade Plan" button of the plan you want to upgrade to, and you will be directed to Stripe’s page, where you’ll see the Current Plan section. Then, click the "Update Plan" button.
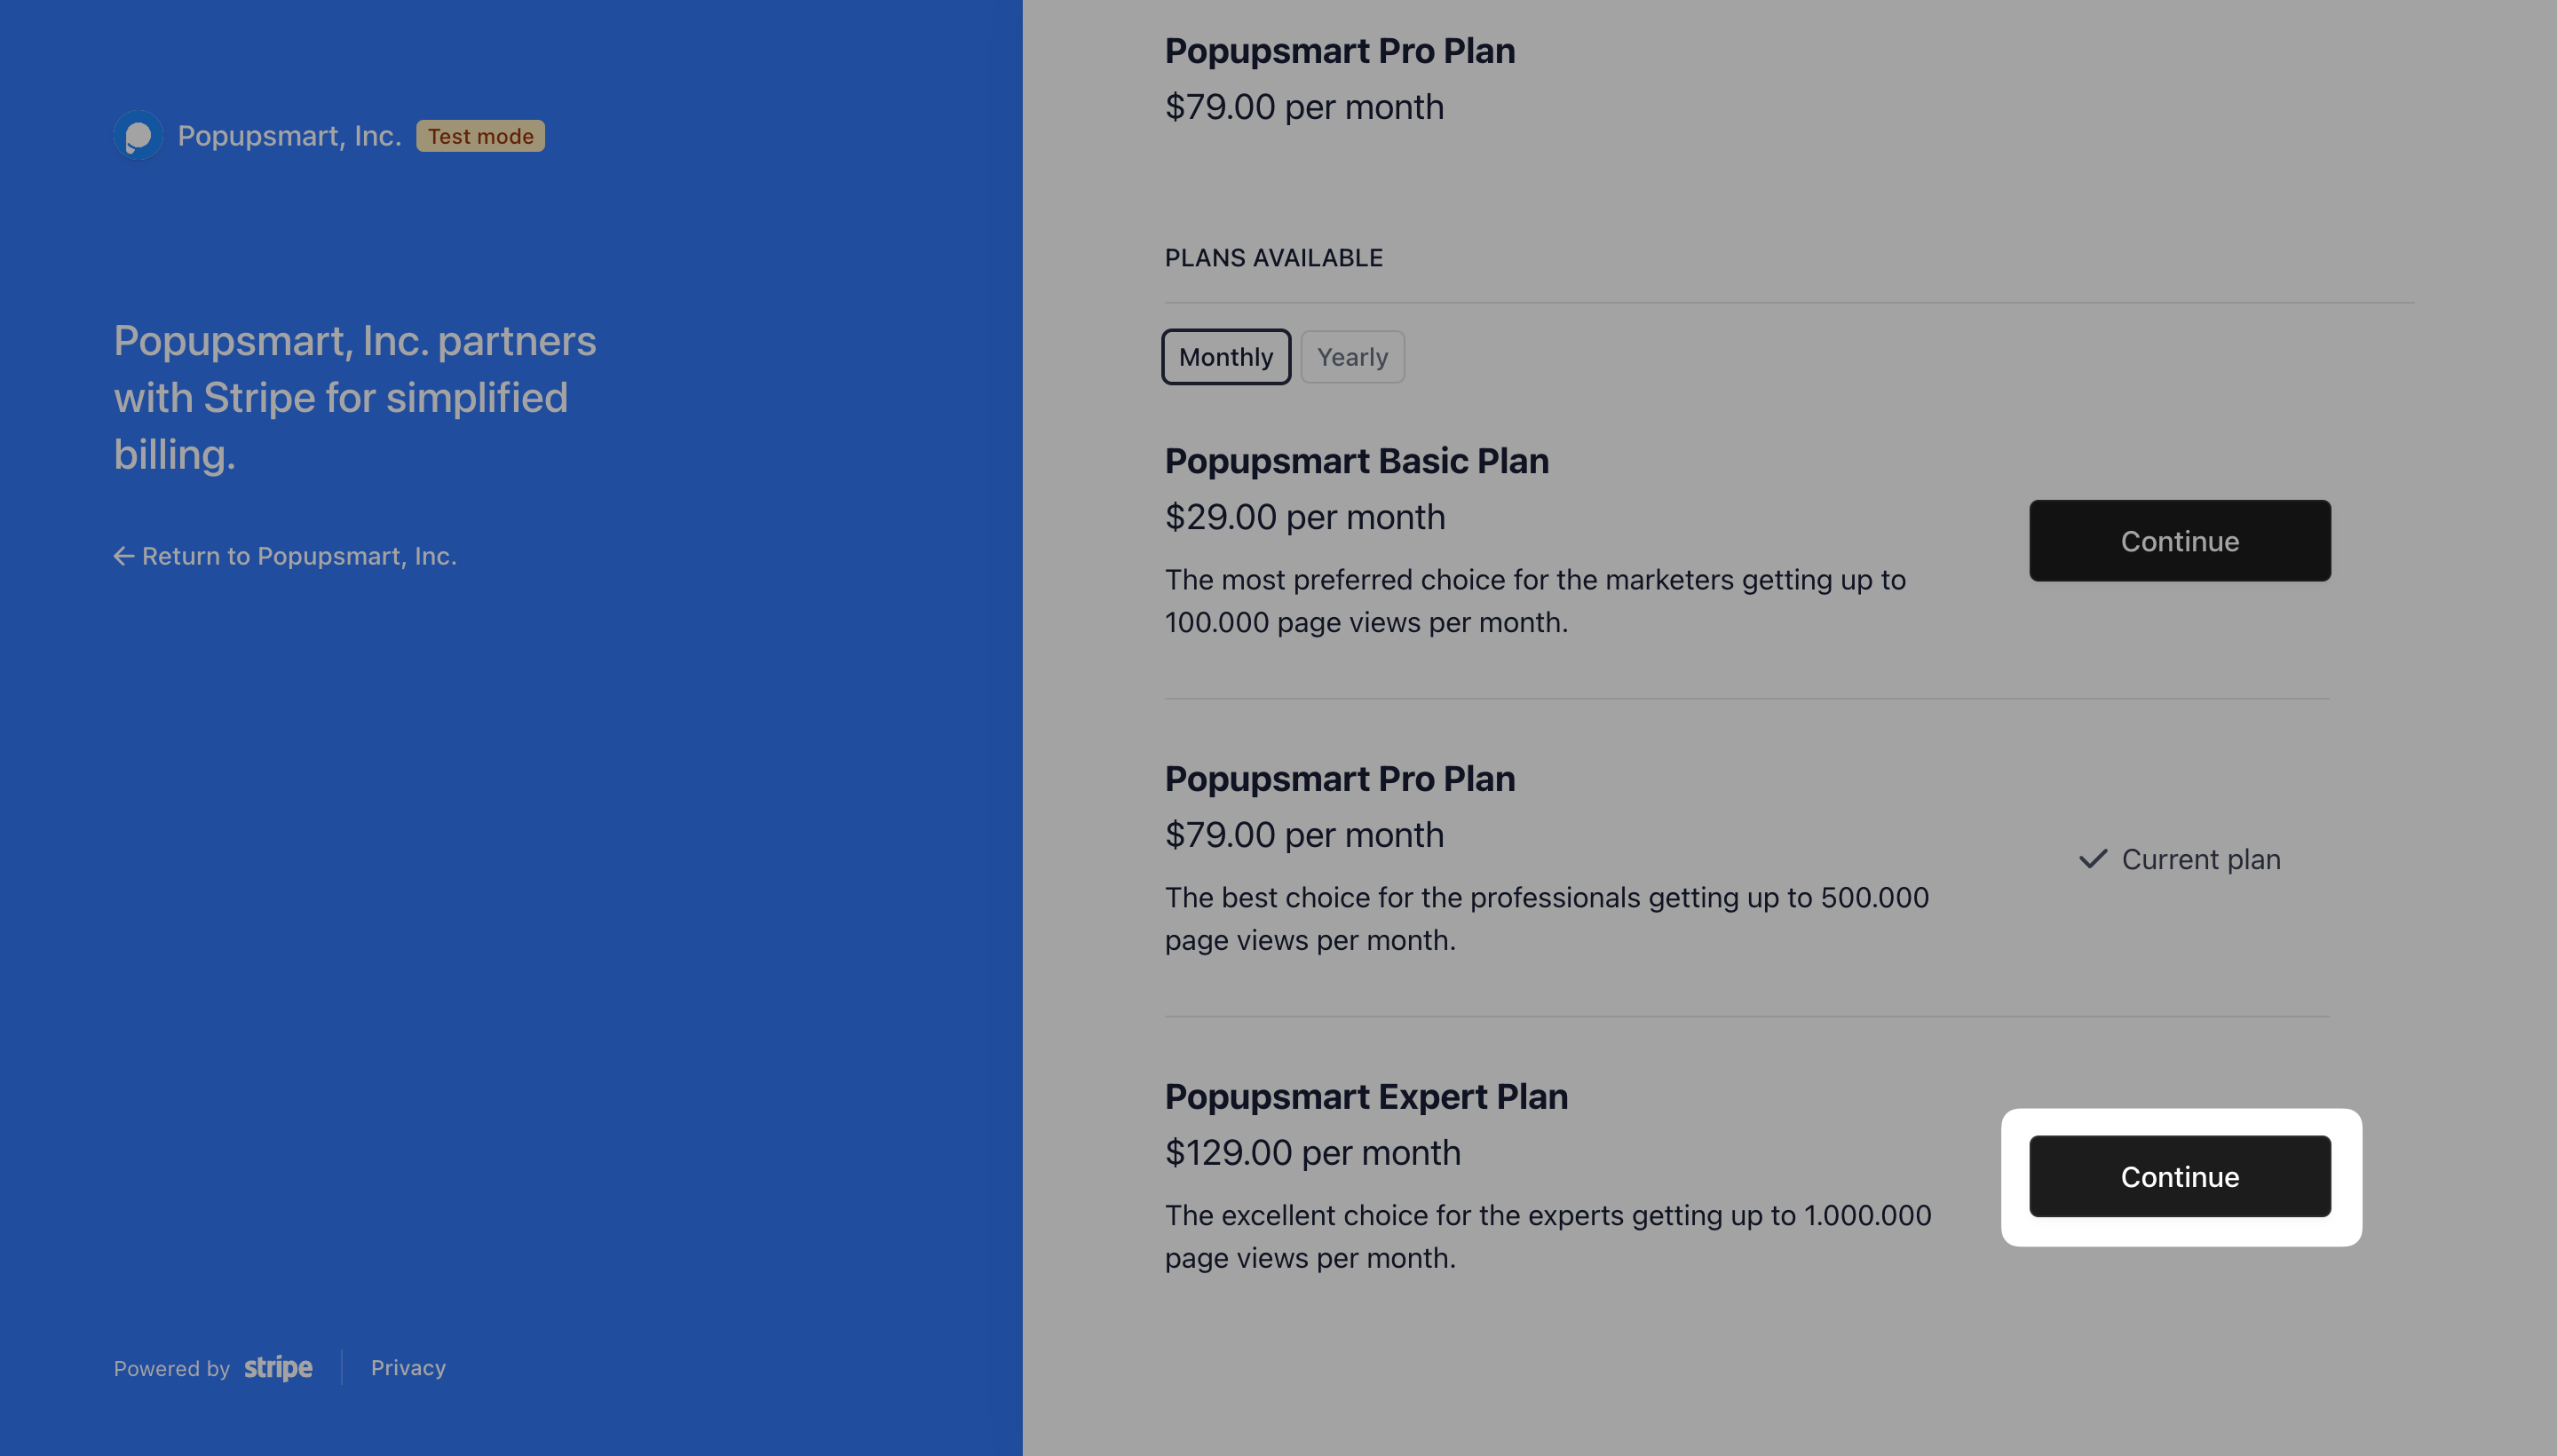
4. Available plans will be listed. Choose the best option that fits your needs, and click “Continue” to upgrade your plan.
5. Click "Confirm" to update your plan.
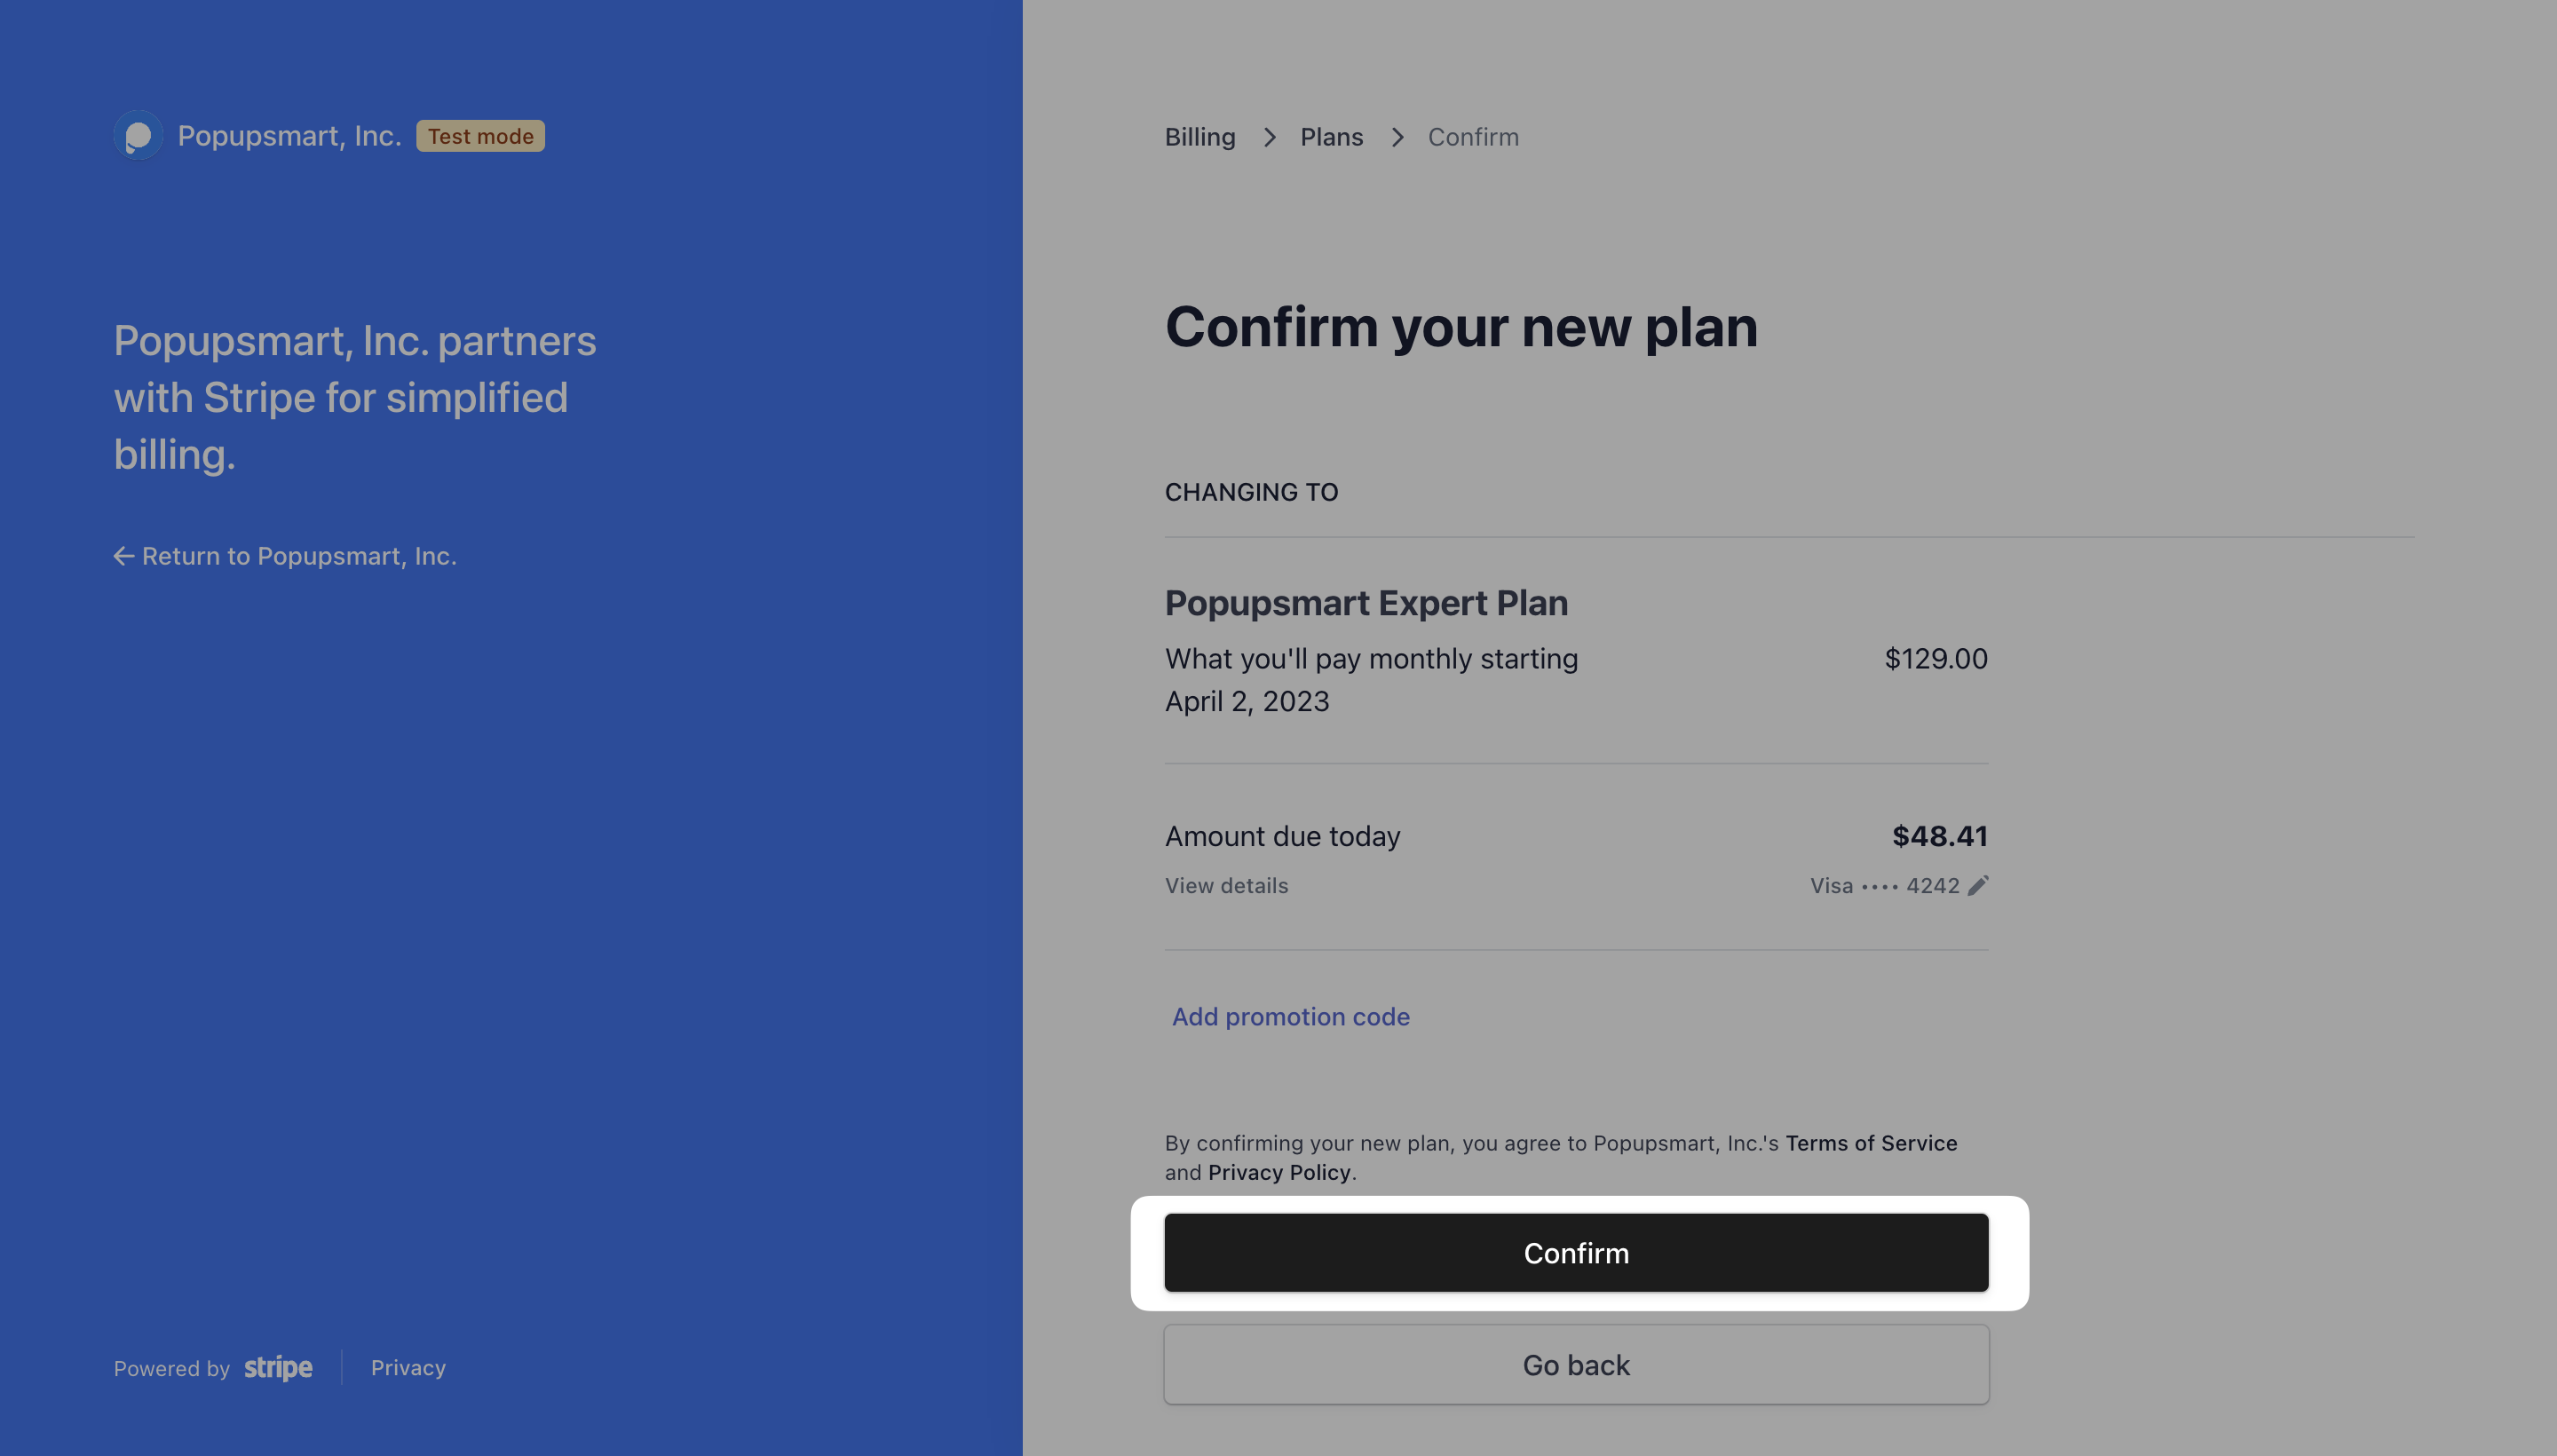
Before confirming your new plan, remember that you can change your payment method and add a promotion code if available.
You can find a list of downloadable invoices on your Invoices page, including your latest upgrade transaction.
Need a hand? Contact Popupsmart!