Testing Popupsmart Email Automation on Live
After publishing your email automation, it is always a good practice to test it in a live environment.
This step is crucial to ensure that your emails function as intended and reach your target audience effectively.
By testing your email automation in a live environment, you can identify any potential issues or areas for improvement.
Testing Popup-based Email Automation
- Locate the popup on your online website that is connected to your email automation.
- Fill out and submit the form fields in the popup.
- Wait for the specified delay time (note that some email service providers may add up to an additional 10 minutes of delay).
- If you receive the email, your setup is complete.
- If you encounter any issues with receiving the email, try the troubleshooting steps below:
✅ Check if your email automation is enabled or not.
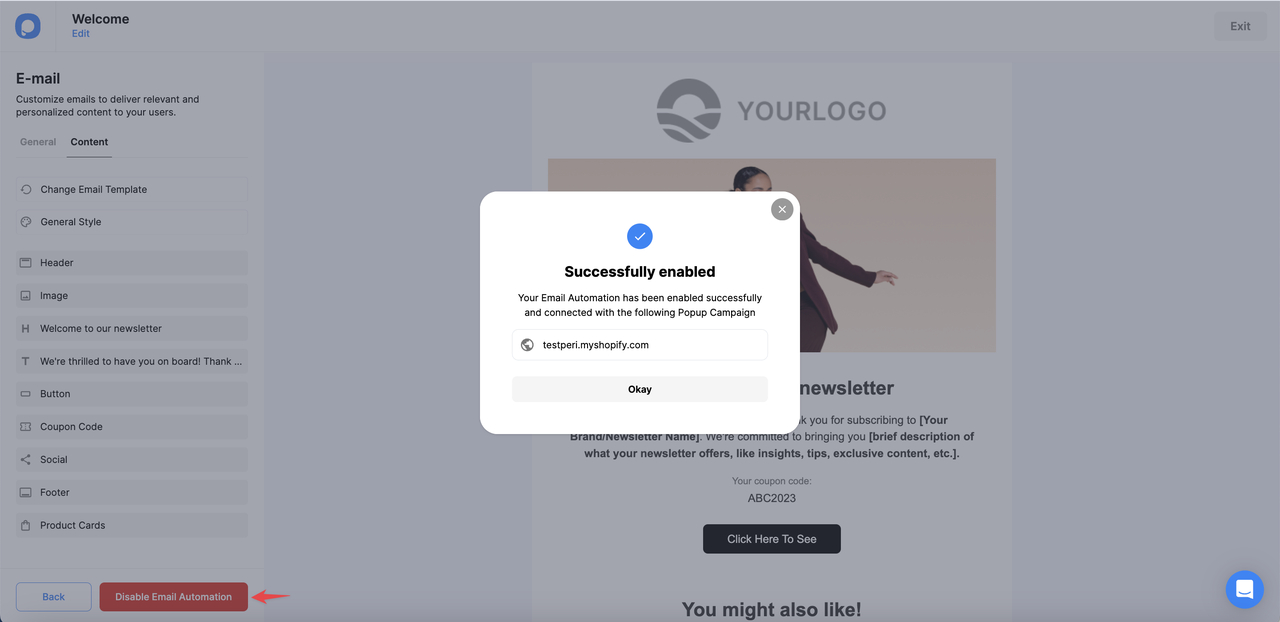
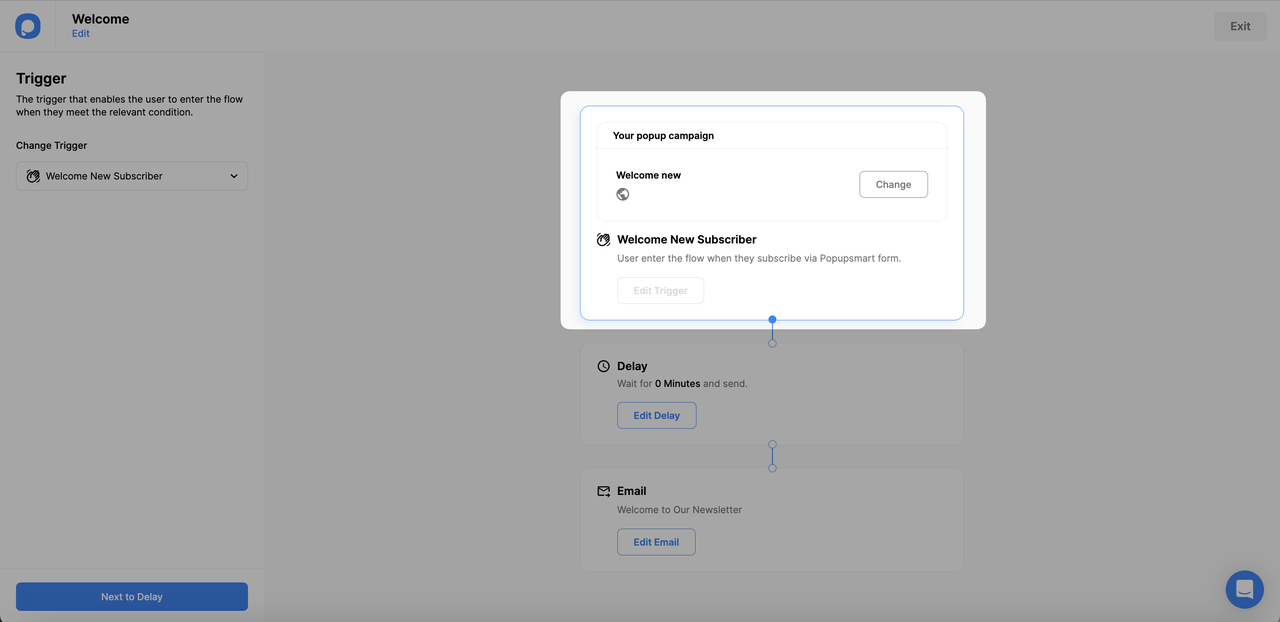
✅ Verify if your email is connected to the correct popup campaign.
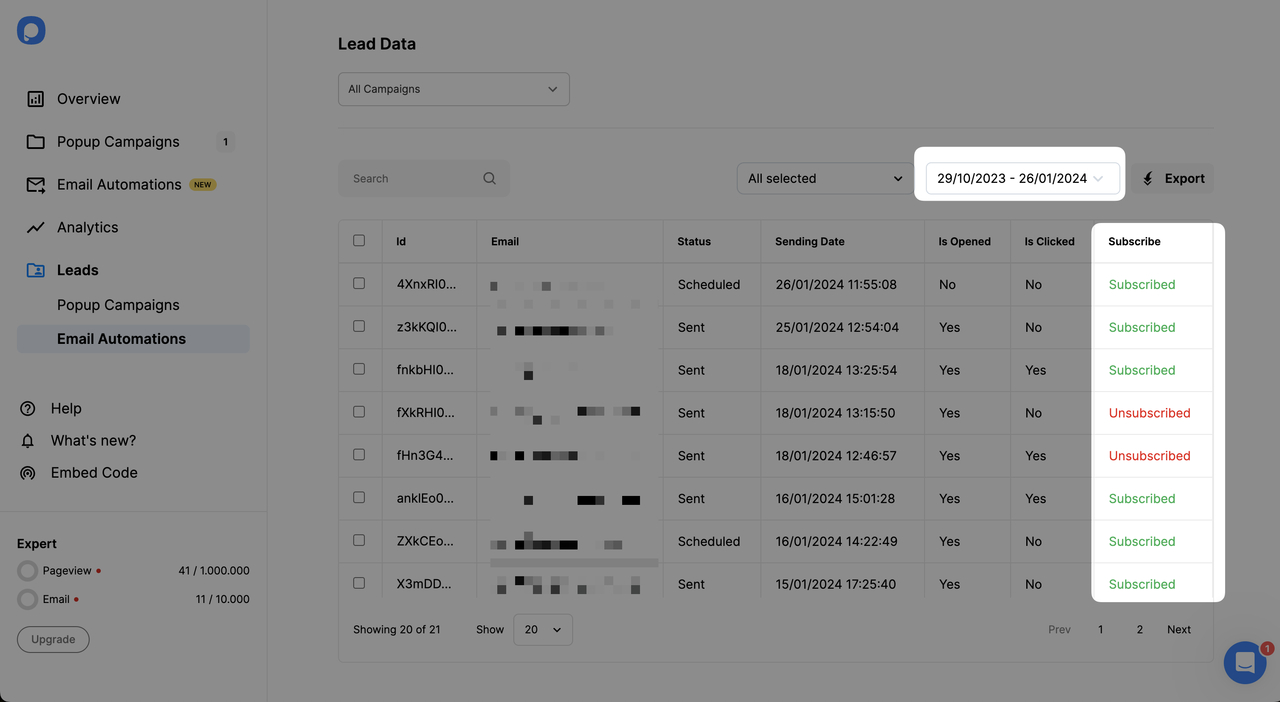
✅ Make sure that you are Subscribed. You can check this in the Lead Data for both Popup Campaigns and Email Automation. Also, remember to adjust the dates to the appropriate span.
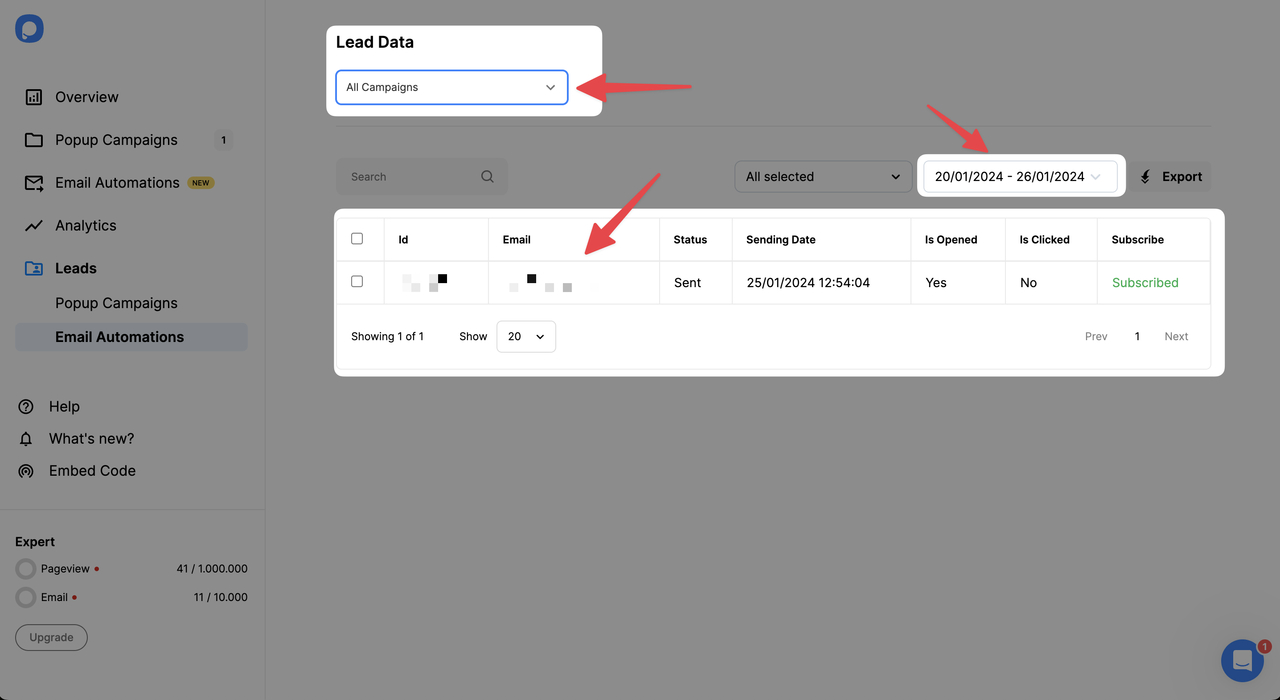
✅ Go to the Lead Data page for Email automation. Filter the lead data based on the campaign name and date to locate your entered email.
If you are unable to solve the problem, please contact us through the chat.
Testing Shopify-based email automation
To ensure the effectiveness and reliability of each Shopify-based trigger, it is important to conduct live tests for email automation.
Each Shopify-based trigger has its unique way of testing.
New Signup
1. After you publish the New Signup email automation, go to your Shopify store and create a new user.
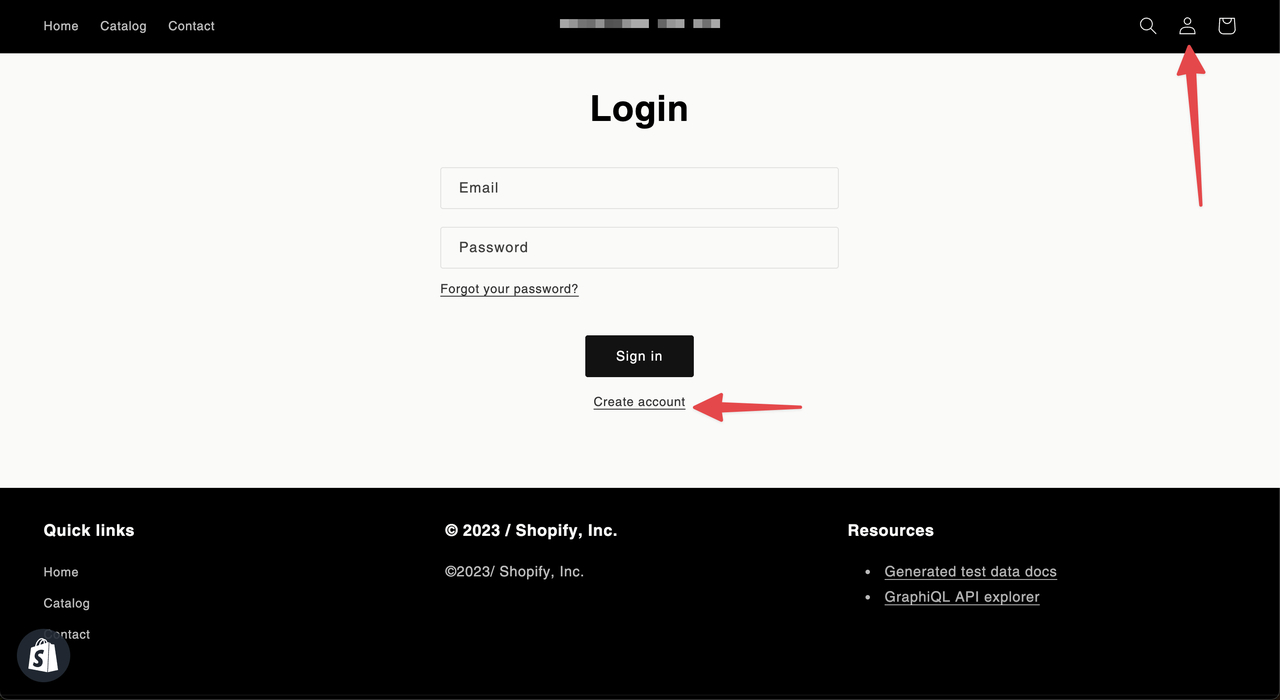
2. Be sure that a new user is created in your Shopify store under your customers list.
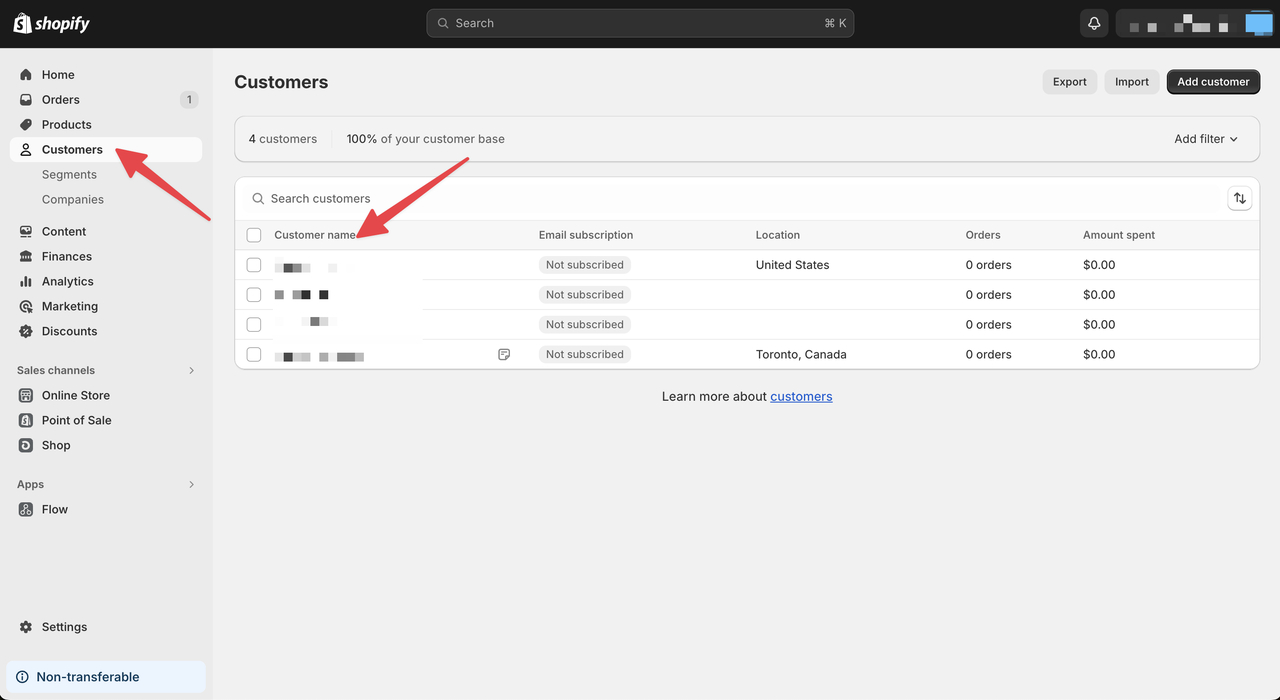
3. Wait for the specified delay time (note that some email service providers may add up to an additional 10 minutes of delay).
4. If you receive the email, your setup is complete.
5. If you encounter any issues with receiving the email, try the troubleshooting steps.
Thank You Email - 1st Purchase
1. After publishing the "Thank You Email - 1st Purchase" email automation for post-purchase marketing, go to your Shopify store and create a first order using an email that has not been used before in your store and is not listed in your customer list.
2. Make sure that a new order has been created in your Shopify store and can be found in your orders list.
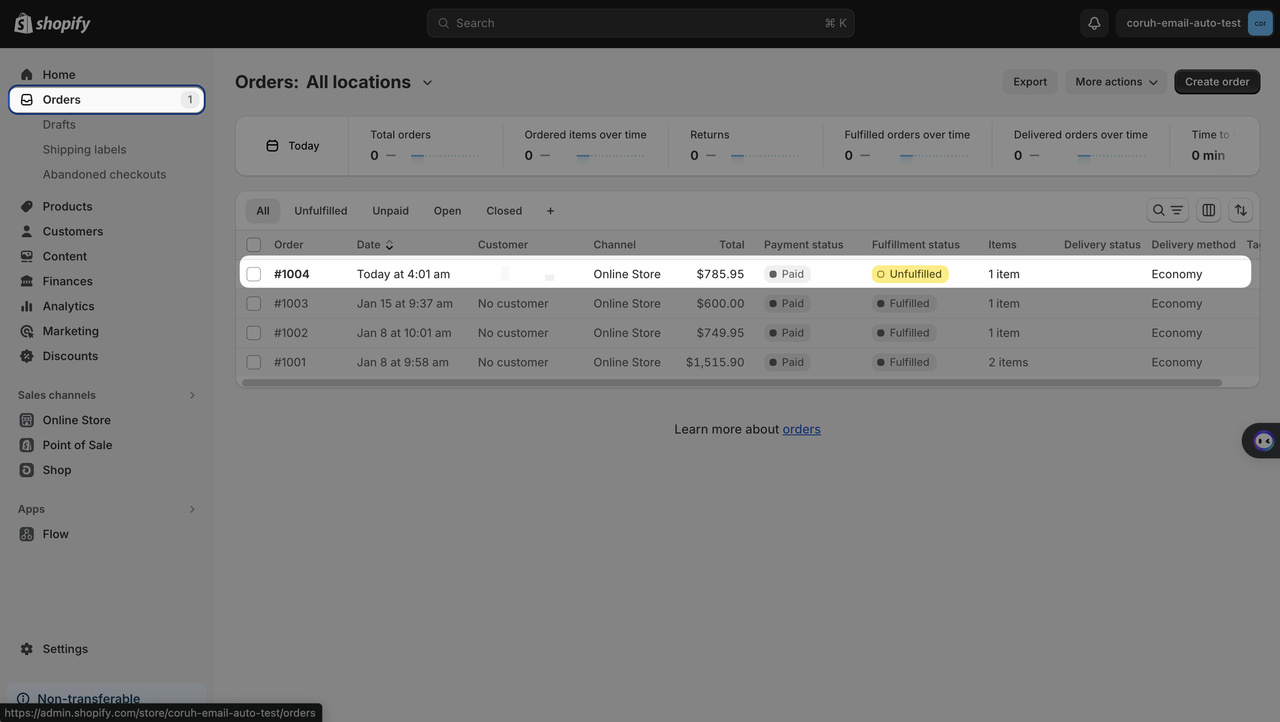
3. Wait for the specified delay time (note that some email service providers may add up to an additional 10 minutes of delay).
4. If you receive the email, your setup is complete.
5. If you encounter any issues with receiving the email, try the troubleshooting steps.
Checkout Abandonment
When you know the importance of checkout abandonment, you can create more effective campaigns.
1. After publishing the Checkout Abandonment email automation, go to your Shopify store and intentionally abandon a checkout on the checkout page. Do not forget to enter your contact information with your email.
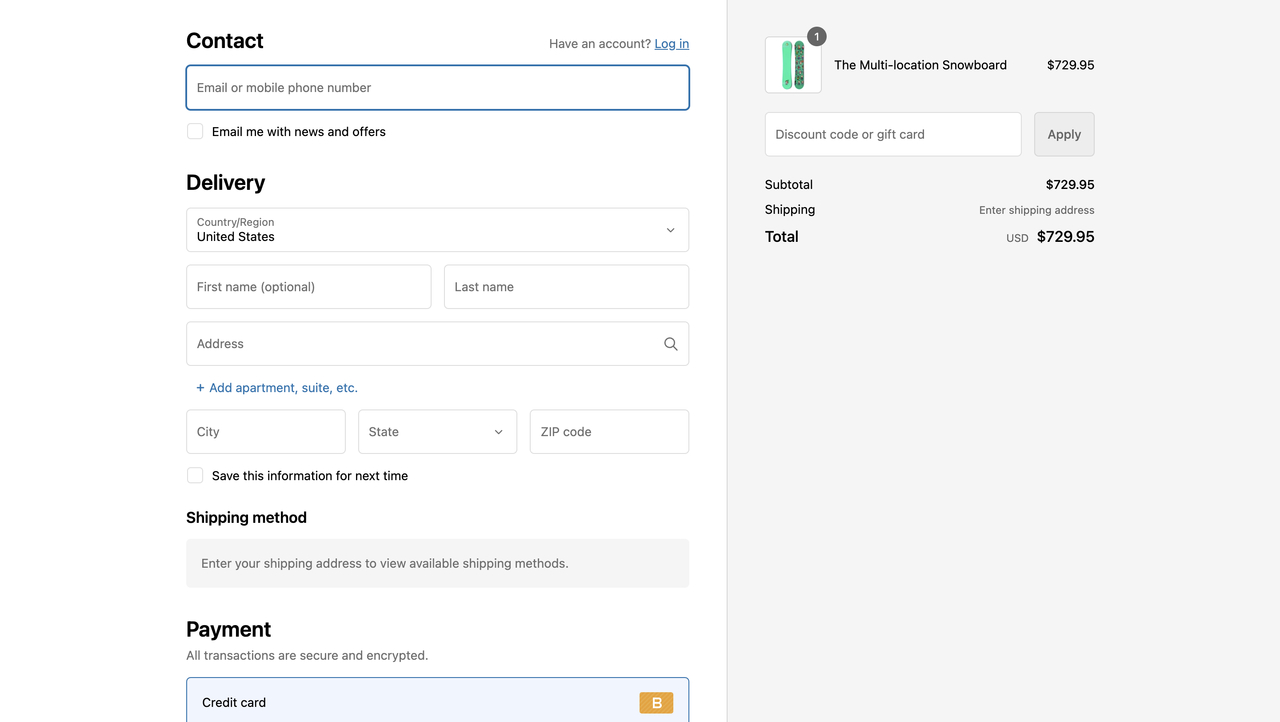
2. Be sure that a new abandoned checkout is created in your Shopify store under your orders list.
