How To Create A Shopify Add to Cart Link
Add-to-cart/cart permalinks in Shopify reduce checkout friction and abandonment by sending shoppers to a prefilled cart/checkout, optionally with discounts and prefilled fields. Use them in emails, social, influencers, bundles, recovery, and targeted popups; test and track.
Are you a Shopify store owner trying to create a link that will directly take users to the cart page with the items pre-loading into their carts? Follow along this tutorial to create a Shopify add to cart link.
Side Note: This might be advanced for some Shopify users. You need a knowledge of CSS, HTML, JavaScript, and Liquid.
To create a Shopify add to cart link, you will need to use a cart permalink. Later in this tutorial, we will discuss cart permalinks but before that, let’s see the easiest way to create a Shopify add-to-cart link.
Your add to cart URL will look like this:
https://www.yoursite.com/cart/add?id=VARIANTID&quantity=1
1. Replace “www.yoursite.com” with your website.
2. Replace VARIANTID with your product variant ID.
3. “1” should be replaced with the quantity of the product you want to add to the cart.
4. To add multiple products and quantities to the cart:
https://yoursite.com/cart/add?id=VARIANTID1&quantity=1&id=VARIANTID2&quantity=1
5. Change the "VARIANTID1" & "VARIANTID2", as well as the quantity of each.
We have tried this method, and it worked. Test to see if it works.
Why Add-to-Cart Links Matter in 2025
The eCommerce landscape is more competitive than ever. Customers expect instant, frictionless paths to purchase—if you make them click too many times, they’ll bounce.
📊 Stats Alert: Cart abandonment rates are still hovering around 70% globally. Minimizing friction—like sending users directly to a prefilled cart or checkout—can drastically improve conversions.
💡 Pro Tip: Instead of relying solely on “Add to Cart” buttons on product pages, strategically place these links in emails, blogs, or popups to capture intent when it’s highest.
What is a card permalink?

This section explains another way to use permalink to create Shopify add to cart links. (Source: Permalinks to preload the cart) We suggest you try the first method above first as we had a chance to test it. However, some Shopify store owners have used this second method and saw it worked as well.
Cart permalinks are defined as the pre-built links that allow customers to reach a shopping cart or checkout directly. These permalinks work best for apps that enable shoppers to purchase items from a single merchant in a cart.
Do you want to link directly to the Shopify checkout screen with a specific cart that already consists of items? Or do you want to add a “Buy it now” button in blogs or newsletters?
Then, cart permalinks will be your answer to your question “how to add a Shopify cart link.”
Here’s what a cart permalink looks like:

Its URL format is:

Appending cart and checkout parameters
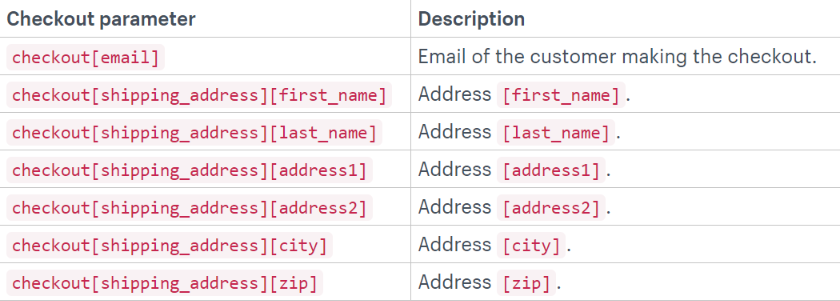
You can pre-fill any of the checkout fields. To do that, you’ll simply need to append checkout query parameters in the cart permalink URL. Use the following format when appending checkout parameters:

The [email] part represents any of the possible checkout fields in the form. The [shipping_address][city], on the other hand, shows how you can use nesting to populate child fields.
List of Checkout Parameters
You can pre-fill the query parameters below.
How to Discount Variants
It is possible to apply a discount to a permalink directly.
The format below applies to discount:

The test part is the string value of a discount code.
Adding one product to your cart with a discount:
https://SHOPURL/cart/VARIANTID1:1?discount=DISCOUNTCODE
Adding two products to your cart with a discount:
https://SHOPURL/cart/VARIANTID1:1,VARIANTID2:1?discount=DISCOUNTCODE
The number after the “:” is the quantity selector.
Side Note: You can add notes, cart attributes, and tracking parameters as query parameters as usual. If customer accounts are enabled on your website, and the user is not logged in, first, they will see the login page before reaching the checkout.
How do you find the product variant ID?
1. Go to your Shopify admin, and then to Products > All products
2. Click to a product that has a variant
3. Then, do either of the following:
- If you have only one location for your store, see the Variants section of the product detail page. Click Edit beside the product variant.
- If you have multiple locations for your store, click the product variant in the Variants section of the product detail page.
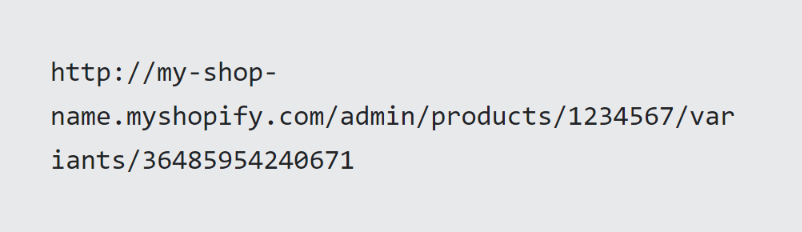
4. See the URL in your browser’s address bar. It should be similar to:
🔥 Real-World Use Cases for Add-to-Cart Links
Shopify add-to-cart links aren’t just technical tricks—they can drive real revenue when applied creatively:
- Email Marketing: Send “Buy Now” links directly in your newsletter. Customers click once and land on checkout.
- Social Media Promotions: Share limited-time discount links on Instagram Stories or X posts.
- Influencer Campaigns: Give influencers prebuilt cart links with their chosen product + discount code.
- Bundles & Upsells: Create a permalink with multiple products preloaded (e.g., “starter kit” or “bundle”).
- Abandoned Cart Recovery: Instead of reminding customers to “come back,” link them straight to the cart with items still inside.
✅ Best Practices for Shopify Add-to-Cart Links
To get the most out of these links in 2025:
- Always test before launch. Multi-product and discount links can break if commas or colons are misplaced.
- Use admin-generated links for simplicity if you don’t need advanced customizations.
- Preserve tracking. Append UTM or referral parameters so you can measure conversions.
- Combine with personalization. Tools like Popupsmart let you segment who sees the popup and which cart link they get.
- Stay updated. Shopify is migrating to Checkout Extensibility—make sure your link strategy fits future-proof workflows.
⚠️ Warning: Don’t overuse cart links everywhere; they work best when intent is already high (emails, popups, targeted promos).
How to Add a Shopify Add-to-Cart Link to a Popup
You can drive more sales by displaying a related product at the checkout page with a discount or no discount. It is even possible to target a specific product. For example, if any customer has product A in their shopping cart, you can display them a popup.
This way, customers who take an interest in the offer can add product B to their shopping cart directly by clicking on a button on the popup.
You can do that by using the Popupsmart popup builder tool. Popupsmart is a no-code popup builder solution for websites. It can integrate with Shopify without any plugin.
Here’s a quick tutorial to build a popup with an add-to-cart button:
1. Create your risk-free Popupsmart account.
2. Set up Popupsmart to your Shopify store. (Takes 5 minutes at most)
3. Log in to your Popupsmart dashboard and click on New Campaign on Popup Campaigns section.
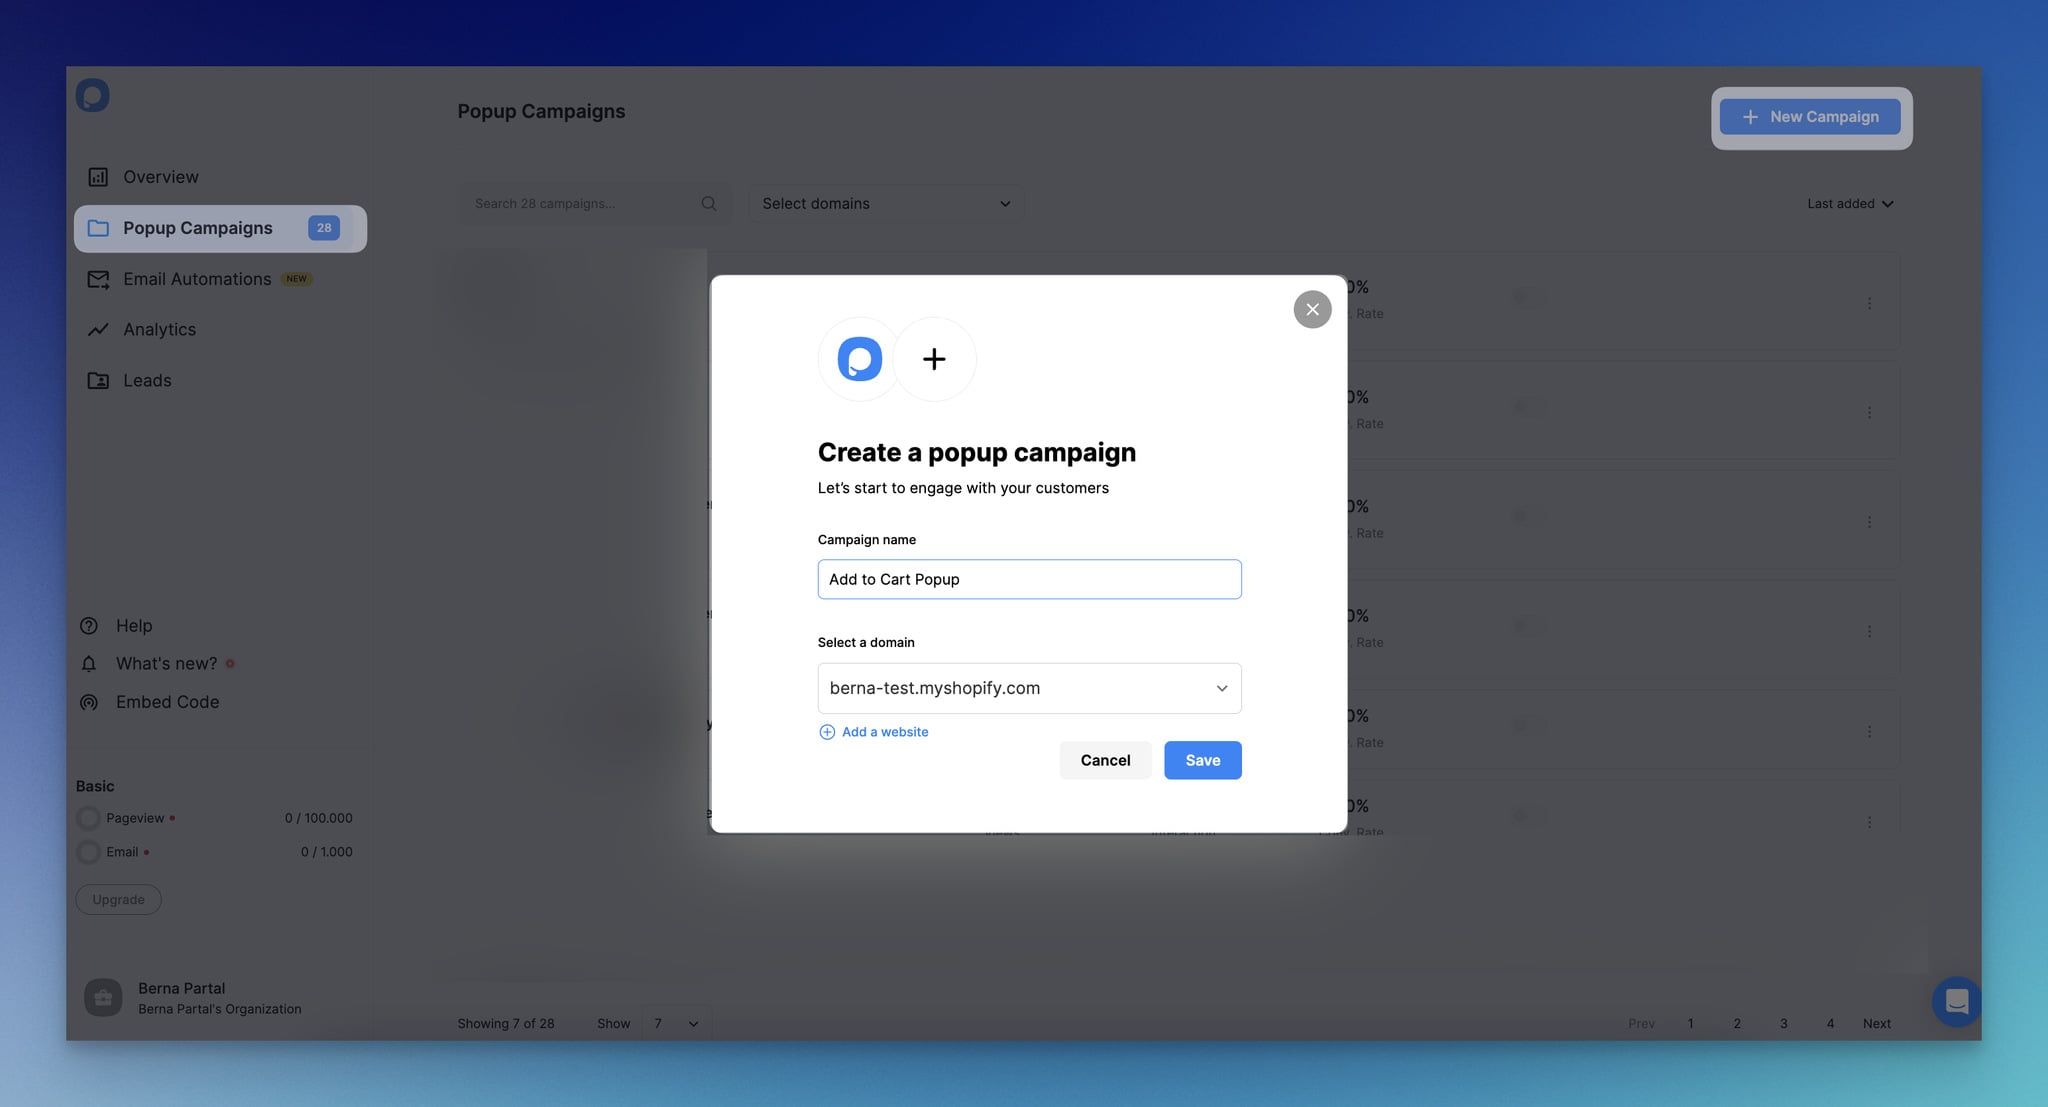
4. Select a popup template and customize it as you need.
See our product documentation to learn customization, targeting, and integrations.
5. See the popup button settings on the customization menu. Identify the text on your popup button. Click on that text from the left side menu (not on the popup.)
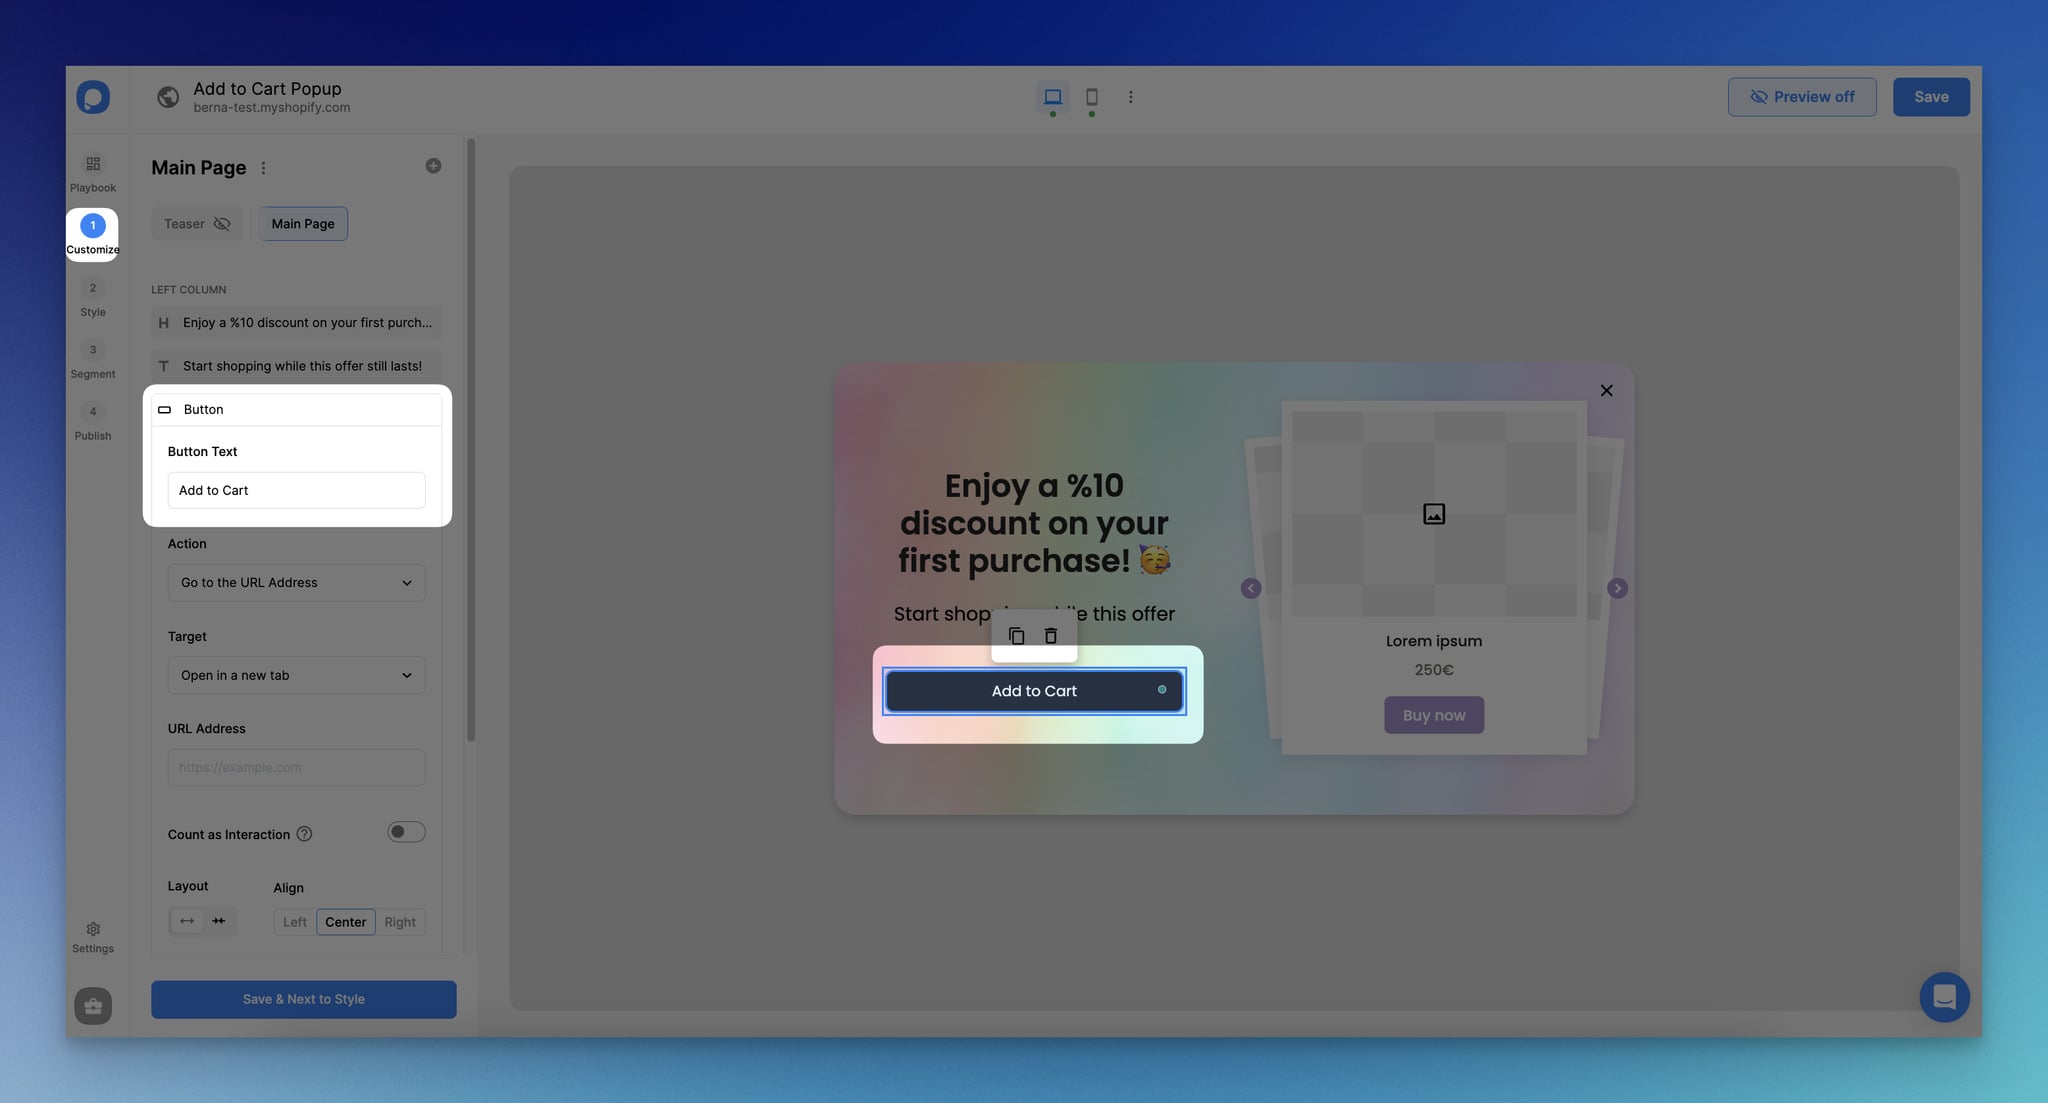
6. Choose Action as “Go to the URL Address.”
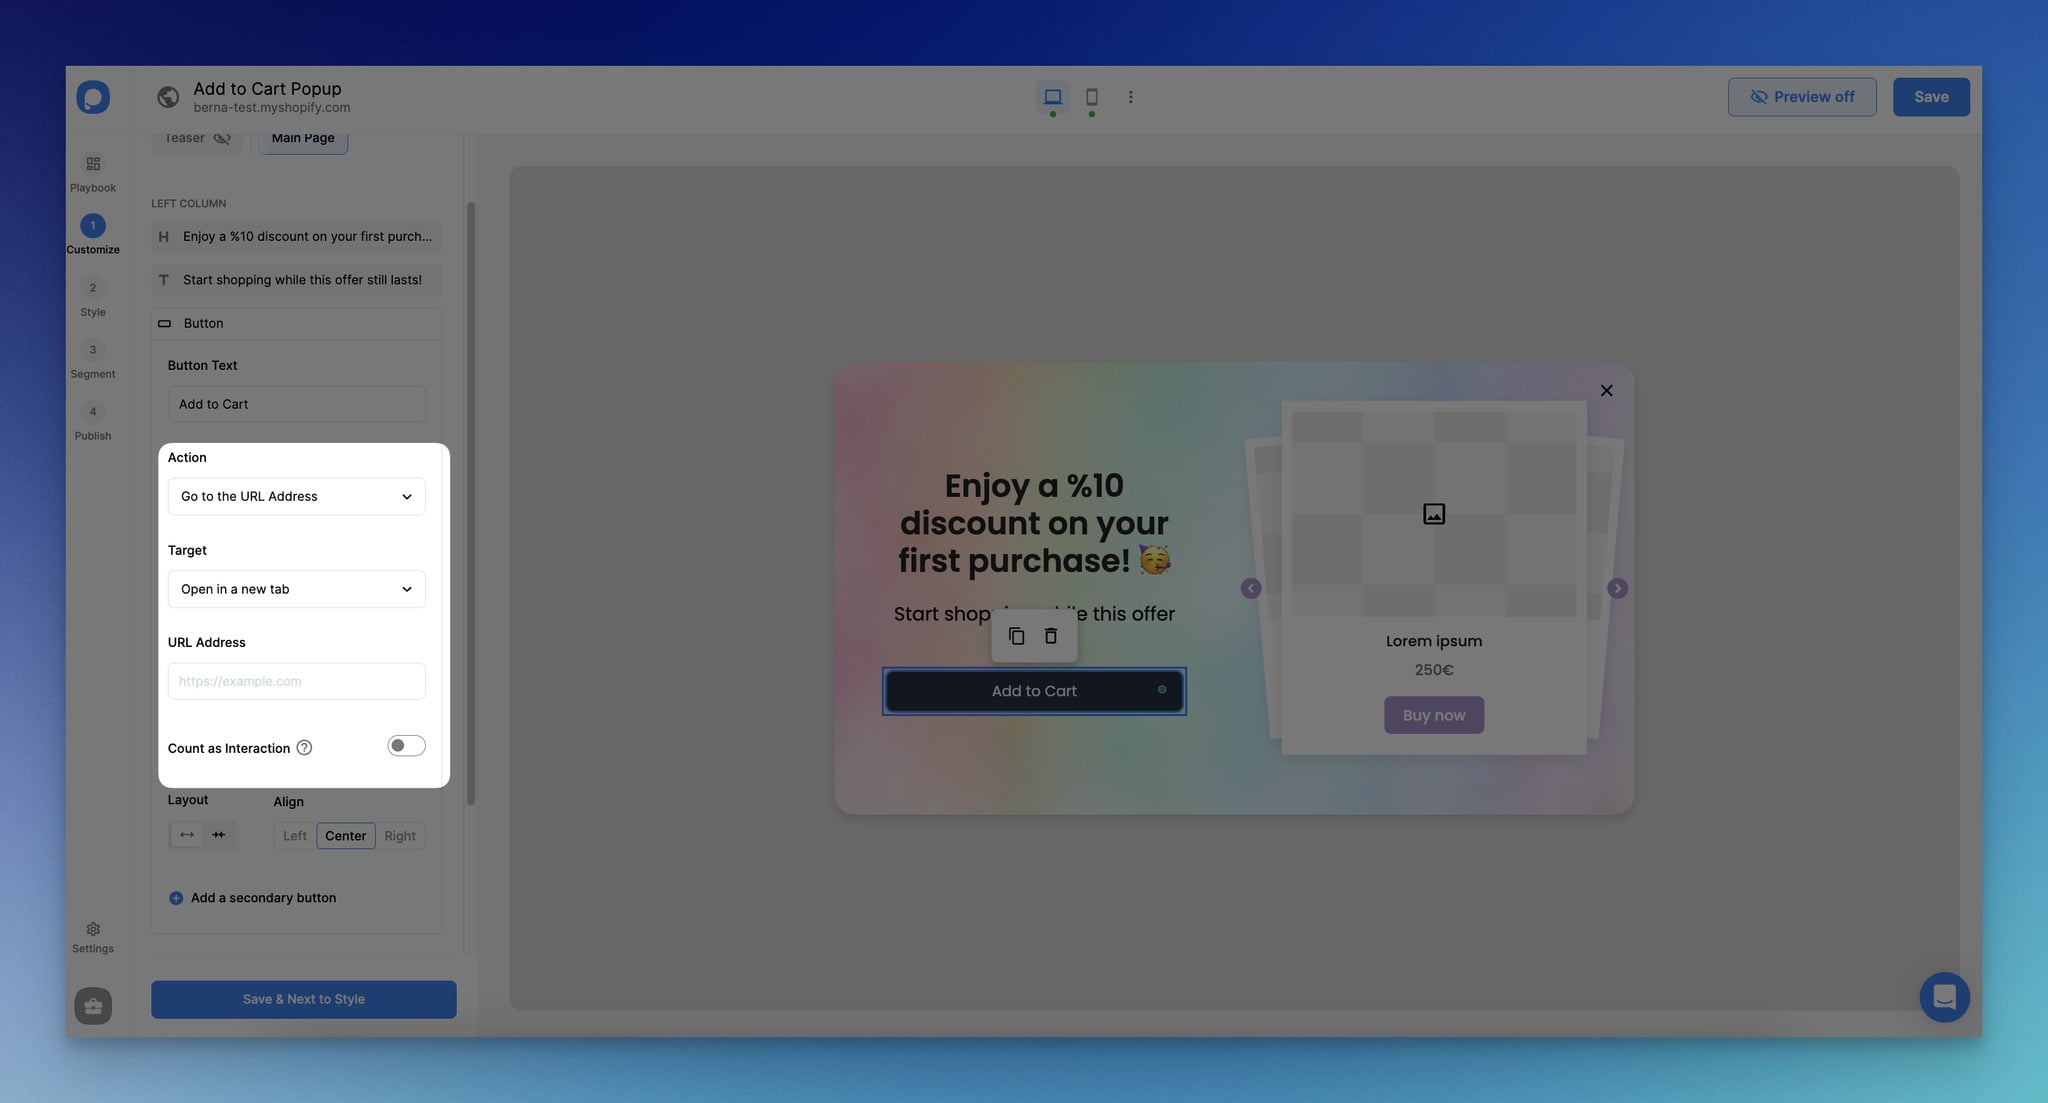
7. Paste the Shopify add to cart link you have created in the “URL Address” box. E.g.,
<img>https://www.yoursite.com/cart/add?id=VARIANTID&quantity=1</img>
8. Once you are done with customization, click Segment.
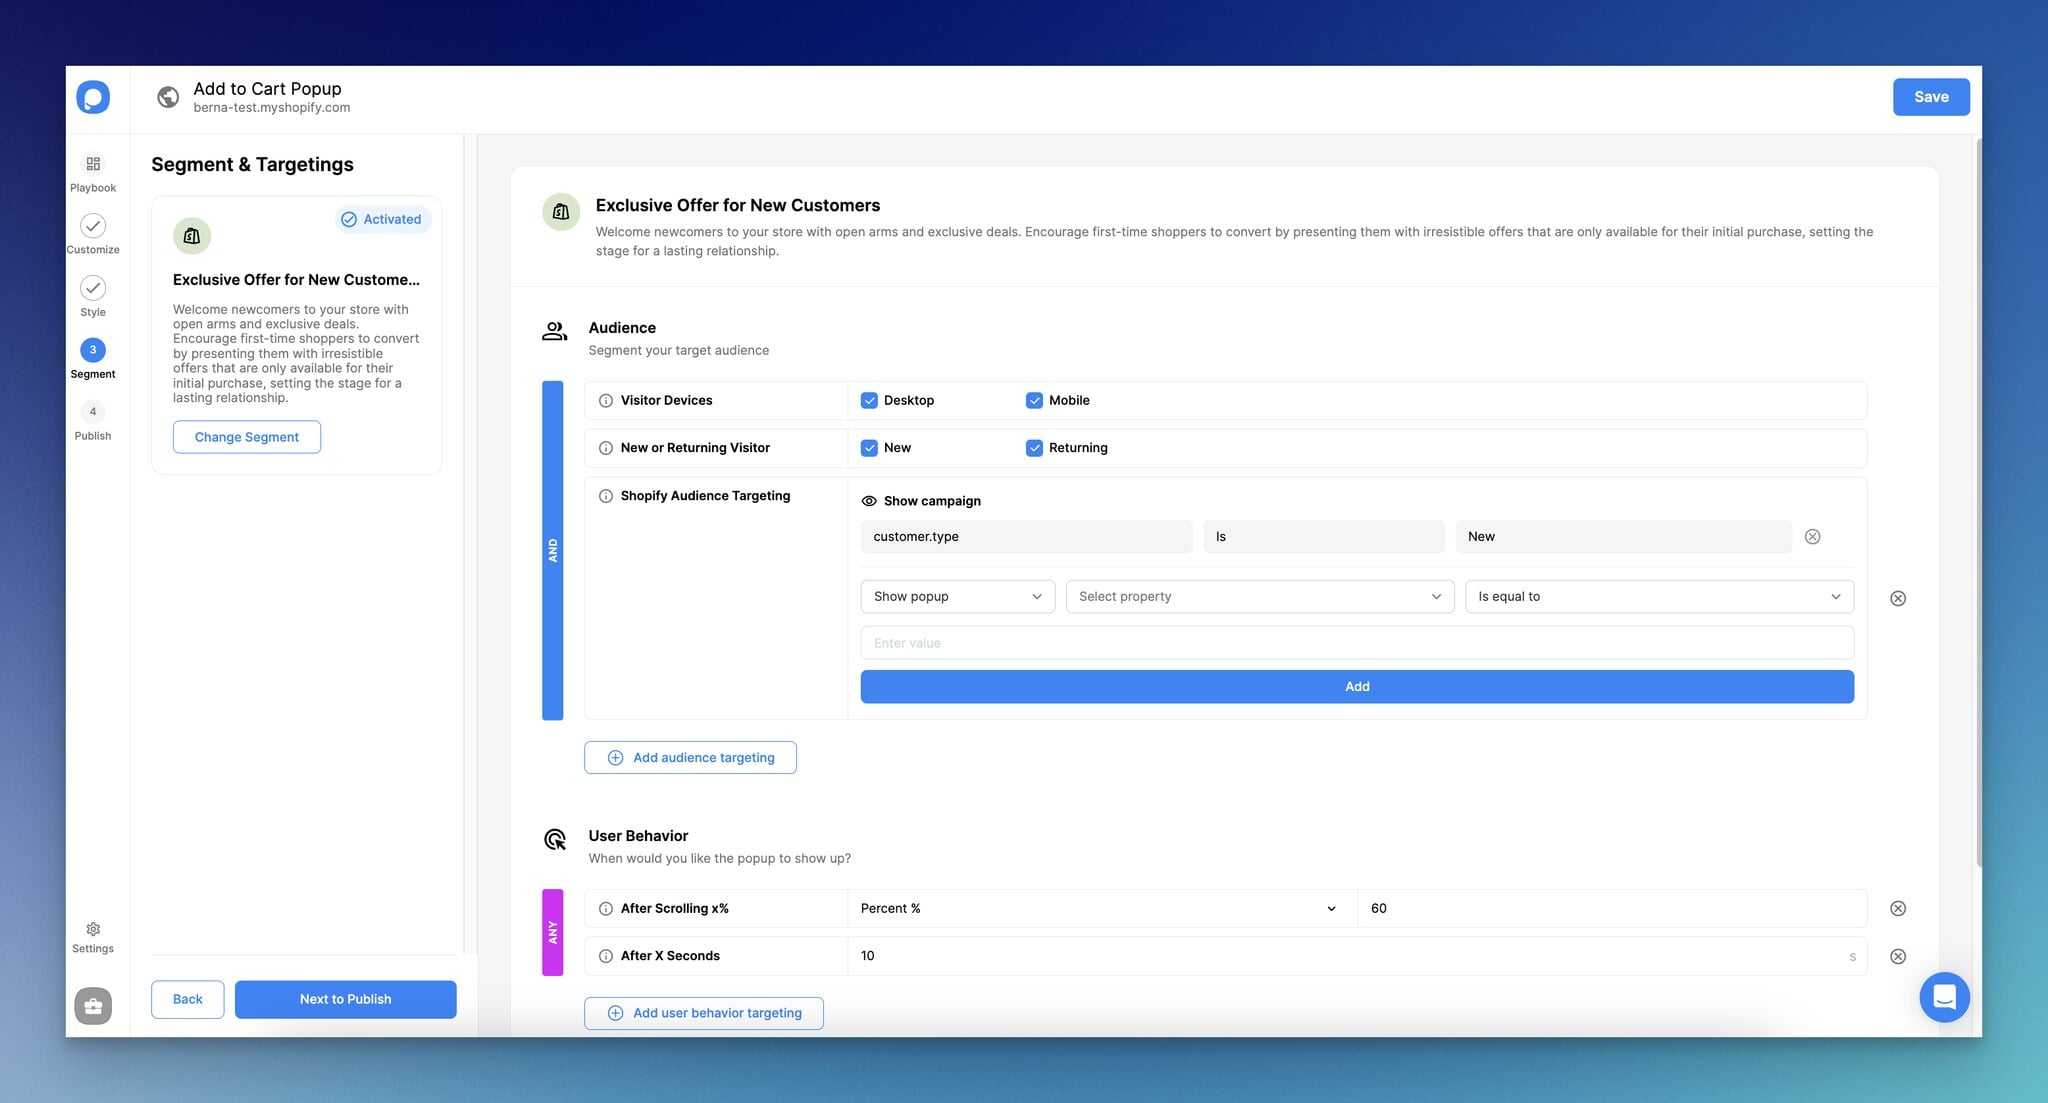
9. If you want to target shopping carts with specific item/s at checkout, you will need to use HTML targeting. Click on Audience Targeting, then select HTML targeting.
See HTML targeting documentation.
You can also use Shopify Audience Targeting to reach the right people at the right time.
If you want to target specific pages on your website, you can use URL Targeting.
10. Once you are done, save to publish later or Save & Publish right now.
It would work perfect for Shopify upselling and cross selling!
Shopify Related Articles:
That’s it! We hope you found this tutorial helpful. Did it work for you? Tell us in the comments below. 🙂

How would you rate your experience with this article? 😊