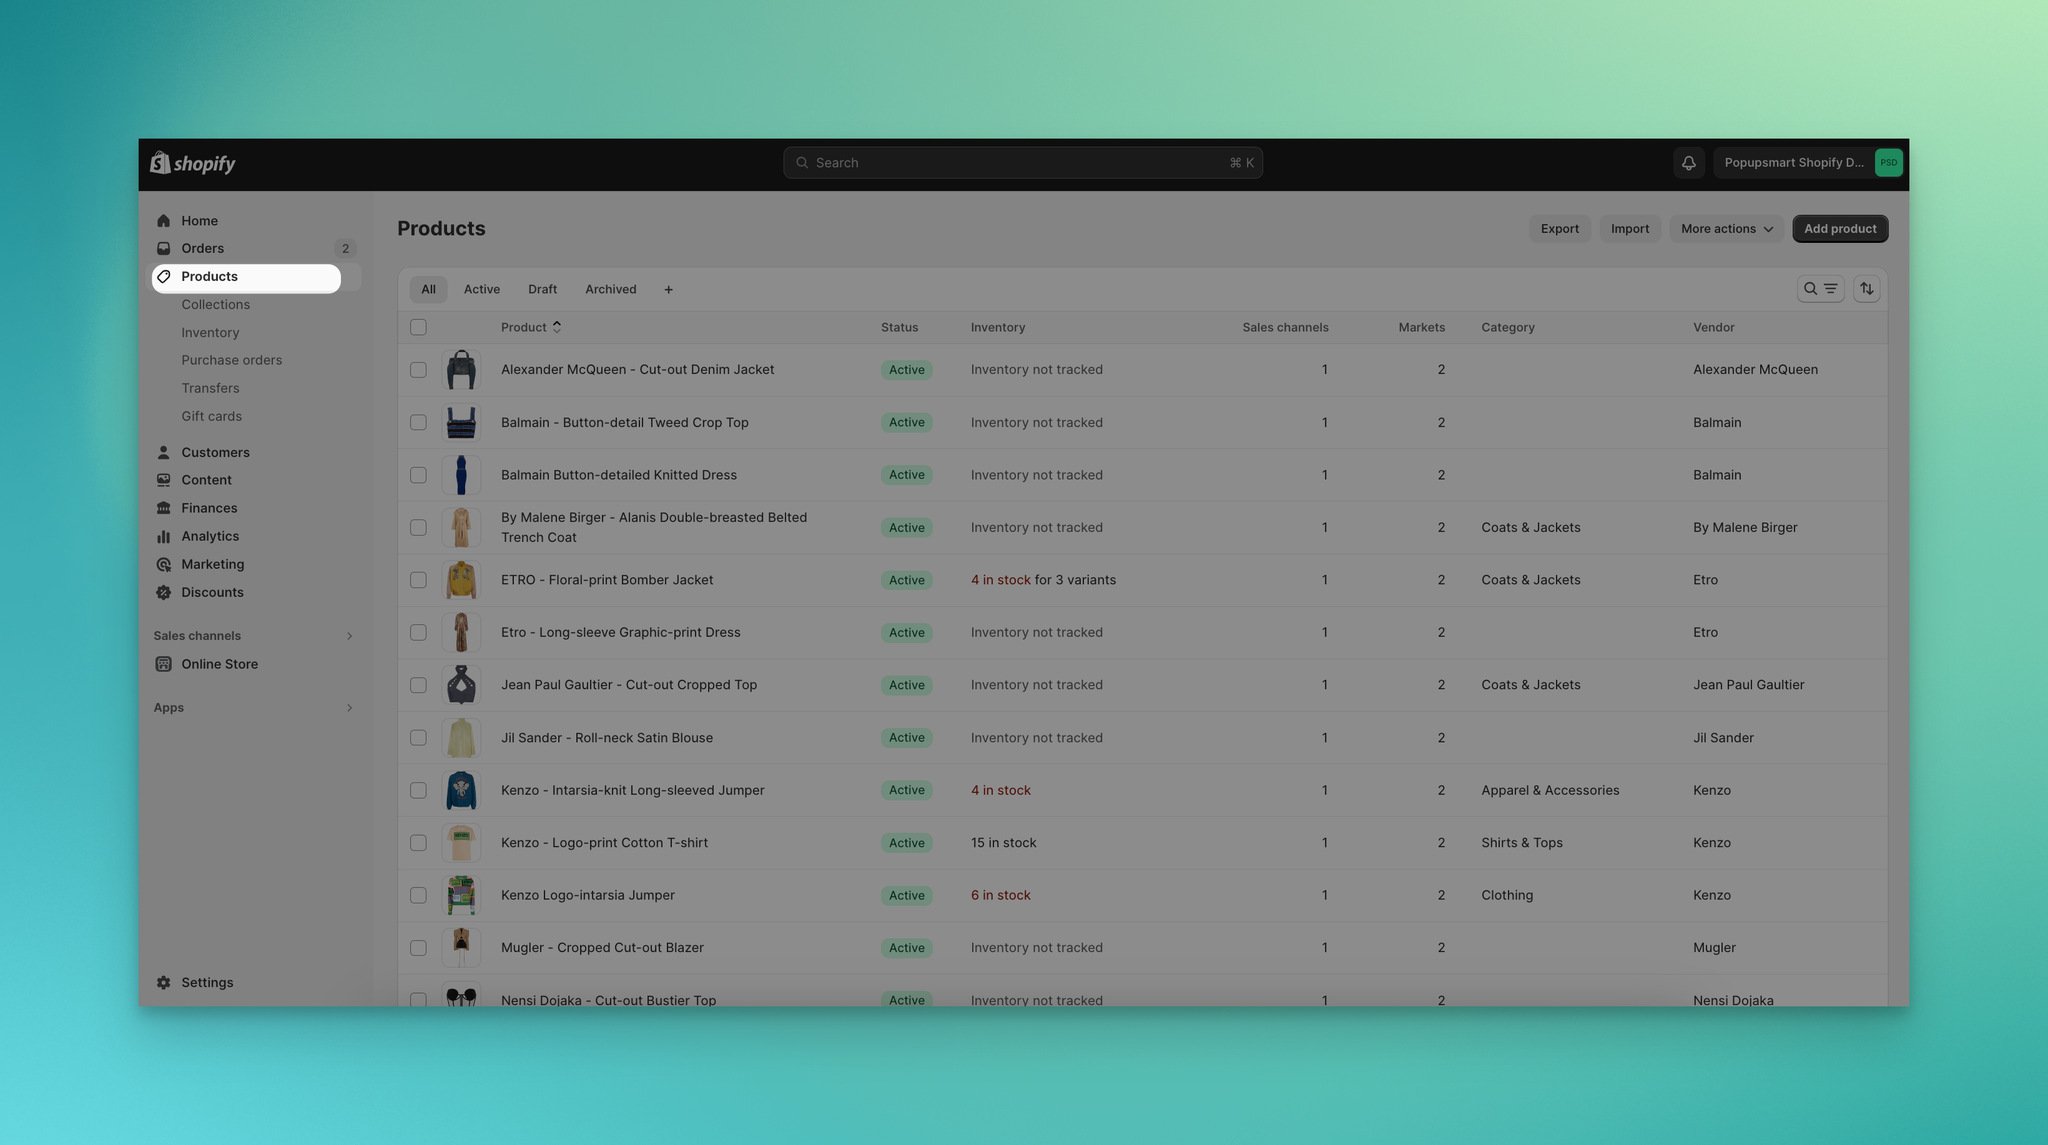
Importance of Organizing Products on Shopify

The way you organize your products can make or break your business. Once a potential customer lands on your Shopify store, you need to ensure that they find what they are looking for quickly and easily.
One of the most important aspects of organizing your Shopify products is providing a better user experience.
Imagine scrolling through a well-organized store, effortlessly finding what you need; that's the experience you should aim for your customers.
Your users should be able to effortlessly navigate through your store and quickly find what they need. If you organize your products strategically, it will not only help your visitors but also your store will be more visually appealing.
Also, you can get the full potential of your products and collections once you organize them properly.
Your visitors can see your wide range of products in a clear and organized way, which can eventually increase your sales and user engagement.
Apart from these, if you include relevant tags, variants, and collections and organize them properly, visitors can also get product recommendations and see what else they can buy without getting lost.
Having a well-organized store can help you boost your sales, cross-sell relevant products, and provide a better customer experience to your potential customers.
How to Organize Products on Shopify with 6 Various Ways
There are various ways you can use to organize your products on your Shopify store. You can use one of them or apply all of them if they suit your store. Below, we listed and explained different methods you can use to organize Shopify products.
Explore them, and start applying them to your store to achieve your goals with a well-organized Shopify store!
1. Categorize Products with Collections
Shopify collections play a significant role in enhancing your store's navigation and presenting products in an appealing way.
Collections allow you to group related products together, which will be helpful for a more intuitive shopping experience. They can be featured on your homepage and guide users to specific product categories.
You can also create collections for seasonal campaigns or trends to capture customer interest.
Let's explore how to organize collections on Shopify & optimize collections for managing your store:
Step 1: Go to the "Products" tab in your Shopify admin, and then select "Collections" to create a collection on Shopify.
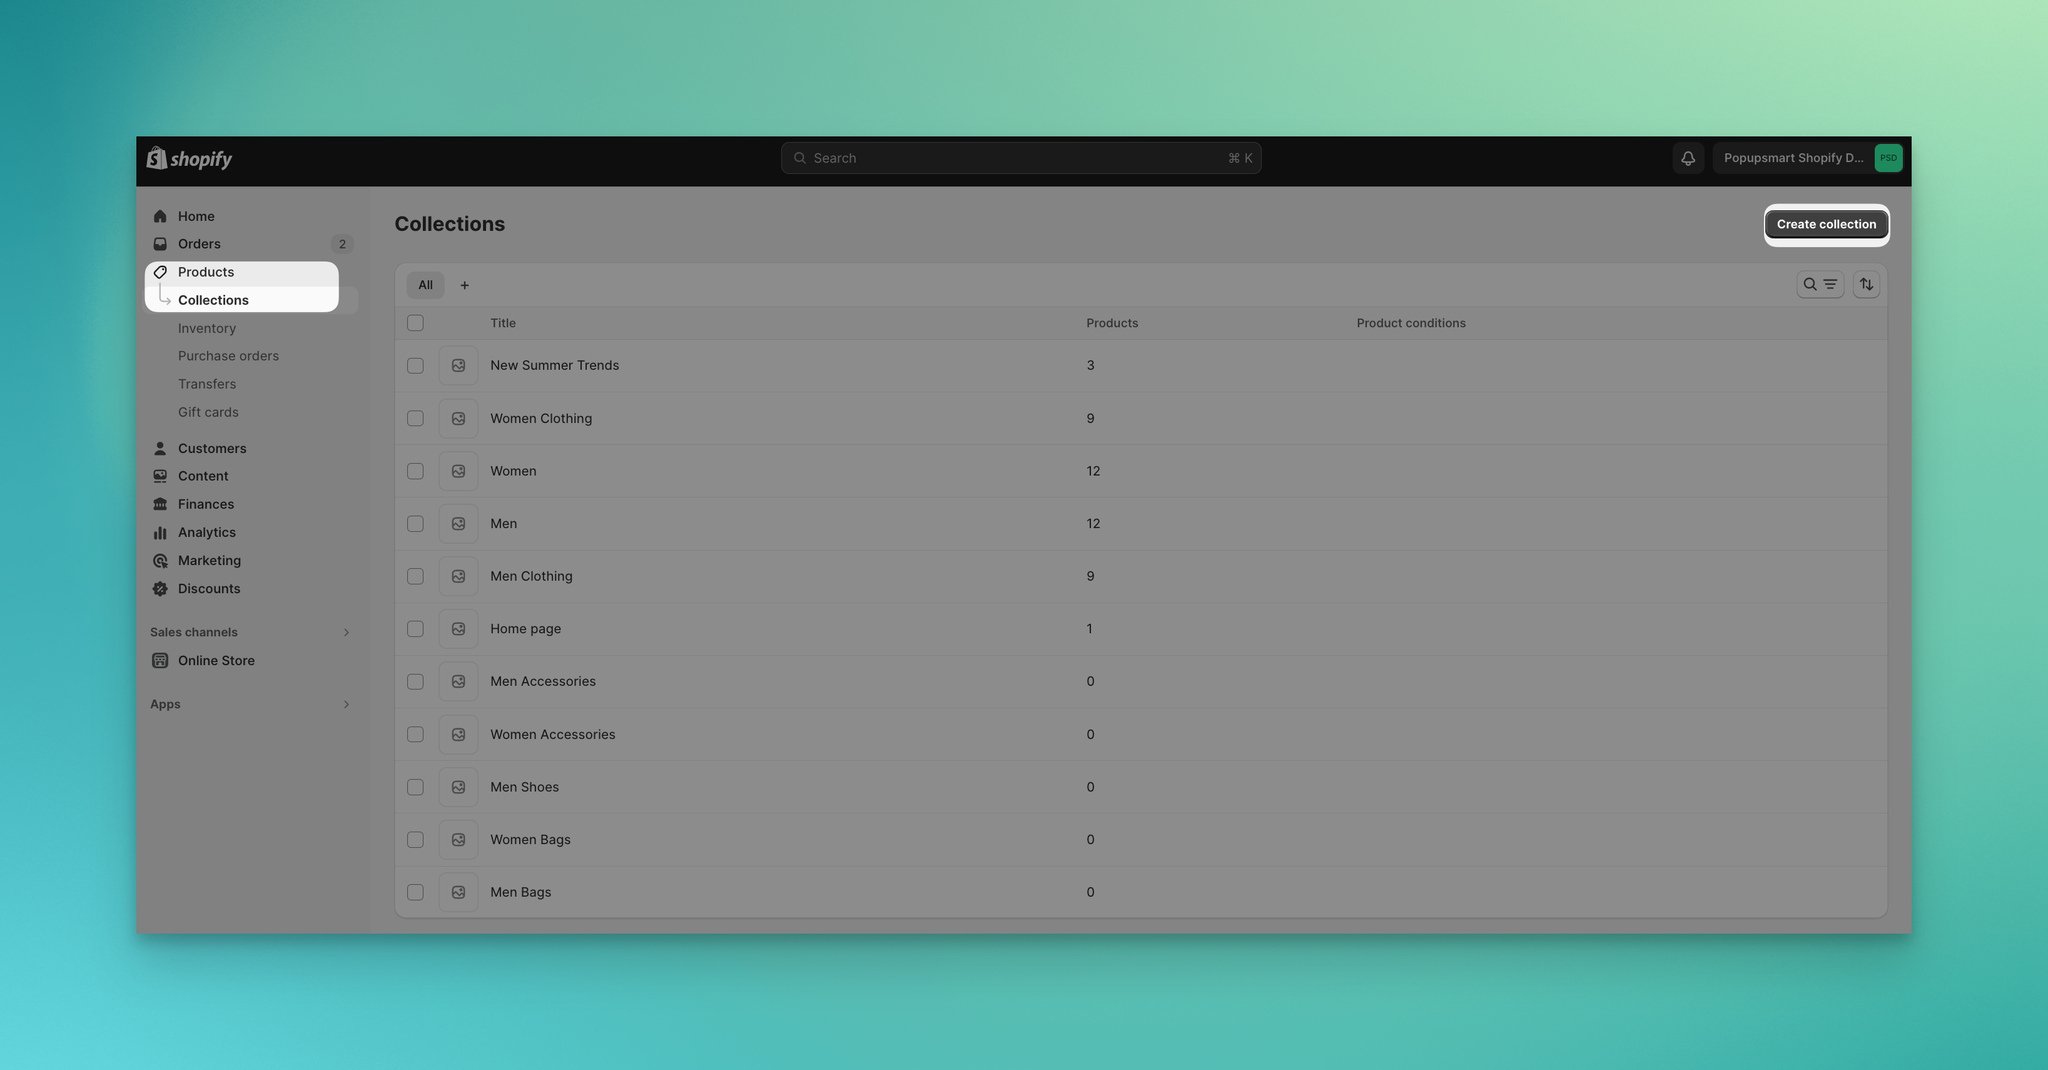
Click on the "Create collection" button to create your collection.
Step 2: Then, you can input a title and description for your collection, add products, and optimize your collection's details.
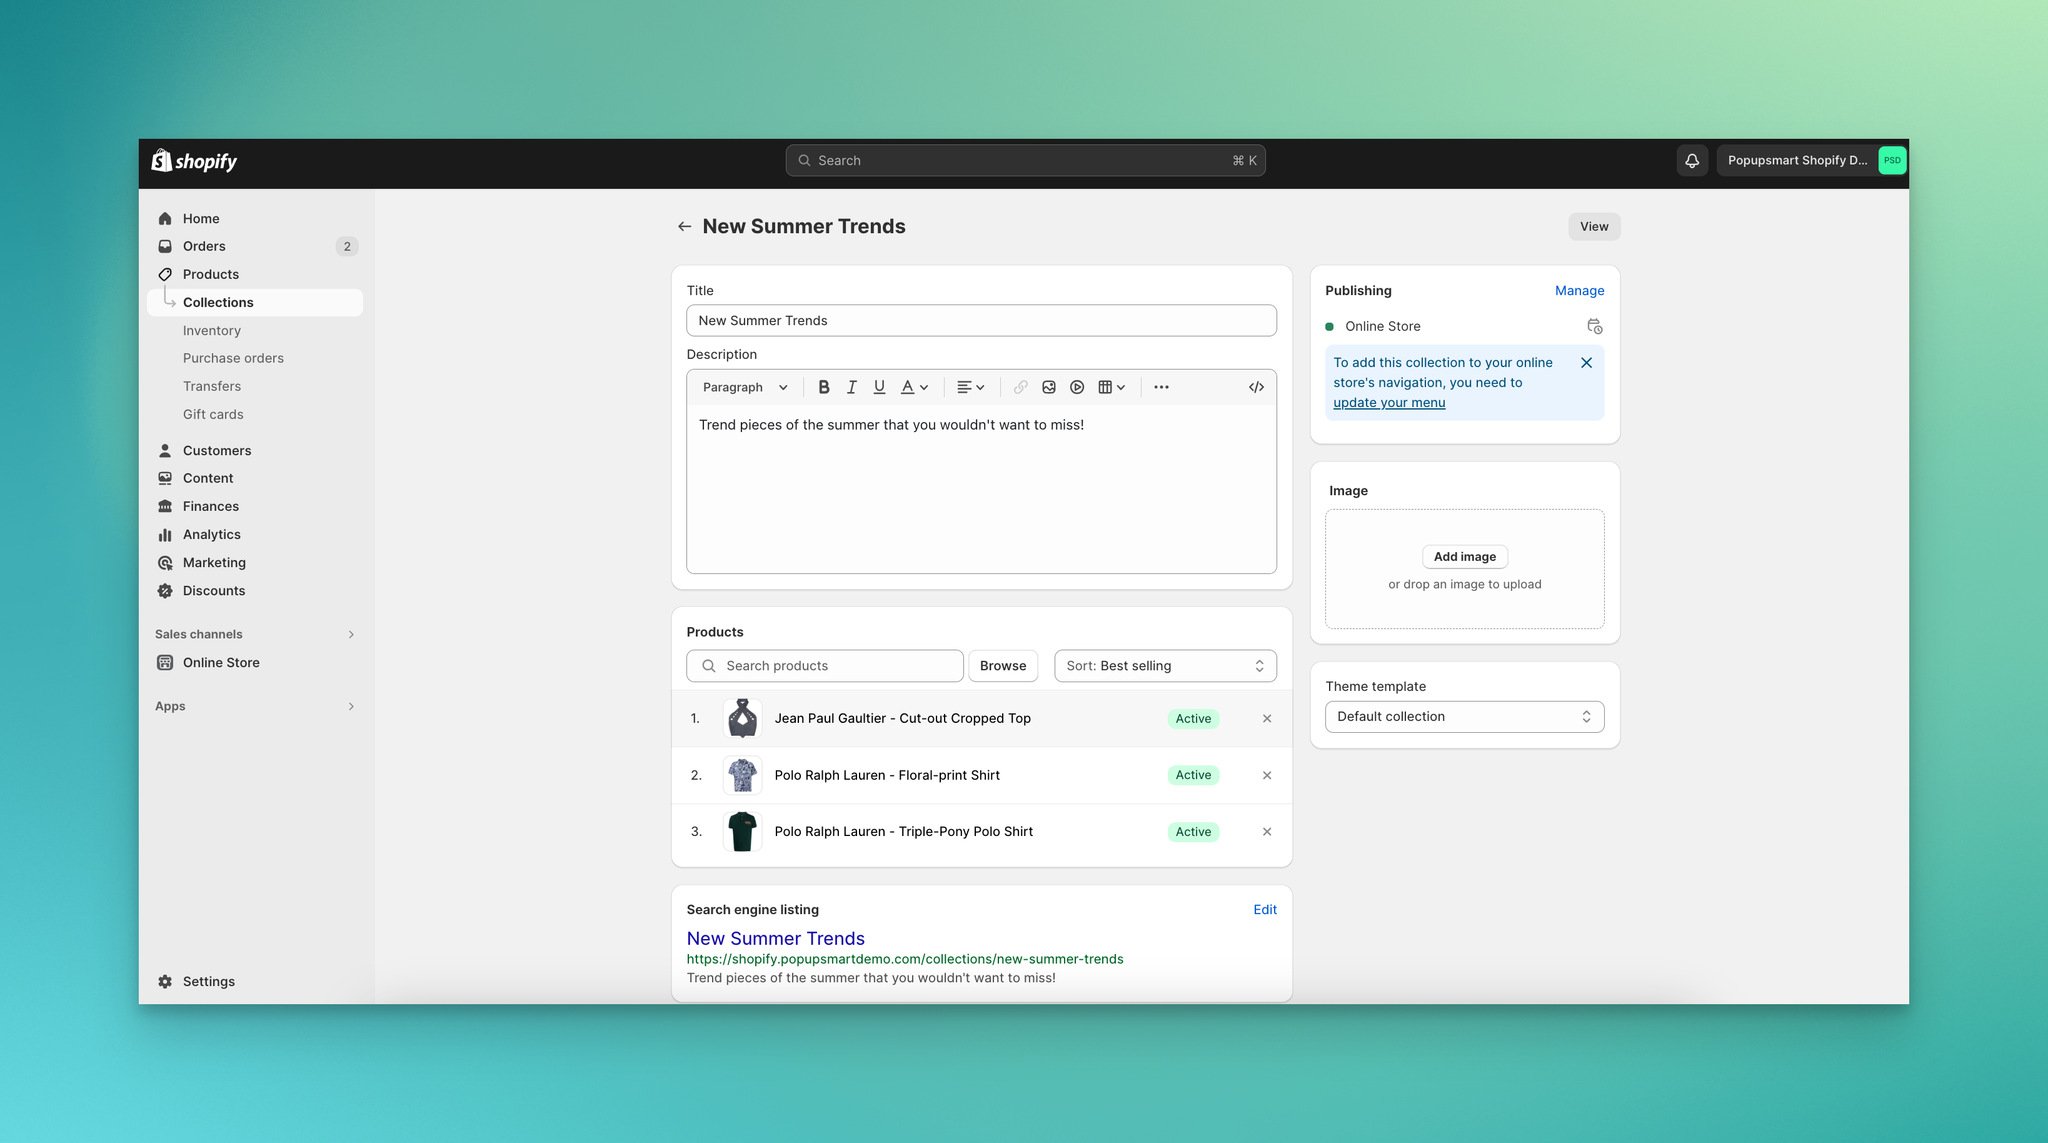
While writing your collection titles and descriptions, write concise yet informative copy that entices customers.
Emphasize your unique selling points and encourage visitors with reasons why they should explore them. Enhance the overall copy of your collection to captivate your target audience.
You can also include images in your collections. While adding a collection image, focus on high-quality images, represent your brand identity, and use appealing images.
Ensure that your thumbnail images accurately reflect your collection.
2. Set Product Order Manually in Collections
By learning how to manually sort products in Shopify, you can organize your collections properly according to various criteria.
Within the "Collection" section, you can choose to order your products in the collection manually.
Here are the quick steps to change the product order manually:
Step 1: Go to your Shopify admin panel first, then "Products" and "Collections," as explained above. Select the collection you want to optimize from the list.
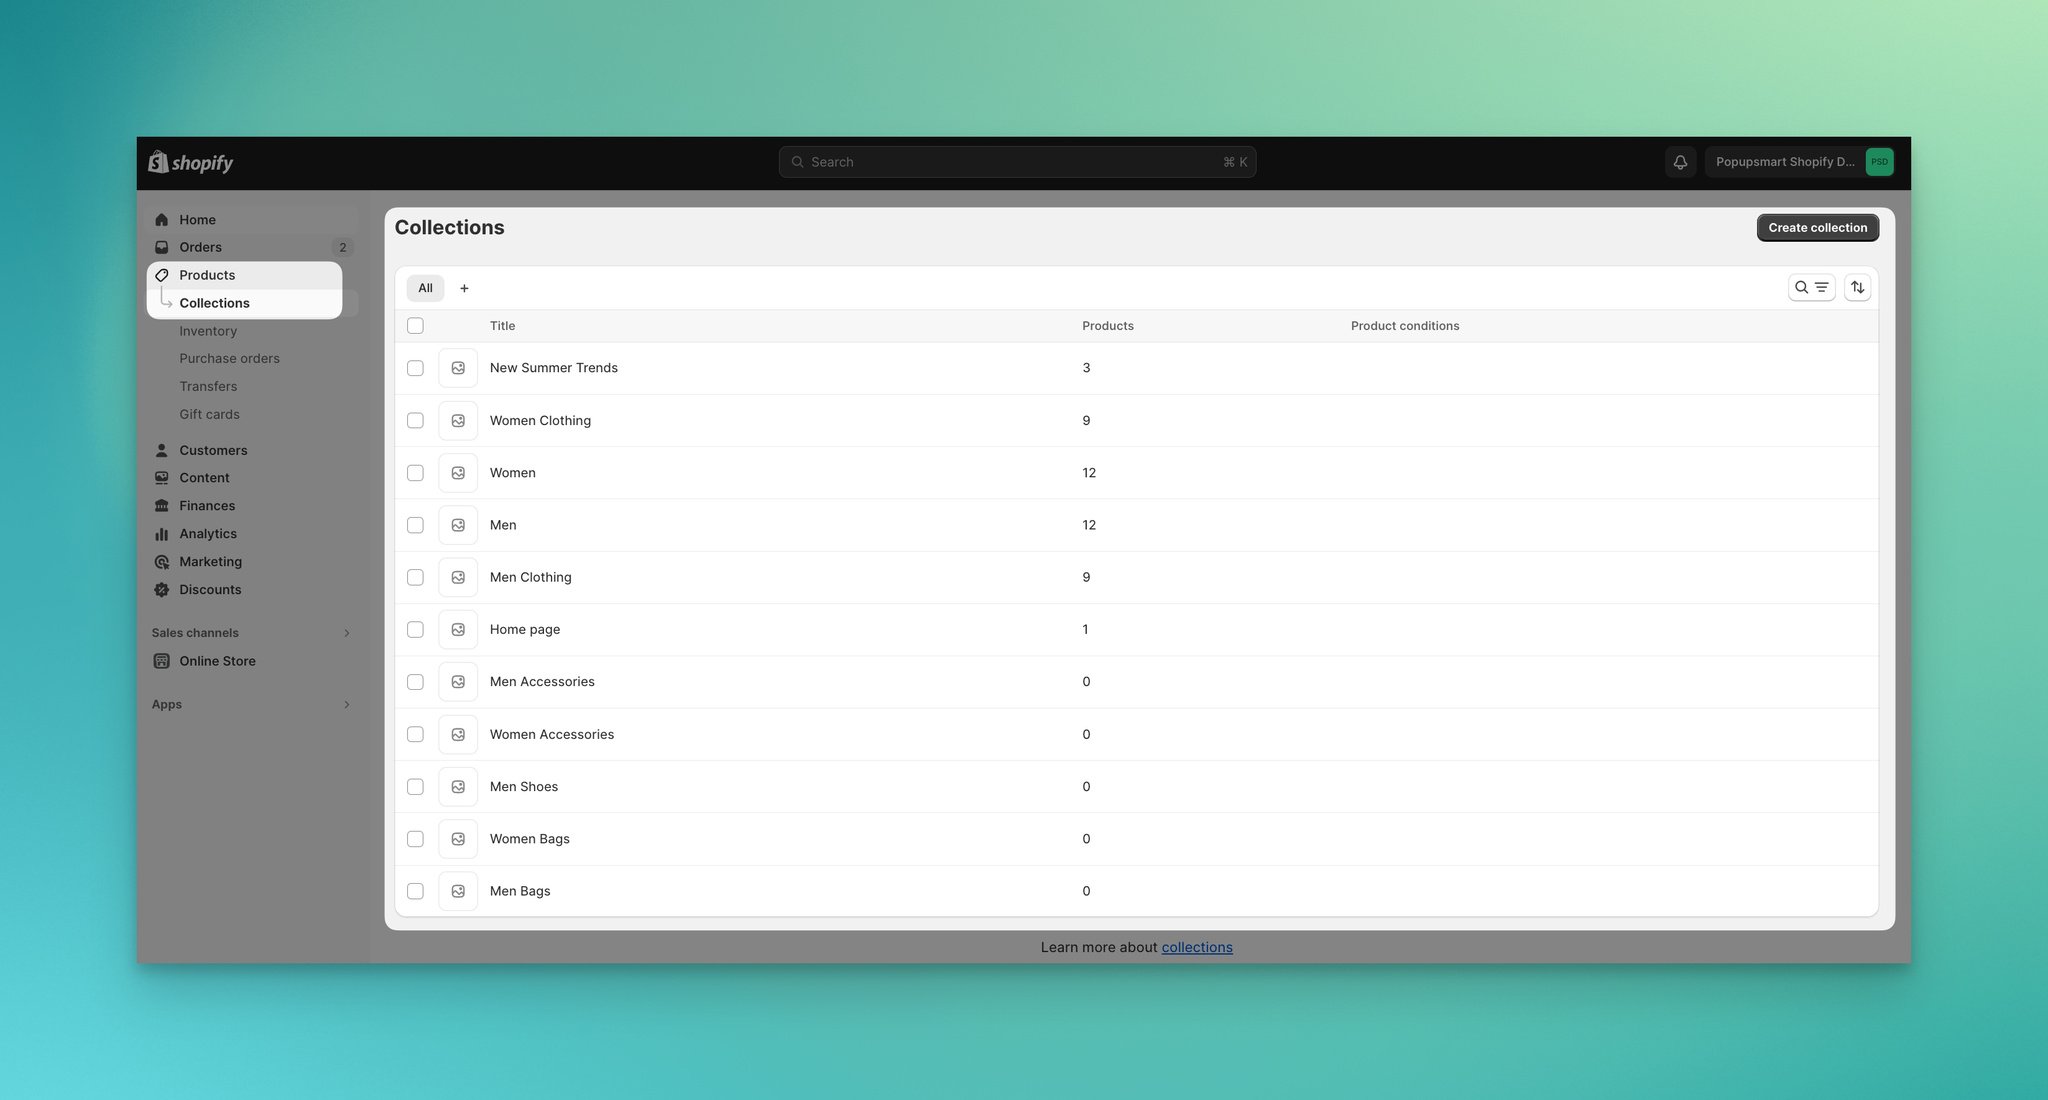
Step 2: Scroll to the “Products” part and select “Sort:Manually” by going to the drop-down menu.

Click the "Save" button and start moving your products manually and organizing them according to your needs.
3. Sort Products in Collections Automatically
If you choose to create an automated collection instead of sorting products manually, you can do so by selecting conditions.
Here are the quick steps to sort products in collections automatically to organize your Shopify products:
Step 1: Begin by accessing your Shopify admin panel, then navigate to "Products" and "Collections" as previously explained. Choose the specific collection you want to optimize from the provided list.
Step 2: Scroll down to the “Products” part. Establish the sorting order for the arrangement of products in your collection from the drop-down list.
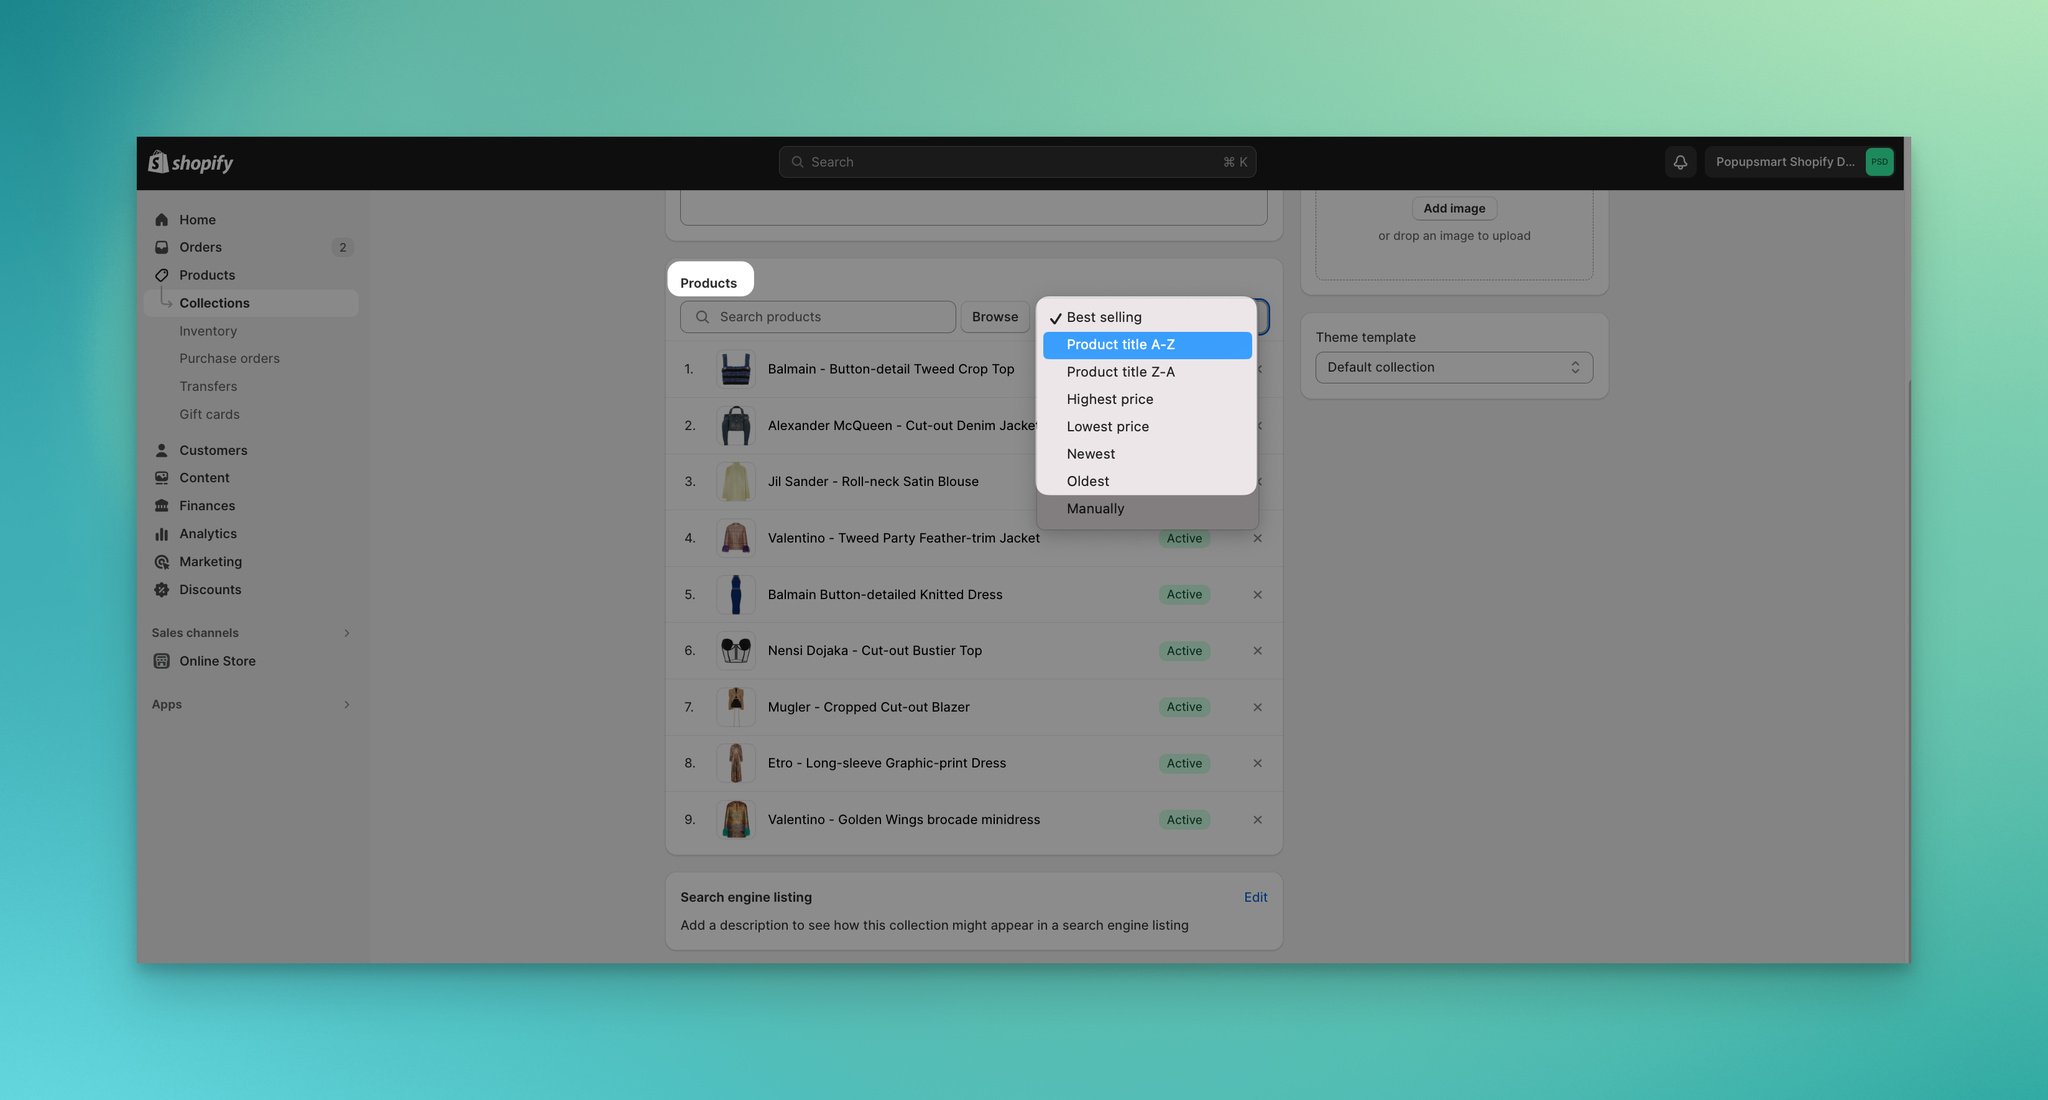
In this section, you can use the drop-down lists to establish the collection conditions. You can select criteria that suit your store's and collection's needs.
Automatic sorting options include:
- Best selling: This option will show the best-selling products first. For those in the early stages without any sales, this will arrange products from the most recent to the oldest.
- Product Title A-Z/Product Title Z-A: You can arrange products alphabetically, either from A to Z or Z to A.
- Highest price/Lowest price: You can organize products based on price, either from the lowest to the highest or vice versa.
- Newest/Oldest: You can arrange products by the date they were added, from the newest to the oldest or vice versa.
Once saved, you will see that products meeting the specified conditions are automatically included in the collection and displayed accordingly.
4. Organize Products Using Tags
Product tags on Shopify are labels and keywords assigned to products to provide additional information other than categories and collections. They enable customers to filter products based on specific criteria to improve search experience.
Shopify product tags can offer you more flexibility and help you organize products to belong to multiple groups simultaneously.
See more at "What are Tags on Shopify? The Complete Guide"
Let's see how you can organize your Shopify products using tags:
Step 1: Go to the "Products" from your admin panel.
Select the particular item you want to modify or include a new product in your list of items.
Step 2: Type the desired tag name into the Tags section or select an existing tag.

To distinguish between multiple tags, you can use a comma.
When you finish adding tags, click the "Save" button to finalize your settings.
While adding product tags, identify key attributes that customers might use for filtering. These attributes can be related to the color, size, and material of your product. Maintain a consistent naming for tags to avoid confusion.
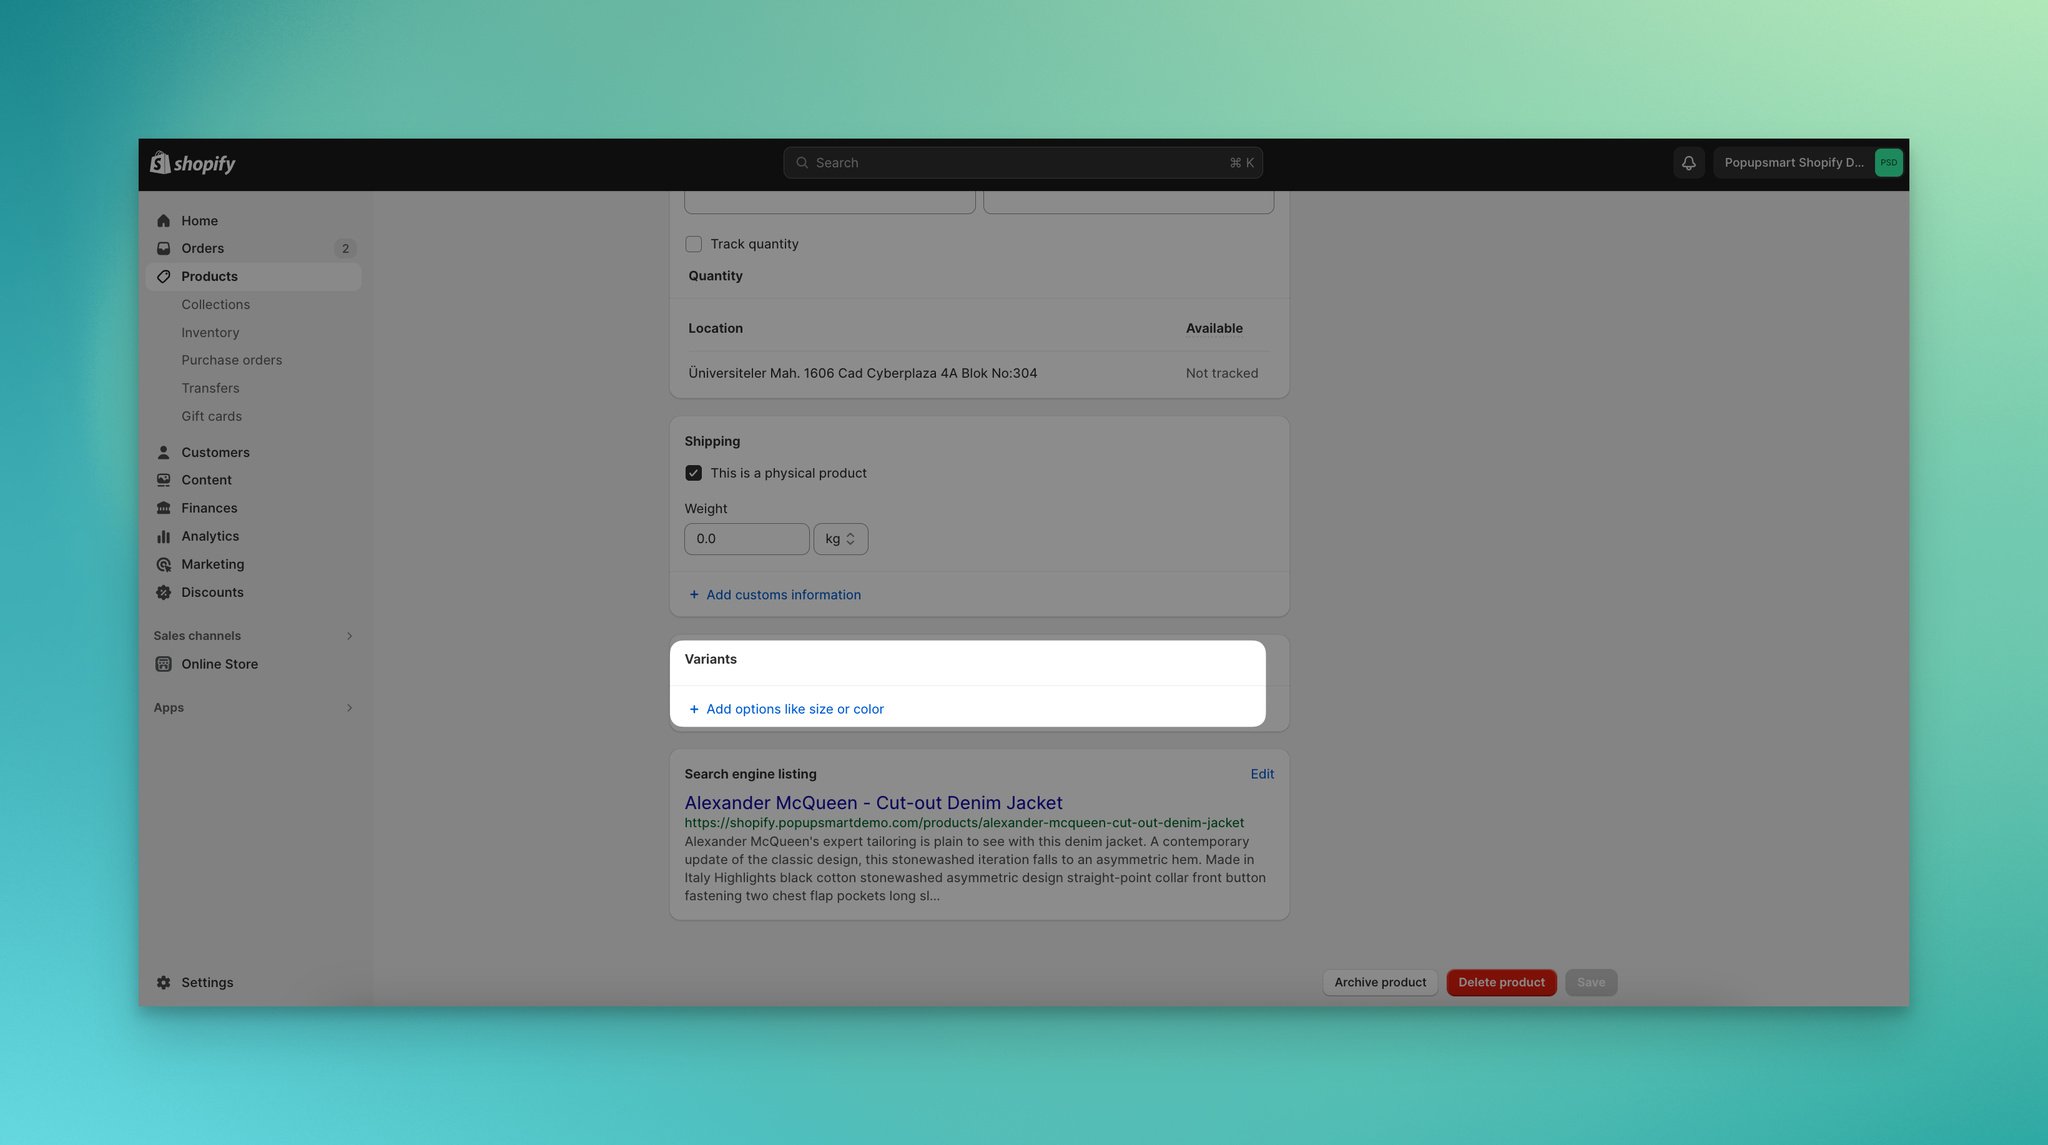
5. Organize Product Options with Variants
Using product variants, you can organize your Shopify products by considering their different options.
In order to organize product options using variants, you can follow these steps:
Step 1: Navigate to the "Products" page from your Shopify admin panel.
Step 2: Navigate to the bottom of the page to locate the "Variants" section, and click the "Add options such as size and colors." button.
Step 3: Following that, you have the option to select from Size, Color, Material, and Style choices and input additional details for each variant.
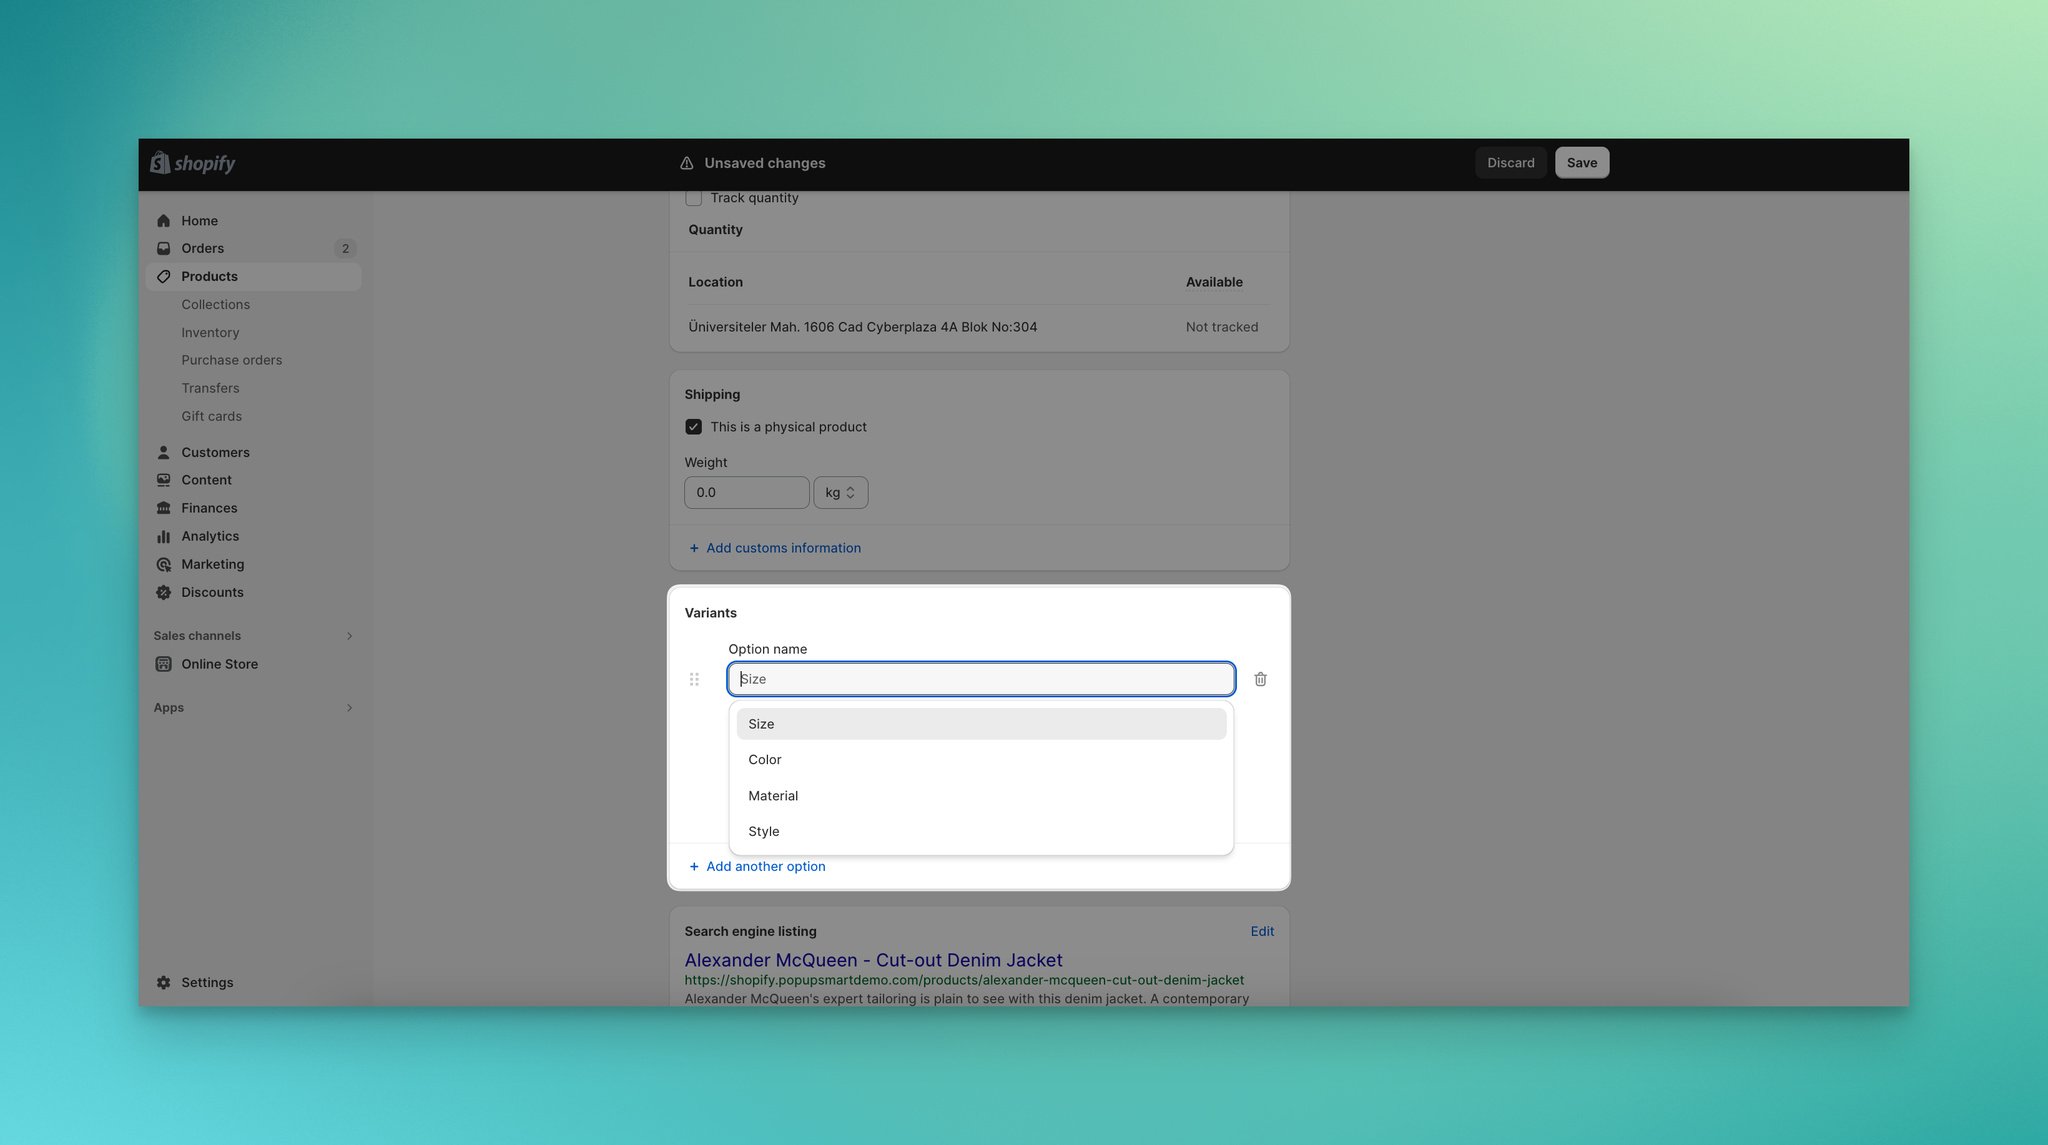
Step 4: Then, to adjust your variant, input the corresponding "Option Name" and its corresponding "Option Value."
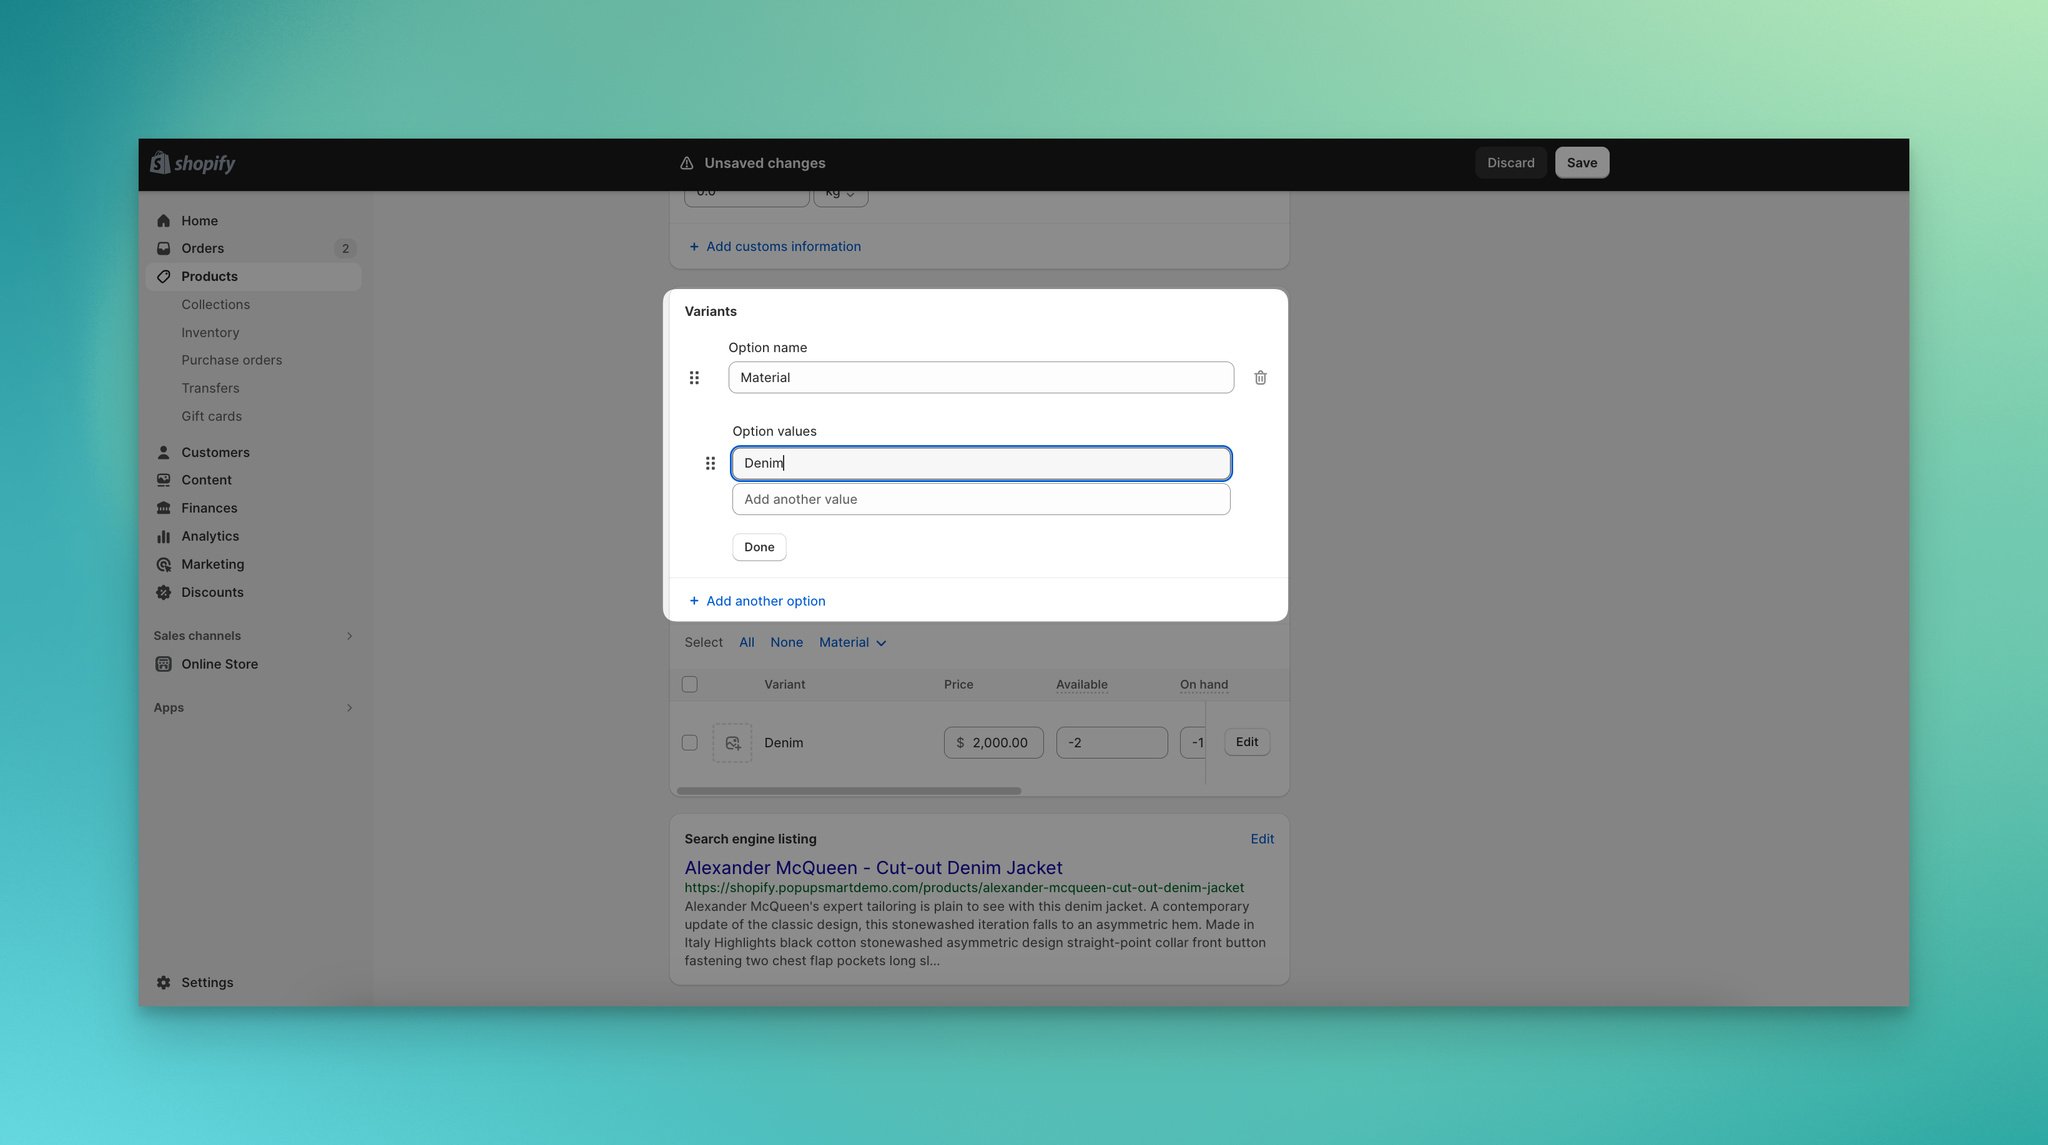
For example, you can include various material details or colors of a product from variant options.
Once you finish adjusting these details, click on the "Save" button to finish up your customizations.
You can also explore "How to Add Variants in Shopify? Step-by-Step Guide in 2024" for more details about variants in Shopify.
6. Use Third-Party Applications
Shopify provides various applications to enhance your store's functionality. These apps can be helpful for organizing your products and keeping your stores efficient and organized.
Since Shopify applications seamlessly integrate with your store, using a tool that helps you organize your products can be helpful. These tools generally provide filtering options based on tags, categories, and attributes.
Also, they can help you to add customizable filter layouts and real-time filtering options.
There are a few apps available on the Shopify App Store you can use to enhance your product organization, such as Smart Product Filter & Search, Advanced Filters & Search, Searchanise Search & Filter and so on.
You can choose one that suits your store's needs by exploring a wide range of apps on the Shopify App Store.
Best Practices for Organizing Shopify Products

While organizing your Shopify products by using the methods we gathered before, you need to pay attention to certain things.
Here are a few best practices & things you should keep in mind while organizing your store:
- Write clear product descriptions: Clear product descriptions are vital for a successful online store. Crafting descriptions with relevant keywords enhances SEO, increasing visibility on search engines. Also, precise product details build customer confidence, reducing the likelihood of misunderstandings.
- Highlight your products' unique features: Emphasize what sets your products apart from the competition. By highlighting certain aspects of your products, you can encourage customers to take action.
- Keep your audience's needs & interests in mind: You need to organize your store according to your potential customers. By knowing your audience, you can tailor your product details and language to resonate with them. Group products logically to improve your audience's experience.
- Optimize collection & product images: As first impressions matter a lot, using high-quality images on your collection thumbnails and products overall can help you create a positive and lasting impression. Use clear and high-resolution images and provide multiple images from different angles while organizing your collections and products.
- Use consistent language and aesthetics: Maintain a consistent theme and language across all product images and copy to organize your store correctly. You need to maintain a consistent naming convention for tags to avoid confusion as well. For example, if you use "Size: Small" instead of "Small Size" in a product, apply the same language to all of your products.
- Strategically place relevant keywords: Whether you are using tags or collection and product descriptions, focus on strategic keyword placement. That way, you can attract organic traffic while providing a better user experience.
- Avoid choices that can overwhelm visitors: Don't overwhelm your visitors with unnecessary options and categories. Keep your categories broad enough to cover your wide range of products, and be specific about them to make sure everything is clear and manageable.
- Organize categories considering your business structure: Categories should align with how your business operates. If you sell clothing, your categories might include "Tops," "Bottoms," and "Accessories." Organize these categories strategically and ensure that nothing is left behind.
Wrap Up
Having a well-organized Shopify store is valuable if you want to enhance your customer experience.
Knowing how to organize Shopify products can help you improve your store's experience and manage your wide range of products.
In this article, we explained how to organize collections on Shopify, set manual and automatic product orders, organize products using tags, and organize product options with variants.
By exploring these, you can apply the best methods that suit your store's and audience's needs. While organizing your products, always keep in mind what your audience needs and how they can find what they are looking for easily.
Frequently Asked Questions
Why Should You Organize Products on Shopify?
Organizing products on Shopify is crucial for an enhanced user experience and boosting sales. A well-organized store allows customers to quickly find what they're looking for, which can lead to higher customer satisfaction scores and better conversion rates.
What is The Role of Collections in Organizing Shopify Products?
Collections in Shopify allow store owners to create a logical grouping of related products, which is crucial in intuitive navigation. They help highlight seasonal trends, promote specific categories, and improve the overall visual appeal of your store.
How Do Product Tags Enhance Shopify Product Organization?
Product tags provide an additional layer of classification beyond categories and collections. They enable customers to filter products based on specific criteria, enhancing searchability and offering a flexible structure.
Dive into these blog posts about Shopify before you go:
- How to Transfer Shopify Ownership (Quick Steps & Tips)
- How to Create Shopify Product Bundles (Types & Tips)
- How to Add Shopify Filters & Top 6 Apps to Use in 2024
- How to Add a Size Chart in Shopify with 5 Different Methods