How to Create a Shipping Label Without an Order on Shopify
A shipping label is a scannable sticker with key shipment details (addresses, barcode, tracking, service, carrier). On Shopify, create one without an order by making a draft order, marking paid, creating the order, then buying/printing a label; useful for returns, influencer gifts, donations, prep, and international shipping.
If you're a Shopify merchant, you know how important it is to create shipping labels efficiently.
Shipping labels are essential to the e-commerce and online retail supply chains.
However, there are scenarios where you may need to create shipping labels without an order.
Consider scenarios such as donations to charities or sending promotional gifts to influencers.
In these scenarios, these labels become more than just stickers on a box; you will need to create shipping labels without an order.
This guide will explain the 6 steps to creating a shipping label without an order and why.
What is a Shipping Label?
The shipping label is a special sticker attached to the package that contains all the vital information carriers need to ensure your package reaches its destination safely.
This information includes where it's going, its size, and a unique code that can be scanned for easy tracking.
While the shipping label is seemingly just a sticker, these stickers have a purpose bigger than themselves.
Without the right information, packages will not reach the right destination, and as a result, you will cause great damage to the post-purchase experience and, therefore, your brand reputation.
Shipping Label Information:
- The recipient's name, address, and phone number
- The sender's address
- A barcode
- The shipment's order number
- A tracking number
- The date when the order was shipped
- The type of shipping service that was purchased
- The shipping carrier's information
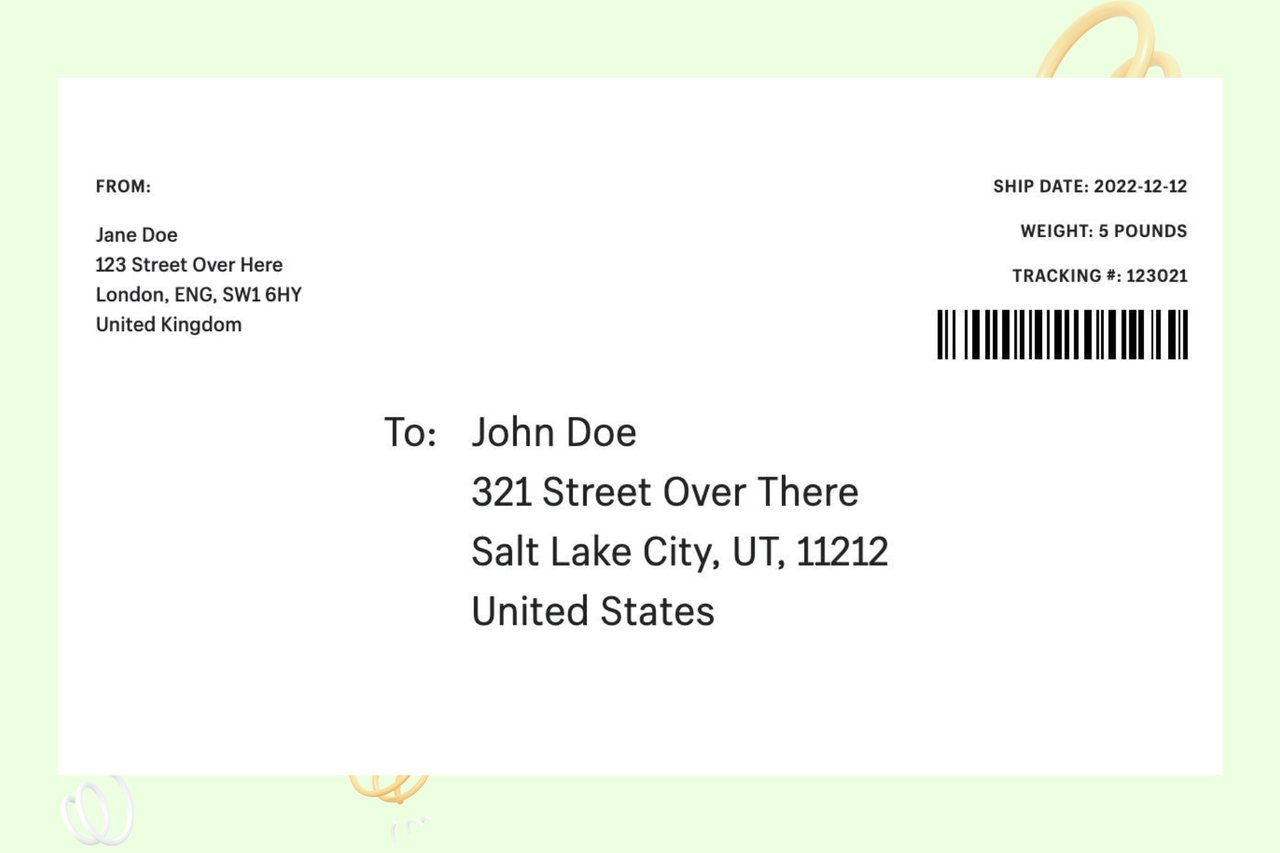
Shopify provides a page with shipping label templates to simplify your process.
The finished label will look something like this:
6 Steps to Create a Shipping Label Without an Order on Shopify
To make creating a shipping label without an order in Shopify as seamless as possible, let's walk you through the process in 6 simple steps.
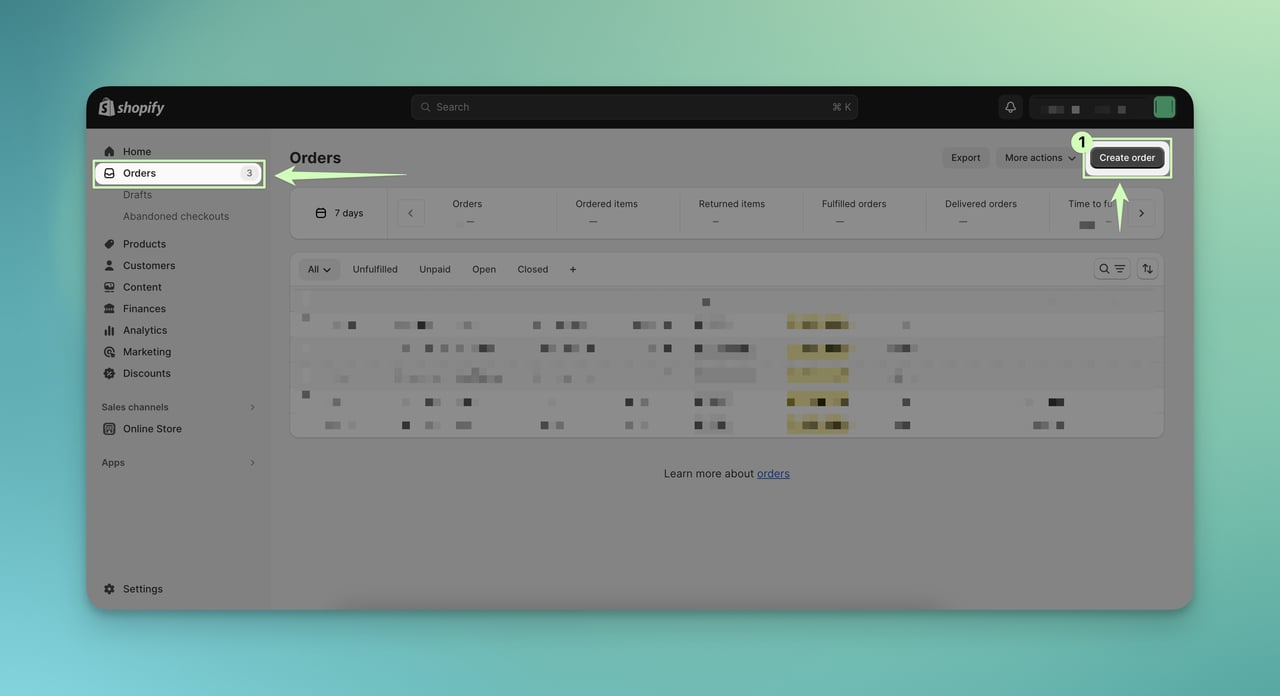
1. Create a New Order
- Click on the "Orders" tab under the "Home" section in your Shopify dashboard.
- In the "Orders" section, click the "Create order" button at the top right.
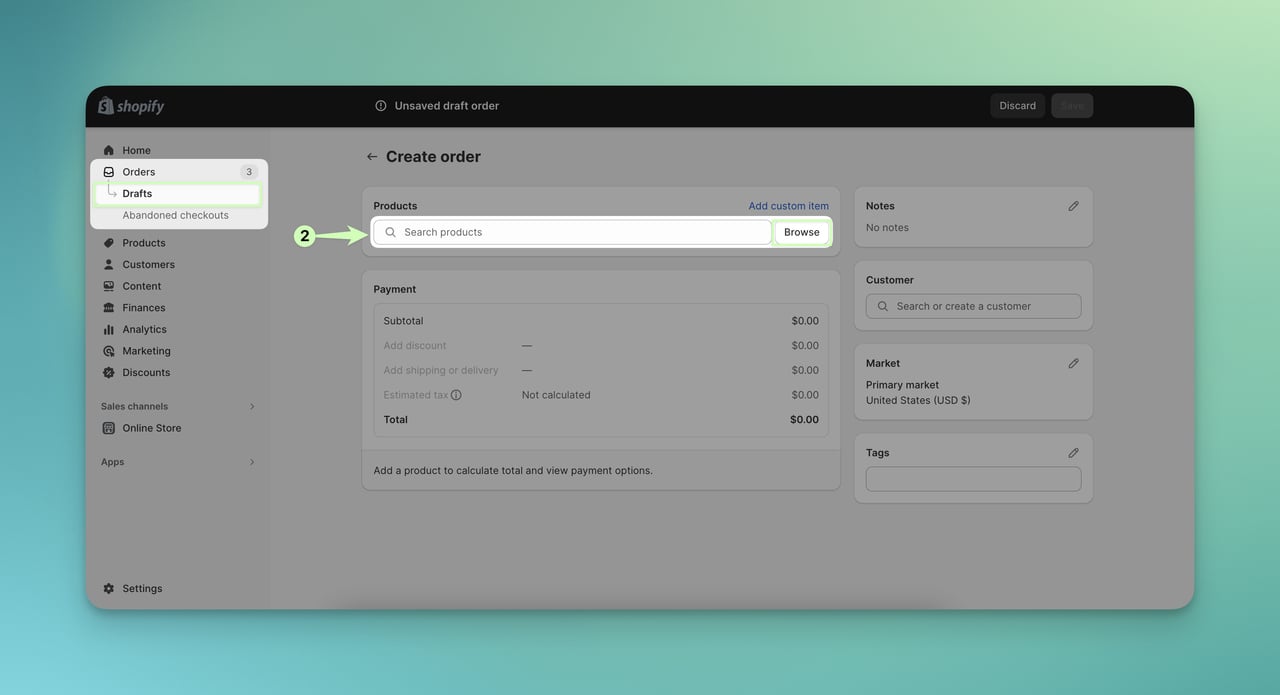
2. Browse Your Products in the Draft Tab
- After clicking "Create order," you will be directed to the "Drafts" tab under the "Orders" section.
- In the "Drafts" tab, you can browse and select the product you want to add to the order.
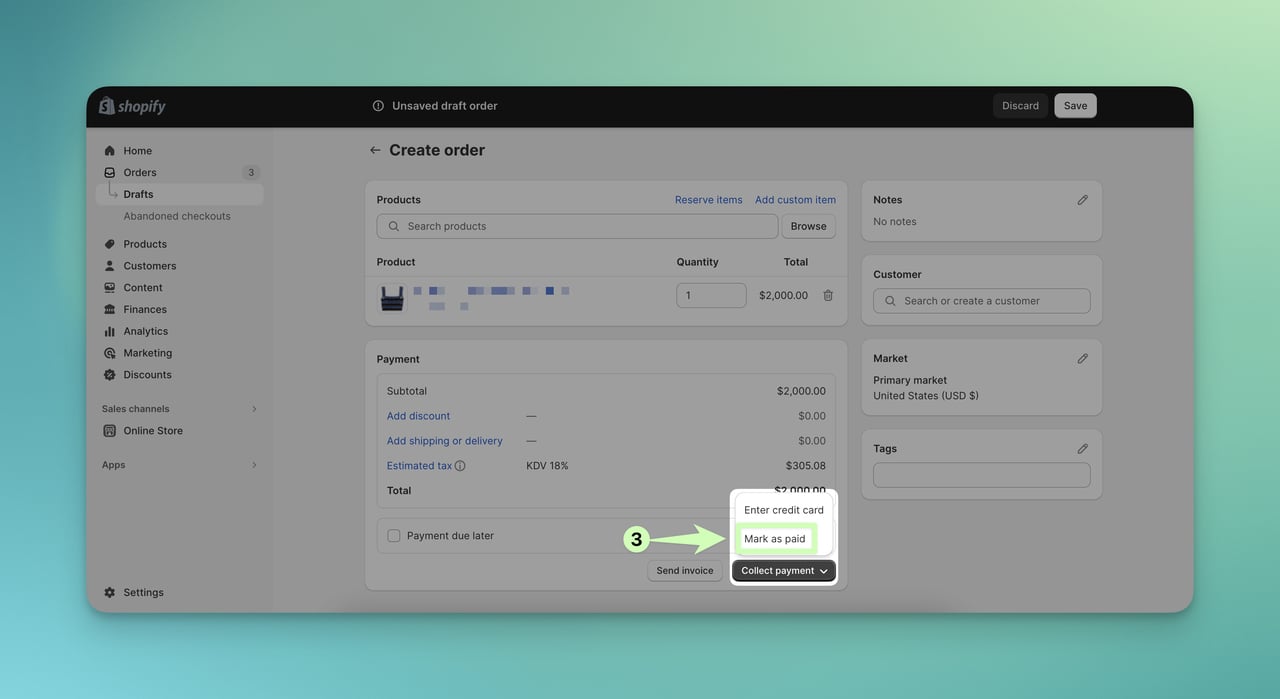
3. Click "Mark As Paid" and “Create Order”
- After confirming the order, click the "Mark as paid" button. This action notifies the system that you received a payment outside Shopify.
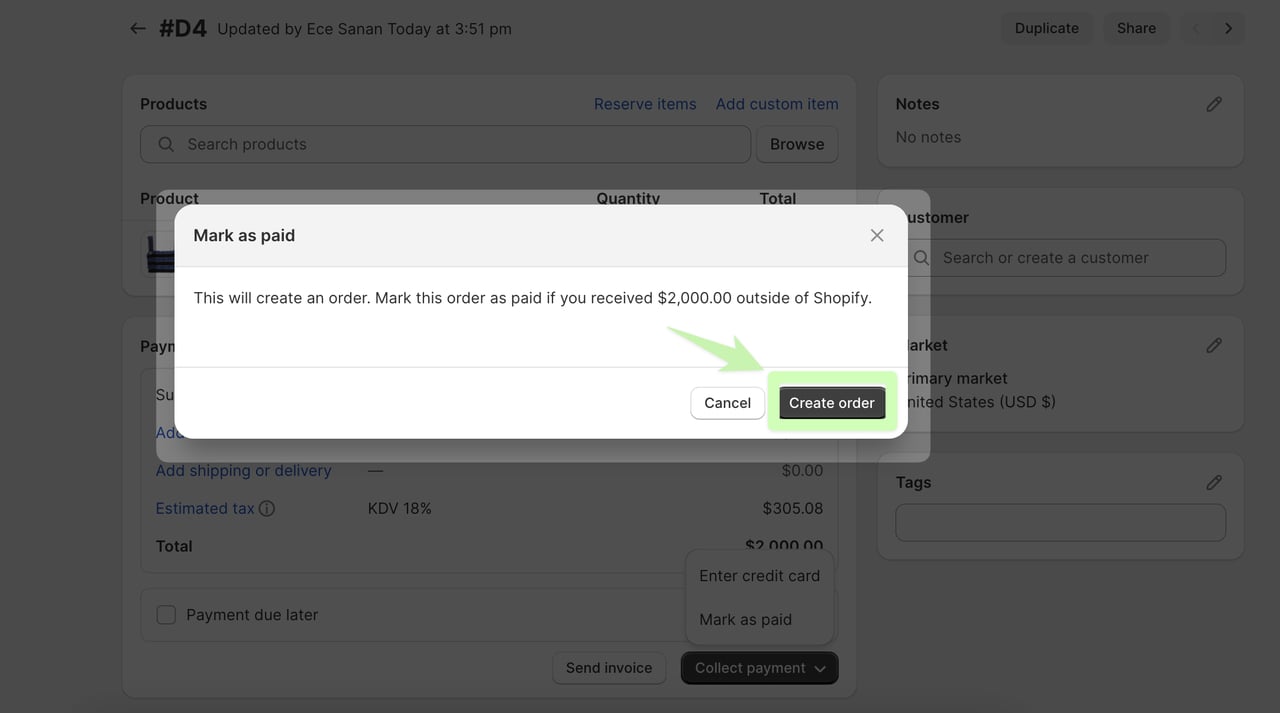
- Then click the "Create order" button. This action will convert the draft order into a regular order.
Note: When you mark a draft order as paid, Shopify warns you that this action will convert that order from a draft order to a regular one. You can see this warning below.
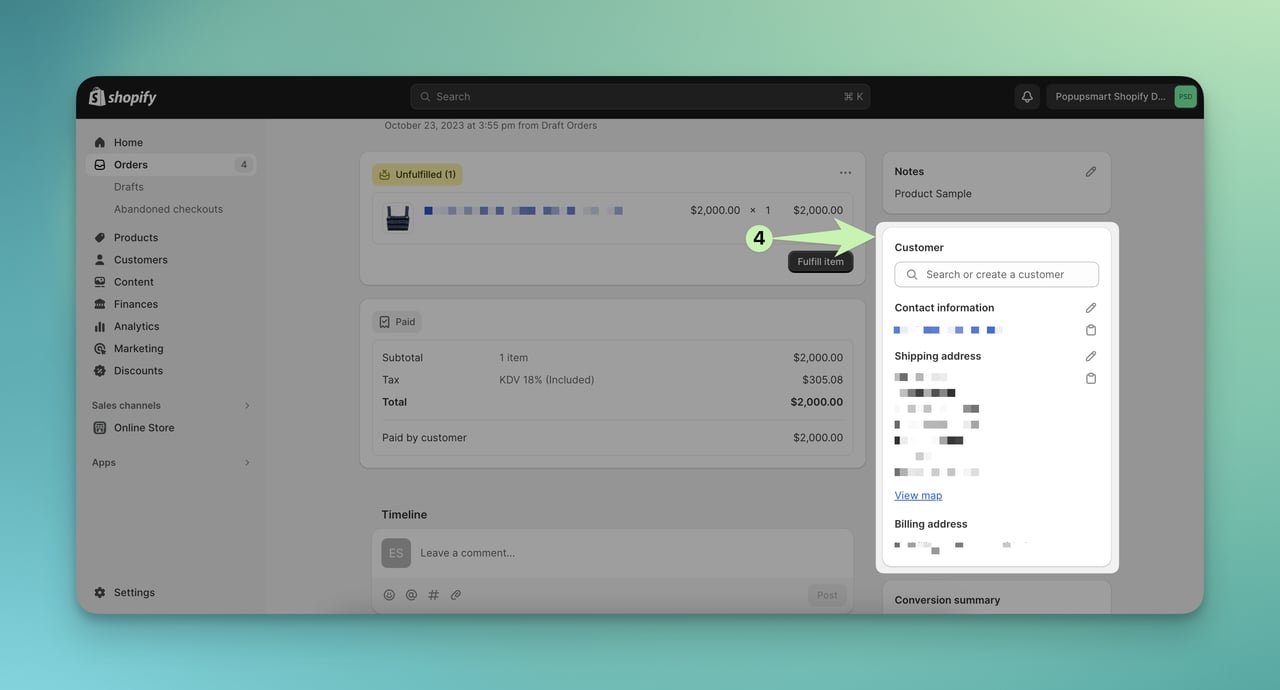
4. Add Customer Information and Shipping Details
- You can edit or add the customer's information and shipping address on the right-hand side.
5. Print the Packing Slip
If everything is ready with your order:
- Click "More actions" as you would with regular orders.
- Select "Print packing slips"
- Your packing slip is ready in PDF format
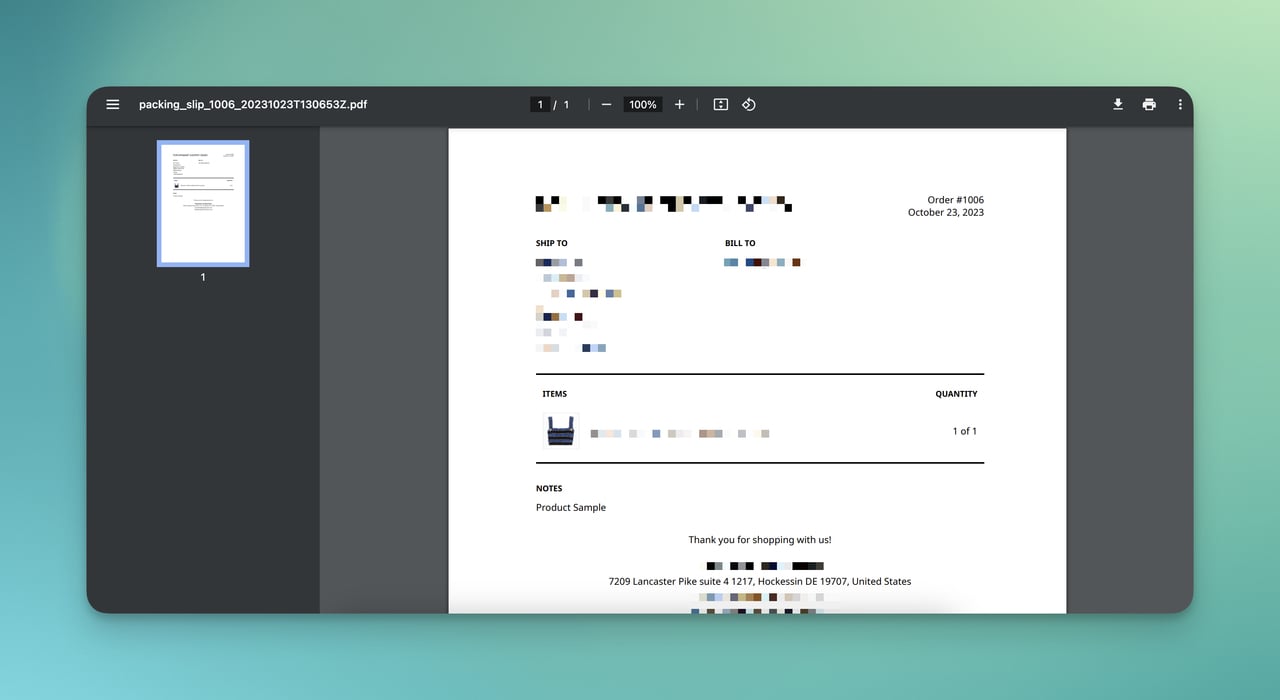
Note: A packing slip is not the same as a shipping label. The packing slip is typically found within the delivered product, while the shipping label is a sticker attached to the package's outside.
6. Create a Shipping Label Without an Order
We mentioned that when you mark a draft order as paid, Shopify converts that order from a draft order to a regular order.
After you do this, you can create a shipping label without an order. You can follow the steps below:
- Click on your unfulfilled order and select Create shipping label.
- Adjust weights, fill out customs forms if necessary, choose a shipping method, and add additional services.
- Review your information and click Buy shipping label. You can then print your label.
Note: If you’re purchasing your first shipping label, review the details of using a specific carrier in Shopify Shipping. Every shipping company has different policies, resources, and requirements.
Reasons for Creating Shipping Labels Without Orders
Creating shipping labels without an order is now quite common in the e-commerce industry for various business scenarios.
One of the most common examples in today's digital world is sending sample products to influencers as an e-commerce referral marketing strategy

Let's look at how businesses use this practice in their strategies to stay ahead in a constantly competitive market:
- Return and Exchange: Customers may request a return or exchange for various reasons. In this scenario, you need to create shipping labels without an order to provide good customer service.
- Influencer Partnerships: Collaborations with influencers are a powerful marketing strategy. Sending Shopify gift cards or special products to these influencers often does not follow the usual ordering process.
- Charitable Donations and Customer Gifts: Charitable donations and sending gifts to customers increase your store's reputation
- Sales Preparation: Sales preparation, which includes pre-labeling products and pre-creating shipping labels, is a common strategy for managing an increase in orders.
- International Shipments: International shipments often require additional customs documentation and the creation of a private label.
- Rental or Leasing Services: Managing rental or leasing services may involve shipping products to customers without a purchase order.
- Third-Party Shipping Services: Instead of your business managing inventory directly, a third-party logistics provider manages the process on your behalf.
Conclusion
The ability to create shipping labels without an order is crucial for Shopify merchants.
It gives them the flexibility to explore many different scenarios.
Whether sending products to influencers, or making charitable contributions, businesses have countless reasons to take advantage of this functionality.
Suppose your business fits any of these scenarios and wants to ship products.
In this case, the six-step process detailed above will help protect your brand's reputation and elevate the overall customer experience.
Frequently Asked Questions

1. How Can I Print a Shipping Label for Free on Shopify?
To print a free shipping label in Shopify, log in to your Shopify store's admin dashboard.
Select the order you want to fulfill and the shipping company and service you want.
Confirm the purchase of the label, and then print it.
Attach the label to your package, and you are ready to ship the order.
2. Do I Have to Print a Shipping Label, or Can I Write It?
You can handwrite the shipping label, but most carriers require a tracking code that must be generated digitally.
To ensure your package reaches its recipient quickly, include the recipient's name and address, the sender's address, the tracking code, and the weight of the box.
How Do I Create a Return Shipping Label?
Return labels can be generated from the order page in your Shopify admin via the Shopify app.
At least one product from your order must be sent to generate a return label.
After creating a return label, you can email it to your customers or provide them with a URL to print it.
Recommended Blog Post
In addition to learning how to create a shipping label without an order, you can check out these articles to learn and try many more things on your Shopify store.

How would you rate your experience with this article? 😊