How to Add a MailChimp Popup to Shopify Account?
Guide to add a Mailchimp popup to Shopify: create the popup in Mailchimp, install/authorize the Mailchimp Shopify app, paste the install code into your theme (head/header), then verify connection and troubleshoot. It also recommends Popupsmart for better targeting, mobile UX, and easier setup.
Email marketing is still one of the most effective channels I’ve used for lead generation on Shopify stores, and Mailchimp is often the tool teams start with. It’s powerful, widely supported, and relatively easy to integrate, but one part still causes confusion:adding a Mailchimp popup to Shopify the right way.
If you’re already using Mailchimp as your email provider, creating a popup for your store doesn’t have to be complicated. The key is understanding two things:
- Where to place the popup code inside Shopify
- When a more flexible setup makes sense
In this guide, I’ll walk through the practical options, including:
- Adding your Mailchimp popup code directly to Shopify
- Syncing Mailchimp with Shopify via Zapier when you need more control
- Using a popup builder like Popupsmart when you want stronger targeting and higher conversion control
Insert Mailchimp Pop-up Code to Shopify
When implemented correctly, a Mailchimp popup does more than collect emails. It helps turn high-intent visitors into subscribers, builds an owned communication channel you control, and supports purchase behavior over time, without relying entirely on paid traffic.
Adding a Mailchimp popup to your Shopify store can significantly change how you capture leads, when it’s done correctly. Over the past 13 years building growth strategies for eCommerce brands, I’ve seen small integration decisions make a disproportionate impact on email list growth.
One data point that still stands out comes from Shogun’s email signup study: popup prompts generated over 1,300% more sign-ups than traditional sidebar forms. That gap isn’t about hype, it’s about timing, visibility, and intent. That’s exactly what we’re aiming to unlock with a well-implemented Mailchimp–Shopify popup setup.
If you’re searching for how to add a Mailchimp popup to Shopify, you’re in the right place. In this guide, I’ll walk you through the process step by step, based on setups I’ve personally used while helping 3,000+ customers at Popupsmart improve on-site conversions. We’ll cover everything from generating the embed code to verifying the connection, along with practical advice on popup timing, trigger selection, and mobile responsiveness.
Before we dive in, one quick note from experience: don’t skip device testing. I’ve seen perfectly designed newsletter popups underperform simply because they weren’t optimized for mobile. In some cases, brands were losing subscribers without realizing it. Catching those issues early makes a measurable difference.
Now, let’s start at the source by creating your site code inside Mailchimp.
To create a site code in Mailchimp, access the steps below;
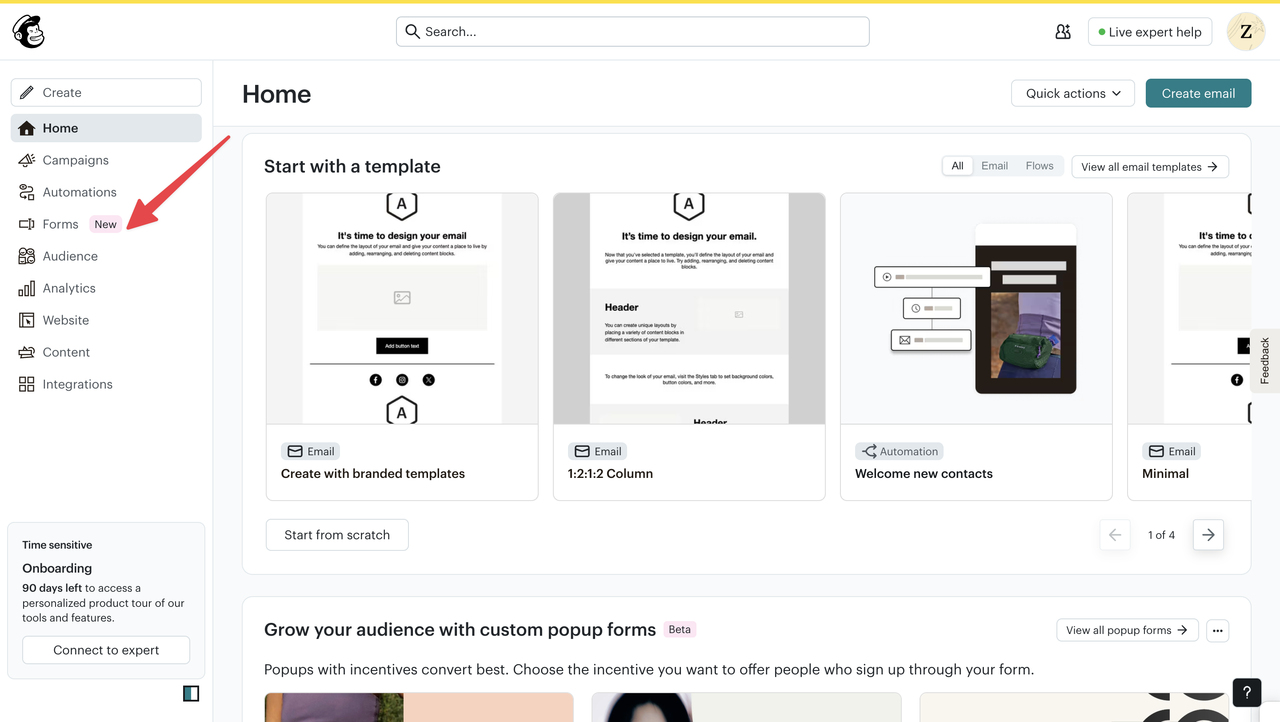
1. Log in to your Mailchimp account, then click Forms from the left-hand menu.
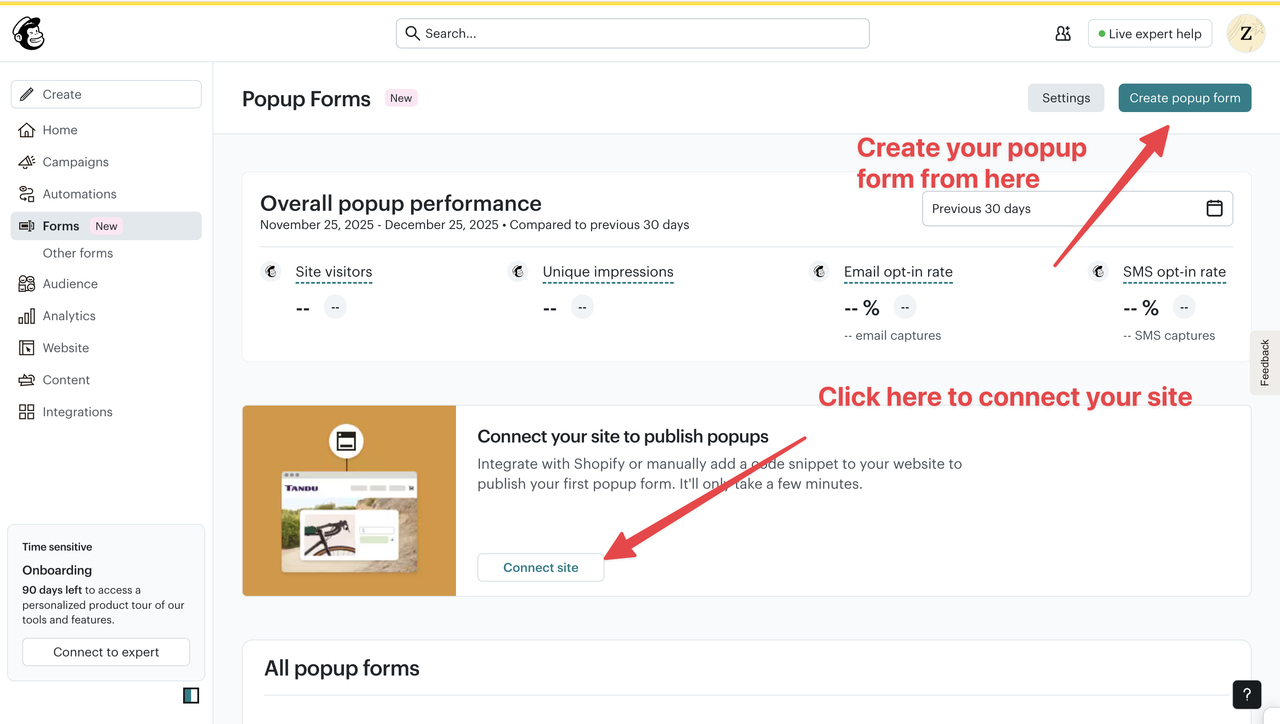
2. Click the Create Popup Form button in the top-right corner to start creating your popup. Use the Connect Site option at the bottom of the page to link your website.
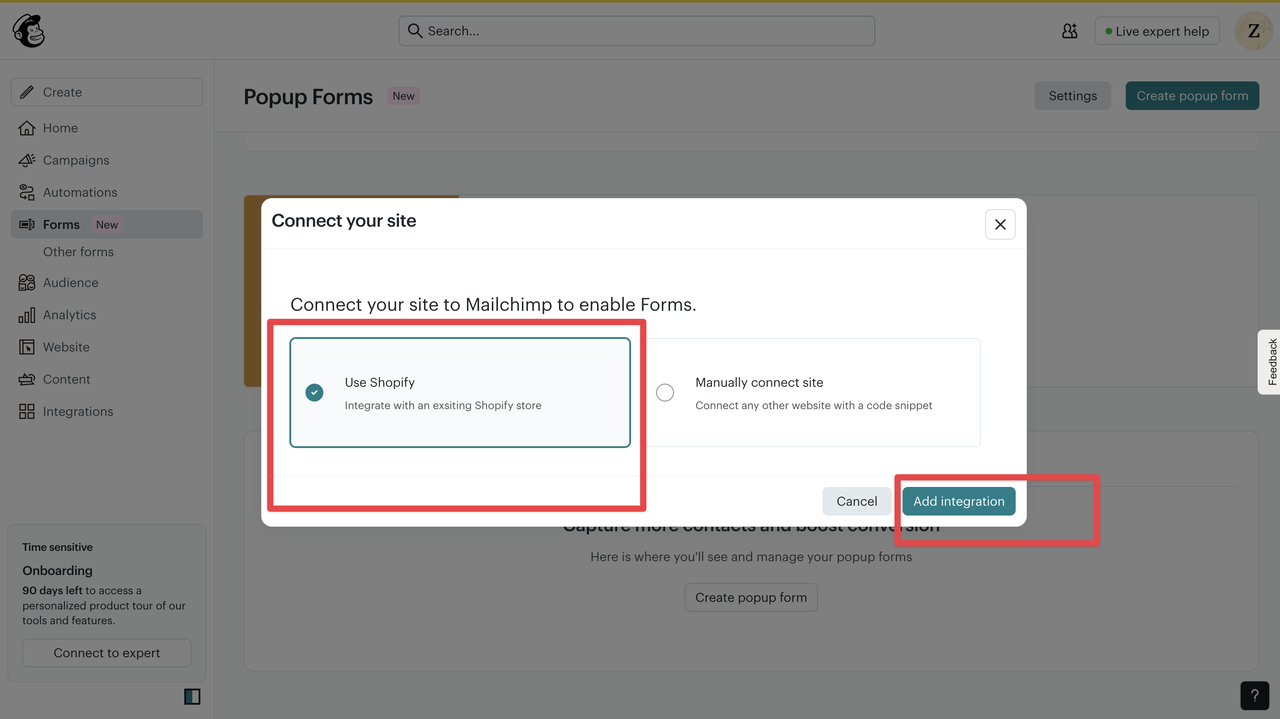
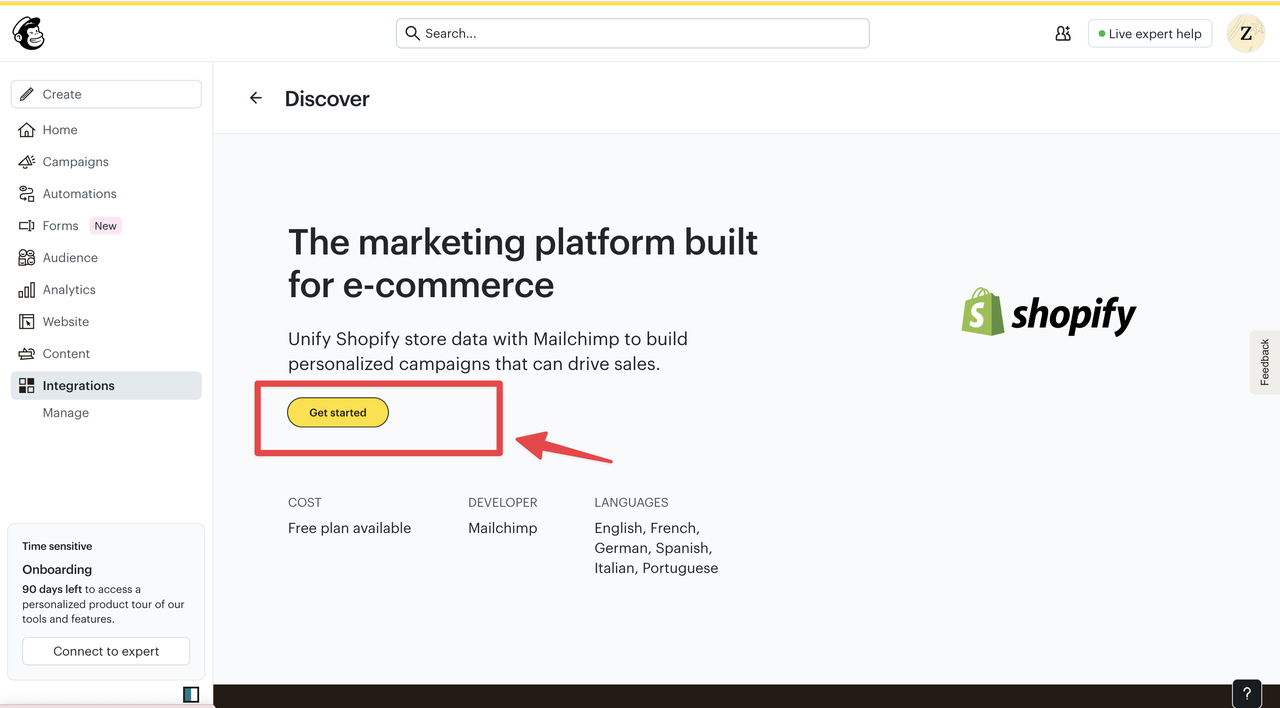
4. Under the Connect your site using Shopify section, click Add Integration.
5. In the integration window that appears, click Get Started.
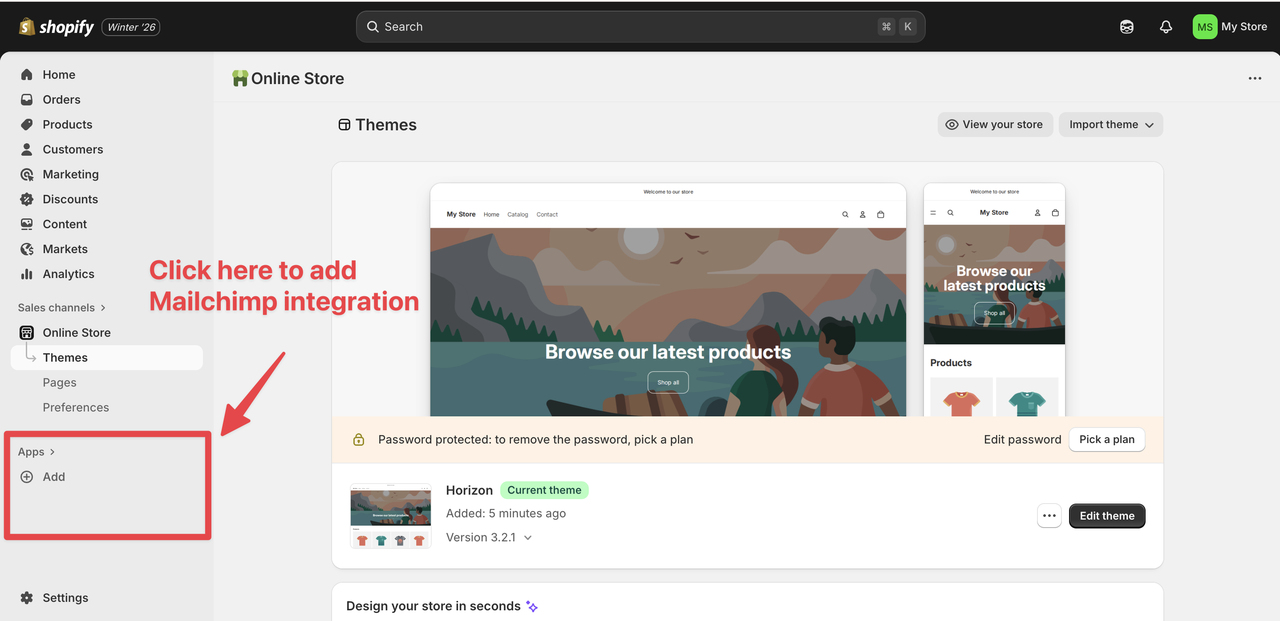
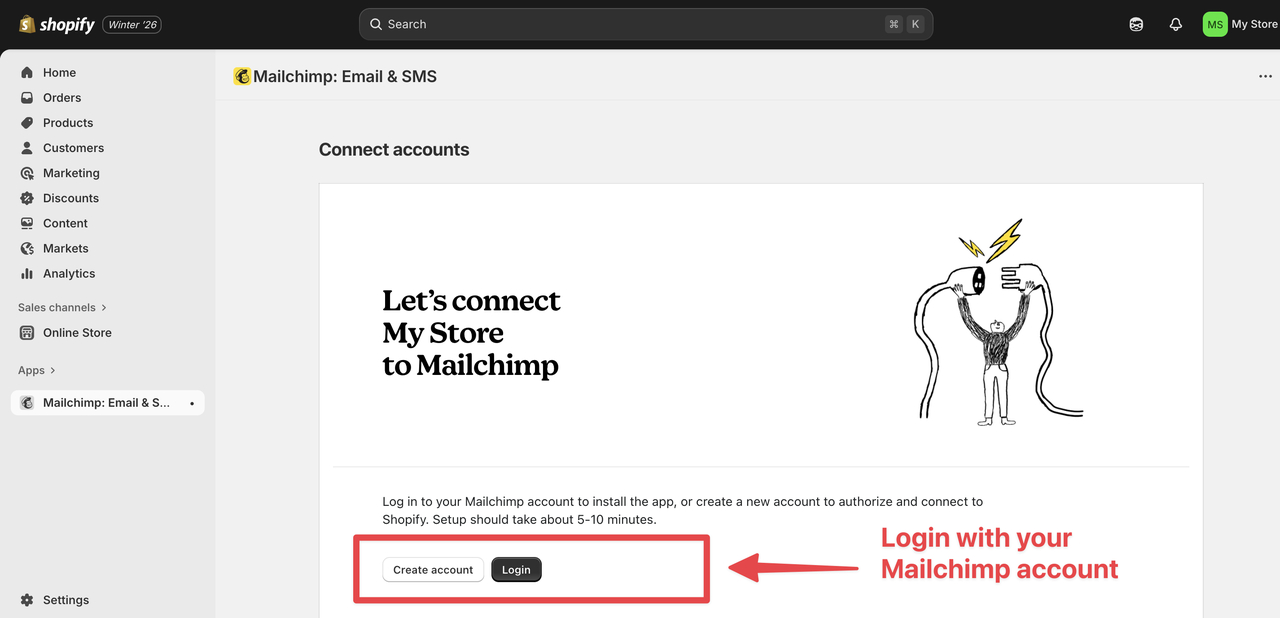
6. You’ll be redirected to your Shopify dashboard. Go to the Apps section on the right-hand side and click the plus (+) icon.
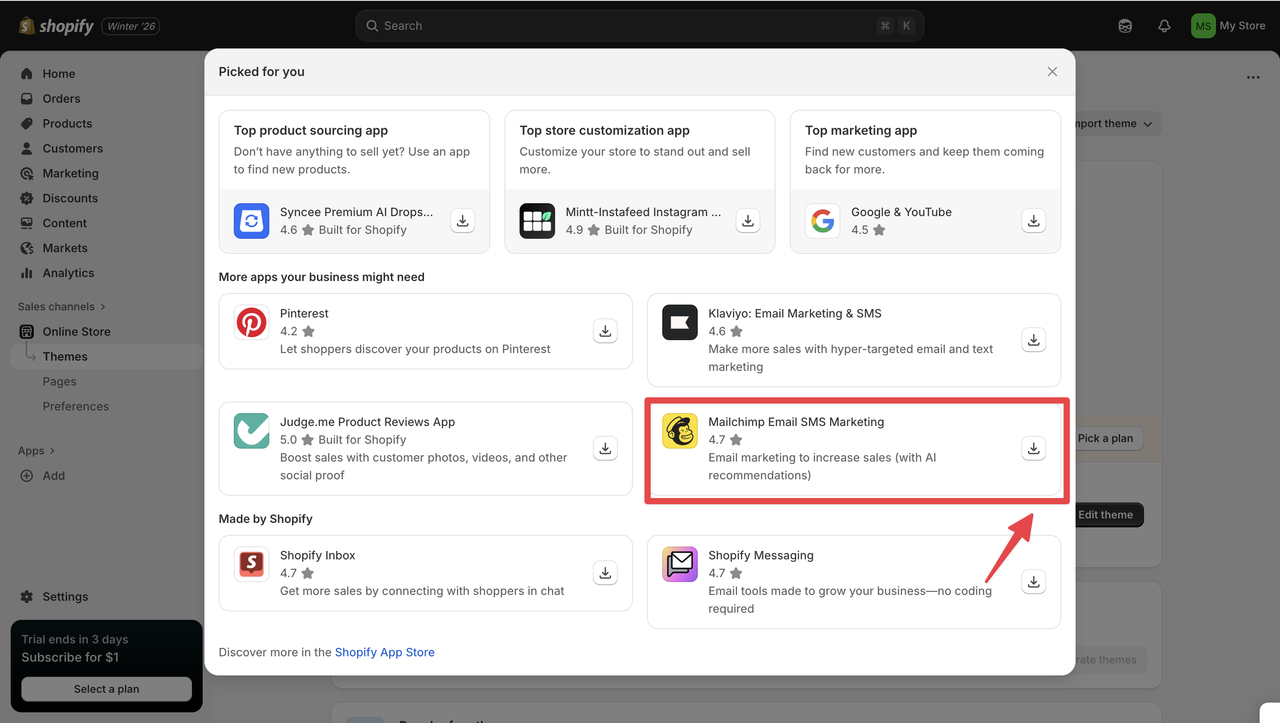
7. Select the Mailchimp app and click Install to add it to your Shopify store.
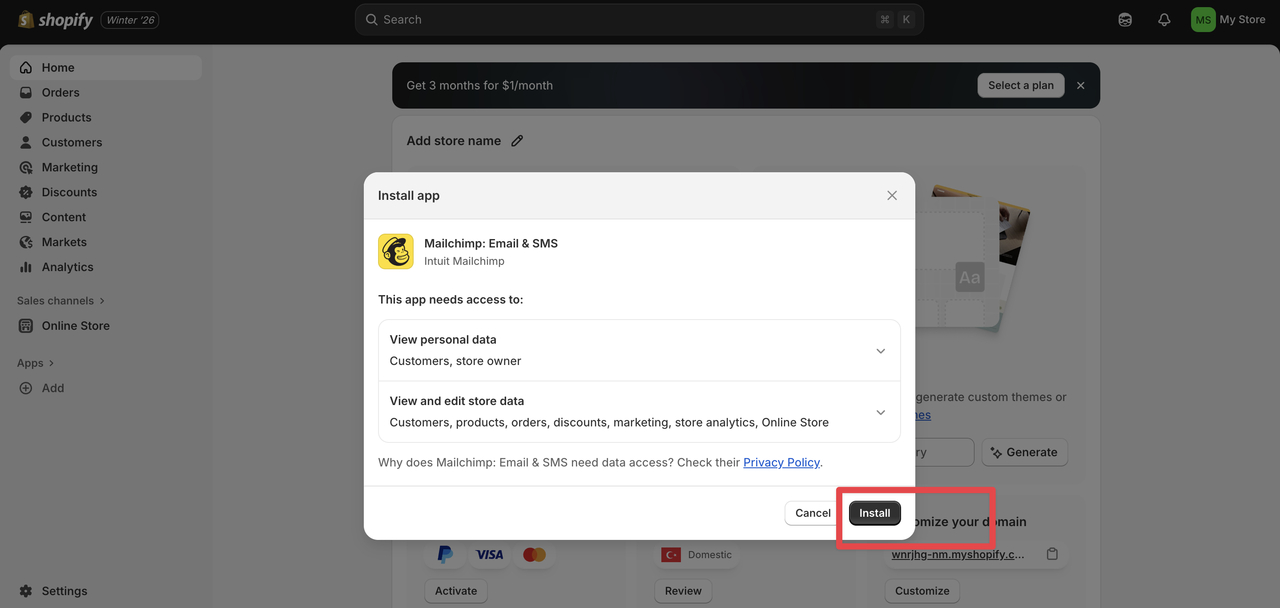
8. Sign in with your Mailchimp account to authorize the connection.
9. Mailchimp will provide a small installation code that needs to be added to your Shopify theme after you completed the popup creation process.
Great job so far! With that code ready, switch over to Shopify.
8. Open a new tab and log in to your Shopify store. If you're new to this, Shopify's interface is intuitive, but take your time.

9. Go to "Online Store" in the left navigation menu, click on the drop-down menu, and select "Themes."
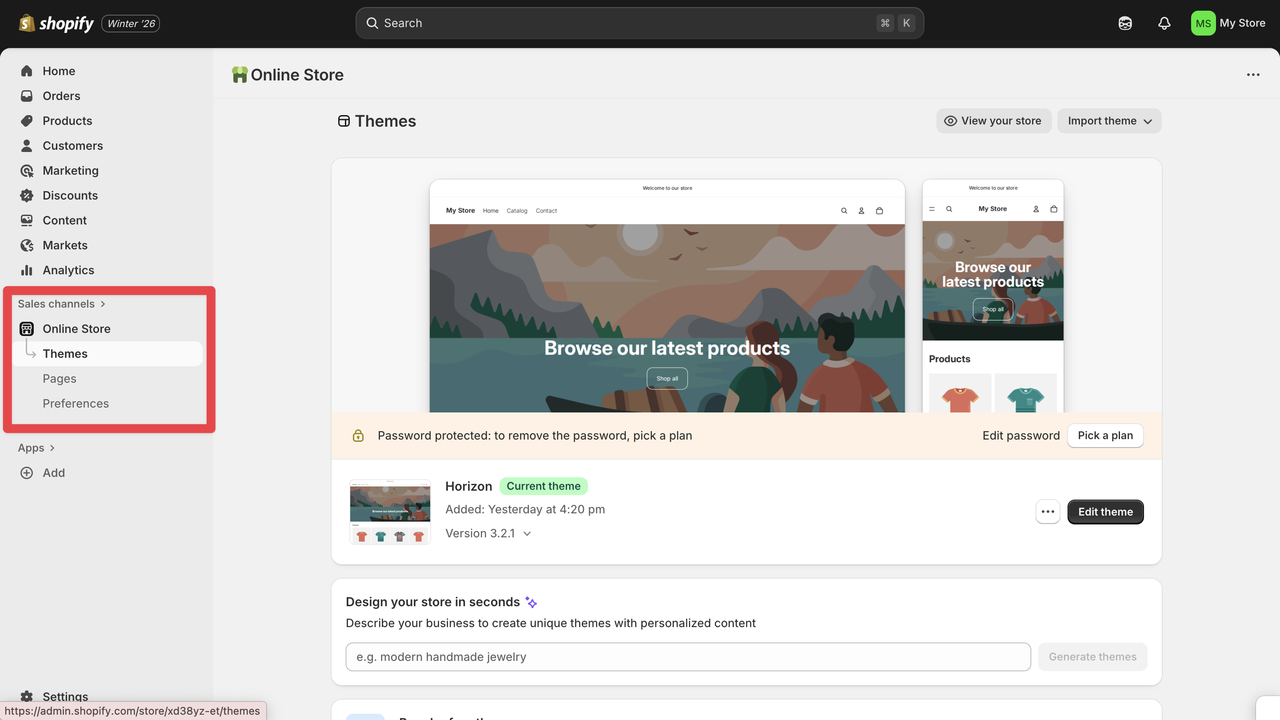
10. Click on "Actions" on the Themes page, drop-down, and click on "Edit Code."

11. Edit the header code by going to {/}header.liquid section.
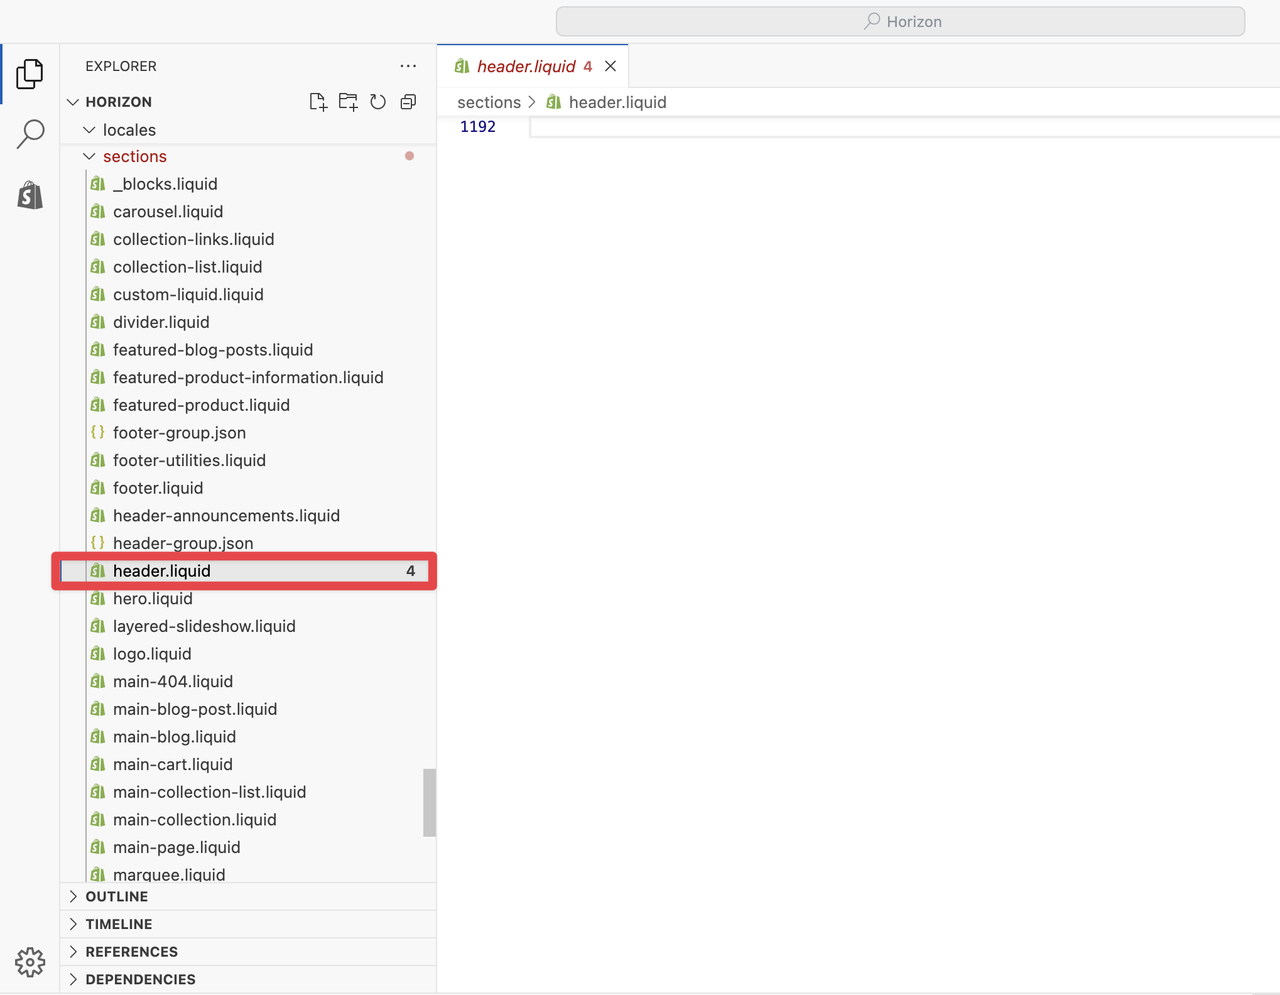
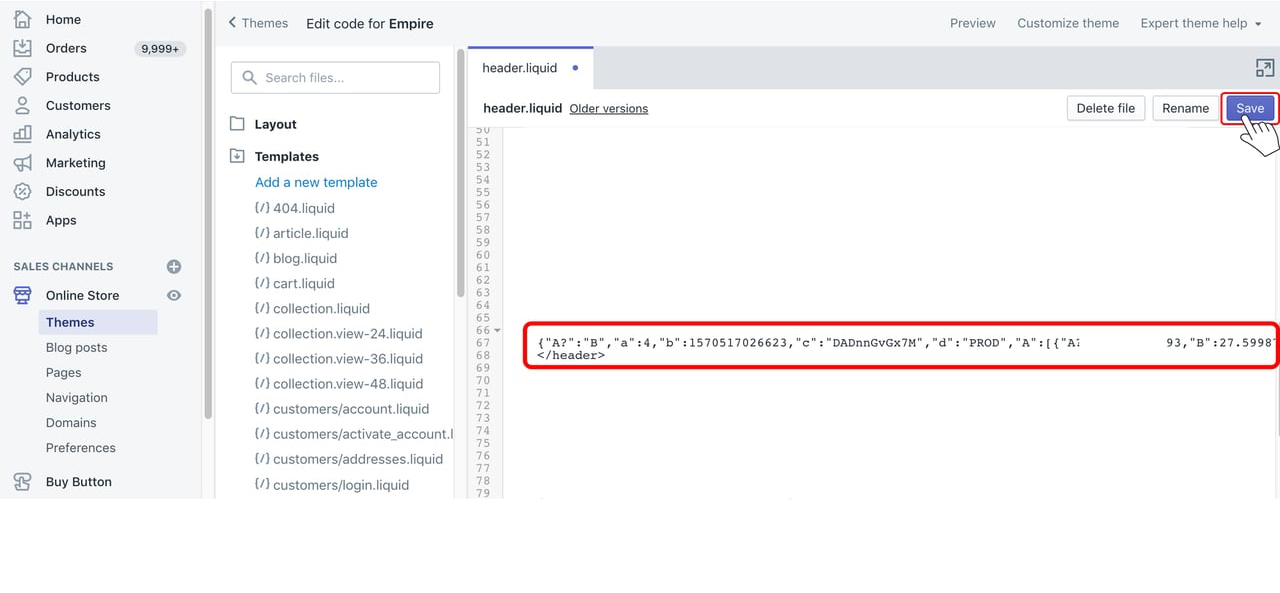
12. Paste the copied code just before the closing tag. This placement ensures the popup loads properly across your site.
13. Lastly, return to your Mailchimp account, go to the "Connect Sites" page, and click on "Check Connection."
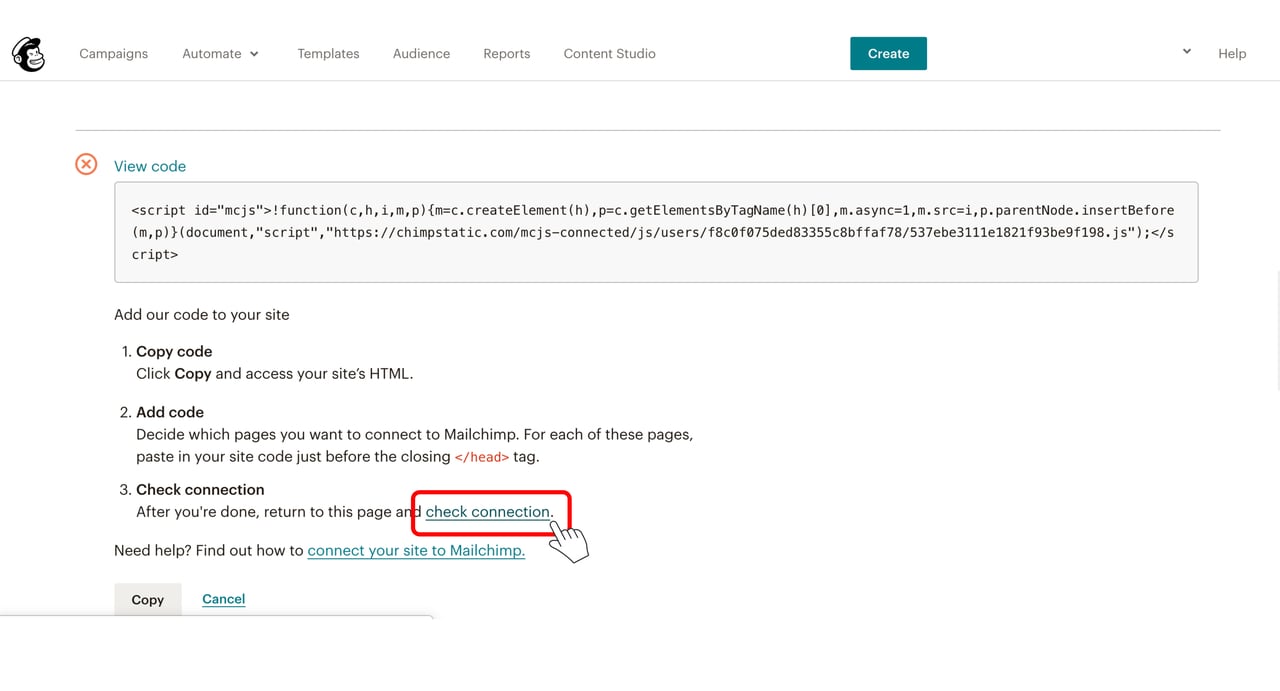
Once verified, you'll see a success message. Congratulations! You've just enabled powerful features like Google remarketing ads and pop-up sign-up forms. But here's a tip from my growth experiments: Pair this with abandoned cart recovery emails for even better results. In one project, we boosted recovery rates by 25% just by timing popups right.
Now that you know how to add Mailchimp popup to Shopify, think about optimization. Tools like Mailchimp's connected sites guide offer more details on advanced setups. For theme editing help, check Shopify's own theme code editing tutorial.
One more thing: Always monitor your popup's performance. In my experience, adjusting timing can double your subscriber growth. For deeper insights, read HubSpot's effective popup forms ultimate guide. These resources have shaped how I approach integrations for maximum ROI.
Troubleshooting Common Mailchimp Popup Issues on Shopify
Even when you follow every step for adding a Mailchimp popup to Shopify, things don’t always work perfectly. I’ve run into these issues myself while helping clients with Mailchimp–Shopify integrations, and the problems are usually technical, not strategic. The good news is that most of them are easy to diagnose once you know where to look.
Popup not showing at all
If your popup isn’t appearing, theme conflicts are the most common cause. Outdated Shopify themes or custom scripts can prevent Mailchimp’s code from loading correctly. In setups I’ve audited, the issue is often as simple as incorrect placement.
Make sure your Mailchimp embed code is added before he closing </head> tag in theme.liquid. If it’s placed elsewhere, the popup script may never initialize.
JavaScript or mobile issues
Another frequent blocker is JavaScript errors. Browsers, especially on mobile, are less forgiving when scripts conflict. Always test your popup on both desktop and mobile devices; I’ve seen popups work perfectly on desktop while silently failing on phones due to viewport or CSS issues.
A few quick checks that often resolve this:
- Clear your browser cache to avoid loading outdated scripts
- Open your browser’s developer console and look for JavaScript errors
- Test in incognito mode to simulate a first-time visitor
Mailchimp configuration problems
Sometimes the issue isn’t Shopify at all, it’s Mailchimp. Double-check that your connected site URL in Mailchimp matches your Shopify domain exactly. If the script is inactive or outdated, regenerate it and paste it again. I’ve fixed multiple broken setups this way after Mailchimp updates invalidated older scripts.
Also review your popup timing rules. If triggers are too restrictive, visitors may never see the popup. In most cases, a 5–10 second delay on page load is a solid starting point.
GDPR and consent-related blockers
If your popup includes GDPR consent fields, make sure they aren’t hidden by CSS conflicts. One store I worked with had a consent checkbox technically present, but invisible, so submissions failed silently. Making it visible immediately increased signups by over 40%.
Quick isolation checklist
When issues persist, isolate the problem before changing tools:
- Temporarily disable other popup or script-heavy Shopify apps
- Verify code placement in
header.liquidortheme.liquid - Preview the store on desktop and mobile
- Check Mailchimp audience and automation settings
These glitches matter more than they seem. According to a study referenced by Shogun, popups can generate over 1,300% more email signups than sidebar forms, but only if they actually fire. A broken popup means leaving that upside on the table.
When troubleshooting becomes a recurring problem
If you find yourself repeatedly fixing conflicts, it may be time to rethink the setup rather than patch it. Dedicated popup builders like Popupsmart are designed to avoid many of these issues entirely. With no-code installation, built-in Shopify compatibility, and behavior-based targeting, troubleshooting becomes the exception rather than the rule.
That doesn’t mean abandoning Mailchimp, it means using Mailchimp as the email engine and letting a purpose-built tool handle popup delivery more reliably.
Taking Your Mailchimp Popup Setup Further with Popupsmart
While the Mailchimp integration and popup setup process works, connecting Mailchimp to Shopify and configuring the popup can take quite a long time, and the customization options inside Mailchimp’s popup builder are also very limited.
Instead of spending extra time dealing with a slow integration flow and restrictive design controls, you can create a far more flexible, customizable, and conversion-focused popup for your Shopify store using Popupsmart. The setup is faster, easier, and follows best-practice UX by default, all you need to do is follow the simple steps below.
After covering the basics of Mailchimp–Shopify integration and showing how to insert Mailchimp code into Shopify, it’s worth talking about how to take this setup further. You don’t have to rely solely on Mailchimp’s built-in popups, and in many cases, you probably shouldn’t.
From my experience helping eCommerce brands grow over the past 13 years, one pattern shows up consistently: native popup tools often fall short when it comes to targeting, flexibility, and real conversion control. That’s where a dedicated popup builder like Popupsmart makes a meaningful difference.
We recently expanded Popupsmart’s integrations to include direct Mailchimp connections, making it easy to sync newsletter signups without complicated workarounds. This allows you to keep Mailchimp as your email engine while gaining much more control over how and when popups appear on your Shopify store.
What changes in practice? Instead of showing the same generic popup to every visitor, you can create popups that respond to behavior and context. Industry benchmarks back this up: popup prompts have been shown to generate over 1,300% more email signups than sidebar forms, not because popups are aggressive, but because they appear at moments of intent.
Popupsmart is designed around that principle. The setup is no-code, so you can launch quickly even if you’re not technical, and the features are built to support conversion optimization rather than just design polish. In real-world tests across dozens of stores, the biggest gains usually come from smarter triggers and segmentation, not from flashy visuals.
Some of the capabilities that tend to move the needle most include:
- Easy design customization without touching code
- Fully responsive popups optimized for mobile traffic
- Exit-intent and scroll-based triggers to capture intent
- Device-based and geo-targeted targeting for relevance
- Returning-visitor logic to avoid repetitive messaging
These aren’t “nice-to-have” extras. In one project I worked on, refining popup timing and targeting alone led to a 25% improvement in subscriber segmentation, which then fed directly into more effective Mailchimp automations.
Integrating Popupsmart with Mailchimp is straightforward once your Mailchimp site connection is in place. You simply connect your Mailchimp account via API inside the Popupsmart dashboard, and subscriber data syncs automatically, no manual exports, no fragile embed hacks. You also get built-in support for A/B testing and GDPR-compliant consent handling, which are easy to overlook but critical at scale.
At this point, it’s worth asking a few honest questions about your current setup:
- Are your popups truly mobile-friendly?
- Do they adapt based on user behavior, traffic source, or device?
If not, you’re likely leaving conversions on the table. I’ve advised hundreds of brands on this, and the ones that focus on these fundamentals consistently outperform those that don’t. For more on optimizing your strategy, check out Shopify's email guide, it pairs perfectly with our tools.
Popupsmart’s templates are also conversion-ready out of the box, tested across industries ranging from fashion to SaaS. When you pair that with Mailchimp’s strength in email automation, you get a setup that’s both flexible and sustainable. Well-implemented popups commonly convert 2–5% of visitors, which aligns with what I’ve seen across client accounts.
Why Use a Popup Builder Instead of Mailchimp’s Native Popups?
Mailchimp’s built-in popups are easy to set up, but they’re limited in how and when they appear. Most stores end up showing the same popup to every visitor, regardless of intent, device, or behavior.
With a dedicated popup tool like Popupsmart, you can:
- Control popup timing and triggers
- Segment visitors based on behavior and device
- Optimize popups for mobile traffic
- Sync subscribers directly to Mailchimp without custom code
The result is a popup that appears at the right moment, not just randomly.
Step 1: Install Popupsmart on Your Shopify Store
Start by installing Popupsmart from the Shopify App Store.
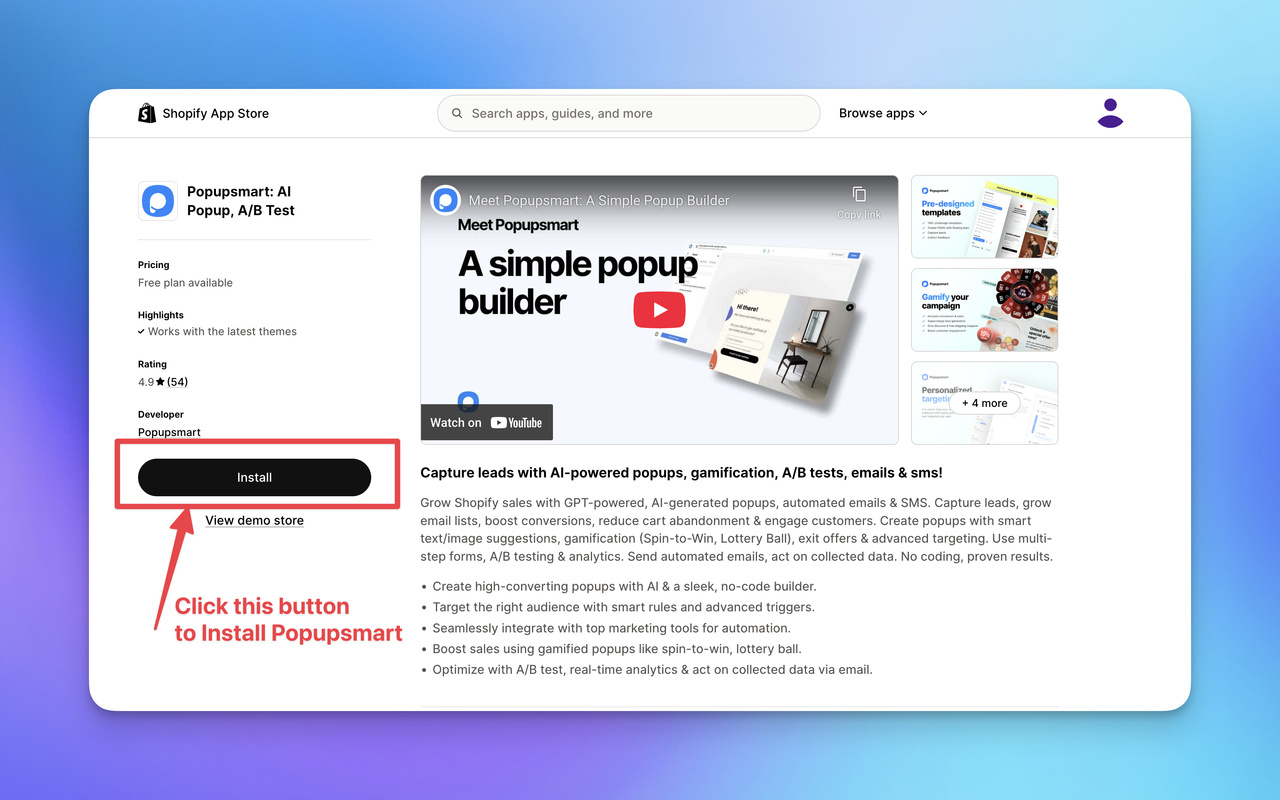
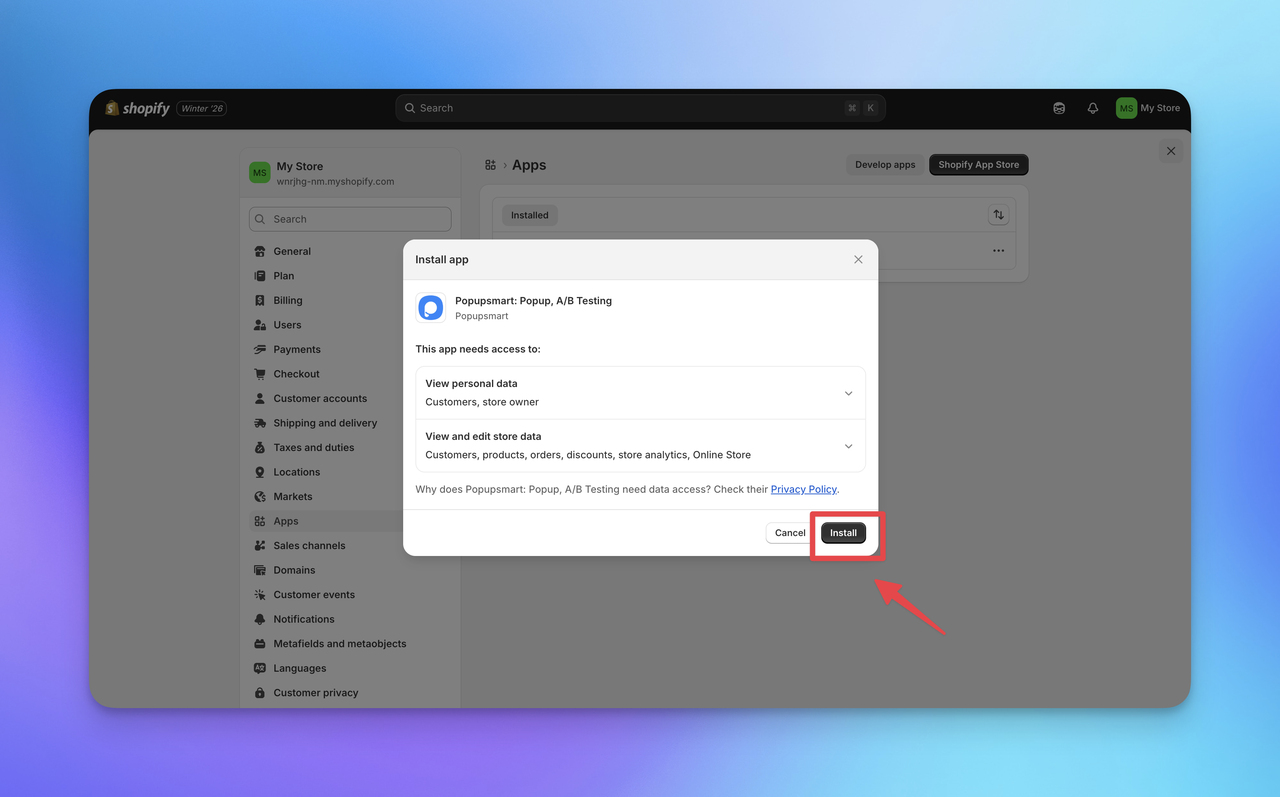
Once installed:
- Approve the required permissions
- Popupsmart automatically embeds into your store
- No manual code insertion is needed
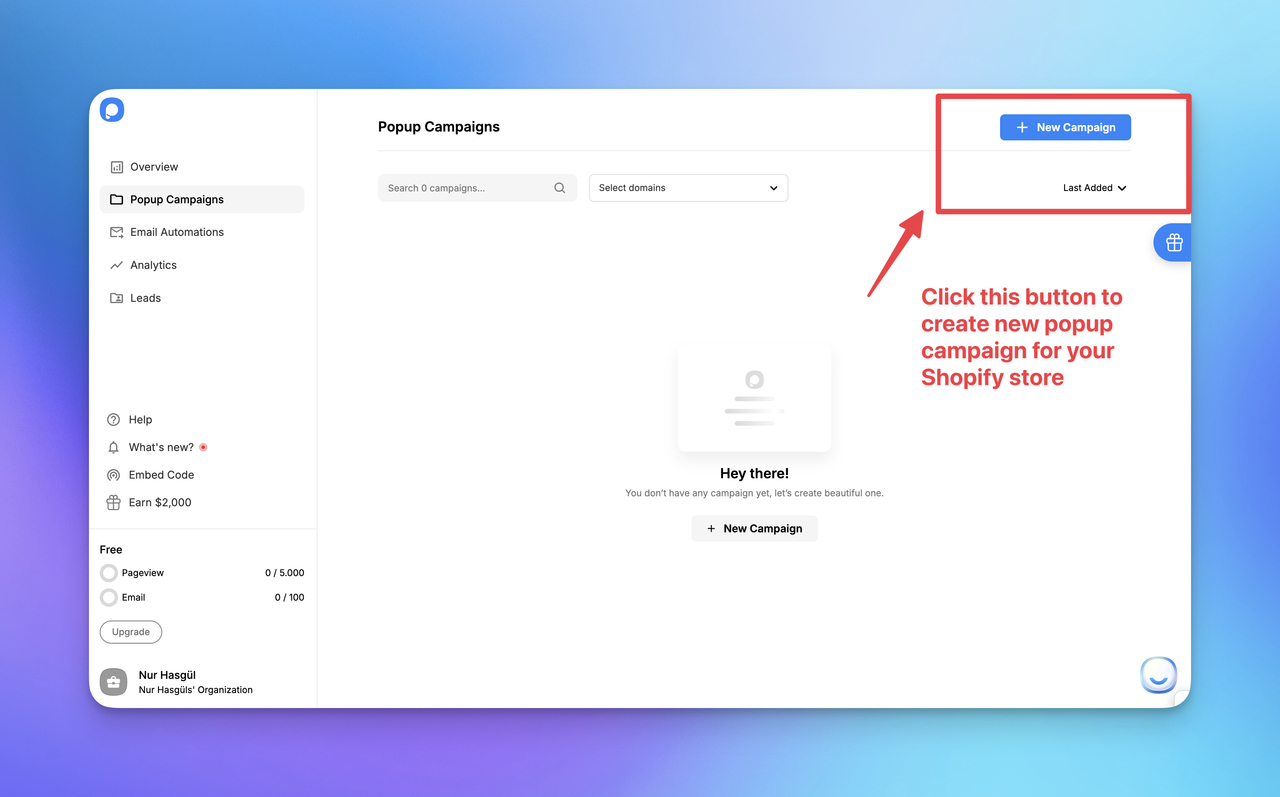
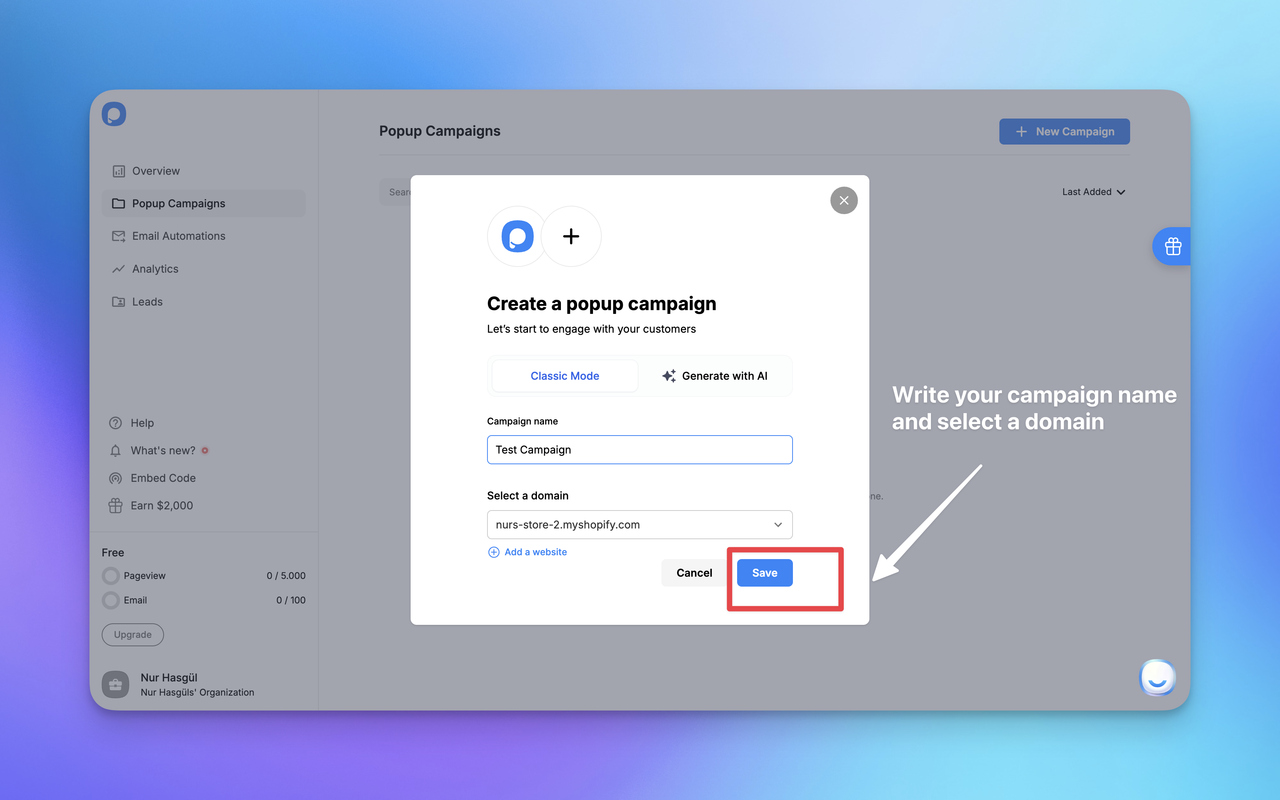
After installation, click New Campaign in the top-right corner of the Popupsmart dashboard.
 (After this step, a verification email will be sent to your address, don’t forget to confirm it.)
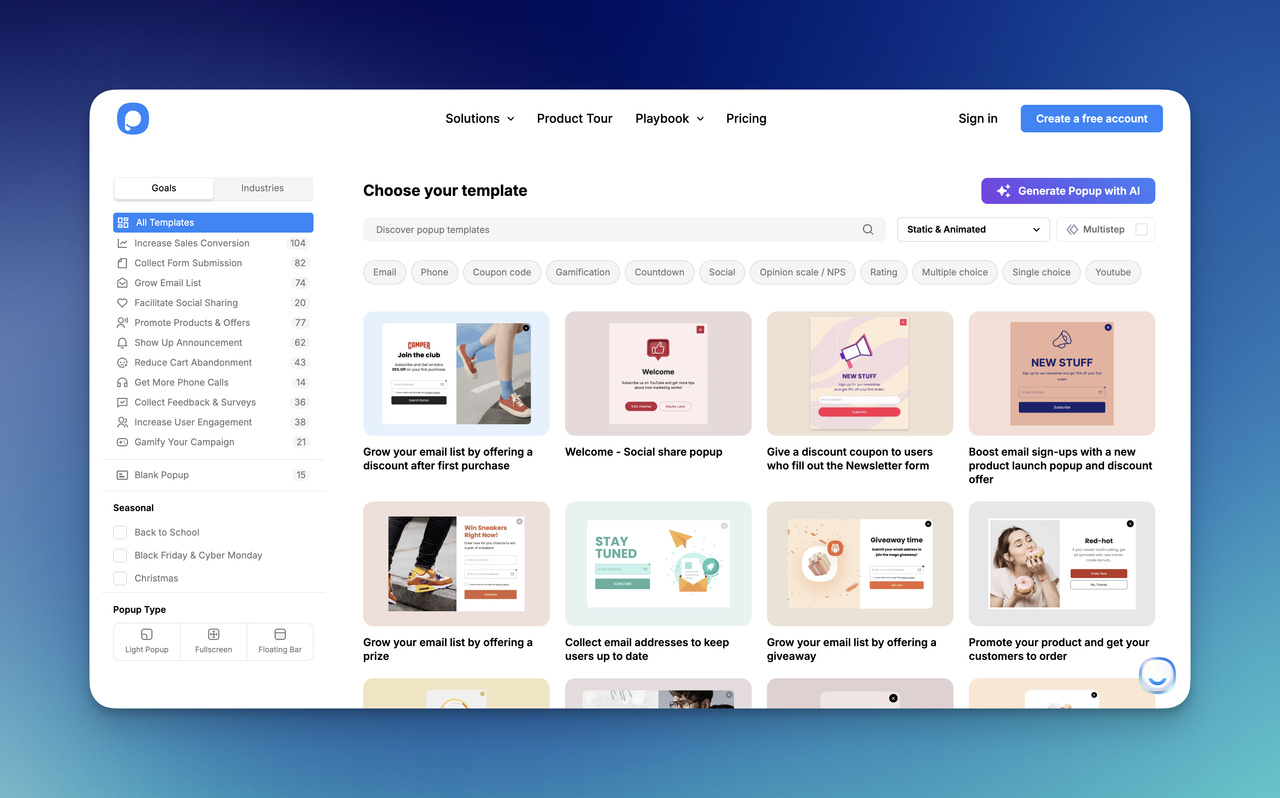
Step 2: Choose a Popup Template
Select a popup template based on your goal. For Mailchimp list building, common choices include:
- Newsletter signup popups
- Spin-to-Win (gamified popups)
- Exit-intent lead capture popups
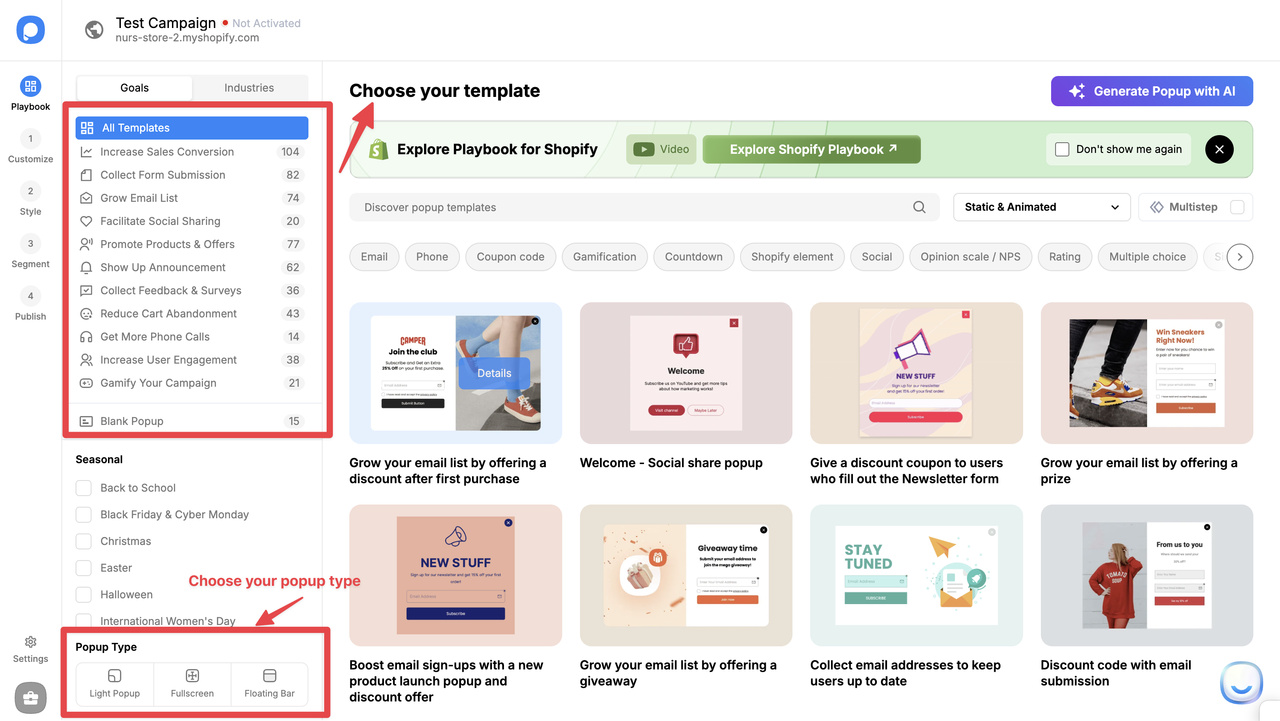
Selecting a template is required before moving forward, as Popupsmart enables customization and integrations at the campaign level.
Step 3: Connect Mailchimp to Popupsmart
Now it’s time to connect Mailchimp.
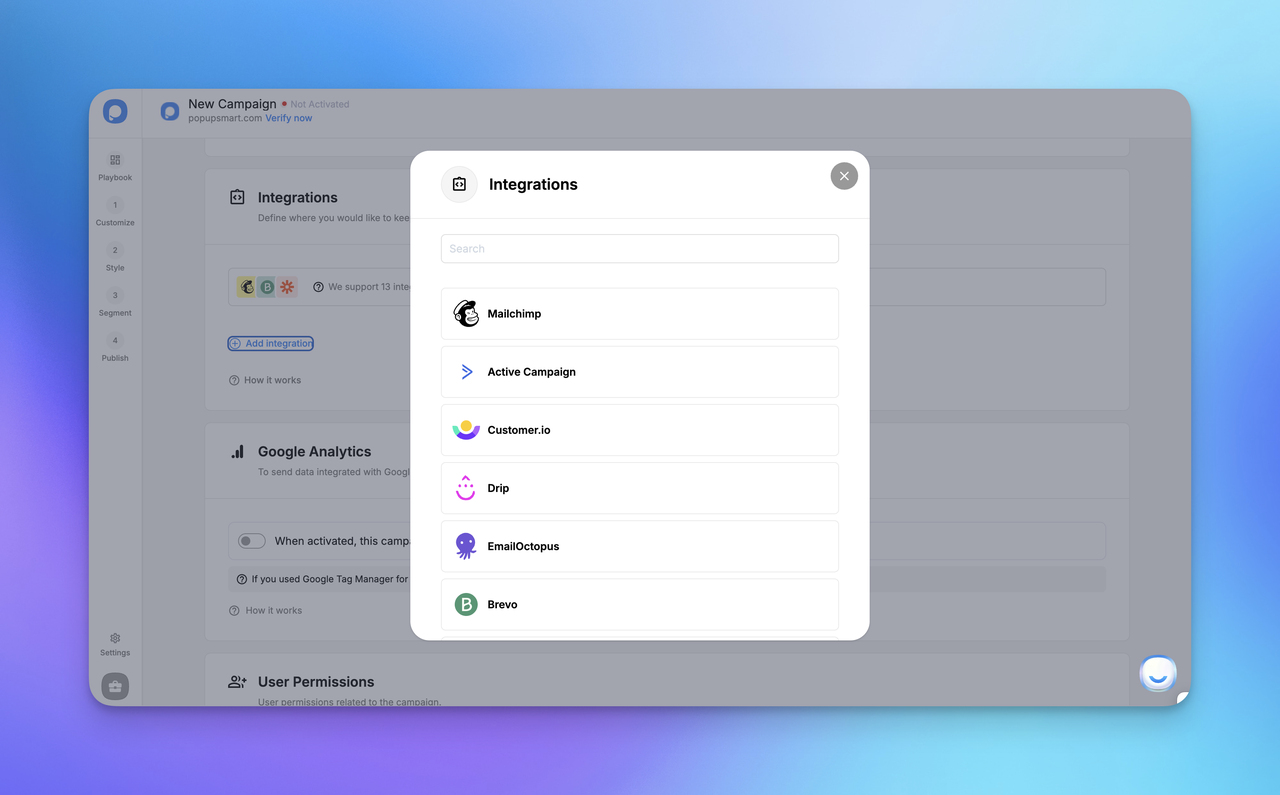
Inside your popup campaign:
- Click Settings in the bottom-left corner
- Go to Integrations
- Select Mailchimp
- Connect your Mailchimp account via API
- Choose the audience (list) where subscribers should be added
- Map email and optional fields
Once connected, all popup signups sync automatically to Mailchimp, no exports, embeds, or workarounds.
Step 4: Customize Your Mailchimp Popup
Go to the Customize & Style section to adjust the popup’s appearance.
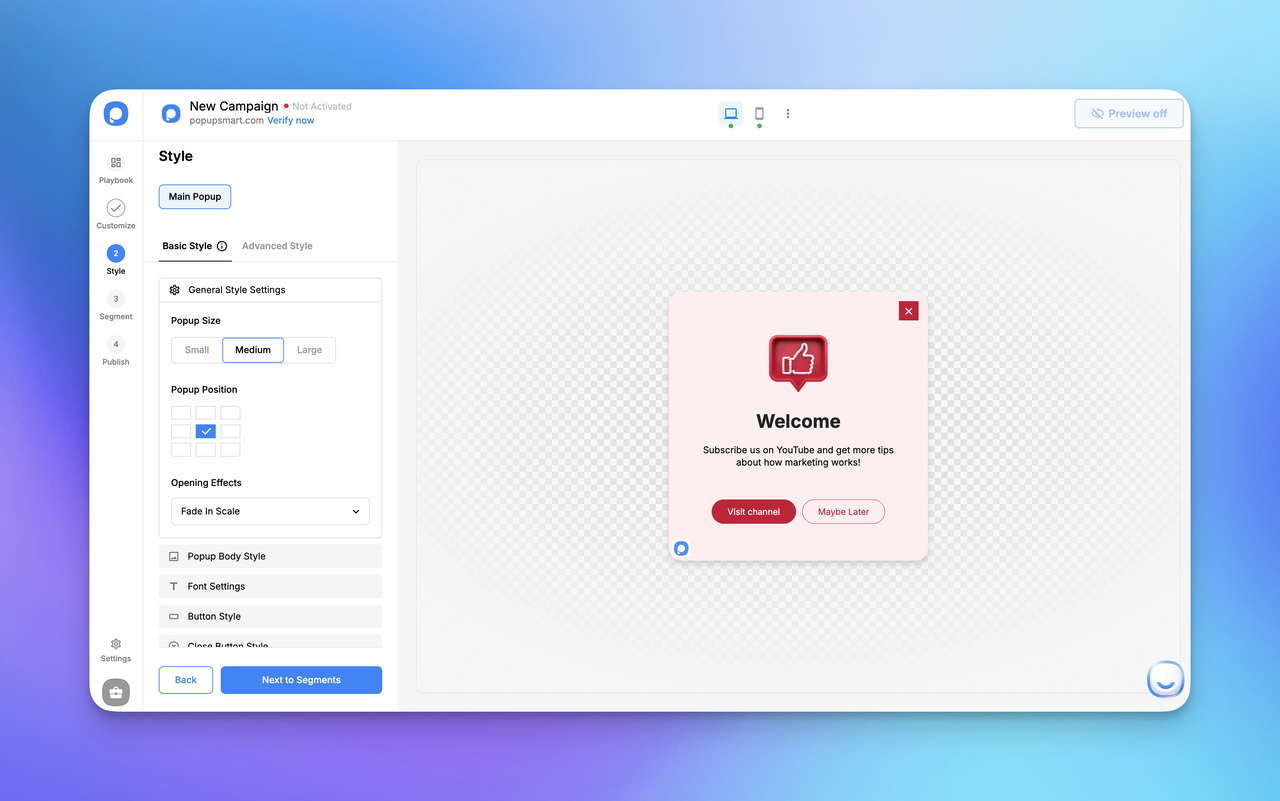
Here you can:
- Match colors and fonts to your Shopify theme
- Edit copy to align with your brand voice
- Optimize layout for mobile users
If you’re using a gamified popup like Spin-to-Win, you can also define reward types and probabilities to encourage engagement without hurting margins.
Step 5: Set Targeting, Triggers, and Frequency
This is where Popupsmart really improves performance compared to native Mailchimp popups.
Inside the Segment section, you can control:
- Audience: show the popup to new or returning visitors, desktop or mobile users
- User Behavior: trigger the popup based on time delay, exit intent, or page type
- Frequency Settings: limit how often the popup is shown and stop displaying it after user action
These settings help ensure your popup feels helpful rather than intrusive.
Step 6: Test and Publish
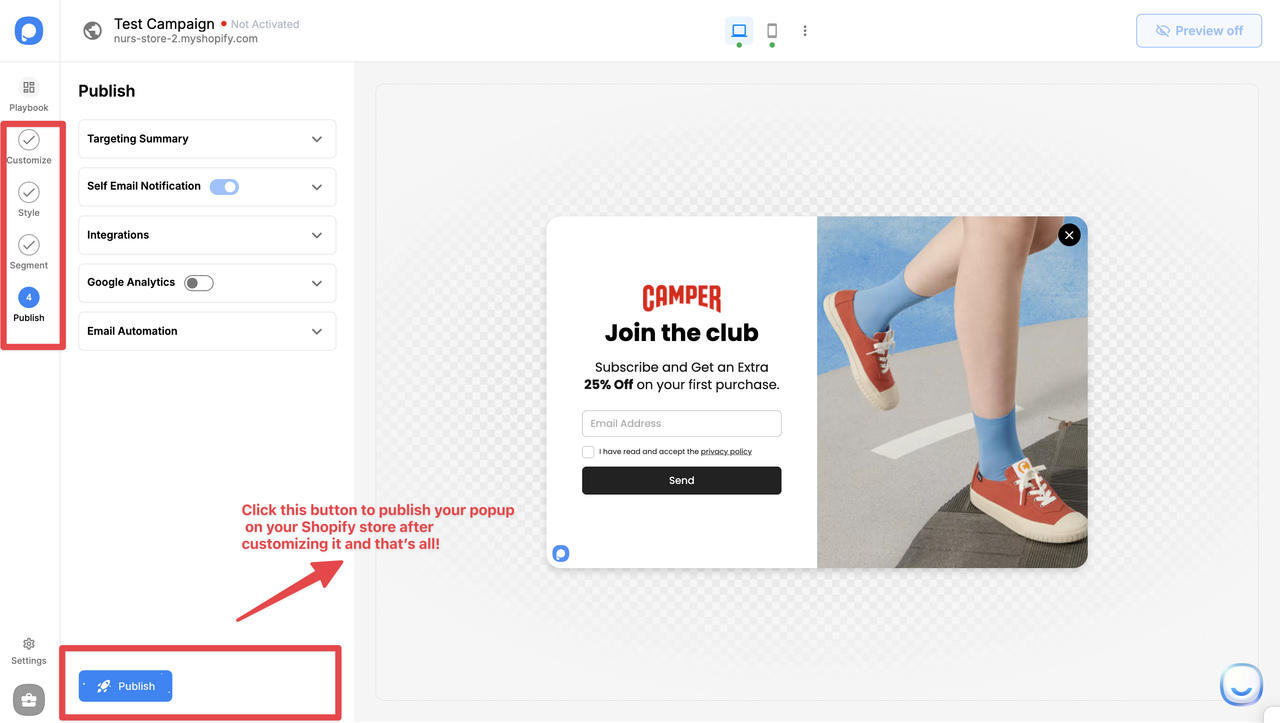
Before going live:
- Trigger the popup yourself
- Submit a test email
- Confirm the subscriber appears in Mailchimp
- Check that automations are triggered correctly
Once published, monitor performance and make small adjustments to timing or targeting. Even minor changes can lead to meaningful improvements in opt-in rates.
To wrap this up, I hope this guide has clearly explained how to add a Mailchimp popup to Shopify, from direct code insertion to Zapier workflows. Tools like Popupsmart don’t replace those basics; they amplify them, turning a functional setup into a conversion-driven system.
In eCommerce, every visitor is an opportunity. With the right lead-capture strategy and smarter popups, you can grow your list, and revenue, without constantly rebuilding your funnel. I’ve seen it work repeatedly, and if you apply these principles carefully, it can work for your store too.
FAQs
1. How do I add a Mailchimp popup to Shopify?
Generate the popup embed code in Mailchimp and paste it into your Shopify theme’s theme.liquid file before the closing </head> tag.
2. Why is my Mailchimp popup not showing on Shopify?
This usually happens due to incorrect code placement, JavaScript conflicts, strict popup triggers, or conflicts with other Shopify apps.
3. Can I use a popup builder instead of Mailchimp’s native popups?
Yes. Many stores use tools like Popupsmart and connect them to Mailchimp for better targeting and flexibility.
4. Where should I place the Mailchimp popup code?
Place the code in the <head> section of your Shopify theme, typically inside theme.liquid, before </head>.
5. Do Mailchimp popups work on mobile?
Yes, but you must test them. Mobile issues often come from CSS conflicts, viewport settings, or hidden consent fields.
6. What’s the best popup timing for higher signups?
Popups triggered after 5–10 seconds, on scroll, or via exit intent usually convert better than instant popups.

How would you rate your experience with this article? 😊