Mailchimp popup: build one and connect it to your Mailchimp audience
 By Mert Özeren
To make a Mailchimp popup, use Mailchimp's own pop-up form, which runs only on a site you've connected to Mailchimp, or build the popup in Popupsmart and connect it with a Mailchimp API key. Popupsmart then sends every email address, phone number and SMS consent the popup collects to the Mailchimp audience you choose.


Connection at a glance
- Sends leads to
- Mailchimp
- What you need
- A Mailchimp API keyAn audience in Mailchimp
- Fields sent
- EmailPhone and SMS consentAny form field
What the Mailchimp connection does
The Mailchimp connection adds each person who submits your popup to one Mailchimp audience (Popupsmart's screens call it a list), with the fields you choose. You pick the audience per campaign and match each popup input to a Mailchimp field: the email to the email address field, a phone number and SMS consent to the fields you set for them. The API key is saved once and offered again in your next campaign, and you can pause the connection at any time.
Popupsmart is not an email marketing platform. It captures contacts and hands them to an email service provider; it does not send campaigns or run drip sequences. Mailchimp keeps sending your campaigns and automations as before.
Does Mailchimp have its own pop-up forms?
Yes. Mailchimp builds pop-up forms under Forms → Popup forms, and according to Mailchimp's guide to creating a popup form, you have to connect a site or Shopify store before you can enable one. As of September 2026, Mailchimp's forms page still calls popup forms a beta, offered on its marketing plans at no additional cost "at this time".
| Mailchimp's built-in popup | Popupsmart | |
|---|---|---|
| Where it runs | A site connected to Mailchimp: a Shopify store through the Mailchimp for Shopify app embed, or any site with Mailchimp's code snippet or Google Tag Manager | Any website that accepts the Popupsmart embed code, plus a Shopify app and an optional WordPress plugin |
| How many popups | As many as you need per audience | One live popup on the free plan; unlimited on paid plans |
| Triggers and targeting | Time on page, inactivity, quick scroll or exit intent; device; target pages; new or all visitors, traffic source, geolocation | Exit intent, scroll, time on page, URL and device targeting |
| Where the leads go | One Mailchimp audience | Mailchimp, or any of the 19 destinations the help center lists |
| A/B testing | Standard plan or higher, per Mailchimp's A/B testing guide | From the Advanced plan |
| Price | Included in Mailchimp's marketing plans, at no additional cost for now | Free plan: one website, one live popup, 5,000 pageviews a month; paid plans from $39 a month |
If Mailchimp is your only email tool and one popup on one connected site covers the job, Mailchimp's pop-up form comes with your account and needs no second tool. Popupsmart earns its install when the same popups have to run on several websites (3 on the Basic plan, up to unlimited on Expert), when you want popups for other jobs, such as calls, announcements and surveys, beside list growth, or when the leads may one day go to a different email tool without rebuilding the popups.
How to create a pop-up in Mailchimp with a connected site
A Mailchimp pop-up form is built in Mailchimp's form editor and goes live only after Mailchimp can see your site. As of September 2026, Mailchimp's help describes this flow:
- Click Forms, then Popup forms, and click Create popup form.
- Choose an offer and a template, then name the form, pick the audience and collect email addresses, phone numbers or both. Texting those numbers from Mailchimp needs an approved SMS application.
- Design the form and click Save and review. The defaults are all pages, new visitors only, and 2 seconds on the page.
- Under Where should it show?, click Resolve, then Add a site: Use Shopify connects through the Mailchimp for Shopify app embed, and Manually connect site gives you a code snippet for your site or Google Tag Manager. Click Check connection.
- Click Publish or schedule.
Before you start
- An active Mailchimp account and the audience your subscribers should join.
- A Mailchimp login you can create an API key with. The connection section shows where.
- A verified website on your Popupsmart account.
Among people who published a campaign in the 90 days to 16 September 2026, the median time from signup to the first published campaign was 32.5 minutes, and 287 of 332 published within a day, according to Popupsmart's own product data. It covers every platform and tool, so treat it as a guide, not a Mailchimp promise.
How to create a Mailchimp popup in Popupsmart
Popupsmart builds the popup in its own editor, with no plugin, developer or code; the next sections place the code and connect Mailchimp.
Step 1: Create your account and verify your website
Create your free Popupsmart account and add the website your popup will run on. Verify it with the website verification guide: a campaign only runs on a verified website.
Step 2: Start a campaign with a form
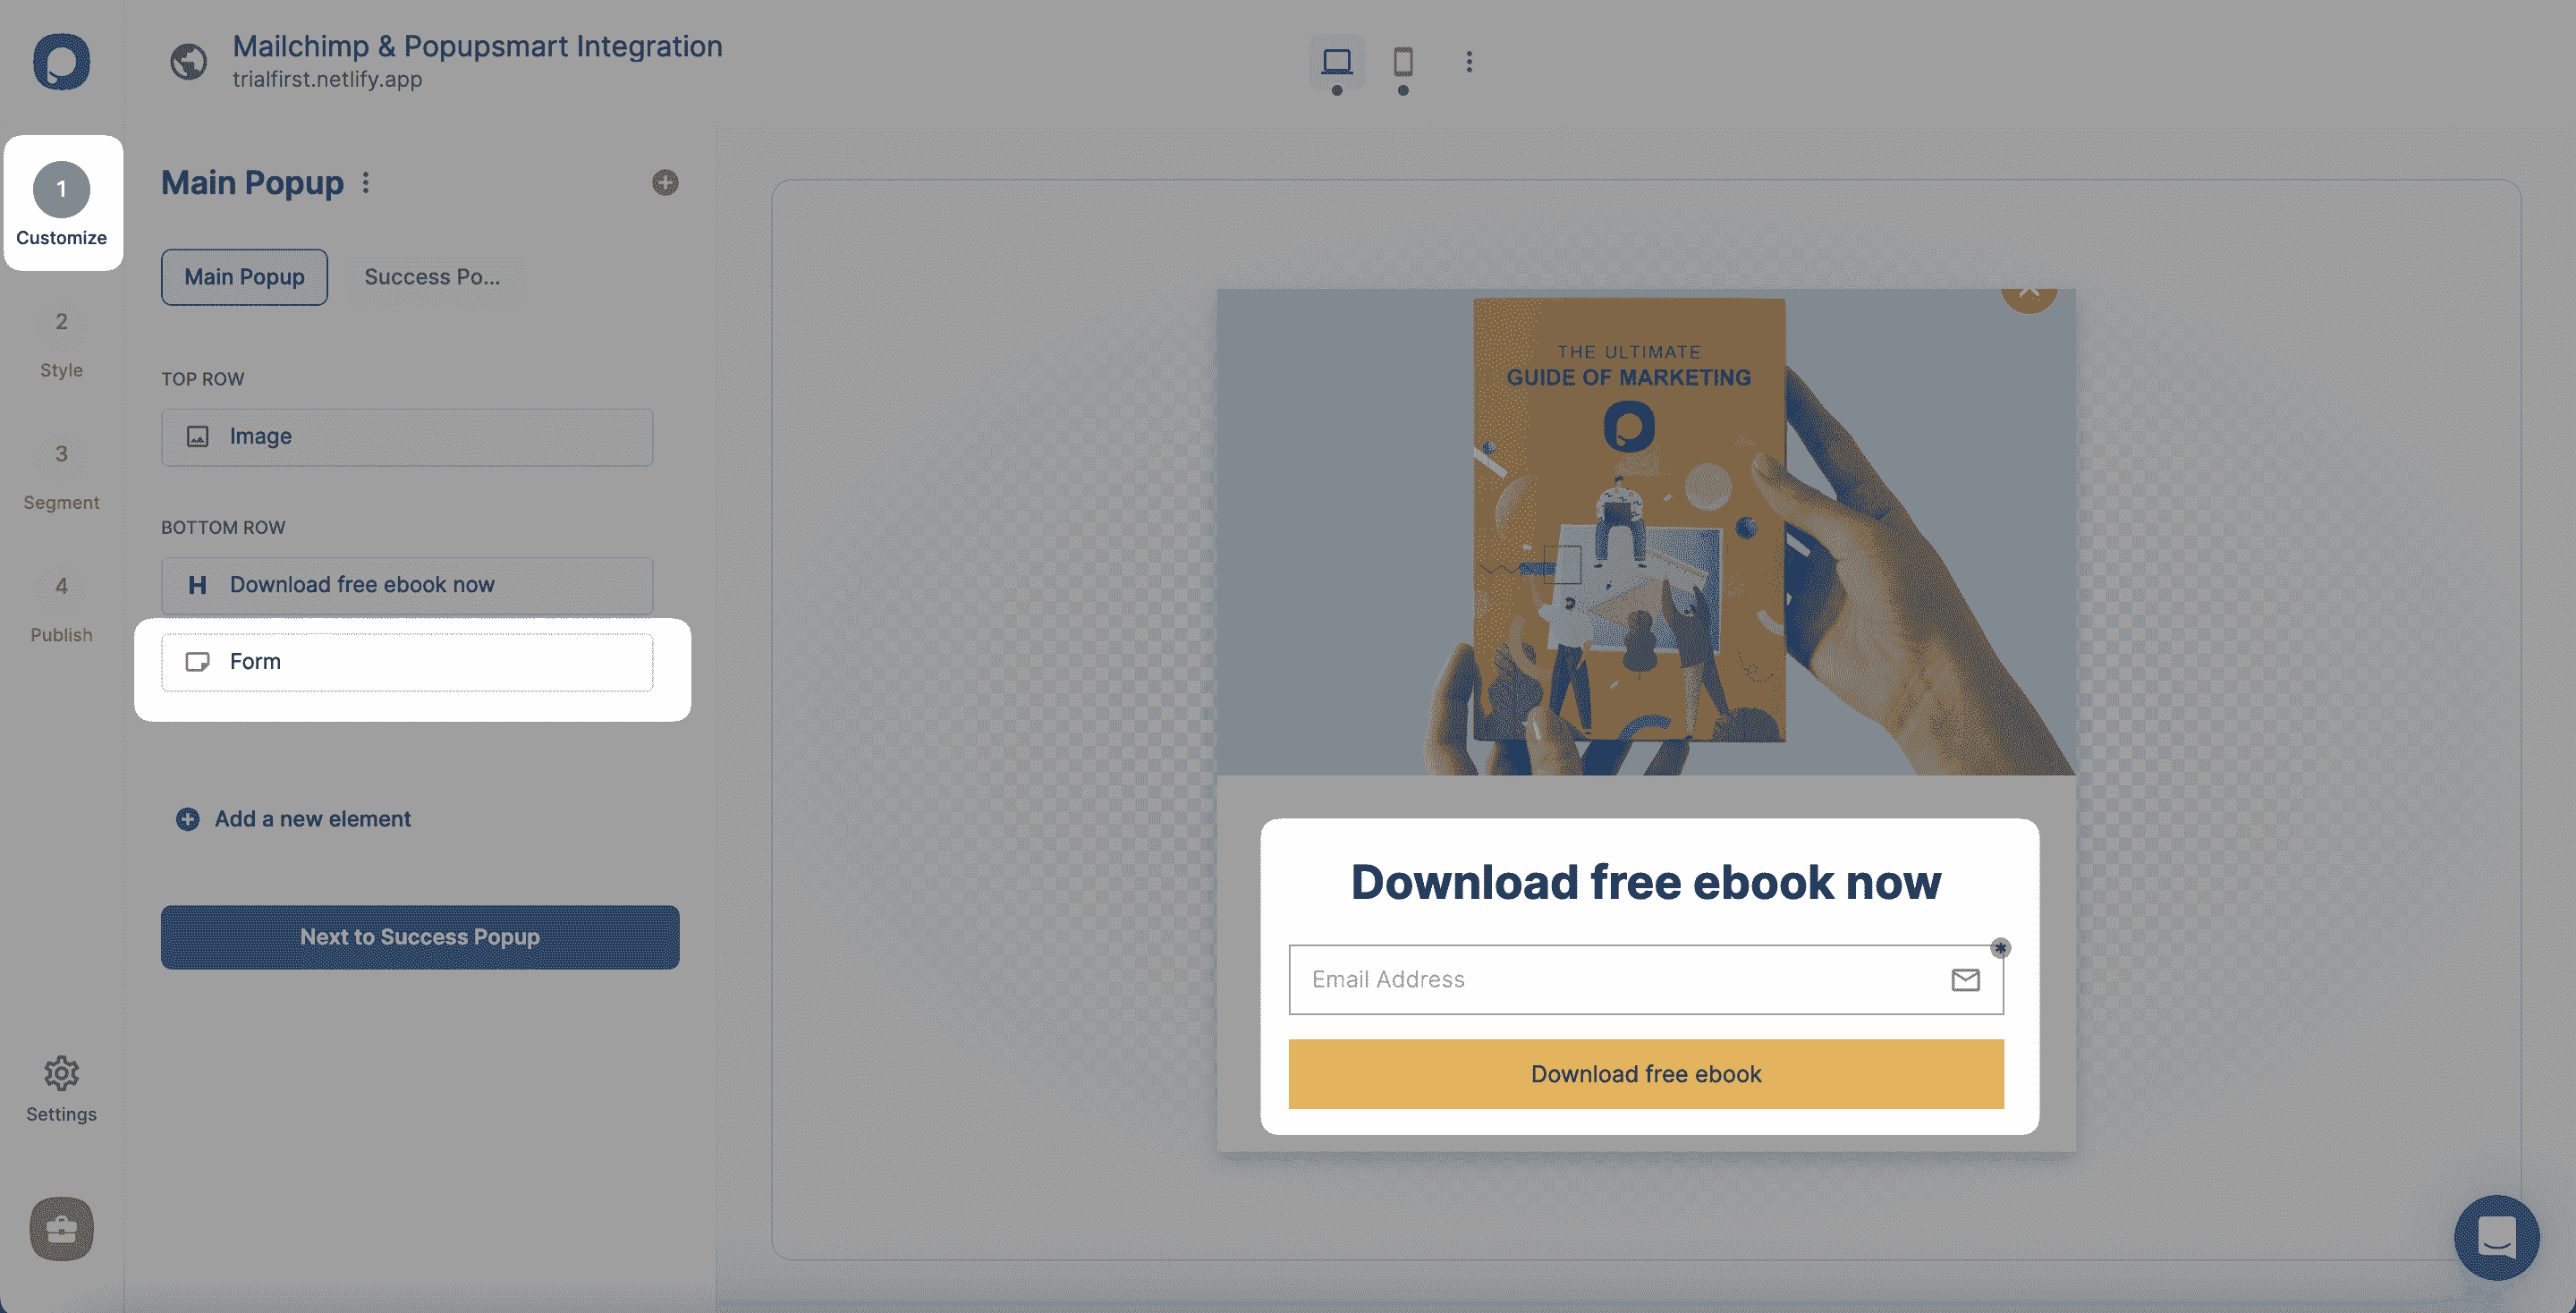
Click New Campaign and choose a template that already has a form input element, or start from a blank popup and add one in the Customize step. The form is what collects the data Mailchimp receives.
Step 3: Choose who sees it and when
Set the targeting and trigger rules: exit intent, scroll depth, time on page, new or returning visitors, device, location or specific URLs, alone or combined. In Popupsmart's 2026 benchmark, popups that wait before appearing convert 0.83% against 0.61% for popups shown the instant the page loads (median campaign), a lean rather than a proven gap, and exit intent shows no statistically reliable advantage. When a popup fires is worth deciding on purpose, so my advice is to choose the trigger before you polish the design.
Step 4: Publish and add the embed code
Connect the popup to Mailchimp first (the connection section below). Then publish it from the Publish step and paste the Popupsmart embed code into your site once; every campaign you build later runs from the same line.
Mailchimp popup types that work well
- Newsletter signup, shown on scroll or after time on page: the email popup guide.
- An email capture built for a Mailchimp list: the Mailchimp popup integration.
- A last offer for visitors about to leave: exit-intent popup examples.
- Free shipping for an email: email popup examples.
Where does the Mailchimp popup code go on WordPress or Shopify?
On Shopify, Mailchimp's own pop-up form arrives through the Mailchimp for Shopify app embed, with no code to paste. On WordPress or any other site, you paste the snippet Mailchimp gives you when you connect the site manually, or add it with Google Tag Manager.
A Popupsmart popup uses one embed code for every campaign:
- Shopify: switch on the Popupsmart Shopify app as an app embed, or paste the code into
theme.liquid. The Shopify popup guide shows both. - WordPress: use the optional Popupsmart plugin, or paste the code into the theme's
footer.php. The WordPress popup guide covers each route.
Use one method per site, not both: the help center warns that adding the code twice can make it malfunction. The Mailchimp-specific walk-throughs are how to add a Mailchimp popup to WordPress and how to add a Mailchimp popup to Shopify.
How to connect Popupsmart to Mailchimp
The connection needs one Mailchimp API key and one audience. You set it up inside the campaign, from the popup's form element.
Add Mailchimp to your campaign
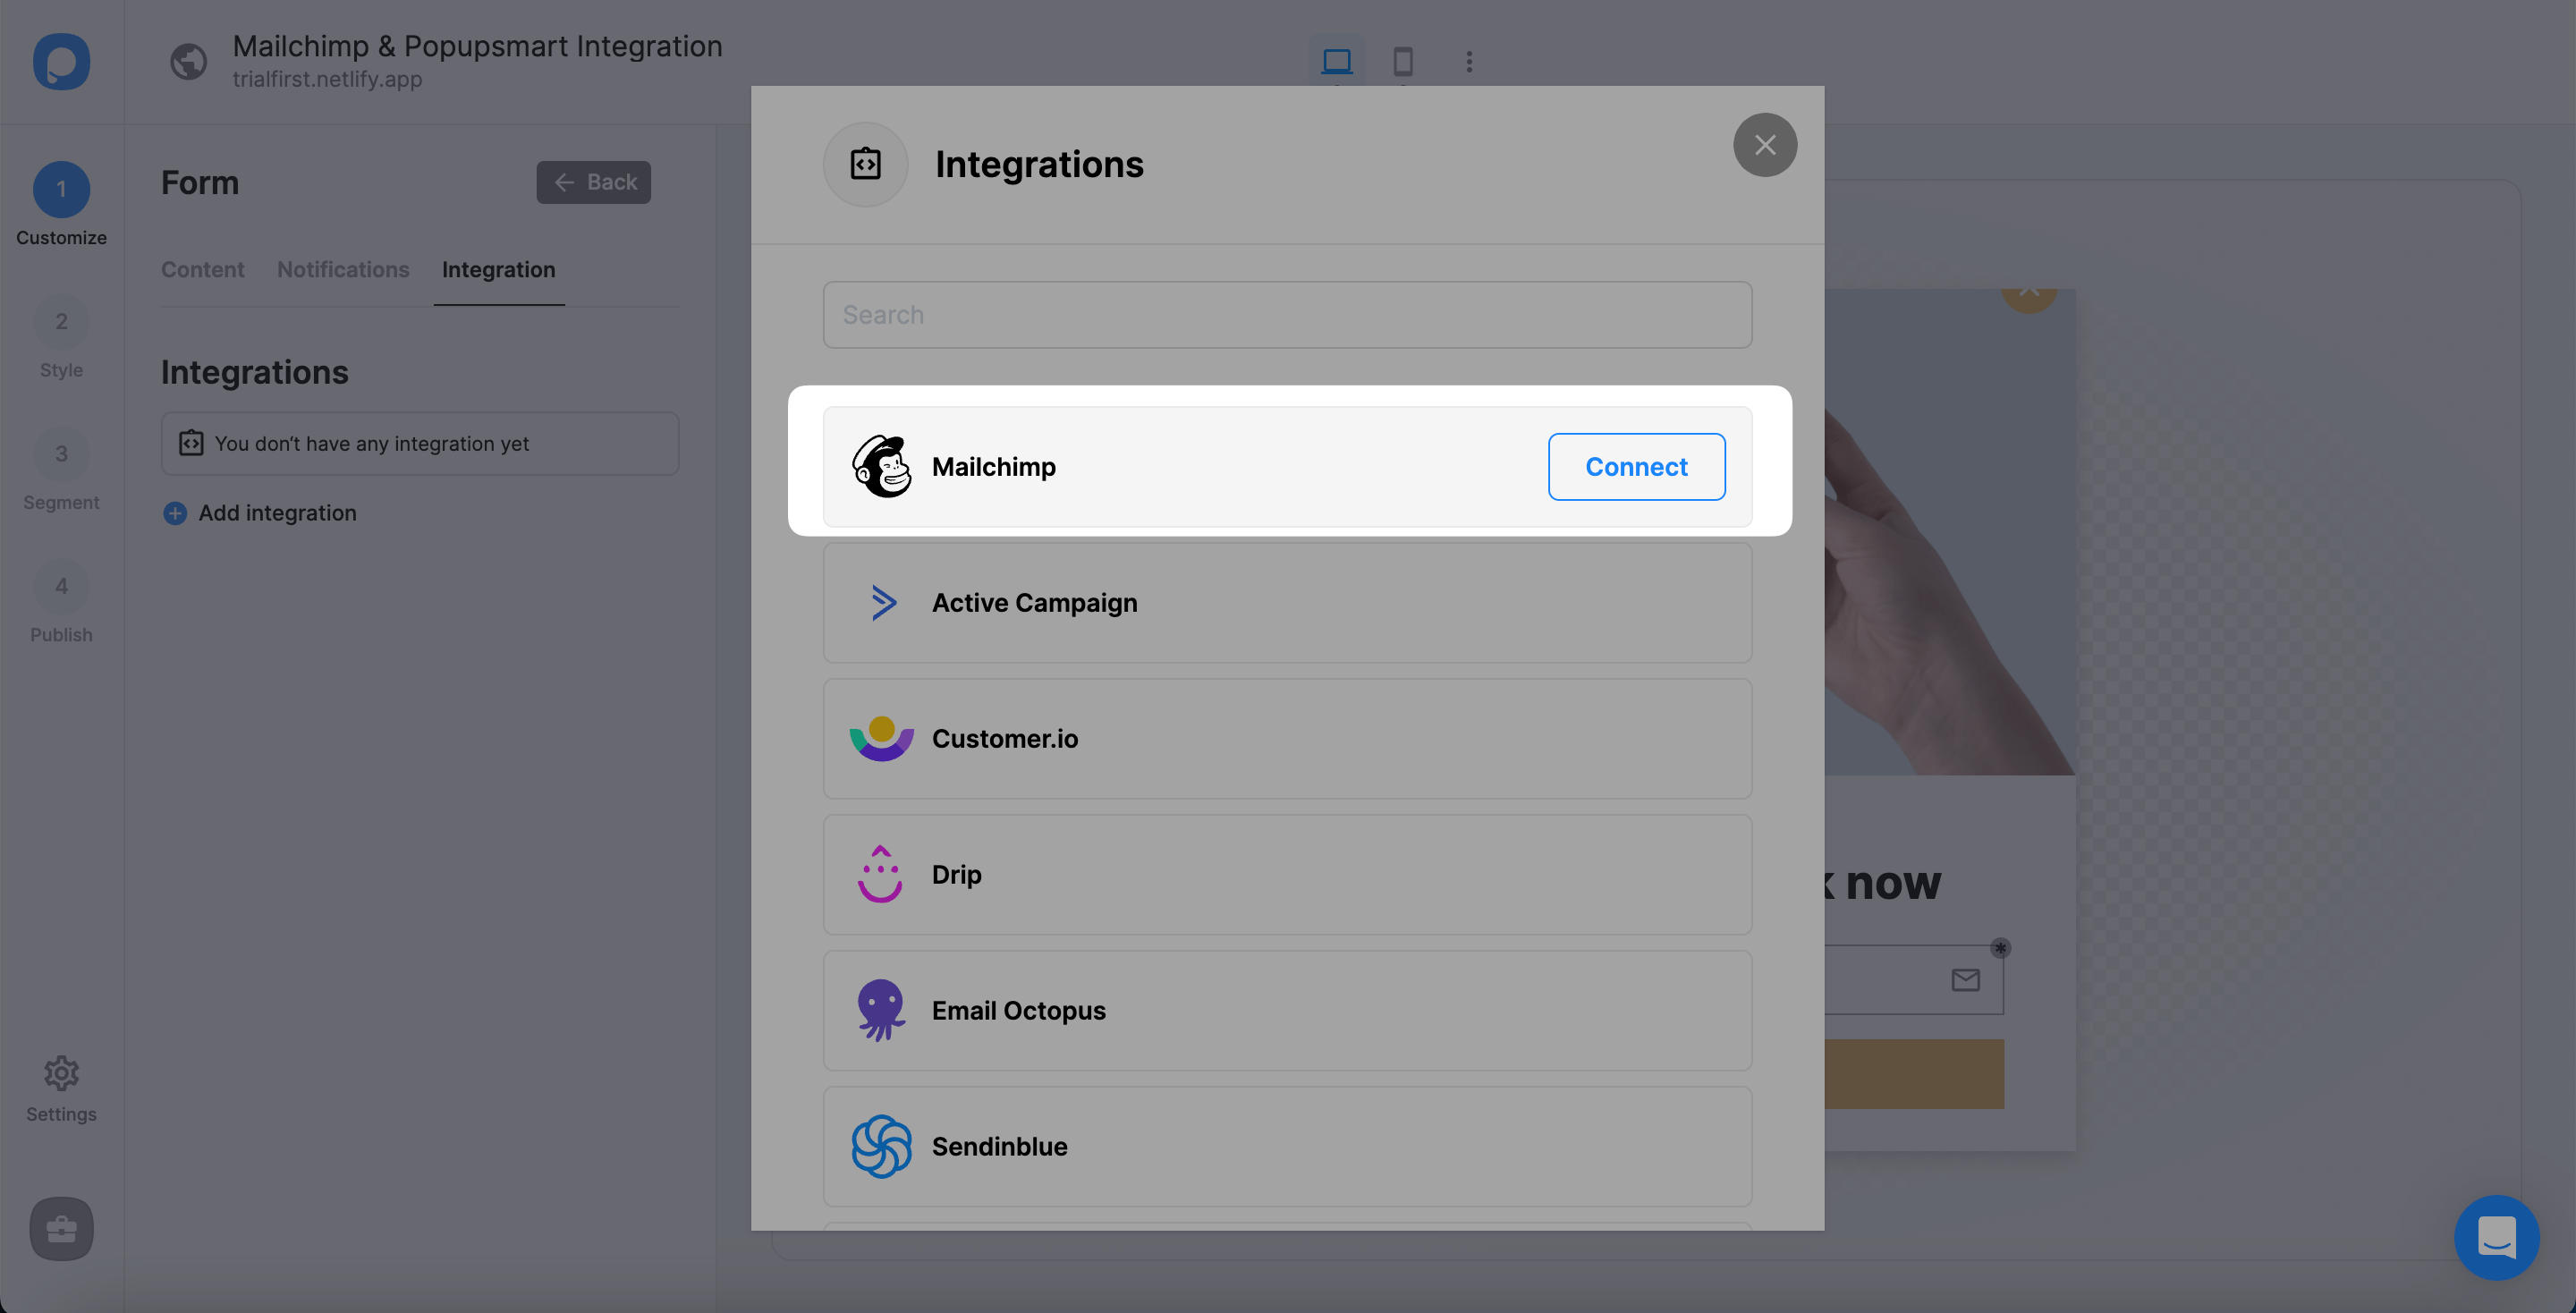
In the Customize step, click the form element you added, open Integration and click + Add integration.
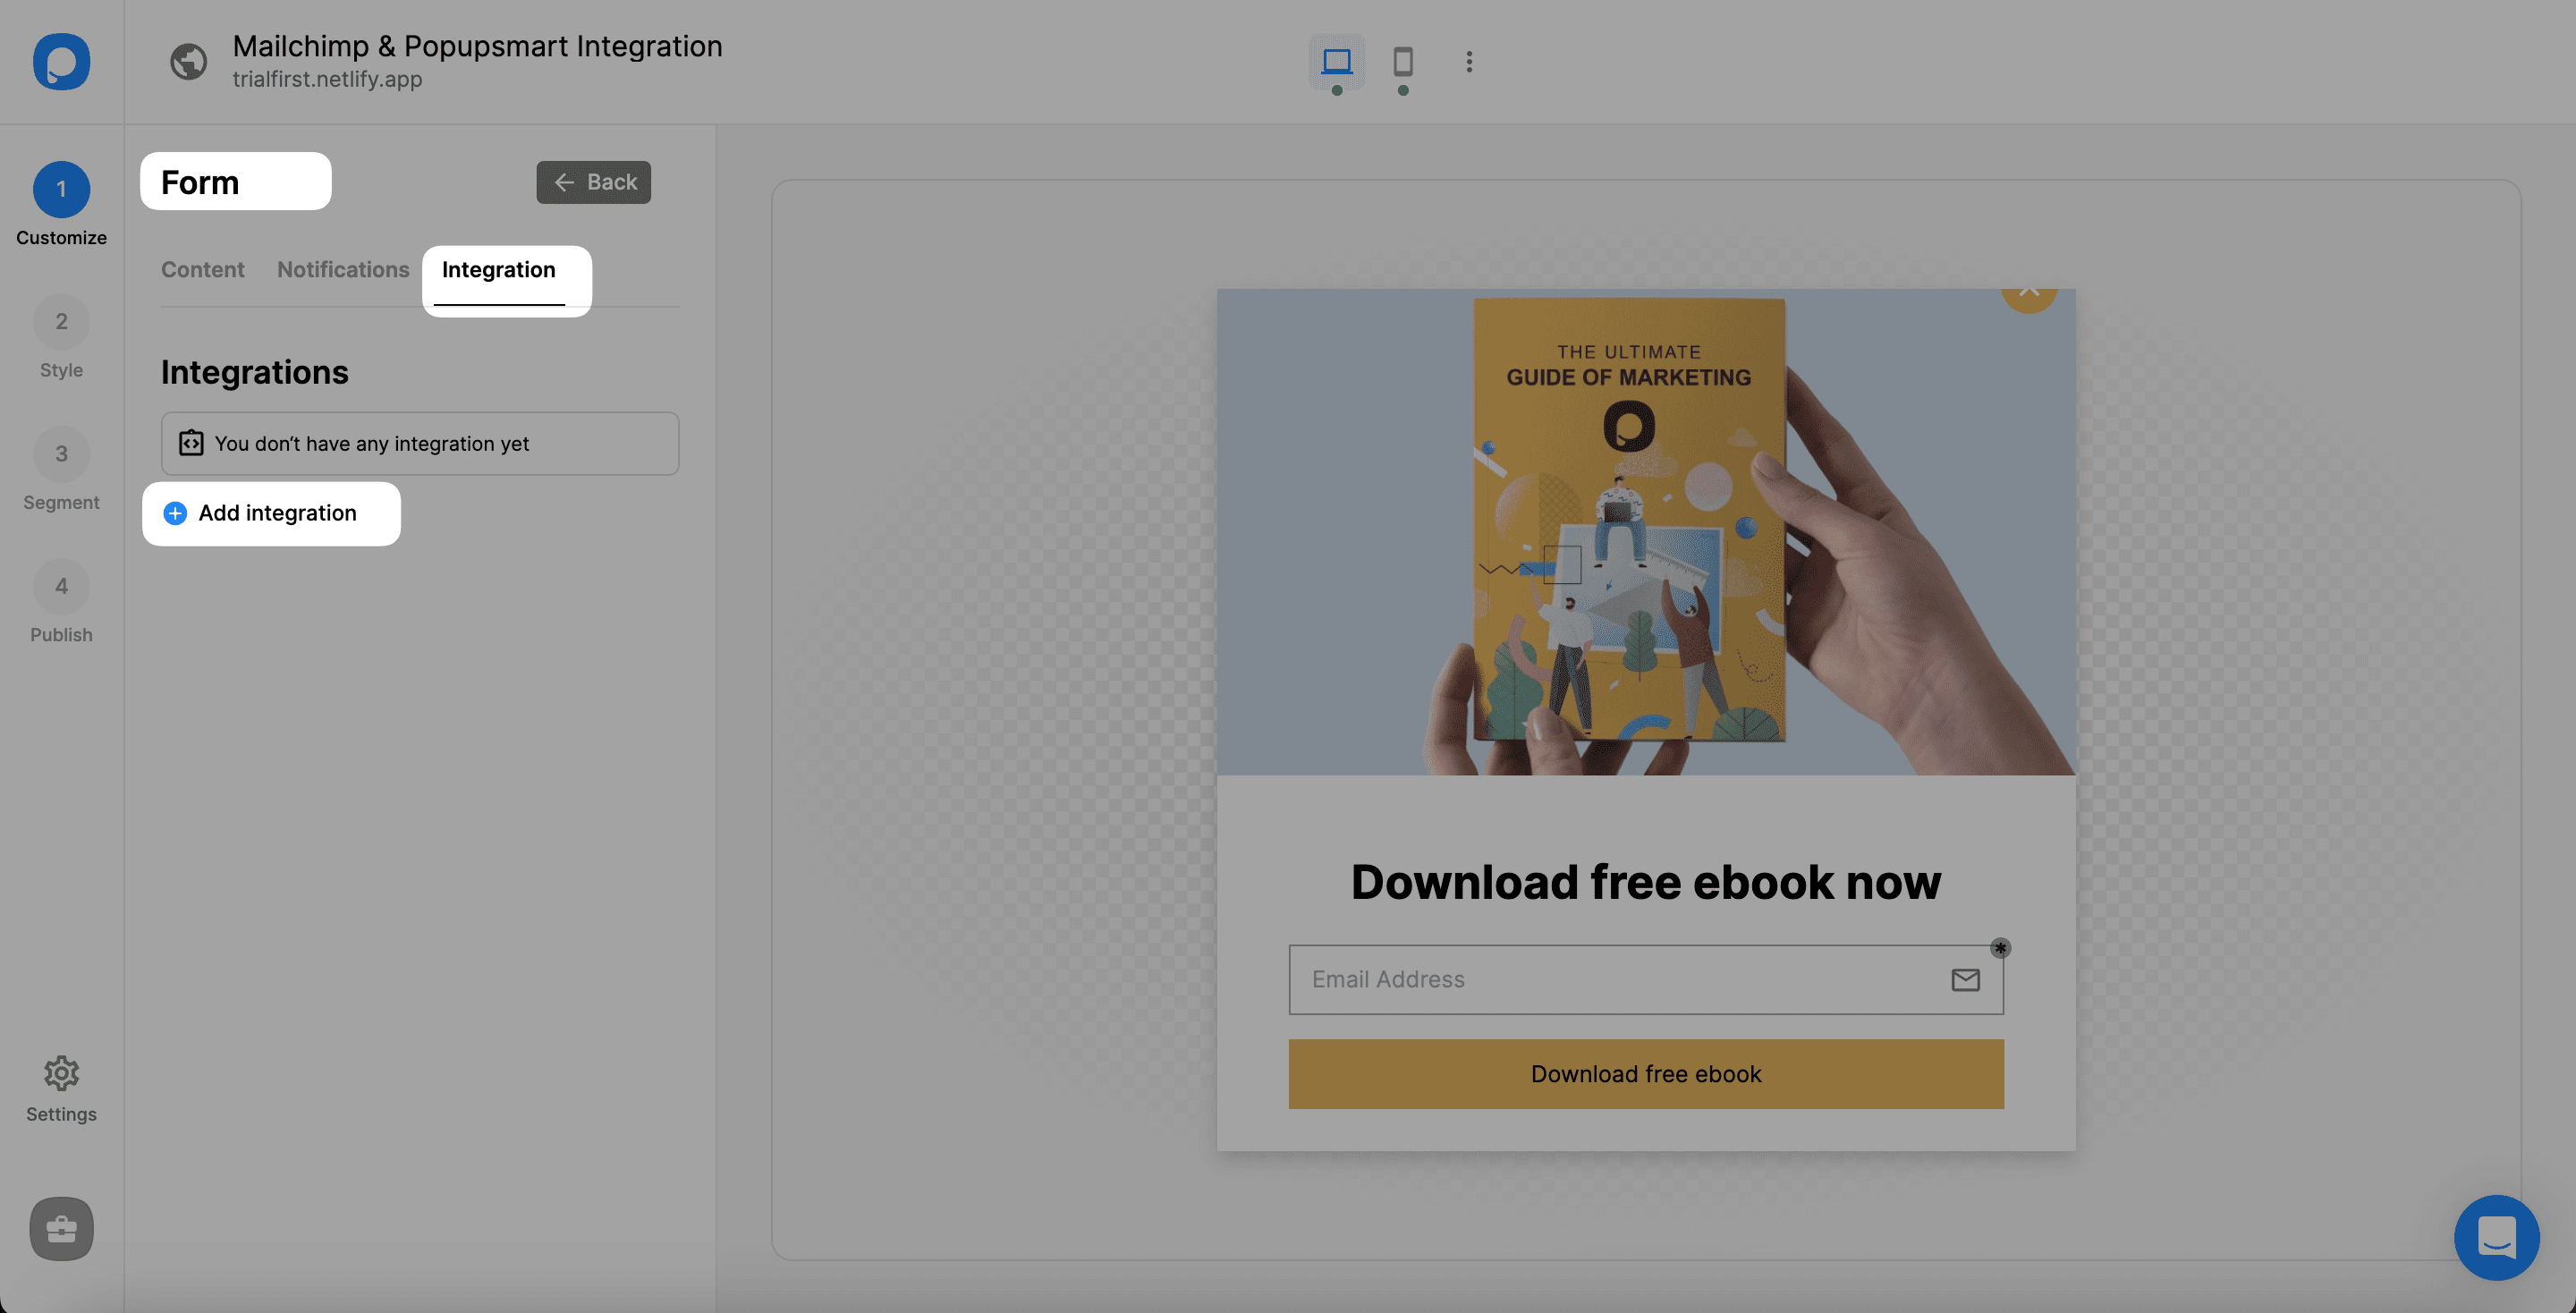
Find Mailchimp and click Connect.
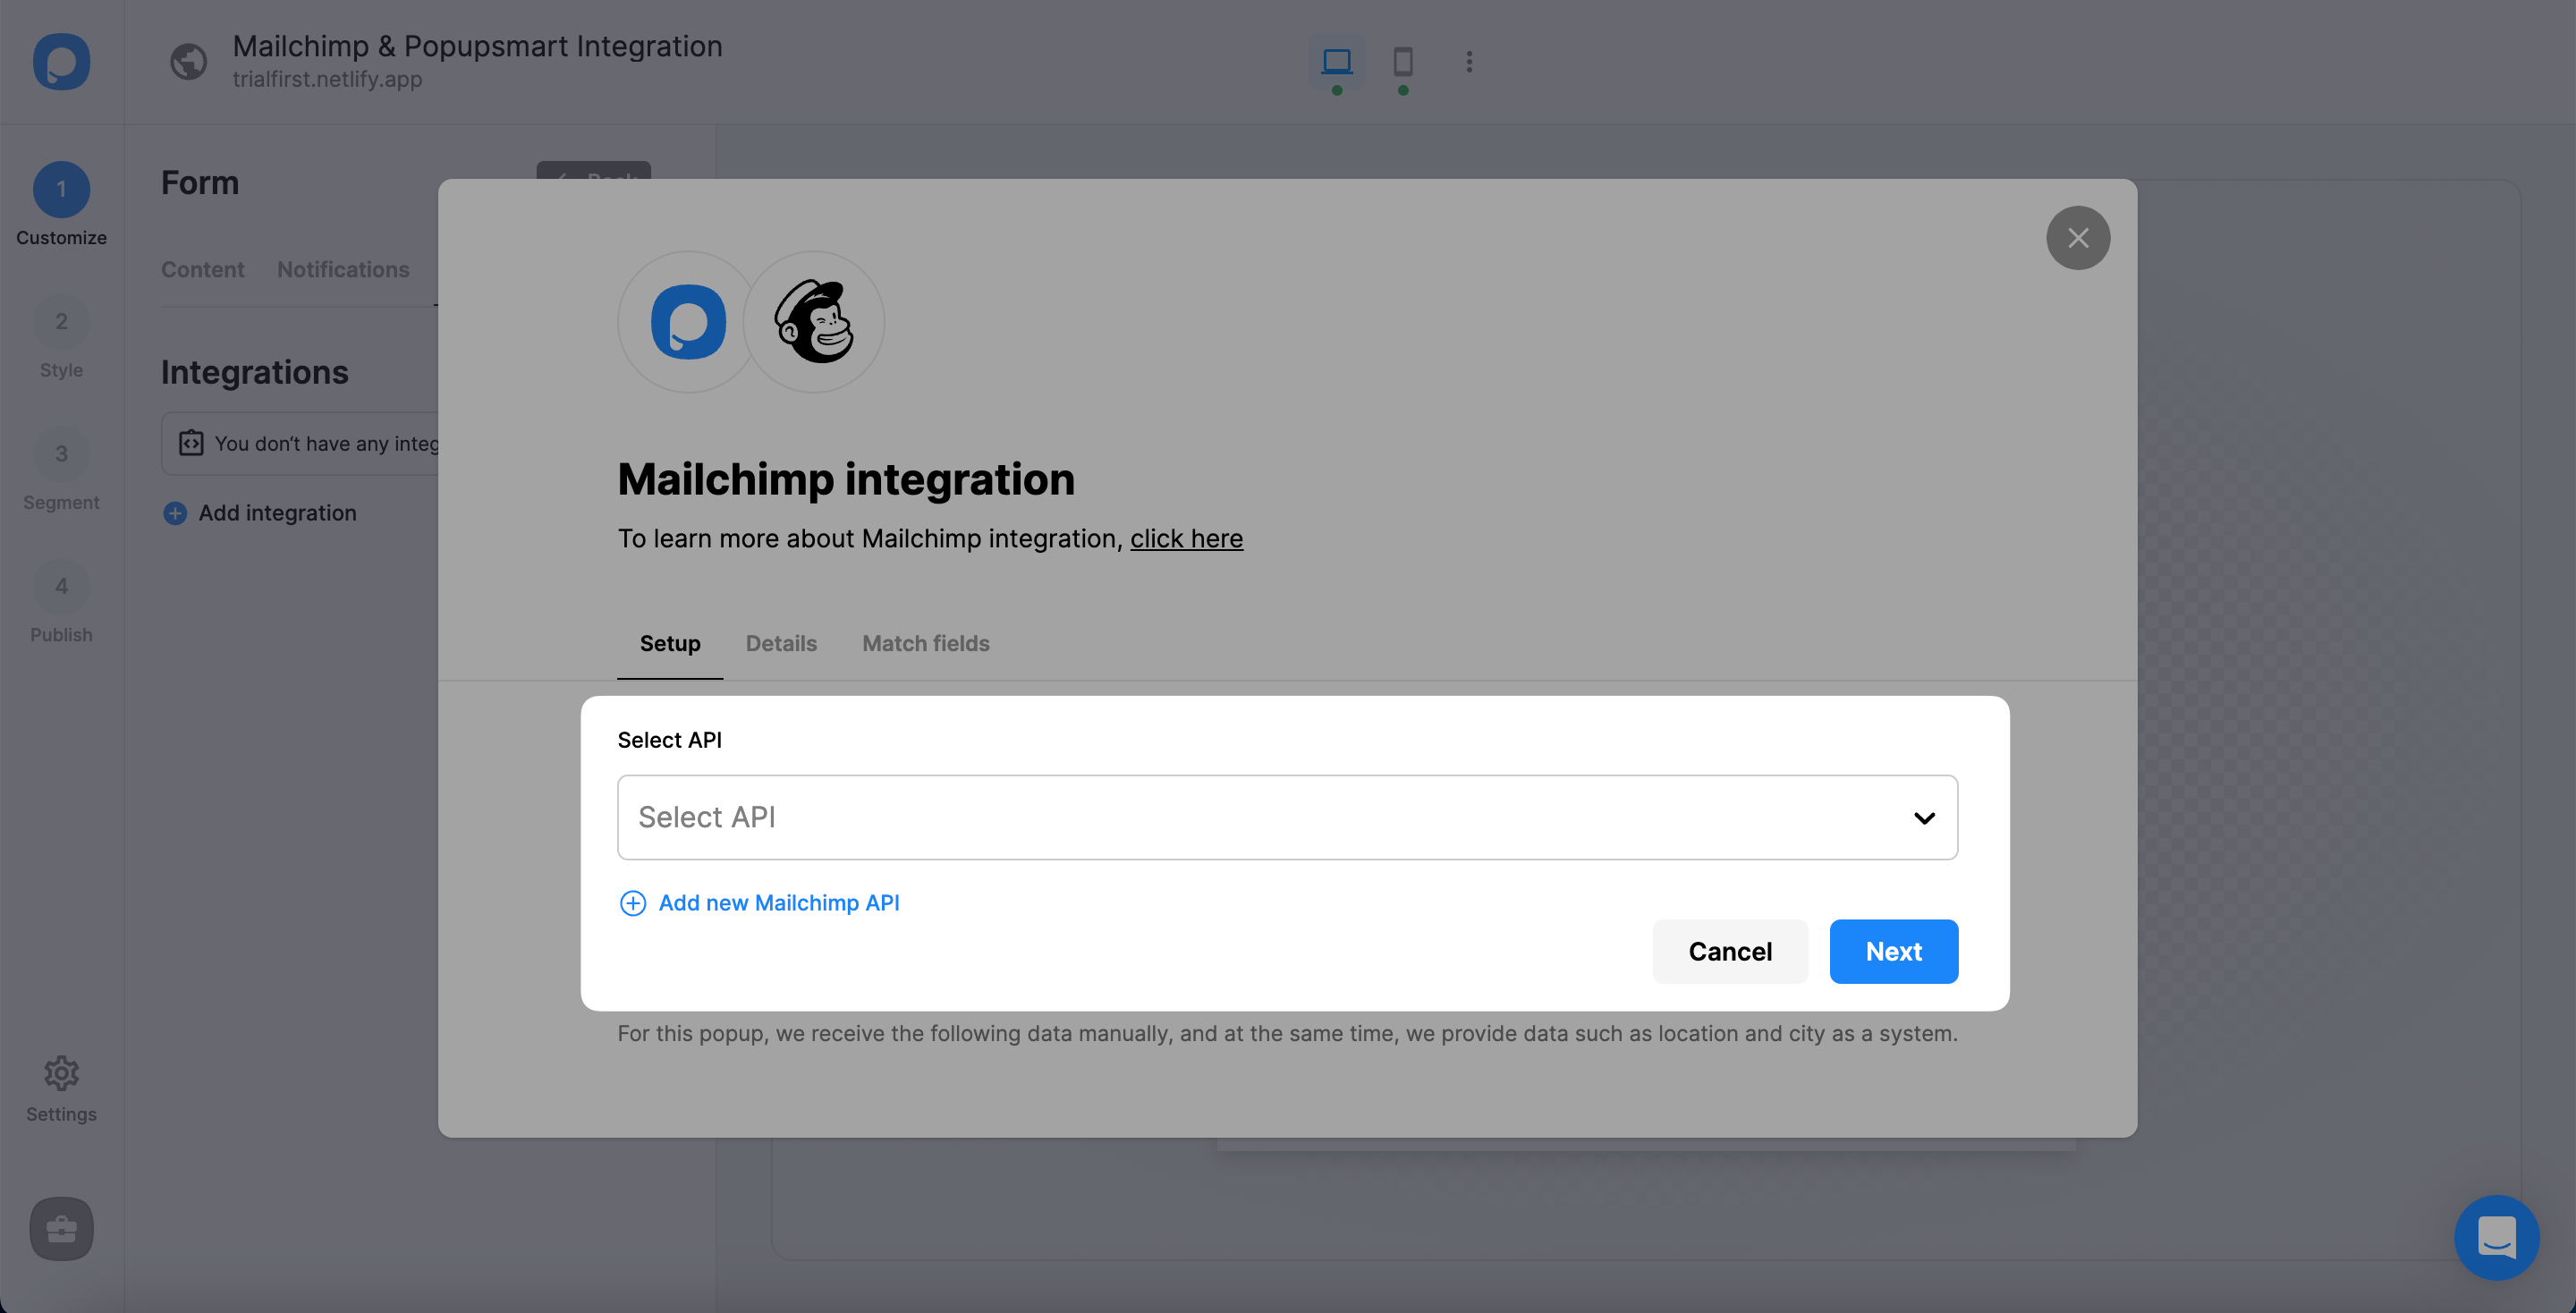
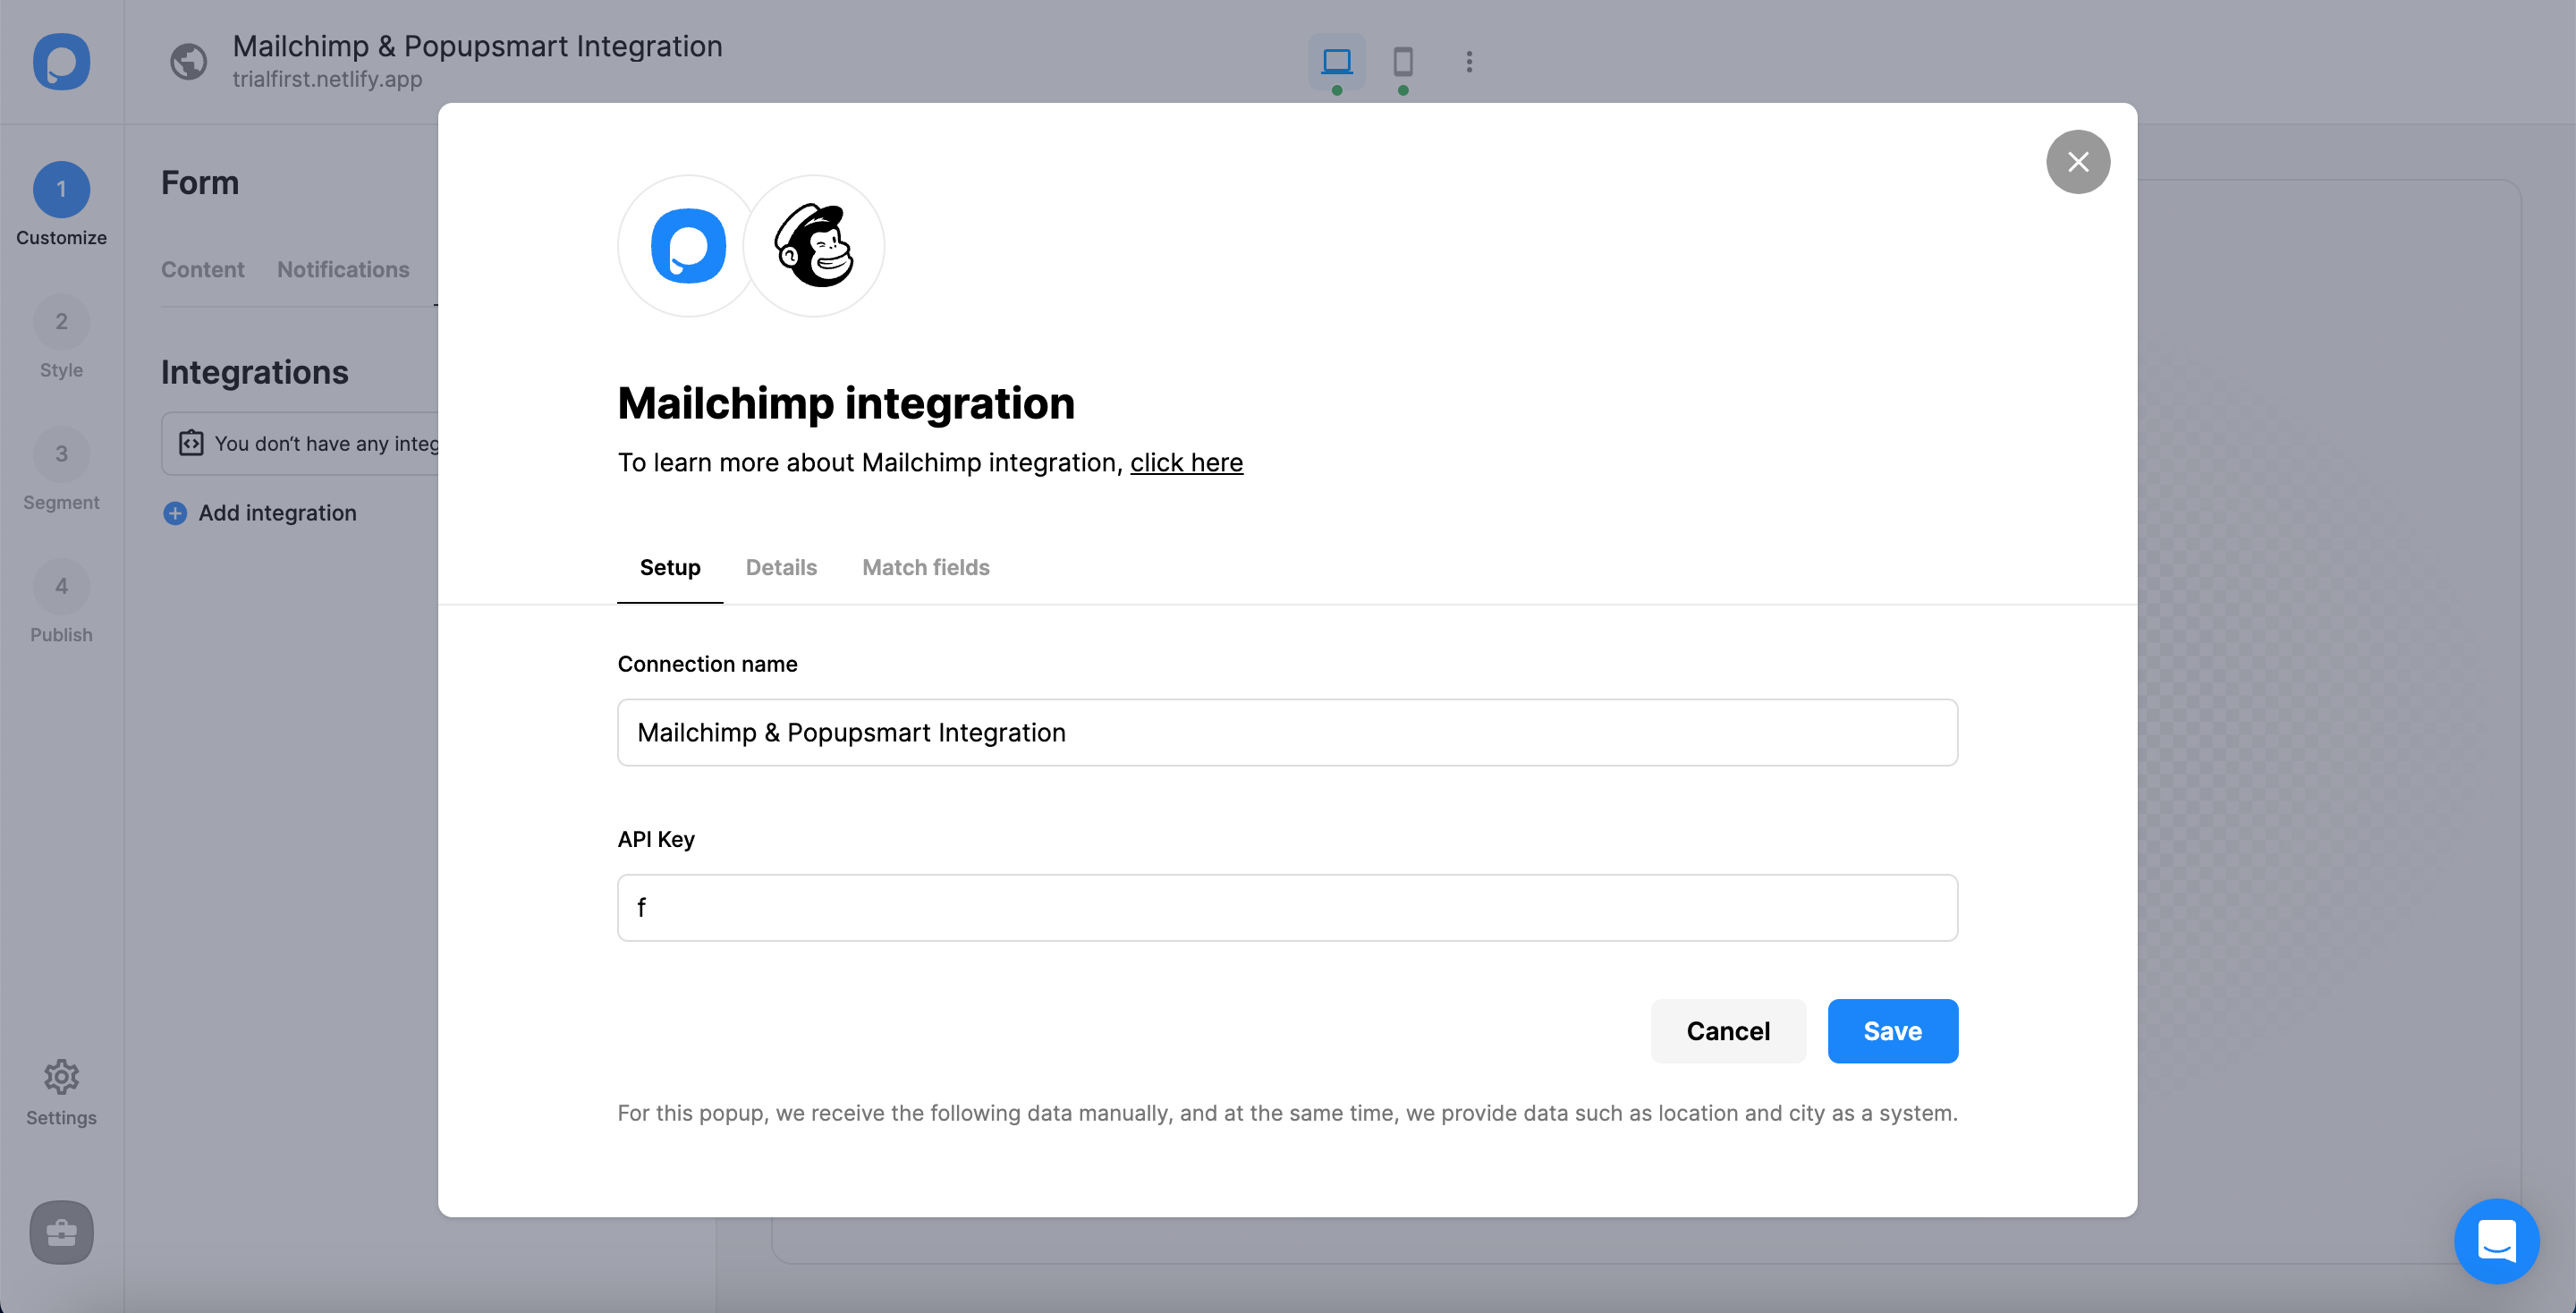
Under Setup, pick a saved Mailchimp connection from the dropdown, or click Add new Mailchimp API for your first one.
Where to find your Mailchimp API key
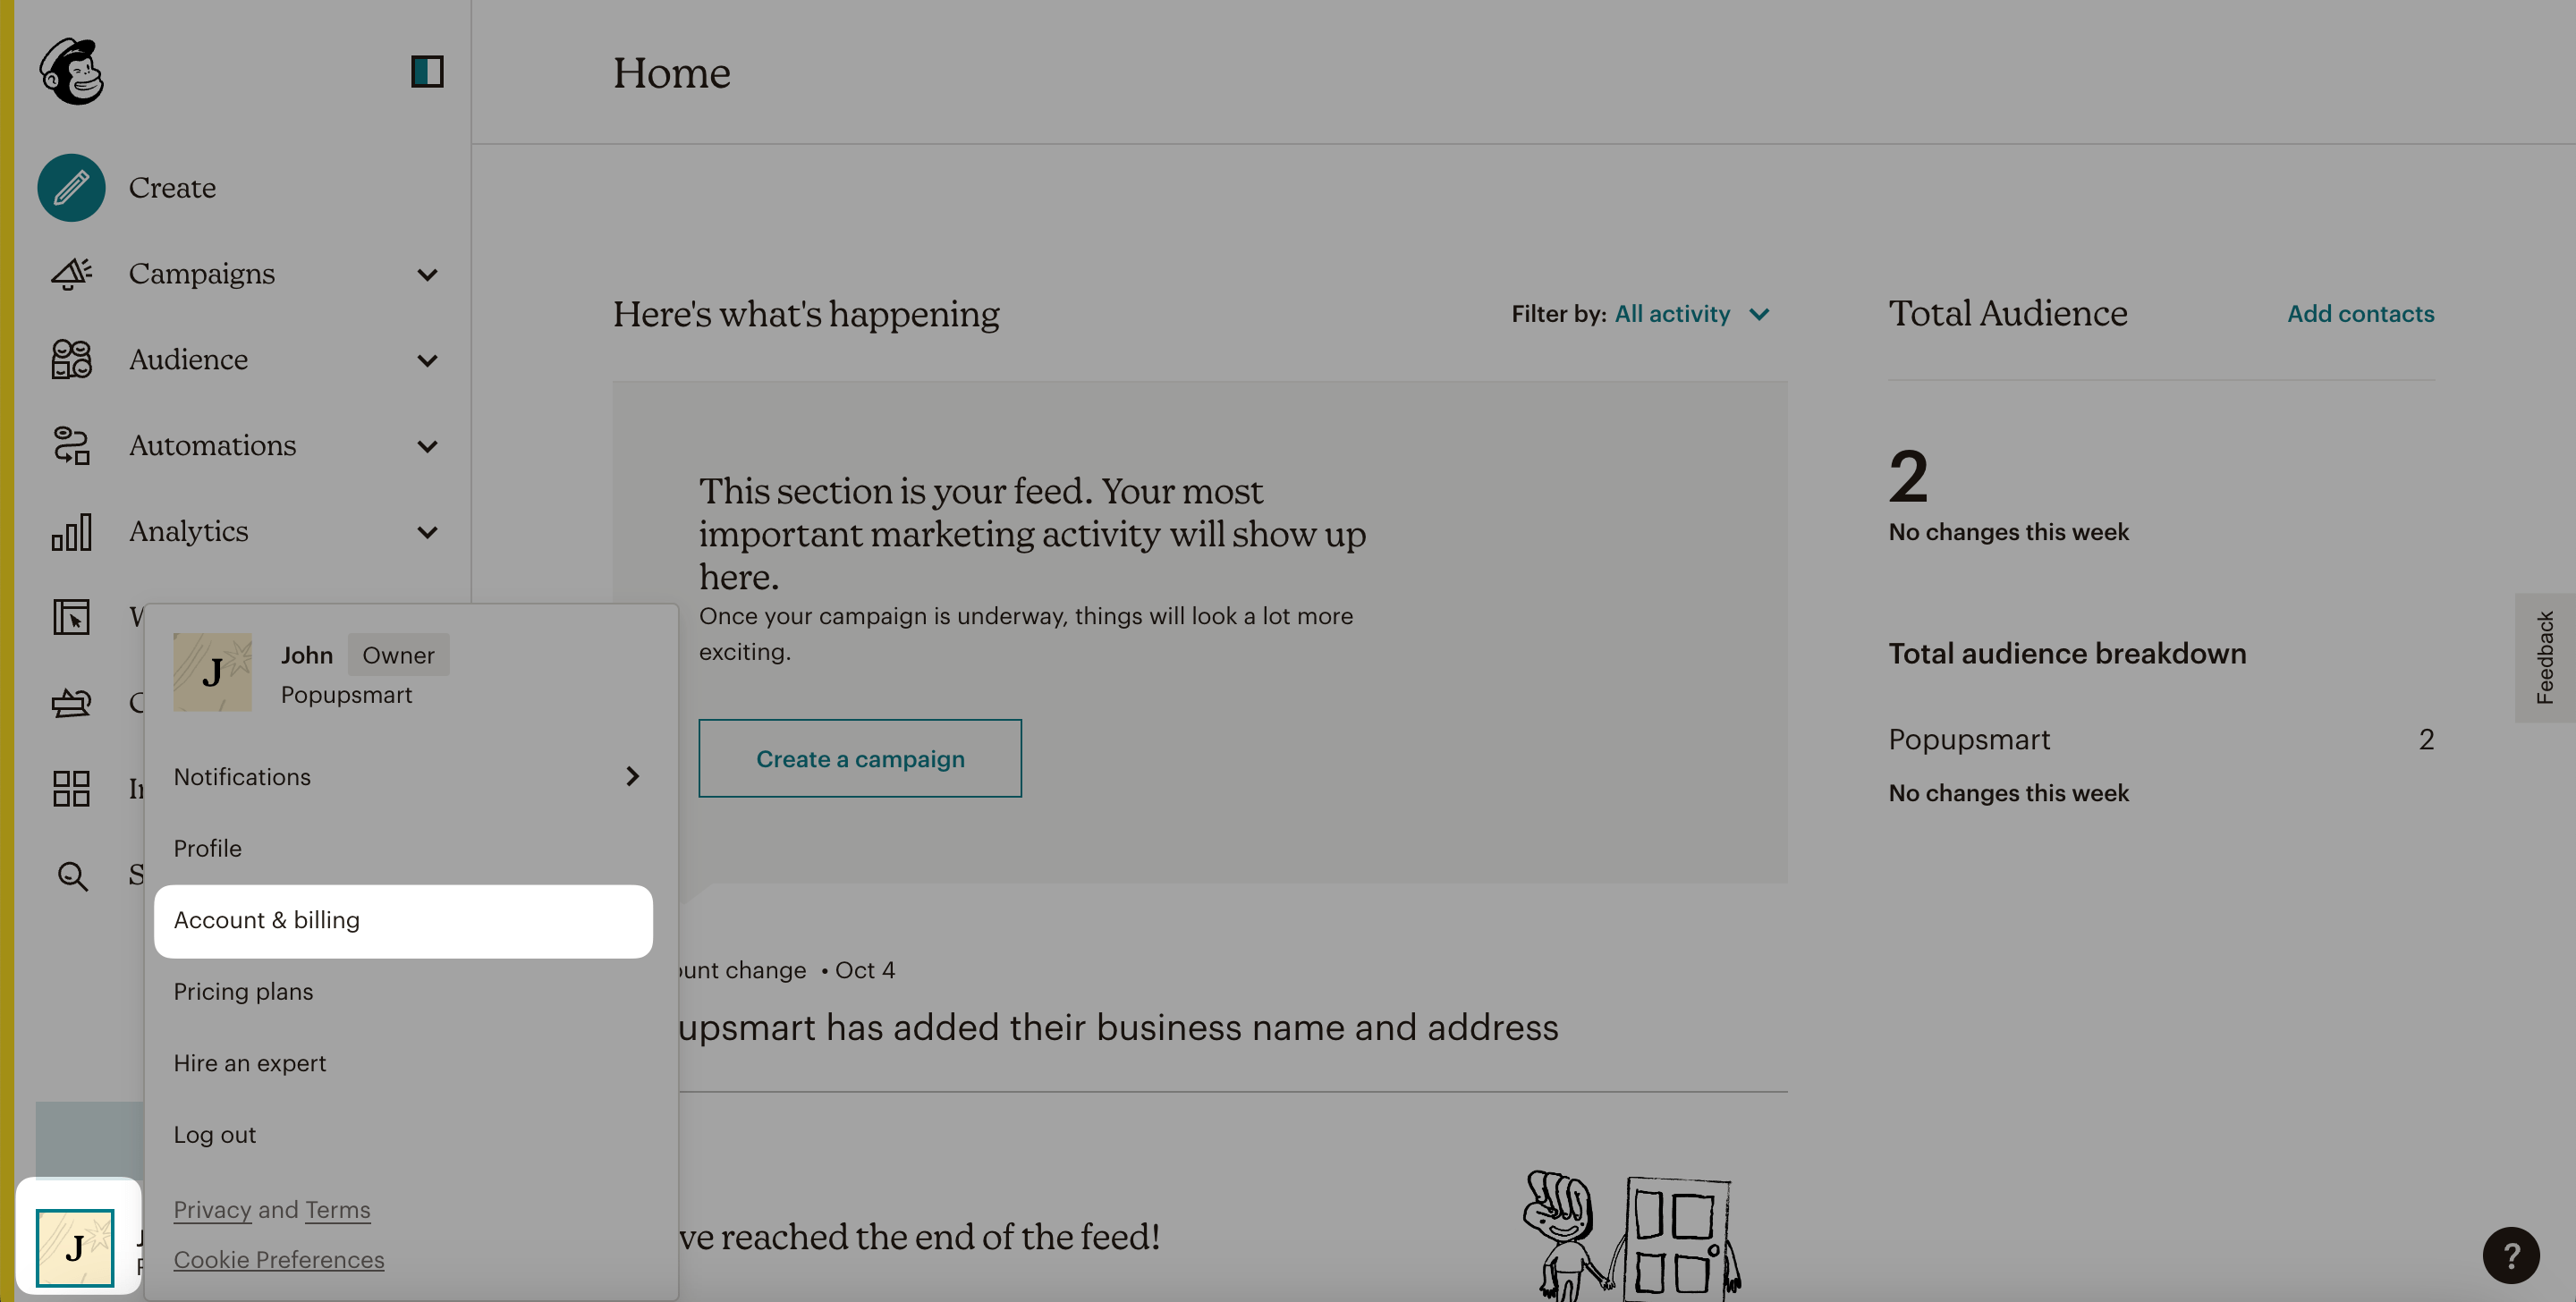
You create the key in your Mailchimp account settings, under Extras. Log in to Mailchimp, click your profile at the bottom of the left-hand menu and open your account settings. The screenshot shows Account & billing; Mailchimp's current help names the item Profile.
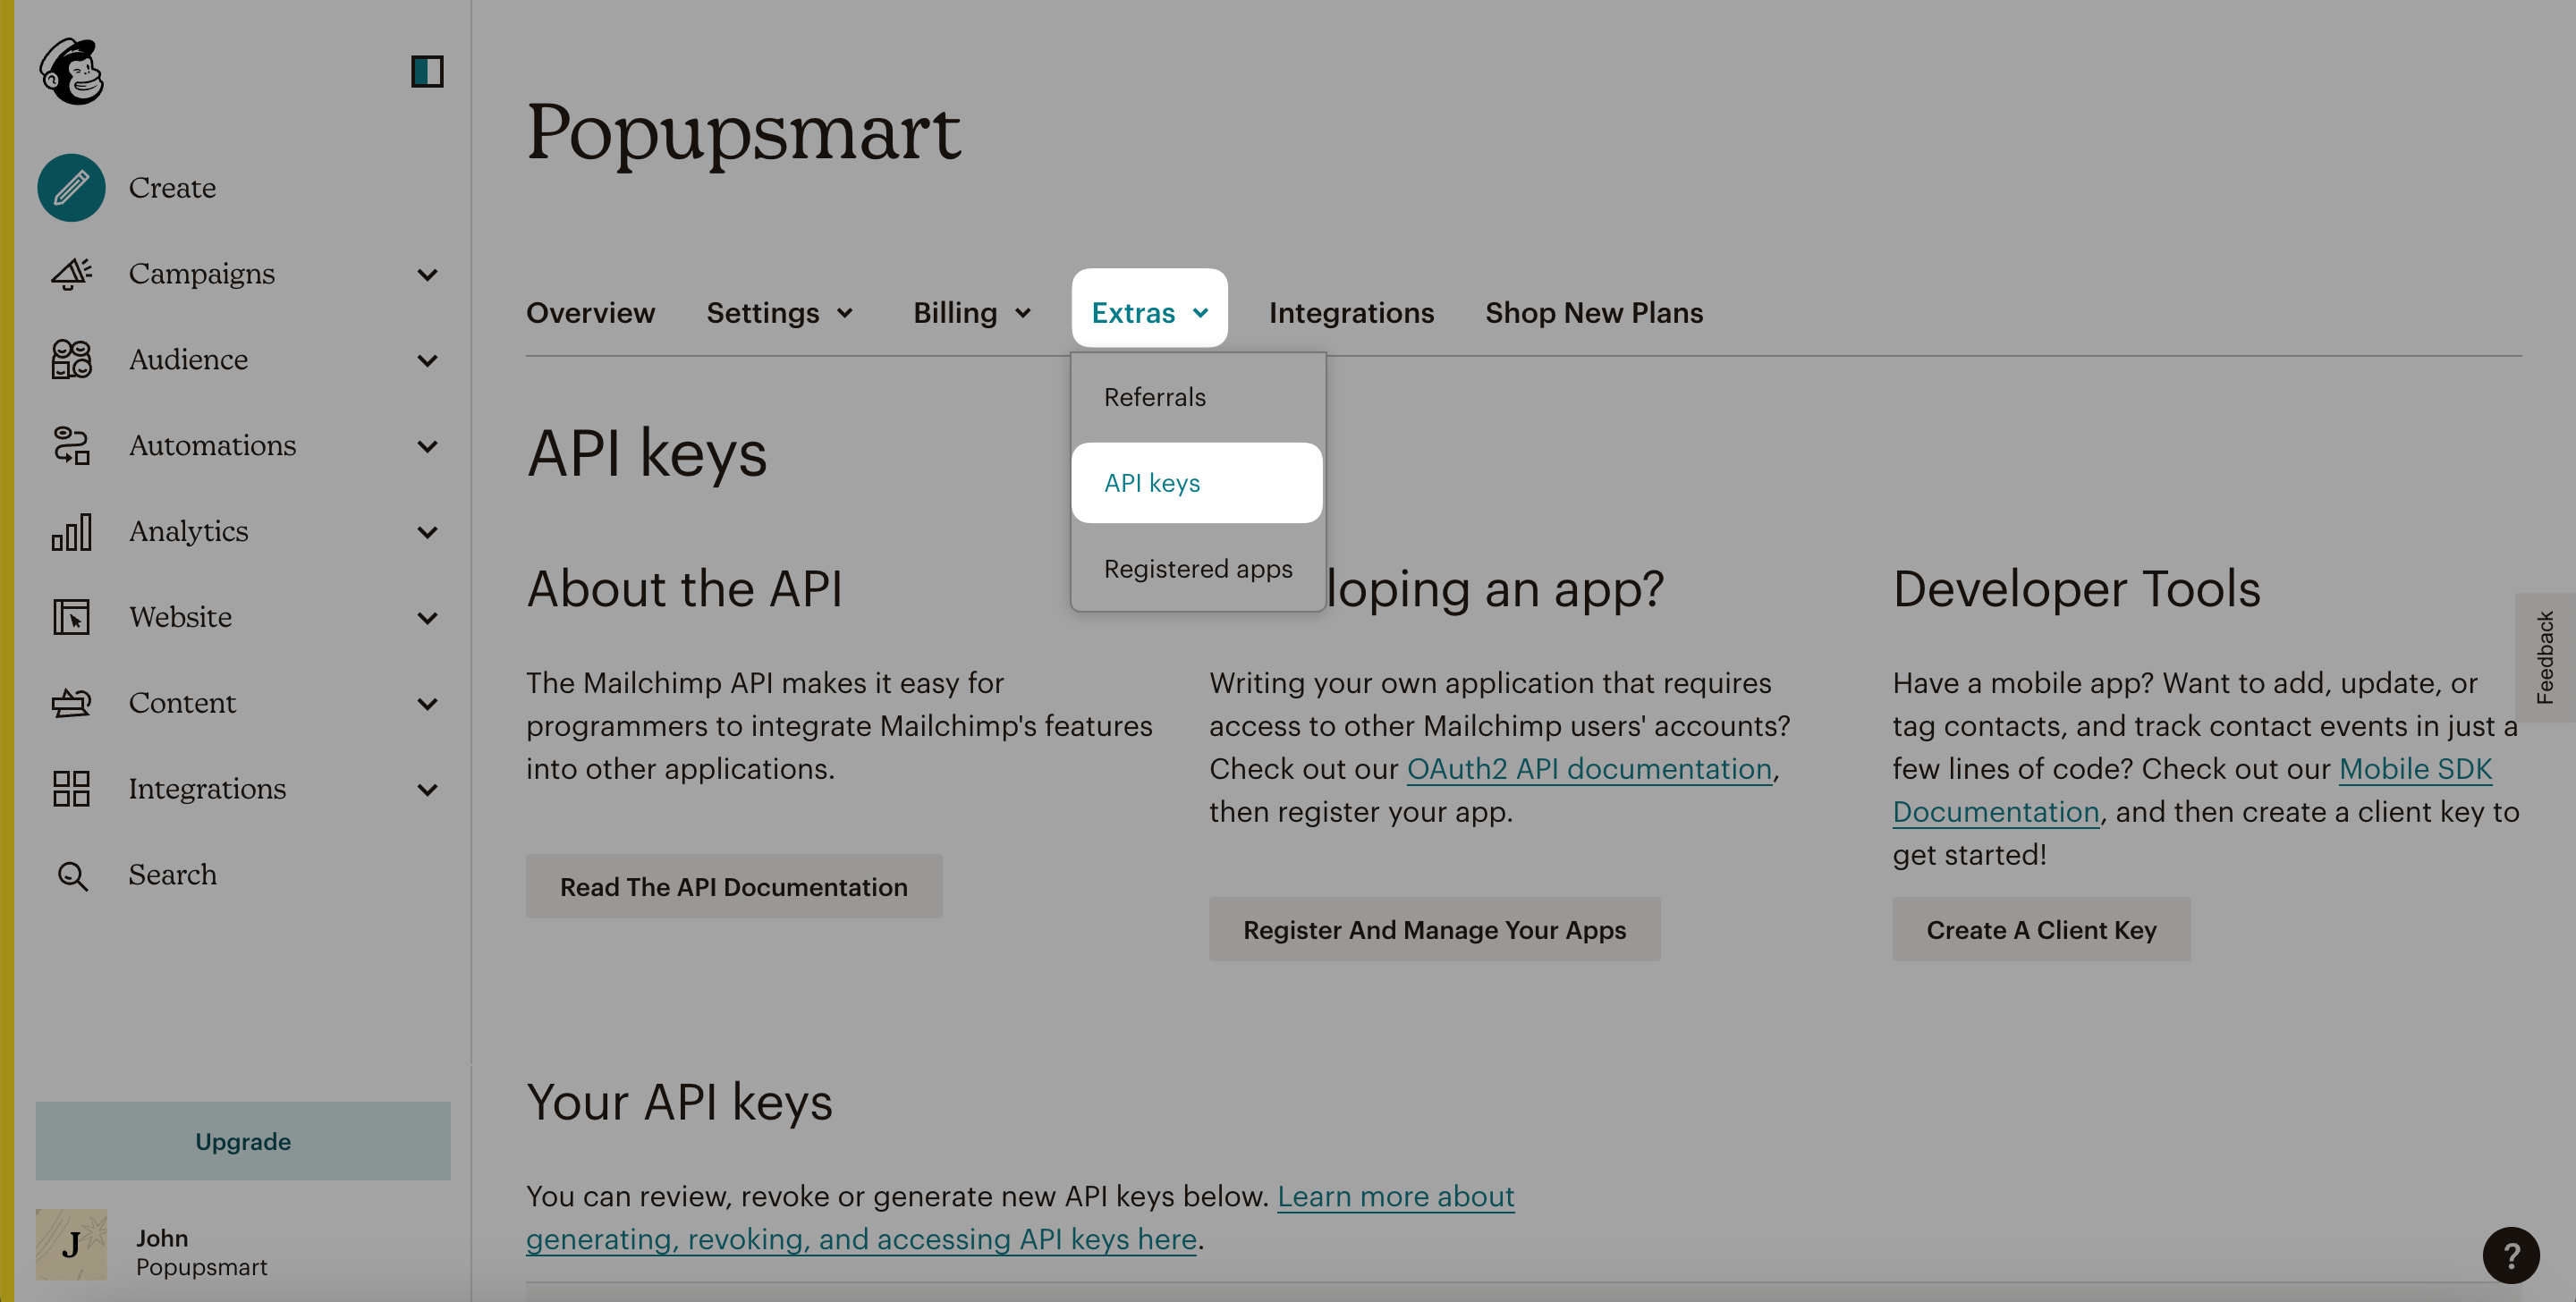
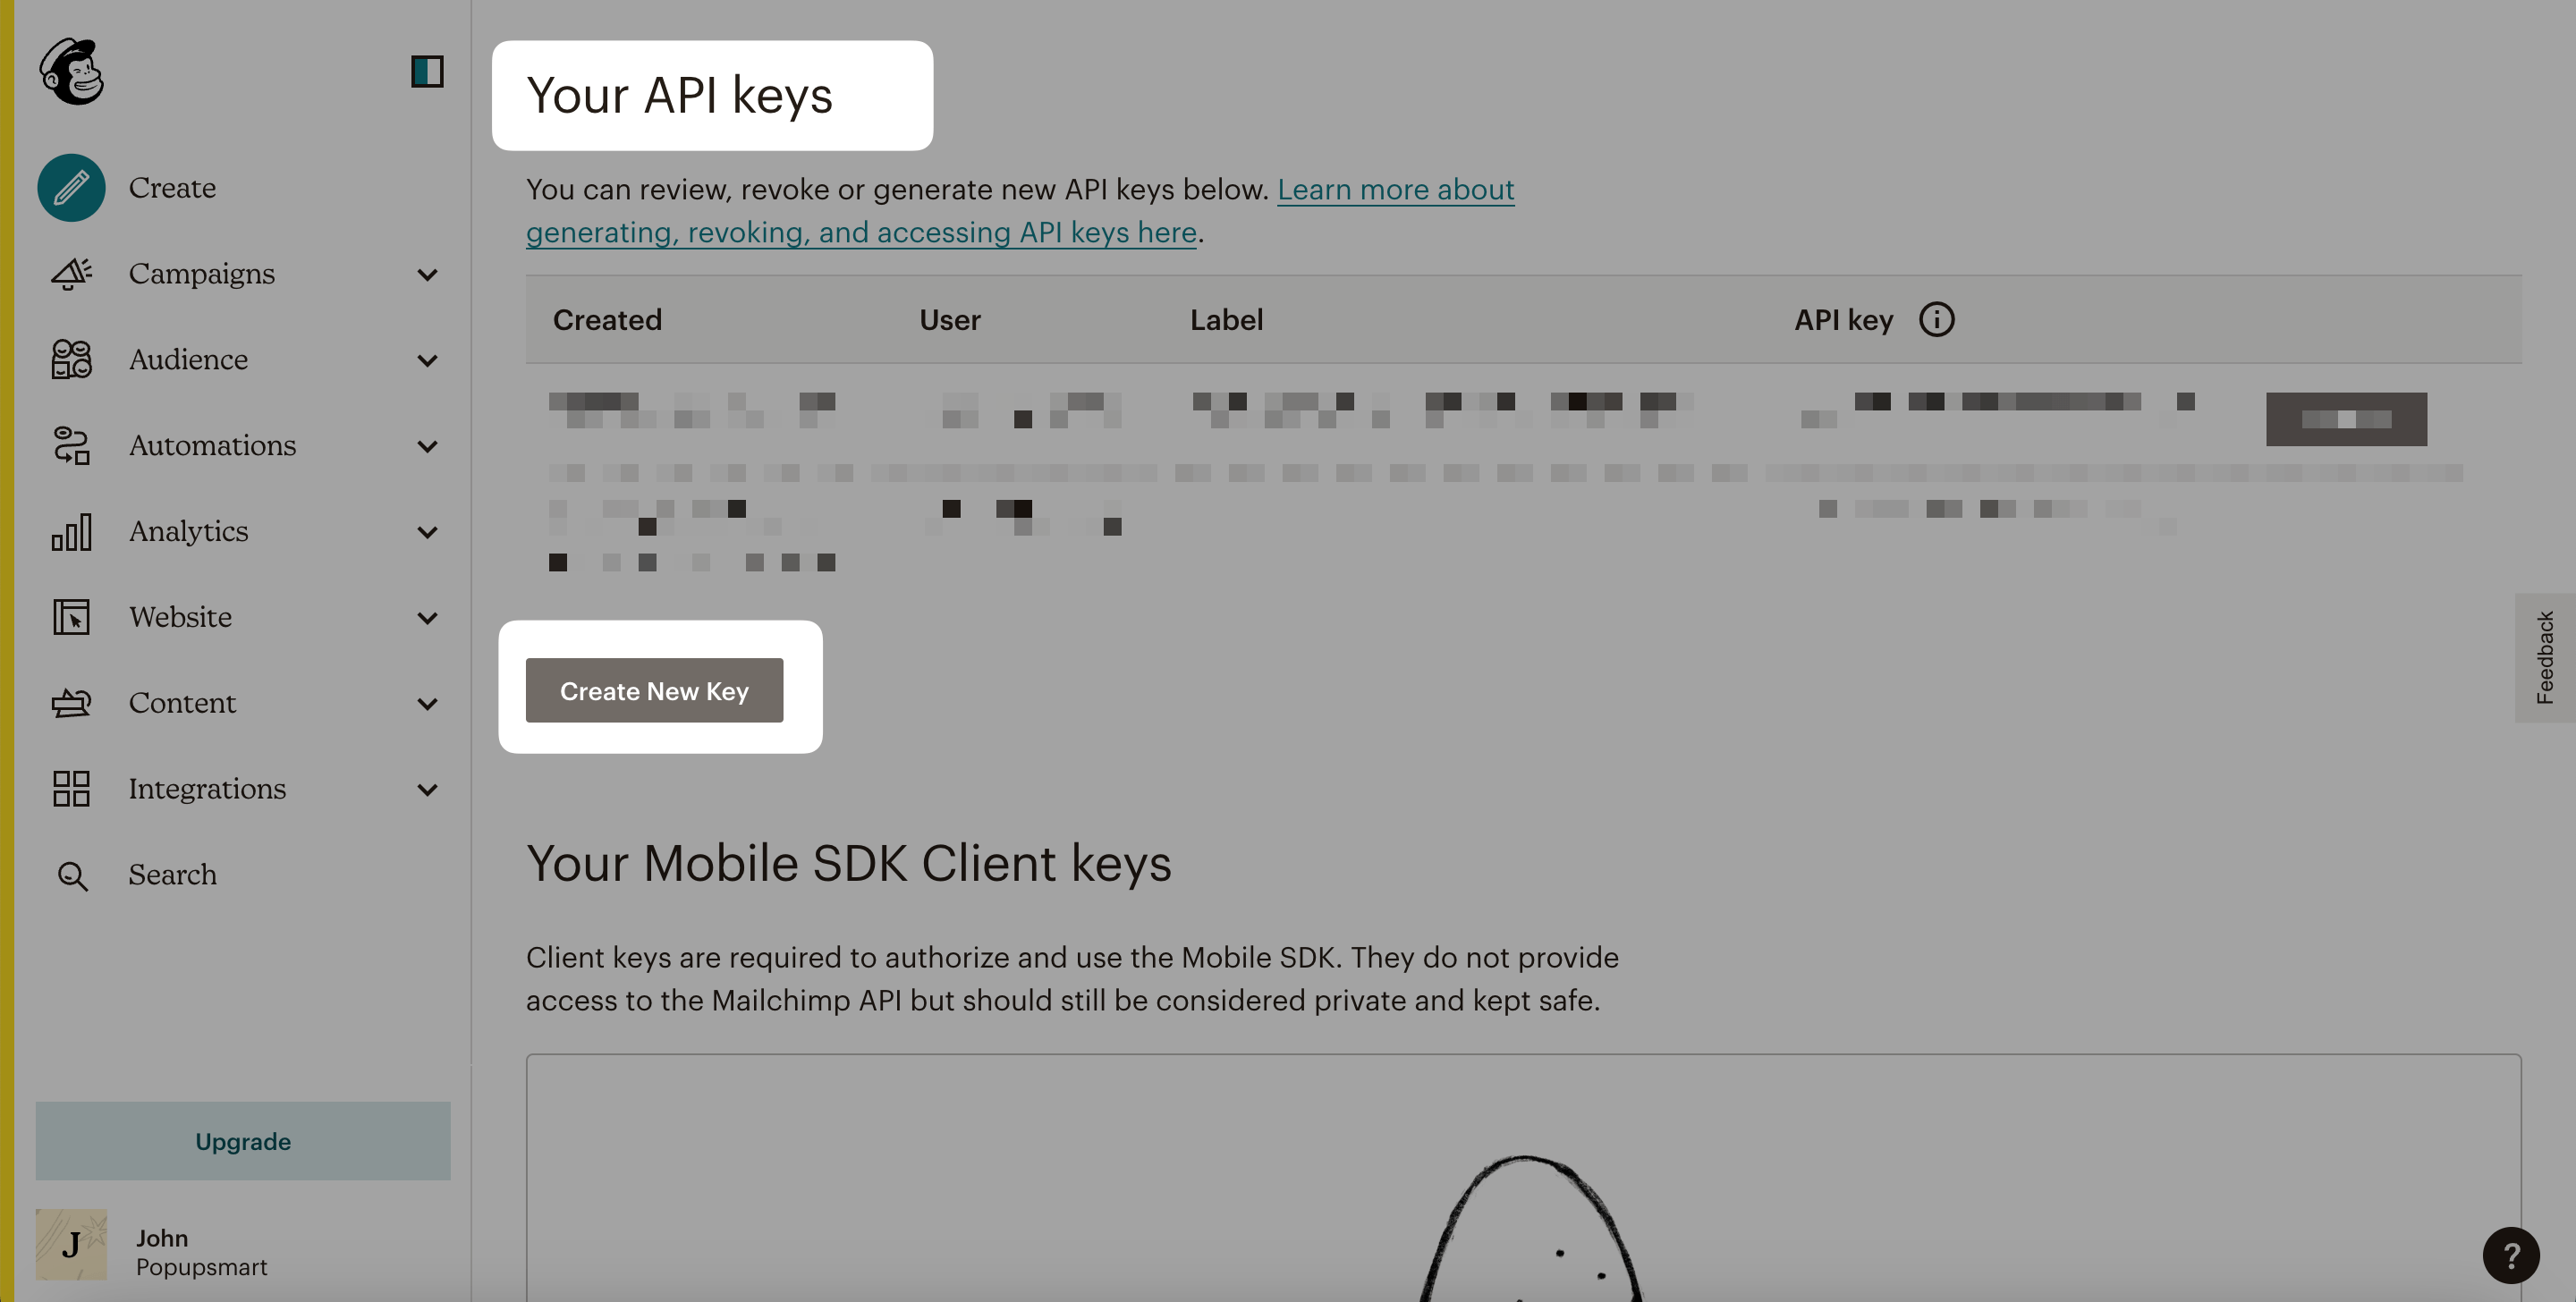
Open the Extras tab and choose API keys.
Click Create A Key.
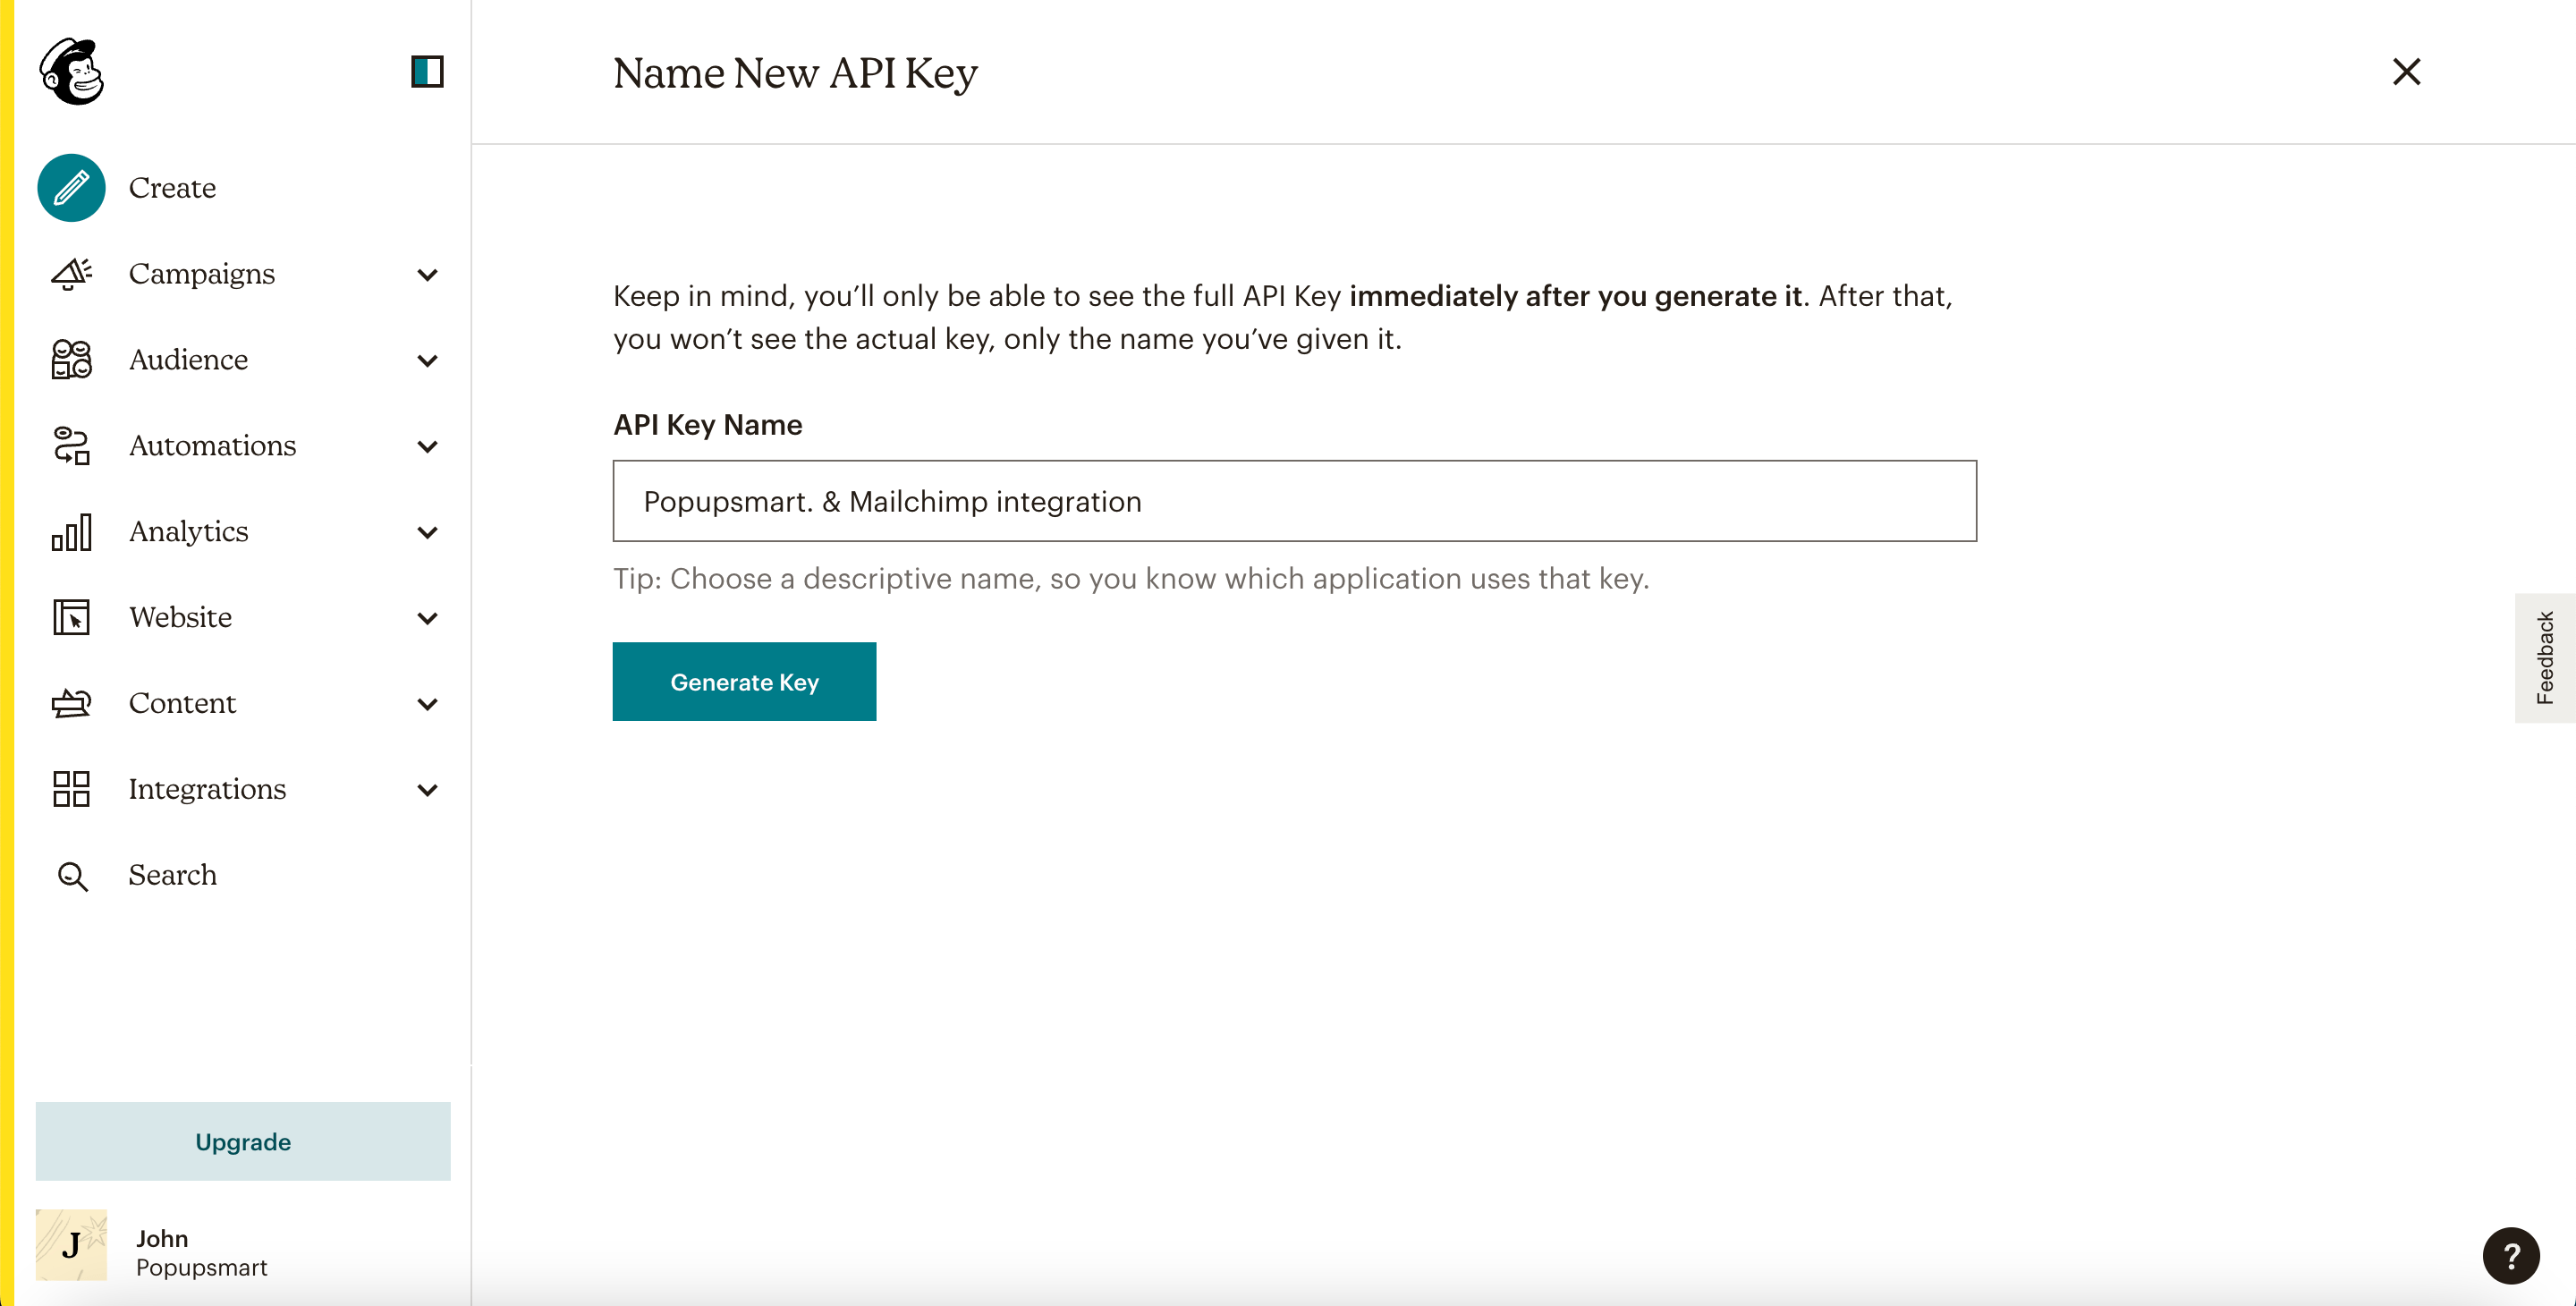
Name the key after what uses it, for example "Popupsmart", and click Generate Key.
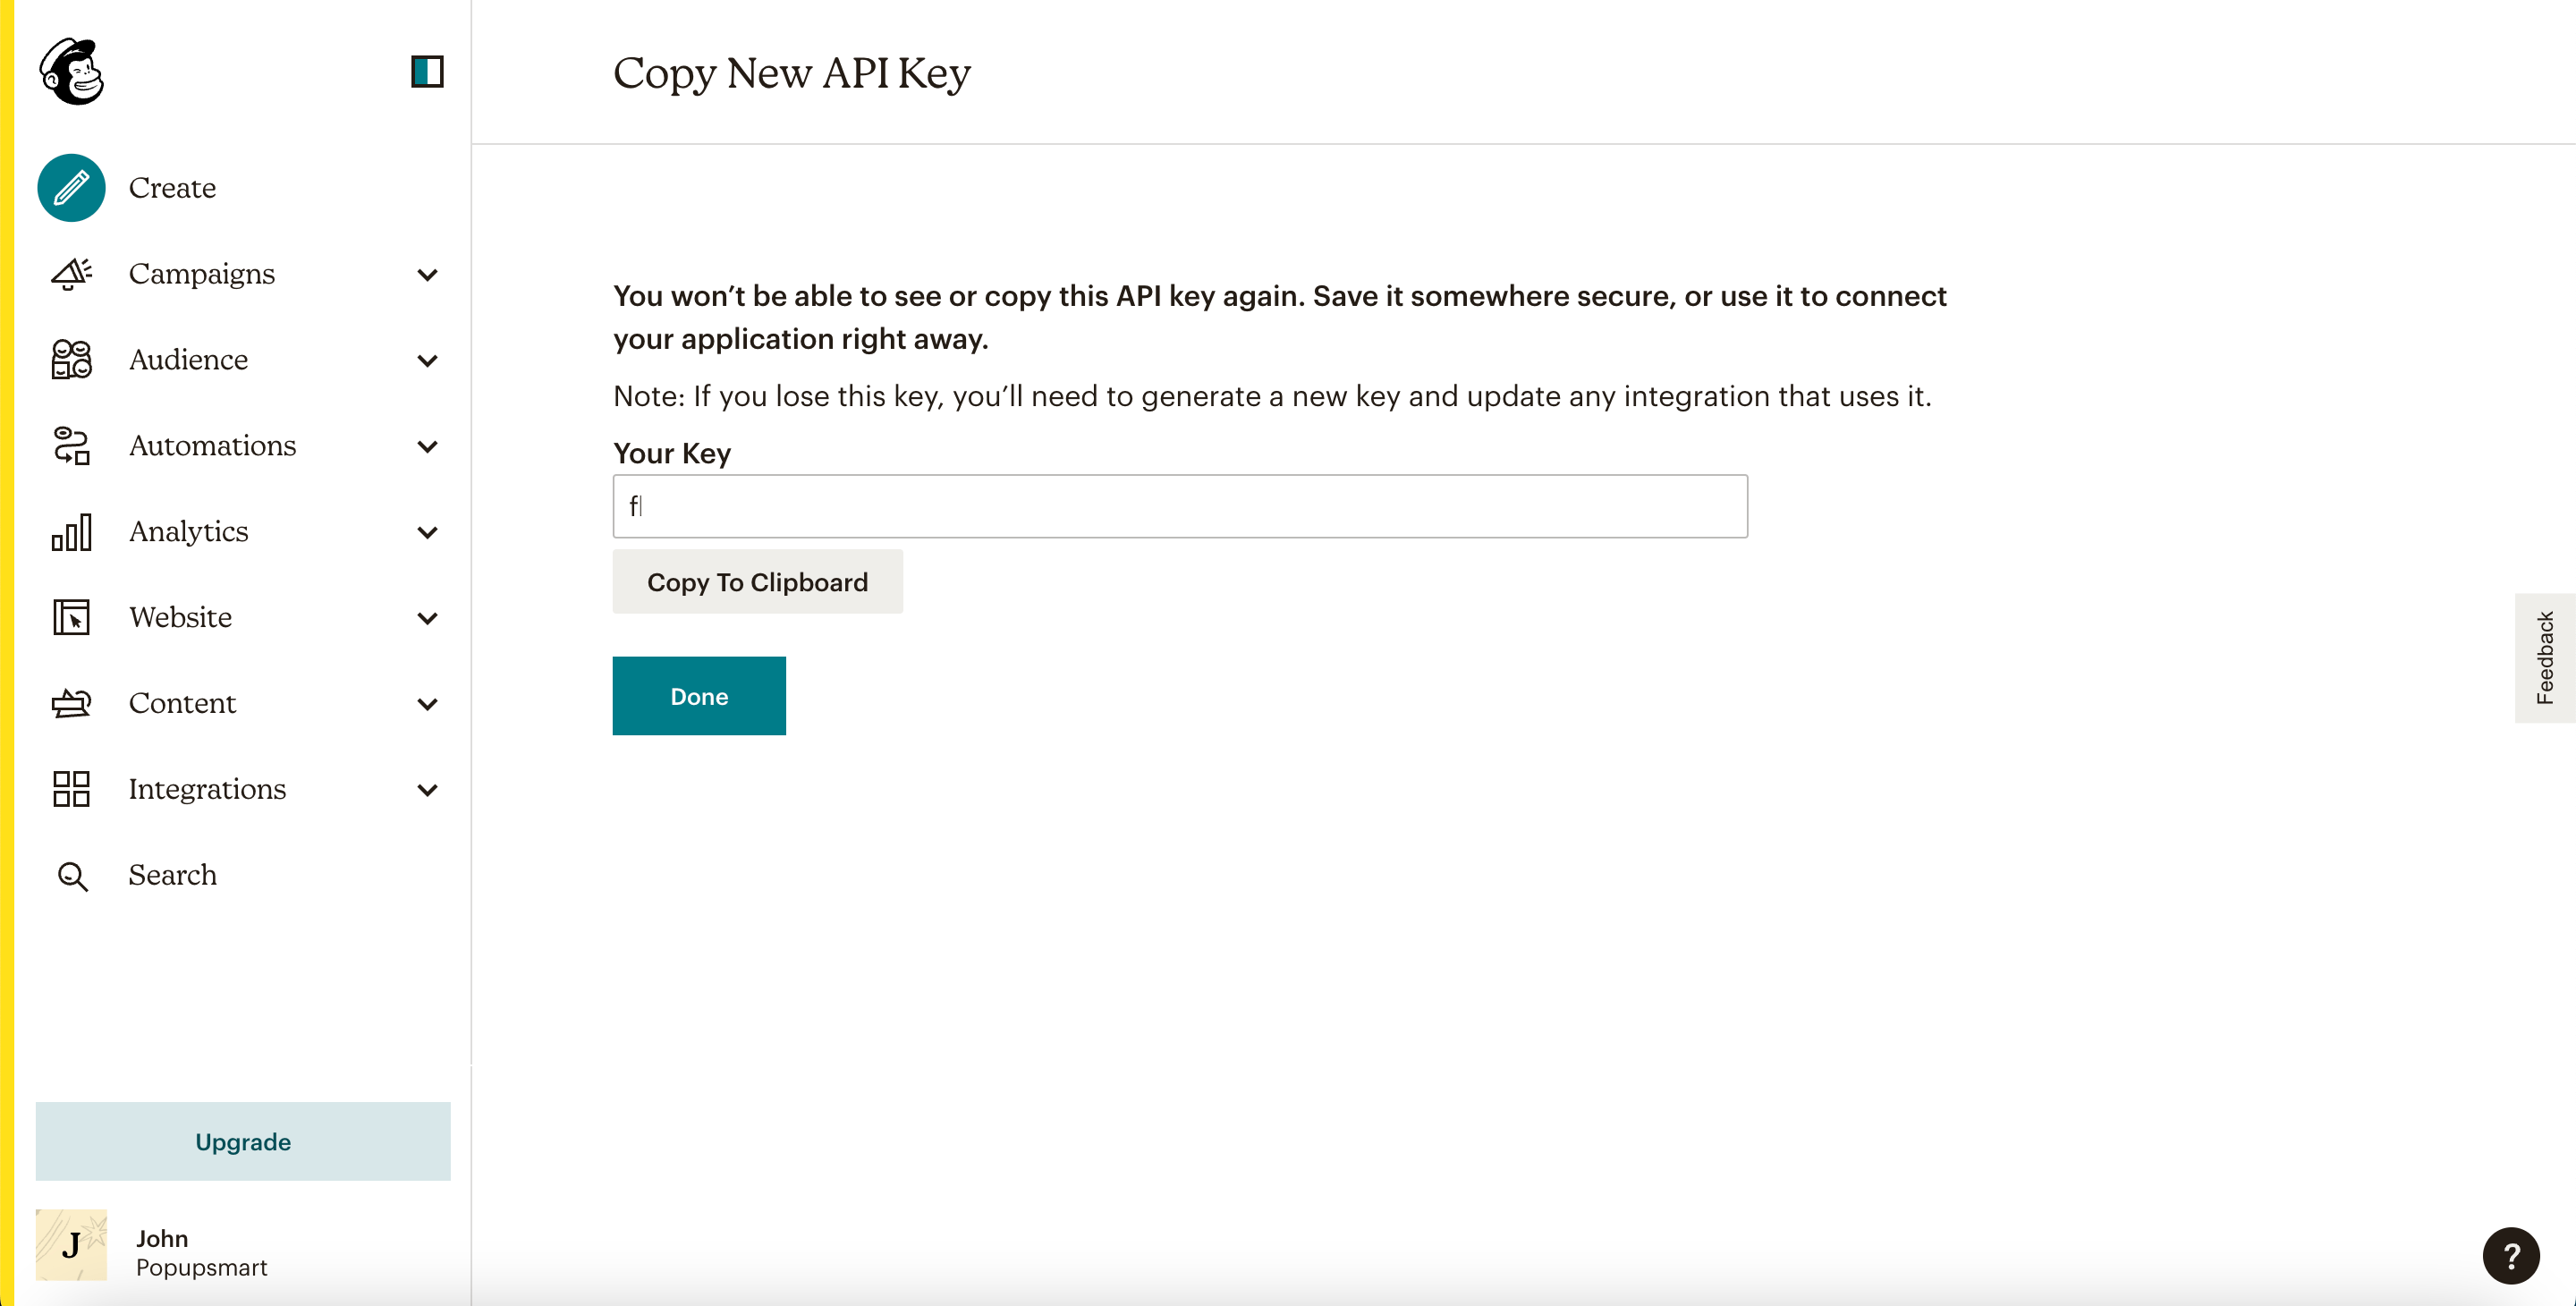
Copy the key, then return to Popupsmart.
Mailchimp's help article about API keys covers the same steps from its side.
Save the connection and choose your audience
Paste the key into the Setup screen and click Save.
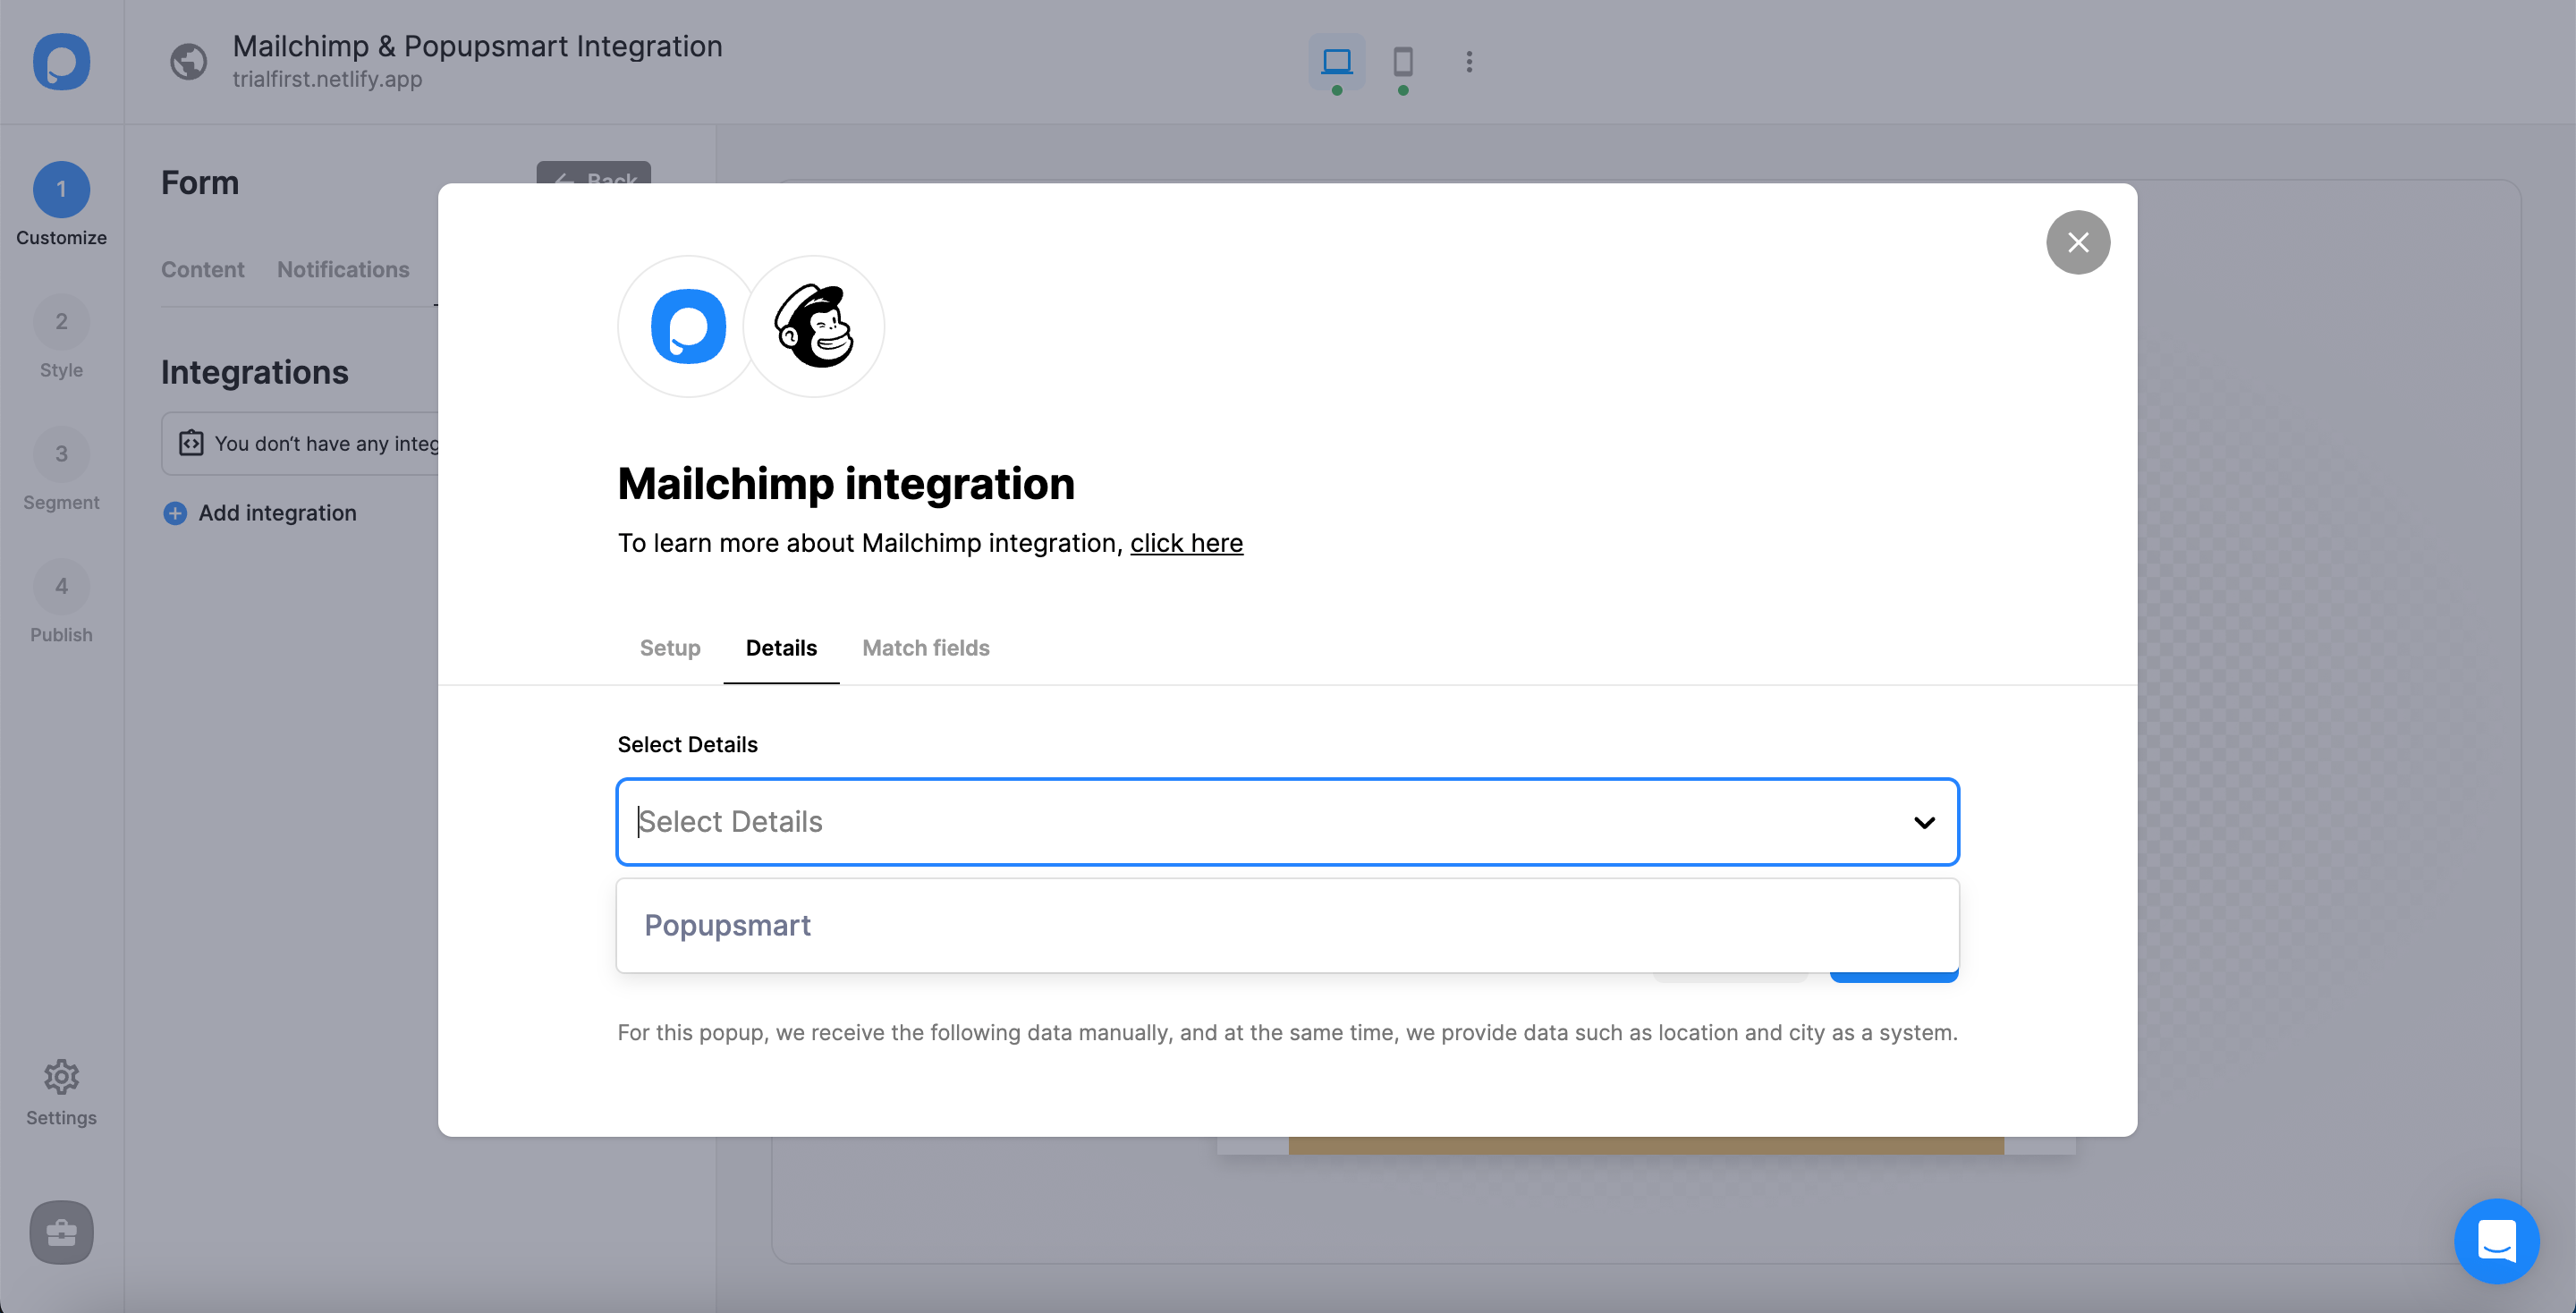
In Details, choose your audience from the dropdown (Popupsmart labels it a list) and click Next.
Match popup fields to Mailchimp fields
Match each popup input to the Mailchimp field it should fill, then click Save.
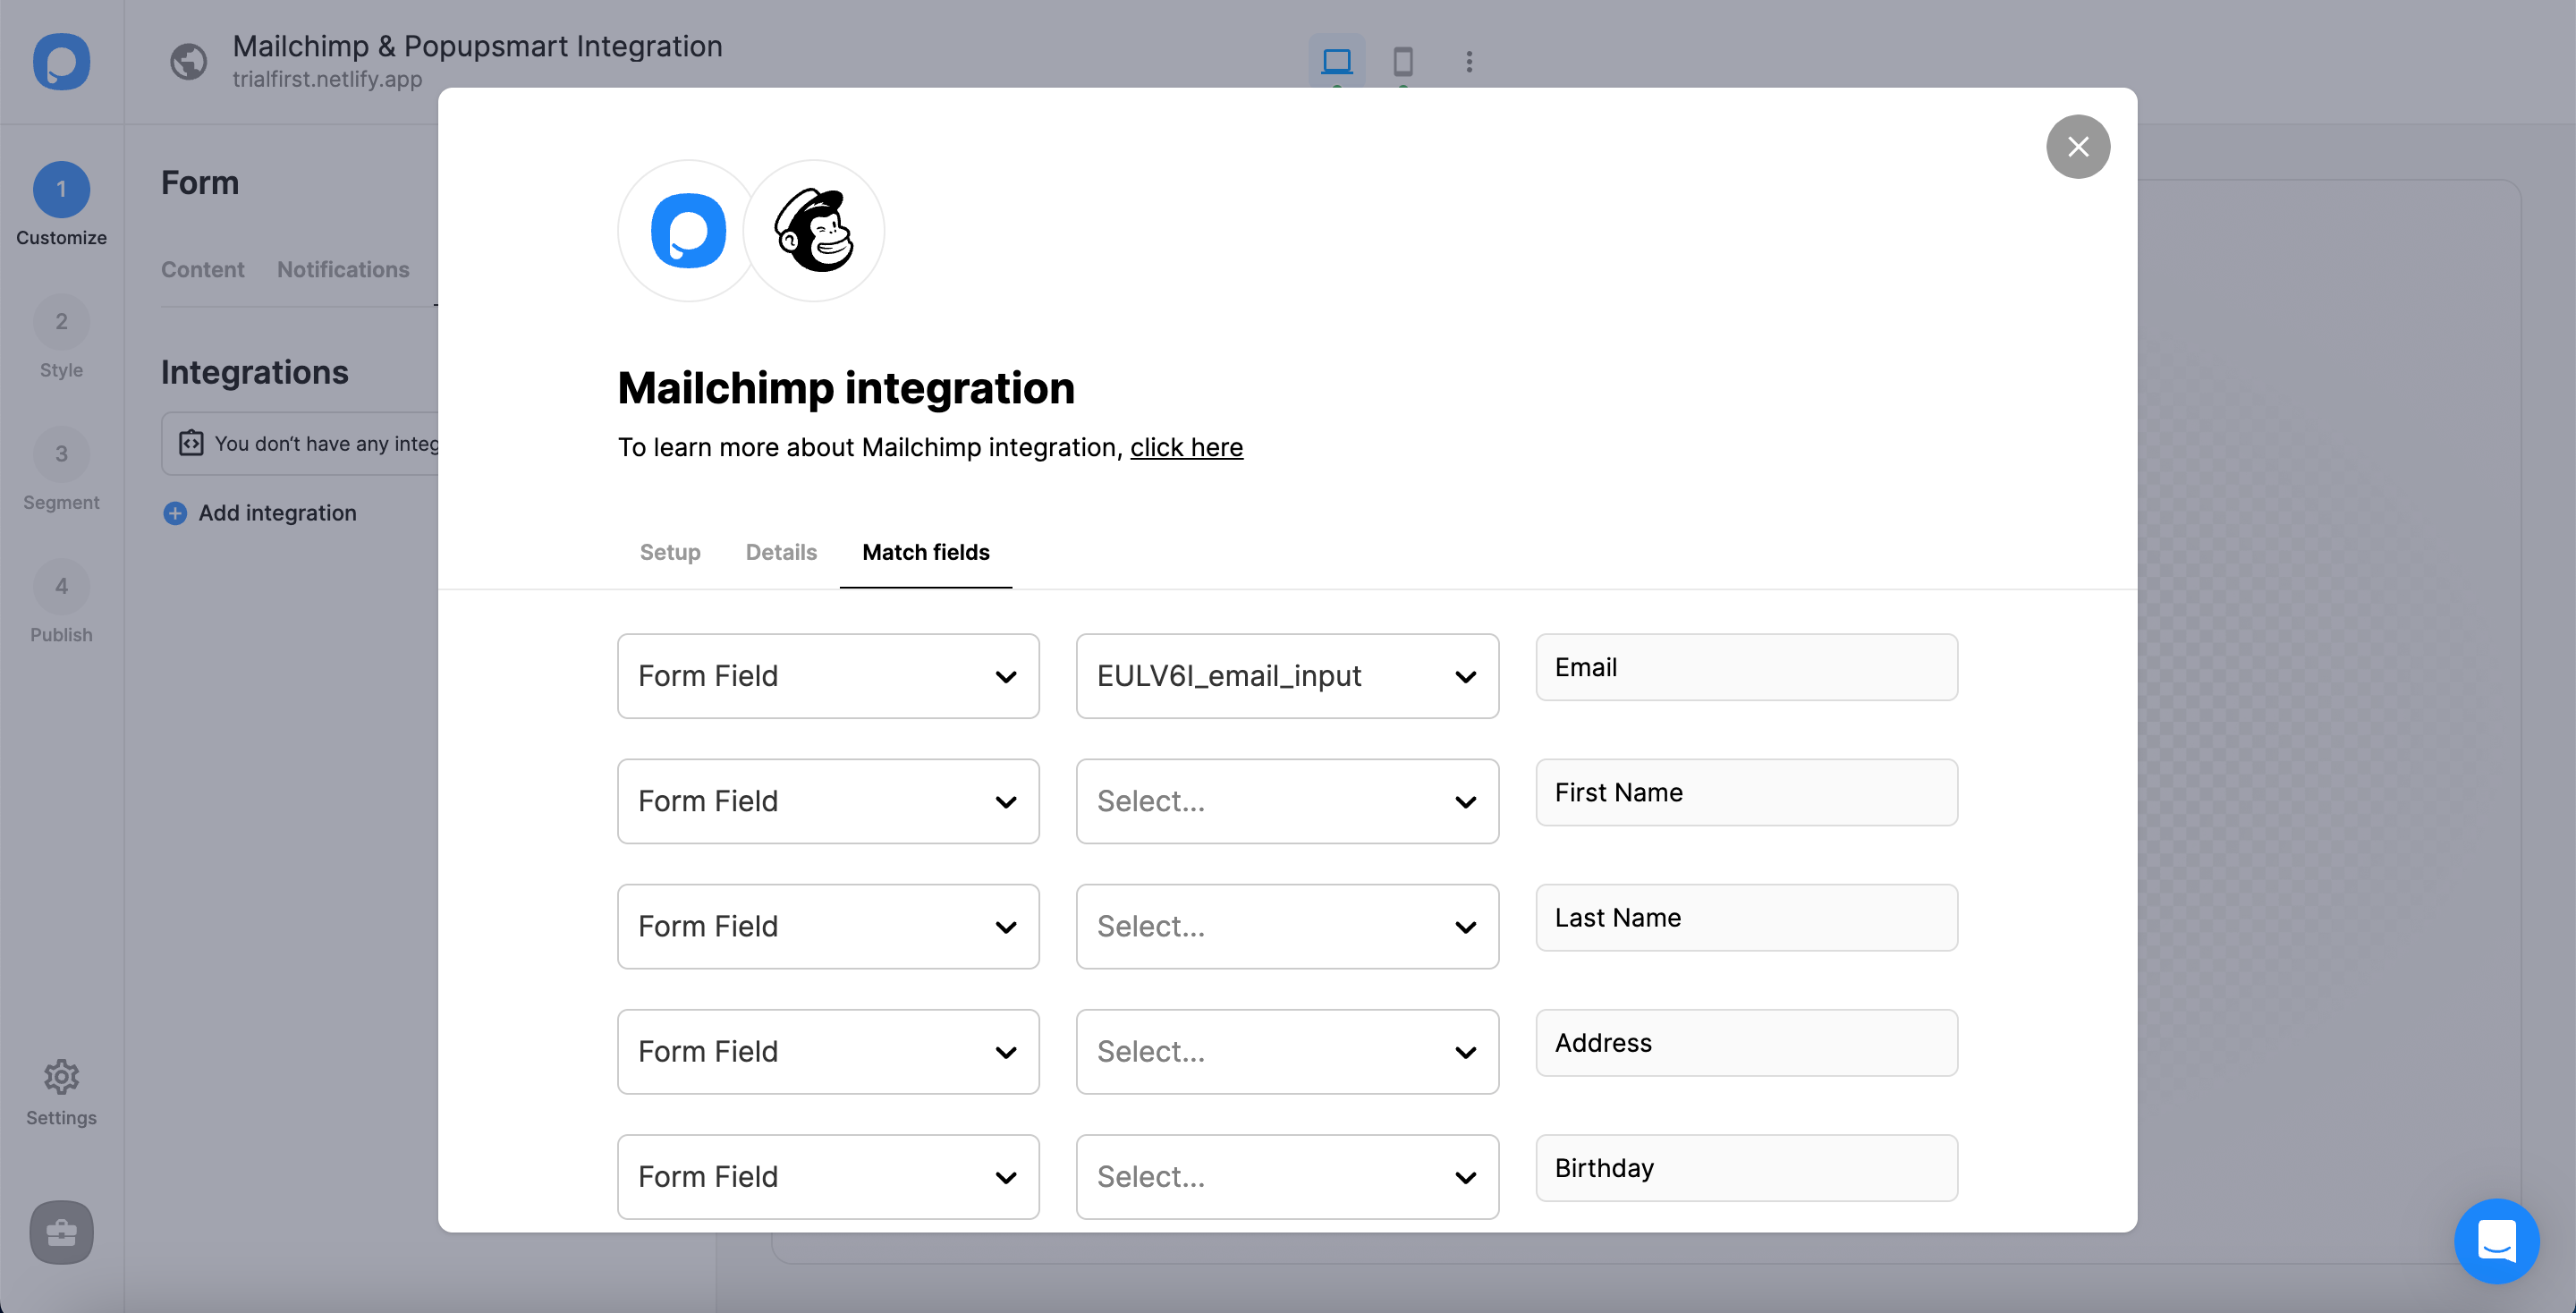
The fields on offer depend on the elements in your popup:
- Form field: an input in your popup. If the popup has none, the dropdown shows "No options".
- System field: data Popupsmart records on its own, such as the browser or device of the person who filled in the popup.
- API field: data you pass to the Popupsmart JS API, sent on to Mailchimp with the rest of the submission.
- Static field: a fixed value you type yourself, handy for tagging where a subscriber came from, such as "sales" or "exit-intent".
Match the email input to Mailchimp's email address field. If the popup asks for a phone number and SMS consent, match those too; both reach Mailchimp the same way.
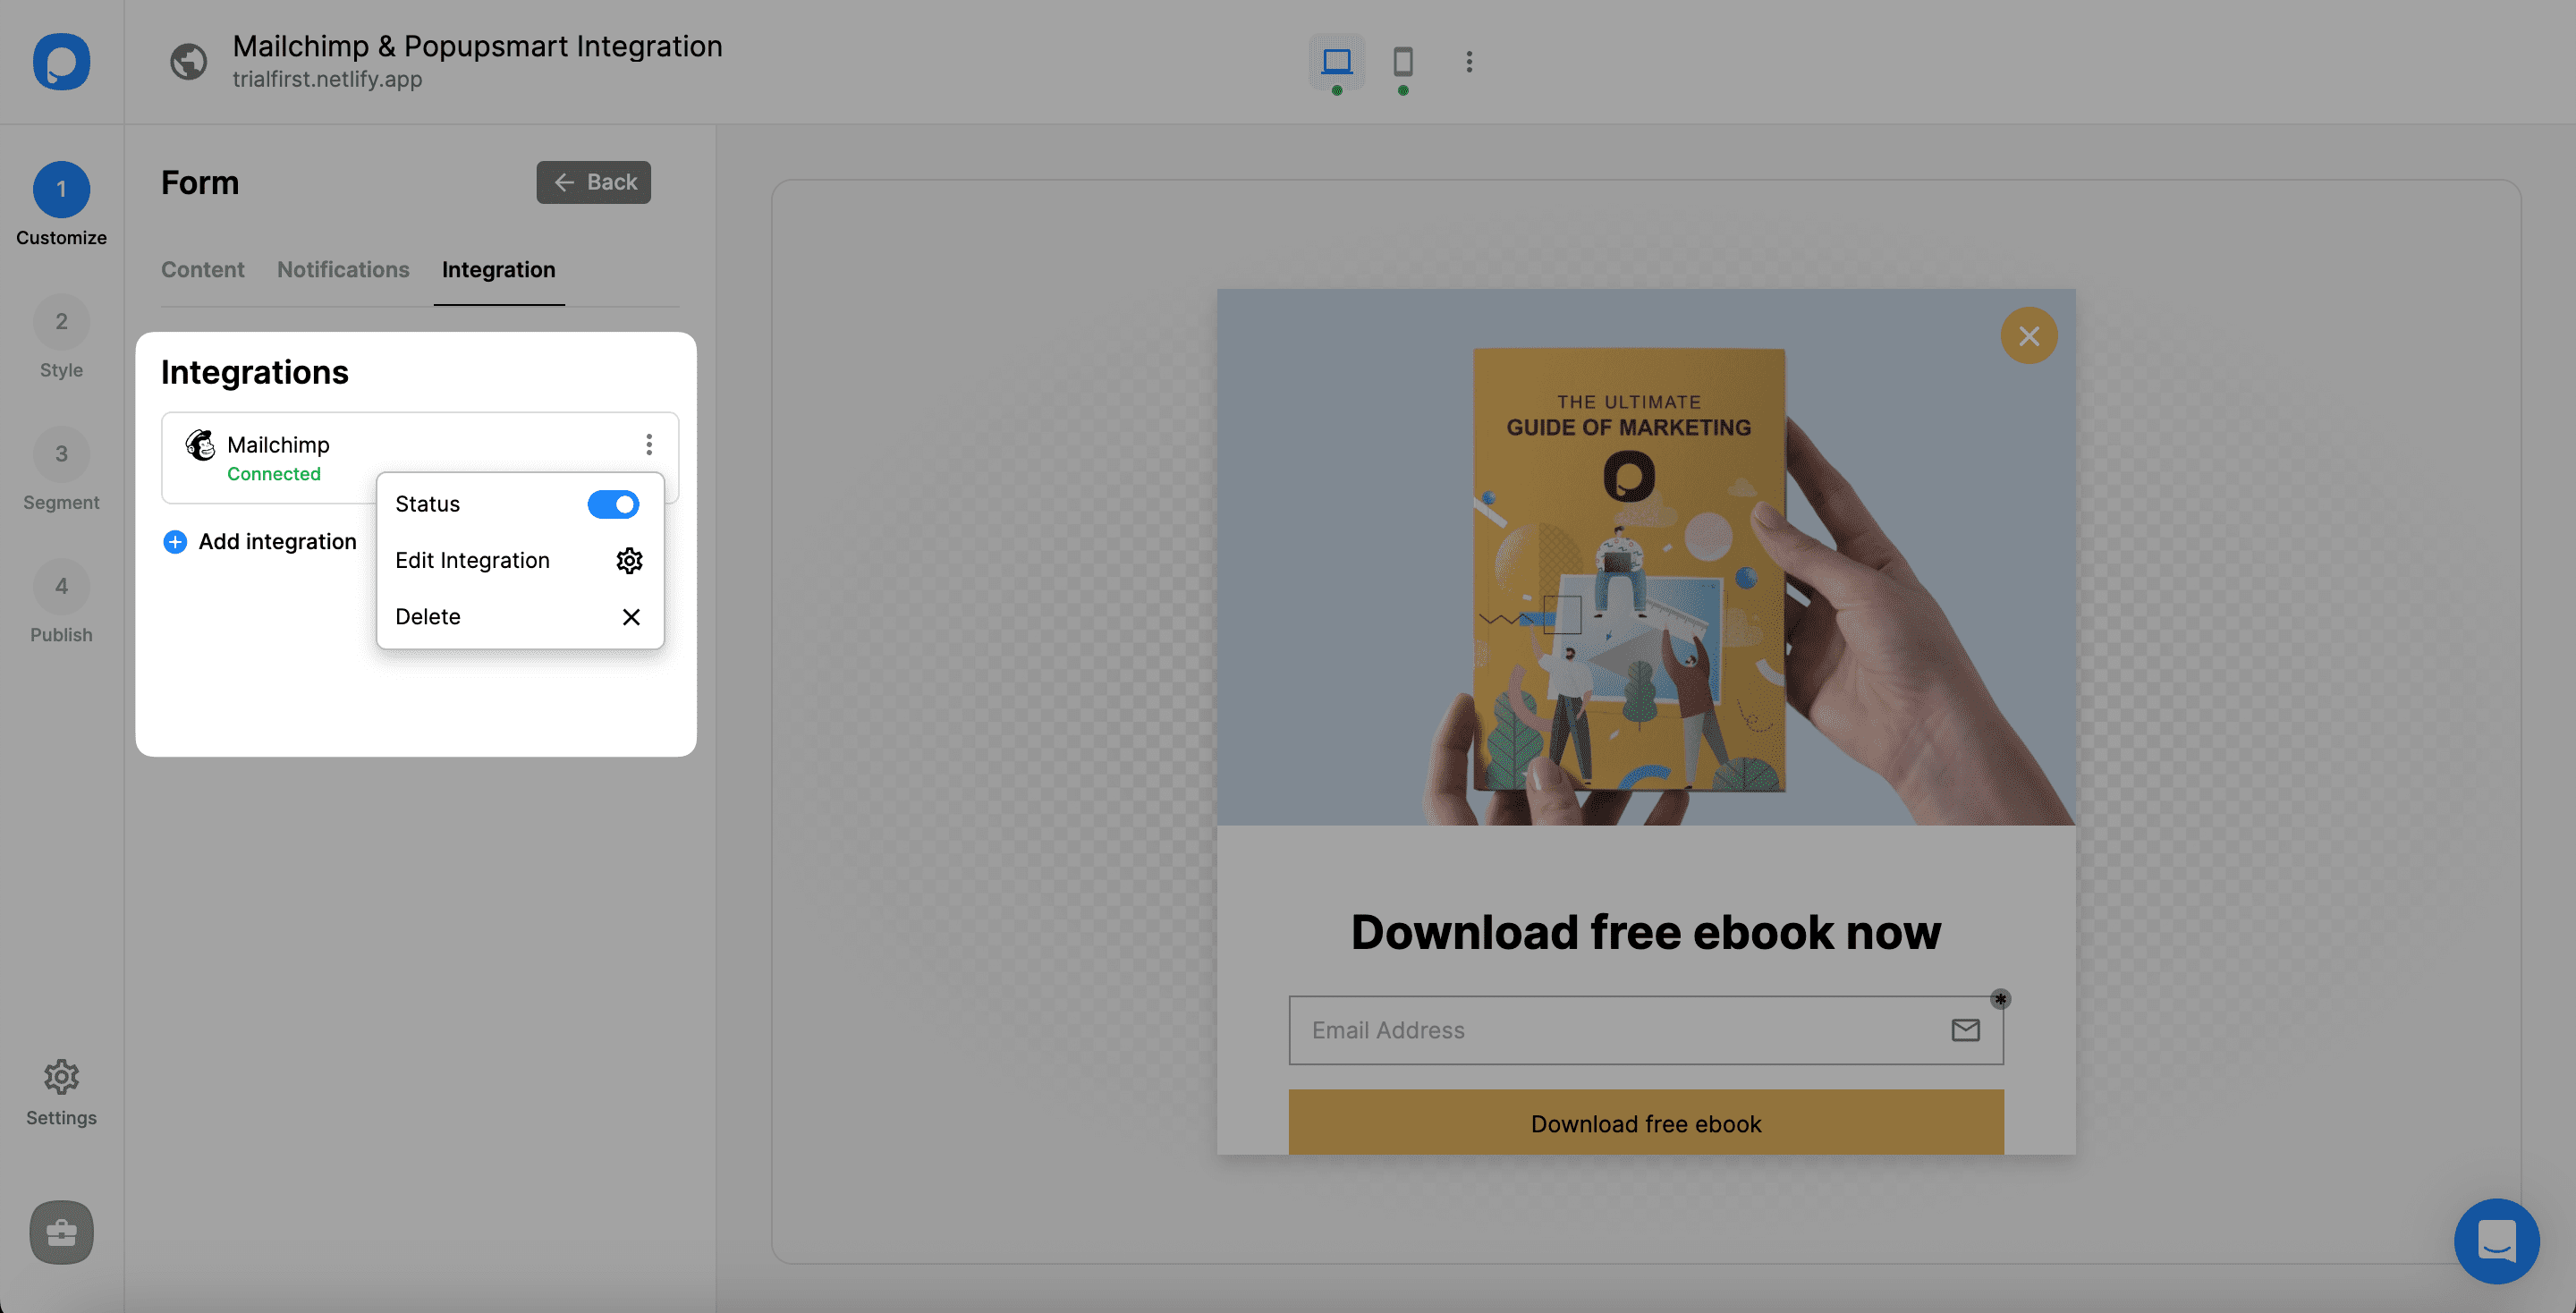
The connection is on by default. Pause or edit it from the three-dot menu, and manage every connection from the Settings section of your Popupsmart dashboard, where you can also set one up outside a campaign.
Test the connection before you publish
A test submission is the only proof that the Mailchimp connection works. Publish the campaign to a page you control, submit an address you own, then search the audience's contacts in Mailchimp for it. Check the phone number and consent fields, then archive or delete the test contact.
Does a Mailchimp popup use double opt-in?
A Mailchimp pop-up form built in Mailchimp is single opt-in by default. Mailchimp's double opt-in setting covers its own signup forms; for integrations and the API, Mailchimp's help leaves confirmation to the integration. So send a test lead and check the contact's marketing status in Mailchimp to see how your subscribers arrive.
Where your visitors' law asks for explicit consent, add a consent checkbox and match it to a Mailchimp field; SMS consent goes to a field of its own.
Why is my Mailchimp popup not working?
A Mailchimp popup that isn't working either doesn't show, which is a display setting, or shows but doesn't add subscribers, which is the connection.
If Mailchimp's own pop-up form doesn't show
- The site isn't connected. Manage connected sites from Popup form settings and run Check connection again. On Shopify, check that the Mailchimp for Shopify app embed is switched on in the theme.
- You've visited the site before. The default rule shows the form to new visitors only.
- The page isn't targeted, or the form has a stop date. Check the target pages, and the stop date under Scheduling on the form's details page.
If Popupsmart's popup shows but subscribers don't reach Mailchimp
- The API key was deleted or replaced. Create a new one and update the connection in Settings.
- No audience is chosen, or the email input isn't matched. Choose the audience again in Details, and match the email input to Mailchimp's email address field.
- The test address unsubscribed before. Mailchimp may refuse to re-add a contact who unsubscribed or was cleaned from the audience. Test with a fresh address.
- The connection is paused, or the campaign isn't live. Switch the connection back on from the three-dot menu, and check that the campaign is published on a verified website.
Still stuck? Contact Popupsmart support with the campaign name and we'll look at the connection with you.
Mailchimp popup FAQ
Can I make a Mailchimp popup for free?
Yes, two ways. Mailchimp's own pop-up form comes with its marketing plans at no additional cost for now, and Popupsmart's free plan is permanent, not a trial: one website, one live popup and 5,000 pageviews a month, with Popupsmart branding. The Mailchimp connection is included on Popupsmart's free plan.
The Popupsmart pricing page compares it with the paid plans.
Can I use Mailchimp's pop-up form and a Popupsmart popup on the same site?
Yes, but give each one its own pages so no visitor gets two popups at once. Mailchimp's pop-up form can be limited to target pages, and Popupsmart's URL targeting does the same on its side.
Do phone numbers and SMS consent reach Mailchimp?
Yes. Match the popup's phone input and SMS consent to Mailchimp fields in the Match fields step, and both arrive with the email address. Popupsmart collects them; it doesn't send email or SMS itself.
Why can't I see my Mailchimp API key again?
Mailchimp shows the full key only once, right after you generate it. Afterwards it shows only the key's name and first digits, so if you didn't copy it, create a new key and paste that one into Popupsmart.