
How to Create a Popup with the Webflow Designer
Let's look at how to create a popup in Webflow via the Design panel.
This guide will show you how to create a popup on Webflow by adding certain elements. You can adjust it according to various needs by styling your popup.
📌 Keep in mind that creating a popup in Webflow's designing panel requires Webflow knowledge and experience.
You can customize your Webflow popup according to your style and needs by learning how certain elements work and styling options.
Here are the quick steps you can follow to create a simple popup on Webflow:
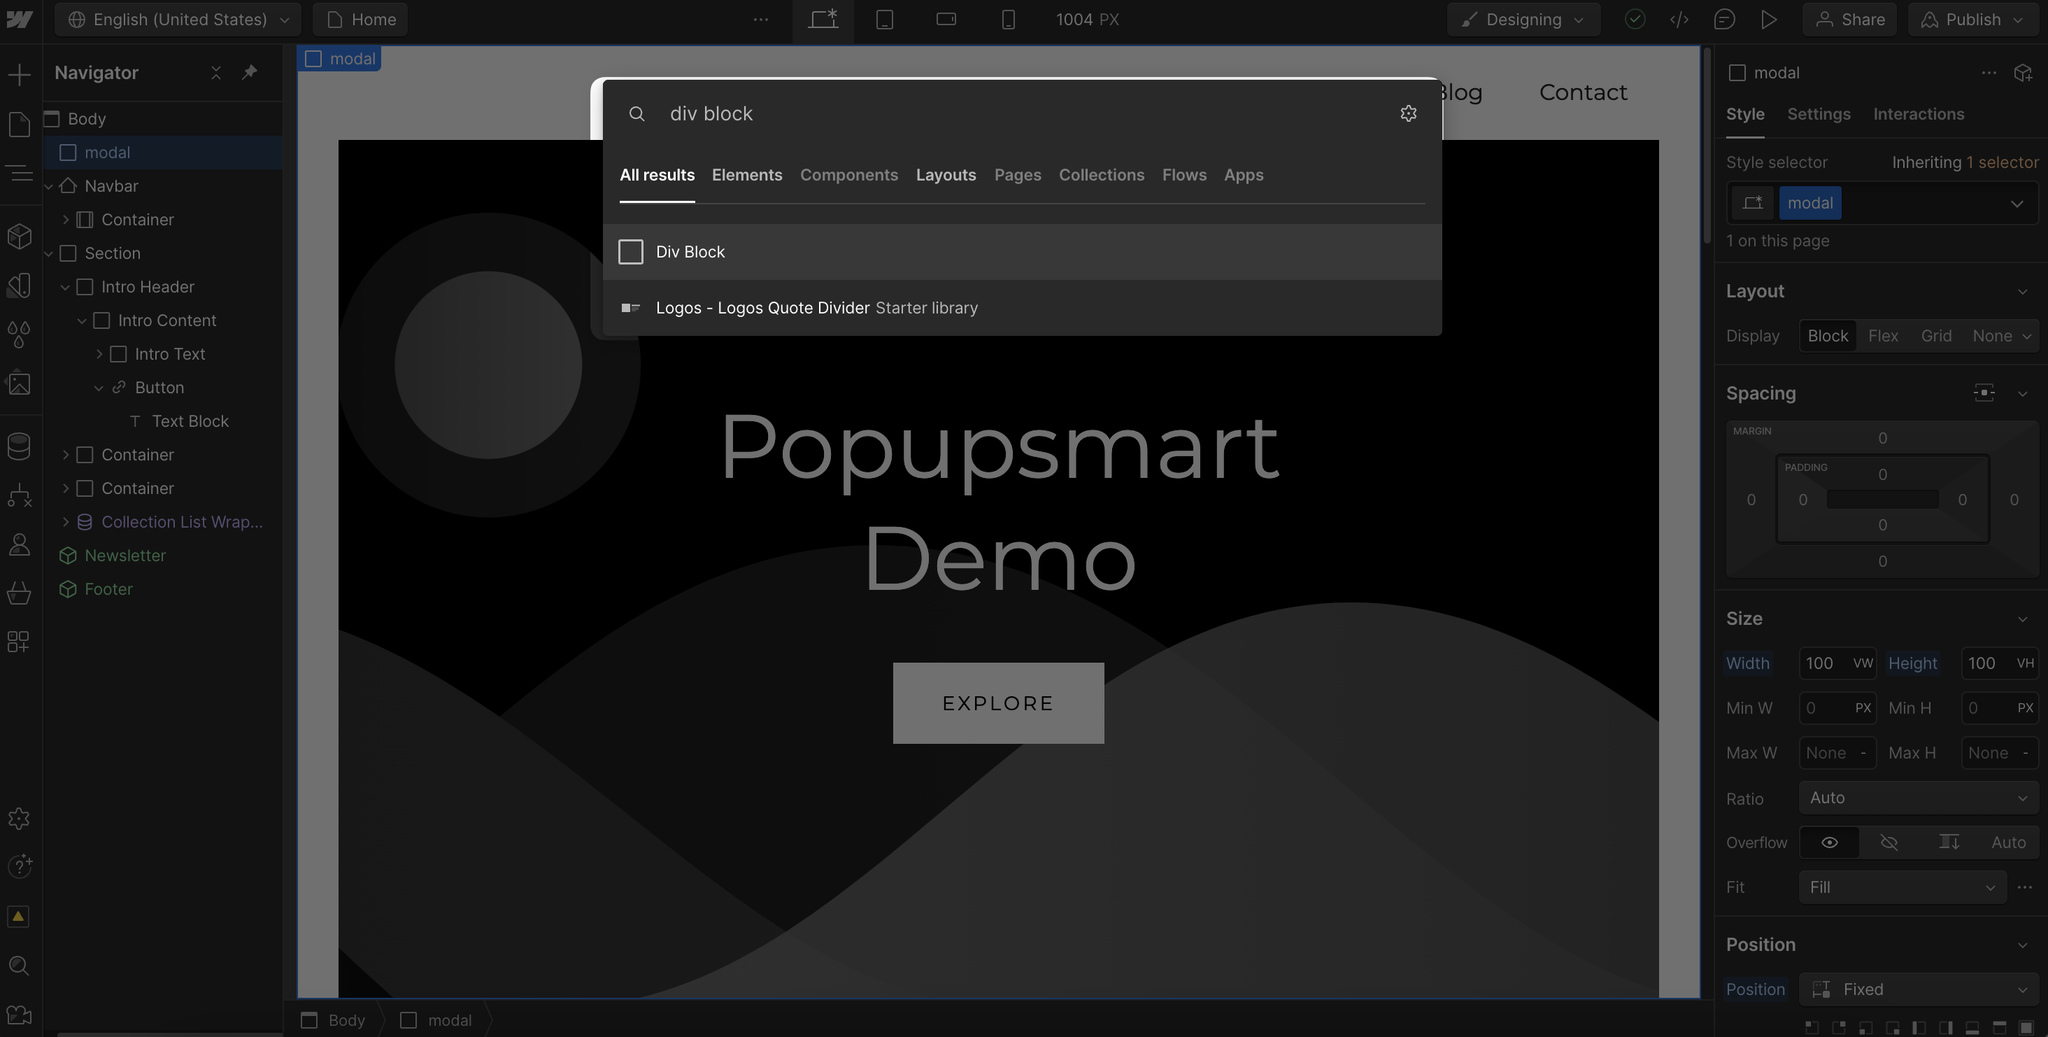
Step 1. Go to the design panel of your Webflow website. Start by adding a Div Block. You can rename your class name as "modal."
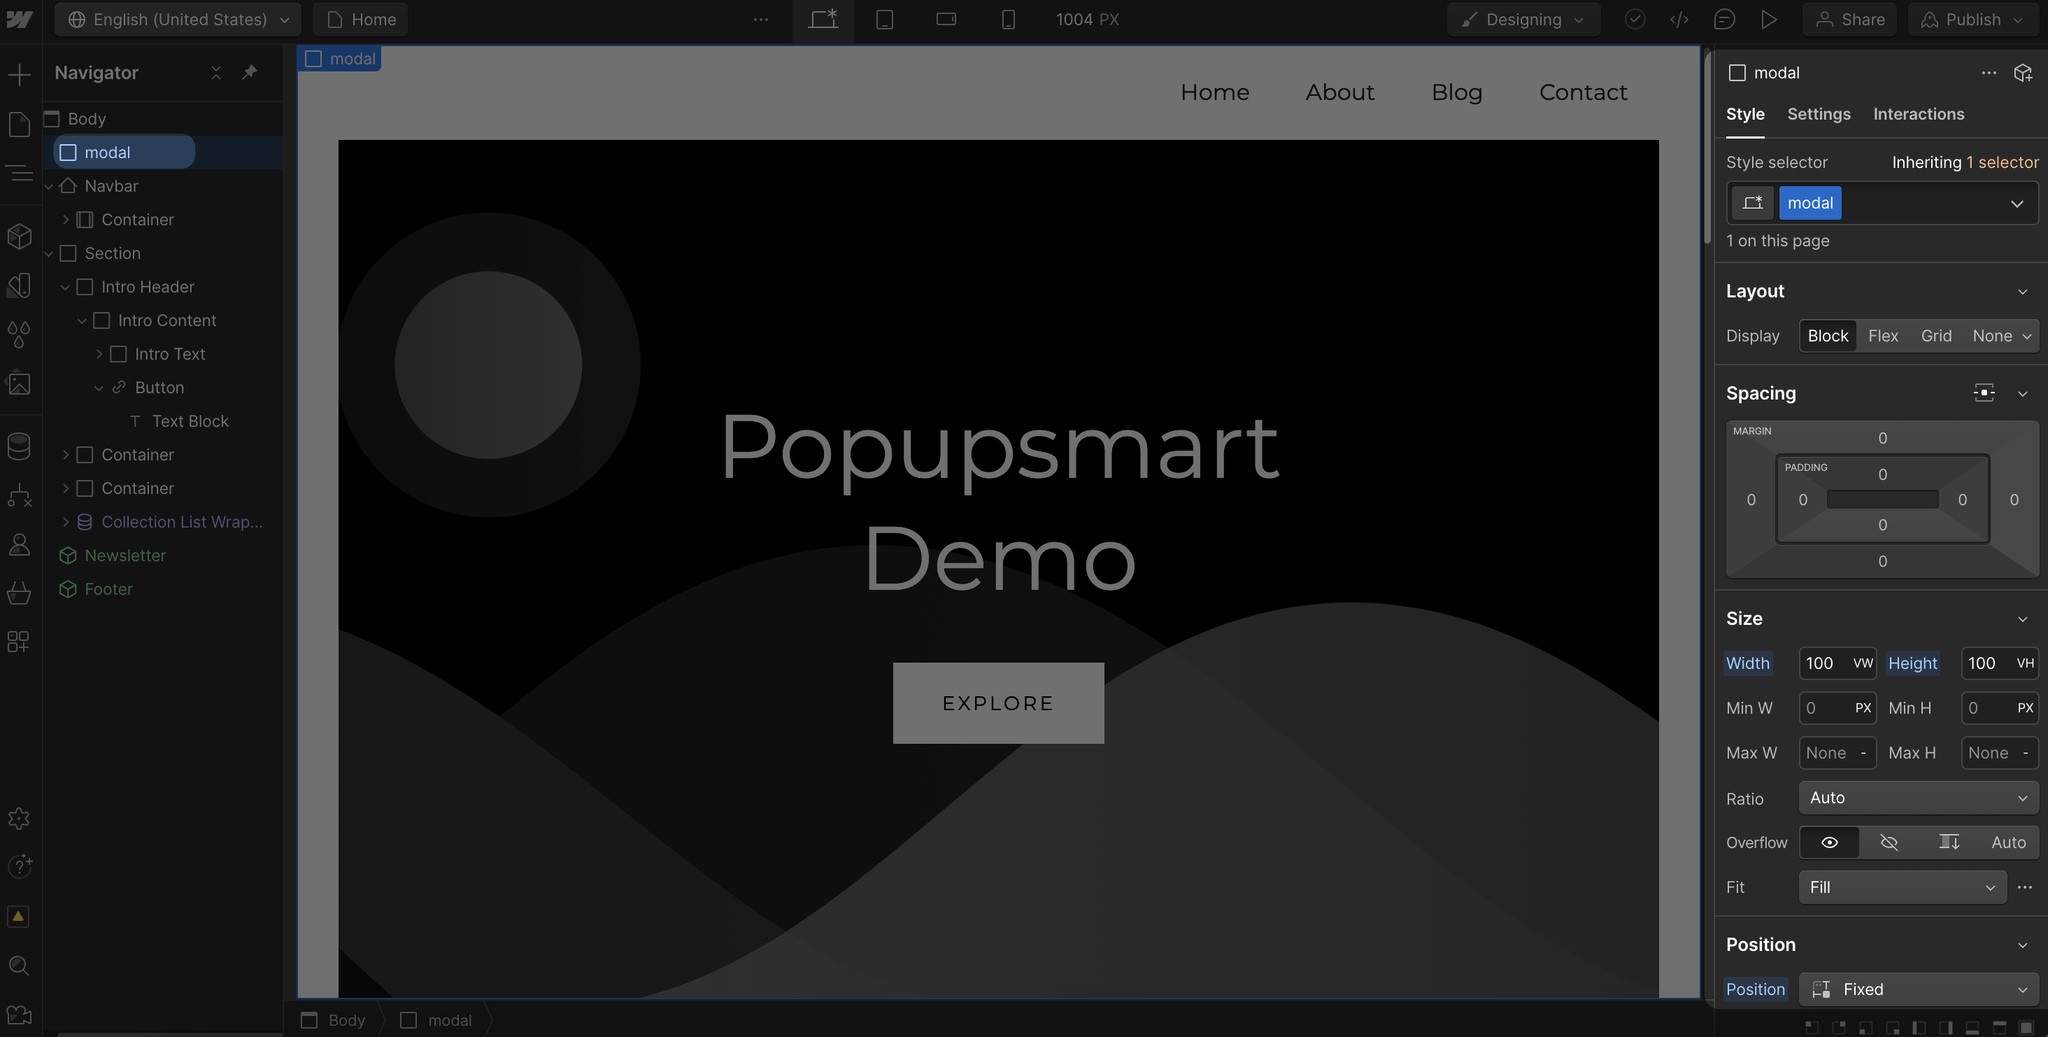
Step 2. From the Layout part, adjust your block's layout and size, and select its position as "Fixed."
Step 3. Add a new Div Block inside the first Div Block you added; it will be your modal's background.
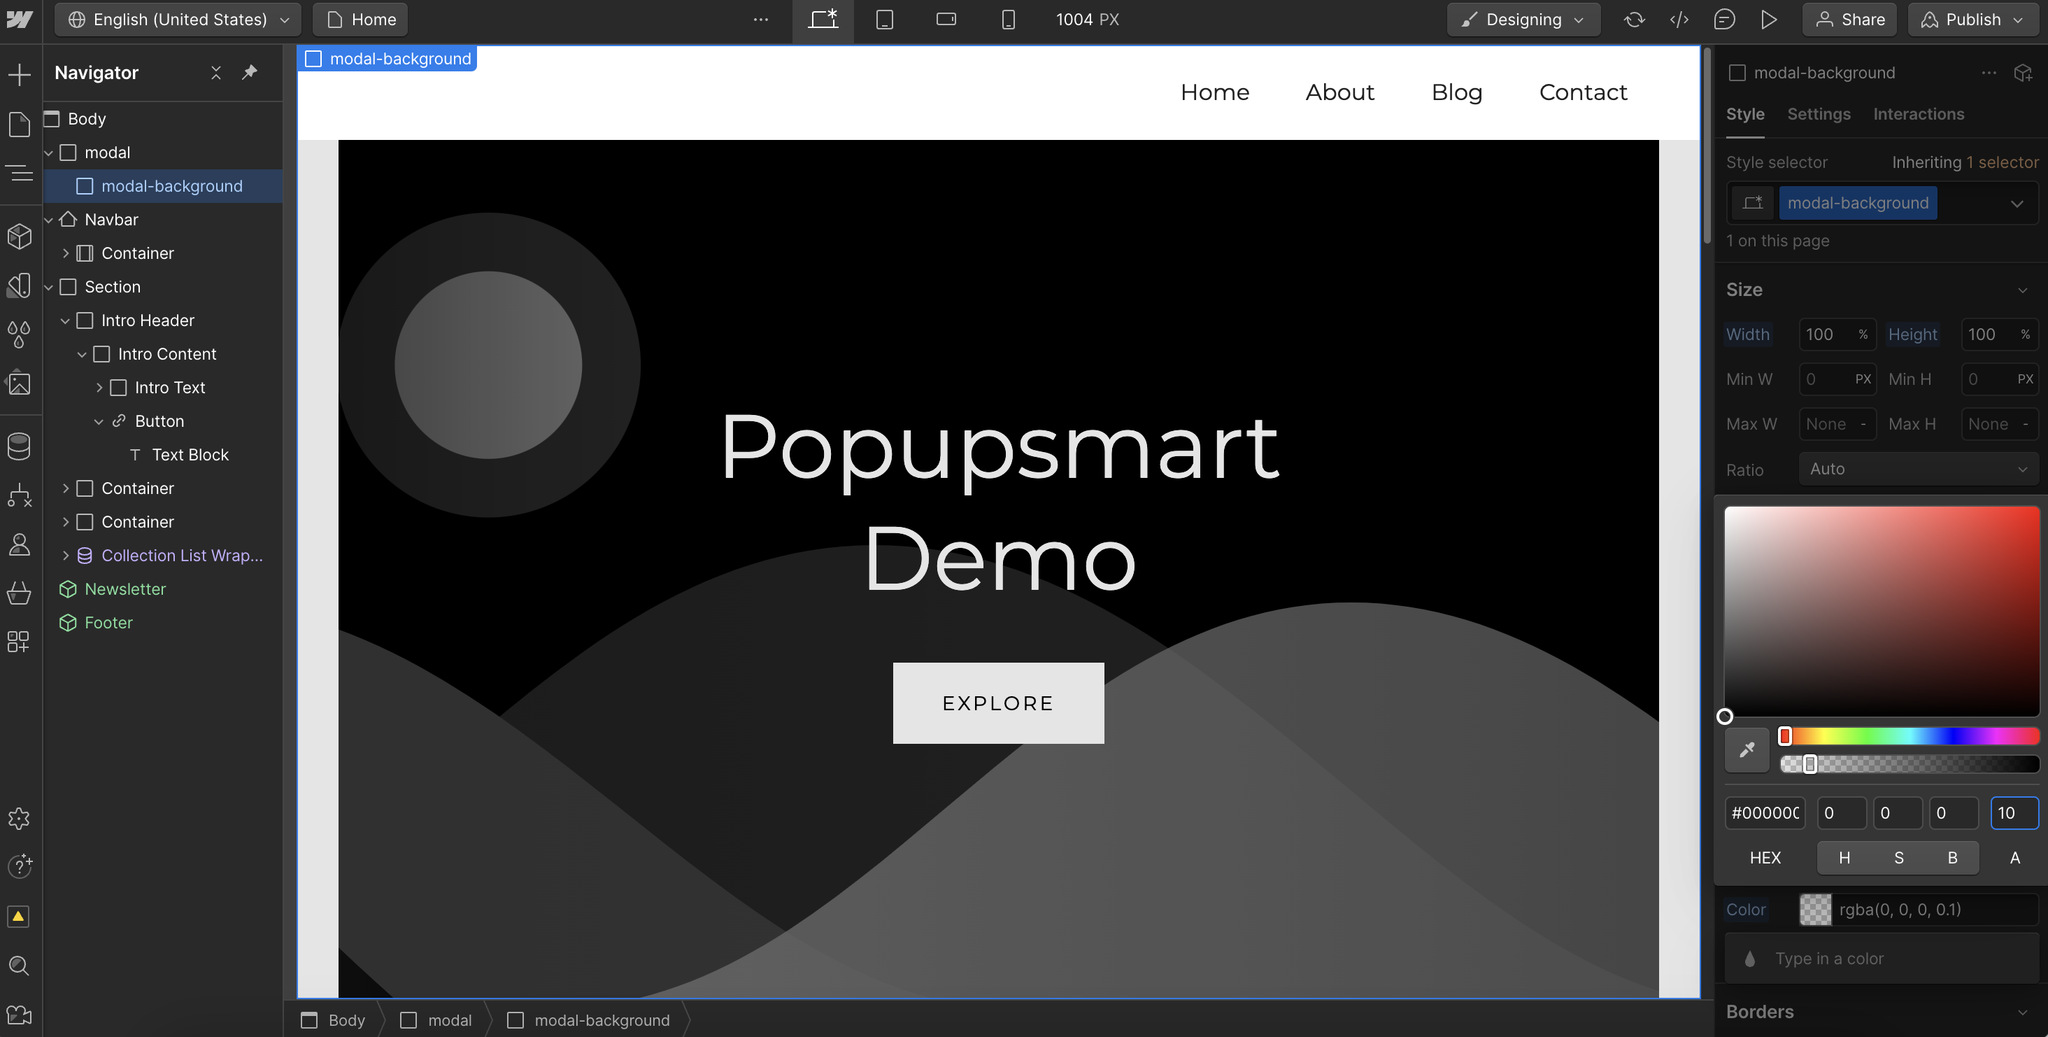
You can name it a modal background or whatever suits your needs.
Adjust its width, height, and color. While optimizing color, give the background color a low opacity. That way, your content will look more appealing.
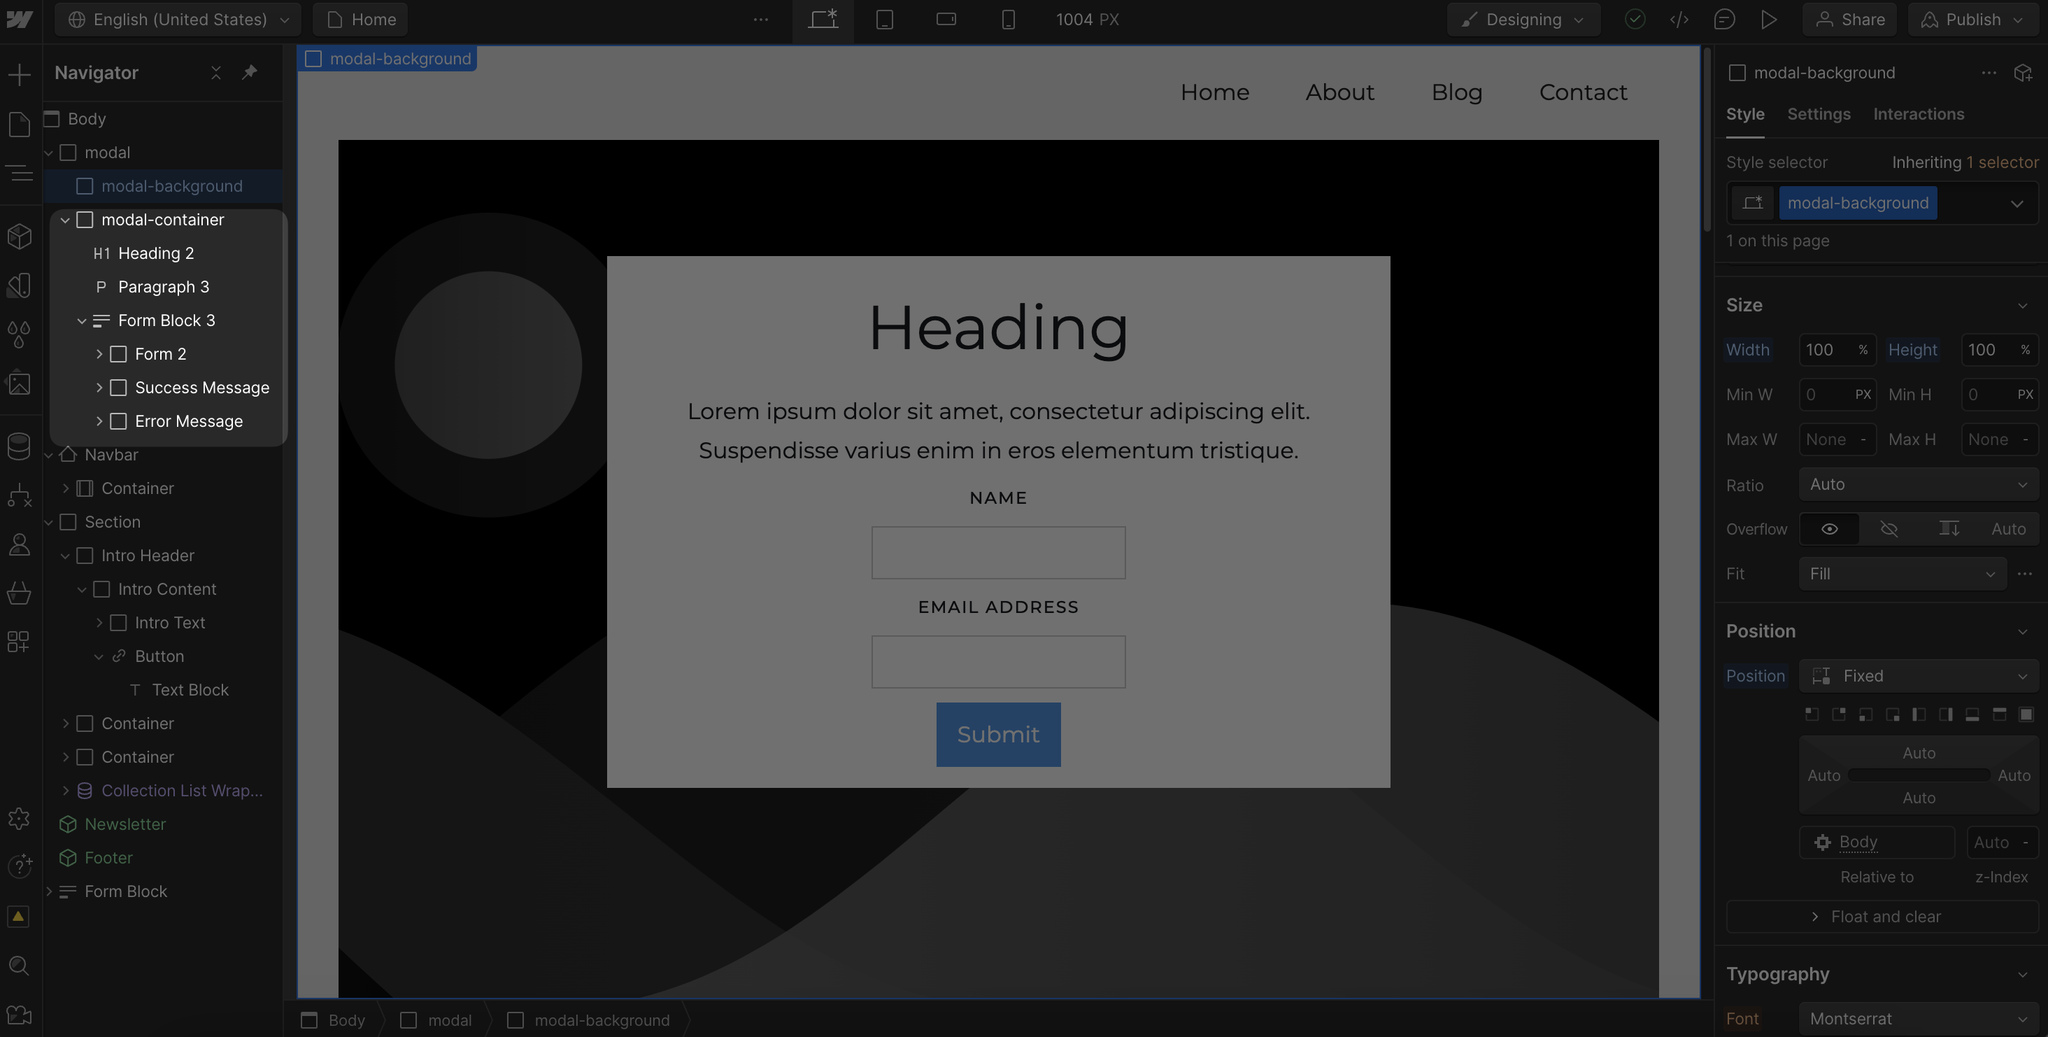
Step 4. Add another div block as your popup's modal container. Then, set its position as "Absolute."
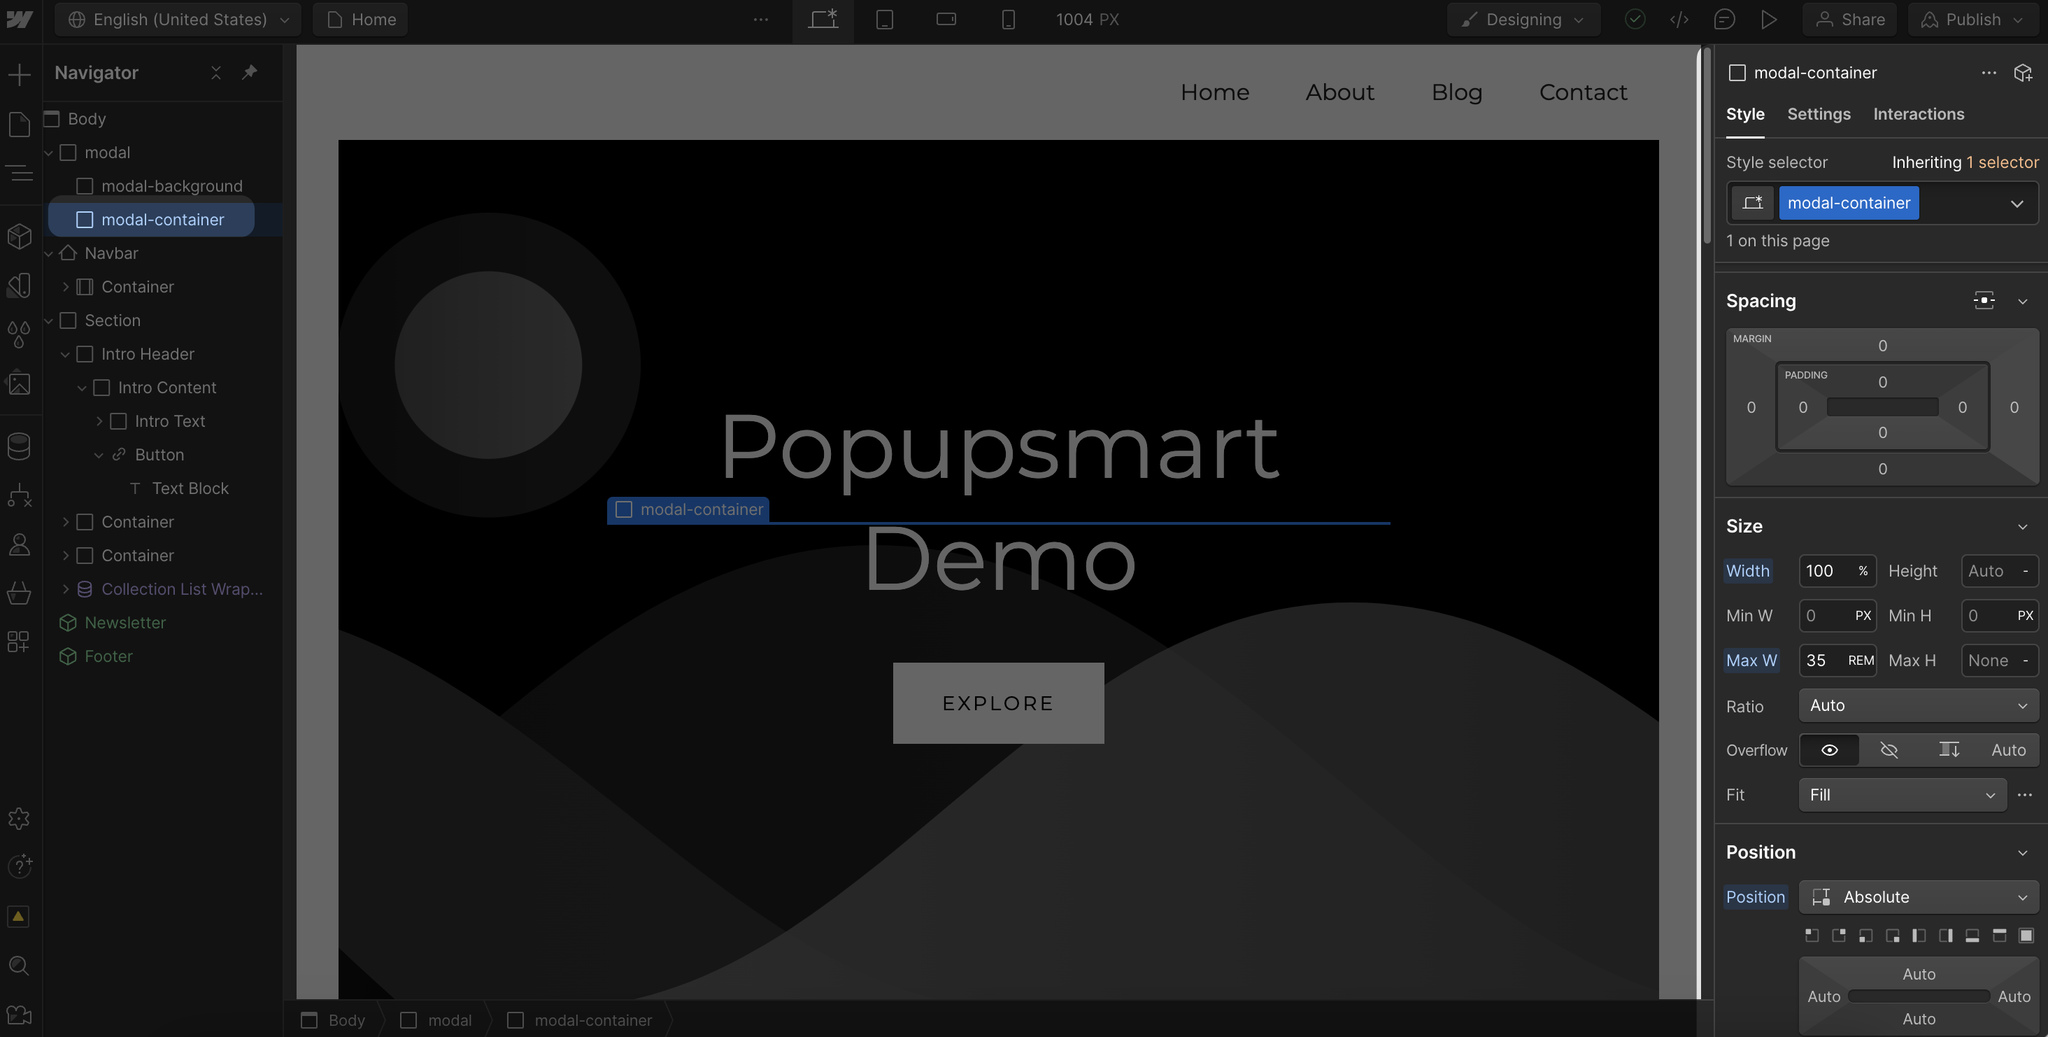
You can set its size according to your website's style options.
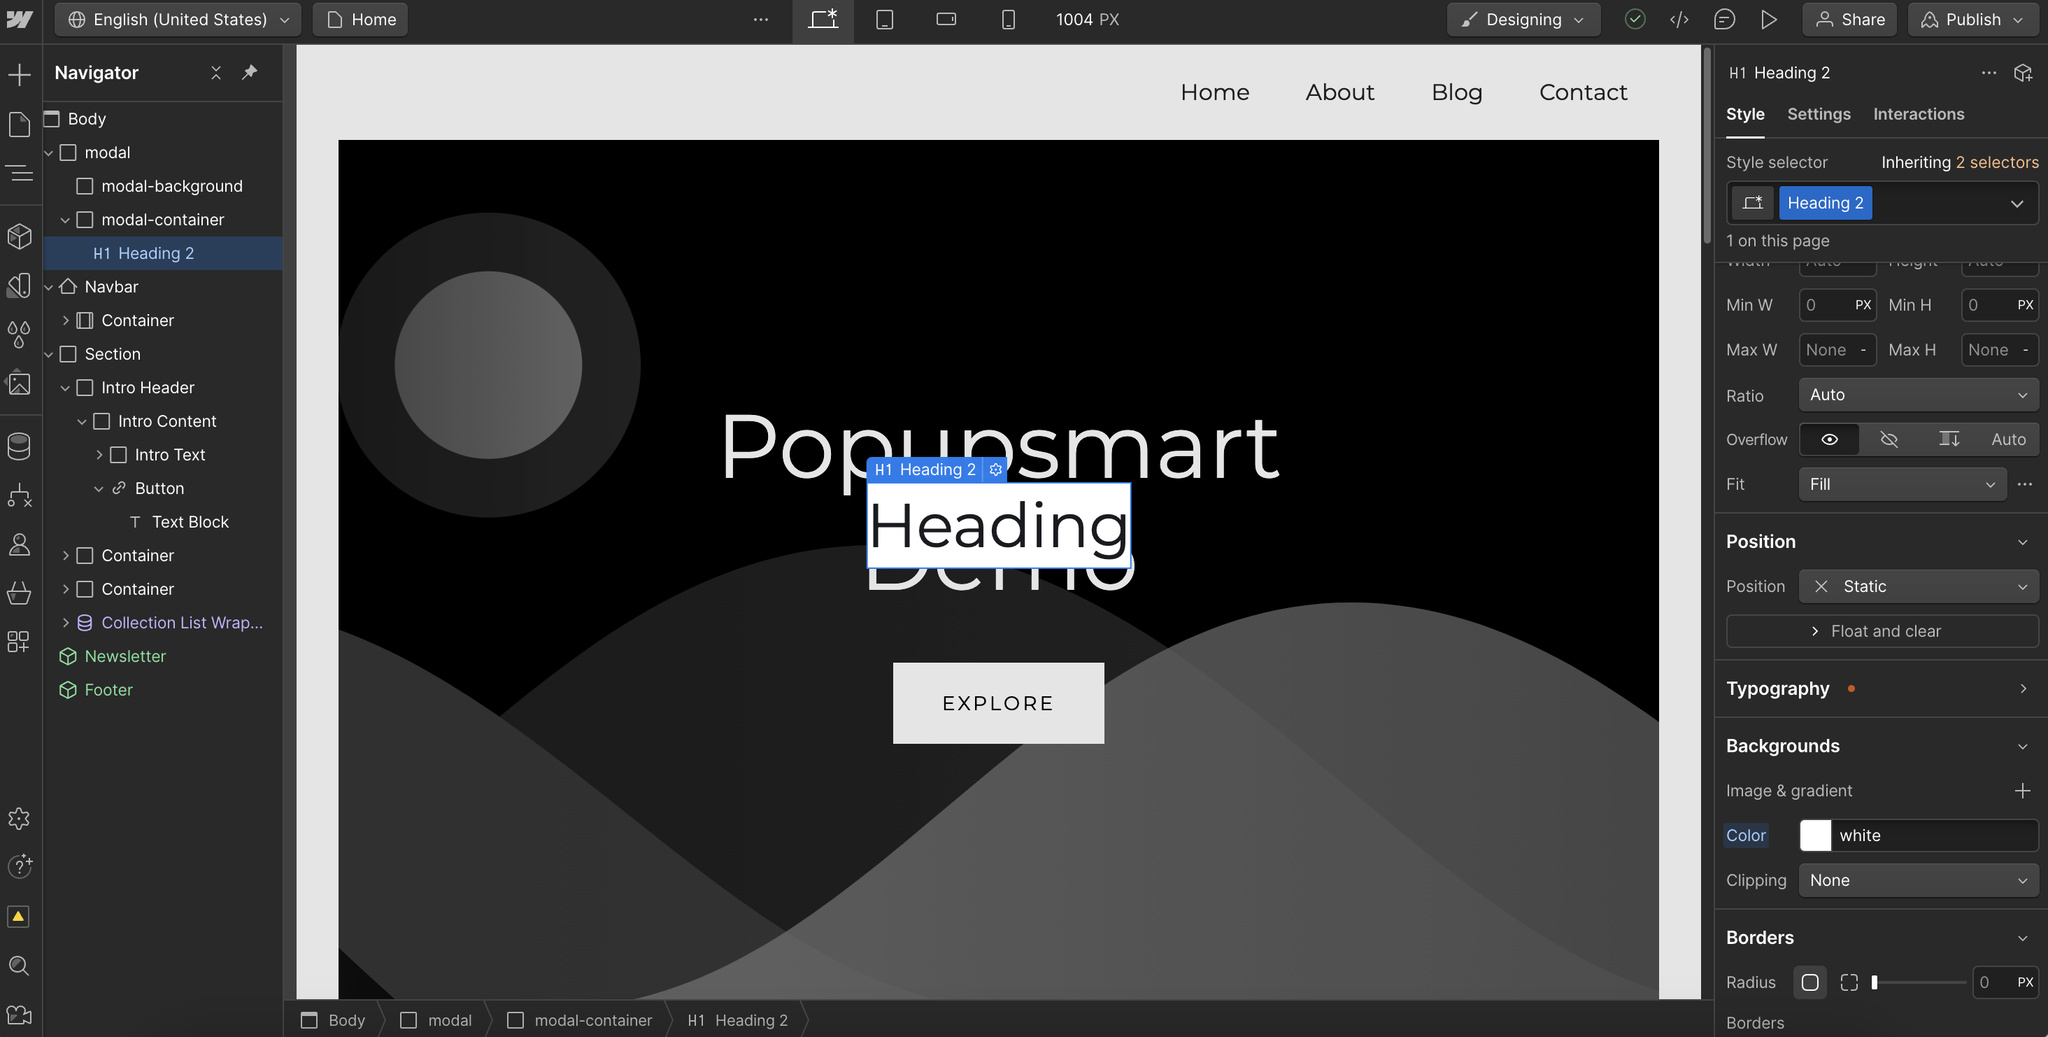
Step 5. To get started with your popup's content, add a Heading element to your block and style it from the right side of the dashboard.
Step 6: Then, you can add a paragraph element and adjust its styling. Also, you can include a form block to make a popup form.
Depending on your popup's style and goals, you can add other elements, like images.
Step 7. Next, you need to include a close button. Add a Link Block element and attach a Text Block to it to add a close button.
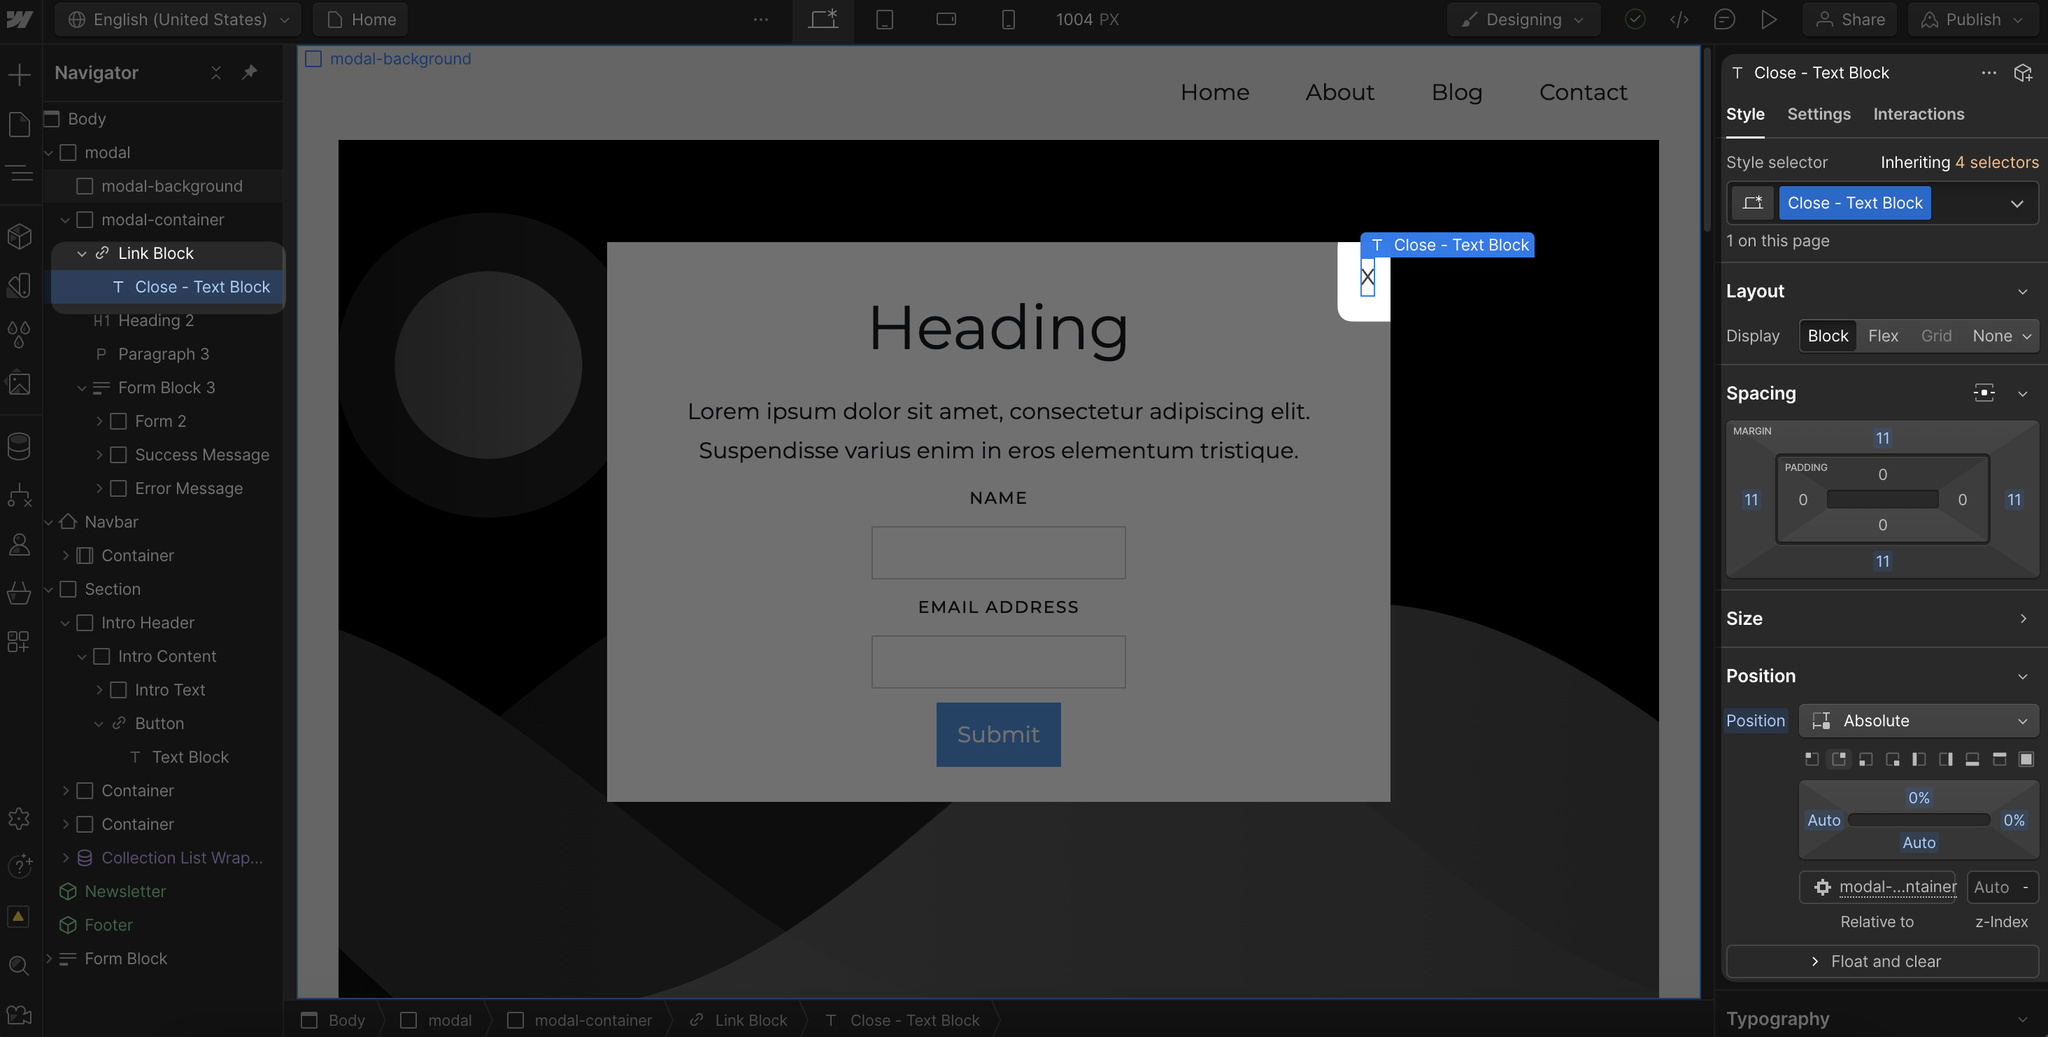
Position your text block for the close button as Absolute and Top Right.
Step 8. To open the popup by clicking the button and making the close button work, you need to add interactions.
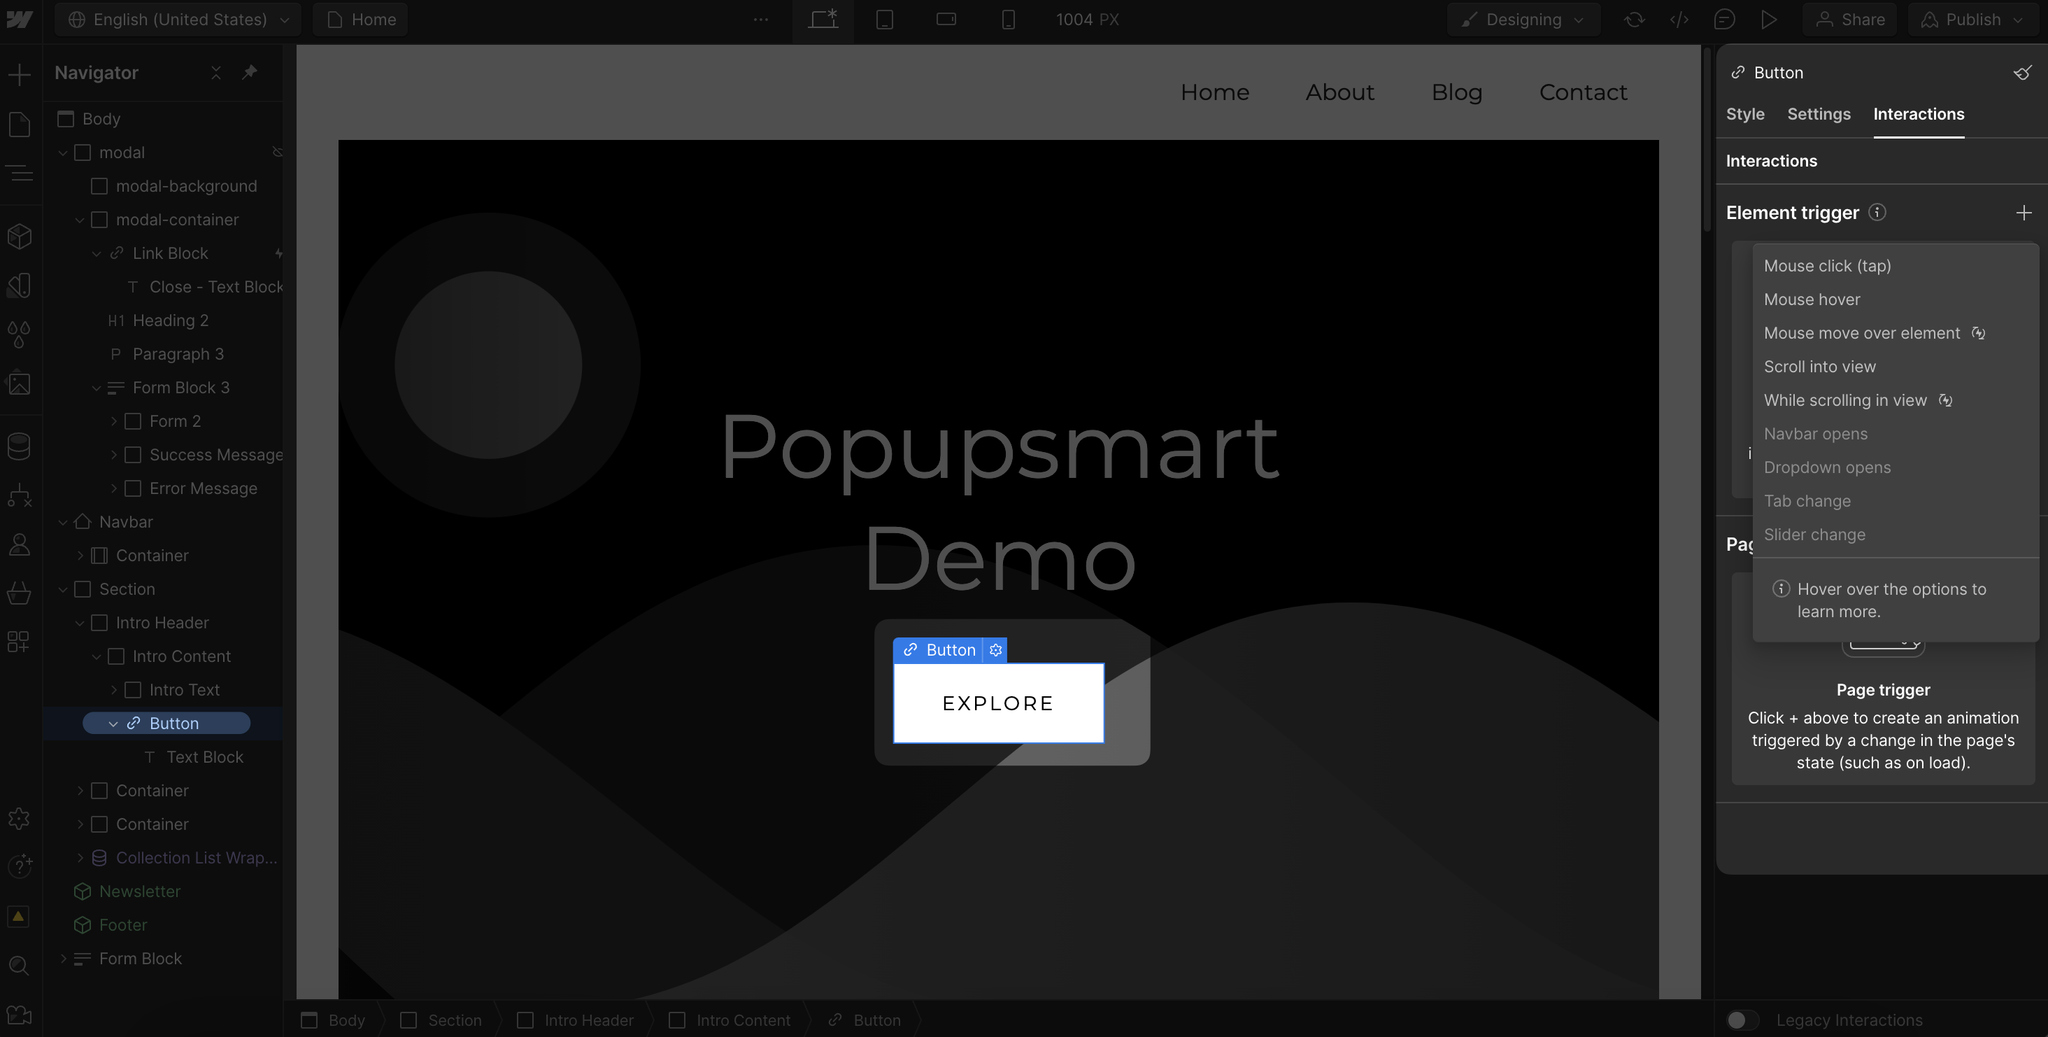
Hide the popup modal block first, select the button on your page, and go to the "Interactions" part. From the Element trigger, select "Mouse click (tap)"
Step 9. Afterwards, select the Action as "Start an animation" and create a new animation. Select the modal block from the left side, click the "+" button, and choose "Hide/Show."
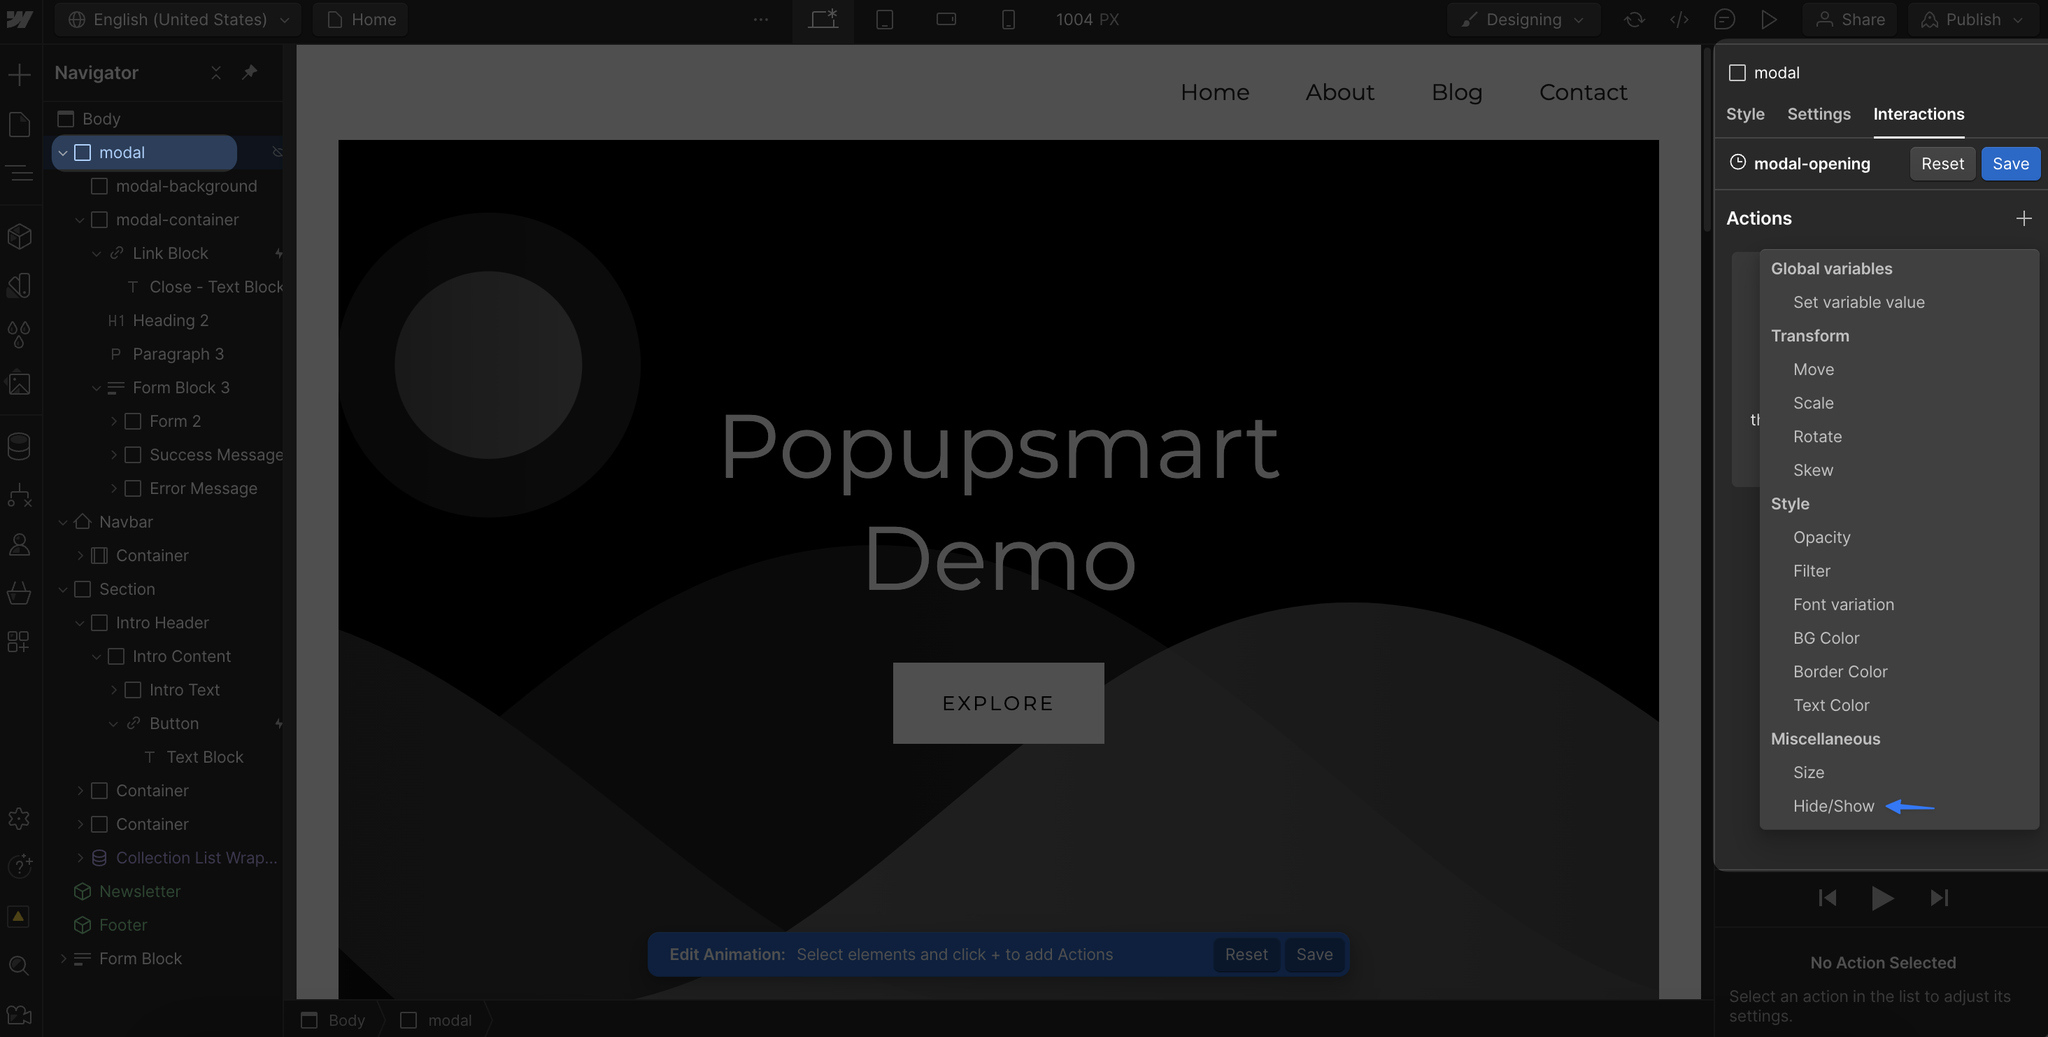
Scroll to the "Timing" part, and set it as the initial state, and select "None" from the Display part.
Then, add another action below the first one, select "Hide/Show," and set it as "Flex" from the Display section.
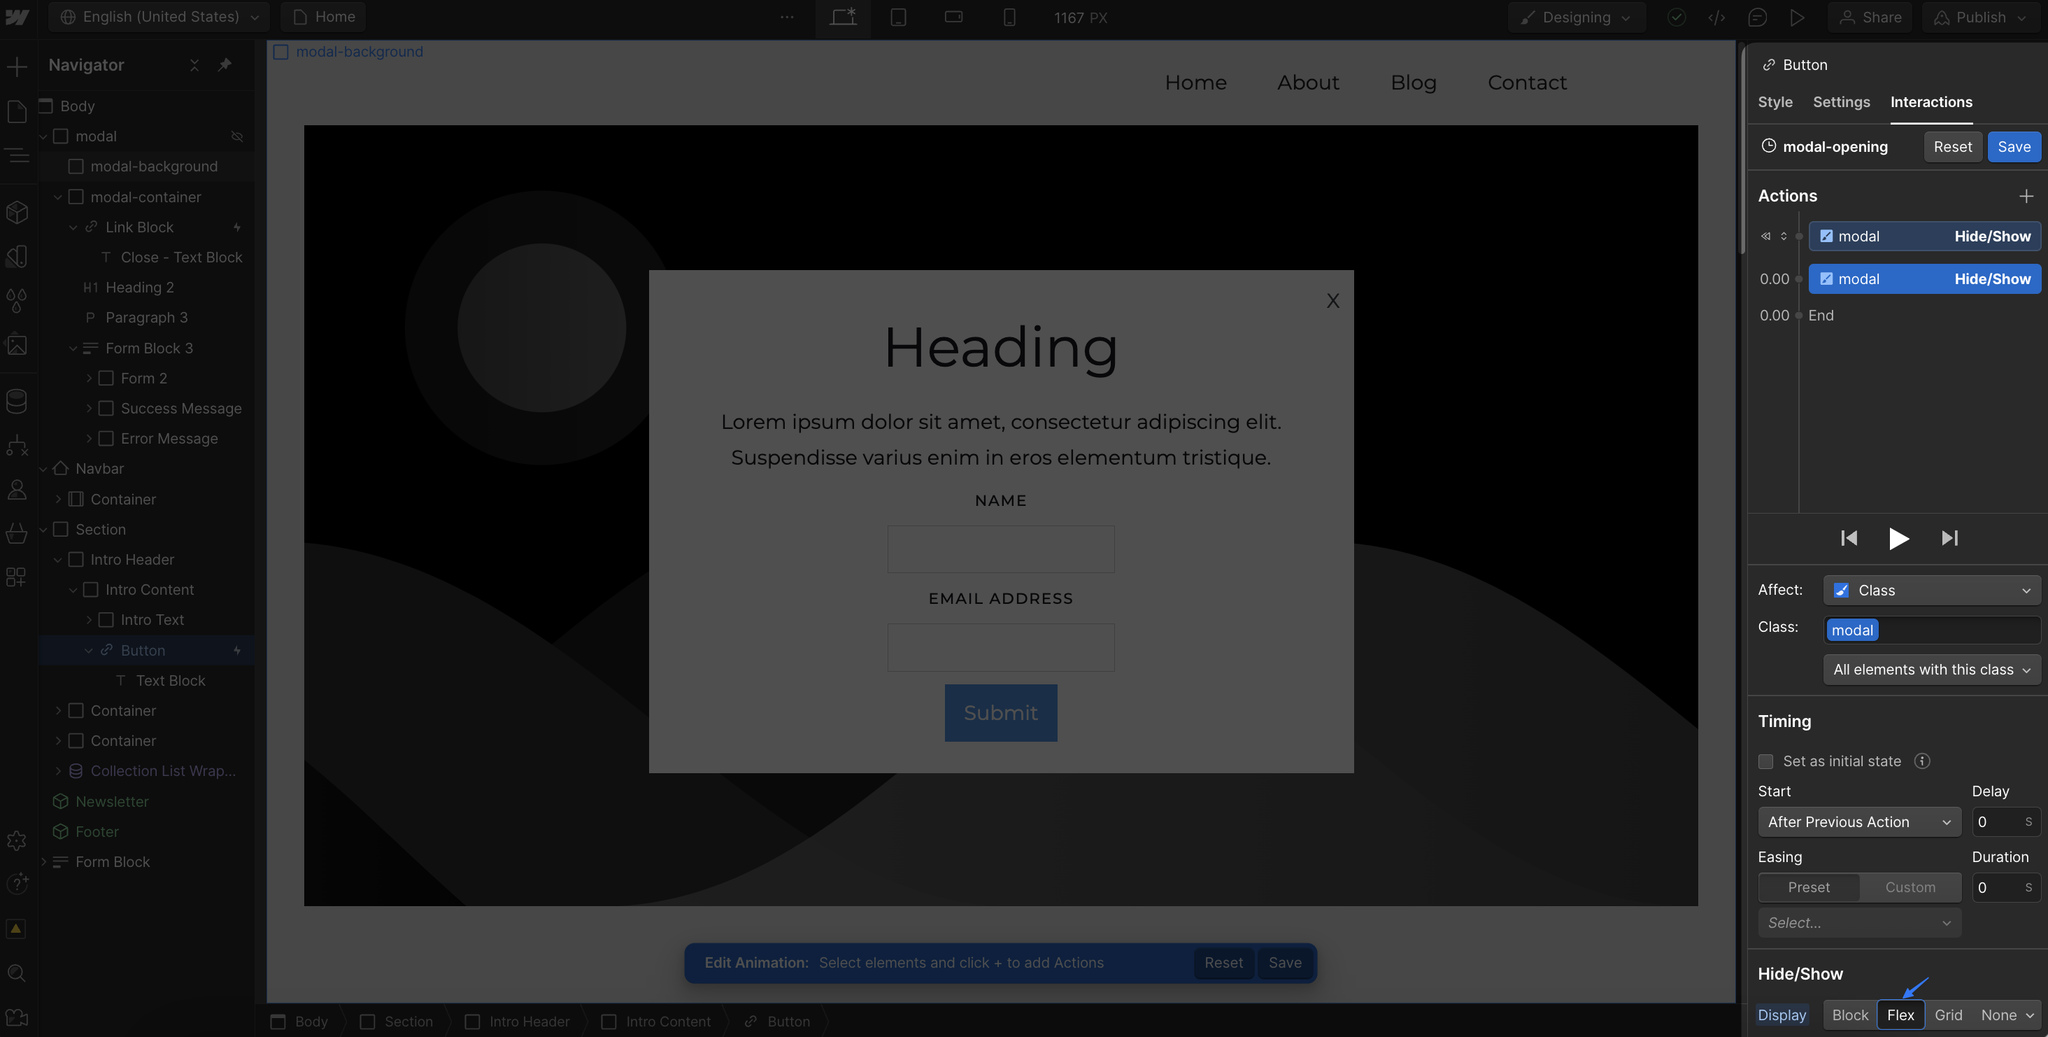
That way, your popup will appear once a visitor clicks the button like this:
Step 10. To add an action to the "Close Button" you added, go to the "Link Block" and then "Interactions." Select "Mouse click (tap)," add the animation by giving it a name, click the "+" button, and choose "Hide/Show."
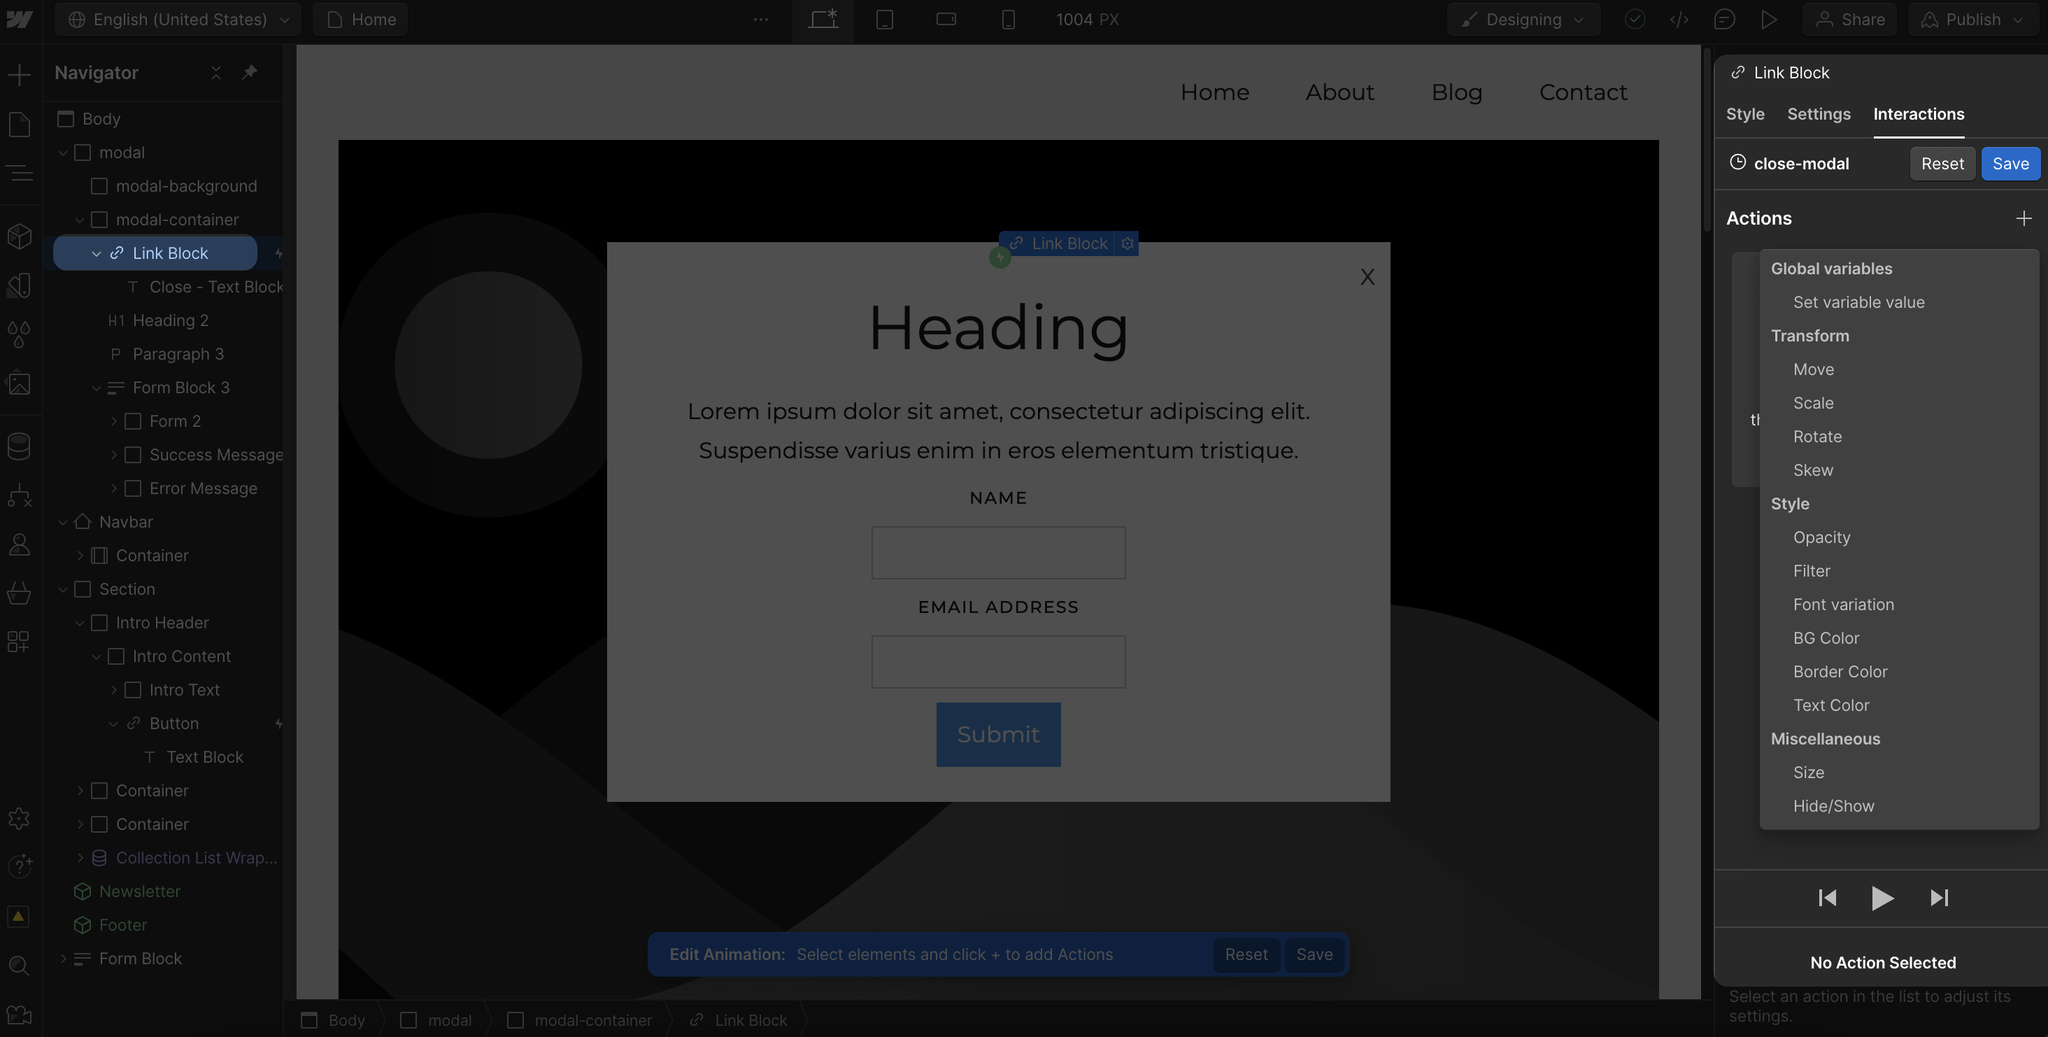
Step 11. Then, click "Change target" and select the main modal block from the left side of the dashboard, and from the Display part, choose "None" to hide it.
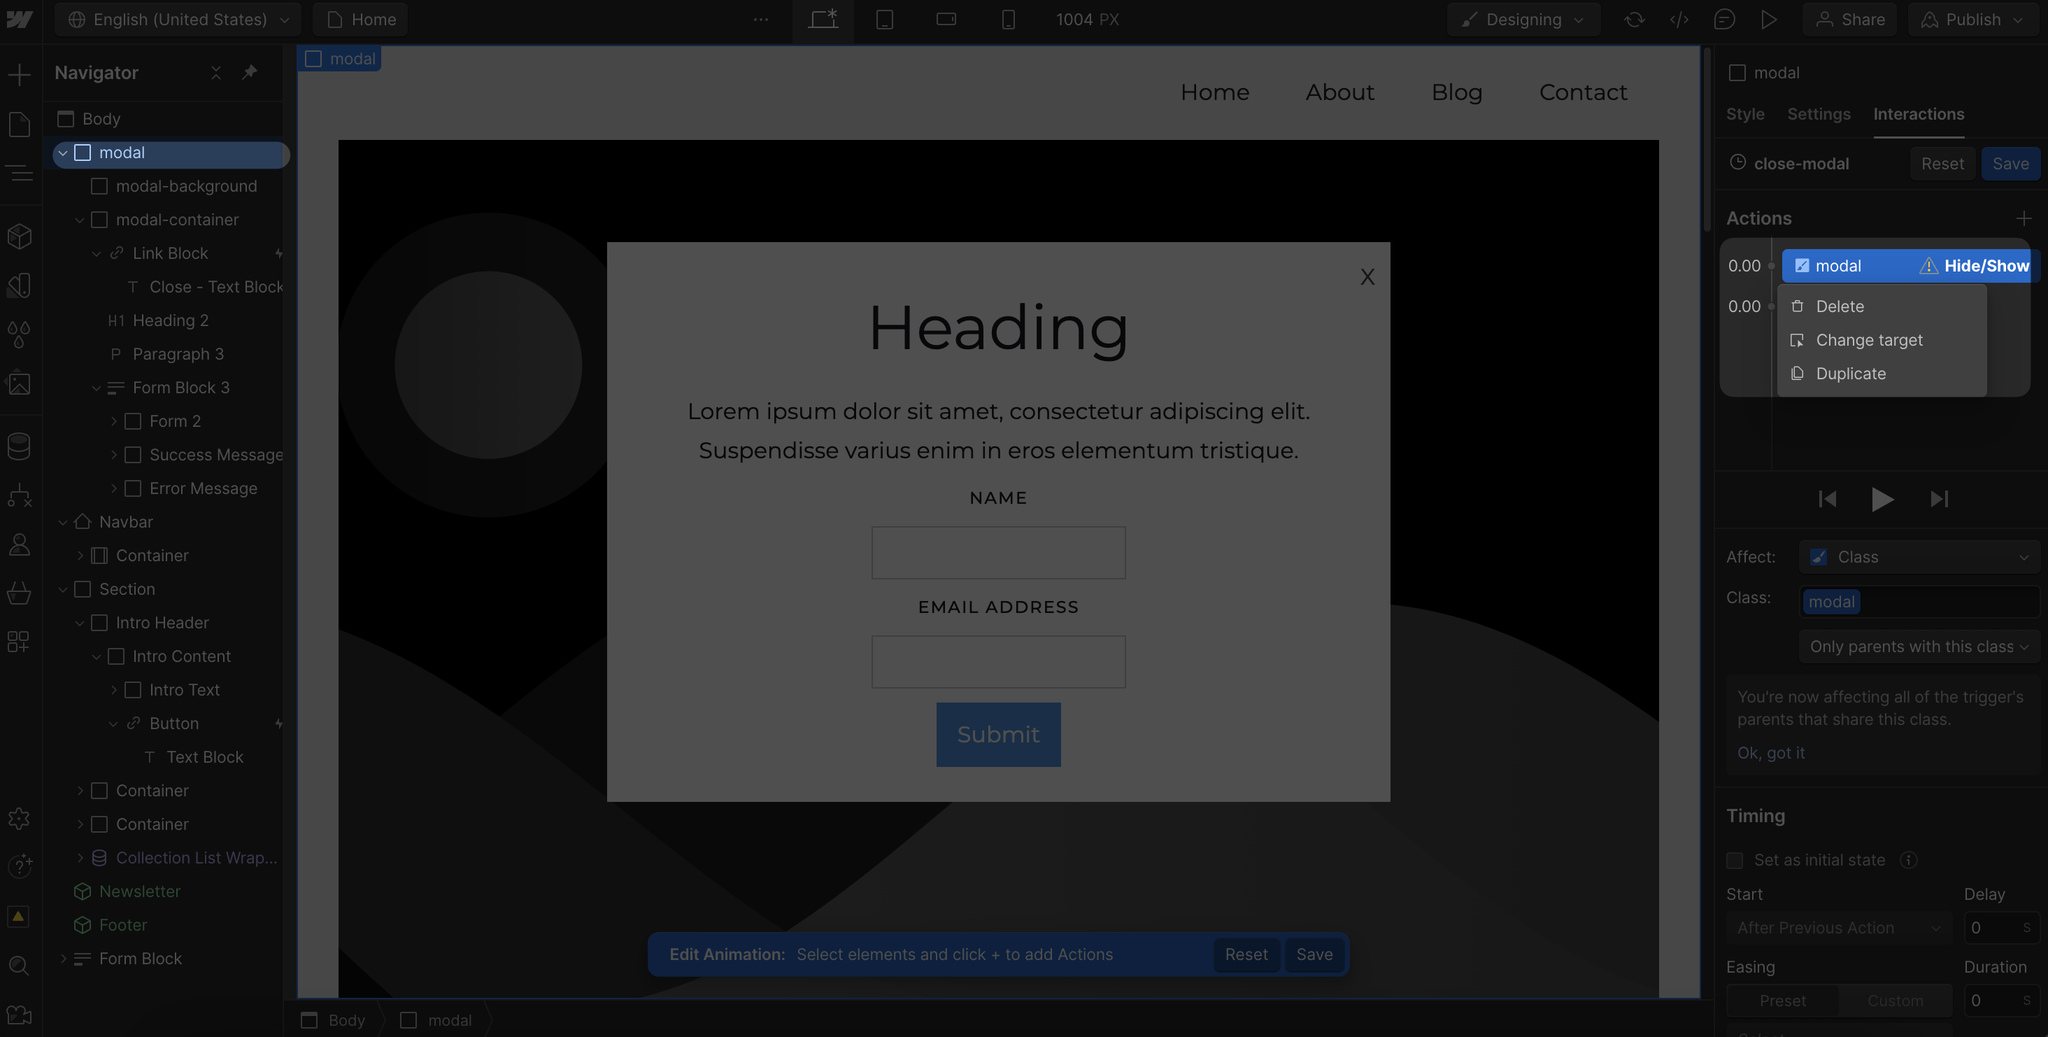
That way, the popup will be hidden once visitors click the close button.
Of course, you can add many different animations to your popup. If you have design and coding knowledge, you can apply them while creating your popup on Webflow.
Don't forget to save and publish your website once you finish adjusting your popup on Webflow.
How to Create a Webflow Popup with Popupsmart
If you don't have design or coding experience, the no-code popup builder Popupsmart can be a great solution for creating your Webflow popup.
Let's have a look at how to create a smart popup for your Webflow website with Popupsmart's builder;
Step 1. Sign up for Popupsmart and log in to your Popupsmart account.
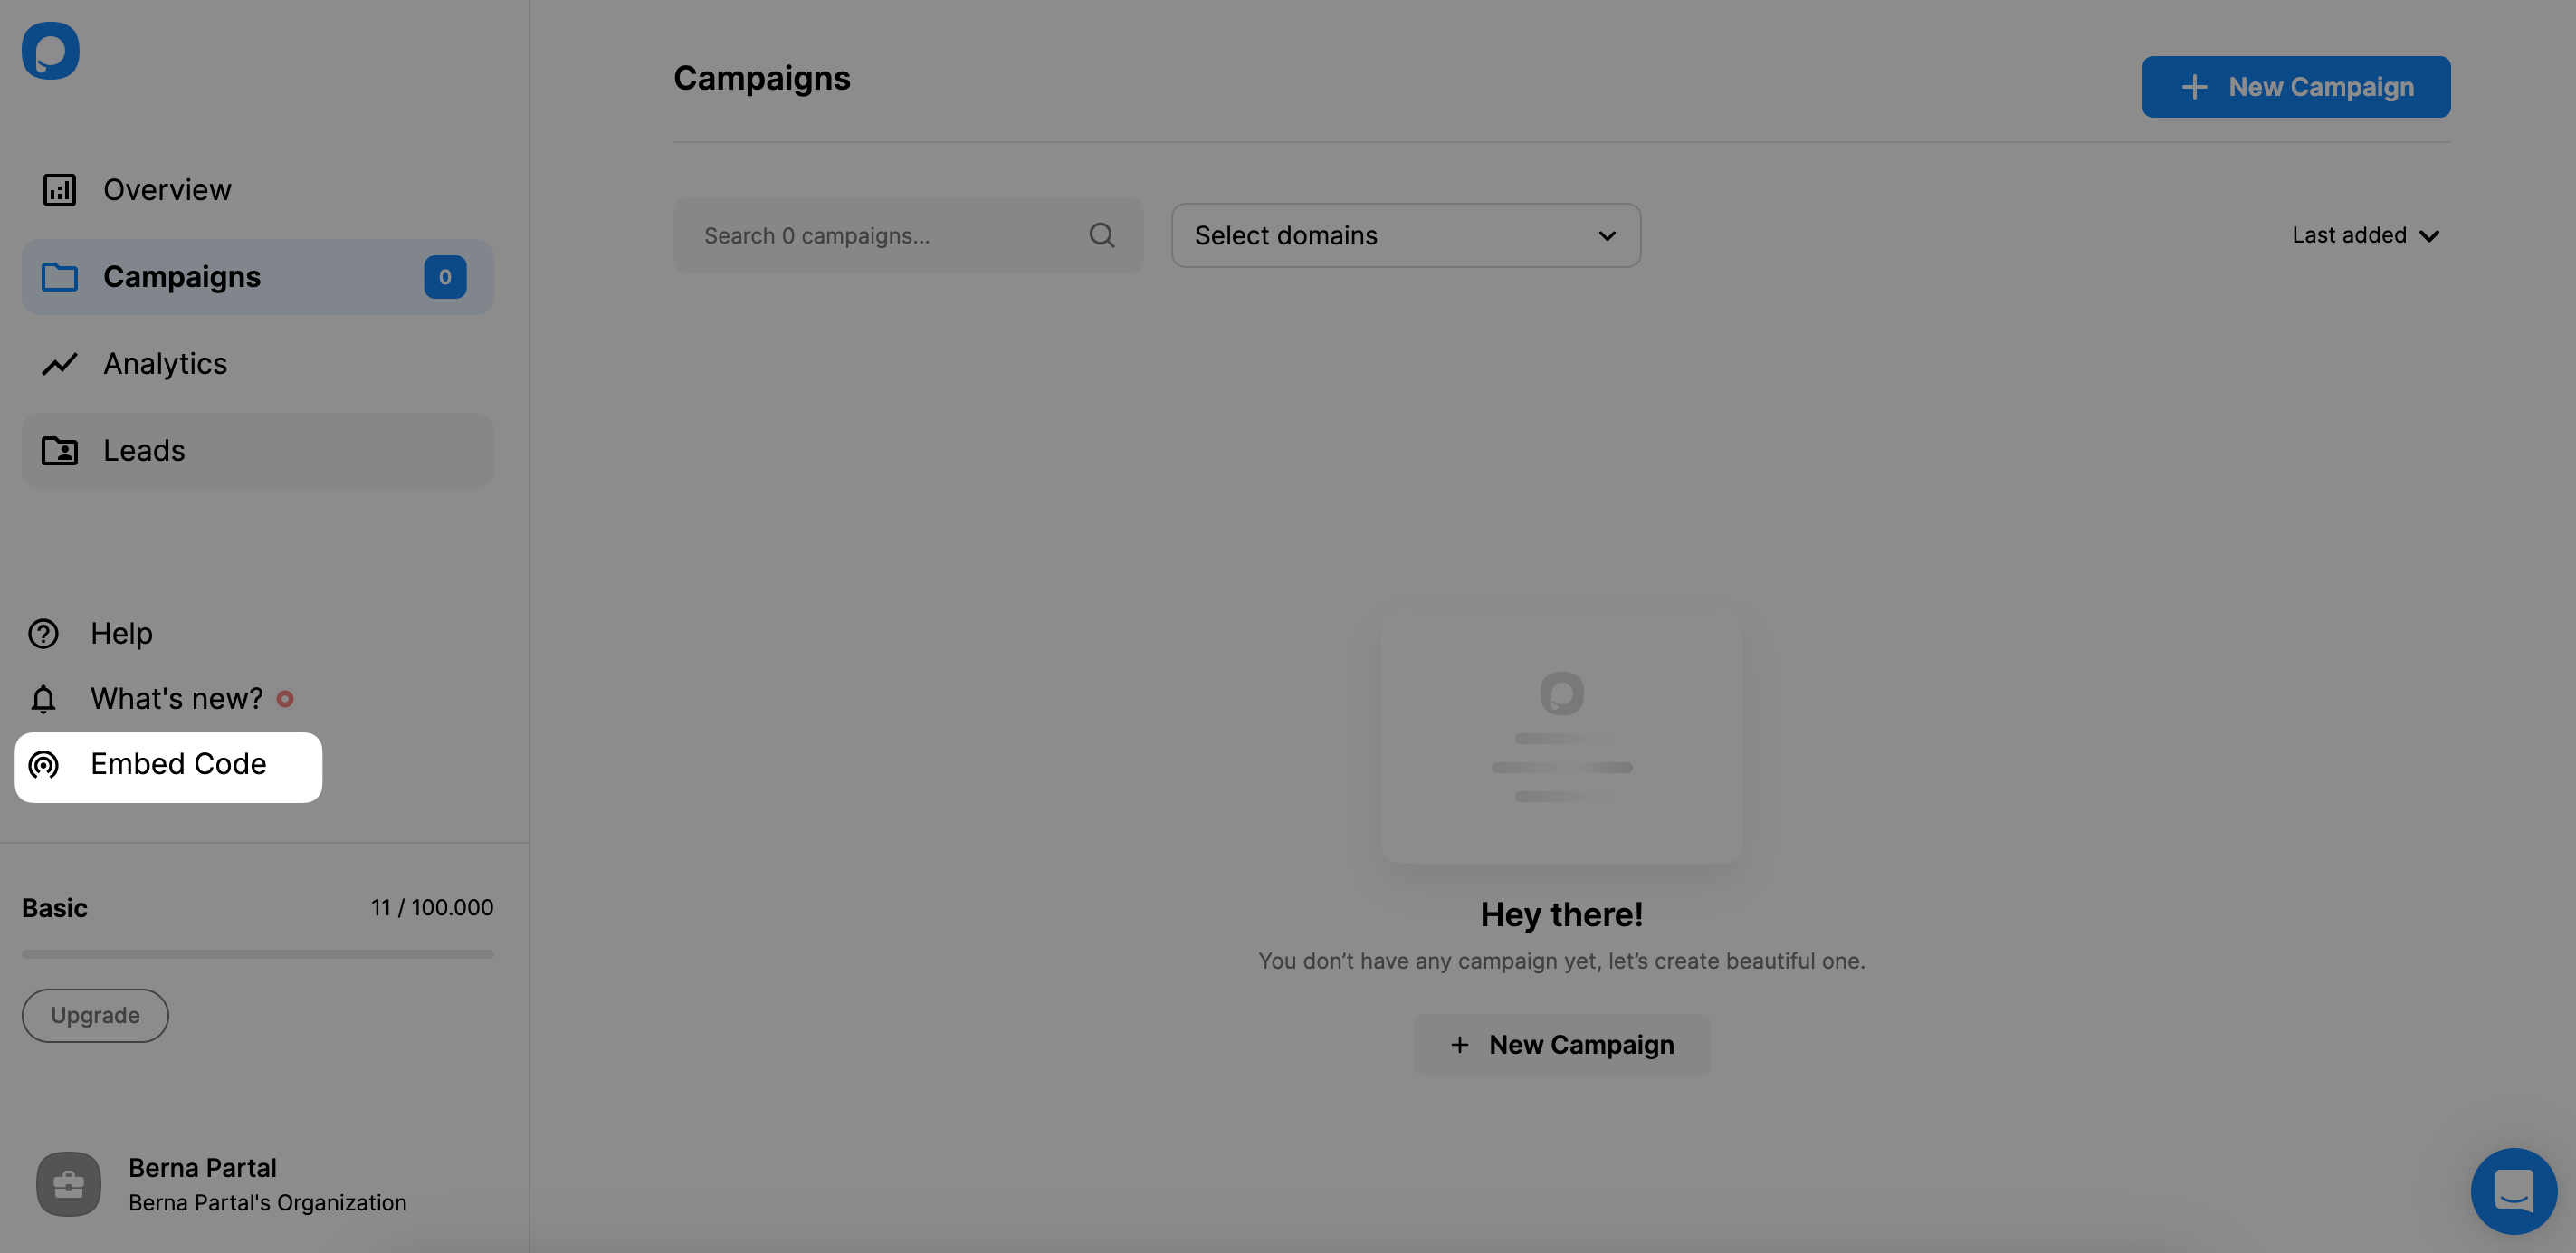
Step 2. To create your first popup, you need to install the embed code between the header tags of your websites. To get your code click the "Embed Code" button.
Step 3. A modal window will pop up, showing your Popupsmart embed code. Simply copy this code to your clipboard.
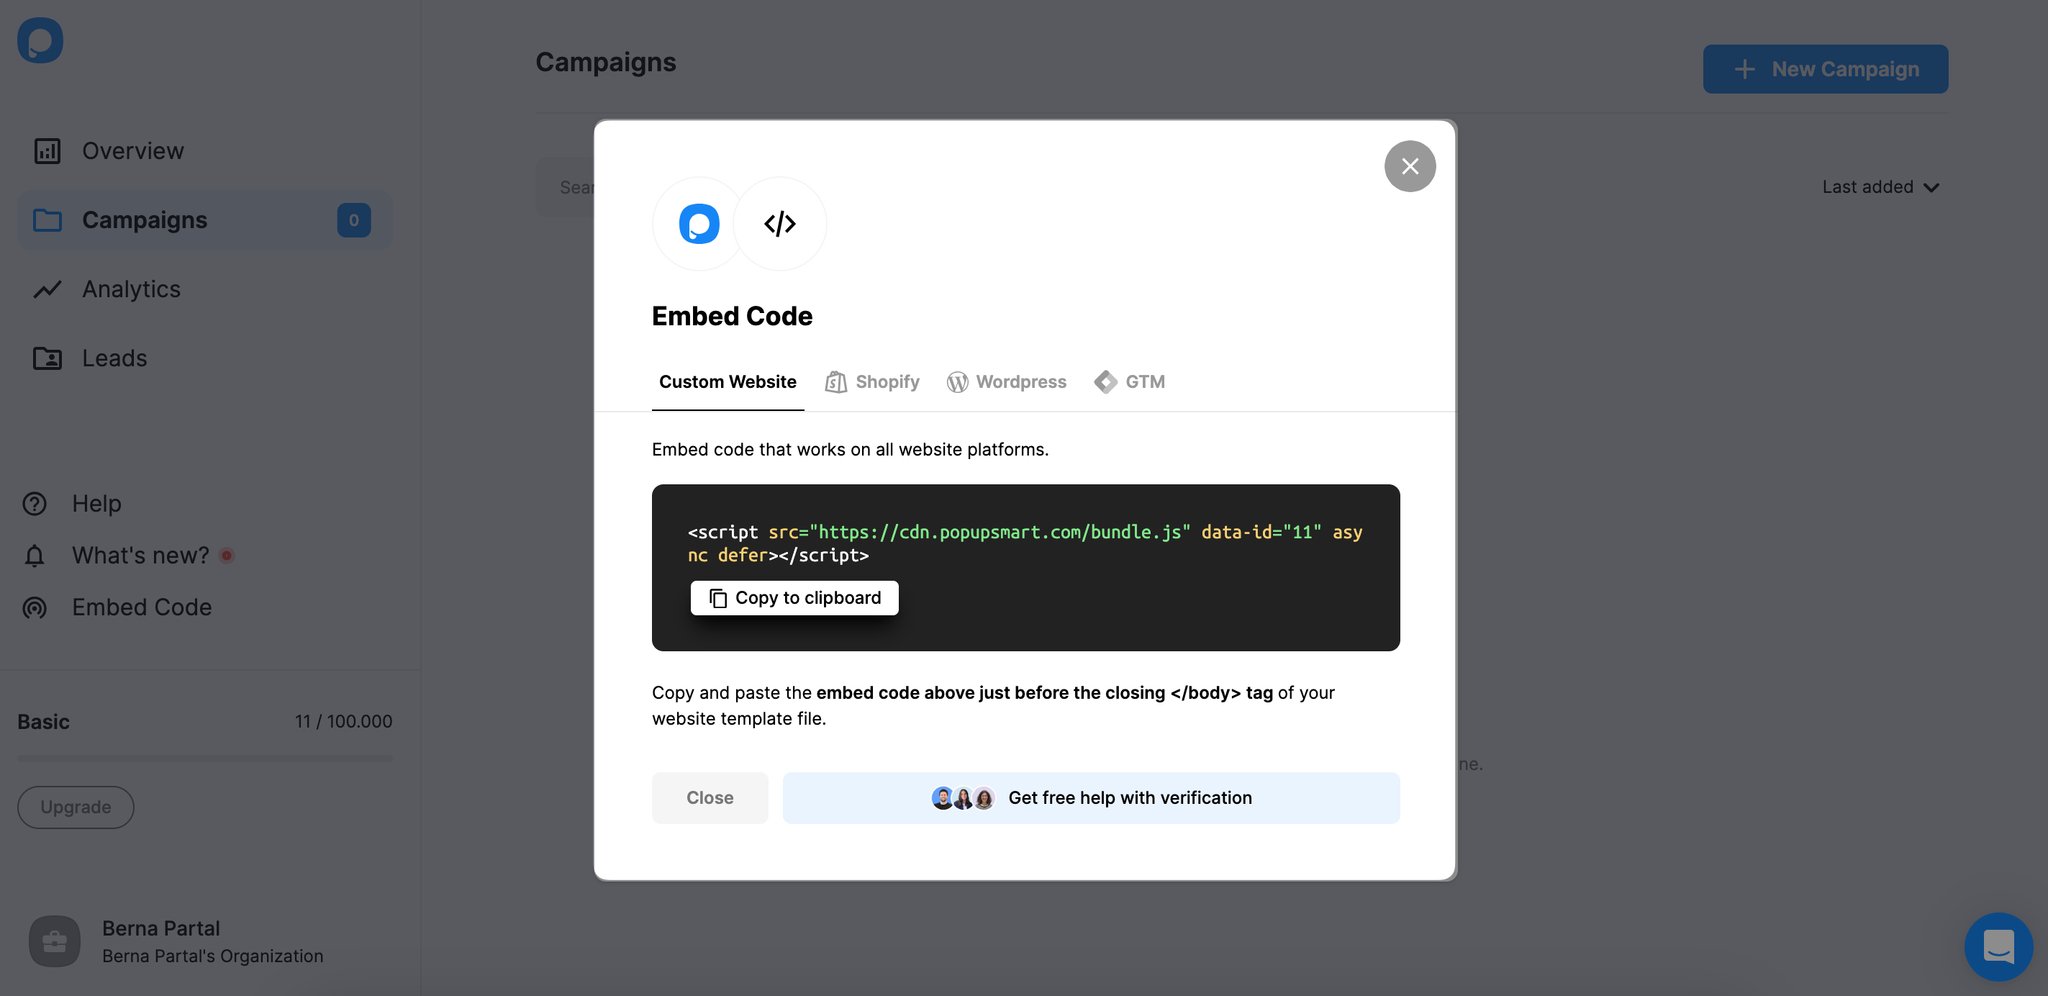
Moreover, you can easily place the embed code on your website via Google Tag Manager.
This is a one-time necessity, so you can use the same embed code for all your websites and future popup campaigns.
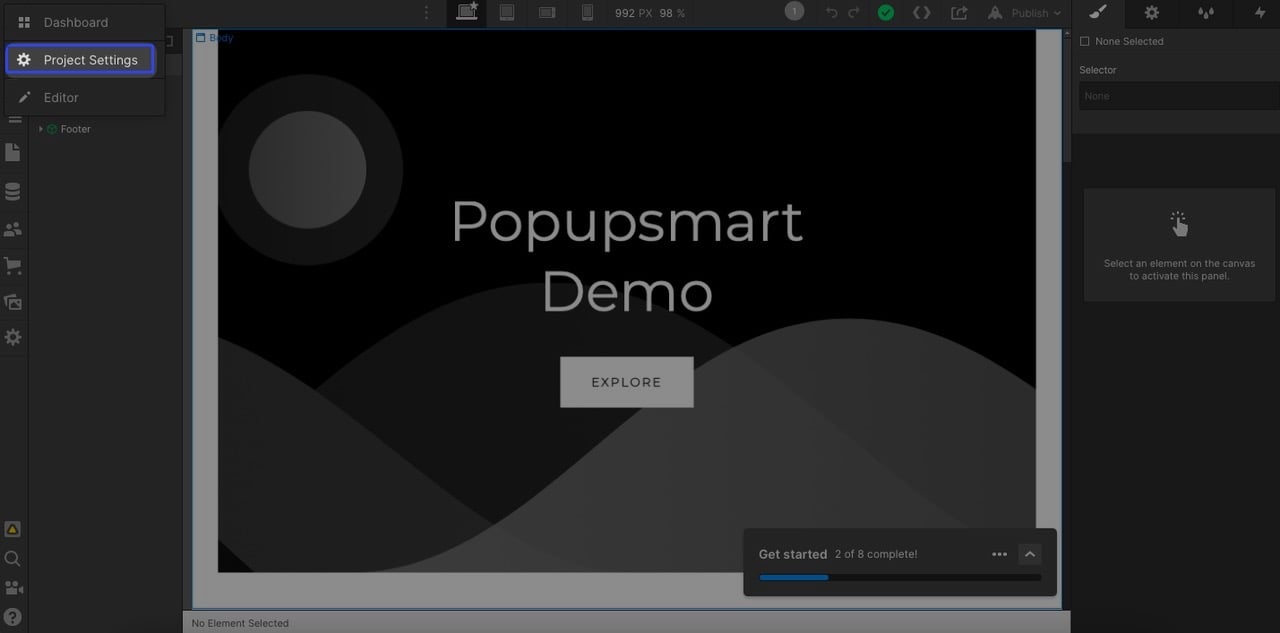
Step 4. Next, access your Webflow website's admin panel. Within your Webflow Dashboard, select the website where you intend to incorporate your embed code, and then click "Project Settings" using the Webflow icon at the top left corner.
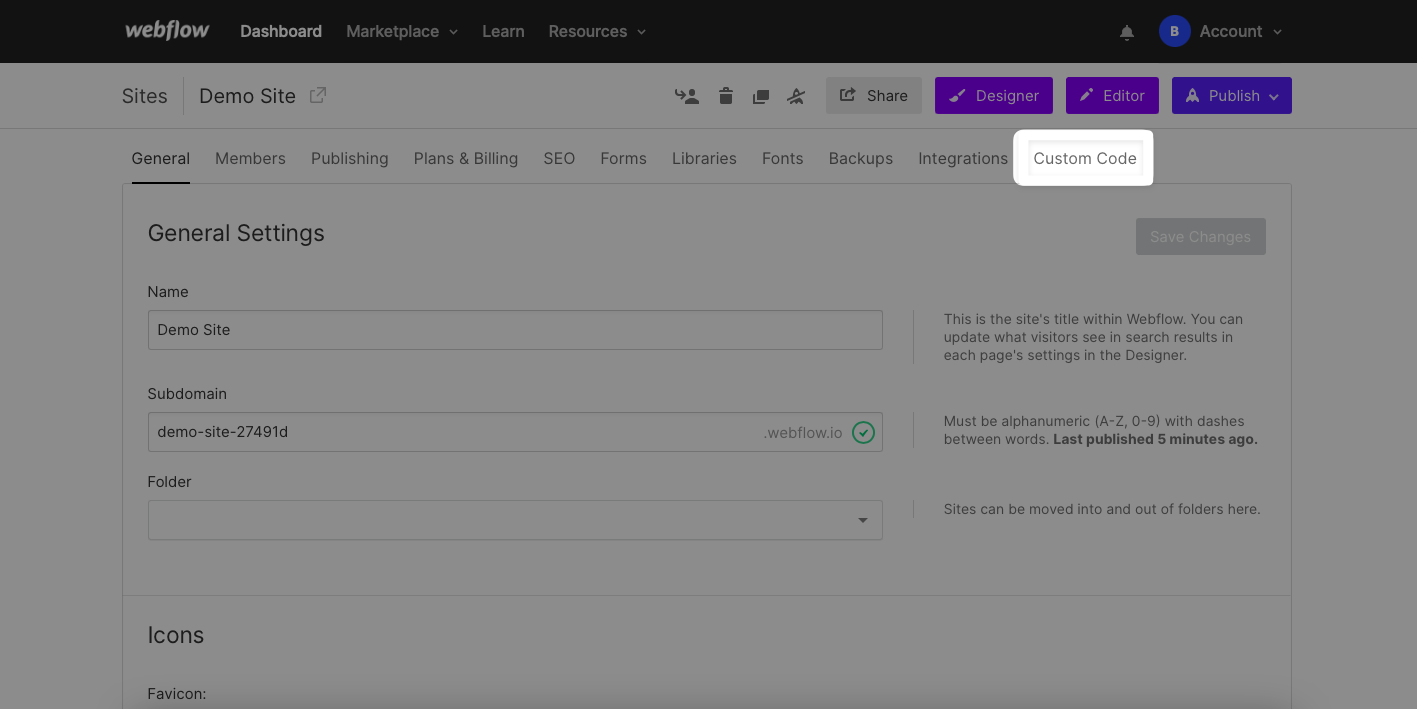
Click the “Custom Code” on the “Project Settings” page.
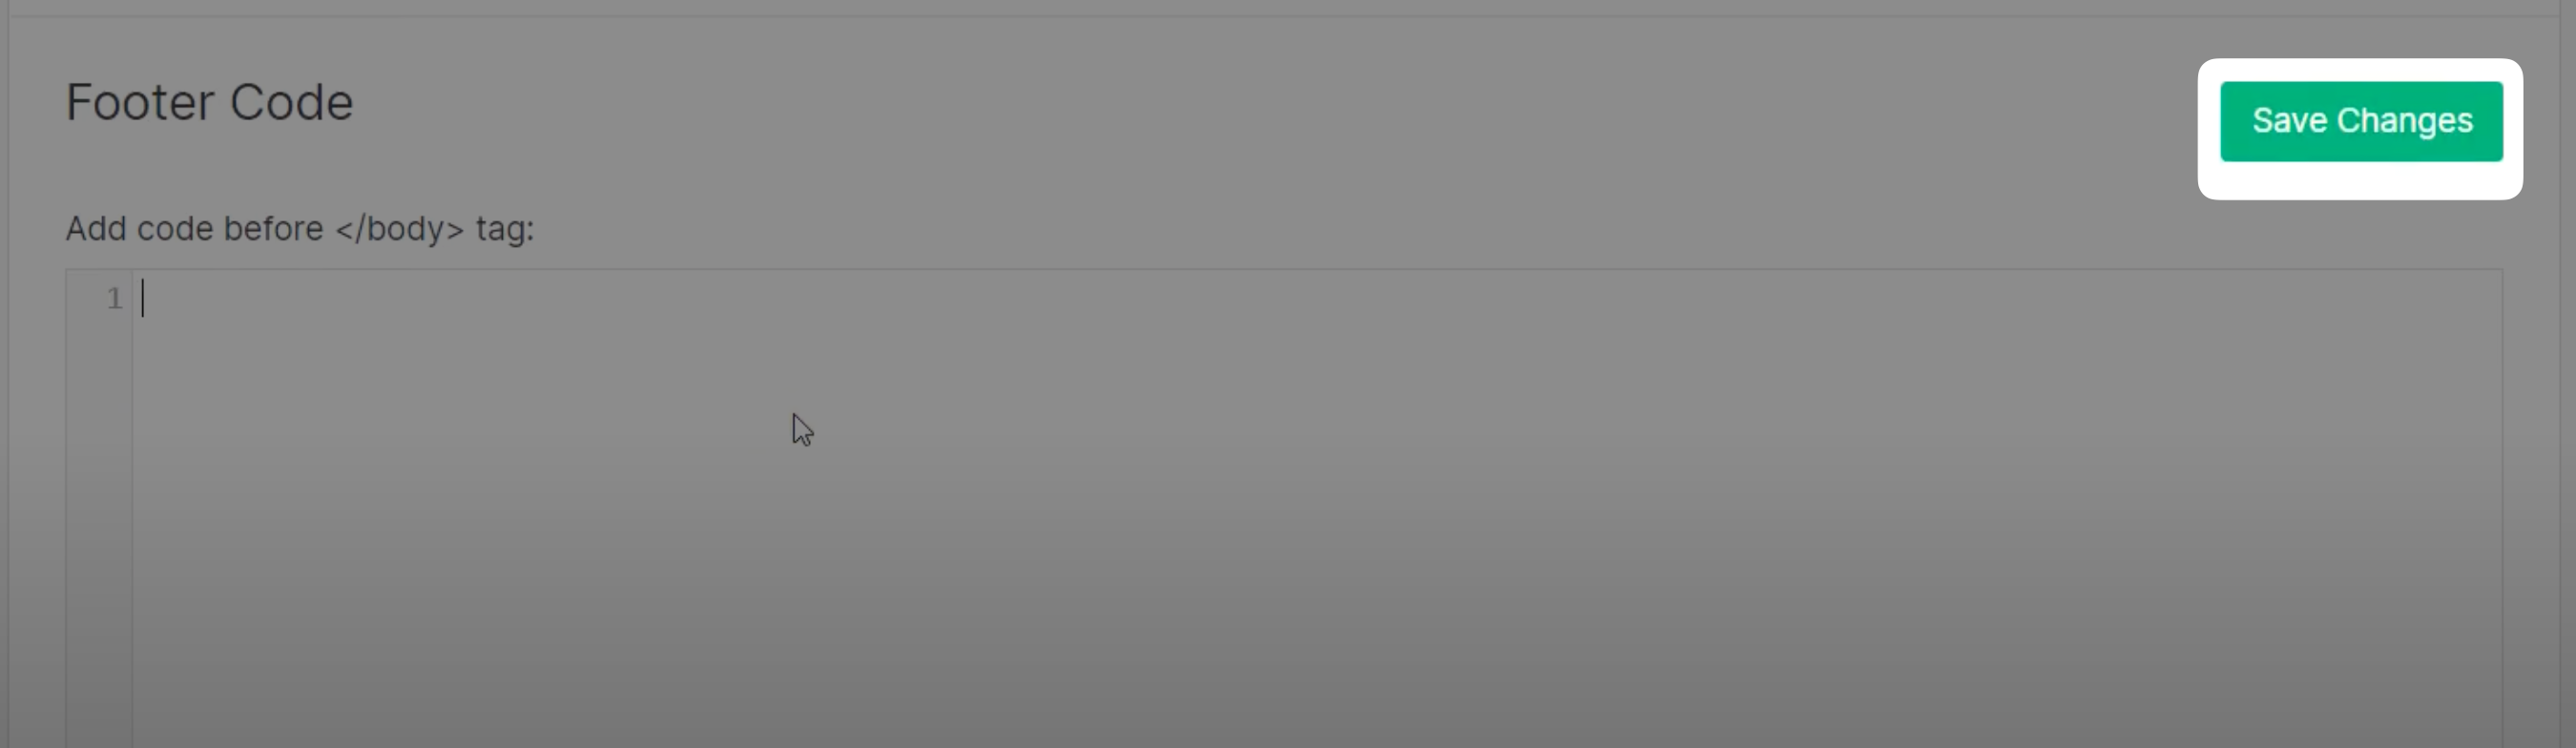
Scroll down and insert your embed code within the "Footer Code" section. Your embed code should be placed before the </body> tag. Afterwards, click the "Save Changes" button.
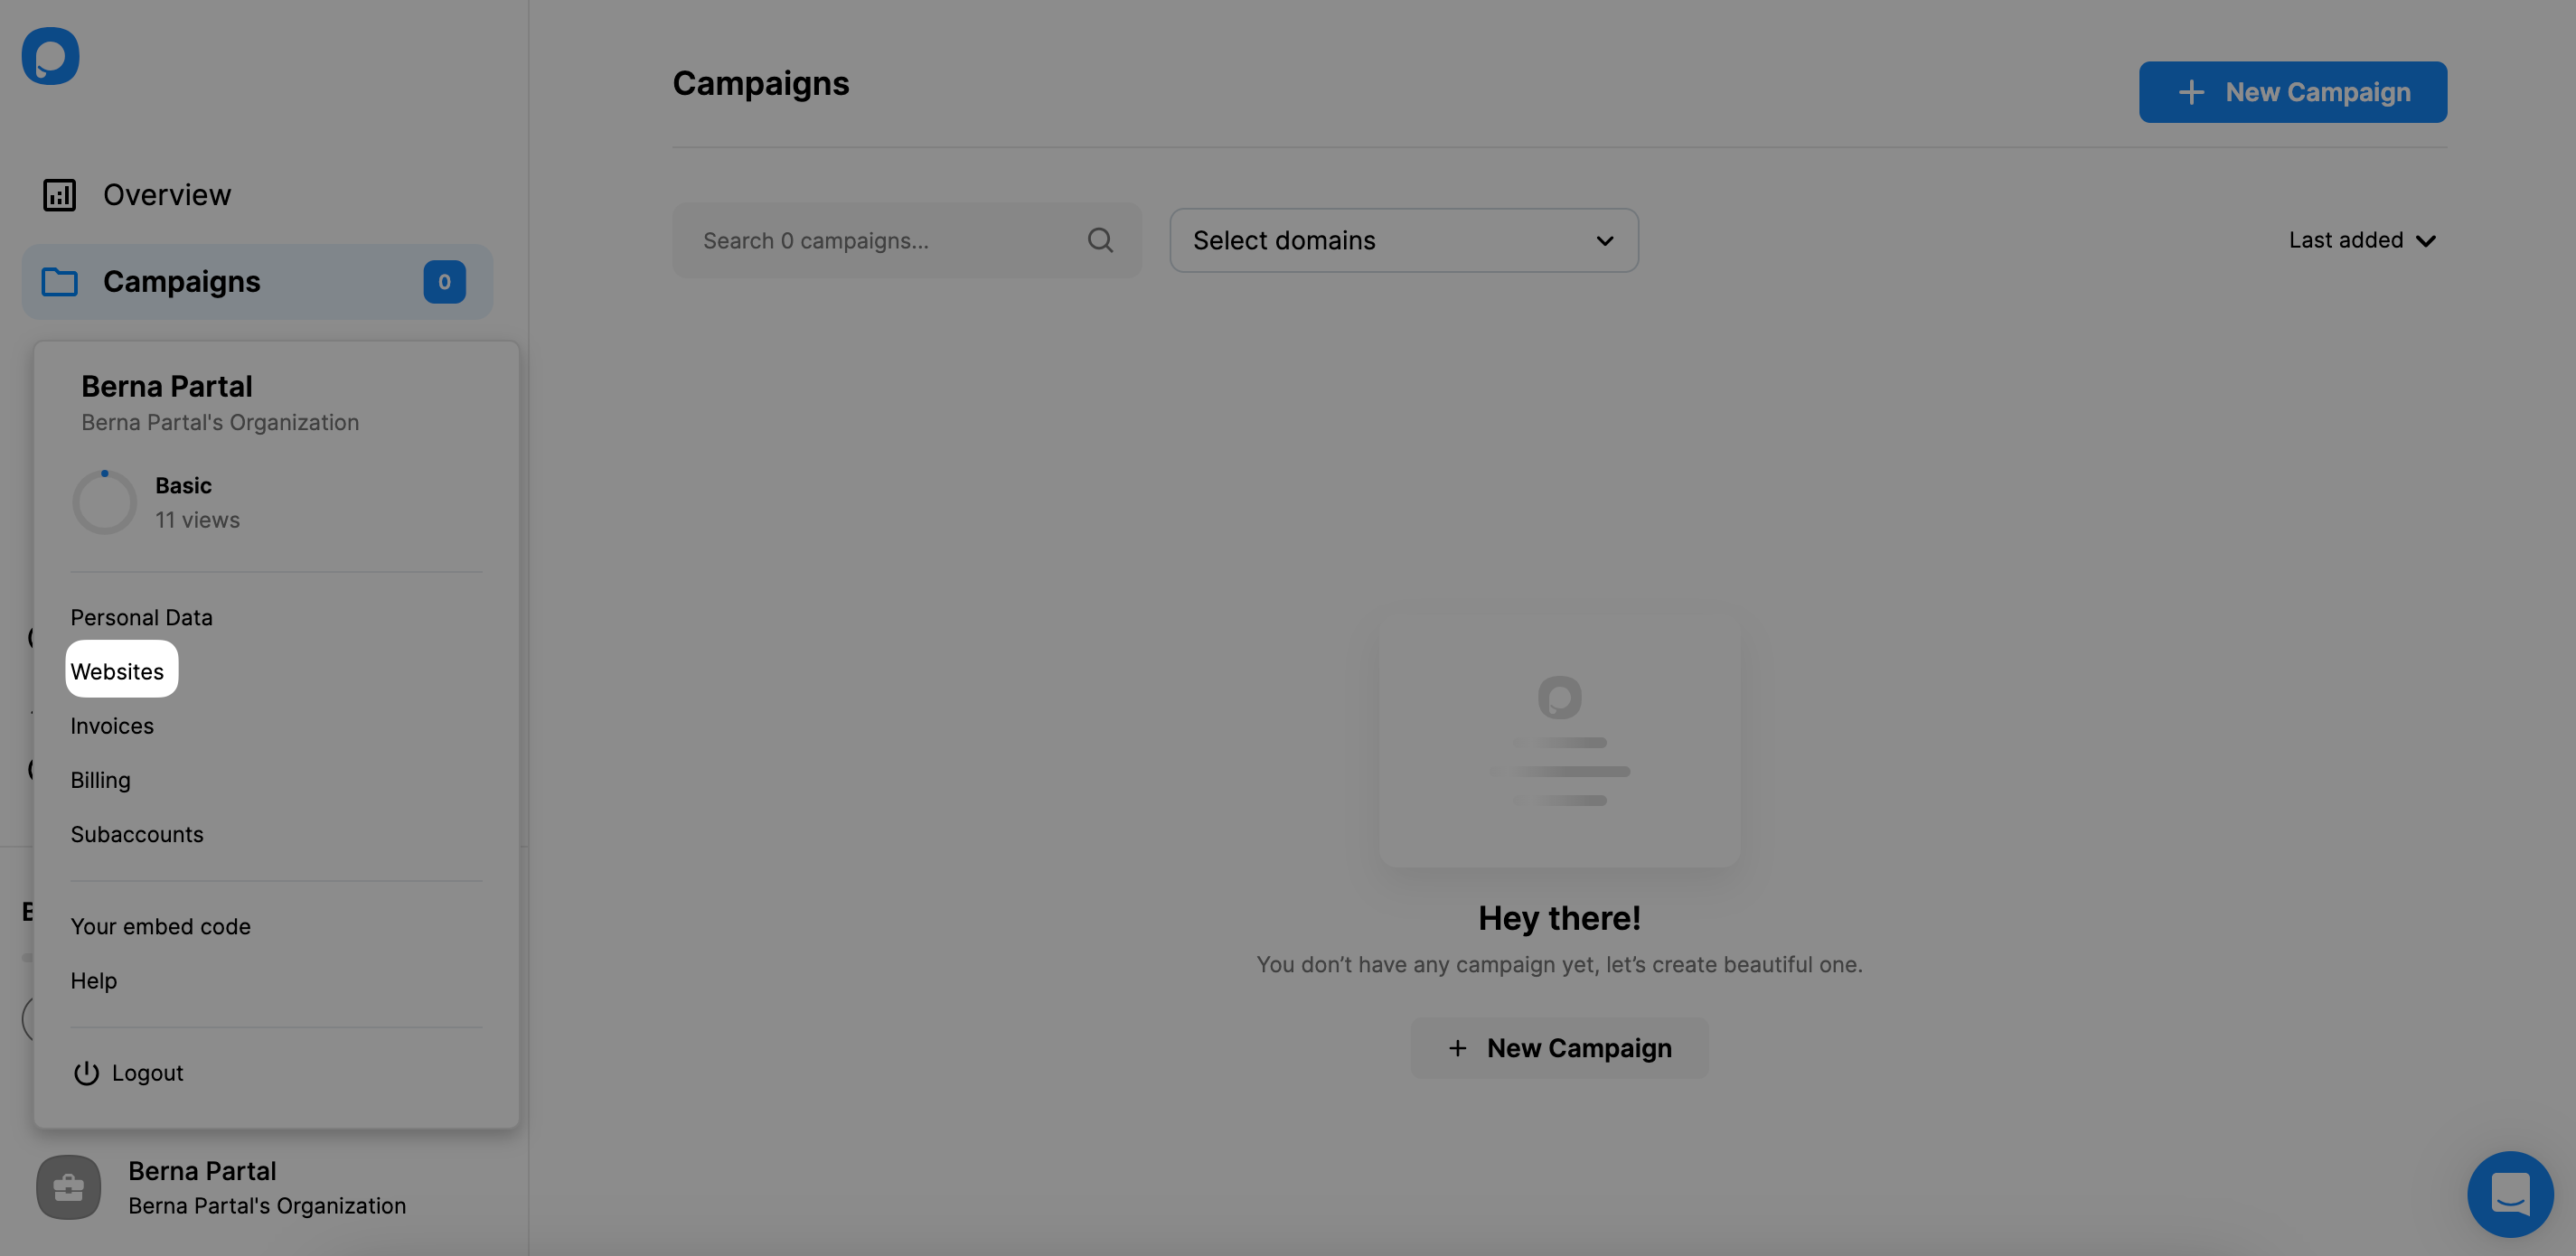
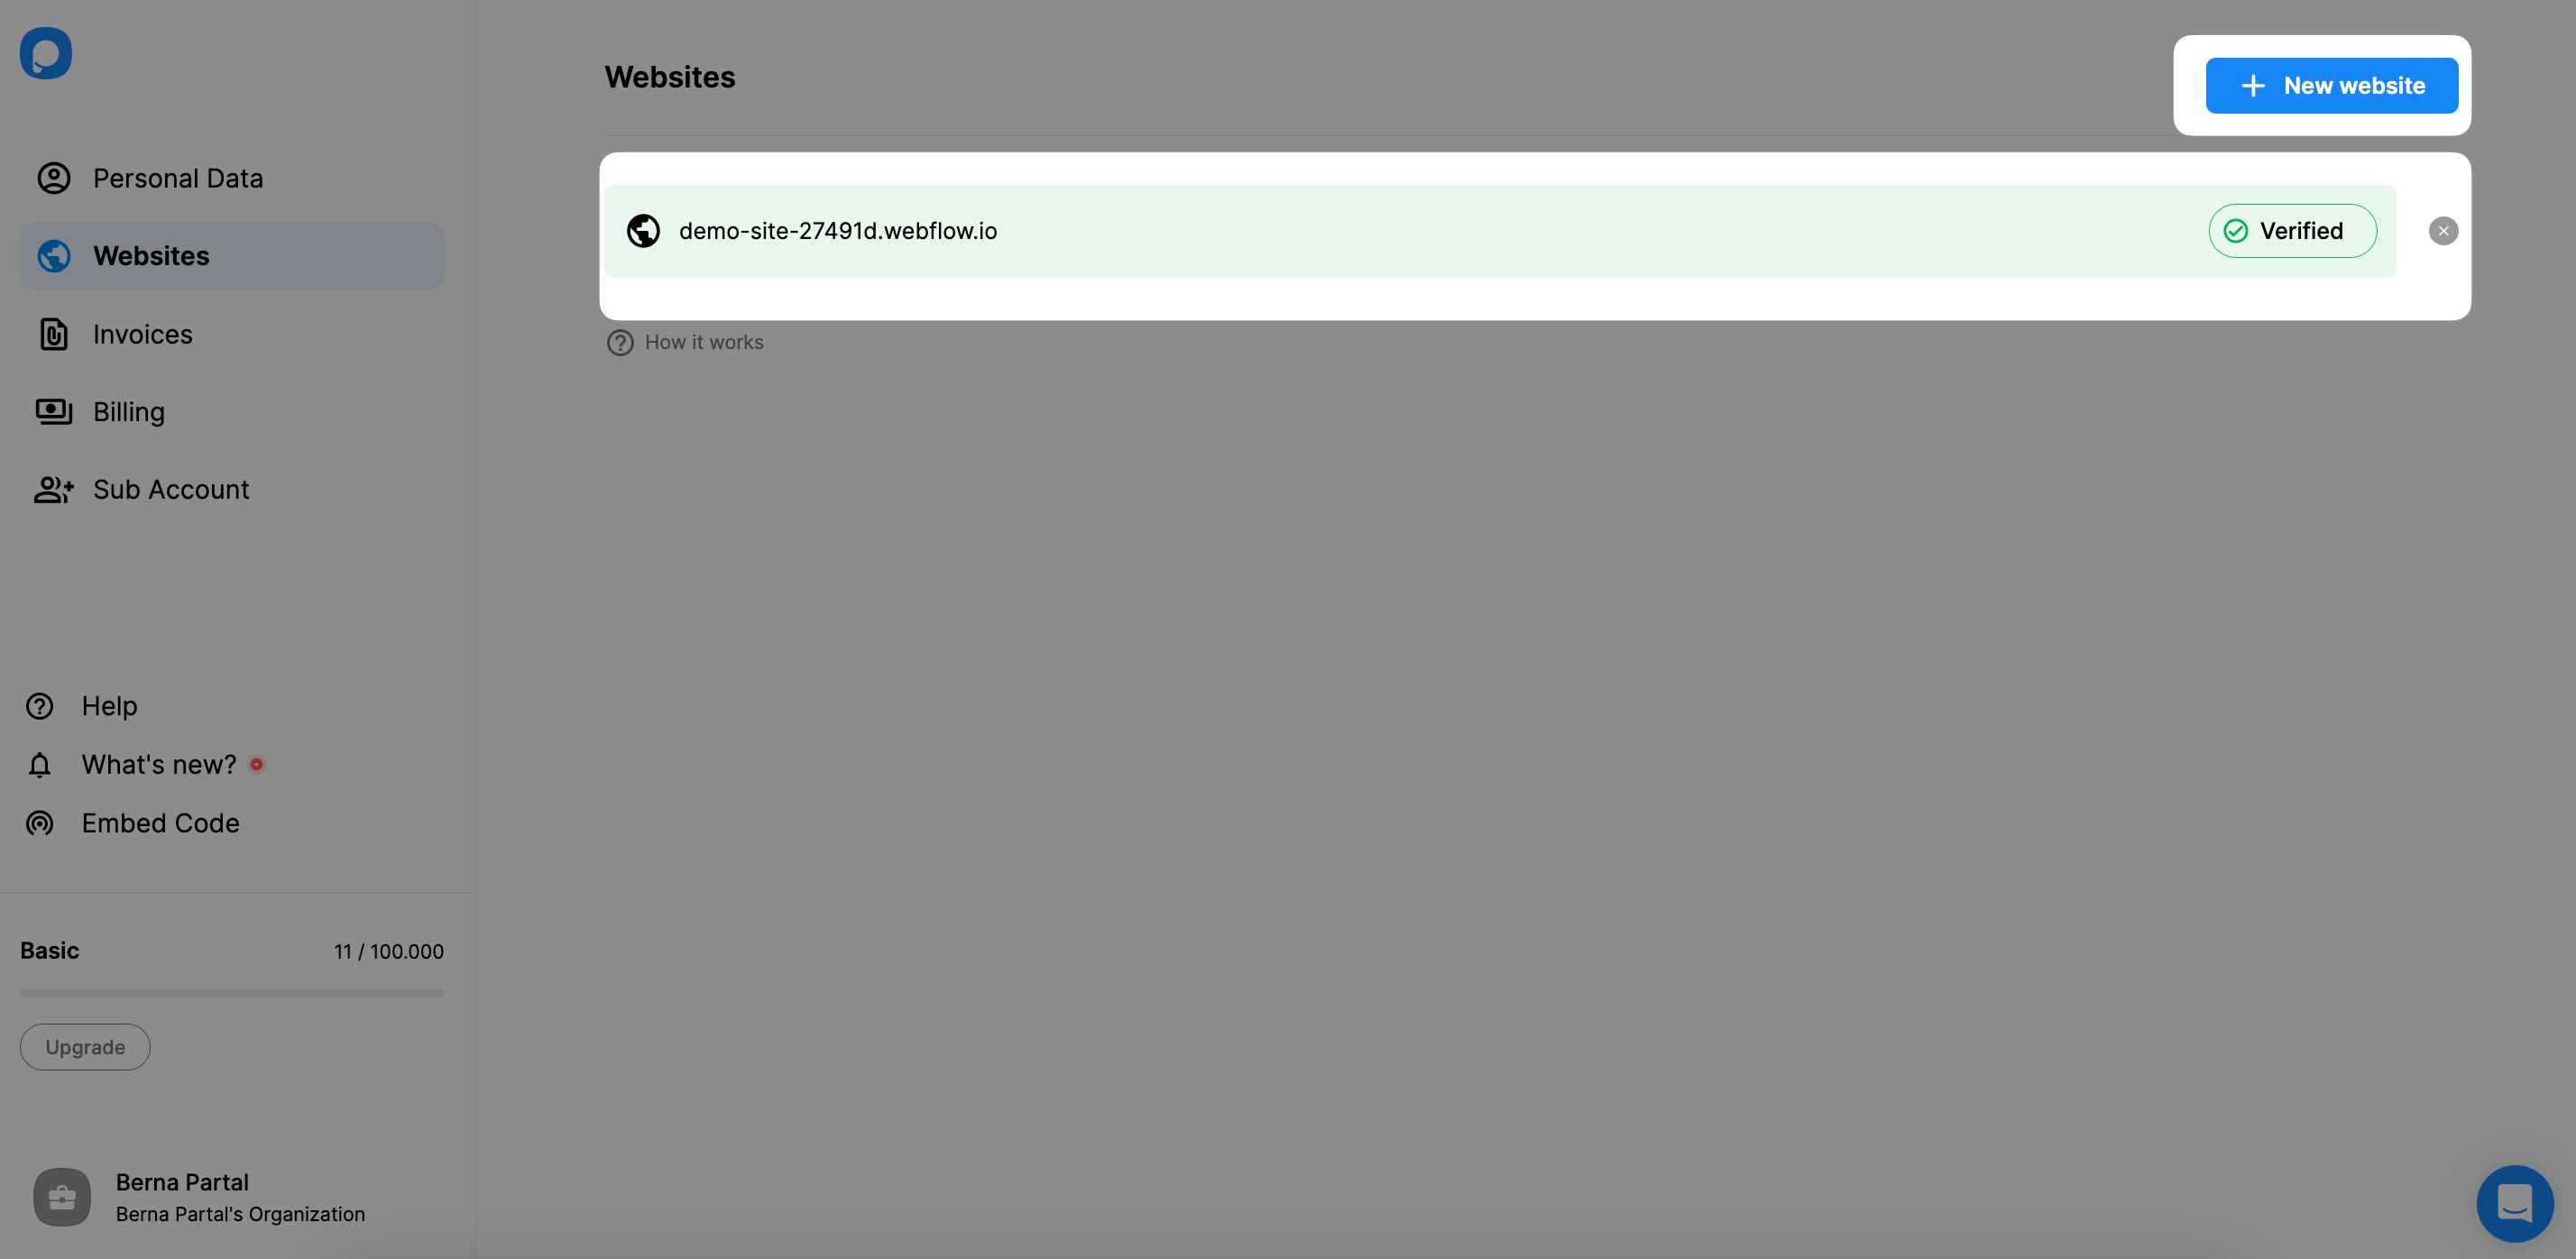
Step 5: After successfully adding your Popupsmart embed code to Webflow, you can navigate to the Popupsmart dashboard and access the "Websites" section through your profile.
Step 6: Click the "New website" option to include your Webflow website. Input your website's URL in the "Add a new website" field, and once you've finished, click the "Save" button. After saving your Webflow website, it will be verified.
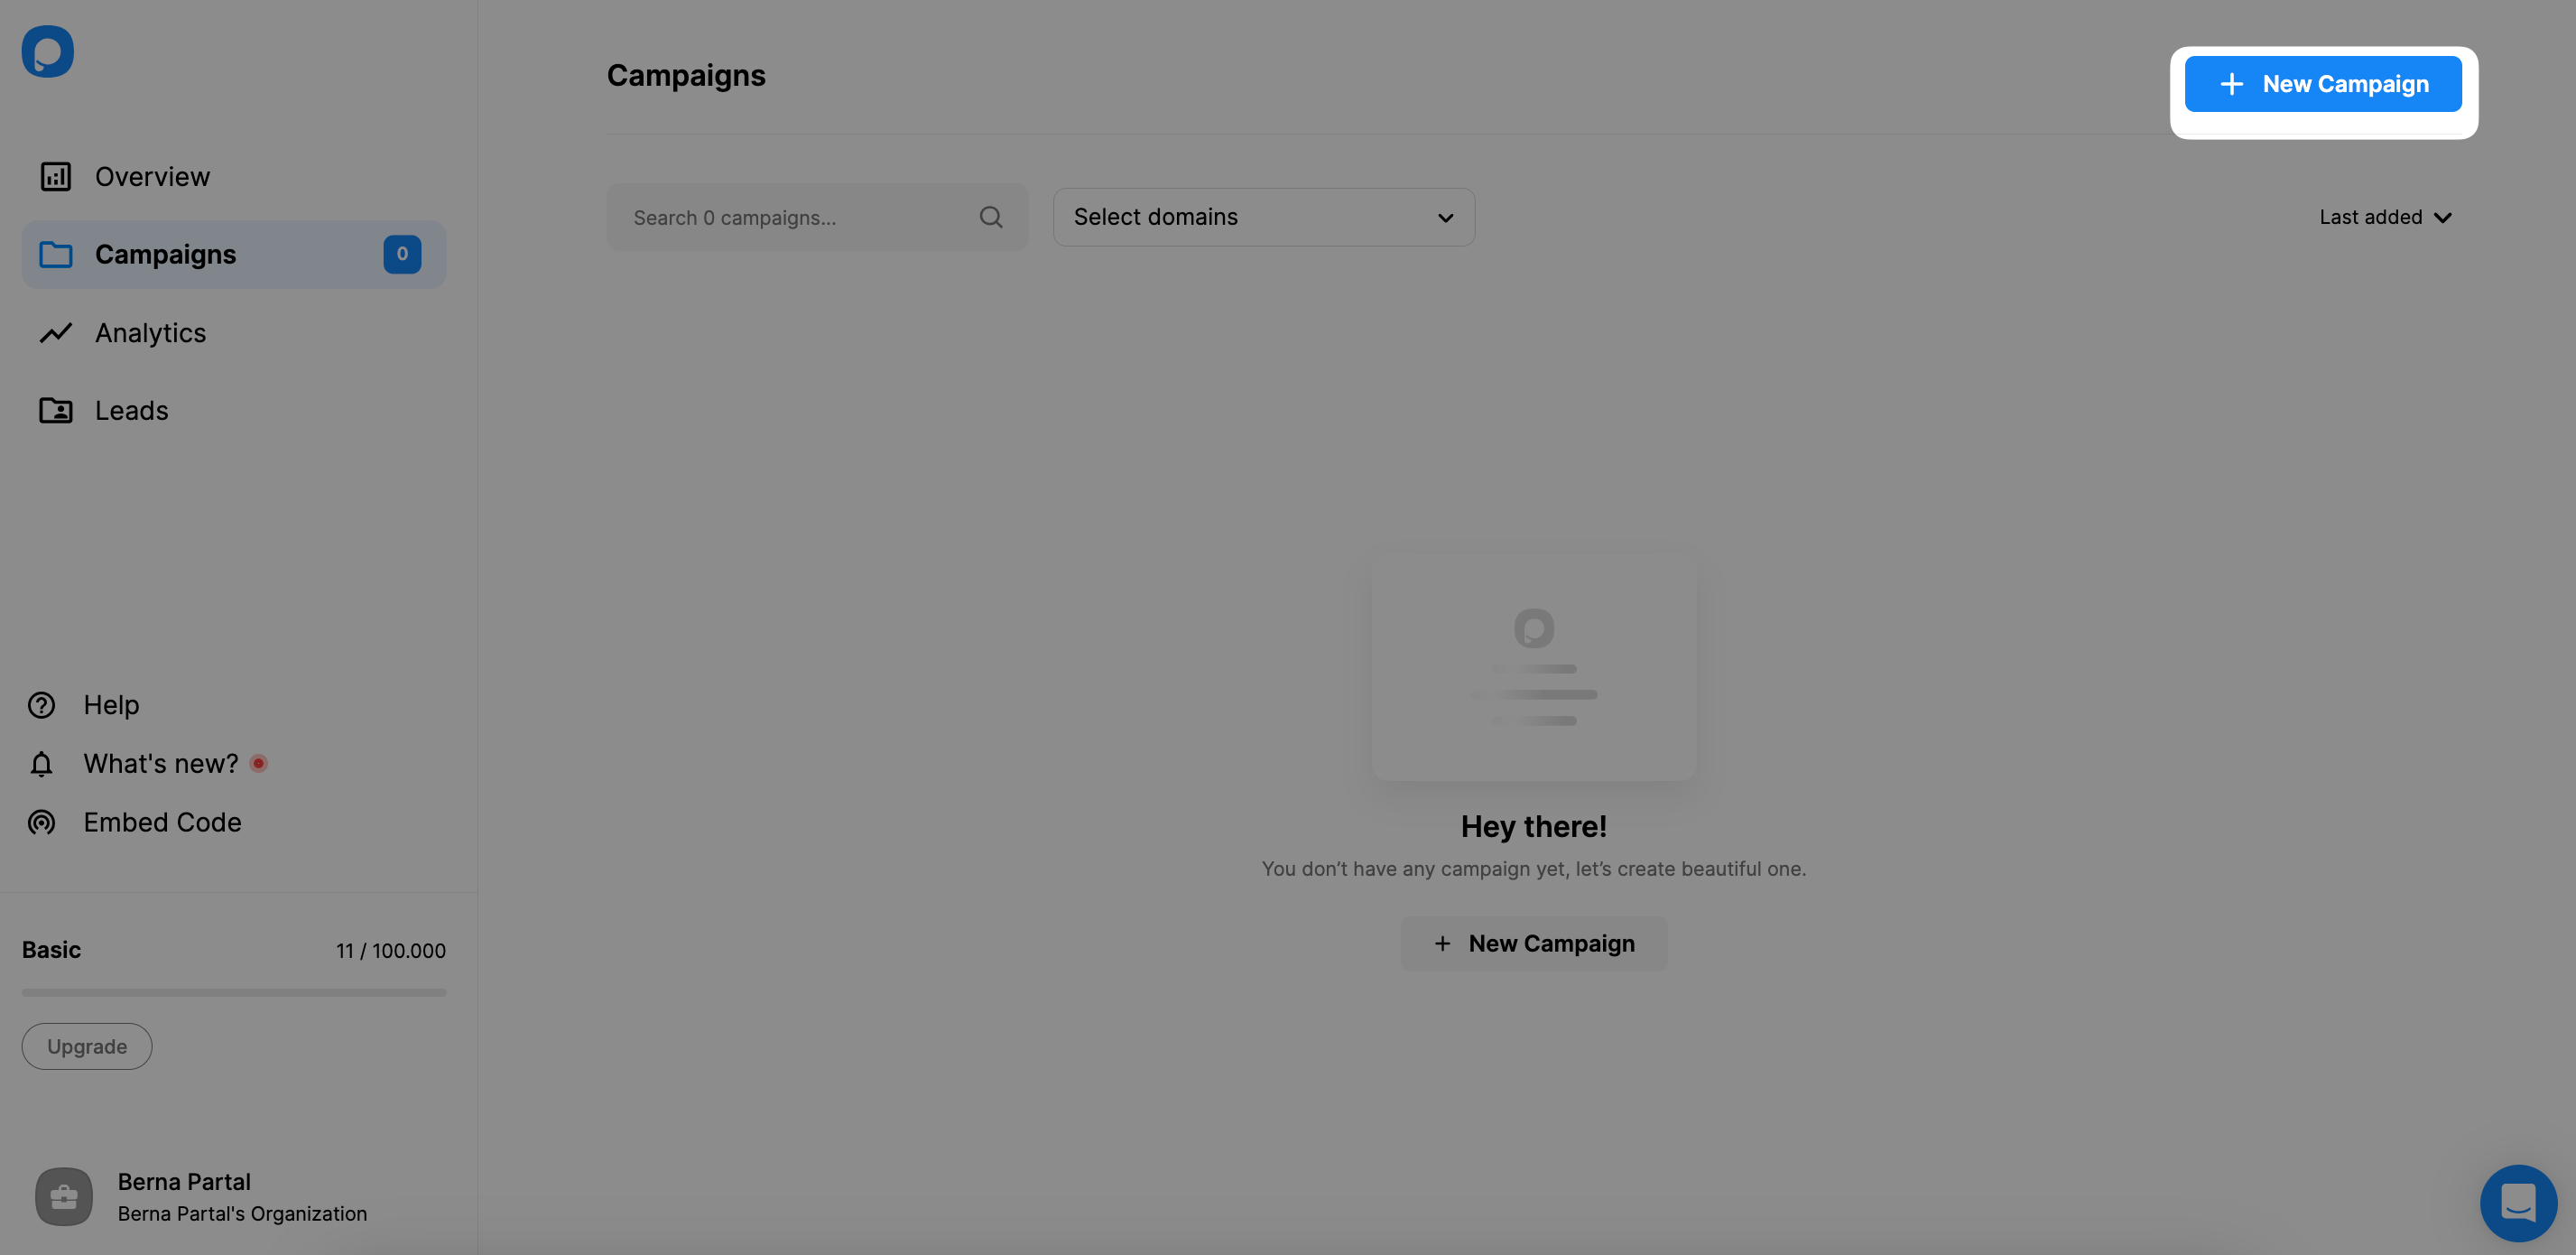
Step 7: Navigate to the dashboard and select the "New Campaign" button.
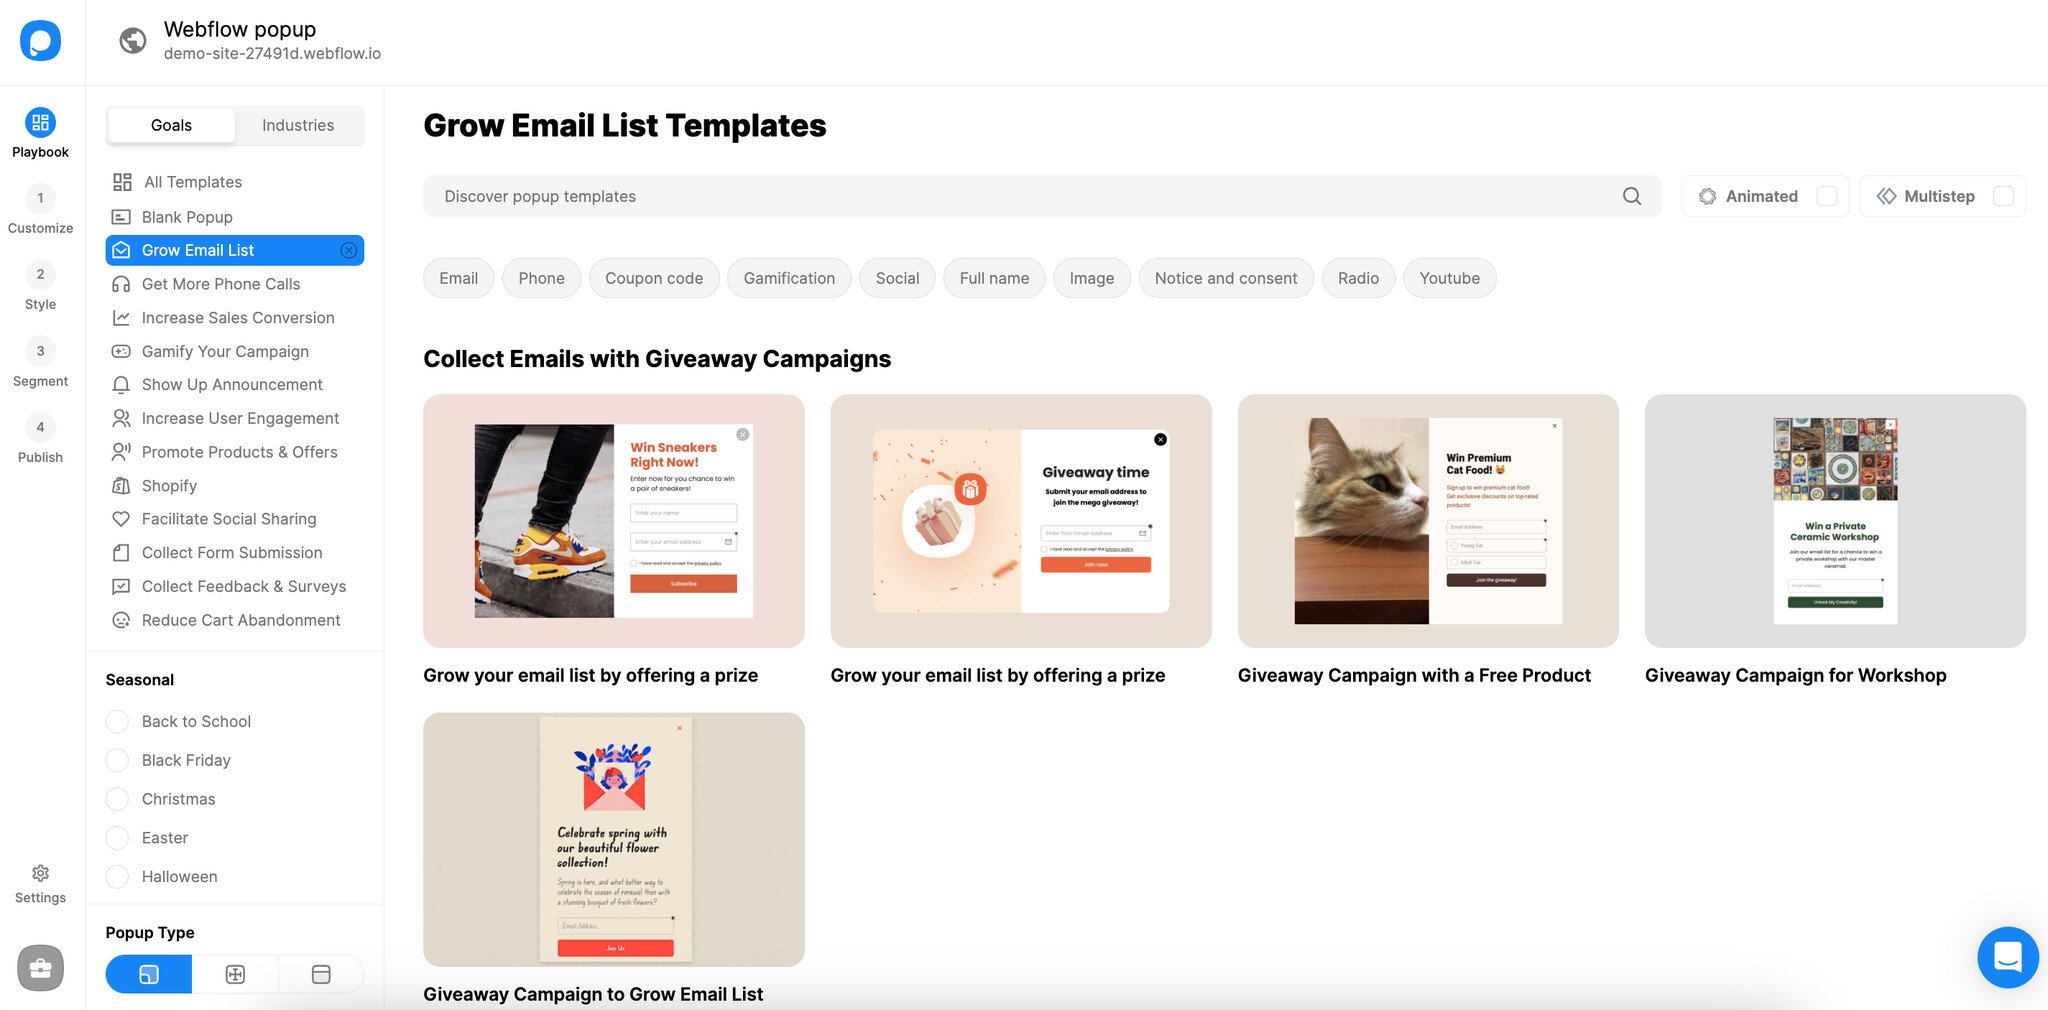
Step 8: Select a customizable popup template that fits your needs and business goals.
Step 9: Design your popup campaign according to your preferences, making any necessary adjustments.
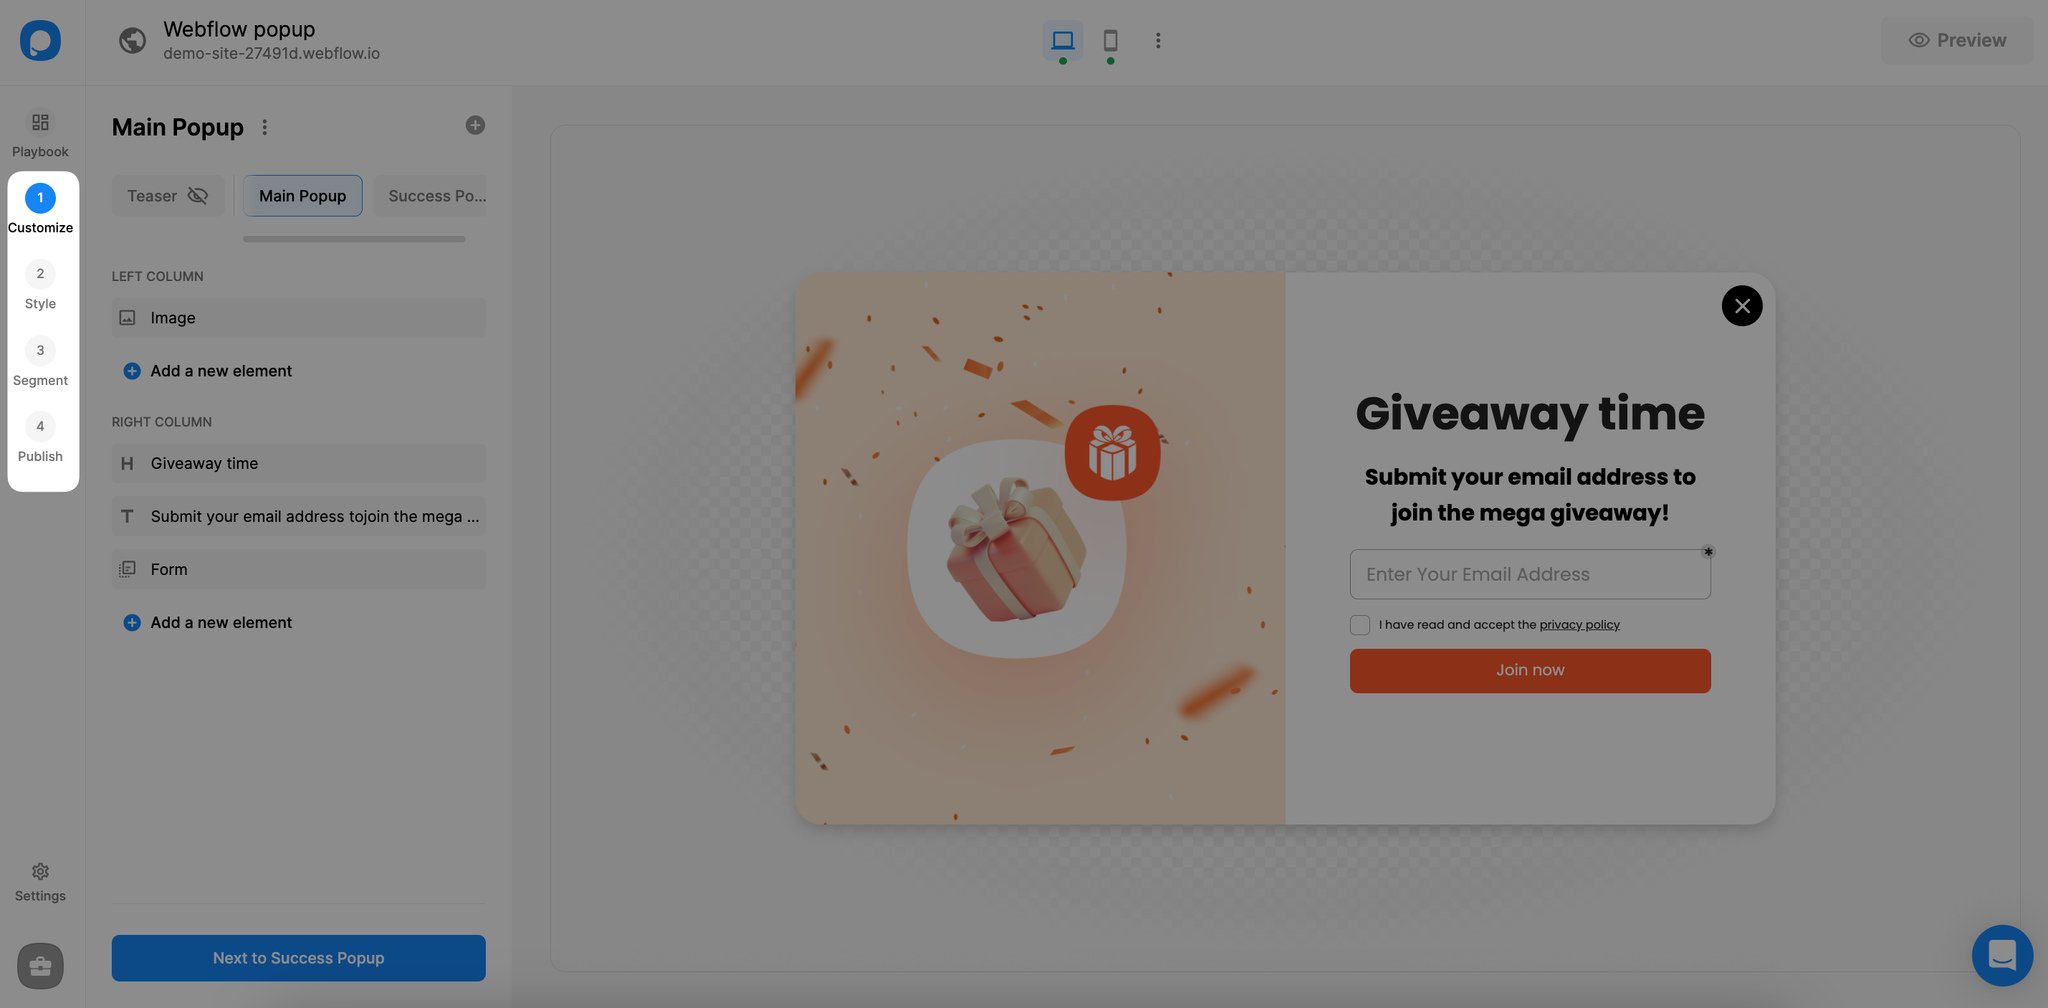
Edit the properties of your popup design, such as form fields, font options, buttons, images, and appearance, via the "Customize" and" Style" steps.
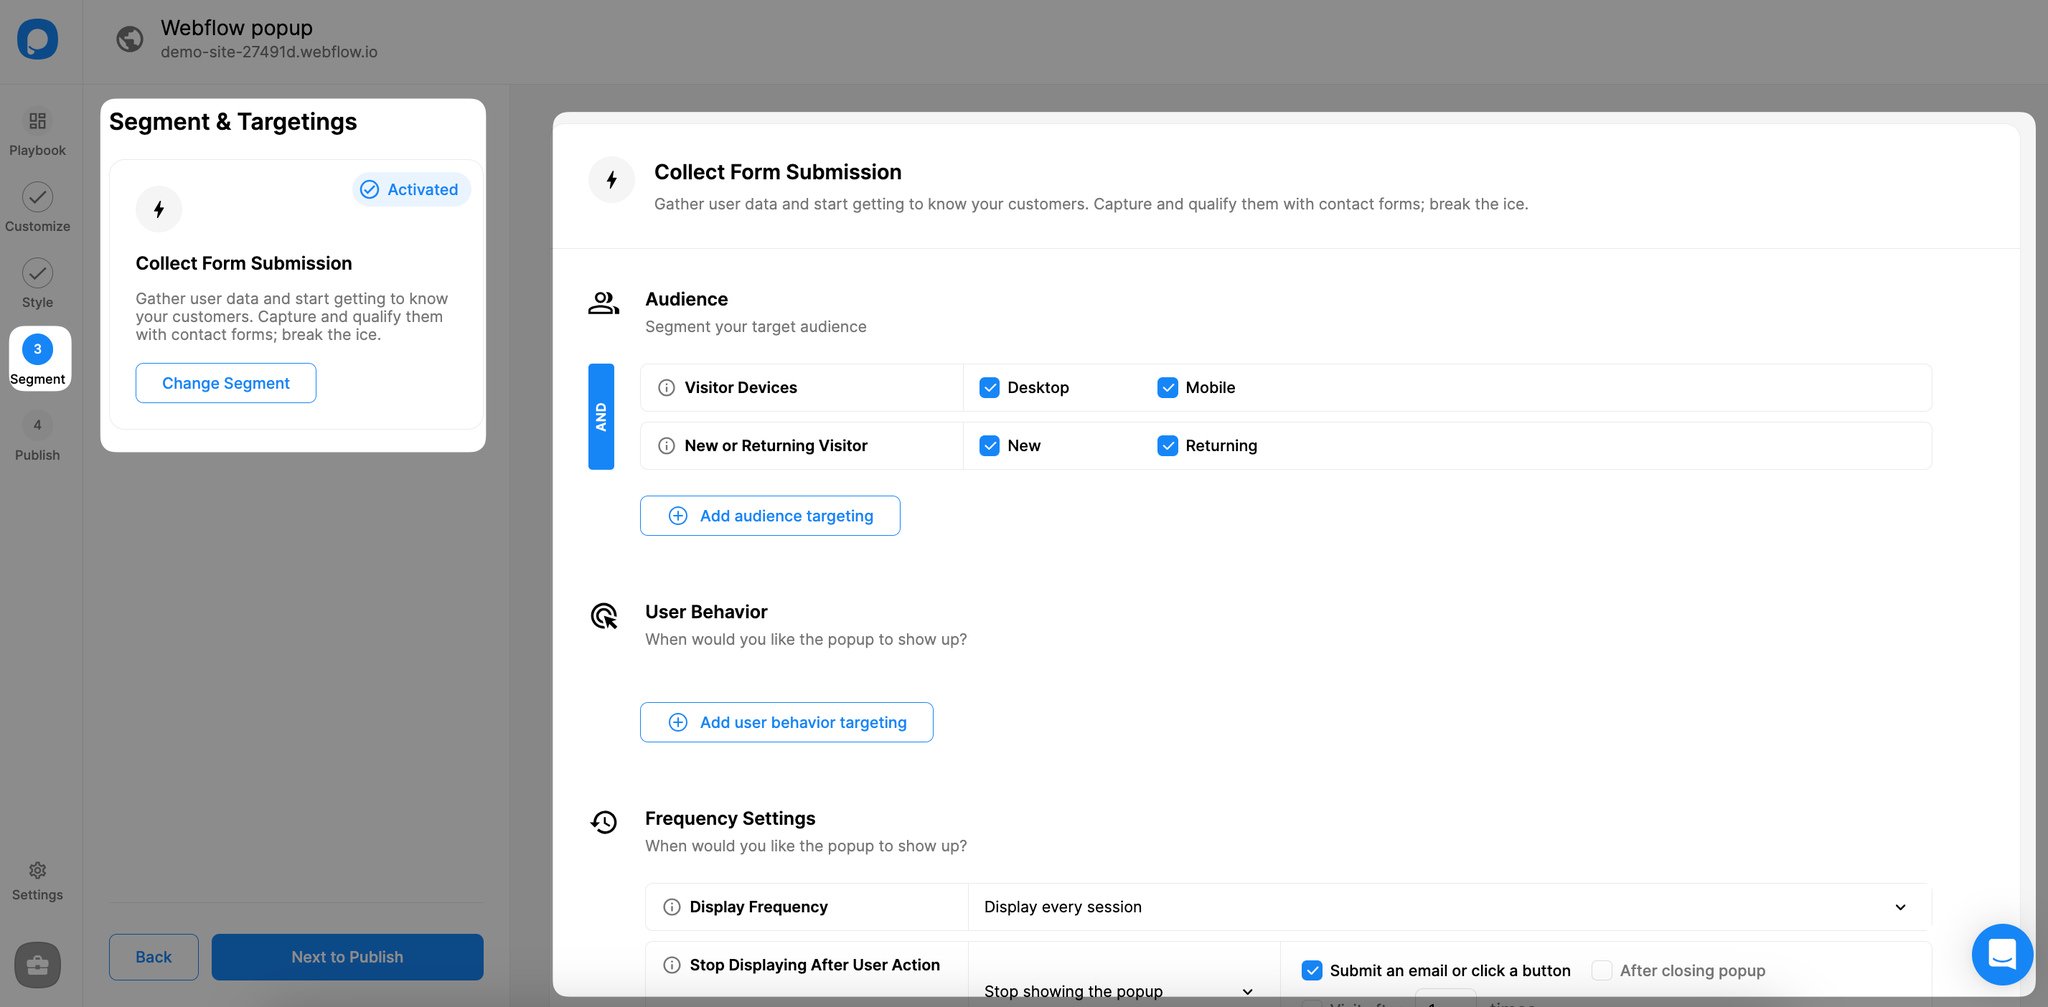
Pro Tip: By going to the "Segment" step, you can adjust your popup campaign's segment and targeting options.
We have different targeting options such as exit-intent targeting, on-click targeting, browser language, traffic source, geo-located targeting, URL targeting, after X seconds trigger, and more!
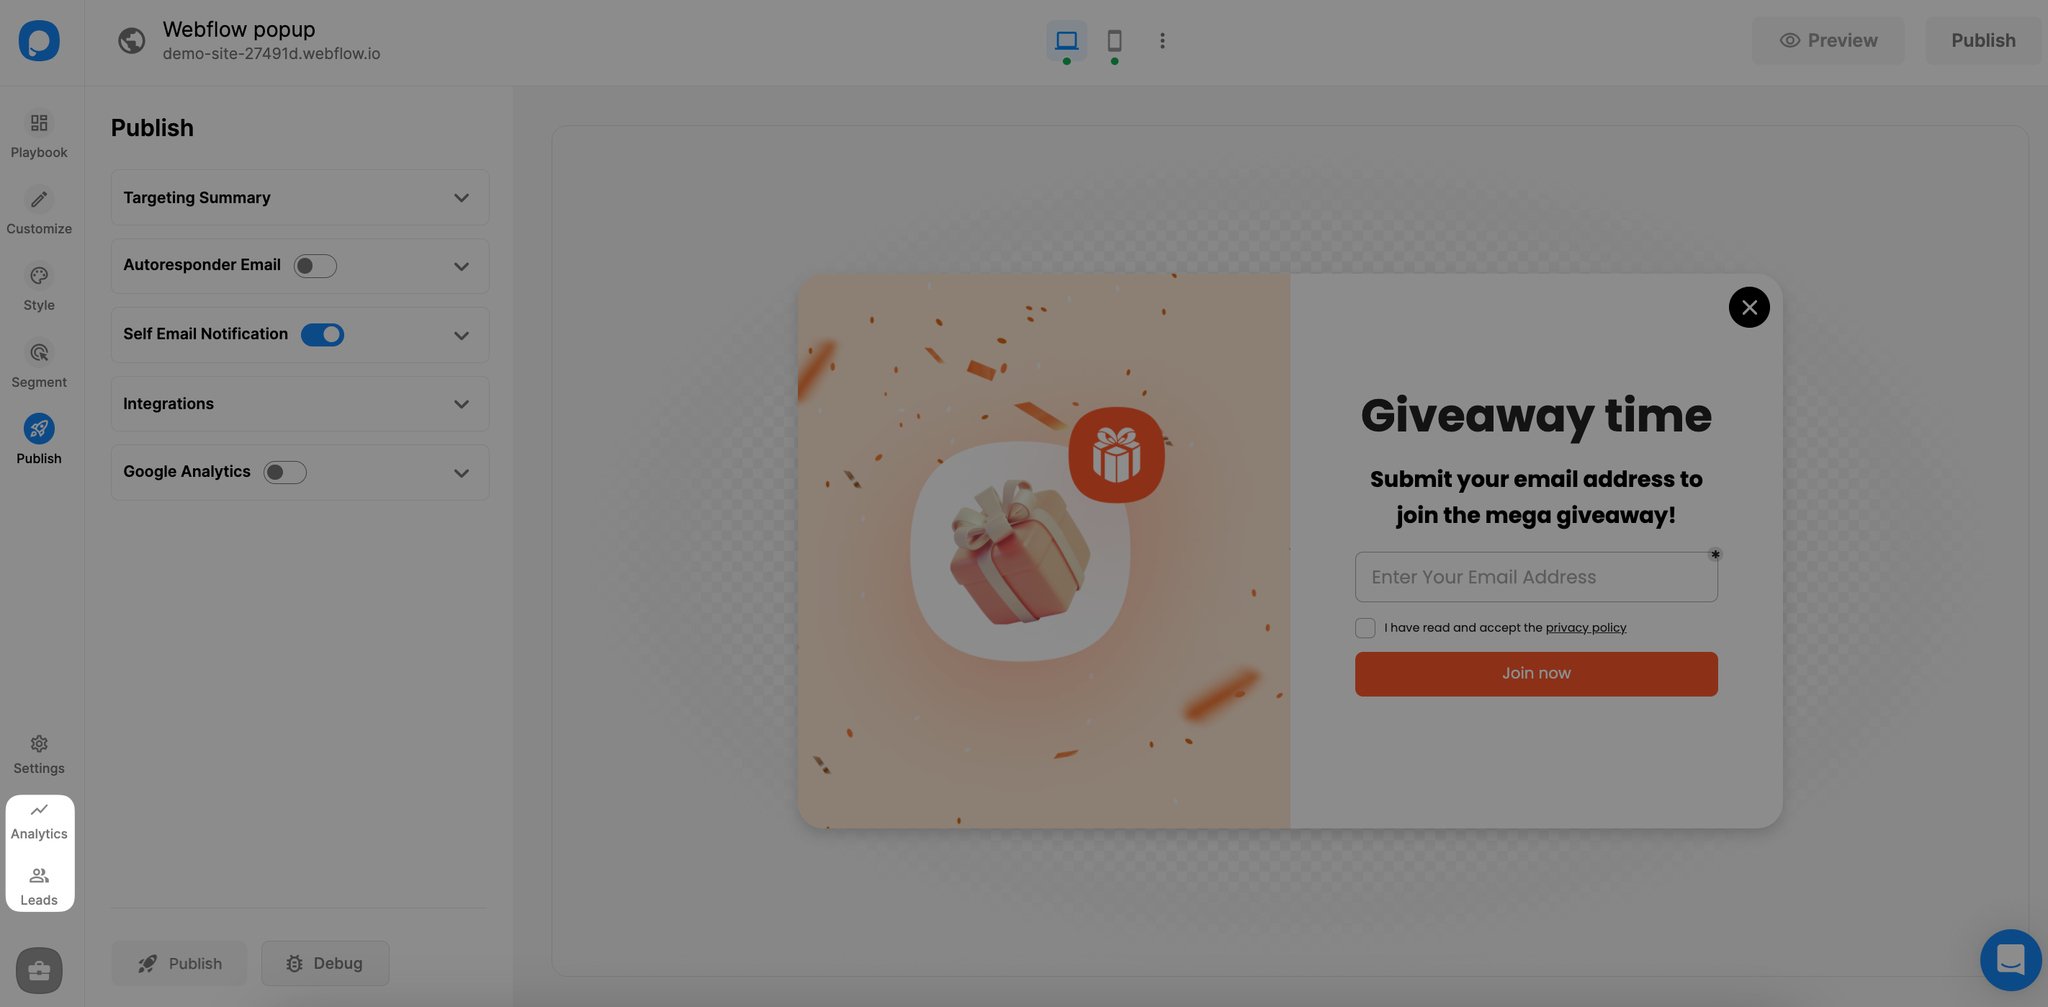
Subsequently, click both the "Save" and "Publish" buttons to finalize your campaign.
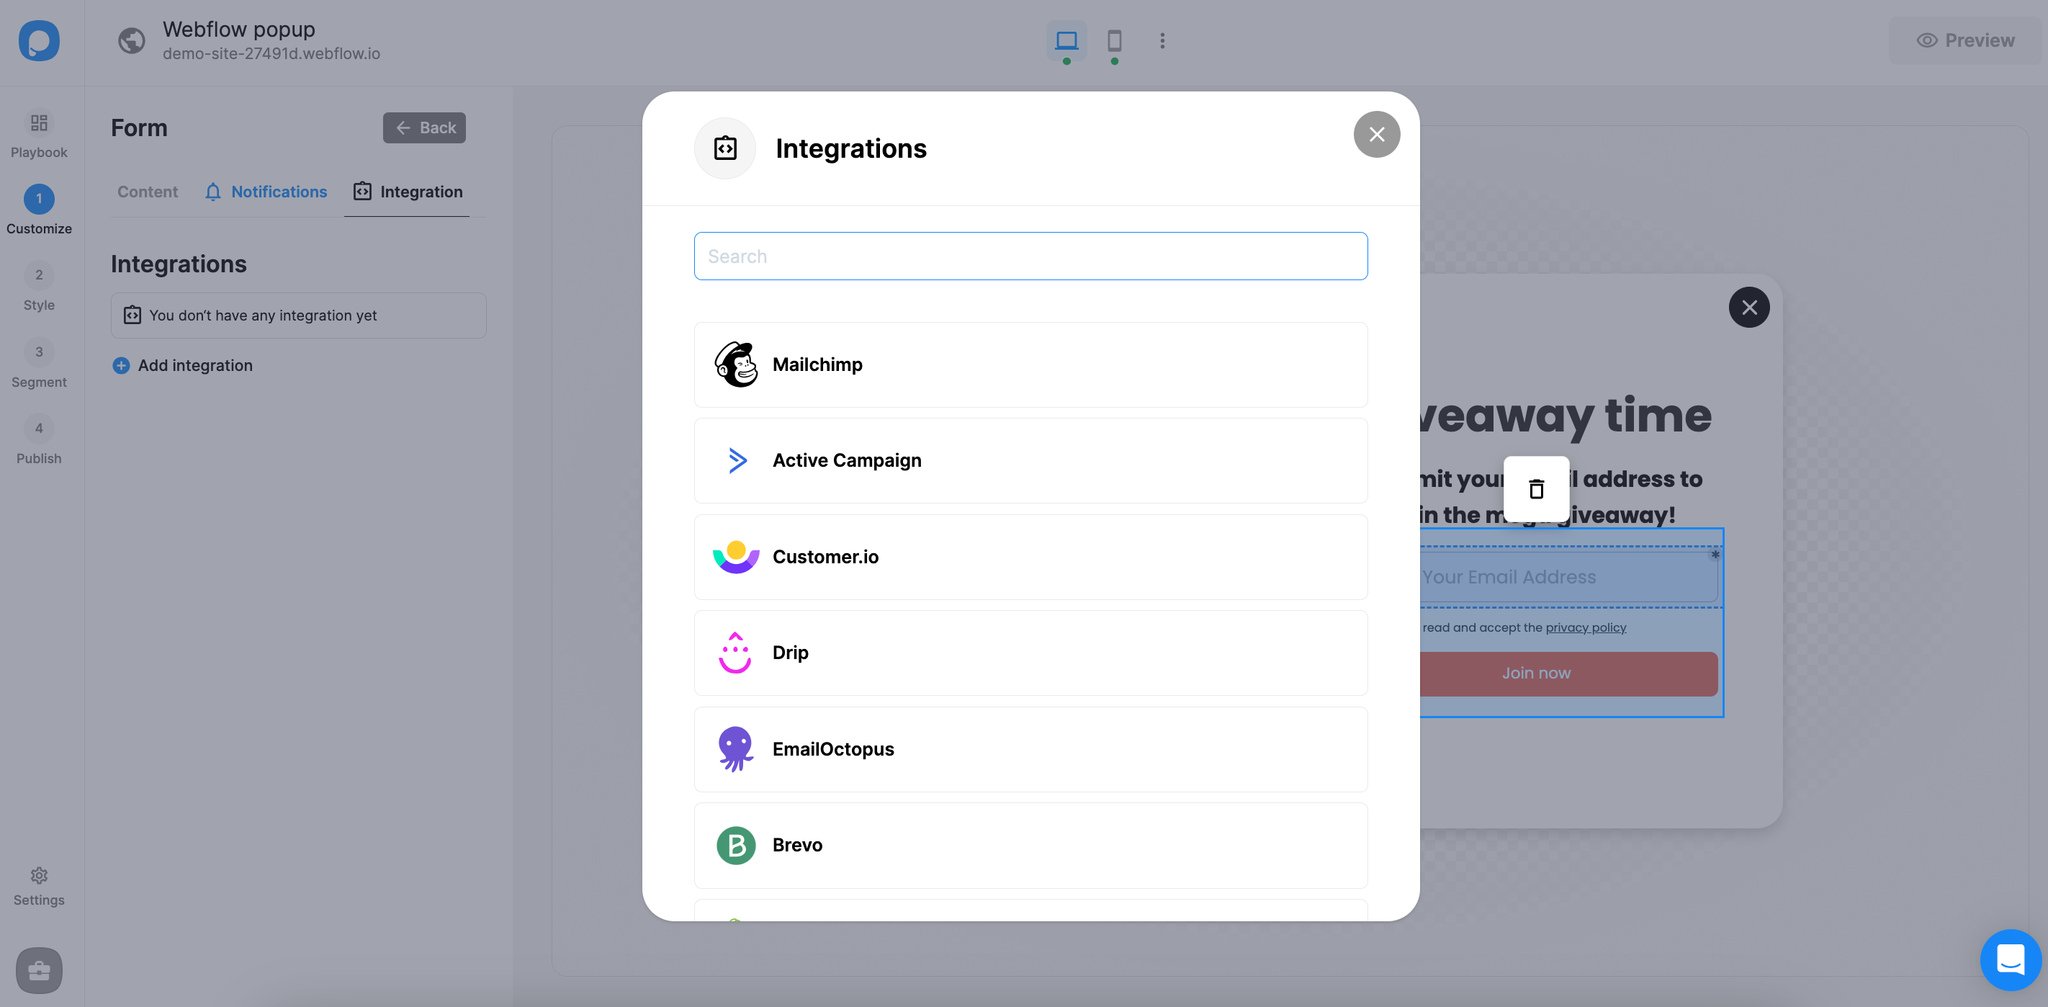
Note: You can connect your Popupsmart account with applications such as MailChimp and Zapier or with a webhook on the "Integrations" part of your form element.
After publishing your popup, you can instantly observe the number of popup impressions, displays, actual conversions, and your campaign's conversion rates via the "Analytics" part.
You can also explore the leads by going to the "Leads" part.
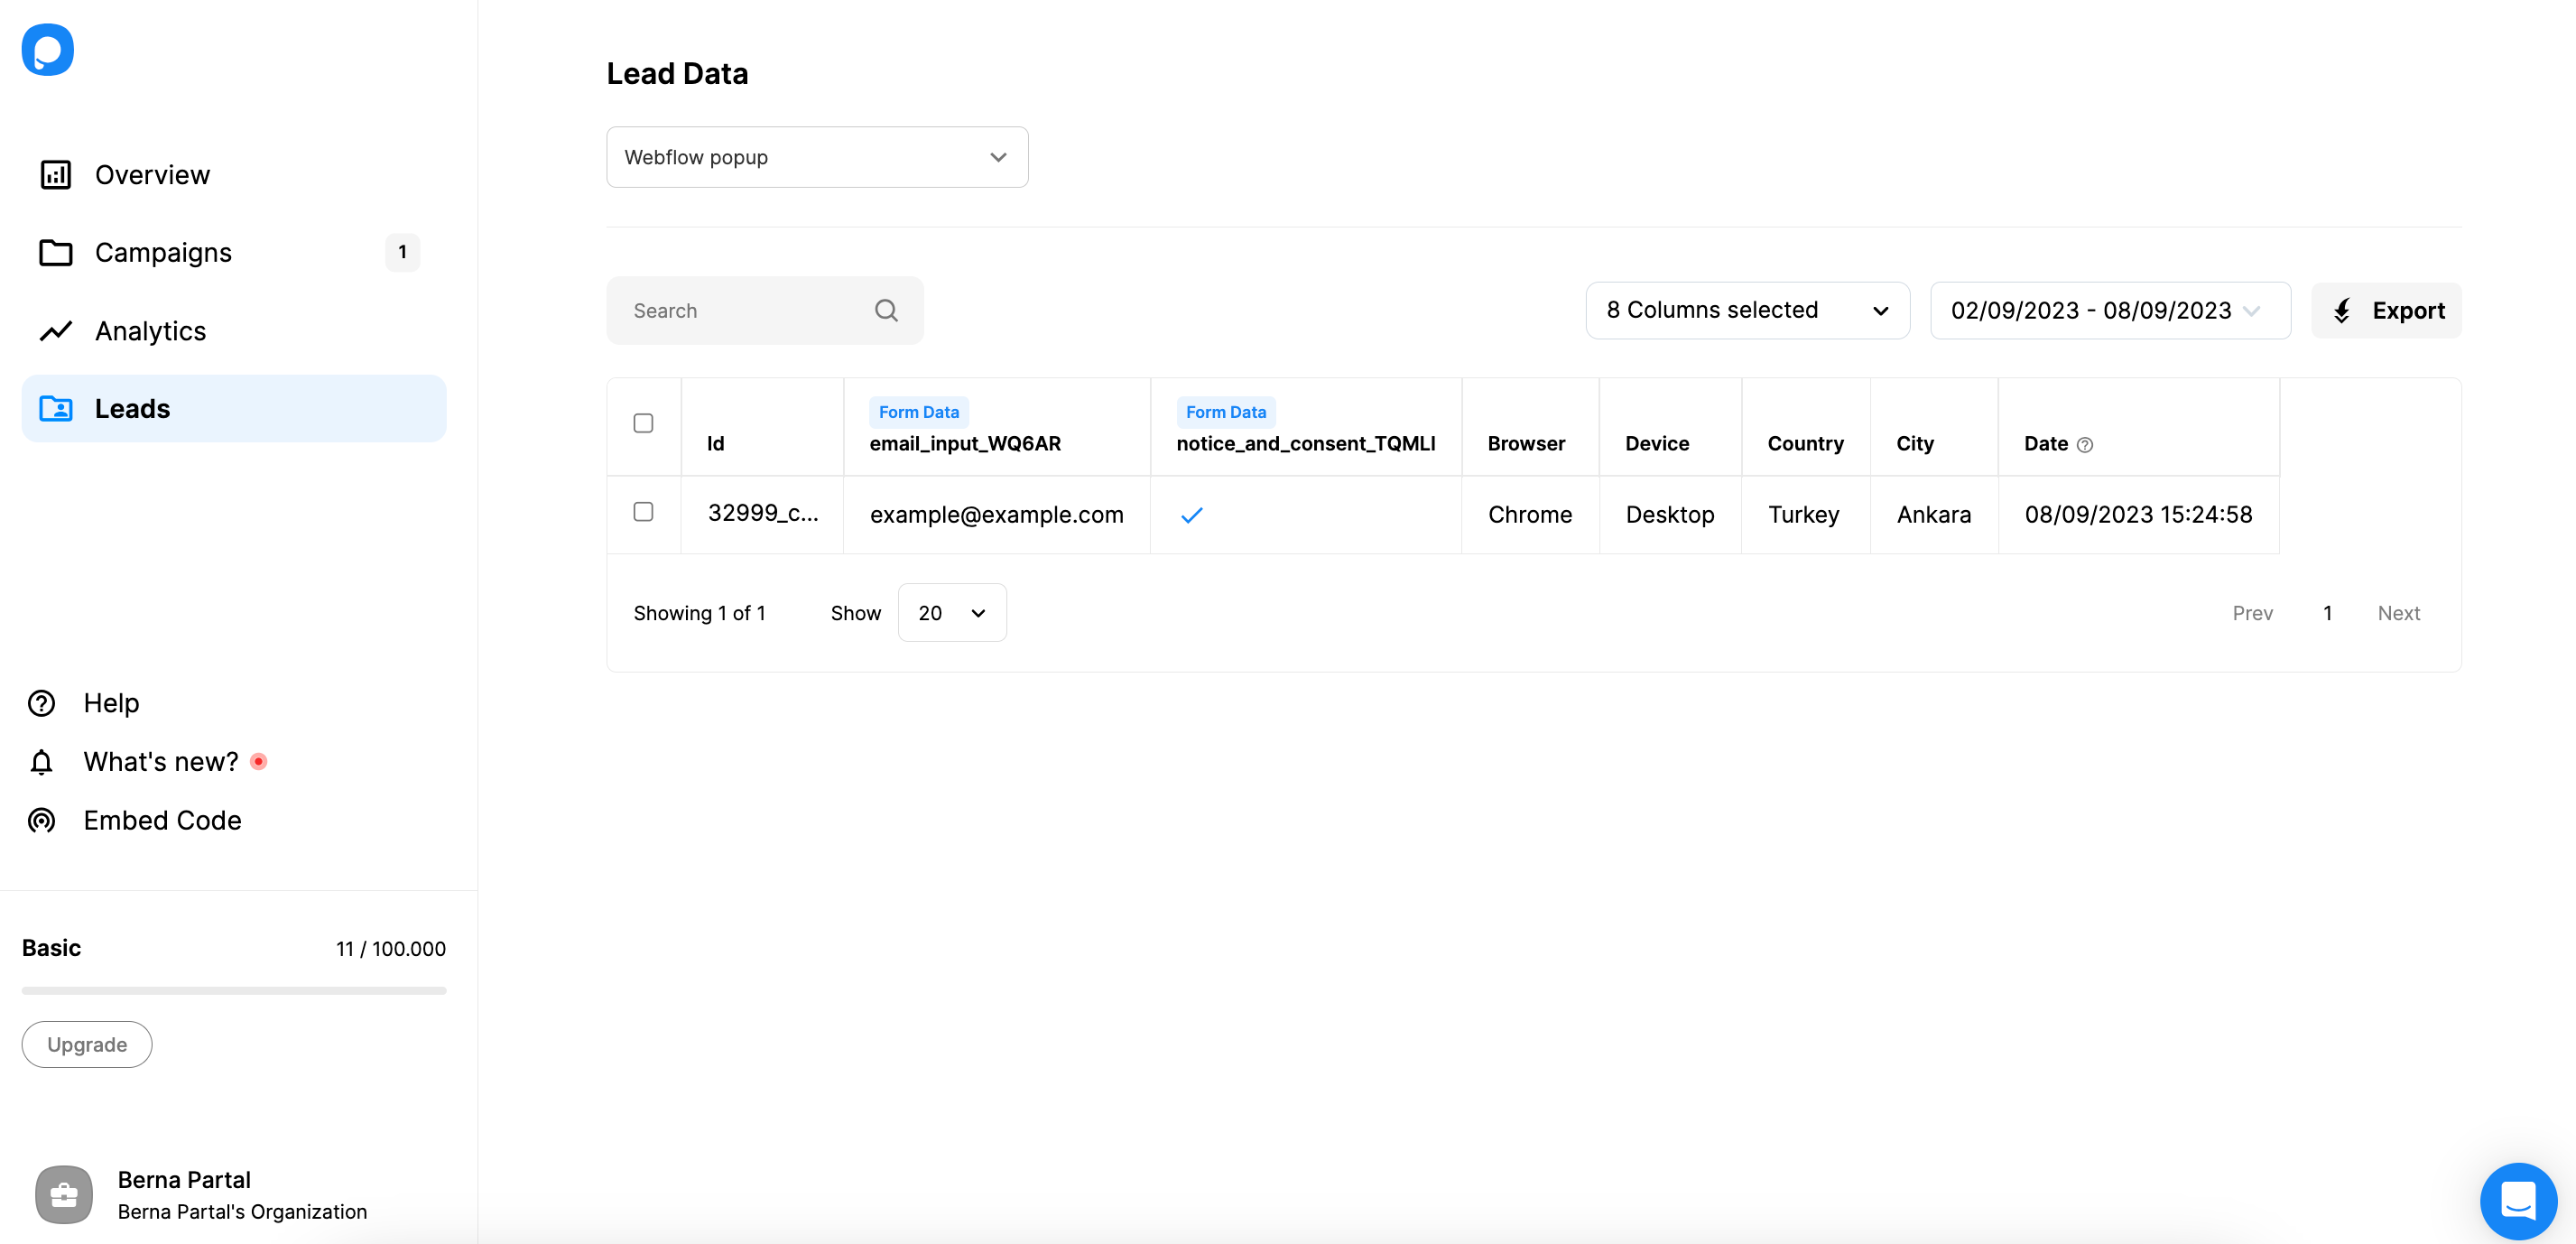
The Leads table covers details about your leads, such as contact information they enter, device, country, city, date, browser, and more. By exploring these, you can get valuable insight into your audience.
Additionally, you can easily measure the effectiveness of your popup campaign thanks to our Popup ROI Calculator.
📌 Note that to add a custom code to your website, you must have an existing paid site plan or switch to an upgraded account plan on Webflow.
Tips for Creating Effective Popups for Webflow
You can consider these tips if you want to enhance your Webflow website with engaging popups and boost your conversion rates:
- Keep It Concise: Capture attention with a clear and concise message. Avoid cluttering your popup with excessive text or unnecessary elements. Keep it simple and straight to the point.
- Visual Appeal: Design visually appealing popups that align with your website's aesthetic. Use high-quality images, eye-catching colors, and legible fonts to make your popup stand out.
- Targeted Messaging: Tailor your popup content to specific audience segments. Use Popupsmart's targeting options to display relevant messages based on user behavior, demographics, or referral sources.
- Offer Value: Provide value to your visitors with compelling offers or incentives. Whether it's a discount code, free resource, or exclusive content, make sure your popup delivers something valuable in exchange for their action.
- Mobile Optimization: Ensure your popups are optimized for mobile devices. With a growing number of users browsing the web on smartphones and tablets, it's essential to create mobile-friendly and responsive popups.
- Clear Call-to-Action: Include a clear and compelling call-to-action (CTA) that prompts visitors to take action. Your CTA should be prominent and persuasive, whether to sign up, purchase, or learn more.
- Strategic Timing: Choose the right popup timing. Avoid bombarding visitors with popups as soon as they land on your site. Instead, consider triggering popups based on user behavior, such as exit intent or time spent on a page.
By following these tips, you can create effective popups that drive engagement, conversions, and success for your Webflow website.
Conclusion
I hope this guide on making a popup in Webflow proves useful for creating high-converting popups and maximizing your sales!
You can use the two methods explained in this guide according to your knowledge and experience.
While creating popups on Webflow requires some experience and design knowledge, Popupsmart can help you create and customize your popup in minutes.
Try both of them to see which one works best for you.
Before you leave, explore our other blog posts:


