How to Integrate Zapier with Popupsmart
Unlock automation possibilities with Popupsmart-Zapier connection. Learn how to seamlessly integrate for efficient data flow and streamlined campaigns.
You can effortlessly transfer the gathered data from your popup campaigns to other applications via Zapier.
Follow this guide to connect your Popupsmart account with your Zapier account.
Prerequisites
- You need to have a Zapier account.
- You need to fill in the data after you publish your popup campaign first. You should do it before you start the Zap on Zapier.
- You need to verify your website on your Popupsmart account.
Part 1: Set Up Popupsmart
Create Campaign
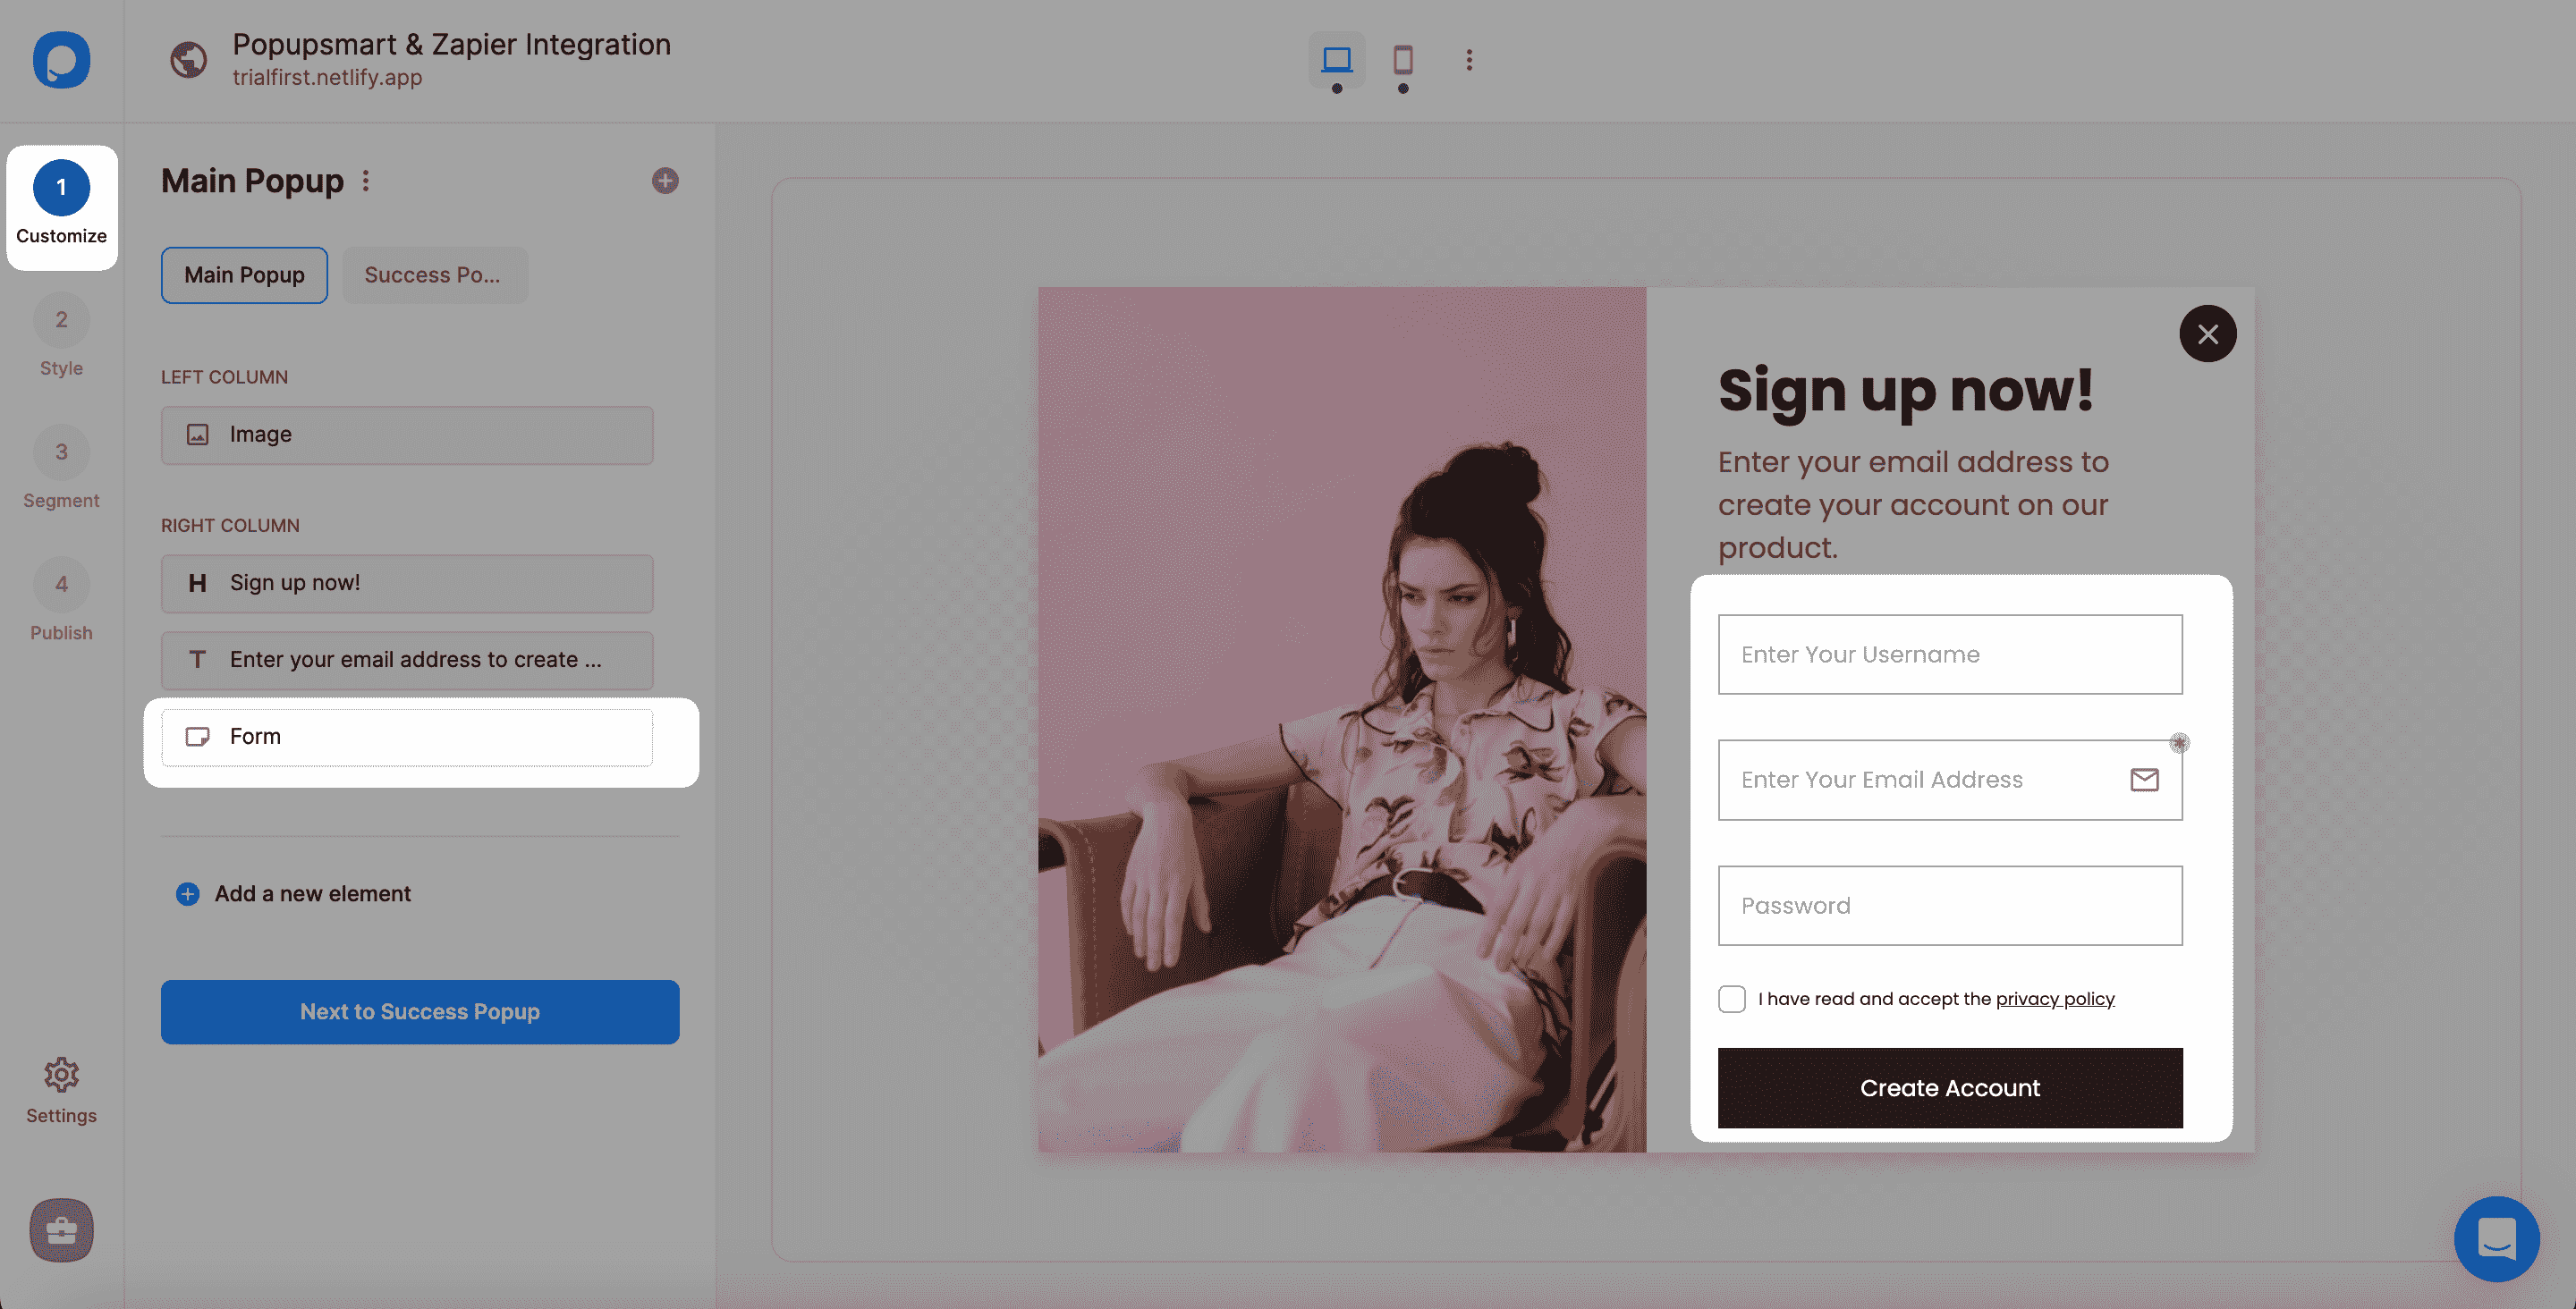
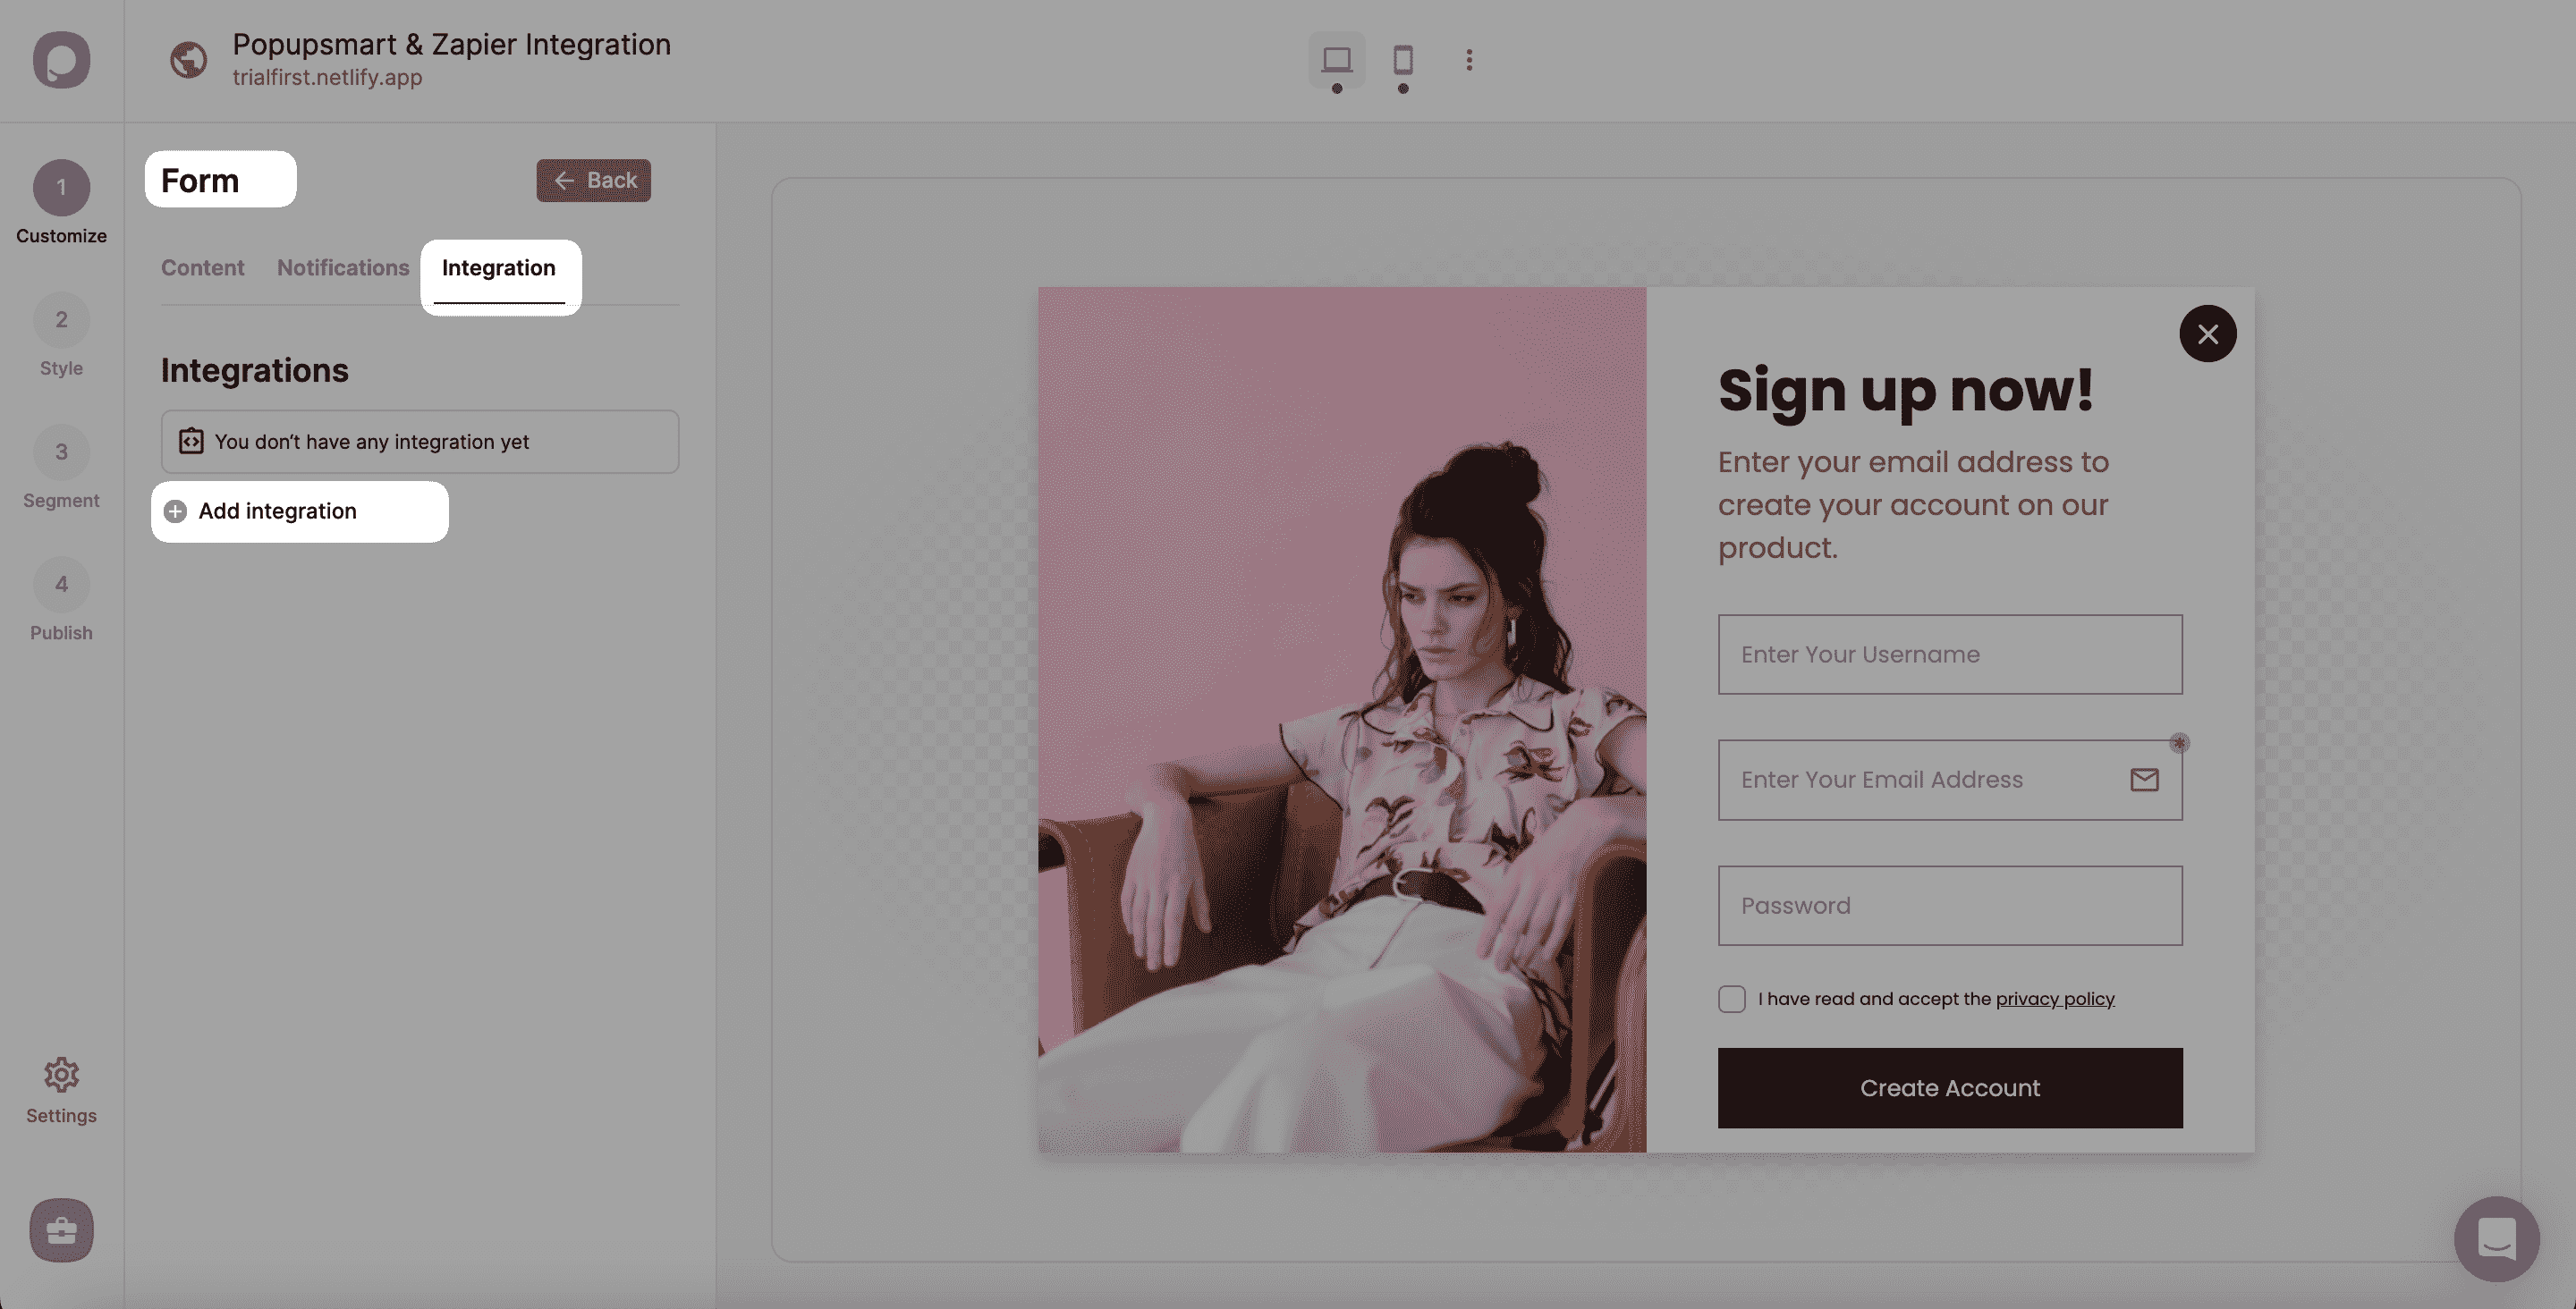
Sign in to your Popupsmart account and create a new campaign with a popup that includes a form input element. Then, click on the form input element to add integration.
Part 2: Configure Zapier
Create a Zap
Now, log in to your Zapier account with your required account information, and you will see the dashboard and the 'Make a Zap' section when you continue. There, you can make a zap easily.
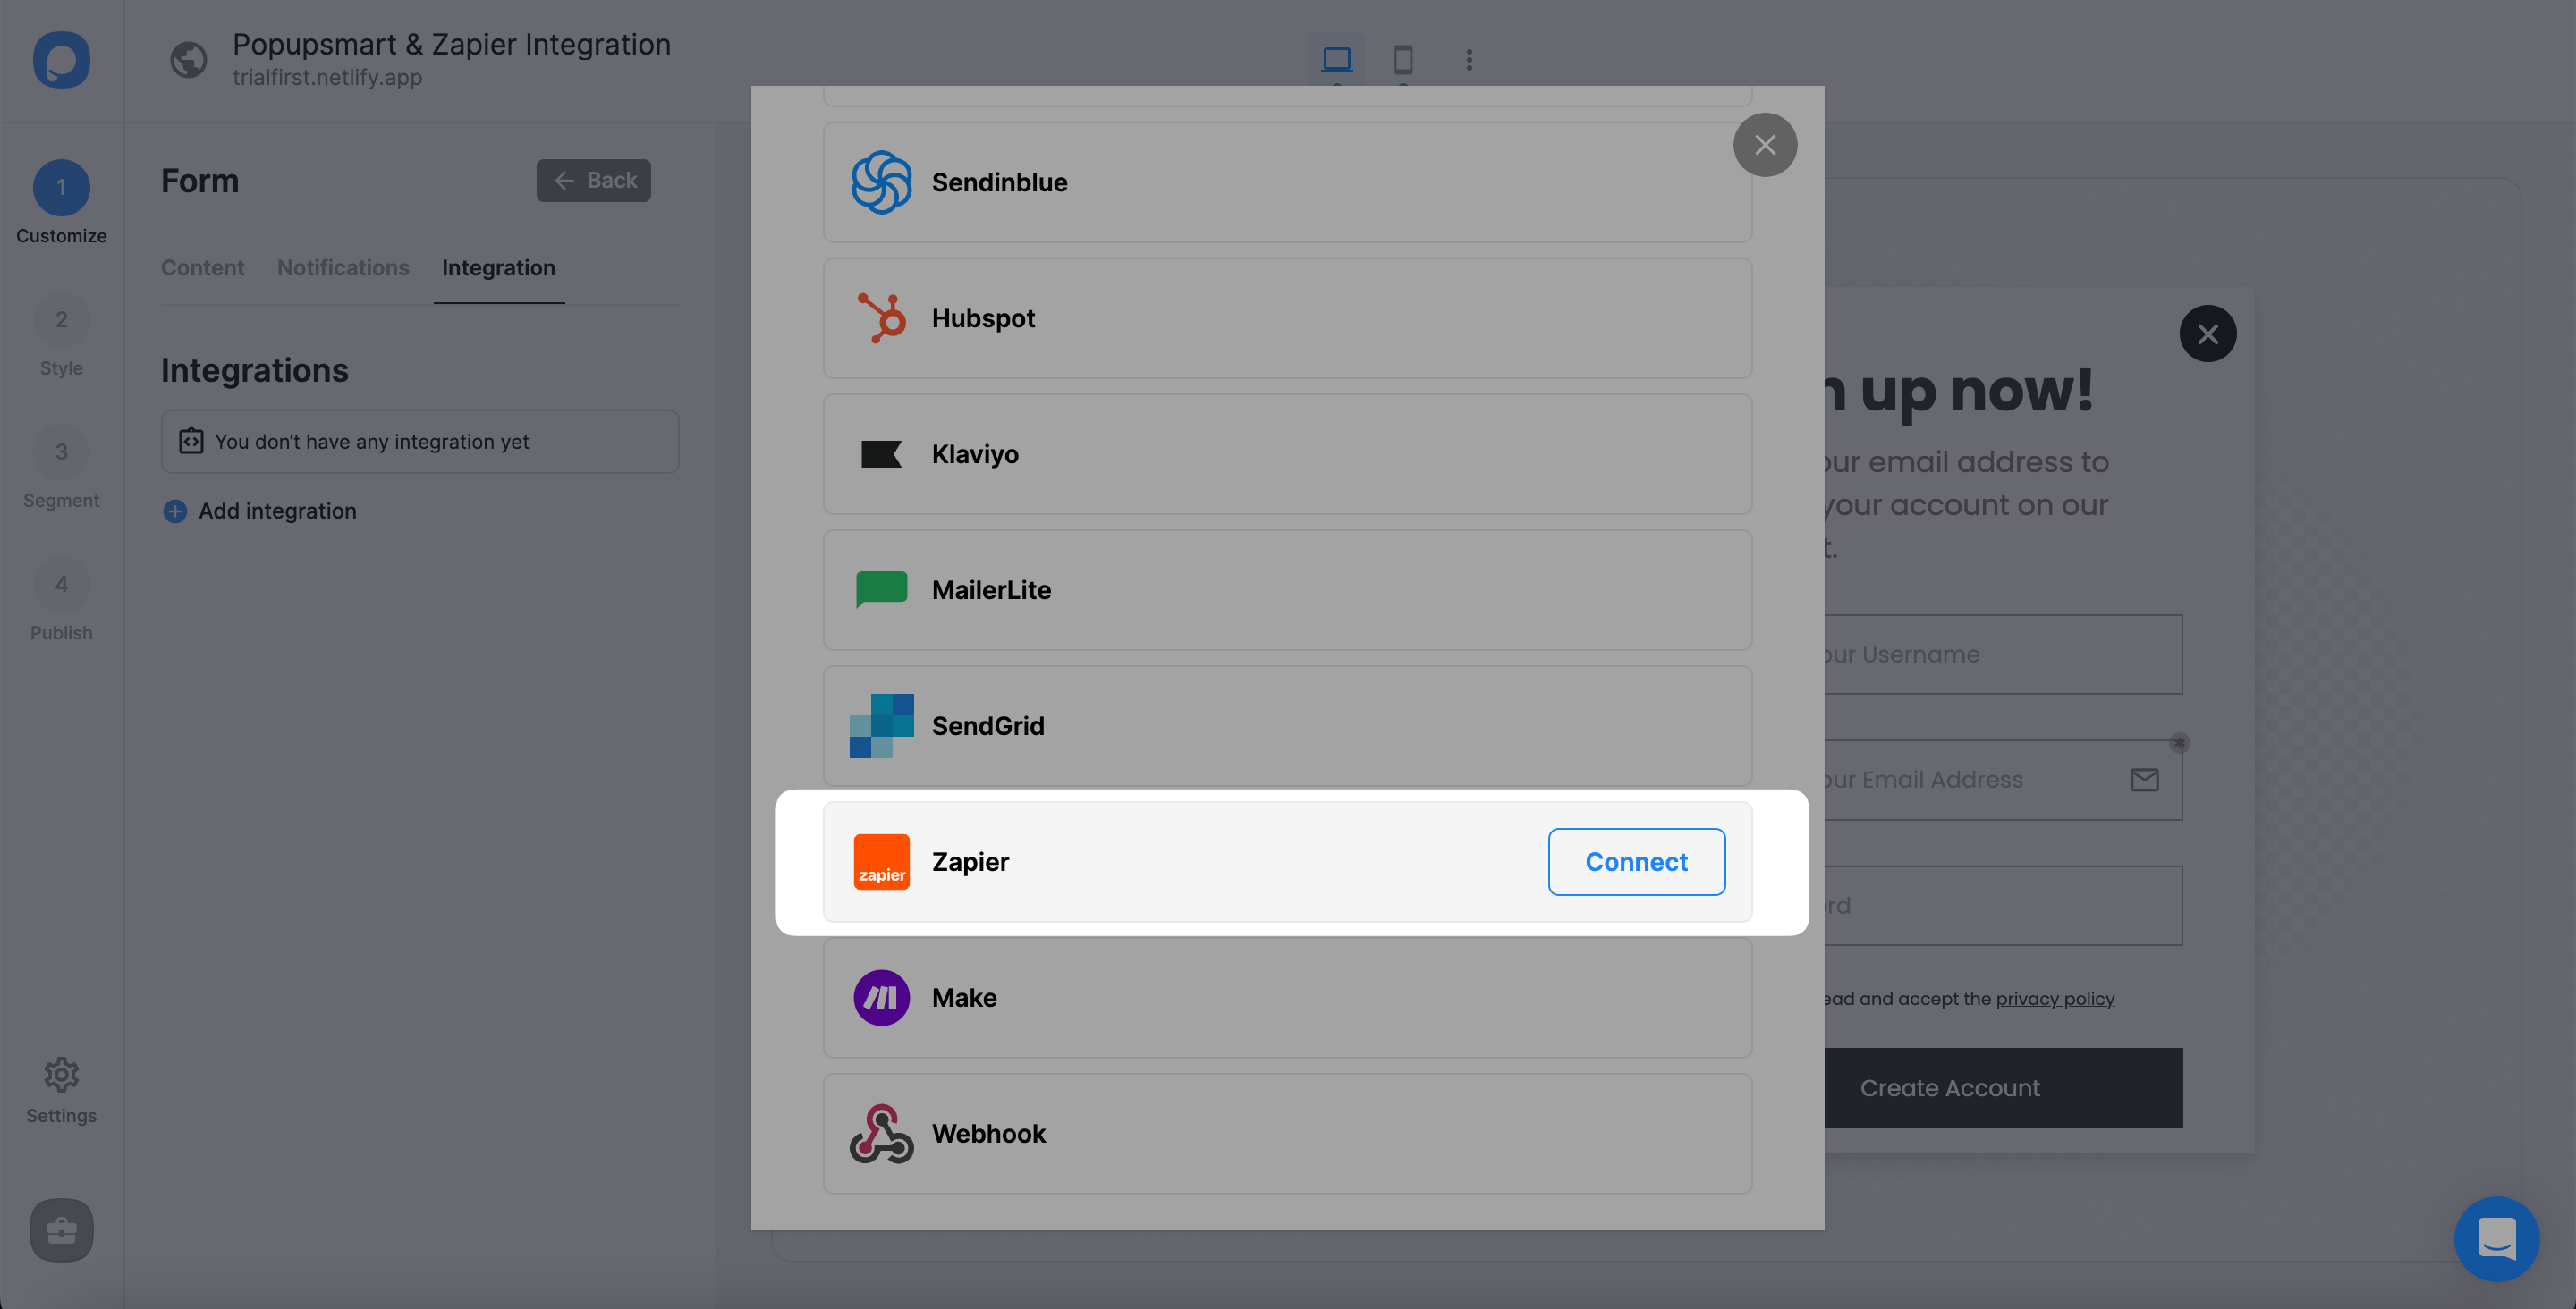
Choose "Popupsmart." And then, choose the app you want to connect your Popupsmart account with to create a workflow.
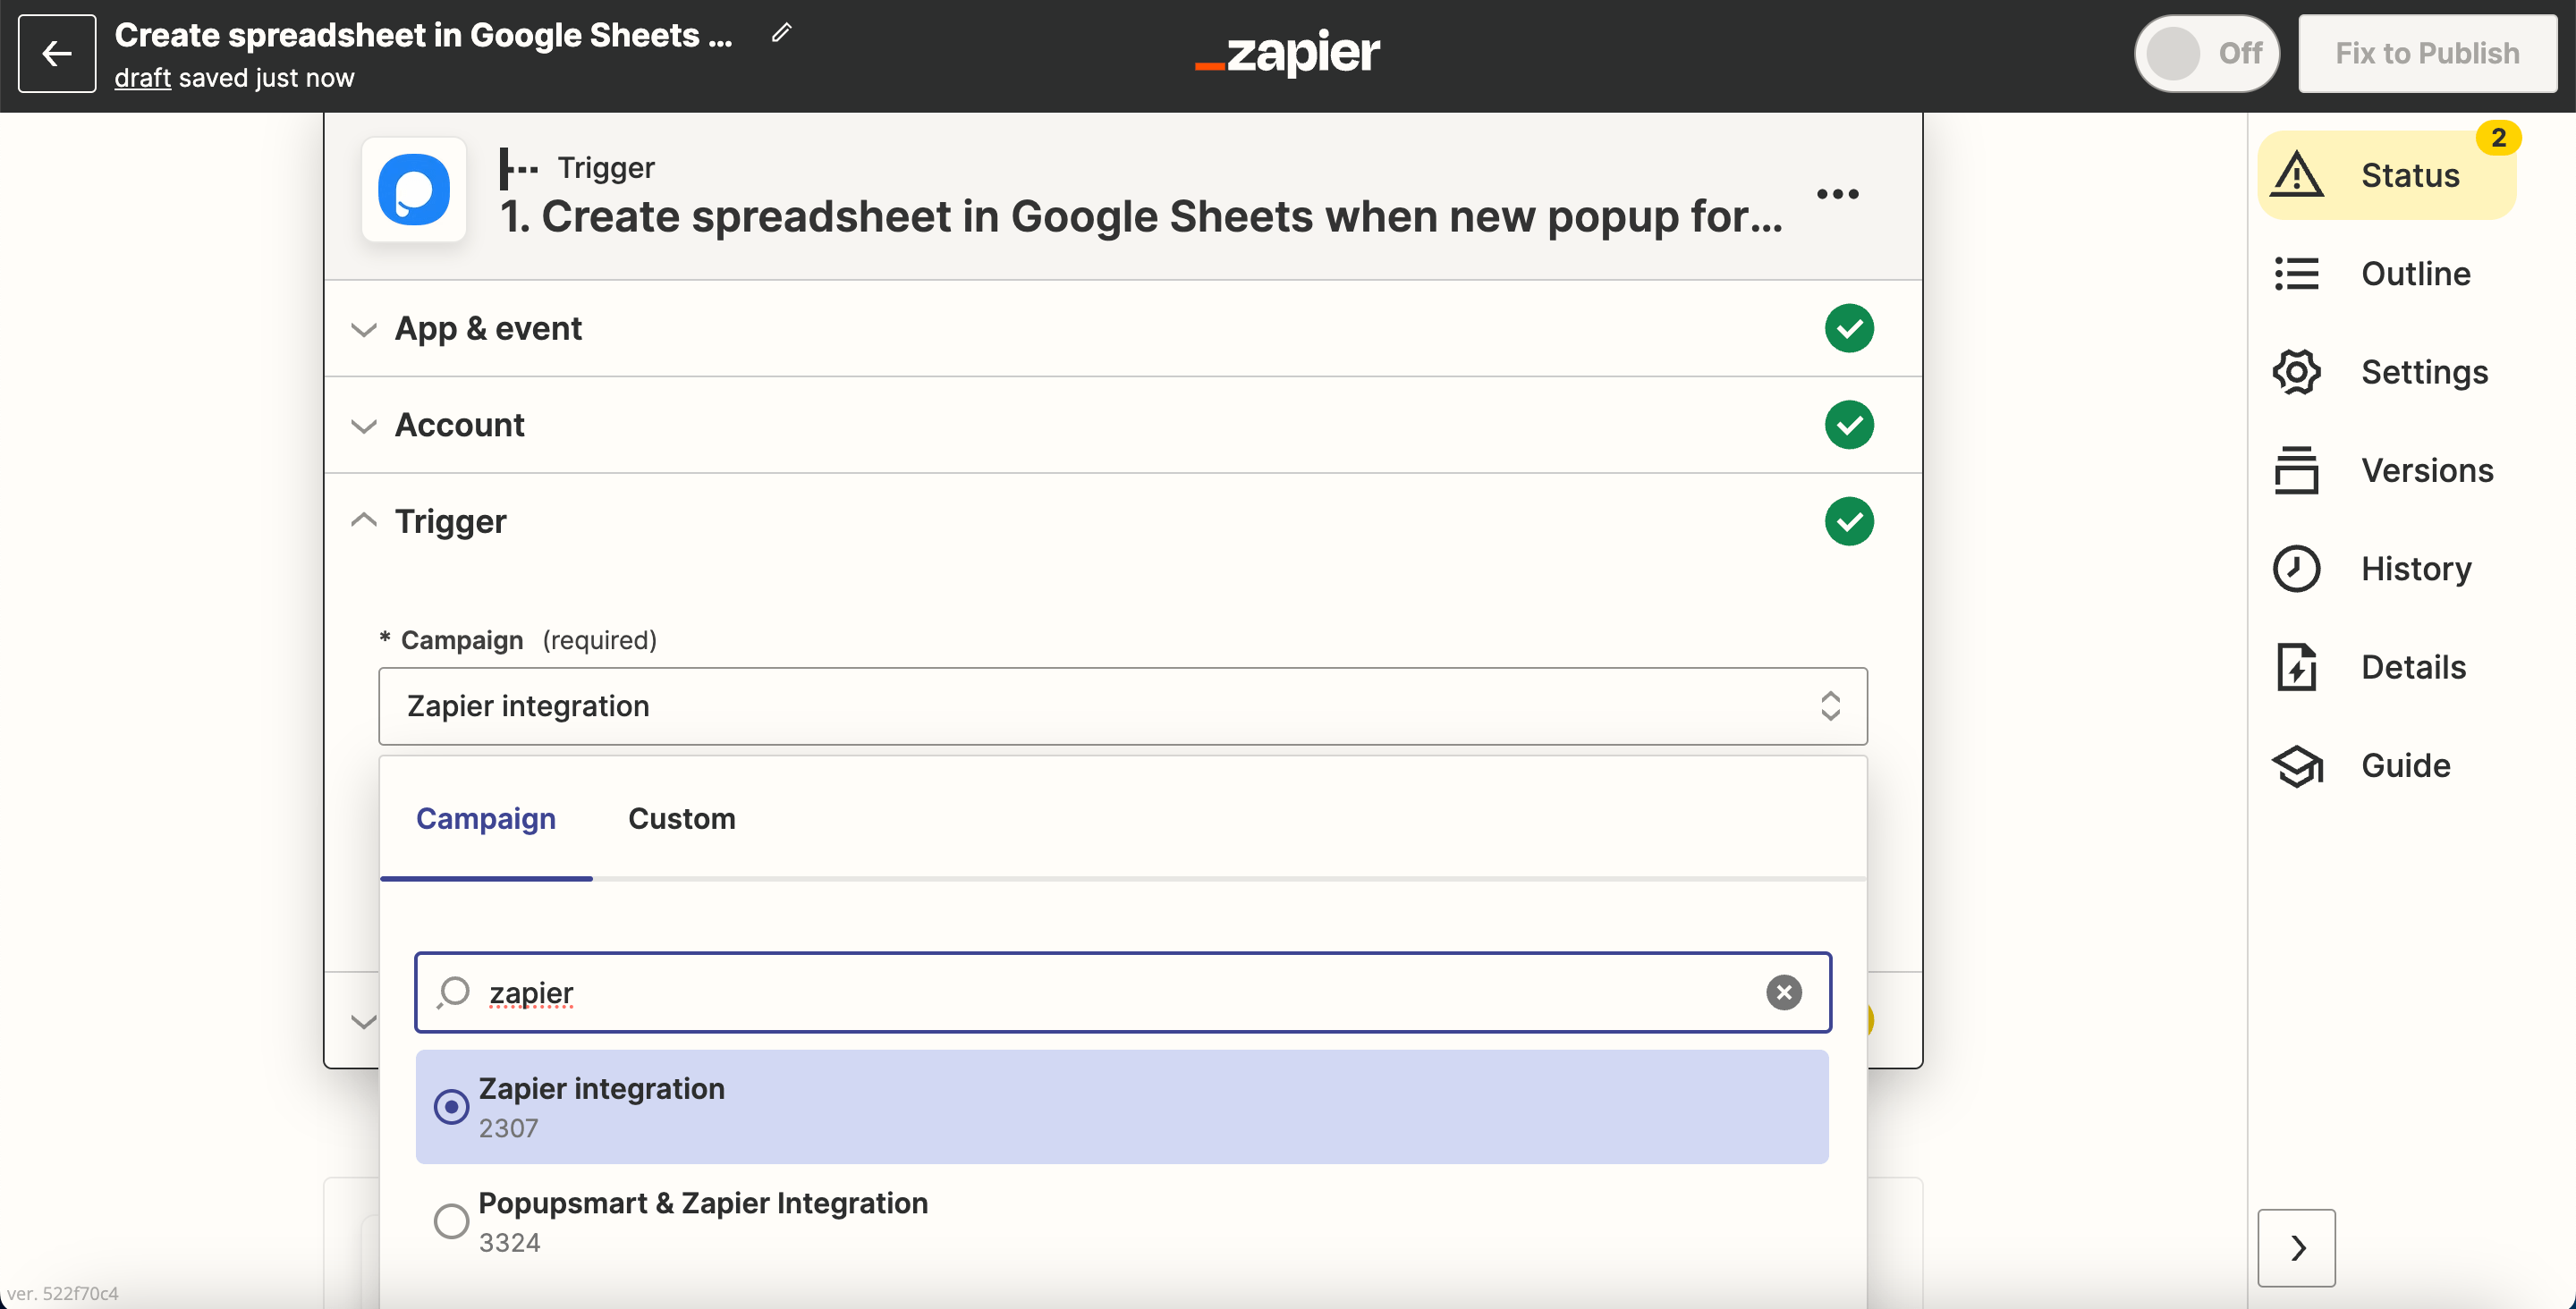
Select the commands on the "When this happens..." and "then do this!" fields.
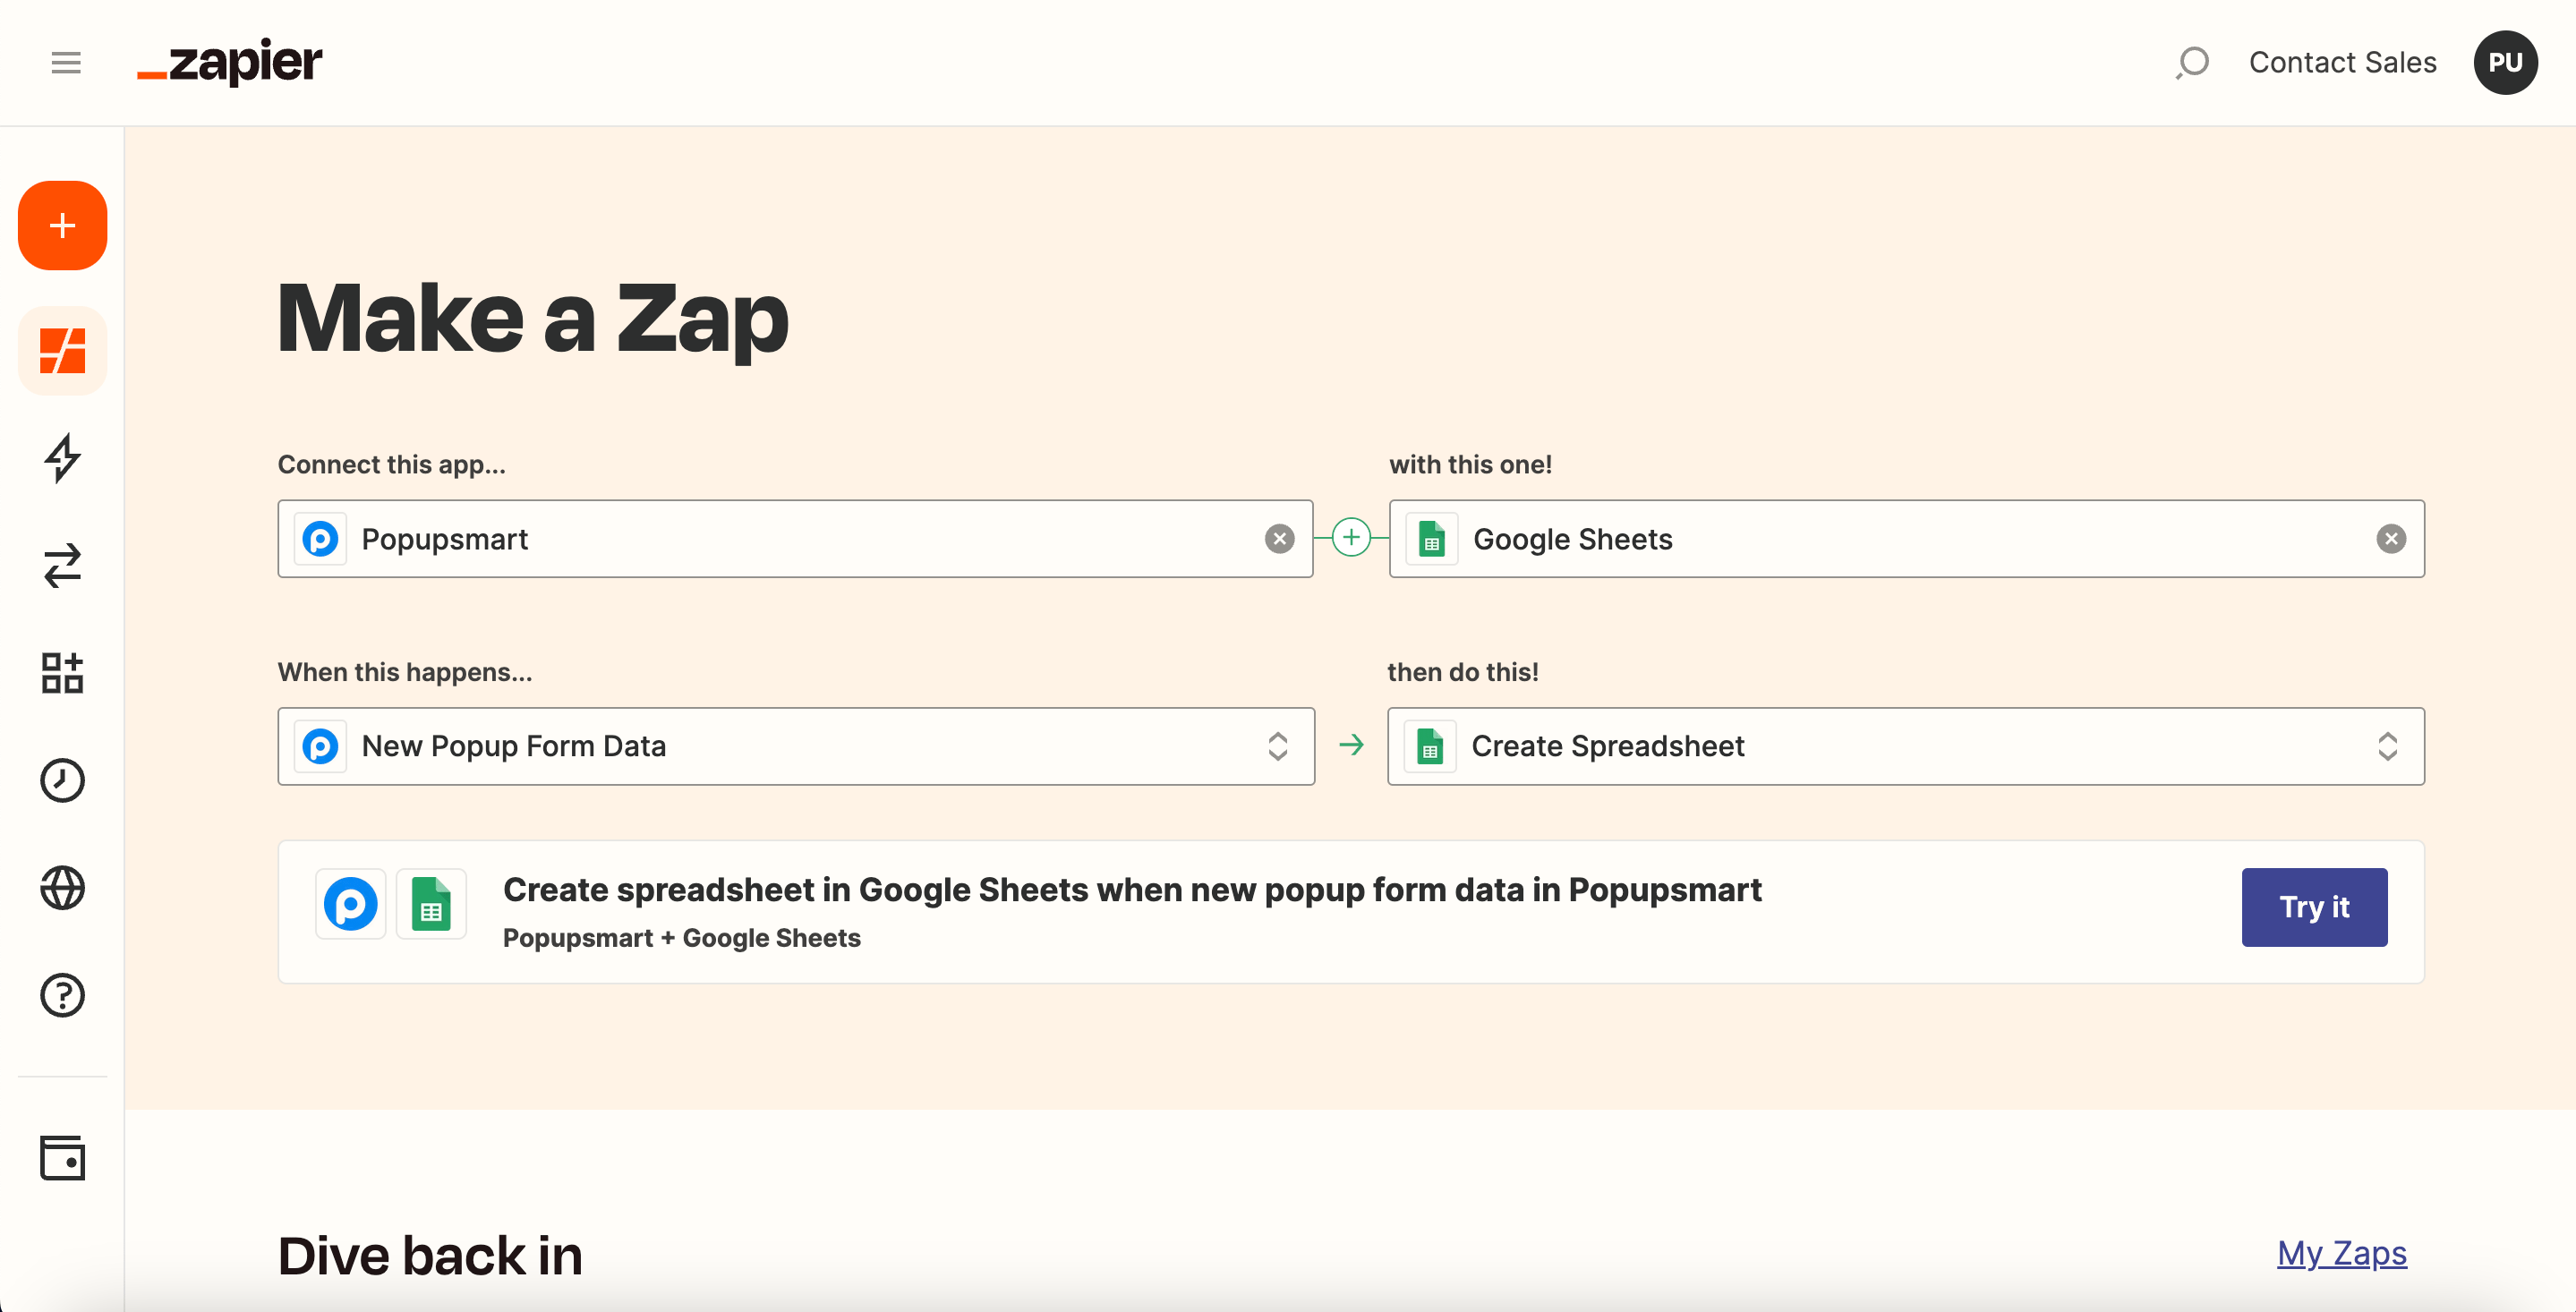
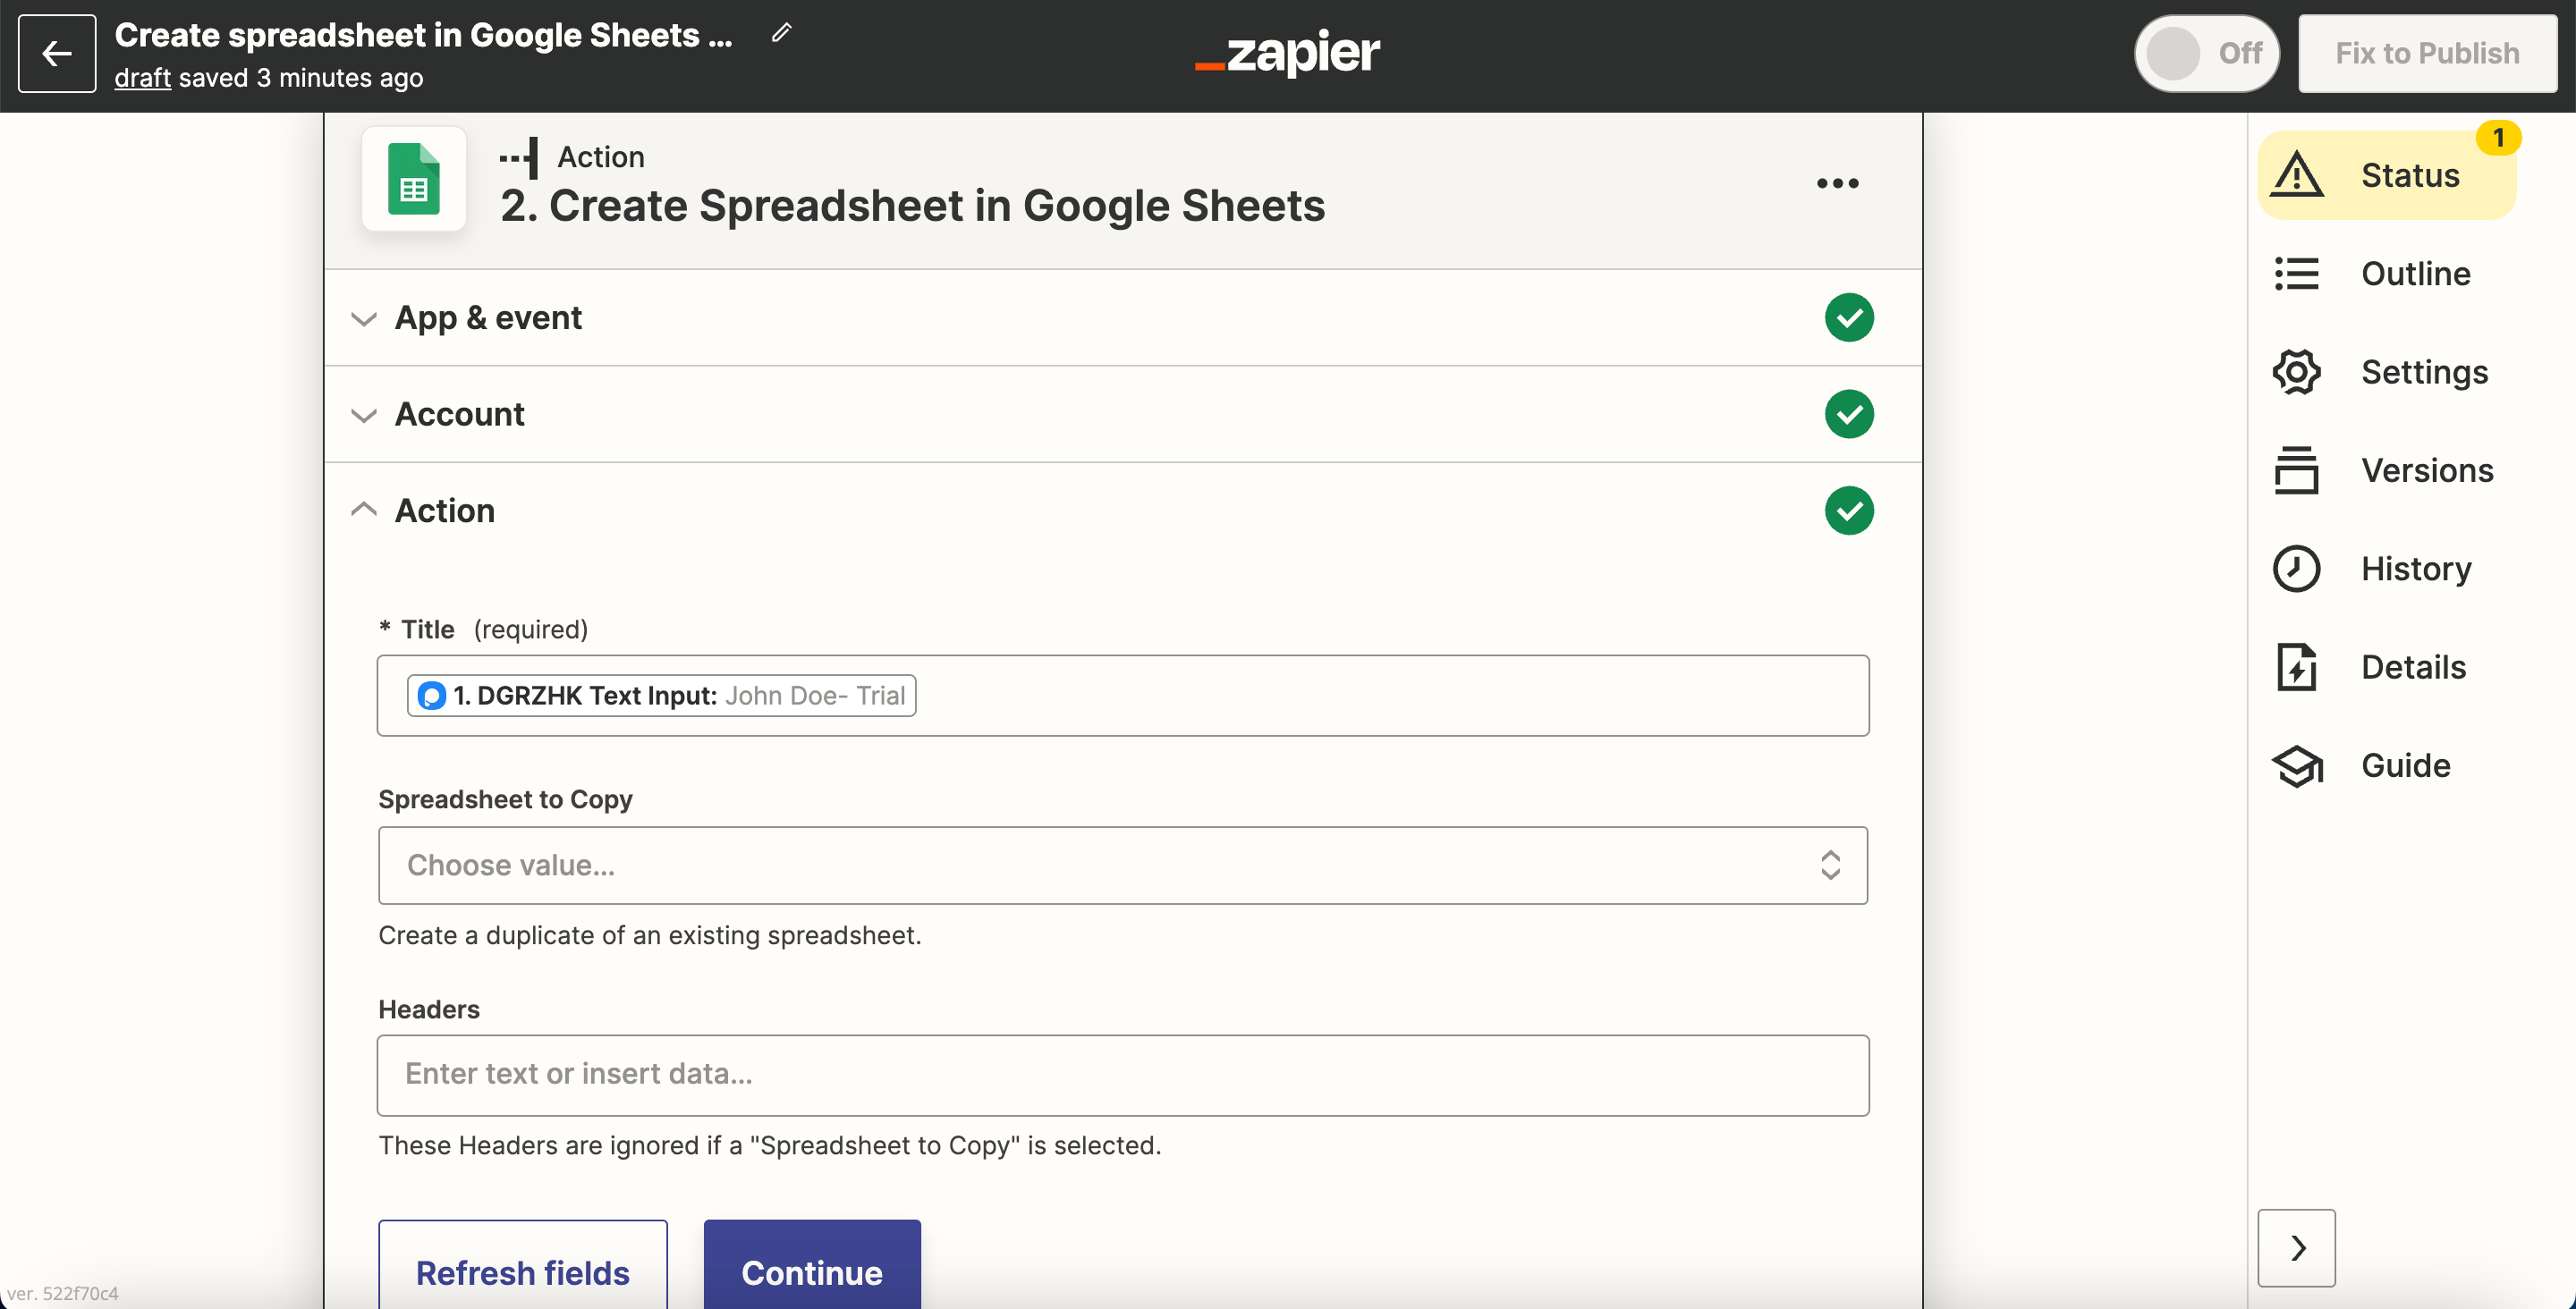
We want Google Sheets to create a spreadsheet automatically so the campaign owner gets new form data via our popup campaign.
At last, click "Try It" after you make all the arrangements.
Sign In to Popupsmart
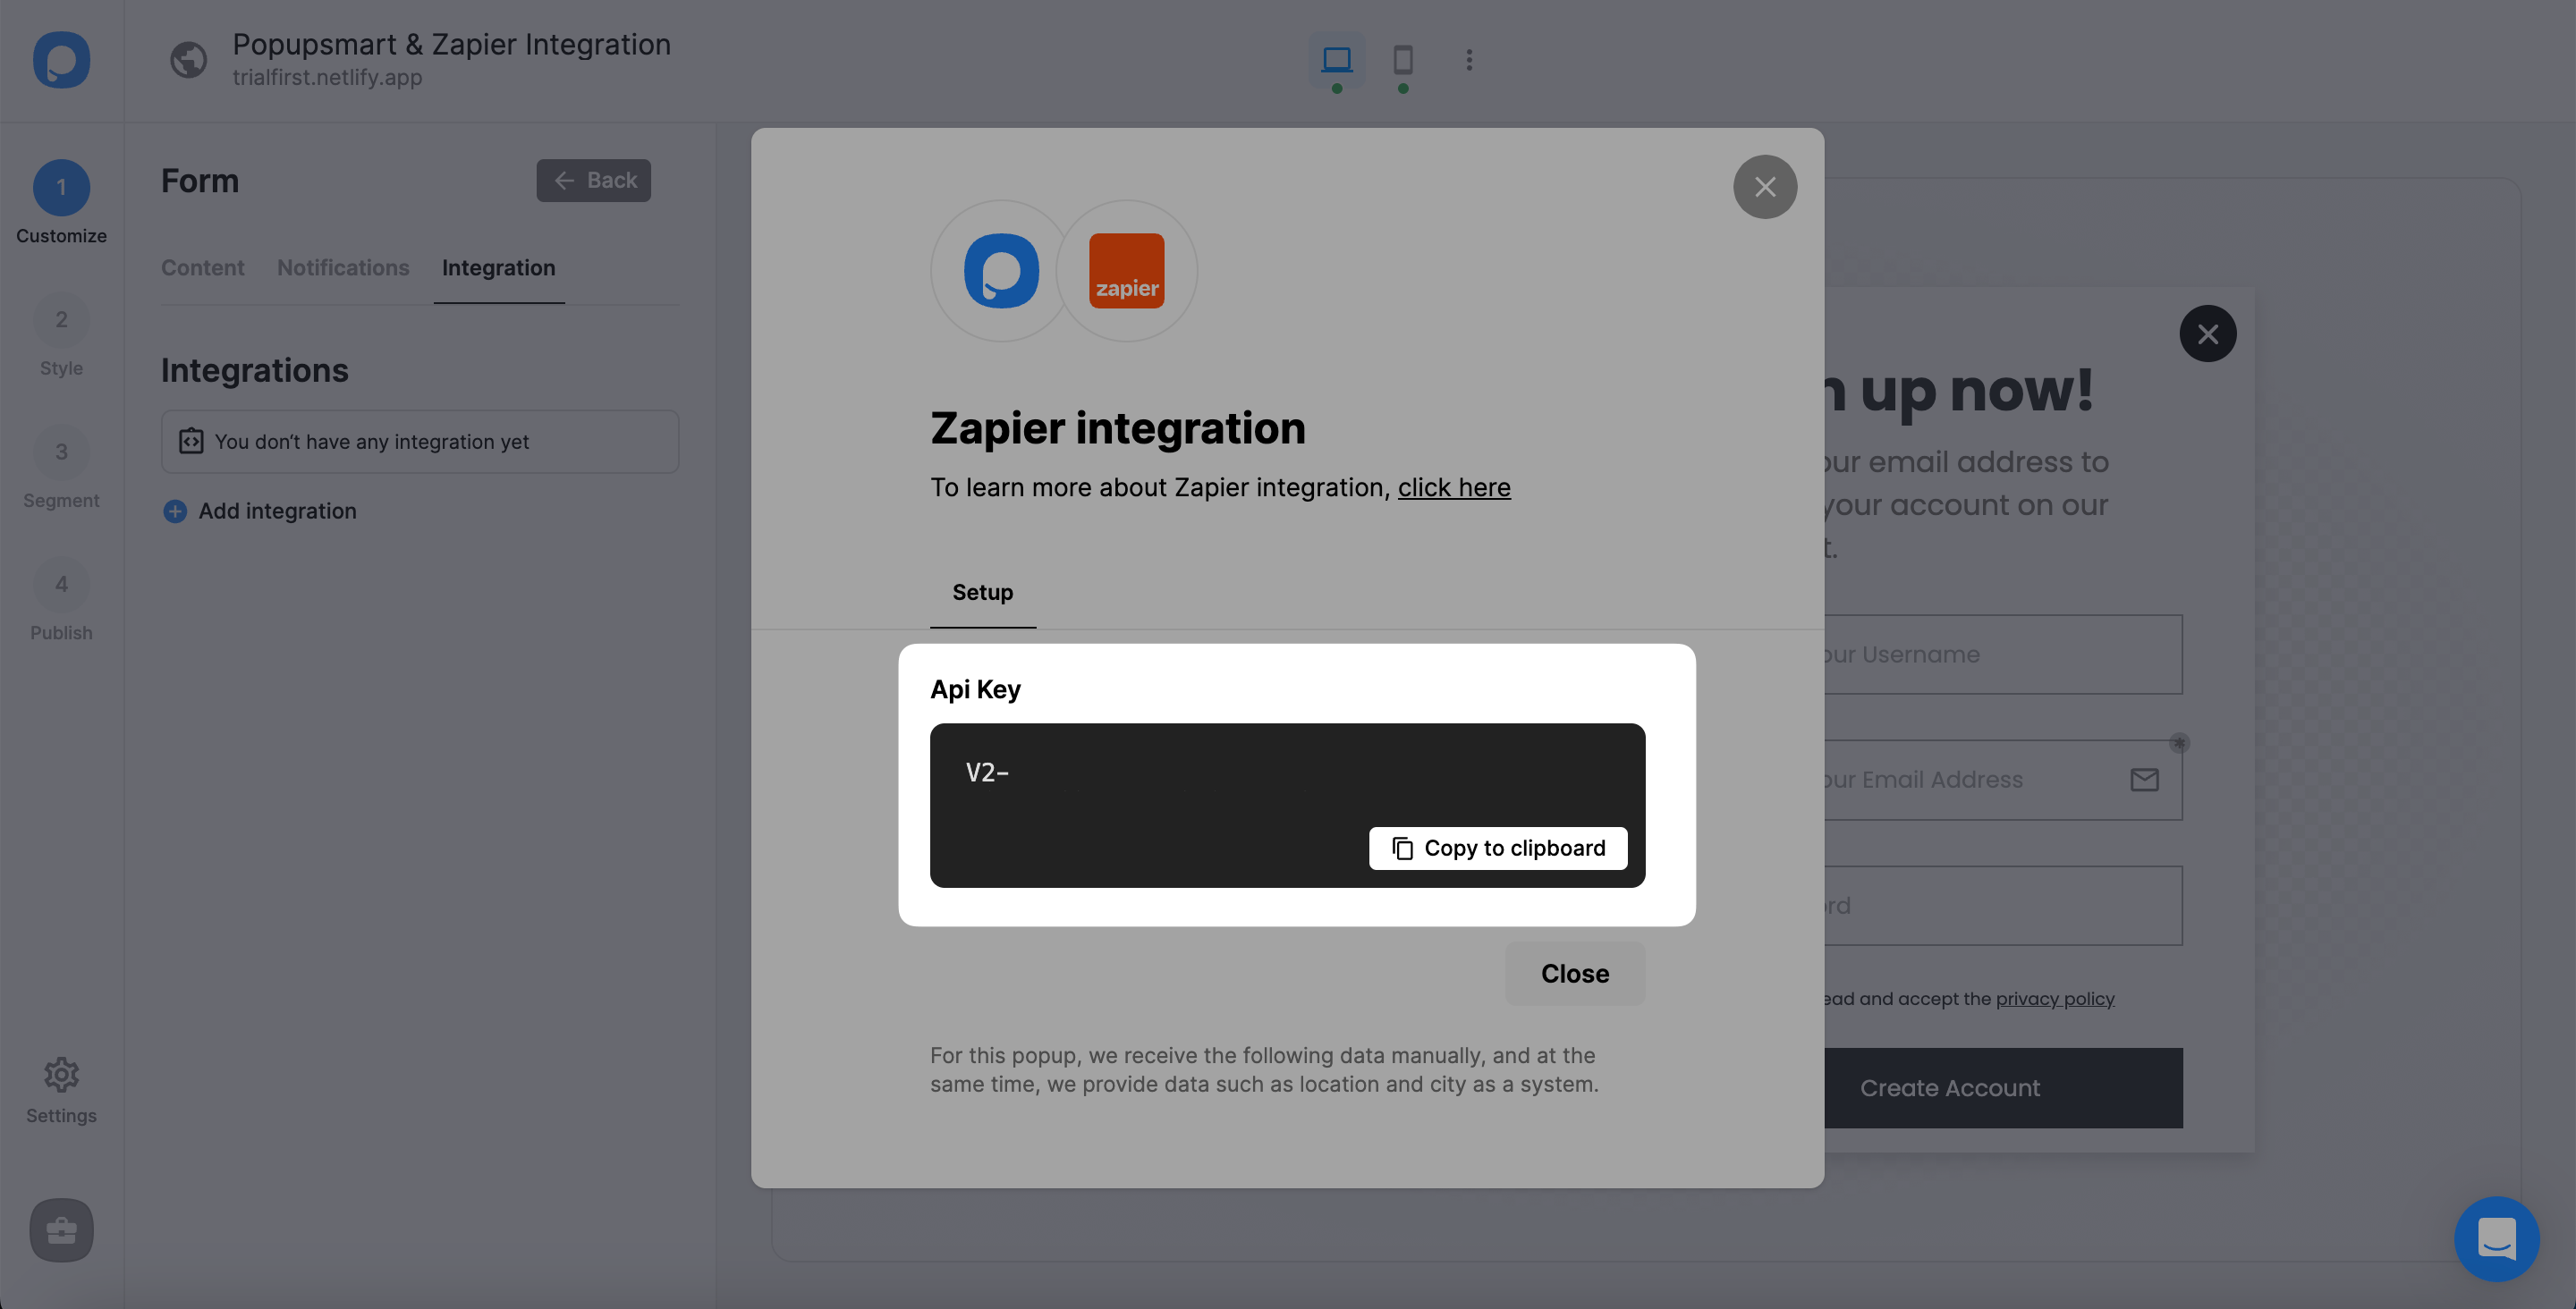
To acquire the API Key and fill in this field, you need to navigate the Popupsmart dashboard. So click "Sign in."
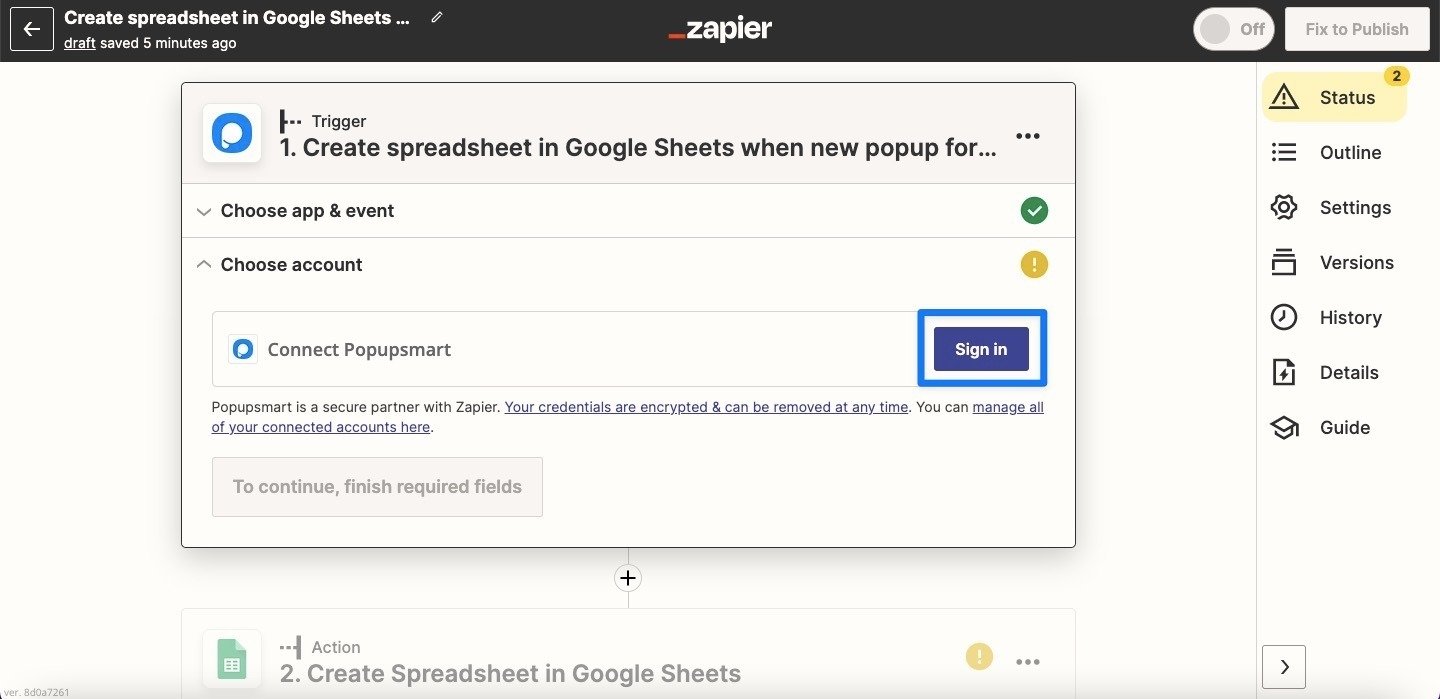
Know that you don't have to sign in to Zapier for the second time.
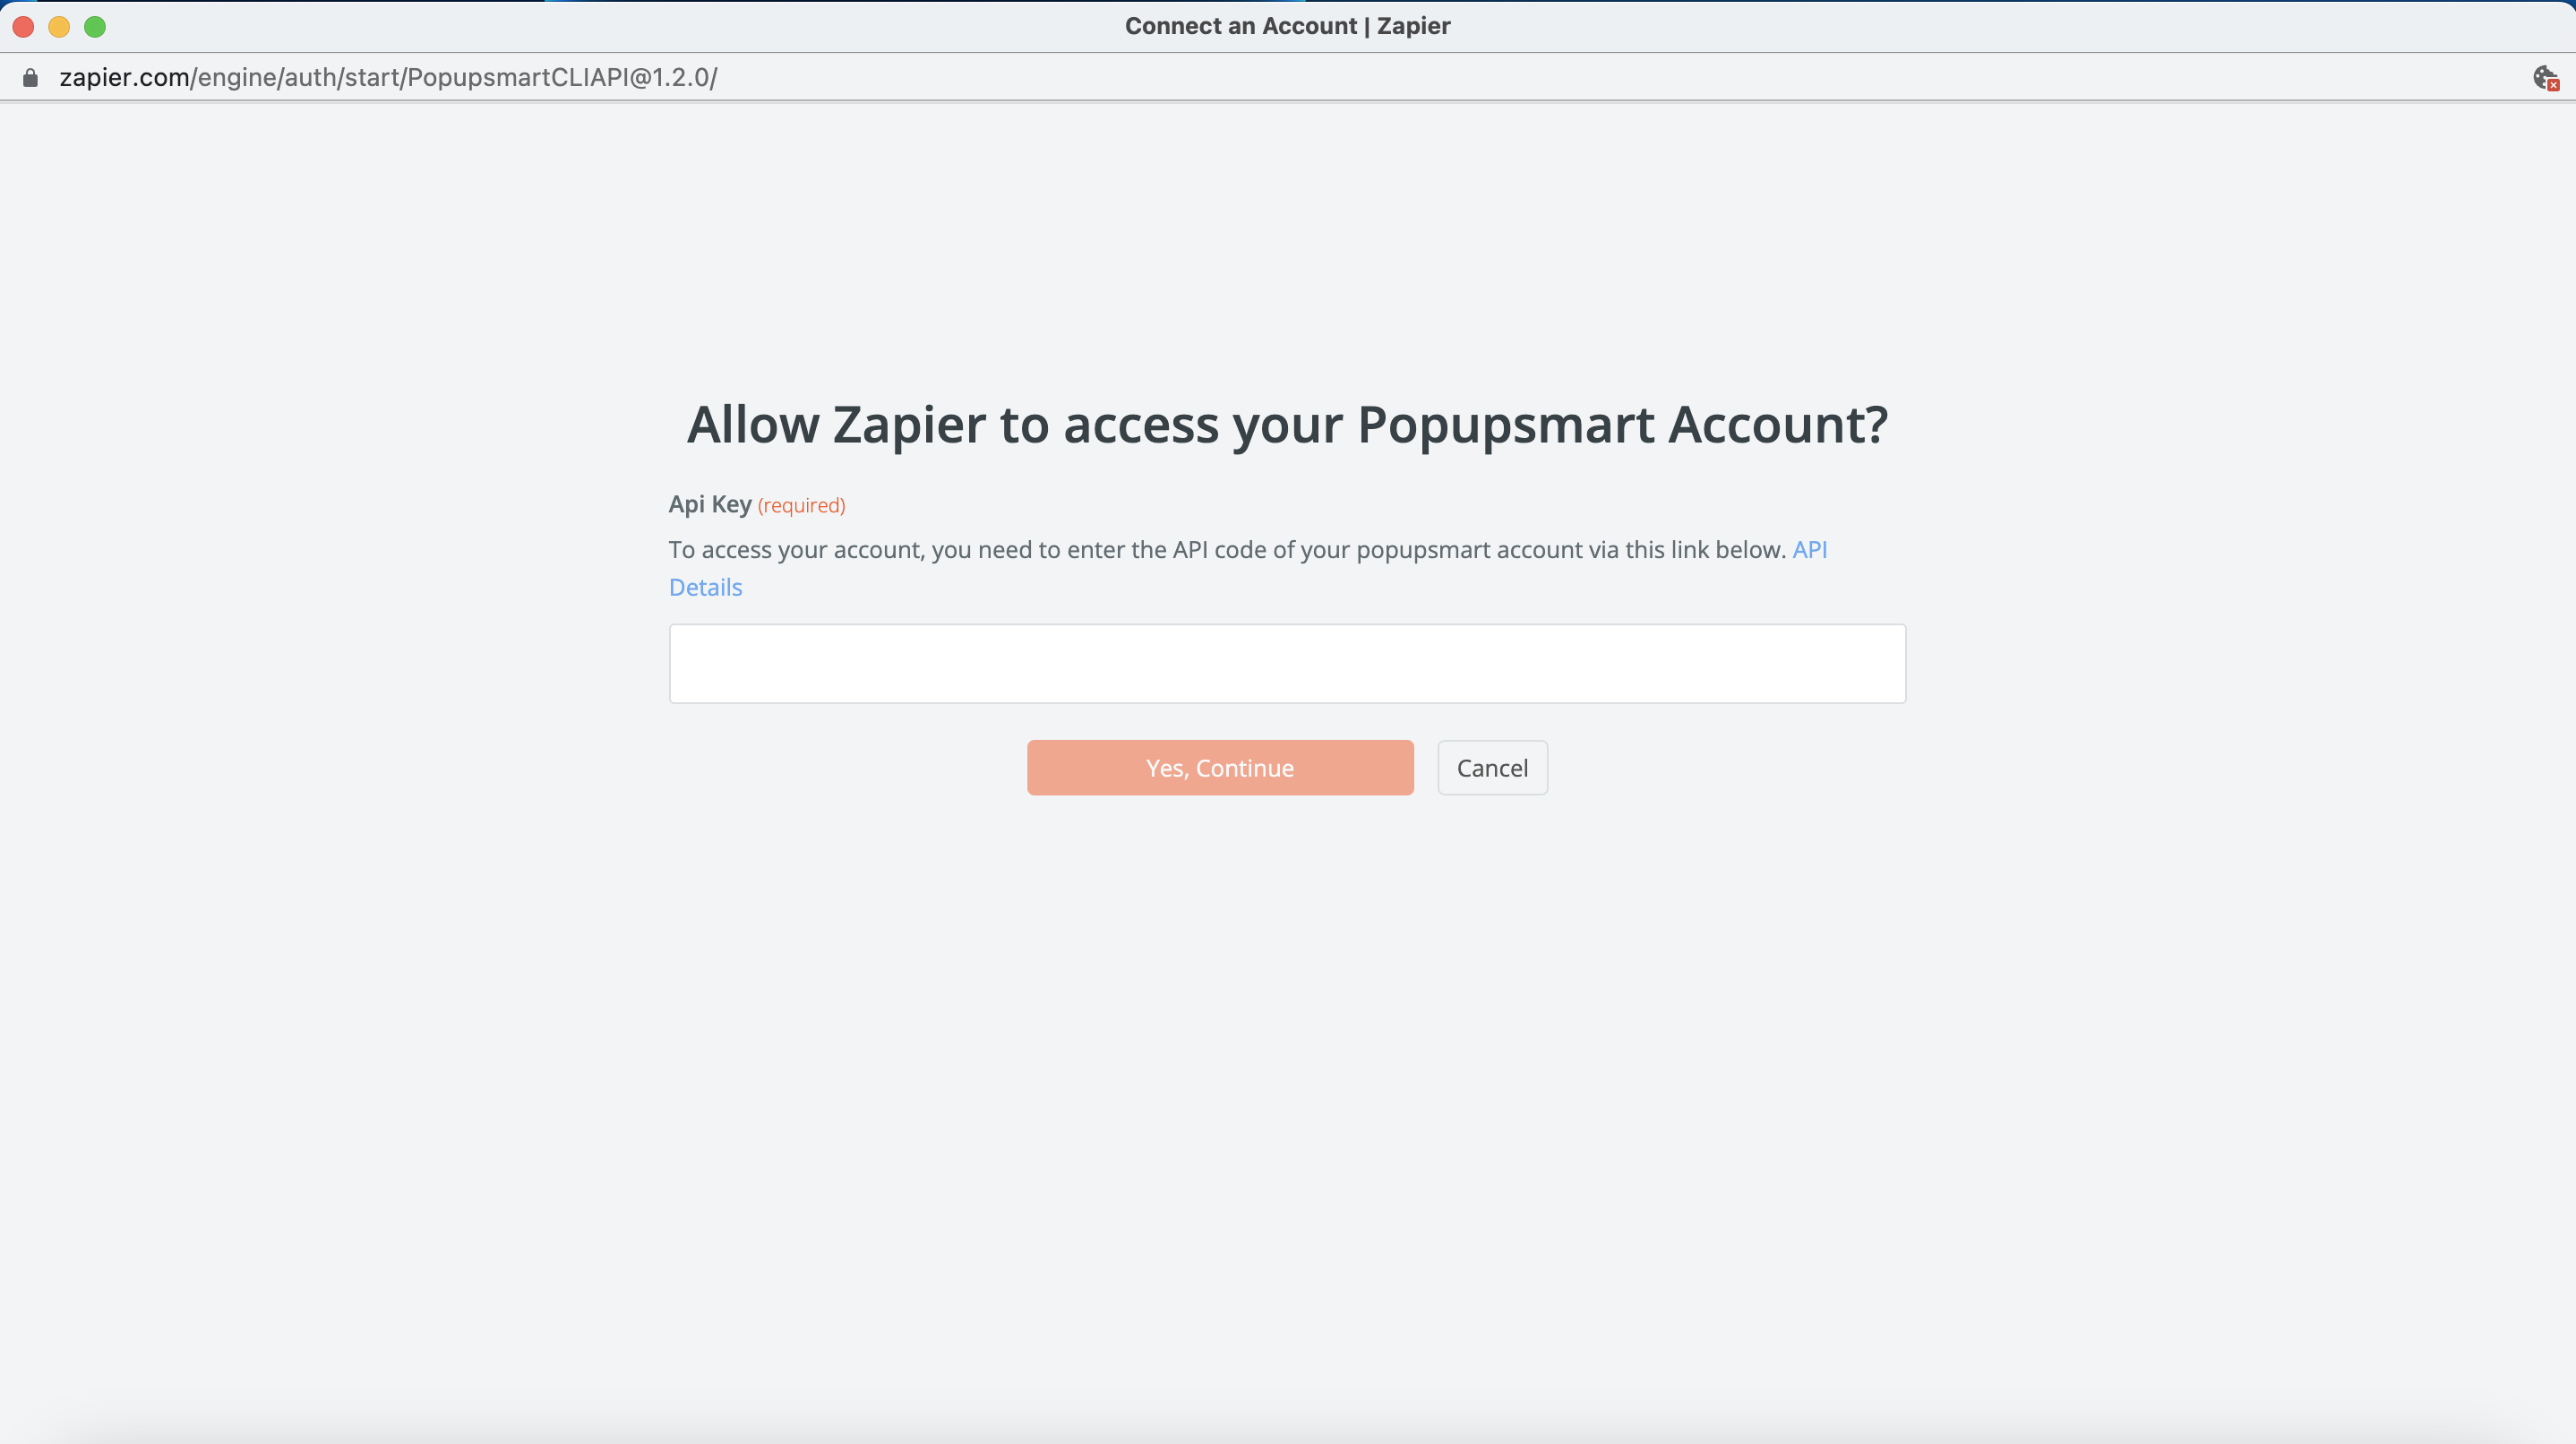
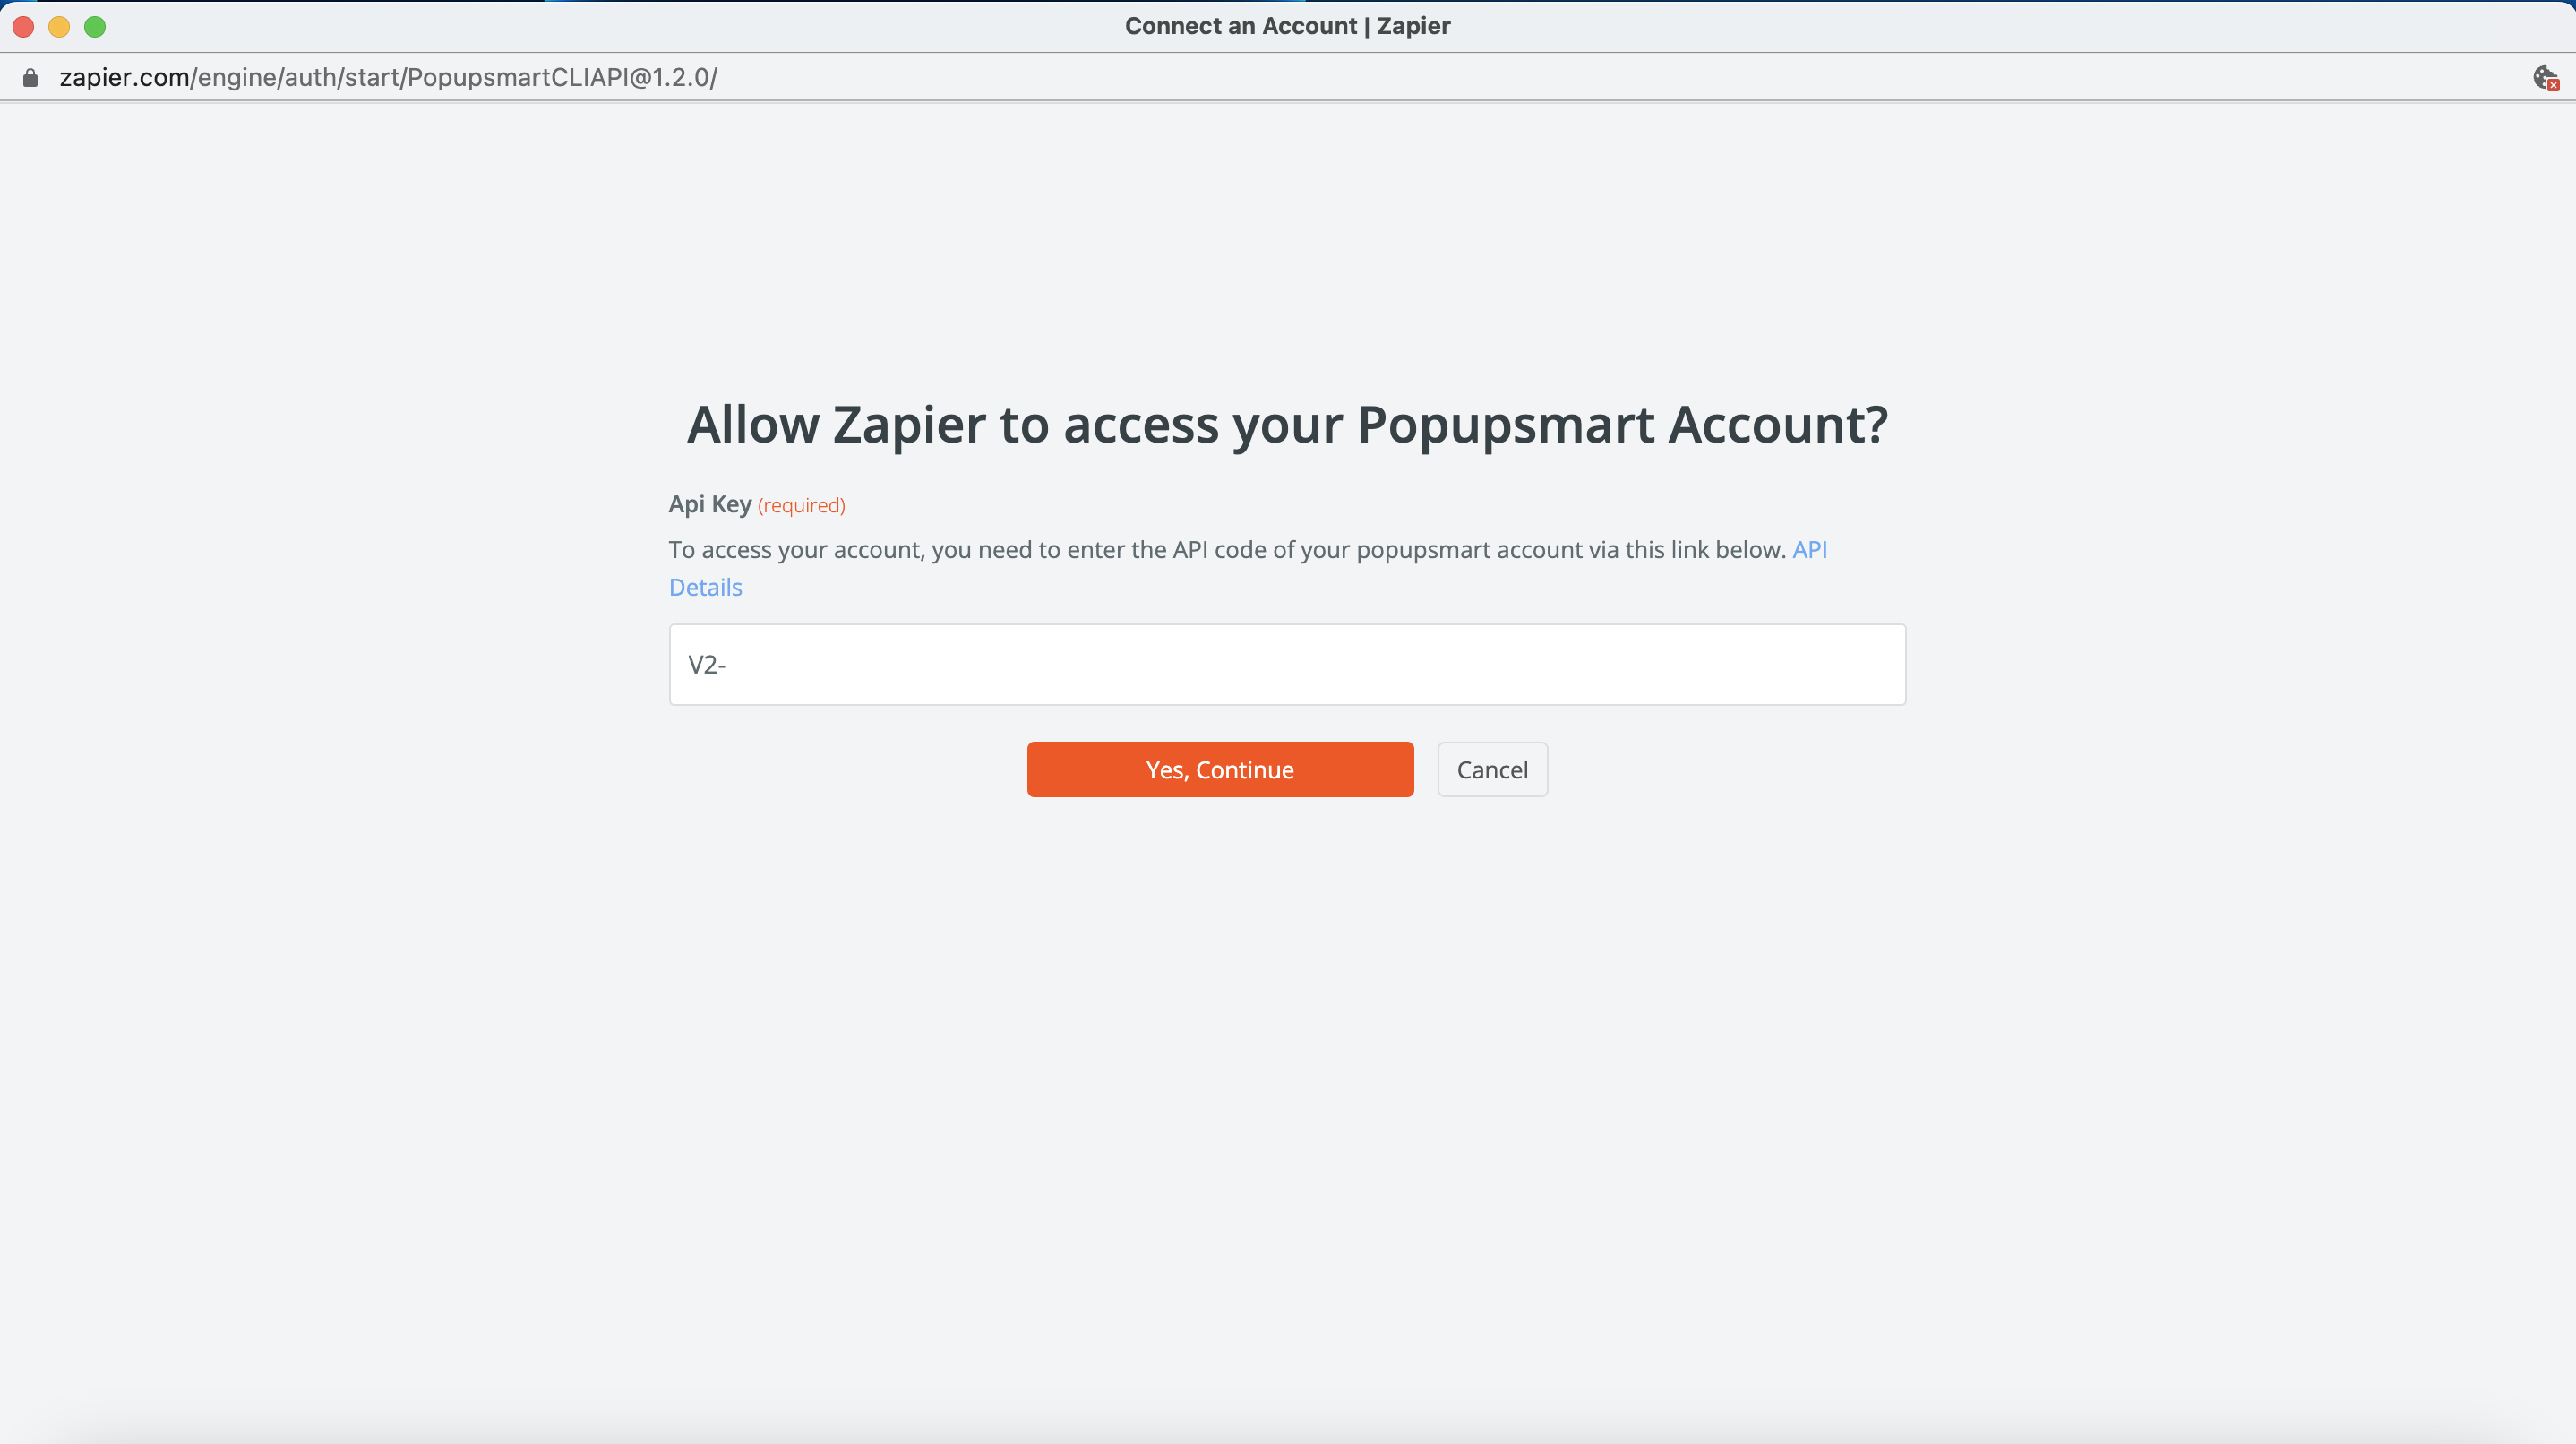
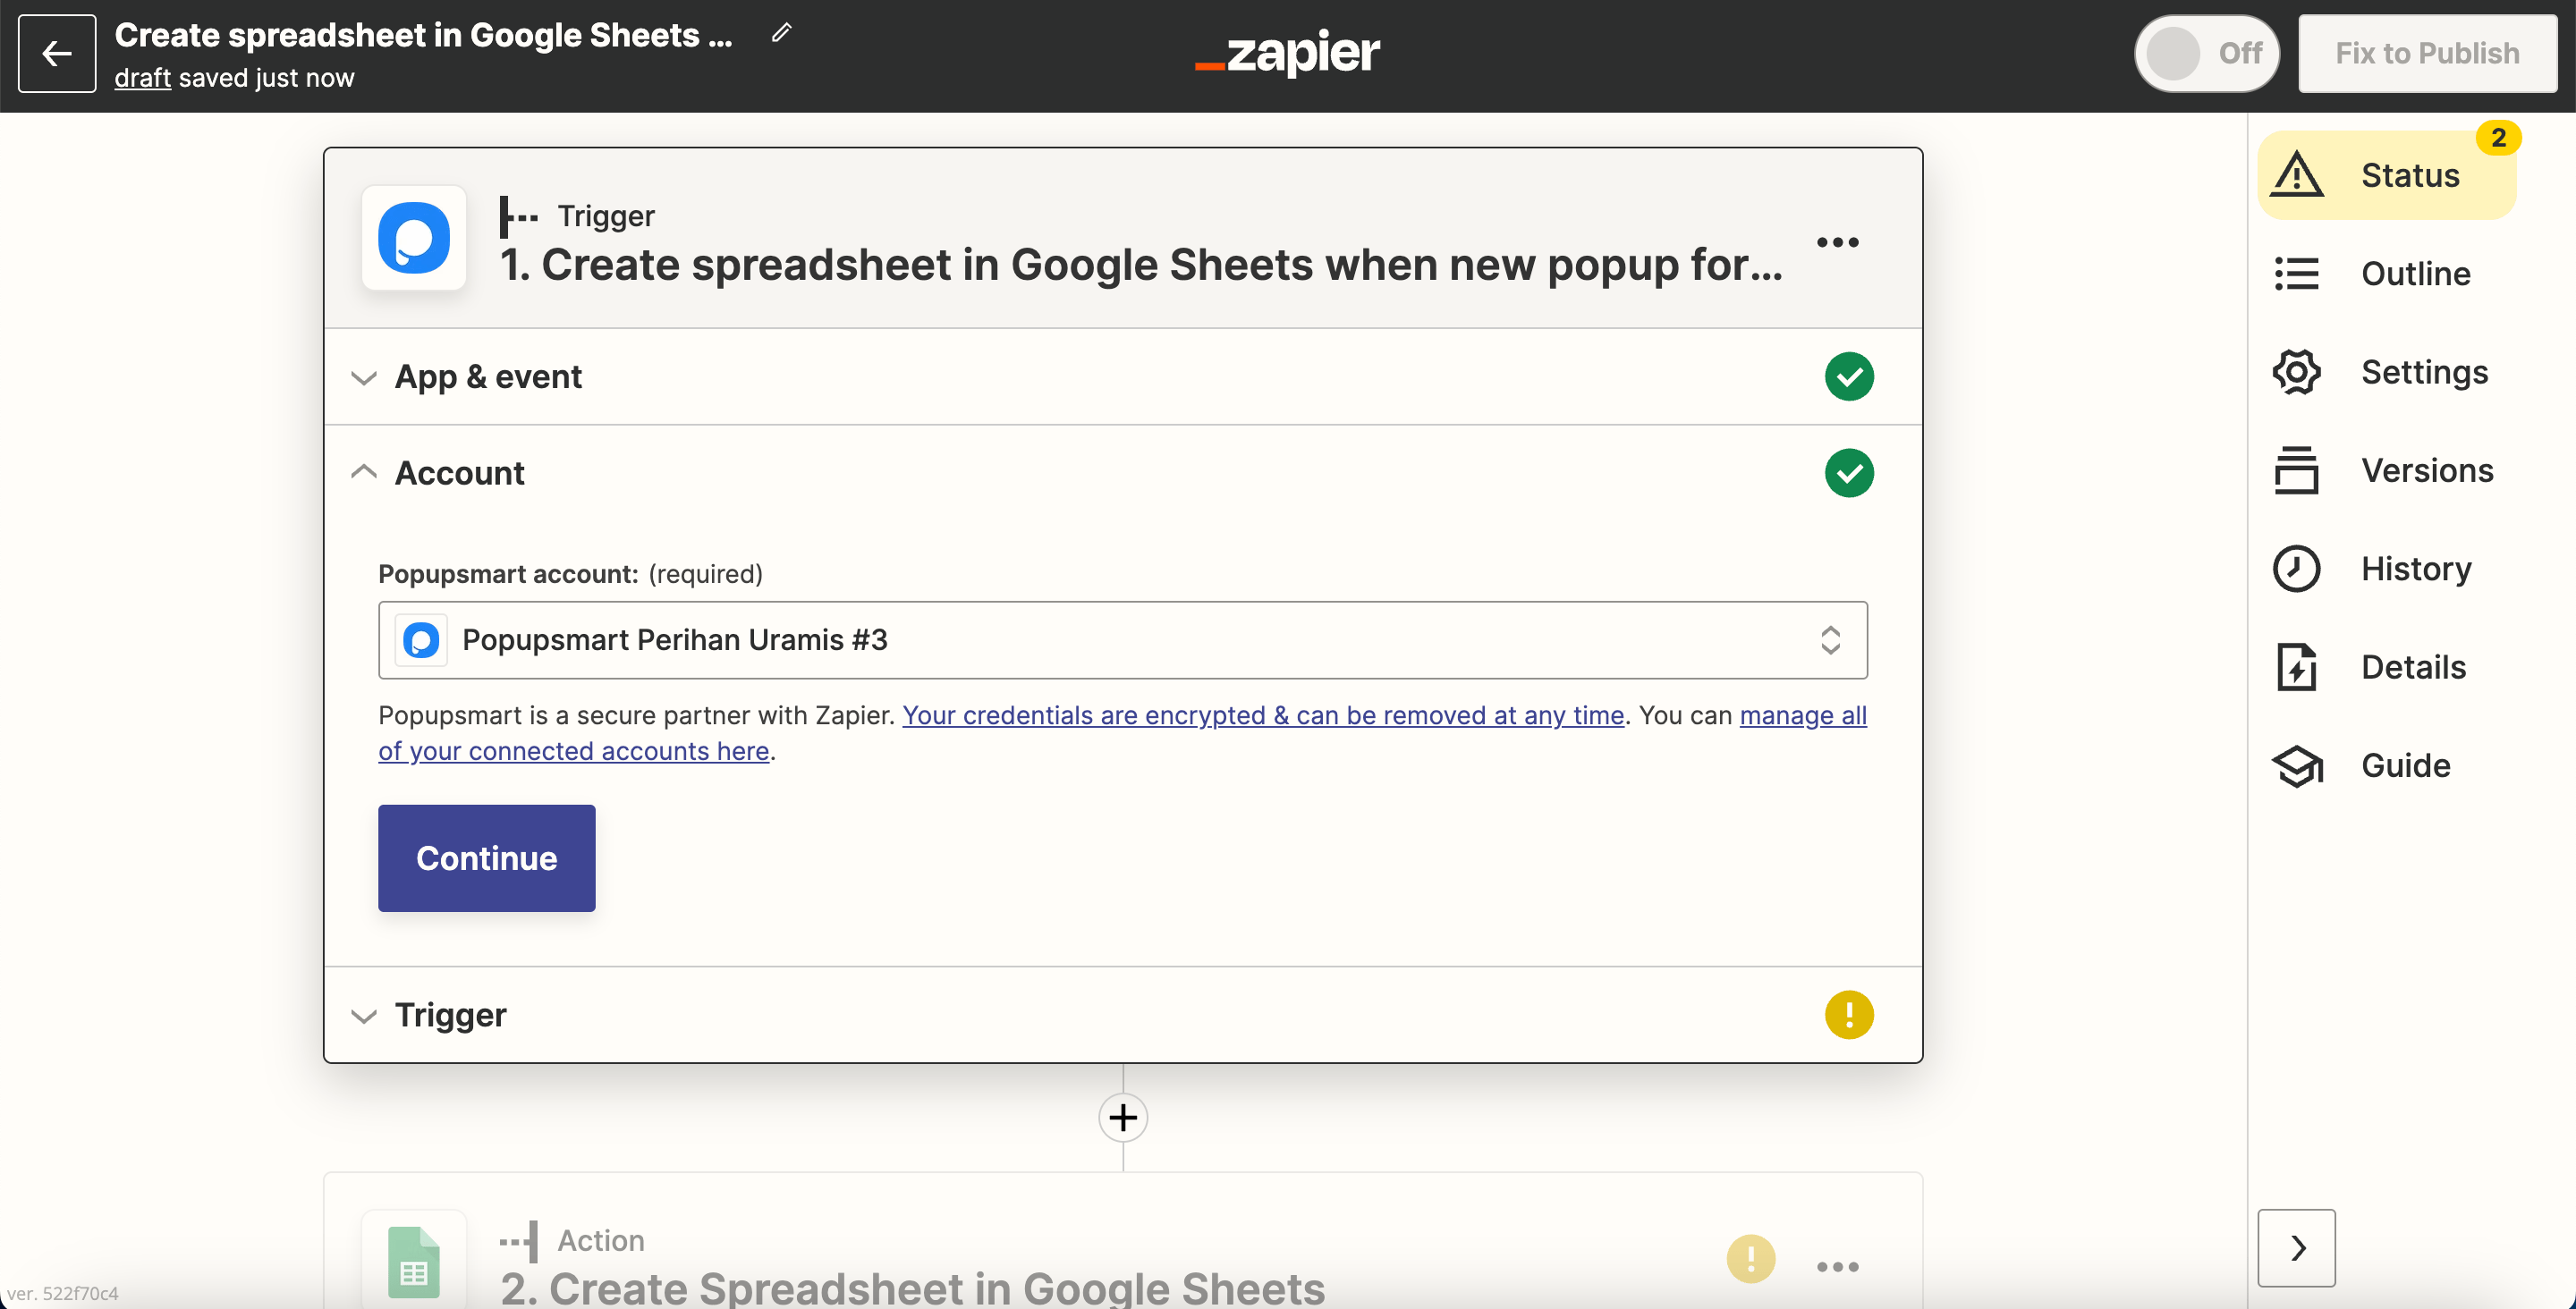
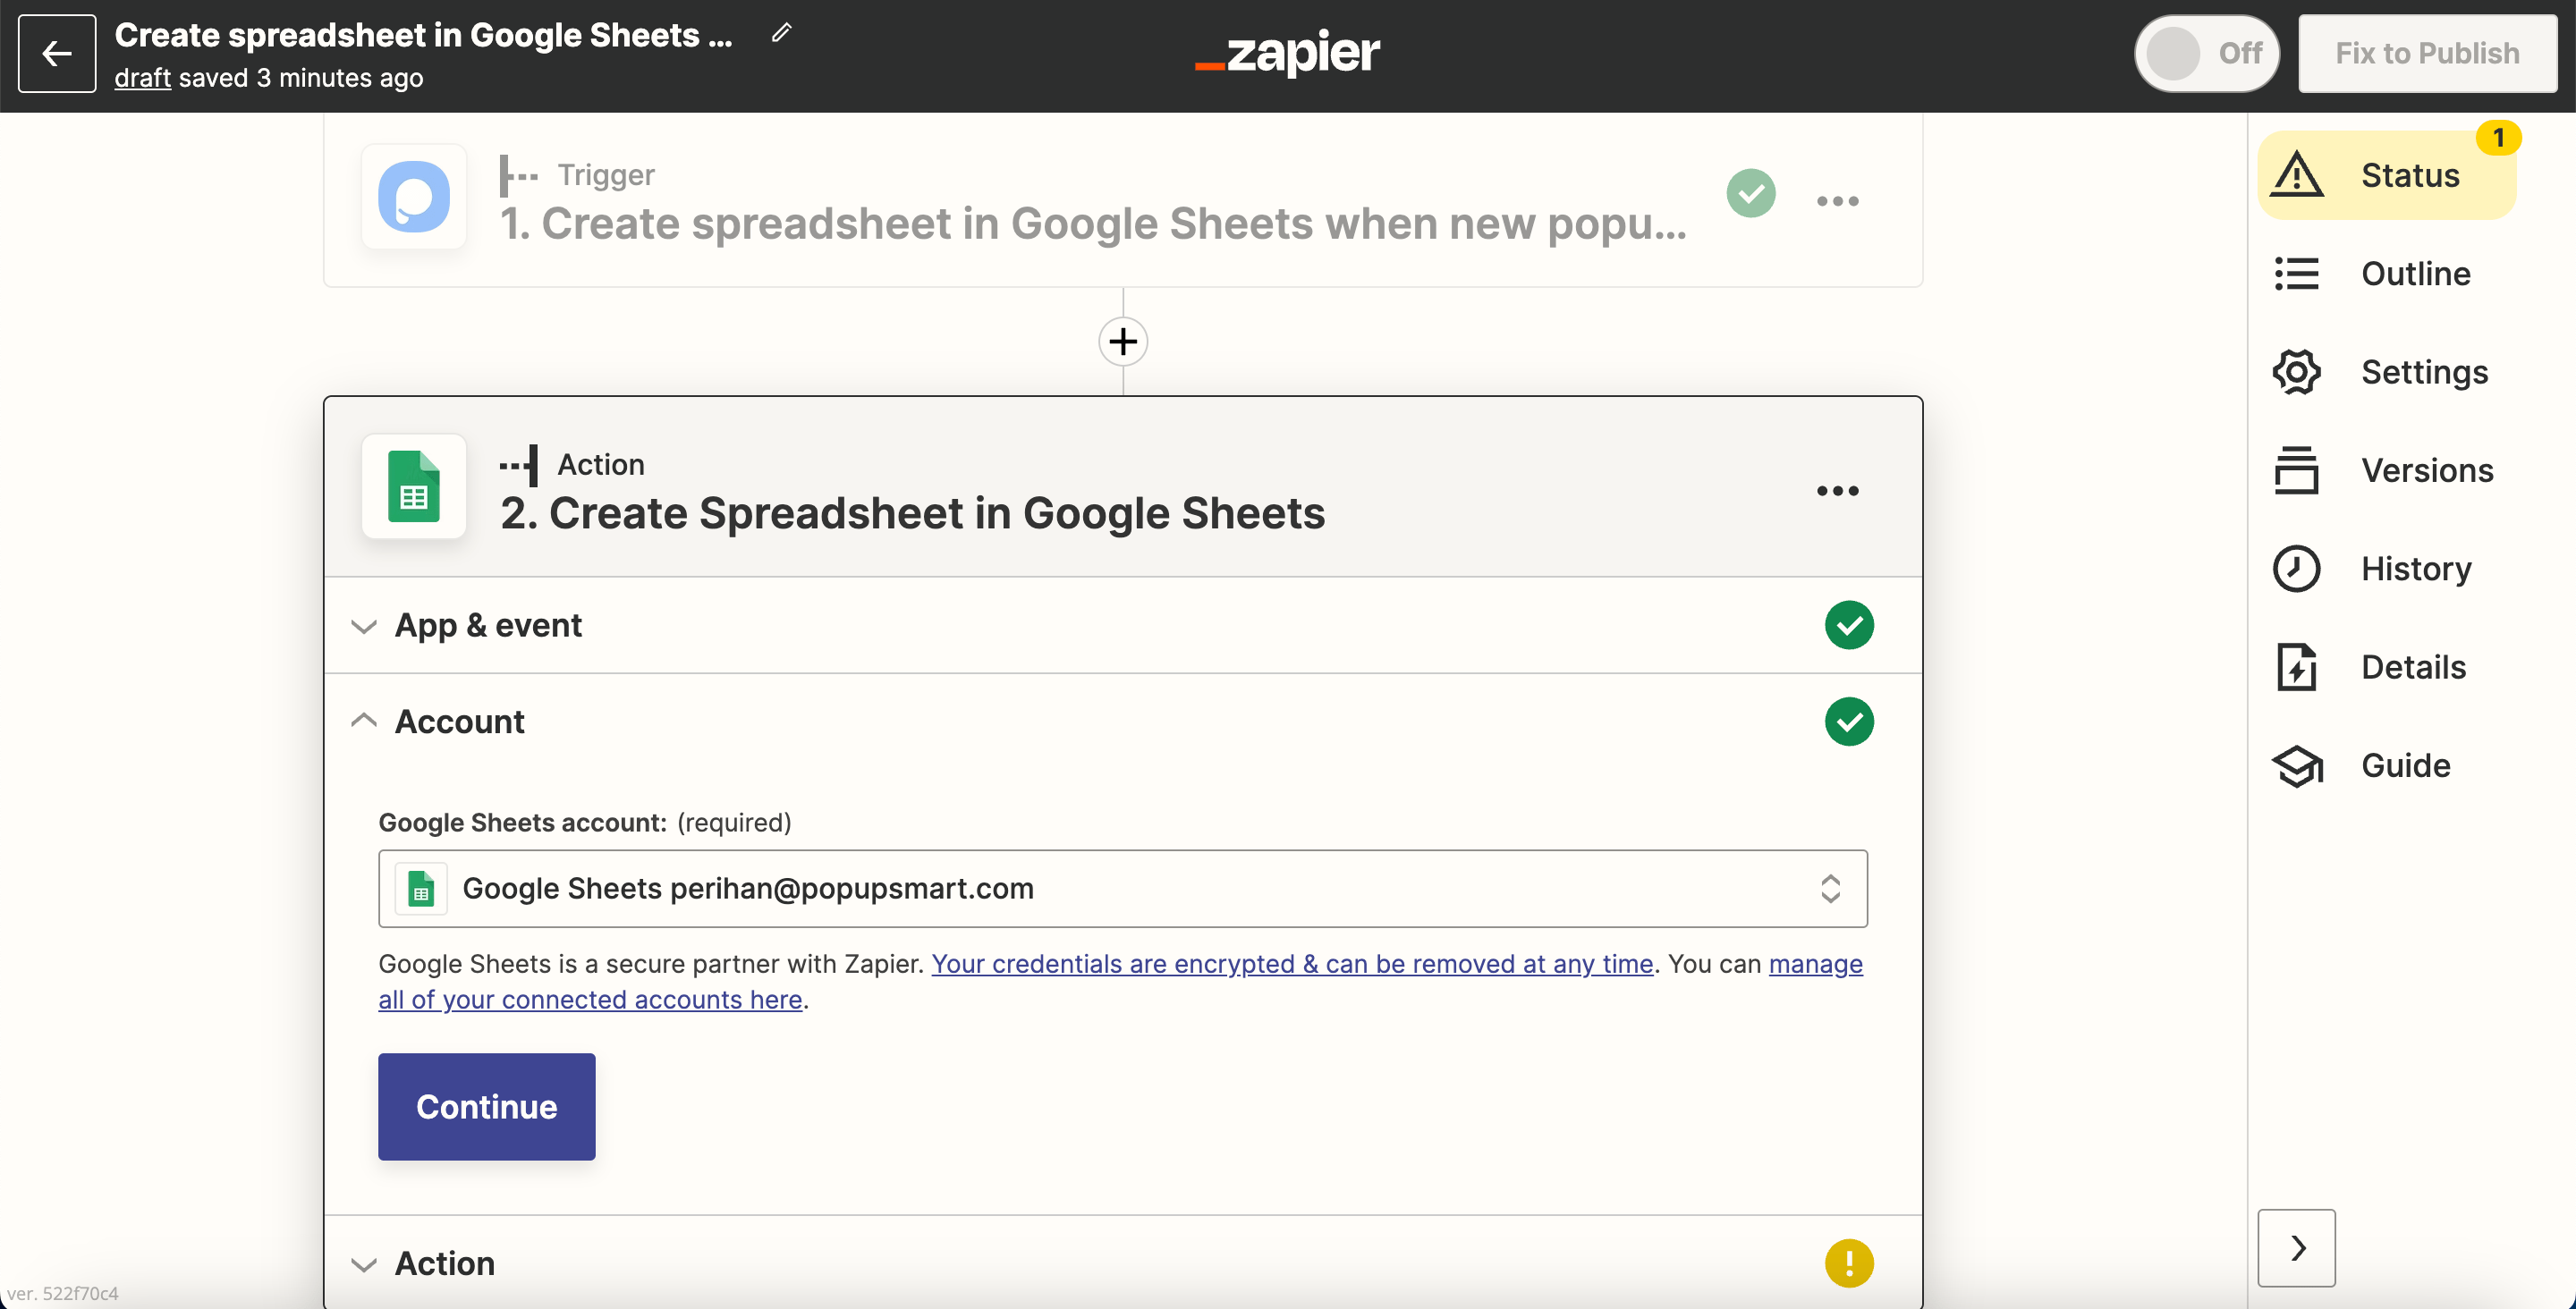
Connect Your Account
To connect your Popupsmart account, you need to click connecting your account and fill in the blank with the API you take from your Popupsmart account.
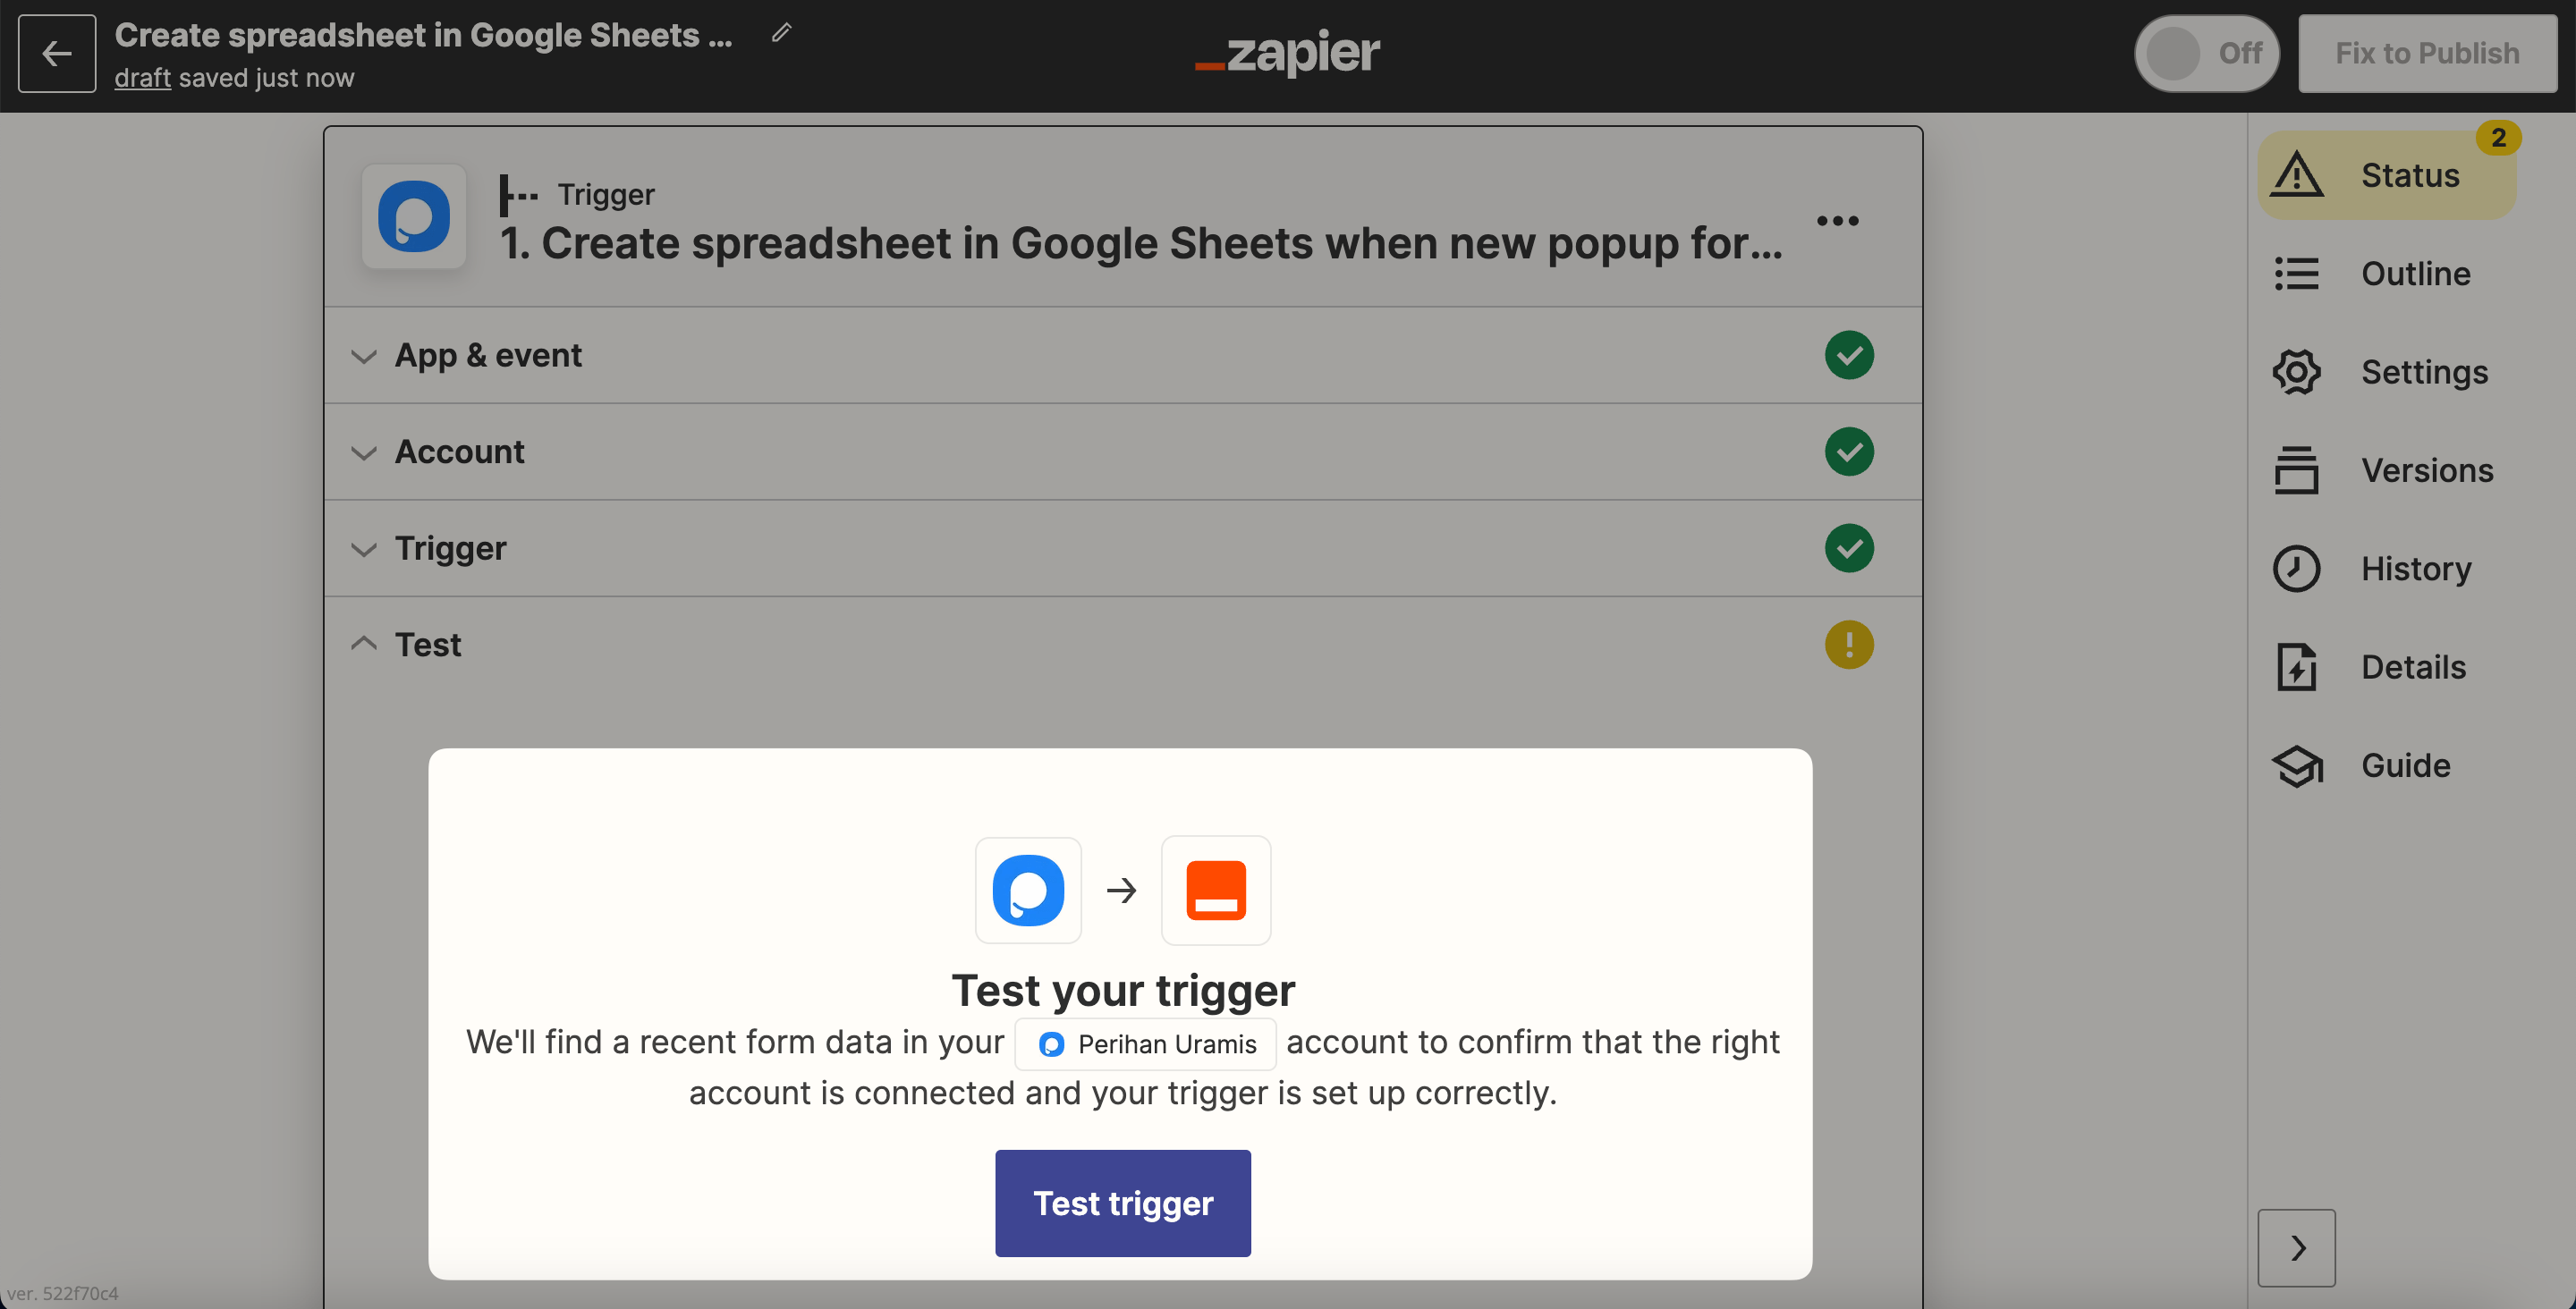
Test Trigger
You need to test the trigger by clicking "Test trigger."
Important
You need to fill in the data after you publish the campaign at first. You should do it before you start the Zap on Zapier.
Verify Data
It needs to find data like in the example. Then, you need to click "Continue."
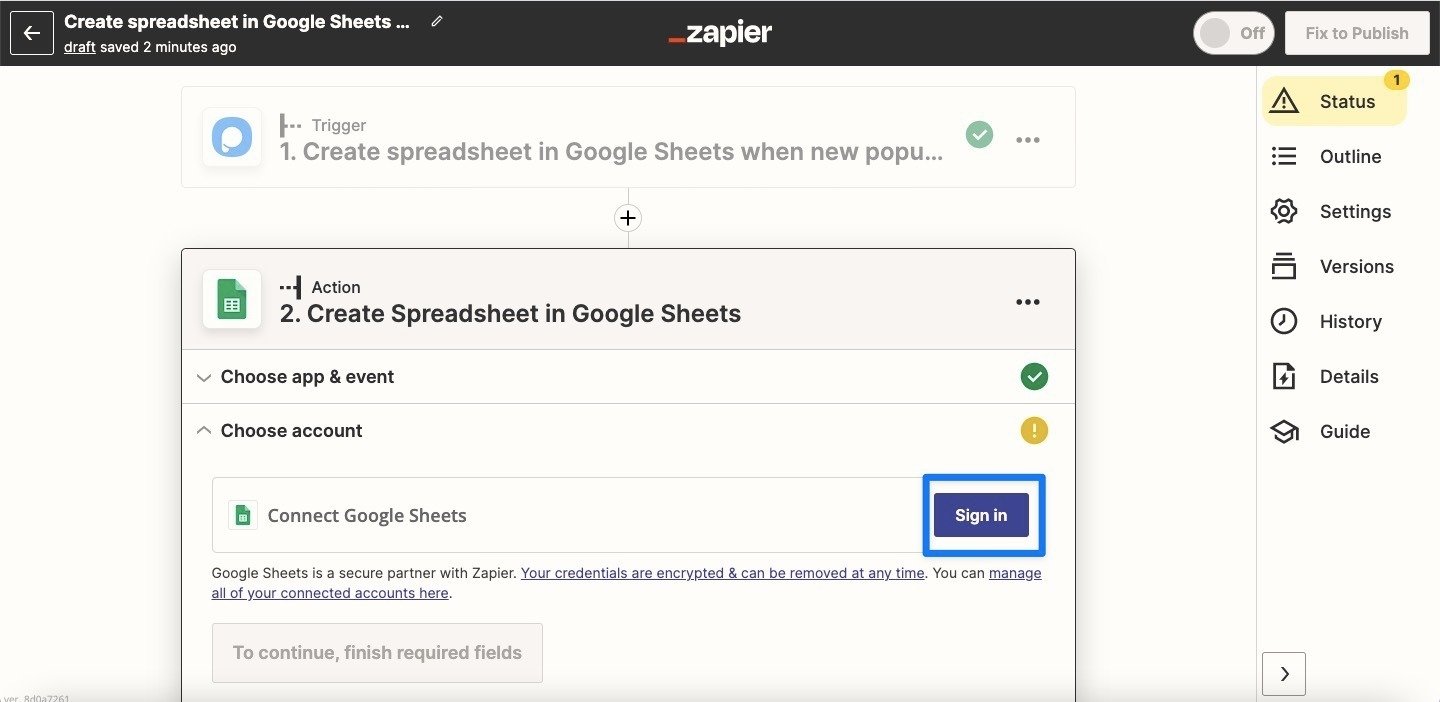
Sign In to Destination App
Now, you need to "Sign in" to your account on the app you're connecting to.
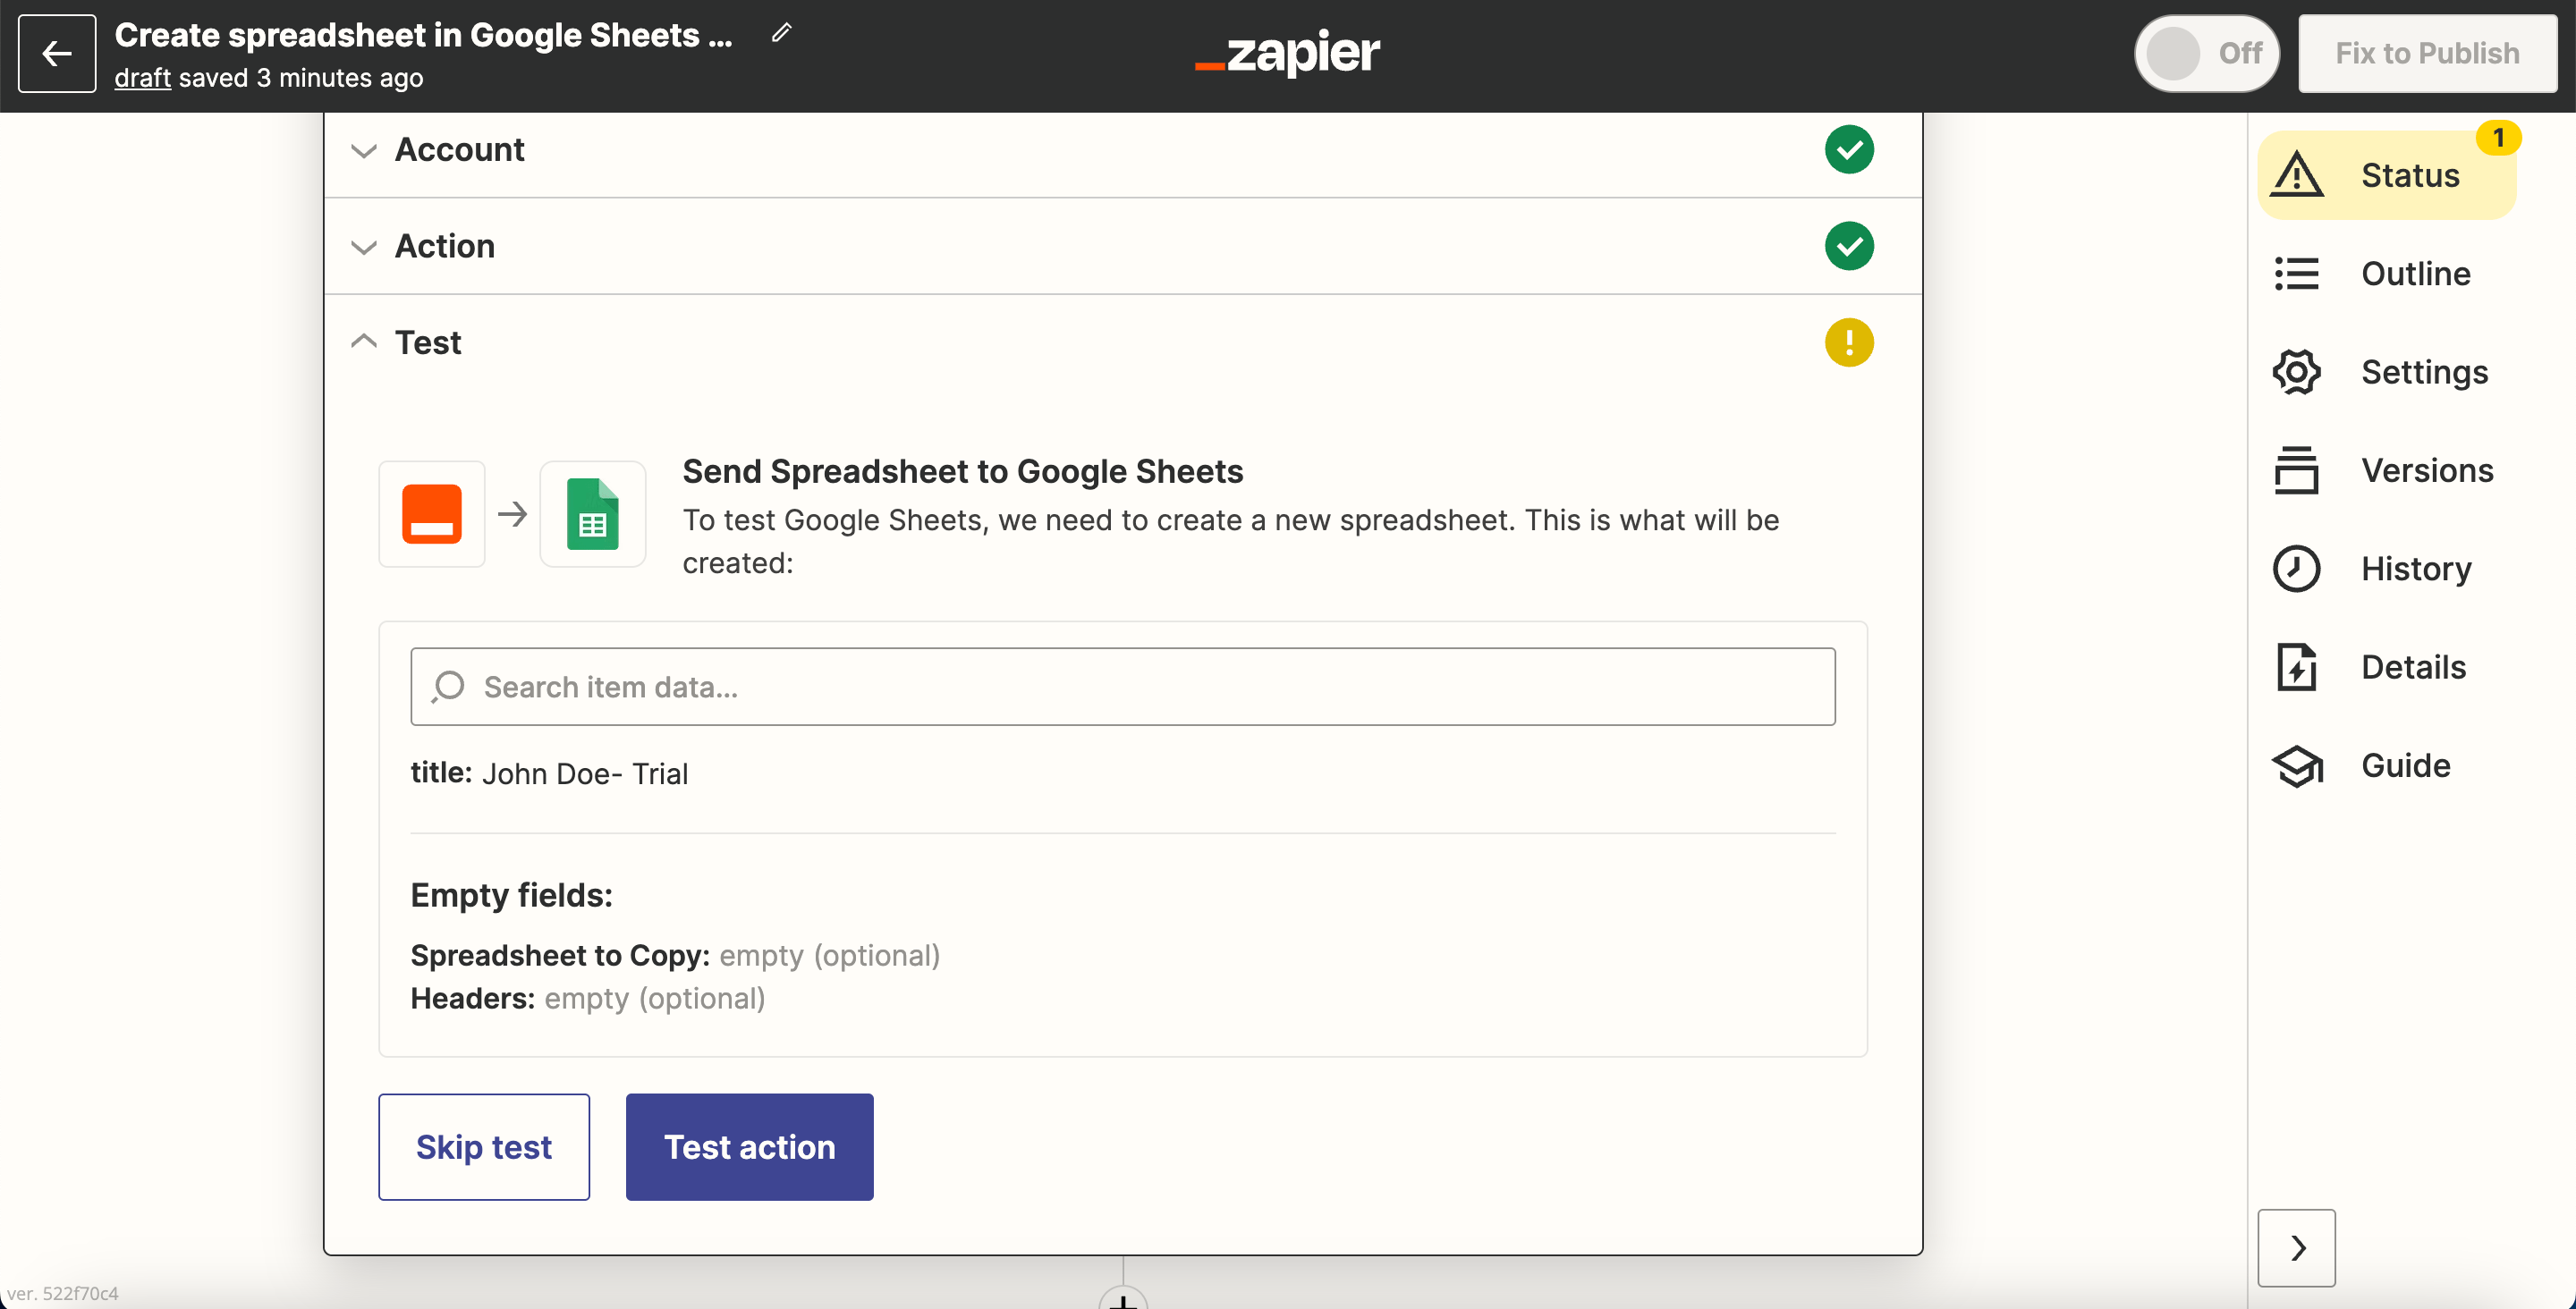
Test Action
Testing your action is important, so we suggest you not skip the test and click "Test action."

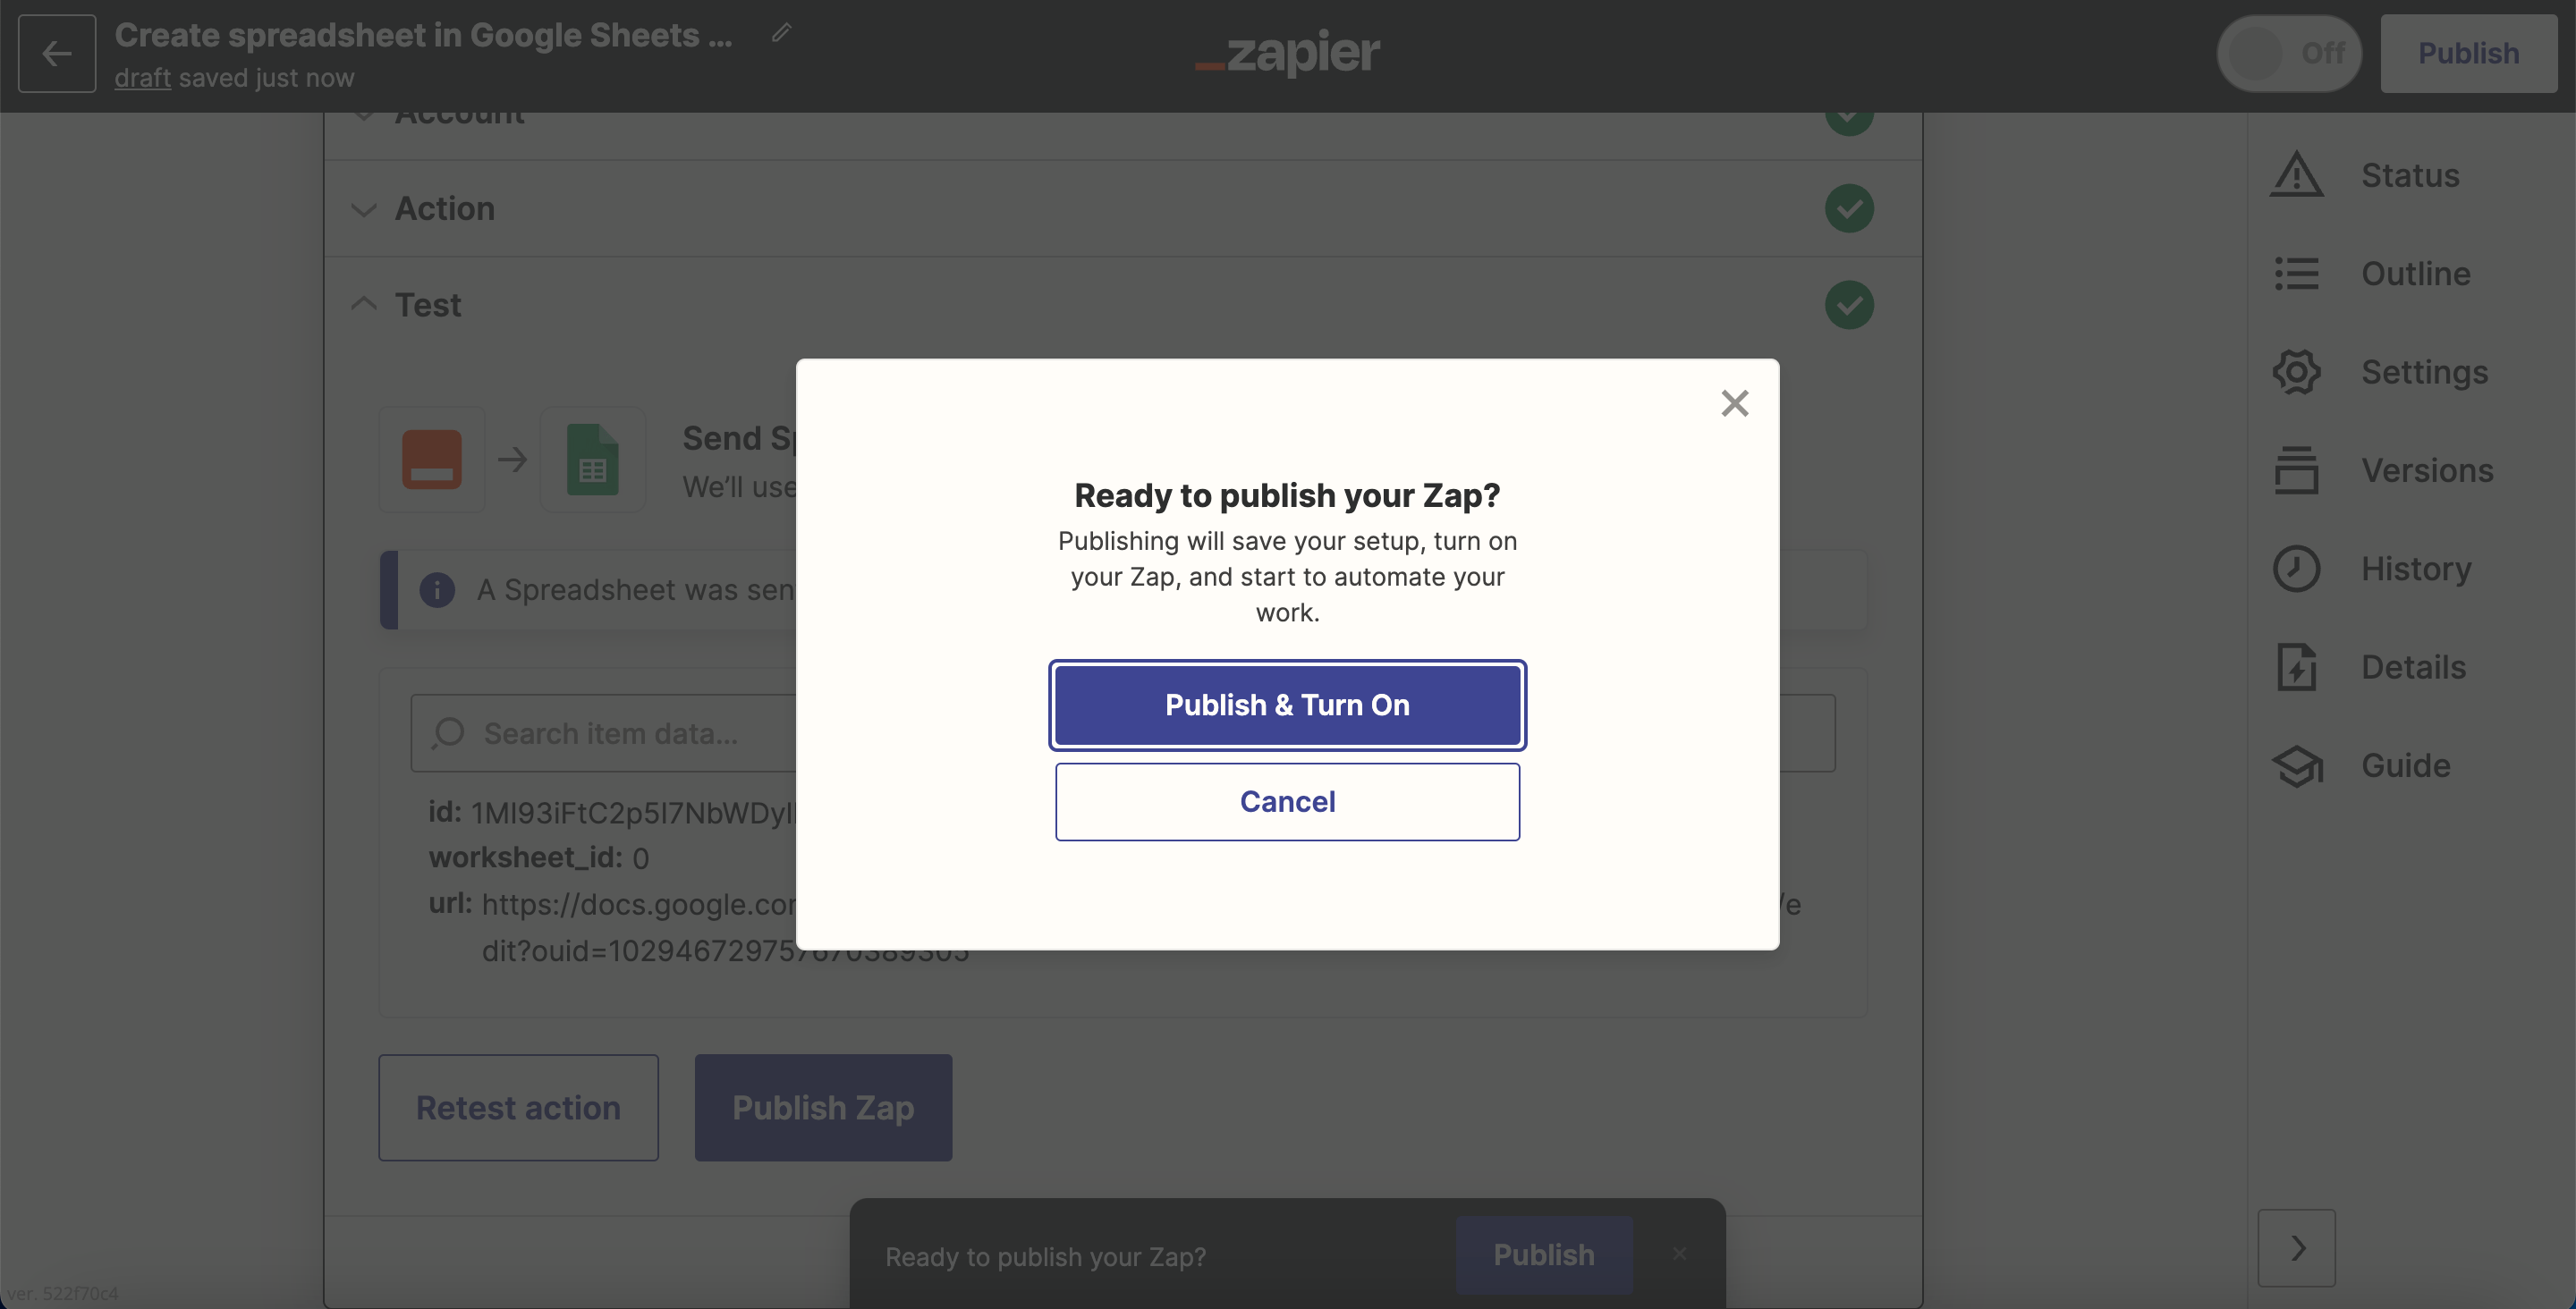
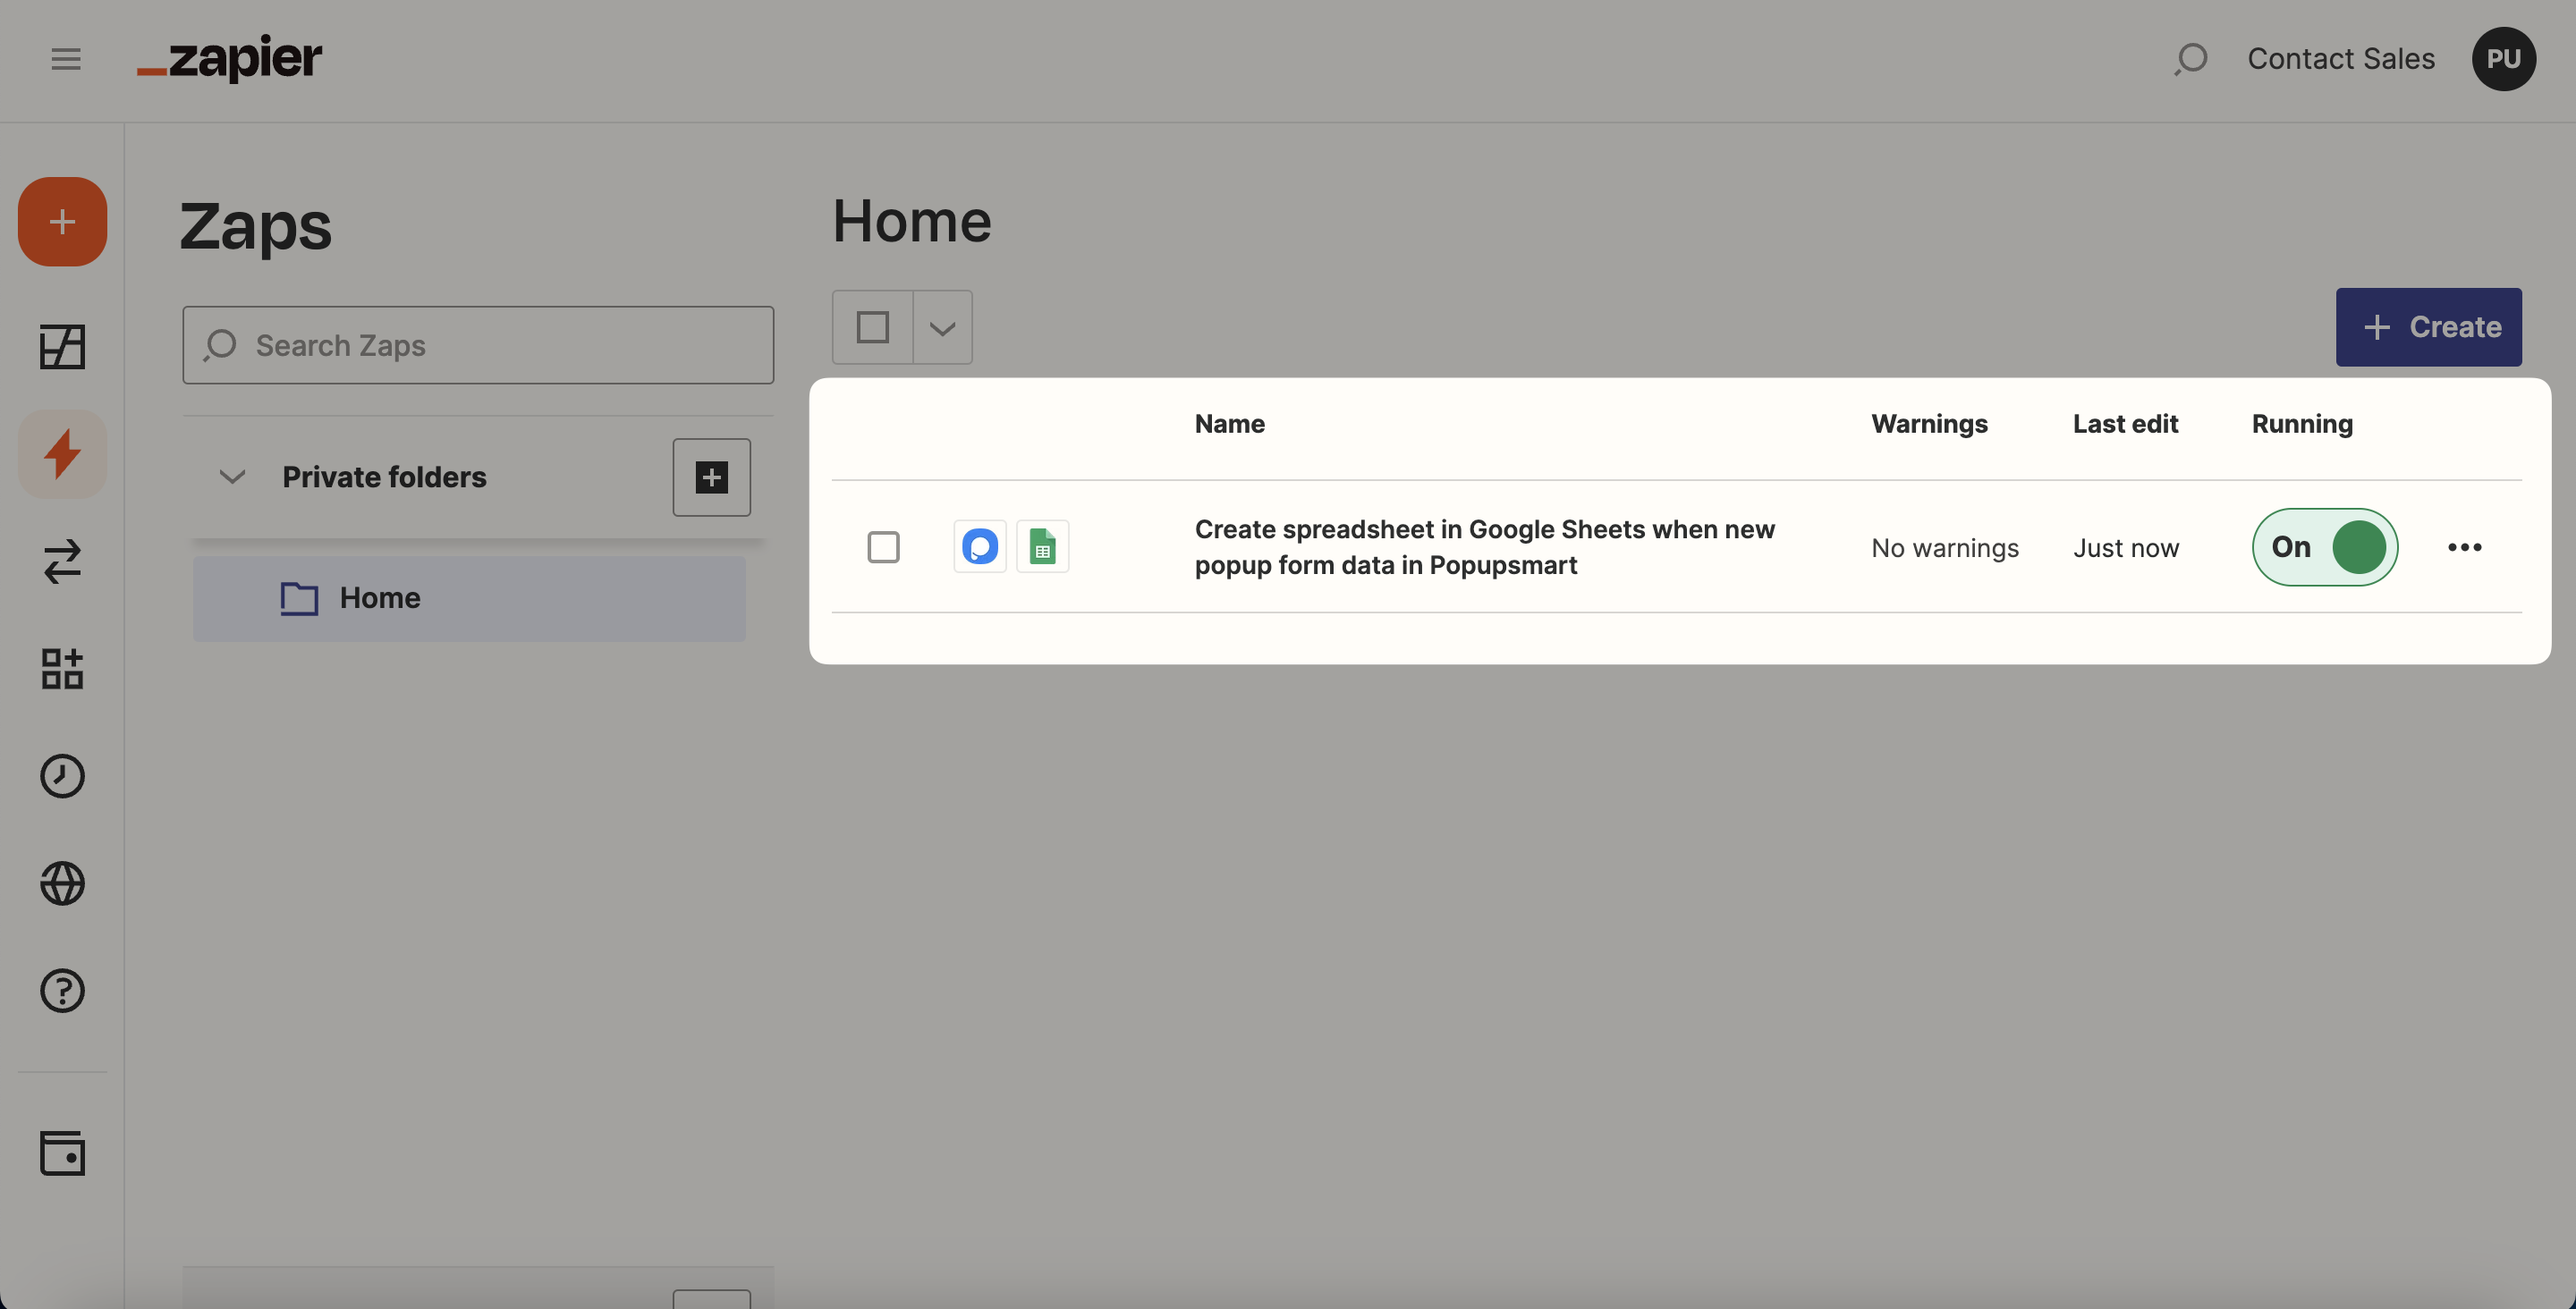
After reviewing your Zap, you can turn it on and off your Zap whenever you want.
Note
Keep in mind that you can lead this process by choosing Settings as well. There, you can both make integration and configure all the general settings.
If you have any other questions about Zapier integration, feel free to mail us!
How is this guide?