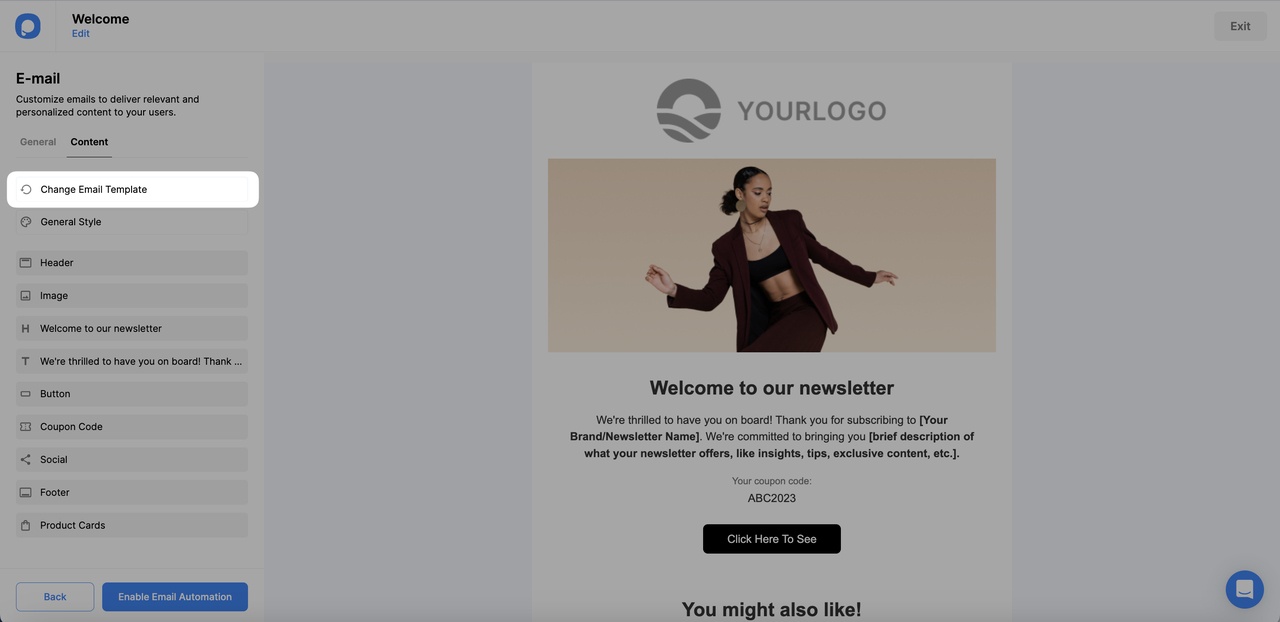
How to Customize Your Email’s Content on Email Automation
With the advanced customization options available, you can create a fully branded and personalized experience for the recipients of your email automation.
By leveraging these options, you can tailor every aspect of your emails to reflect your unique brand identity and make a lasting impression on your audience.
Changing Email Template
You can change the email template whenever you like while customizing your email content. However, please note that if you change the template, any customizations you have made will be applied to the new template.
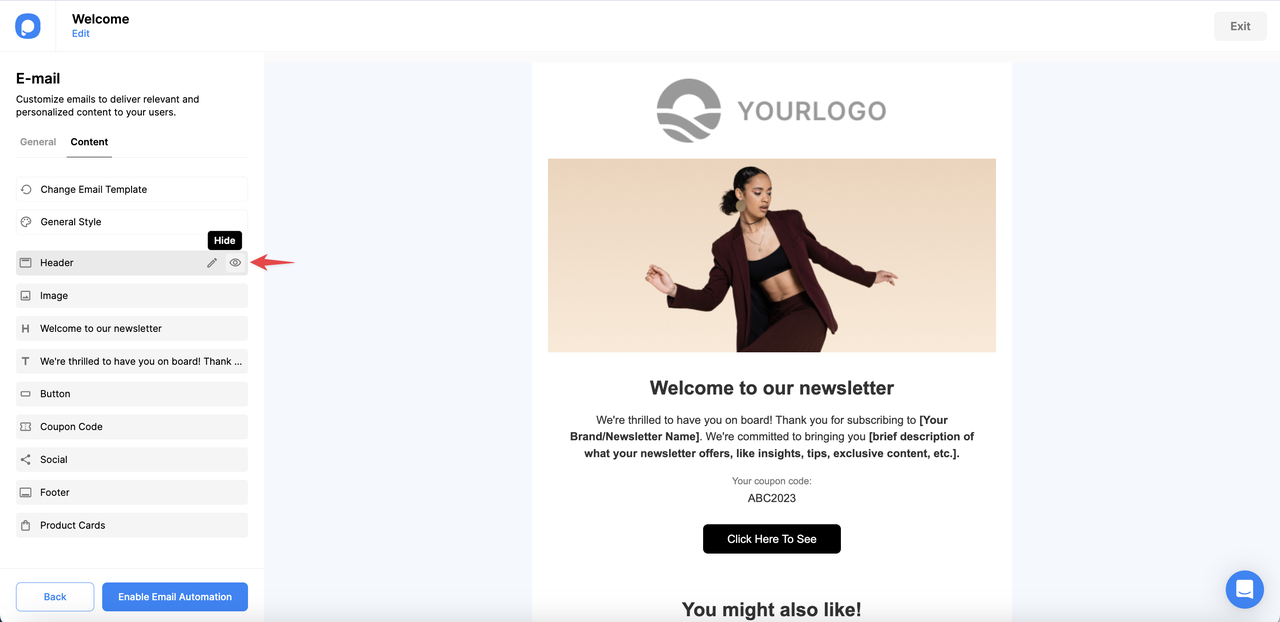
Hiding Element in Email Content
To hide any element in the email content, simply click the hide button located on the right side of the element card.
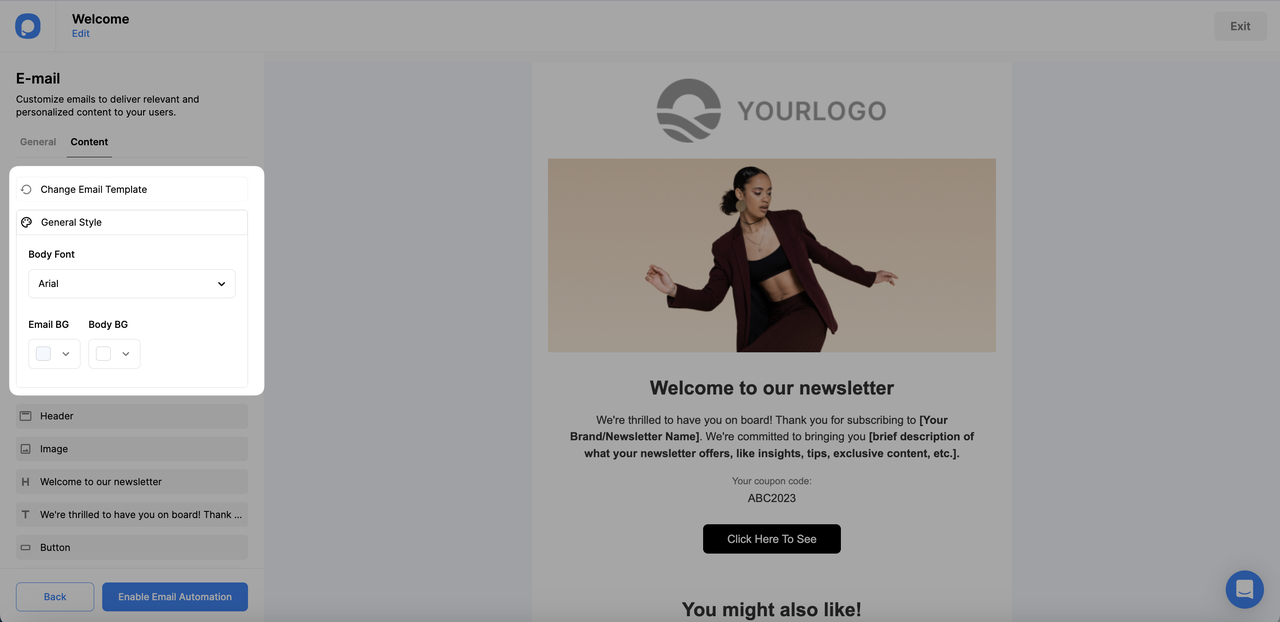
Determining General Style
You can change the font used in the email and the background of both the content and email area from the General Style card.
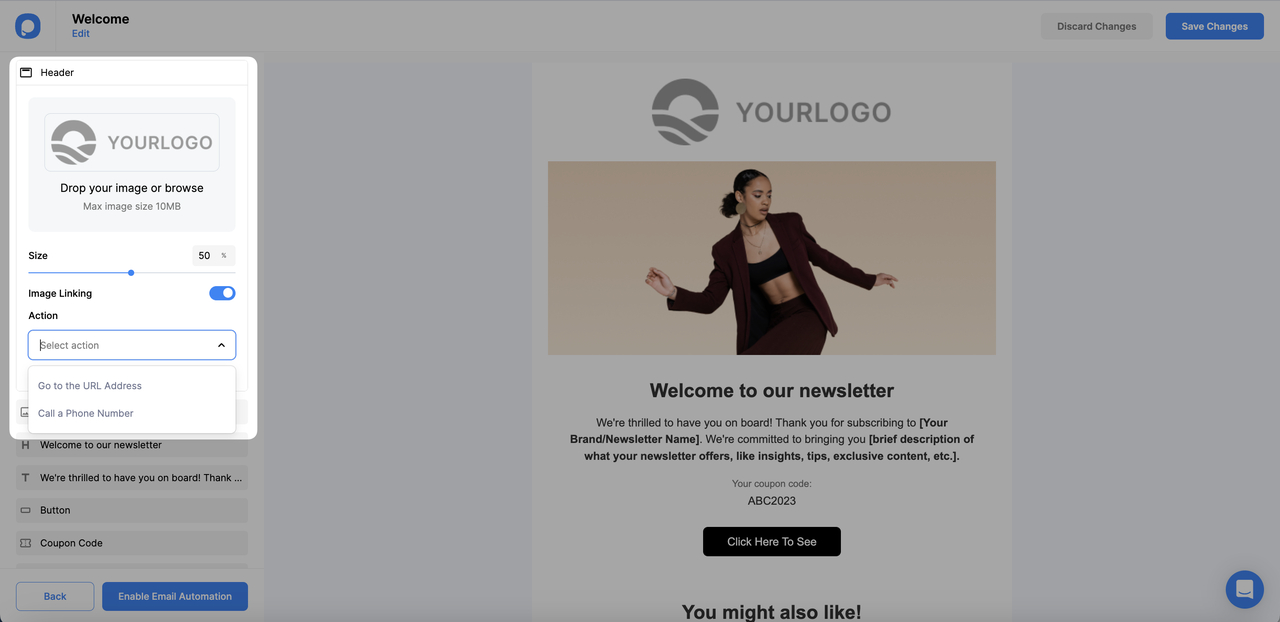
Changing Logo
To change the logo of the email, you can use a Header card. Here, you can:
- Upload your logo
- Determine its size
- Link the logo image to redirect users who click on it to a website or prompt them to call a number.
Changing Image
To change the image of the email, you can use an Image card. Here, you can:
- Upload your logo
- Determine its size
- Link the logo image to redirect users who click on it to a website or prompt them to call a number.

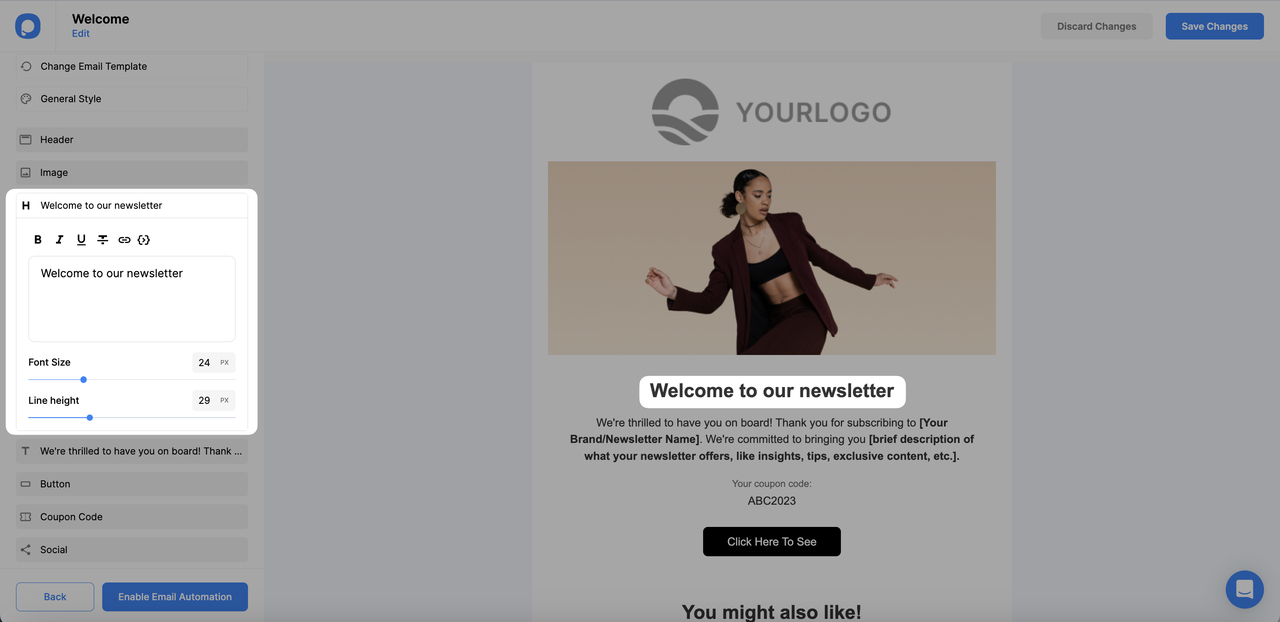
Customizing Heading of The Content
To change the heading of the email content, click on the writing of the heading that has an H icon in front of it. You can:
- Change the font size.
- Change the line height.
- Make the heading bold, italic, underlined, or strikethrough.
- Add a link to the text.
- Add a smart tag.
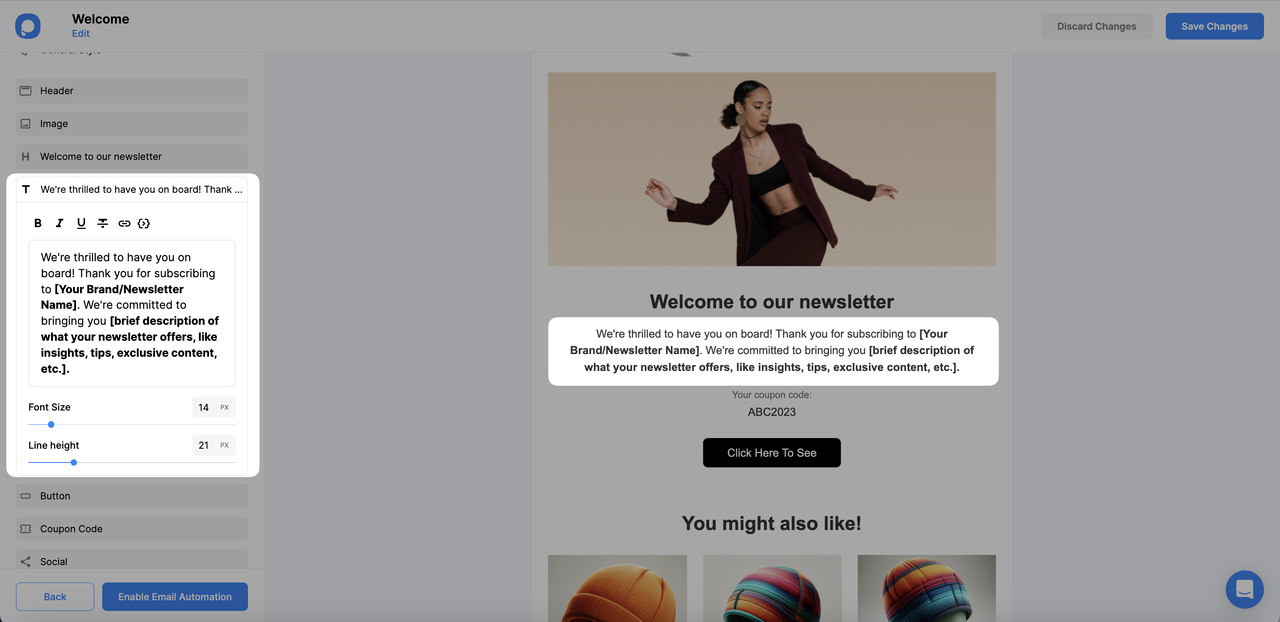
Customizing the Email Content
To change the text of the email, click on the writing of the heading that has an T icon in front of it. You can:
- Change the font size.
- Change the line height.
- Make the heading bold, italic, underlined, or strikethrough.
- Add a link to the text.
- Add a smart tag.
Determining the Coupon Code
To change the coupon, click on the Coupon Code card for your coupon code ideas. You can perform the following actions:
- Change the label of the coupon code
- Change the coupon code itself
- Add a border and fill in the coupon code
- Modify the text color, font size, and line height of the coupon code

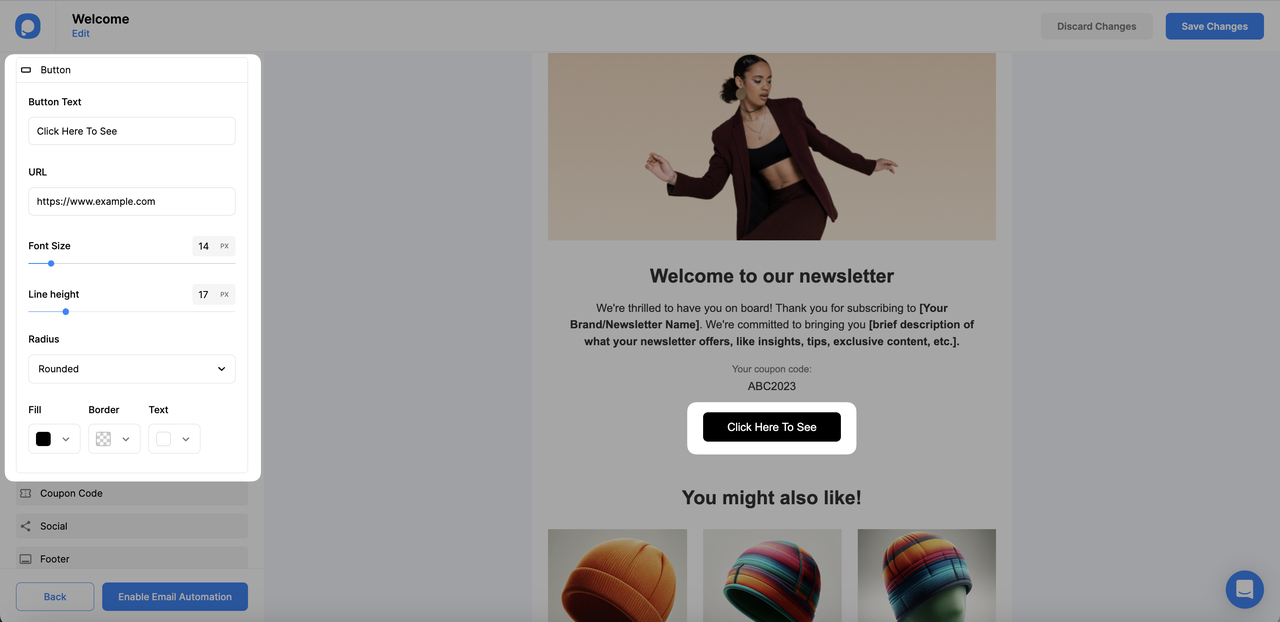
Customizing the Button
To customize the button, click on the Button card. From there, you can:
- Change the button text
- Adjust the font and line height of the button text
- Modify the fill and border color of the button
- Choose the shape of the button
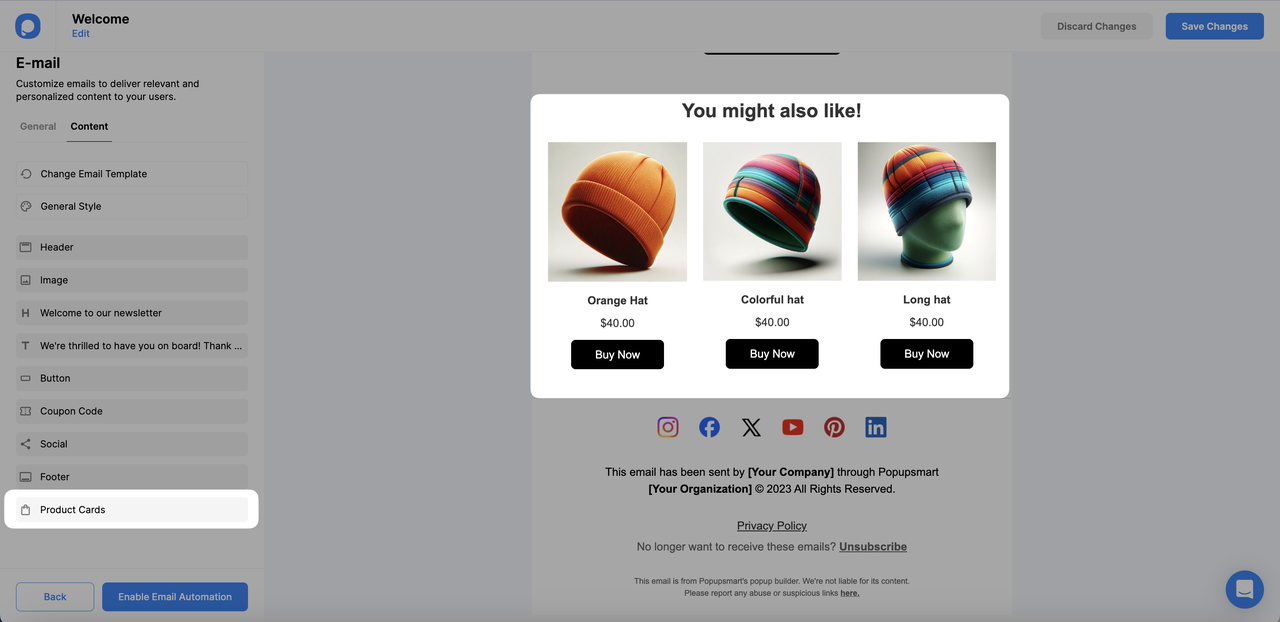
Adding Products from the Shopify Store
If you are sending an email for a Shopify store, you can add dynamic products to your email using the Product Cards Element.
To send products from a collection that you want to promote, take the URL of the collection and add "products.json" at the end. Here is an example:
- https://www.myshopifystore.com/collections/mycollection/products.json
You can also send random products from all of your collections using the following link:
- https://www.myshopifystore.com/collections/all/products.json
Alternatively, you can send random products from all of your products using the link below:
- https://www.myshopifystore.com/products.json
Copy one of these links for your store and paste it into the "Collection URL" input area in the product card element.
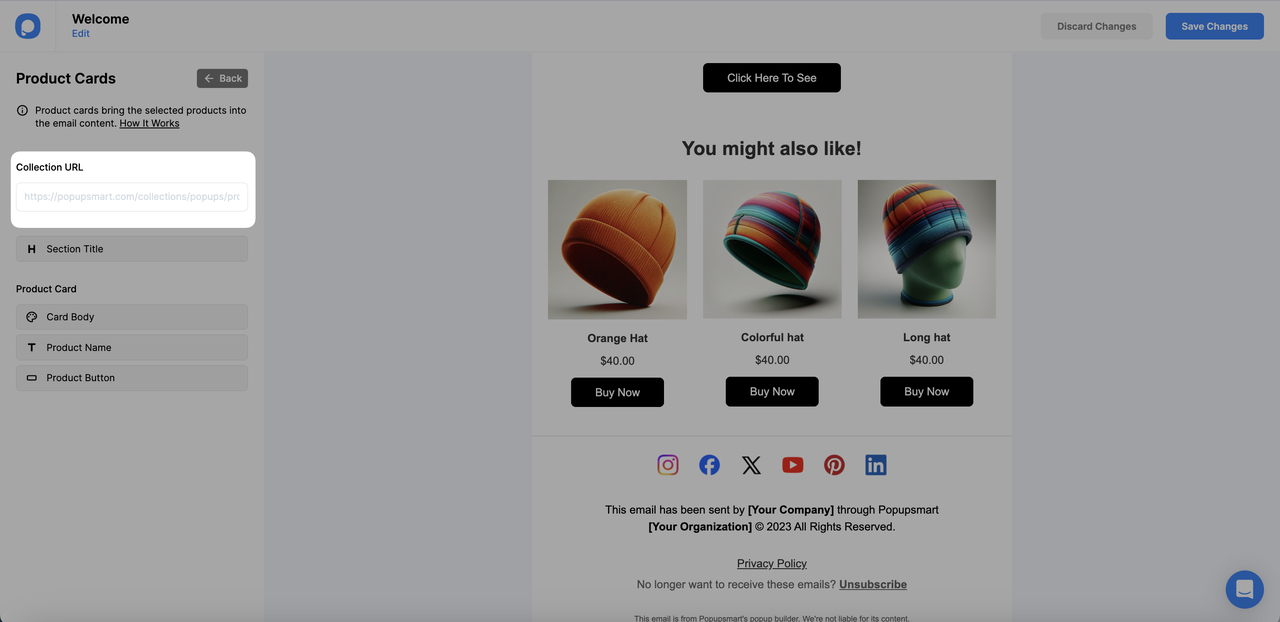
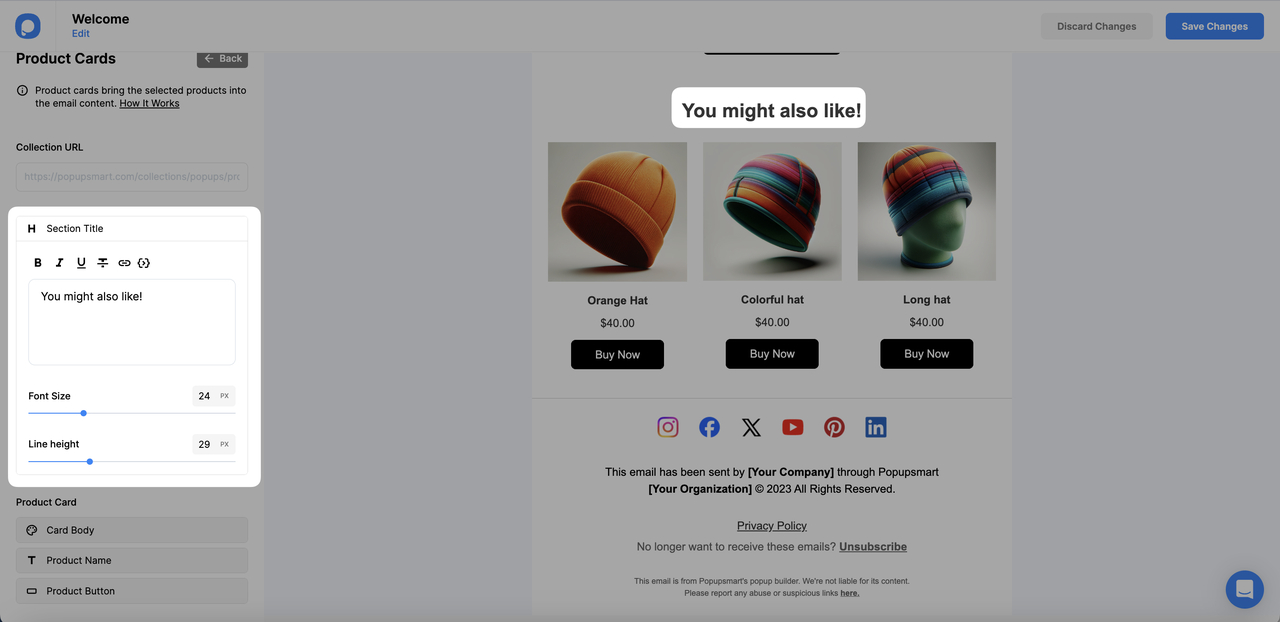
You can also customize the product card element by modifying the heading using the Section Title Card. Here are the customization options available:
- Adjust the font size.
- Change the line height.
- Apply formatting such as bold, italic, underlined, or strikethrough.
- Add a link to the text.
- Include a smart tag.
It is also possible to customize the Product elements card via Card Body. You can:
- Change the card's shape
- Adjust the card's fill
- Modify the card's border
- Add a shadow

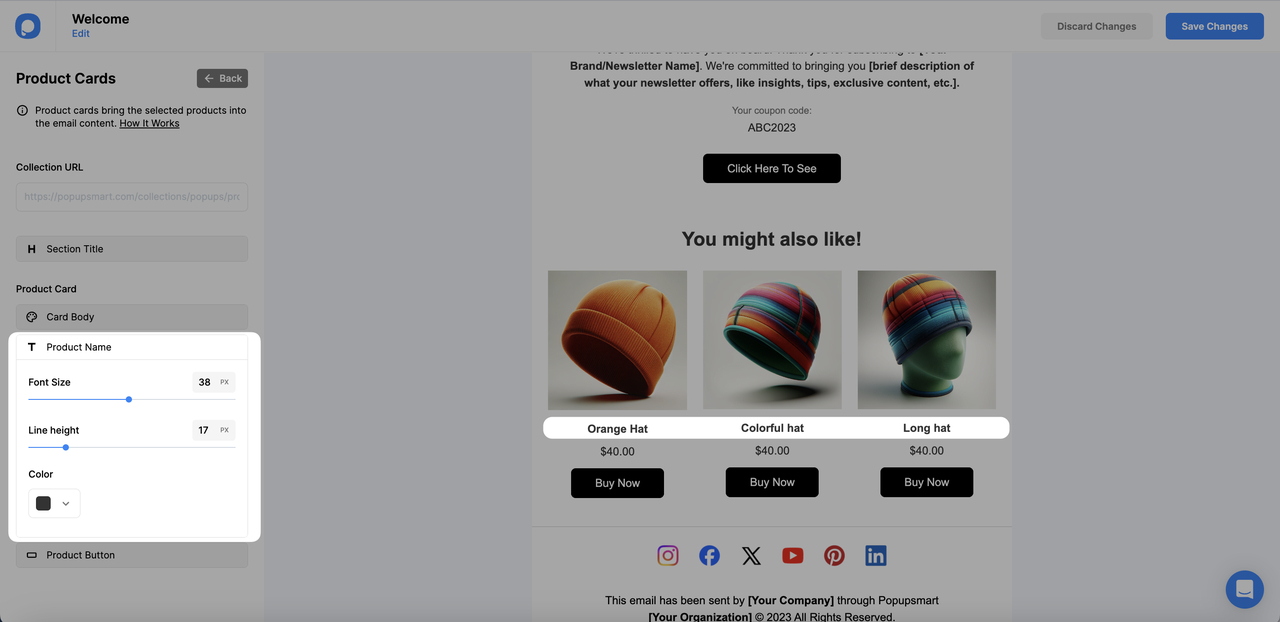
You can also customize the text style of the product names by:
- Adjusting the font size.
- Changing the line height.
- Changing the color.
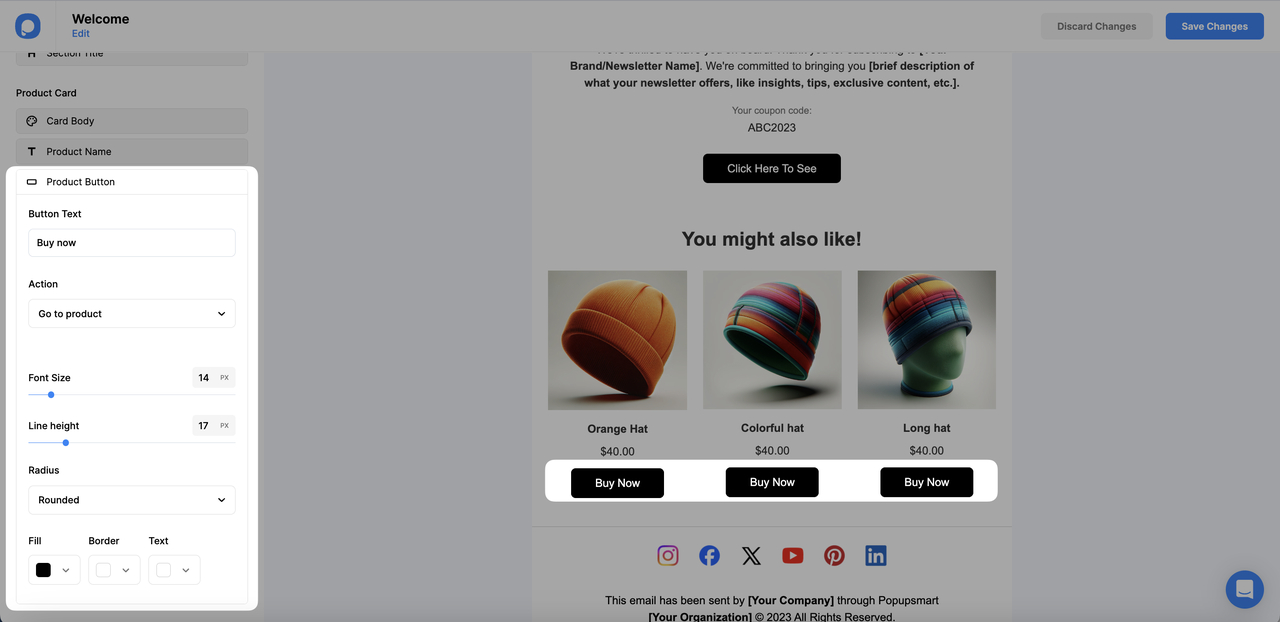
It is also possible to customize the buttons of the product using the Product Button card. You can:
- Change the button text
- Adjust the font and line height of the button text
- Modify the shape of the button
- Adjust the fill, border, and text color of the button.
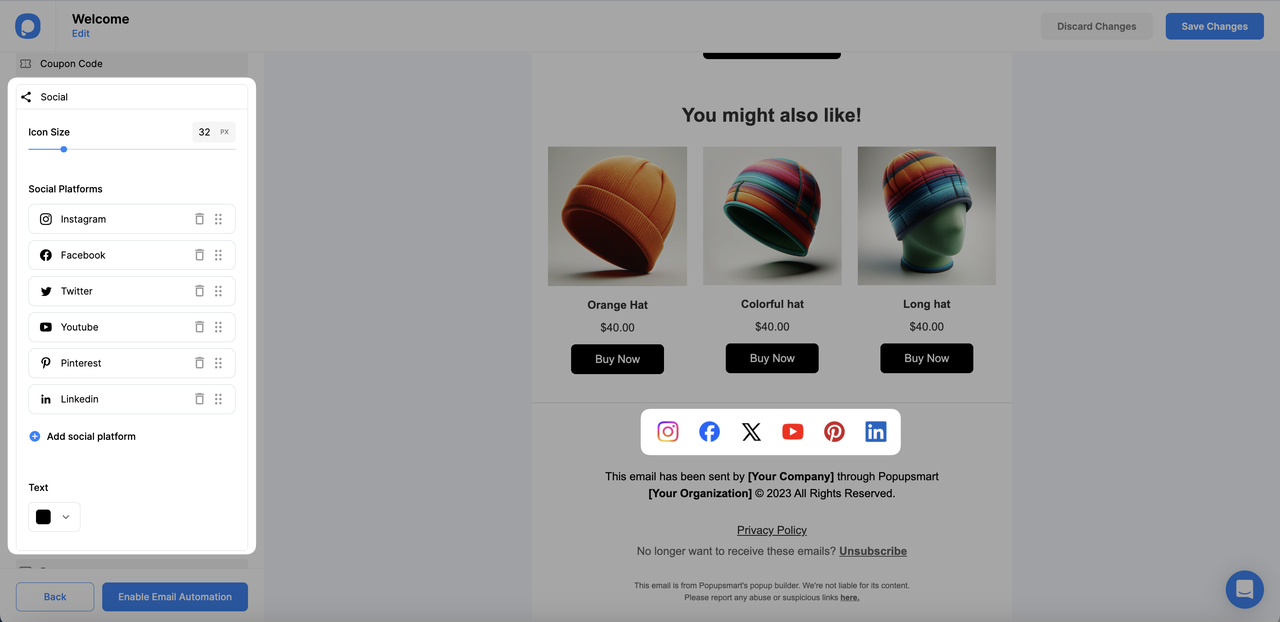
Adding Social Buttons
You can add social links for your store using the Social Card. Simply click the "Add social platform" button to add the desired social platform.
If you assign a label to the social elements, you can also change the text color from within the card.
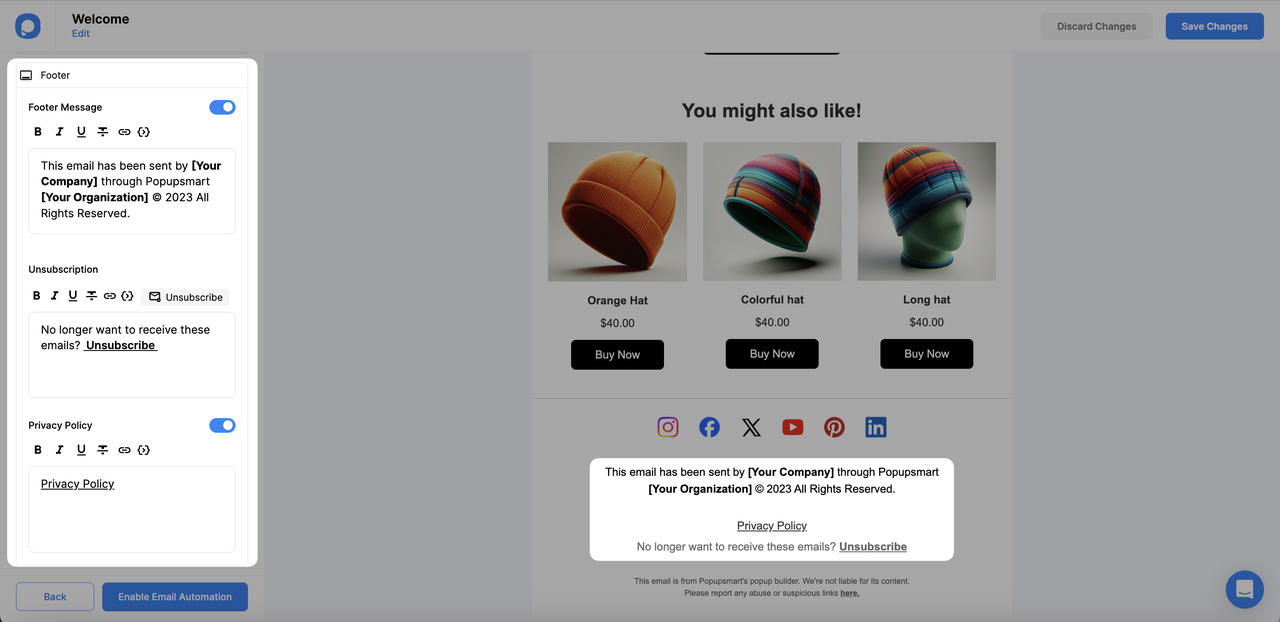
Customizing Email Footer
With the footer card to create one of the good email footer examples, you can add the following to your email:
- A footer message to include your company information.
- An unsubscription sentence and the ability to send unsubscribers to your own system.
- Your privacy policy.